wanna be…clutter free

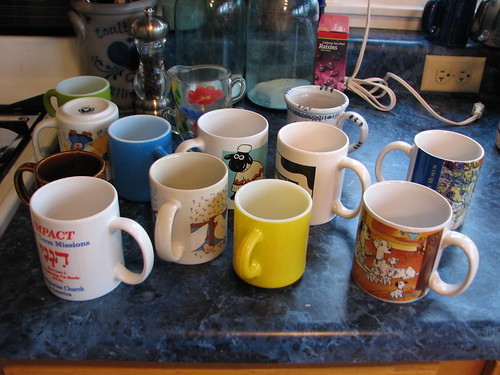
Today I worked on some of the kitchen cabinets, “decluttering” and sorting and putting away. I didn’t take a before picture of the cabinet over the stove, but here are some of the things that came out of it. They are now wrapped and in a box for charity. If my kids want any of these, they’d better speak now or forever hold their peace. I will find a home for the painted creamer and sugar bowl. DDs, want them?

extra mugs...gotta go

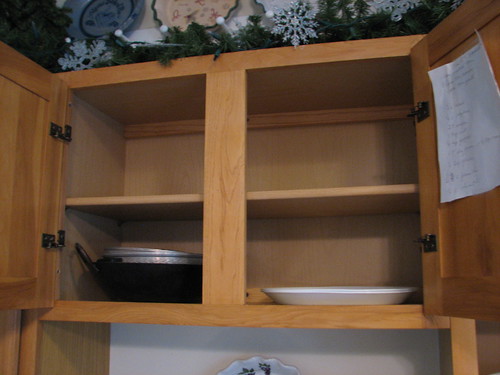
Here is the cabinet after. Mug free and lots of new space. I am not sure what will go up there. Maybe a couple of casserole dishes I have in the pantry.

mug free

The cabinet to the right had quite a few things in it that I never or rarely use. A cheese grater, a veggie chopper (do use that at Christmas time for nuts), a couple of boxes of coffee filters (moved one to the pantry), bread pans (to the pantry), old postage scale (charity), a measuring cup for skimming fat (charity).

when's the last time I used the cheese grater?

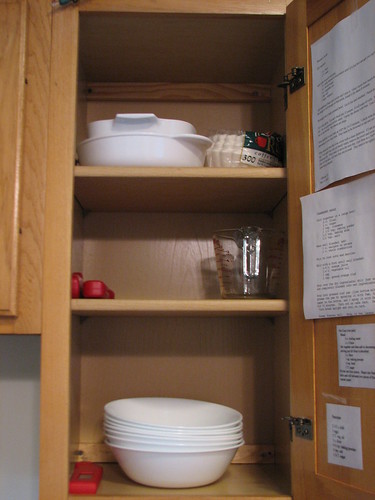
I moved the bowls I don’t use as often to the top. The serving bowls I use all the time and they stayed on the bottom. I love having these at the stove. Makes it so easy to dish food for the table, right off the stove or out of the oven. Most of my measuring cups are in the dishwasher. They will go on the middle shelf. The red object on the bottom shelf is my Thermapen. It’s an instant read digital thermometer, a Christmas gift from DH. Love it! The papers on the door are recipes we use often: Homemade rolls, Cranberry Bread, Pancakes, and Pie Crust.

ah, much better

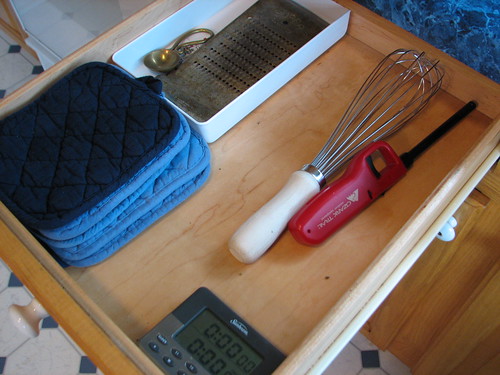
The next drawer (to the right of the stove) didn’t have much in it and I didn’t take a before picture. The large whisk is in this drawer because it doesn’t fit in the kitchen tool drawer.

after...didn't get a before

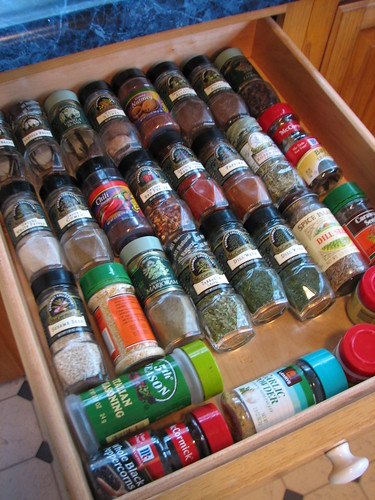
Spices. This drawer smells good! I do have other spices…oregano, basil, parsley, dried onion, etc., that I buy in larger quantities and those are contained in a box in the corner cabinet.

the spice of life

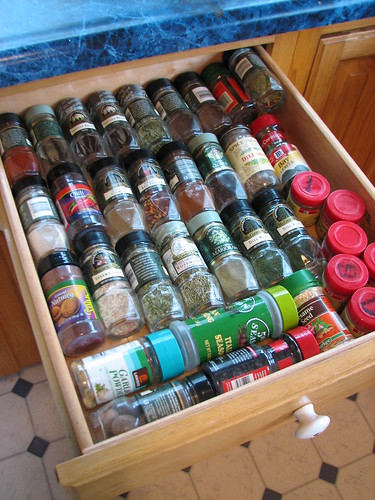
I got rid of some. And found I have some duplicates. The drawer is less crowded now. This drawer is the second one to the right of the stove. I love having my spices in a drawer. So easy to see, so easy to grab. The drawer is between the stove and the corner of the counter, right below where I put together recipes, assemble dishes, etc. Very convenient.

love my spice drawer

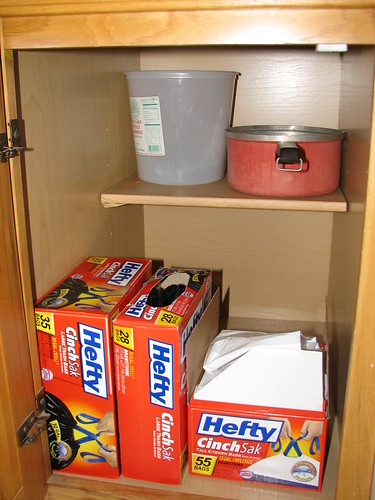
The lower cabinet to the left of the stove holds garbage bags for the most part. I wasn’t even sure what was in the back of this cabinet.

garbage bag cabinet

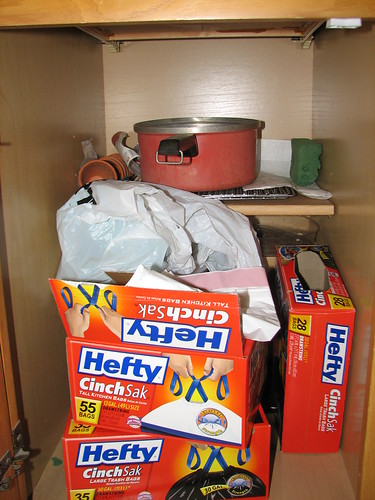
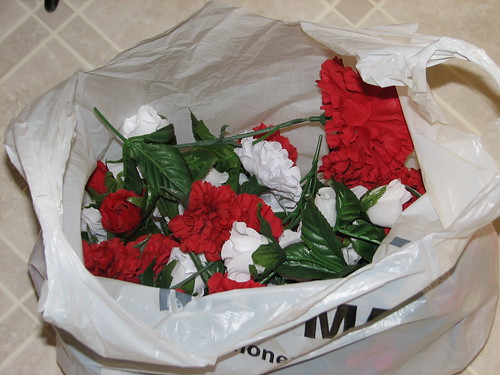
I removed old floral foam, an ice shaver, two bowls I didn’t recognize, a dozen tiny flower pots, and three cooling racks I never use. The top shelf now holds a plastic bin for my bouquet supplies which I use every week from March through November, and it holds DH’s fudge pan. Fudge is the only thing this pan is used for, so we store it here rather than in the pots and pans cupboard. When I begin making bouquets again, I will store floral foam behind the garbage bags.

threw the rest away

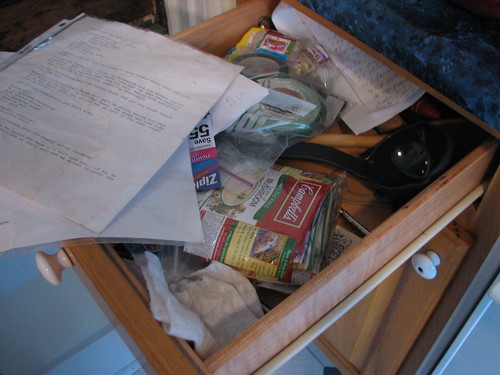
The drawer over the garbage bag cabinet was a sort of catch-all. Labels for school, coupons for the store, two long wooden spoons, a ladle, miscellaneous junk, etc. And it had a few recipes in it.

catch all

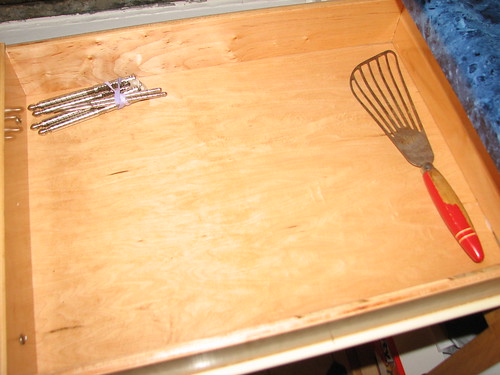
Whoa! Where’d it all go?? The labels are going to school tomorrow, the spoons and ladle are going to church, and the recipes went to the recipe binder. The red kitchen took belonged to my MIL and DH uses it when he makes fudge. I don’t know what will go in the drawer now. Maybe I’ll move a few things over from the kitchen tool drawer when I get to it.

whoa...where'd it all go?!

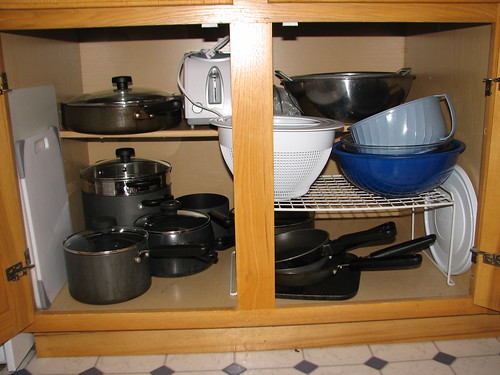
The pots and pans cupboard had a few unneeded items in it. I got rid of the juicer, the teapot, and the old green Dutch oven. Now we have more space for the pots and pans. The toaster was moved to the shelf as we do not use it unless we have company at breakfast.

pots and pans

wasn't bad, but now it's better

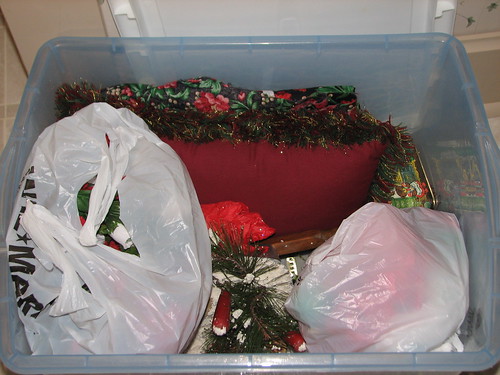
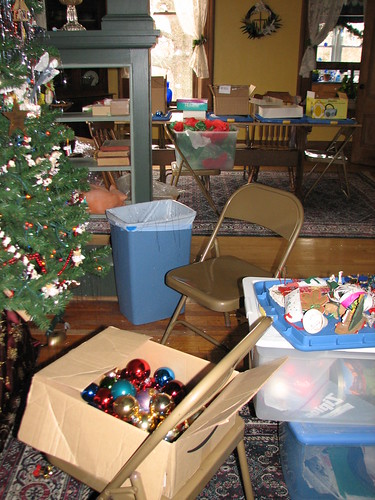
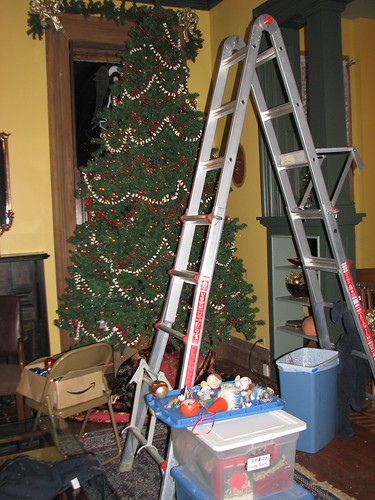
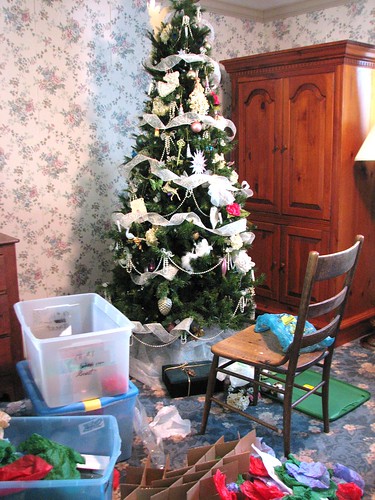
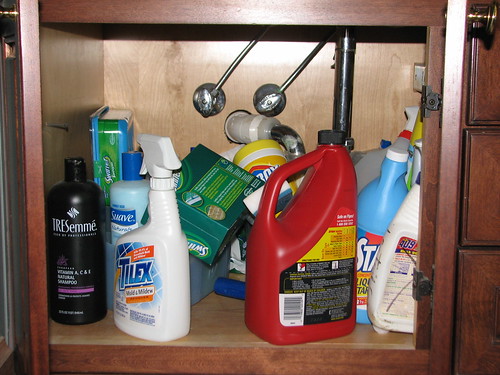
After I put everything away and had lunch, I took Christmas down in the bedrooms of our two older daughters. DD#1 will be home for a wedding in a few weeks and DD#2’s room will be occupied by guests coming for the same wedding. Once DH gets all those Christmas boxes carried on up to the attic, the rooms will be ready for occupancy. While I was upstairs, I cleaned out under the sink in the hall bathroom. I wanted to tell someone “it’s not MY fault!” when I looked under there. Quite a mess.

Honest...it's not MY fault!

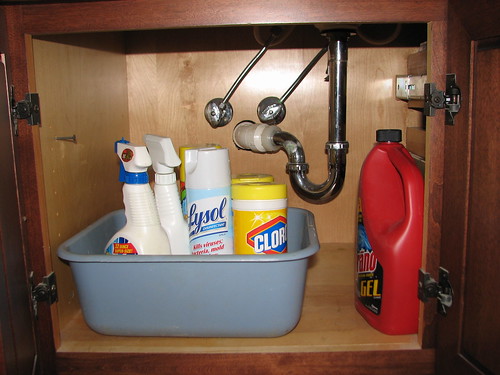
But now it’s neat and tidy. Everything else was put away elsewhere.

neat and tidy

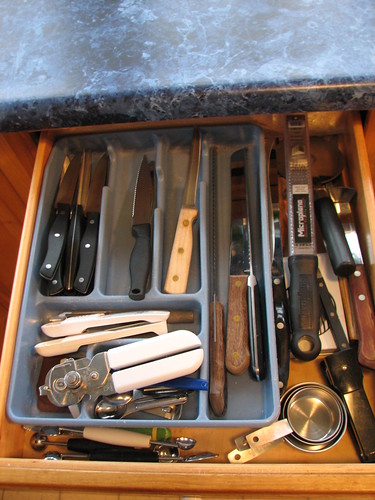
Back downstairs, I tackled the knife drawer. Not tooooo bad before…

knife drawer before

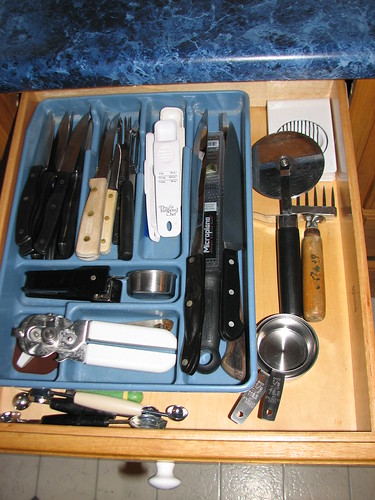
But definitely nicer after. I got rid of a few old knives and did some rearranging.

knife drawer after

The kitchen tool drawer was the worst thing I decluttered today. Too much stuff in too small a space.

kitchen tool drawer before

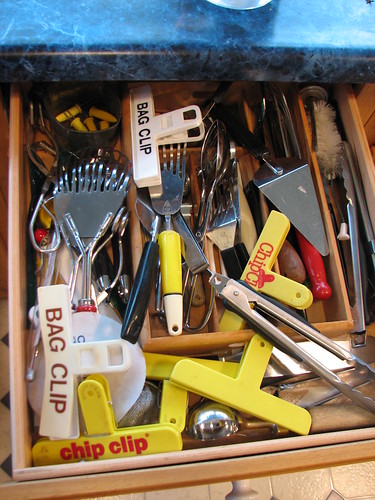
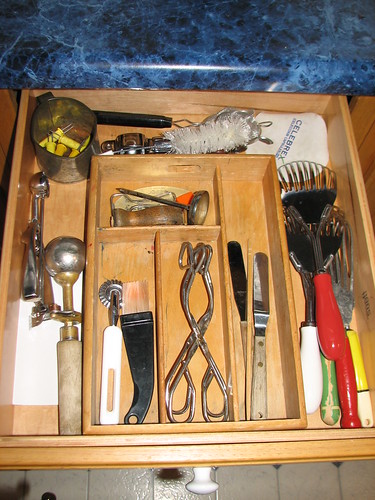
But look at the after!

kitchen tool drawer after

I moved the chip clips to the drawer to the right of the stove.

clips found a new home

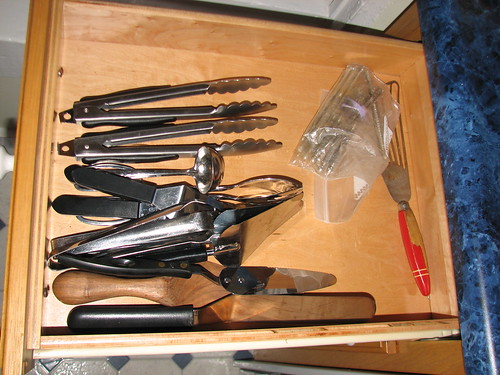
And all serving utensils went to the drawer to the left of the stove. I *knew* I’d find something to put there. 🙂 I plan to find some boxes or dividers to organize these items, but I think they are going to work well here.

found something to put in that empty space

We spent about an hour and a half in the basement this evening while severe storms rumbled through. Now it’s about time to get DD ready for bed and I am going to spend some time reading. I’ve had a productive day…now for some down time. ~~Rhonda

tiny pink hearts

My friend Mary and I hosted a baby shower for another friend, Wendy, this past Sunday afternoon. We like to have “open house” showers…no games…just visiting. Doors are open between 2:00 and 4:00 p.m., come when you like, snack as you like. DH opened the afternoon with a devotion featuring Jacob and the fulfilled promises of God as the theme. We are grateful to God for His fulfilled promises, for the generations to come who will grow to love and honor Him, and for the many blessings He has given this particular family.

devotions

Mary arranged for the cakes and they were lovely! One chocolate, one vanilla…delicious! And look at those cute little booties!

treat table

I made a variation of Daniel’s Cookie Bar Bites for this party.

And here’s how they’re made…

After baking and cooling the cookie bars, I used a small 1 1/4″ heart-shaped cookie cutter to cut the cookies. Next time, I won’t cut the edges off the cookie bars before cutting the hearts. That would have given more stability to cutting near the edge of the cookie bars.

takes a while...

Years ago (while in college), I found this little heart cookie cutter at a yard sale in a tin with lots of other cookie cutters. I use it every year at Christmas when making Sour Cream Sugar Cookies.

cookie cutter

Cut, dip, sprinkle…cut, dip, sprinkle.

cut, dip, sprinkle

A helpful tip…when dipping these, I turn the heart over and make the bottom of the cookie bar the top of the heart. The heart on the left is bottoms up. You can see how uneven the top of the cookie is on the heart to the right.

bottoms up

The heart on the left was dipped with the top of the cookie bar up. The one on the right was dipped with the bottom of the cookie bar up. Dipping with the bottom up gives a more defined shape and a much smoother coating.

don't dip this way...dip this way...

I used almond bark for dipping the cookies. I melt it in the microwave for 3 minutes at 50% power, then stir to melt any remaining lumps. If the coating gets too hot, it will sag on the cookies and have a rough uneven finish.

baby shower hearts

Cute and easy. They just take a little time to make. I watched Dr. Who and a little of “Ghandi” while I made these. 🙂

~~Rhonda

who’s ready for spring?

This is now:

Pippin

::sigh::

Pippin spends a lot of time sitting on the railing of the back porch, peering in through the kitchen door. He may be spending this evening in the shed, though, curled up in the hay bales. The news is predicting 6-8″ of snow for us this evening. We shall see…but I am so ready for spring! If you are, too, here’s a taste of what’s to come.

The peonies and irises make a beautiful show in May.

peonies and iris

Peony ‘Krinkled White’

Peony 'Krinkled White'

Iris ‘Raspberry Blush’ is one of the first irises to bloom in our yard. It comes on strong and looks beautiful!

Iris 'Raspberry Blush'

Baby robins in the redbud tree.

baby robins

One of my favorite irises ~ ‘Immortality.’ This is a beautiful flower and a great rebloomer providing it gets plenty of moisture. Smells wonderful!

Iris 'Immortality'

Columbine has a habit of coming up all over the place. 🙂 The purple flowers in the right foreground are honesty, otherwise known as “money plant.” They, too, pop up all over the place, but we don’t mind. They are beautiful in early spring and, later, they form a pretty seed head that is useful in dried arrangements.

columbine and fountain

Peony ‘Bowl of Cream’

Peony 'Bowl of Cream'

Irises come in so many lovely colors and combinations.

iris

And my favorite peony…’Sorbet.’ What’s not to love??

'Sorbet' peony

I can almost smell spring…soon, I hope! ~~Rhonda

putting away Christmas in the downstairs bath

The downstairs bath has a garden themed tree, full of pictures from our own yard. It’s surprising how much bigger that bathroom seems with this tree down.

downstairs bath

The garland is simply silk flowers (red and white carnations and roses) cut apart and tucked into the branches, in a long spiral all the way down the tree, with a garland of ivy. The ivy and the lights stay on the tree during storage.

silk flower garland

To store the flowers, I put them in a plastic bag. They are placed on top of other items in the storage box and I haven’t had any problems with crushing. They look fine each year.

flowers for the garland

I made the picture ornaments on the tree. Some are decoupaged onto balls.

fountain

In this picture, you can clearly see how the edges of the pictures are clipped to make them fit the curve of the ornament. That’s a pawpaw blossom above the butterfly, BTW.

swallowtail

dwarf iris

Some ornaments are simply printed, cut into circles and laminated.

DD#3 on the wood chip pile. It’s springtime…the bridal wreath spirea is blooming. They always remind me of home. We had the same kind of spirea along the driveway.

on the chip pile

We collect hostas. This particular one has beautiful variegation.

hosta

Weeding. A perpetual occupation, though not necessarily for DD#3.

weeding

The balls are stored in a plastic bag. I put tissue paper around the picture ornaments and the rest (all green) are just plopped in the bag with the wrapped ones.

storing ornaments

The storage box for the downstairs bath…the plastic bag on the left has the silk flowers, the one on the right has the ornaments. Other items in the box…the fabric for the tree skirt, a tin (to the right of the pillow) containing a small five piece glass nativity for the bathroom counter, the bubble light night light wrapped in red tissue paper, a pillow from the wing chair in the laundry room, and a wheelbarrow decoration from the laundry room.

storage box

After finishing the bathroom, I also put away what remained of Christmas in the laundry room. The small garden tree in the laundry room had been removed a few weeks ago, so there wasn’t a lot to store.

I “unwrapped” our children’s baby pictures in the hall and put away everything on the hall counter opposite the pictures except the grandbaby tree. That will stay up for a few more weeks.

baby pics

Grandbabies Tree

Last evening we had our 4H meeting here which was good incentive for putting away this part of Christmas. Takes me a long time to get it all put away, but I don’t mind. 🙂

~~Rhonda

a few favorite ornaments

As I removed ornaments from the living room tree this year, I took pictures of a few of my favorites to share with you.

I made this ornament a few years ago, one for each of our five children, using pictures from Christmases past. It was a fun project and one I have adapted to other ornament themes, including an ornament with pictures of DS#2’s and DDIL’s two cats.

family ornaments

I imported the pictures I wanted to use into Print Shop, cropped them, sized them, then printed the pictures using a color inkjet printer (HP 5500, I think). I tore around the pictures, clipped them to make them fit the curve of the ornament, then decoupaged them to the ball. When dry, I sprayed them with a sealant. Easy to make.

My sister gave this ornament to me after a particularly bad infestation of lady bugs one fall. Their little legs are on tiny wires and jiggle madly with every movement. I think she found it at a truck stop. 🙂 This is one of the few ornaments I store in its original package, to protect it while in storage. Most fragile ornaments are wrapped in tissue paper and stored together in cardboard boxes which are then placed in plastic storage boxes.

ladybug Christmas

My sister also gave these ornaments to me. She made them from salt dough. They have the cutest expressions. Wish I had more…maybe that’s a project I need to note in my Christmas Notebook for next year.

salt dough stars

This is one of my favorite ornaments. DD#2 made this little guy while in summer camp when she was younger. He’s supposed to be Jesus, as stated on his front, but I think he looks a lot like Hitler…

guess who

As our children leave home for homes of their own, they take their ornament collections with them to decorate their own Christmas trees. I told DD I was keeping that ornament when she leaves one day, but I did put it in her box of ornaments this year, she will be glad to know. 😉 He’s just so cute…and he makes me laugh every year when I pull him out of the storage box.

My most favorite ornament is another one DD#2 will inherit one day. I blogged it here.

~~Rhonda

putting away Christmas in the living room

A few weeks ago, DH and I took down all the Christmas decorations in the dining room and living room except the living room tree and the window toppers. This week I tackled the tree. It’s a big job. The tinsel has to be removed, the ornaments sorted (ours, the kids’), the popcorn/cranberry strings taken off, the lower lights removed and stored. Lots to do.

I didn’t know I could use tinsel on an artificial tree until my sister Margaret told me five or six years ago that she always uses it on her own tree. We had a cut tree in the living room until I found that out. Then we went to artificial, which I had wanted to do for some time as we decorate so early and leave the tree up so long. I had stayed with using a cut tree so I could use tinsel.

In this picture, I’ve started taking the tinsel off the bottom of the tree…grabbed it by handfuls, saved some just because it came off so well, and the rest went into the trash.

living room tree

After the tinsel was removed, I took off the ornaments. I store plain balls in a cardboard box without wrapping them in tissue. I’ve never had a problem with this method. I used a storage box lid to hold the other ornaments as they were removed. Then they were carried to the dining room table where they were sorted.

taking down Christmas

At the table, I had a lid for each of the three kids and for my and DH’s ornaments. When they came from the tree, I sorted them onto the ends of the lids…DD#3 at the far end, then DD#2, DD#1, and DH and my ornaments at this end of the table. After sorting all the ornaments I had carried from the tree, I stopped long enough to wrap the ornaments in tissue paper and place them into cardboard boxes which were also sitting on the storage lids. Each cardboard box has the name of the child whose ornaments are in that box. They have always enjoyed putting their own ornaments on the tree, so I have always kept them stored separately.

sorting the kids' ornaments

I don’t wrap unbreakable ornaments with tissue. I like to have a box or two of ornaments I can hand to children who want to “help.” They like having an entire box of ornaments they can put up without constantly being told “be careful!”

unbreakable ornaments

I did tier one – what I could reach sitting down, and tier two – what I could reach standing up. DH did tier 3 – what had to be reached from the ladder. BTW, we love our Little Giant ladder! It’s a wonderful tool for “this old house.” I gave it to DH for Christmas several years ago and we are constantly commenting on how glad we are to have it.

DH has to do the top of the tree

Once the ornaments were removed, we took the red beads and the popcorn and cranberry strings off. The beads are stored in a large zippered storage bag. They are thrown in together and never tangle, so they are easy to store. The popcorn and cranberry strings are pitched. We tried putting them outside for the birds a few times, but never found any interest in them, so now we throw them away.

Then it was time to remove the lights. Most years, we remove the lights from the lower four branches, remove the branches for storage in black bags (because the tree is too wide to fit through the attic door otherwise), and leave the rest of the tree intact. This year, we removed all the lights because many of the strings are old and fading. They need to be replaced. We were able to buy the commercial grade of light strings after Christmas for 75% off. A great deal and we will use those to replace the lights on this tree and the library tree next year.

I wrap the lights around my hand and store each string in a plastic shopping bag. I begin wrapping at the female end (the end without the prongs) so the male end (prongs) are on the outside of the roll. That makes it easy to plug the string in next year to check it, without unwinding the entire string.

storing light strings

This year, we took the tree completely apart, then replaced the branches. Some were obviously out of order (not sure how that happened!) which gave the tree an odd shape. As we removed each layer, I lined up the bundles in the front hall, with layer #1 at the front door and coming down the hall in order. We checked each layer to be sure all the branches were there and that all the branches in each layer matched. Now the tree is in good order and looks better.

tree braches lined up in order

With the tree down, DH was able to remove the window garlands and that was the end of “undecorating” the living room.

This is the two foot tall box DH made for the 9′ tree to stand on. The round things are sliders which make moving the tree across the floor very easy.

box for the living room tree

And now the living room is back to “normal.” It looks bare after all the decorations are removed, but now we’re ready for our 4H meeting tomorrow evening! 🙂

back to

~~Rhonda 🙂

wedding bookmarks

This evening the young ladies’ Bible study gathered together to make the bookmark favors for Shawn and Melissa’s wedding. It was a fun evening! Lots of laughter and good times with good friends.

Shawn and Melissa chose 1 John 4:7 KJV for the verse on the bookmark. “Beloved, let us love one another: for love is of God; and every one that loveth is born of God, and knoweth God.”

Melissa said she has 46 things left on her wedding “to do” list. Now she can mark off “favors.” We were glad she was able to join us this evening.

Melissa

Even DD#3 helped out. She punched the two little hearts at the bottom of the bookmark.

getting started

Cut, punch, glue. Cut, punch, glue…

cut punch glue, cut punch glue

favors

Almost done…

bookmarks

The finished product.

the finished product

God bless you, Shawn and Melissa! We are looking forward to your wedding day! ~~Rhonda 🙂

putting away Christmas in the guest room

Because we were gone to New Orleans for a week, I am behind on putting away Christmas. Yesterday I finished the guest room. The room doesn’t have a lot of Christmas decorations. Three boxes hold it all. It didn’t take long to put it away.

guest room tree

One storage box is an ornament box, which holds most of the tree’s ornaments. The plain glass balls are stored separately in a plastic sack. I don’t bother wrapping each one of those. Balls with decoration or glitter go into the ornament box, without wrapping. Fragile ornaments are wrapped with tissue paper and placed around them to keep them from shifting.

ornament box

Unbreakable ornaments are not wrapped in tissue paper before being placed in the ornament box for storage. Small ornaments are tucked into leftover spaces.

ornament box

ornament box

The other boxes hold the plastic bag of plain balls, a bag of silk flowers for the tree, tulle for under the tree, the three trees for the top of the bookcase, etc.

We have a lot of wreaths in the house during the holidays. This one decorates the door to the guest room. It will be covered with a white garbage bag and hung in the attic until next Christmas.

guest room wreath

There are three trees left on the first floor. Tomorrow, I will start taking down the big one in the living room. ~~Rhonda

can’t do a thing with my hair

did you say something?