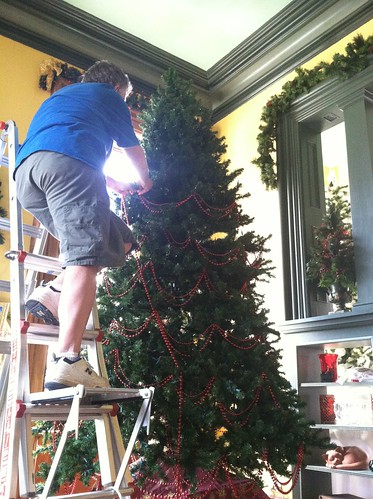
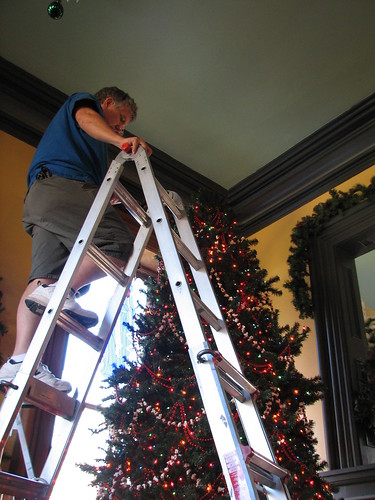
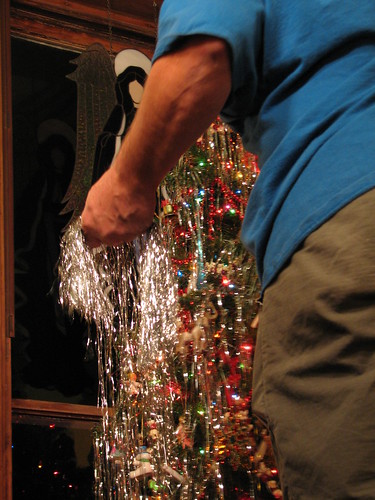
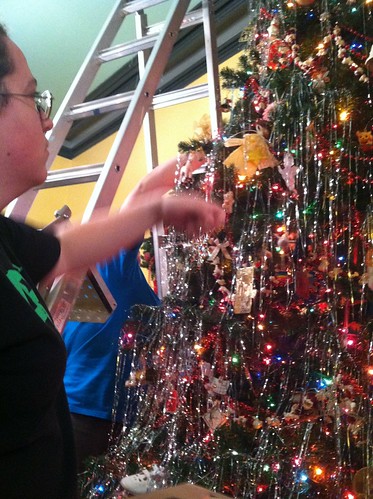
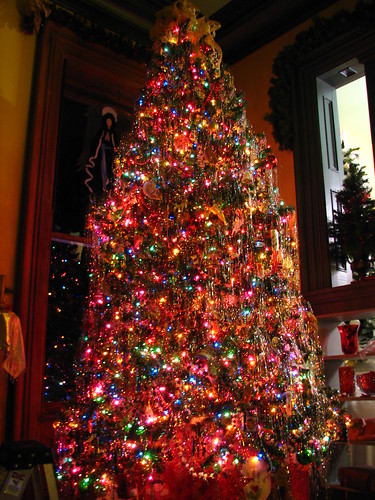
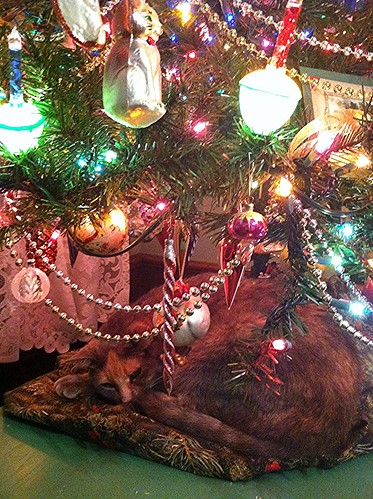
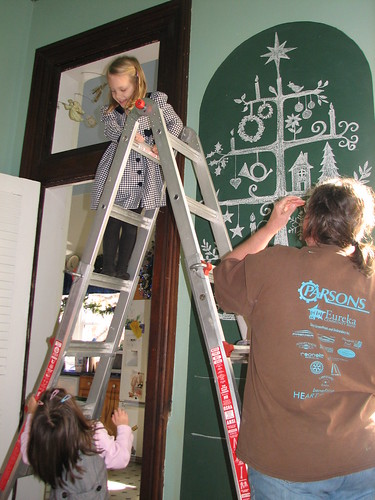
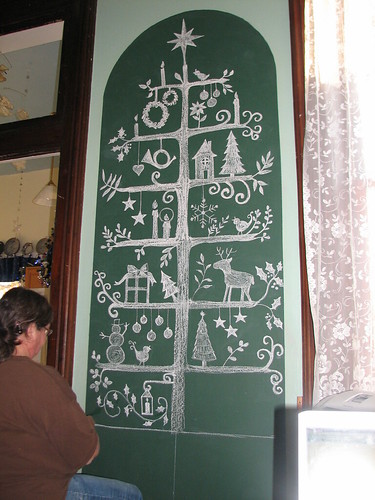
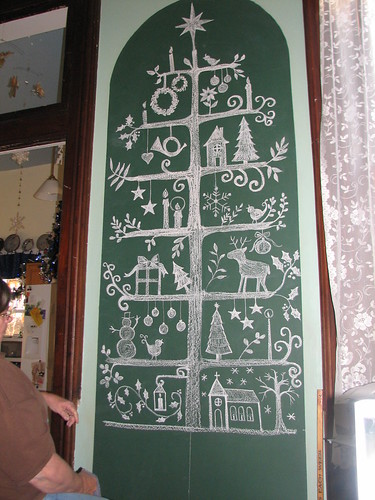
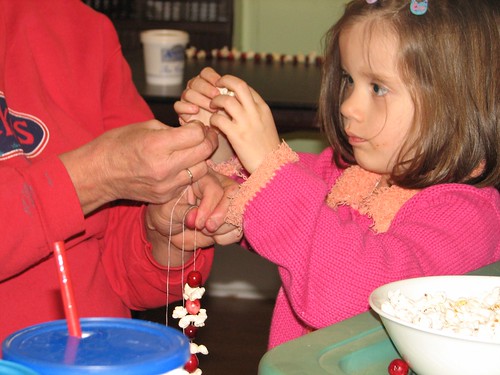
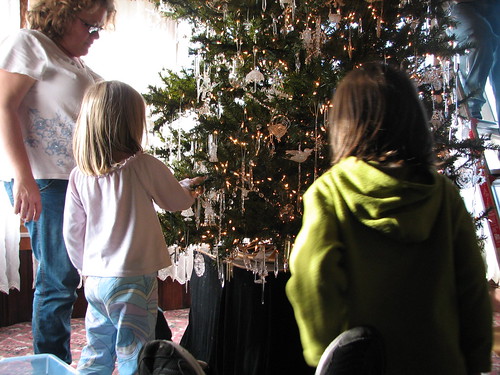
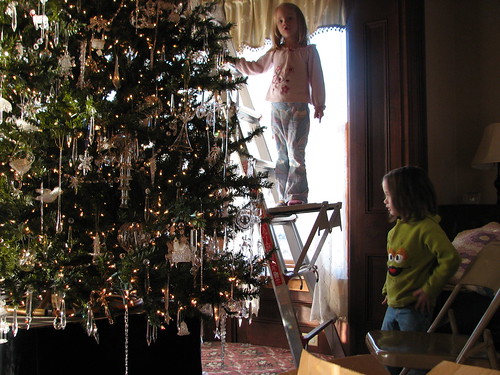
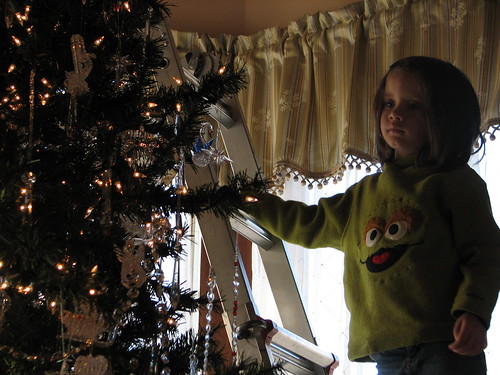
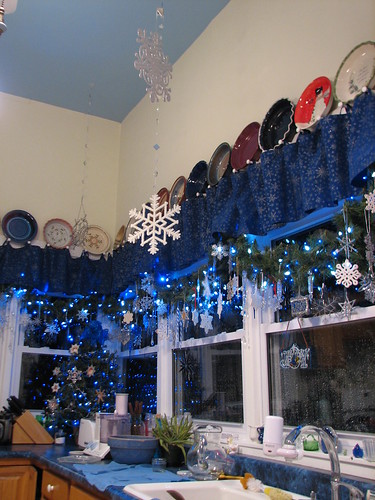
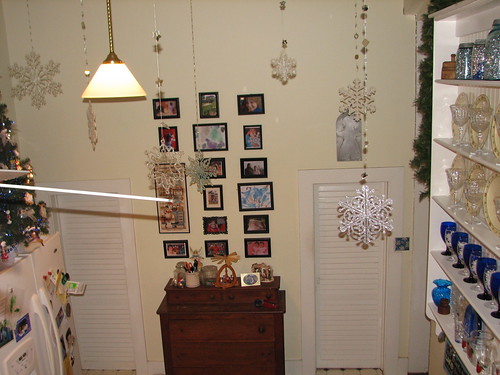
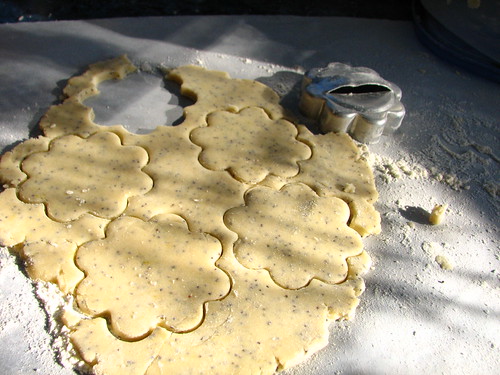
menu plan monday ~ september 24, 2012

I am loving this beautiful September weather. Cooler days (and nights). Jackets and blankets are coming out of storage. The garden is beginning to look and feel like autumn. The changes in weather, temps, and season seem to perk up everyone. And it makes me think apples!

hi, there!

Several weeks ago, DH and I canned 21 pints of spiced applesauce. It is so delicious, I am ready to make more, as soon as DH gets another bushel of yummy apples from the orchard.

canning applesauce

The menu this week takes into account a few meetings. Other than that, we’re cleaning in prep for Christmas decorating. One of my sister’s friends gave me two vintage aluminum trees, an “aluminized vinyl” tree, and parts of three color wheels. Can’t wait to put these up! Well, actually really couldn’t wait! Just had to see it with the color wheel on it!

vintage for sure

Menu time:

Monday
Carry-Out (making life easy today)

Tuesday
Chicken Taco Chili
Cheddar Cornbread

Wednesday
Not sure how the family schedule will meld, so I’m planning to have things on hand for “eat whenever.”
Ham and/or Turkey Sandwiches on Homemade Buns
Fresh Fruit
Help yourself to anything else…

Thursday
Pork Chops in the Crock Pot
Baby Baked Potatoes
Spiced Applesauce
Asparagus
Garden Salad

Friday
Low Cal Fettuccine I’m adding chicken and asparagus.
Garden Salad
Rosemary Bread

Saturday
Beef Stew in the Crock Pot

Sunday
Crock Pot Rotisserie-Style Chicken
Corn on the Cob
Roasted Veggies (carrots, potatoes, beets, turnips…)
Pear Walnut Salad

Check out more menus and ideas at Menu Plan Monday. Planning menus ahead of time helps make the whole week run more smoothly. I hope you’ll give it a try!

~~Rhonda

weekend snapshots

Autumn is in the air, for sure. And it’s in the yard, too.

autumn...on its way

The garlic chives have bloomed and are setting seed.

autumn...on its way

Beautiful golden rod everywhere. One of my Mom’s favorite flowers.

autumn...on its way

The red geraniums on the back step are perking up for the last part of the season.

autumn...on its way

The bouquet for church looks quite fallish. Jerusalem Artichokes, Golden Rod, and White Snakeroot.

Sunday bouquet

The garden is still putting out tomatoes. Delicious.

cherry tomatoes from our garden

The twins fed goats at the farm of friends from church.

fun on the farm

And they took great happiness in being given some of Auntie’s childhood coats. A little grow room there, but that will come too soon.

auntie's coats

Beautiful weather for being outside. Blue-blue skies, warm sun, autumn breezes. The smell of fall in the air. Makes you feel good!

racing down the driveway

I hope you were able to get outside this weekend and find something to enjoy.

~~Rhonda

paper circle garlands

Last year, I came across a blog with a Christmas tree garland made from waxed paper punched into circles. Click the link to see the garland she made. She glued her paper pieces to the string. Sounds like a long and frustrating job to me. I sewed mine together. Worked great. She put hers on the Christmas tree. I put mine in the window.

"snow tree" in the dining room

While I really like the look of the waxed paper garland, I thought it might be a troublesome paper weight to work with, so I decided to make a garland with punched circles from old Christmas cards and scrapbook papers. I used a couple of sheets of silver card stock (scrapbook paper) to give the garlands some shimmer and flash as they turned in the breeze. I have a large collection of used Christmas cards. If you don’t have access to many, you can use scrapbook paper, magazine pages (lighter weight, but would work), or even construction paper, if you don’t mind it being solid colors. Using the Christmas cards was fun because it made the garlands interesting to look at. As it twirled in the breeze, you could see all sorts of Christmas related pictures.

I used four different sizes of circle punches. The smallest was three-quarters of an inch, the largest was 2″ across.

punched circles

I kept the different sizes separated in paper bowls. That way, I knew what kind I needed more of as I made the garlands. Using a regular straight stitch and a regular needle, I sewed through each circle to make four to five foot lengths, leaving a small amount of space between each circle. They can be made into any length you like, of course, but this length was easy to work with. The strands could be tied together if they had to be longer.

sewing paper garlands

I found it easiest to pull six or eight circles from each pile, set them on the table in front of the machine and randomly pick them up for sewing together.

sewing paper garlands

I made sure to sew some with the picture to the front and some with the white side to the front. Doing that prevented having all white sides when they were hanging from the curtain rod.

paper garlands

DH put them up for us.

hanging paper garlands

I left them at different lengths, but it would be easy to trim them all to the same length, or into a scalloped effect, after they were hanging. The slightest breeze from the furnace made the circles spin and twirl. So pretty!

paper garlands

Here are a few photos of making the circles. Most cards can give you a couple of large circles. And smaller circles can be punched from the leftover spaces.

circle punched Christmas cards

Turn the punch upside-down so you can see exactly what you are punching.

circle punched Christmas cards

circle punched Christmas cards

circle punched Christmas cards

circle punched Christmas cards

This card had a picture over foiled card stock. A two-for-one punch.

circle punched Christmas cards

A very easy project, but it did take longer than I thought it would. I punched a lot of the circles over time, as I watched TV or a movie. But even with punching them ahead of time, I didn’t have enough. Of course, I was making garlands to hang from three windows and that took a lot. If you are making a garland to hang from one end of a mantle to another, it won’t take long. If you are making enough to hang as I did, or to circle a Christmas tree, it’s going to take several hours or more. Just FYI.

We saved the garlands by stacking the circles on top of one another, then clipping the whole thing with a clothespin. Then they were stored in a box and put away with the Christmas decorations. We’ll see how that worked when we get them out this year!

~~Rhonda

menu plan monday ~ september 17, 2012

It was a busy weekend! The grands came Friday afternoon and stayed until Sunday evening. They didn’t realize how cool the weather would be, so had to improvise when they wanted to play outside. Snow White is wearing the Christmas sweatshirt I made for her father 22 years ago, and Rose Red is wearing the one made for my husband.

what you wear when you didn't think the day would be cool enough to need a jacket

They always beg to play games on our phones. They finally talked Auntie into letting them use hers.

playing games with auntie's phone

Church made almost 400 pints of apple butter Saturday. Here’s hubby taking a turn at stirring.

It's apple butter day!

Snow White helped Pa make bread.

flour girl

Our son and daughter-in-law came Saturday evening to make supper for us. Delicious roasted chicken, roasted potatoes, arugula-spinach-fig-feta salad, roasted asparagus, mushrooms, and roasted garlic to spread on homemade rosemary bread. And they brought turnips and beets from their garden, and a box full of basil for me to dry for winter use. We had a great time, a wonderful meal and lots of fun being together. The past year has been full of extra joy and happiness having them so near. Hard to believe it has been almost a year since they moved here!

And Sunday afternoon, my dad surprised us by dropping by to visit on his way home from a work-related trip. It was fun to have the grands here to visit with him.

With cooler weather, I am looking forward to making more soups and stews. The menu this week includes ham and beans in the crock pot for Tuesday which is supposed to be our coolest day this week.

Monday
Crock Pot Pizza Pasta
Garden Salad

Tuesday
Ham and Beans in the Crock Pot
Cornbread

Wednesday
Fridge Food

Thursday
Savory Lemon Chicken
Garden Salad
Baked Potatoes
Steamed Green Beans

Friday
Homemade Pizza

Saturday
Fridge Food

Sunday
Stove Top Pork Chops
Mashed Potatoes
Steamed Broccoli
Corn on the Cob
Crock Pot Apple Crisp

You will find more menus and ideas at Menu Plan Monday. While there, you can link your own menu for the week. It’s a great way to stay accountable for getting the job done!

~~Rhonda

thrifty Christmas decorating

People keep asking if I’m decorating for Christmas yet. I have to admit, I am already thinking about all aspects of Christmas…the decorating, the entertaining, the baking, and all the other fun things we do this time of year. It’s a big event at our house.

Last year, I made a real effort to cut back on the amount of money we spent on Christmas decorations. If you know me at all, you know we have a lot already, and I didn’t want to overspend on more. It really started with the project I wanted to make for the scrapbook room…ornament garlands.

ornament garlands

My sister Genny shopped thrift stores and consignment shops on a constant hunt for old Christmas ornaments and shiny balls. She also had a running list of things I would like to find for use in our Christmas decorating. Here are a few of her finds.

These candlesticks were thrift store finds. Cheap, cheap, cheap! They made great bases for the candy trees.

candy trees

Another thrift store find…this picture frame. We placed a white piece of poster board behind the glass, then used dry erase markers to write a message. The frame cost a couple of dollars, at the most.

message board

In the laundry room, we displayed old ornaments Genny found at the thrift stores. I made the star for the top by bending wire into the shape of a star, then wrapping it with old tinsel roping. And, believe it or not, Genny and I painted that old wing chair yellow. 🙂

vintage ornaments in the laundry room

This glass dome, the birds and the silver charger are thrifted items. I had the nest, the eggs and the Christmas plate.

Christmas birds

This nativity, displayed on the counter in the laundry room, is thrifted. Genny found several lovely nativities which we used around the house.

nativity on the laundry room counter

I used this 1970 Sears nativity in the scrapbook room on the counter.

Sears nativity circa 1970

In the guest room, we placed five mirrors over the bookcase. They were all thrifted. I’ve had the middle one for a long time, though it was originally painted gold. Two of the frames came with mirrors. We had mirror glass cut for the other three. We spray painted all the frames silver.

thrifted frames with mirrors

All these items came from the thrift store. I used a dry erase marker to write a message on the platter.

all thrifted

The little wreath, and the snowman clothesline that I attached to it, came from the thrift store. Even the suction cups that hold it to the dryer were thrifted! I did remove some old decorations from the wreath to give it new life.

dryer wreath

These tinsel wreaths are made by wrapping tinsel roping around embroidery hoops. Both thrifted.

tinsel rope wreaths

And I loved the way the wreaths came out.

tinsel rope wreaths

Genny found this great box at a thrift store. I plan to fill it with Christmas items. A lot of these are thrifted. Some were picked up around the house from Christmas trees or from the boxes of Christmas decorations we have on hand. The tiny copper cookie cutters were in the kitchen pantry with my other cookie cutters. The picture for the little frame was cut from a Christmas card. I plan to expand and develop this cubby collection as time goes by.

thrifted display box and thrifted Christmas items

These thrifted jars held a variety of Christmas candy. The jars were shuffled around from here to there for different events we hosted. During the open house, they were in the kitchen. During the house concert, they were in the dining room.

thrifted jars for candy

Thrifted plates displayed the message “JOY” in the dining room.

thrifted plates and thrifted plate display

Some thrifty decorating didn’t involve any buying at all. The circles for these window garlands were punched from old Christmas cards and scrapbook paper that I had on hand, sewn on the machine and tied to the existing curtain rod. They were not hard to make. Just took some time. And we got a lot of compliments on them, too.

snow tree in the dining room

As an aside, another good way to use old Christmas cards is to make tags.

making gift tags

If you enjoy browsing thrift stores as much as Genny and I do, you can find all sorts of things to use for decorating, for crafting, for organizing, for all sorts of things. And not just for Christmas!

~~Rhonda

menu plan monday ~ september 10, 2012

We had a busy weekend with my niece and her family here, then babysitting of the grands. Sunday afternoon, we spent some time on the east porch playing with marbles and bubbles and numbers. Fun. 🙂

filling the star

blowing bubbles

fun with numbers

This week, back to normal? We’ll see! Here’s the menu.

Monday
Fridge Food…lots of leftovers…

Tuesday
Crock Pot Rotisserie-style Chicken
Rice
Sauteed Zucchini and Summer Squash
Garden Tomatoes

Wednesday
Fridge Food

Thursday
Chicken Quesadillas with Spinach
Avocado Sour cream

Home Baked Tortilla Chips
Lettuce and Garden Tomatoes

Friday
Hamburgers
Homemade Buns
Cole Slaw

Saturday
Beef Stew in the Crock Pot

Sunday
Vegetable Lasagna
Garlic Bread
Green Salad
Corn
Steamed Sugar Snap Peas

You will find more menus and ideas at Menu Plan Monday.

~~Rhonda

pear butter

With all the pears we’ve been gifted with, I decided to make some pear butter. It took six quarts of pear sauce to make 12 cups of pear butter.

making pear butter

I apologize for the quality of the pictures. I took them with my iPhone. It doesn’t do the greatest job. But it does take a pic when I can’t find my camera!

I washed the pears first.

making pear butter

Some of the fruit was damaged. I cut around all that, trimmed the ends and that all went out to the compost pile, which will make the box turtles very happy. We see them dining there now and then.

making pear butter

No need to peel or core with my handy dandy Victorio Food Strainer and Sauce Maker. Hint for when you do need to core pears: use a melon baller. Easily scoops the core out of halved pears.

making pear butter

making pear butter

I poured all the pear sauce into my big pot, and added 1/2 cup of lemon juice, a couple of star anise, 12 whole cloves, some grated cinnamon, and some freshly grated nutmeg. Next time, I’ll skip the lemon juice and add Fruit Fresh to the sauce instead. Didn’t have it on hand when I made the pear butter. I had too much sauce to put into my crock pot until it had cooked down a bit. It simmered on the stove top for about four hours. This shows the sauce down about an inch.

making pear butter

At that point, I transferred it to the crock pot. Filled it to the very top and turned the crock to high. In the crock pot, it doesn’t have to be watched as closely as it does on the stove top. No burning in the crock.

making pear butter

After it had simmered for three hours, it was down about half an inch. The crock pot takes longer, but is easier that the stove top, in my opinion. I like the fact that it just takes an occasional stir. No need to watch it so closely. During the evening, as I gave it a stir now and then, I pulled out the star anise and the whole cloves as they came to the surface.

making pear butter

The sauce went into the crock pot at 3:00 p.m., and was turned to high. Around 10:00 p.m., it was turned to low and left to perk away all night. No lid at any point during the process. The next morning, it was done. Thick, rich, and delicious. As you can see, the longer it cooks, the darker it gets. At this point, I asked DH to sample it and he thought it needed a little sweetening, though I thought it was fine without it. I did add 1 cup of sugar and stirred that in to suit his sweet tooth. A second taste test pronounced it just right.

making pear butter

I poured the pear butter into 8-oz. jelly jars and processed it in the hot water bath for ten minutes.

making pear butter

Twelve jars of yummy pear butter, saved for the coming months.

making pear butter

I’ll be making more this weekend. We still have a mountain of pears to work through. Tonight, I plan to process some for drying. And we’ll be canning more as they ripen.

making pear butter

~~Rhonda

menu plan monday ~ august 27, 2012

It was a busy first week of school. I assumed I’d have some free time, but that worked out for only one day. Did get a lot of canning done, though, with the help of my son. We processed Concord grapes into 40+ pints of jelly and 32 quarts of canned juice.

processing grapes

And he and his wife helped can pears. We’re just getting started on that. The pears are picked but many have to ripen a bit more before being canned. Thanks to our friend the tree trimmer for bringing the bounty over!

a tree's worth of pears

Before I give this week’s menu, I want to share how much we enjoyed this recipe last week for chicken quesadillas. It was the first time I made them. Simple to make and everyone really liked them. The avocado sour cream was delicious. Heard some very happy noises while the fam’ ate lunch. I’ve included the avocado sour cream in this week’s menu, too.

chicken quesadillas

Monday
Ranch Chicken Tacos
Avocado Sour Cream

Tuesday
Baked BBQ Pork Steaks
Baby Baked Potatoes
Sugar Snap Peas and Cherry Tomatoes

Wednesday
Spaghetti with Homemade Sauce
Rosemary Bread
Garden Salad

Thursday
Mexican Mostacolli and Cheese / I plan to mix all the ingredients instead of layering them, and will use half the amount of cheese. And I’ll add a tablespoon of homemade taco seasoning mix.
Garden Salad
Garlic Bread

Friday
Chicken and Cornmeal Dumplings

Saturday ~ Apple Butter Day
Family Dinner with Dad in memory of Mom on her birthday.
I’m providing the birthday cake. I’ll make it a pumpkin cake because my mother loved it (and loved anything to do with her favorite season autumn!).

Sunday
Vegetable Lasagna
French Bread
Garden Salad

You will find more menus and ideas at Menu Plan Monday.

~~Rhonda

in the garden after the drought

After a long two months of drought, we have been getting rain off and on. And we are so grateful for it. Some of the garden plants are looking better, though many have leaves that are half crisped to brown. These dogwood trees look so sad.

dogwood

dogwood

I don’t know what this bodes for next spring. I wonder if any of the shrubs and trees that set their blossoms after a spring bloom will have blossoms next year or not. The terminal buds of the lilacs are dried up. No lilacs next year? The star magnolia lost 99% of its leaves this summer. No blossoms in the spring? We’ll have to wait and see.

Leaf burn is evident on many of the hostas. Some worse than others. This ‘Regal Splendor’ did better than many.

Hosta

‘Invincible’ has earned its name this year. It looks great and flowered well. Some of our ‘Royal Standard’ hostas didn’t bloom at all. I can’t remember that ever happening before.

Hosta 'Invincible'

‘Thunderbolt’ did great, as well, but the ‘Love Pat’ to its left suffered some leaf burn.

Hosta 'Thunderbolt'

‘Gold Standard’ did well, too. Looks as good as ever.

Hosta 'Gold Standard'

Garlic chives are tough. They have only been hampered in timing. Their bloom is coming on a bit more than a week later than usual.

garlic chives

It looks like my lavender plant is going to survive.

lavender

Who can complain about crepe myrtle? Gorgeous color in the yard this time of year.

Crepe Myrtle

The beautiful purple ironweed is blooming in the woods. When I see this, I know autumn is on its way!

ironweed

Also along the edges of the woods, the elderberries are ripe. We picked a lot of them for elderberry jelly, but left some for the birds to enjoy.

elderberries

The Southern Pin Oak behind the house provides a lot of shade for our yard. We watered it during the drought. Not taking any chances with it. You can see, though, that the hostas around the base of the tree are stunted. Half the size they usually are.

Southern Pin Oak

It is making a lot of pretty little acorns.

Southern Pin Oak acorns

In spite of the drought, some of the daylilies have rebloomed. Daylilies that looked crispy to the ground are putting up new green leaves, too.

‘Chicago Petticoats’

Hemerocallis 'Chicago Petticoats'

‘Mae Brown’

Hemerocallis 'Mae Brown'

I think this year I spent less time in the garden than any other year. It was just too hot and too dry for too long. I am eager to see what next spring brings. Will we have the usual spring blooms? Are some of our plants just dormant or are they gone? Will we have to replace some of our hostas? How about the dogwoods? We shall see!

Check out Jean’s “Bloomin’ Tuesday” post for her garden pictures and links to other gardens. An easy way to stroll through a garden tour or two or three. 🙂

~~Rhonda

pumpkin cream cheese muffins

For breakfast on the first day of school, I used this recipe for Pumpkin Cream Cheese Bread to make muffins. Spicy, moist and delicious. Thumbs up from everyone!

pumpkin cream cheese muffins

Pumpkin Cream Cheese Muffins
Makes 20 regular sized muffins.

Mix together:
1 2/3 cups all-purpose flour
1 teaspoon baking soda
1/2 teaspoon salt
1/2 teaspoon ground cinnamon
1/2 teaspoon ground cloves
1/4 teaspoon ginger
1/4 teaspoon nutmeg (I used freshly grated.)

Whisk together:
1 cup pumpkin puree
1/2 cup canola oil
2 large eggs
1 1/2 cups sugar

pumpkin cream cheese muffins

Pour the flour mixture over the wet ingredients and stir until blended.

Optional: Stir in
1 cup chopped pecans or walnuts (I left out the nuts.)

Cream Cheese Filling:

Stir together: (will be runny)
1 package (8 ounce) cream cheese, softened
1/2 cup sugar
1 Tablespoon all-purpose flour
1 large egg
1/2 teaspoon vanilla extract

Line regular sized muffin tins with cupcake liners.

I used my small scoop to put batter in the liners.

pumpkin cream cheese muffins

Two scoops for the bottom, then poured some cream cheese mixture on top…

pumpkin cream cheese muffins

Then another scoop of batter…

pumpkin cream cheese muffins

At this point, I should have swirled the cream cheese filling into the batter, but I didn’t. The filling will be better incorporated if you take a knife and give the batter a short twirl.

Bake at 325* for 25 minutes.

They smell delicious while baking.

pumpkin cream cheese muffins

When cooled, you can add a glaze, though we didn’t bother.

Glaze / Mix together:
1 cup powdered sugar
2 to 2 1/2 Tablespoons half & half
1/2 to 1 teaspoon cinnamon
Optional / Top with:
1/2 cup chopped pecans or walnuts for garnish

Moist and spicy. Like pumpkin pie in a cake.

pumpkin cream cheese muffins

And they’re off! One to her first year of high school and one beginning her pursuit of a Masters in Business.

off to school

::sigh:: Where have the years gone?? ~~Rhonda