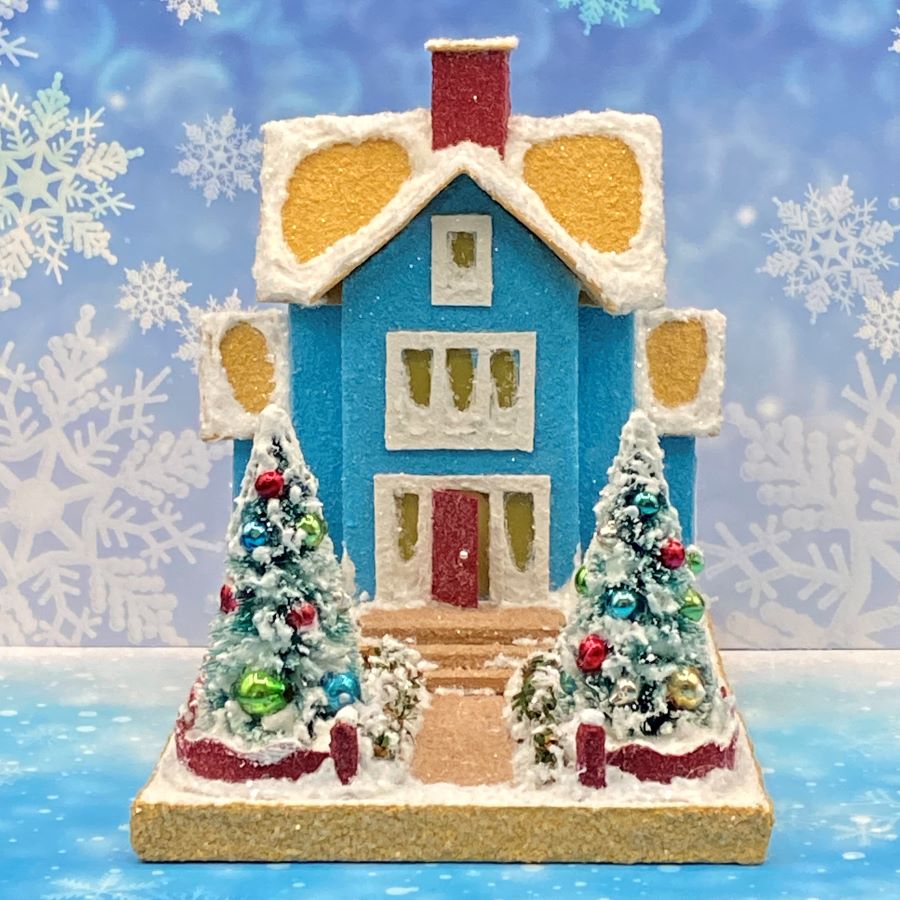
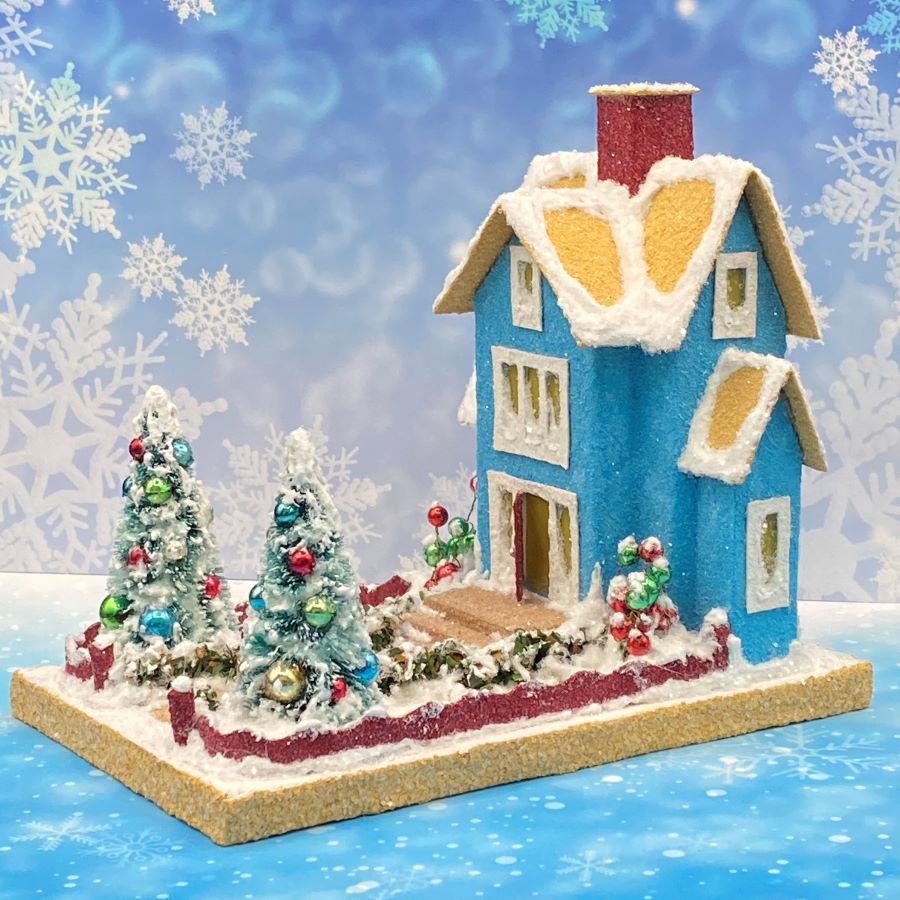
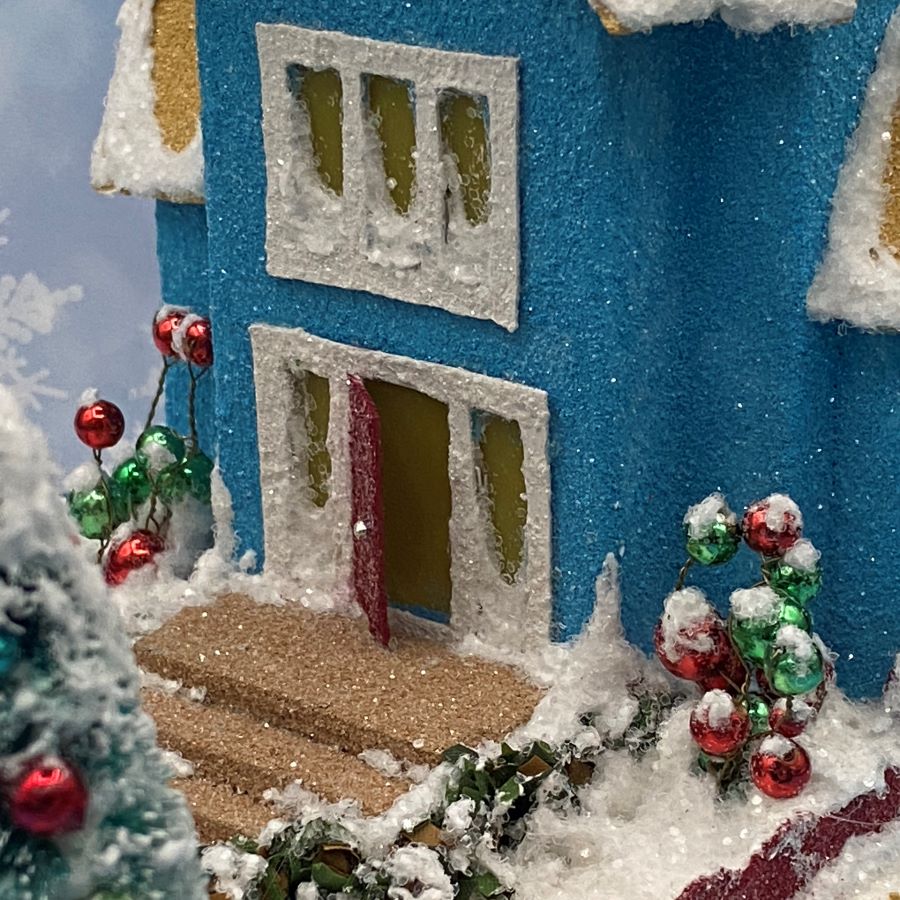
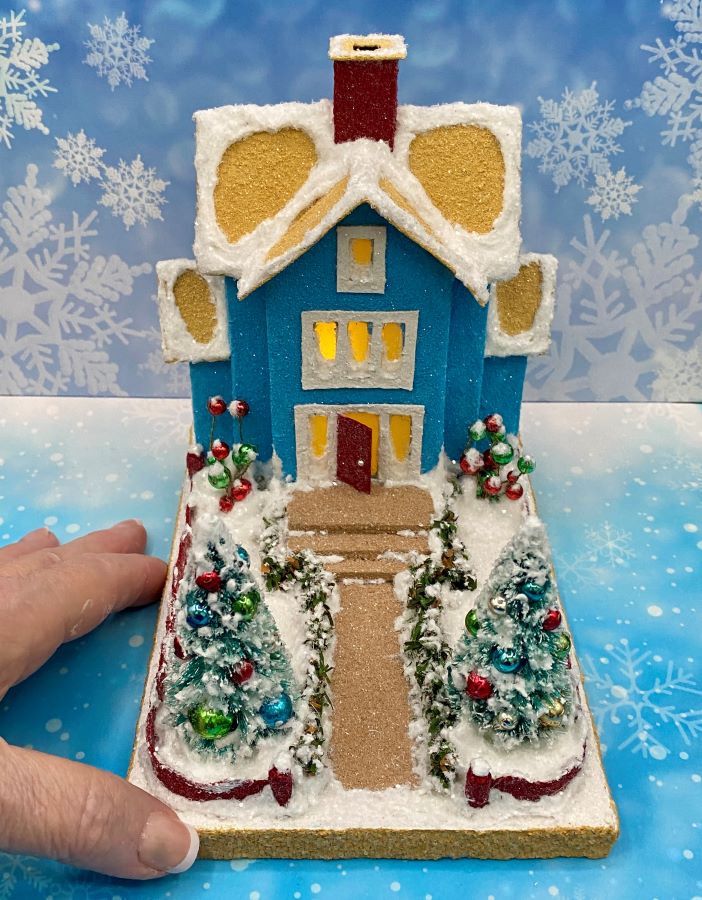
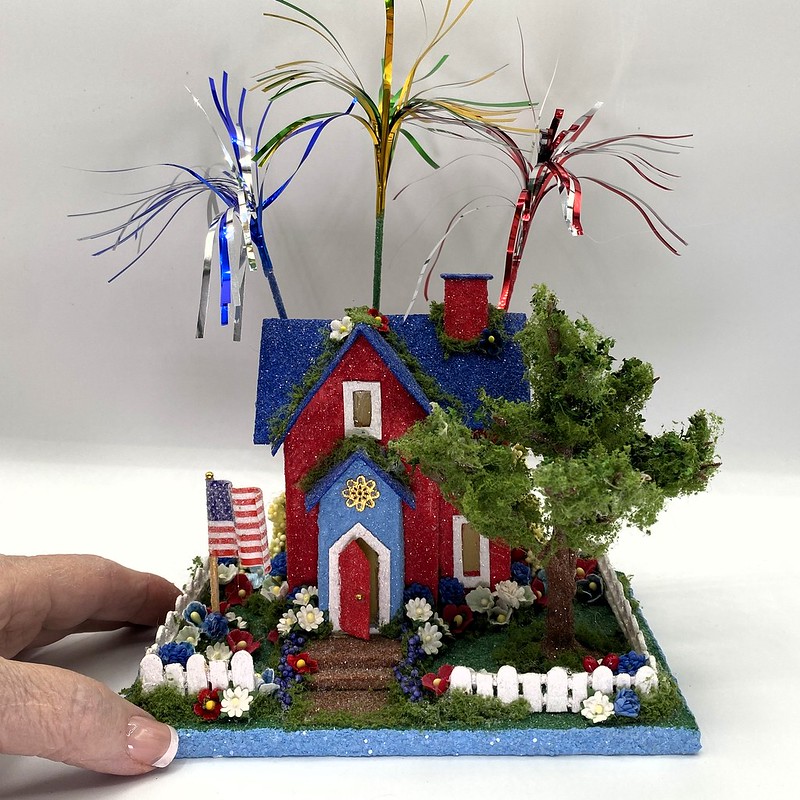
This house is made from a pattern I drew last week. I love the way it turned out. Right down to the gorgeous aqua blue color. When I chose the card to use as the base, I assumed I would use the red and gold colors on the card as they are the most prevelent. But I liked that blue too much not to use it as a prominent color.
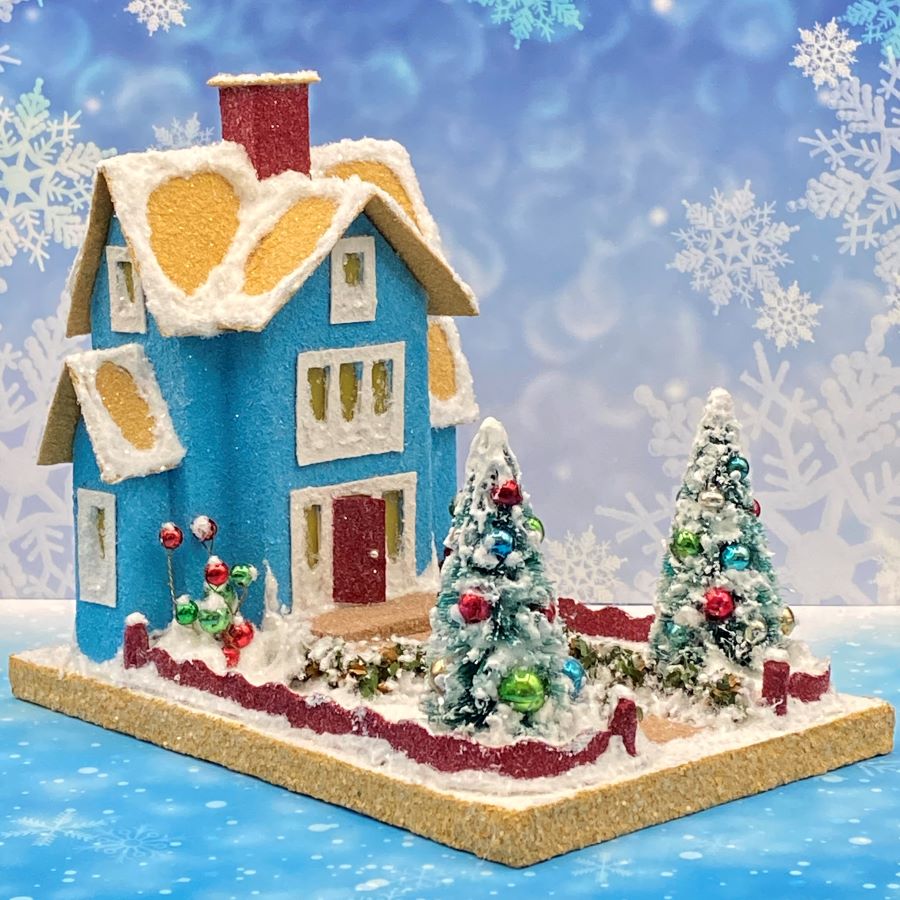
The putz is 4 7/8″ wide by 7 1/4″ deep. It is 6 1/4″ tall, as measured from the bottom of the base to the top of the chimney.
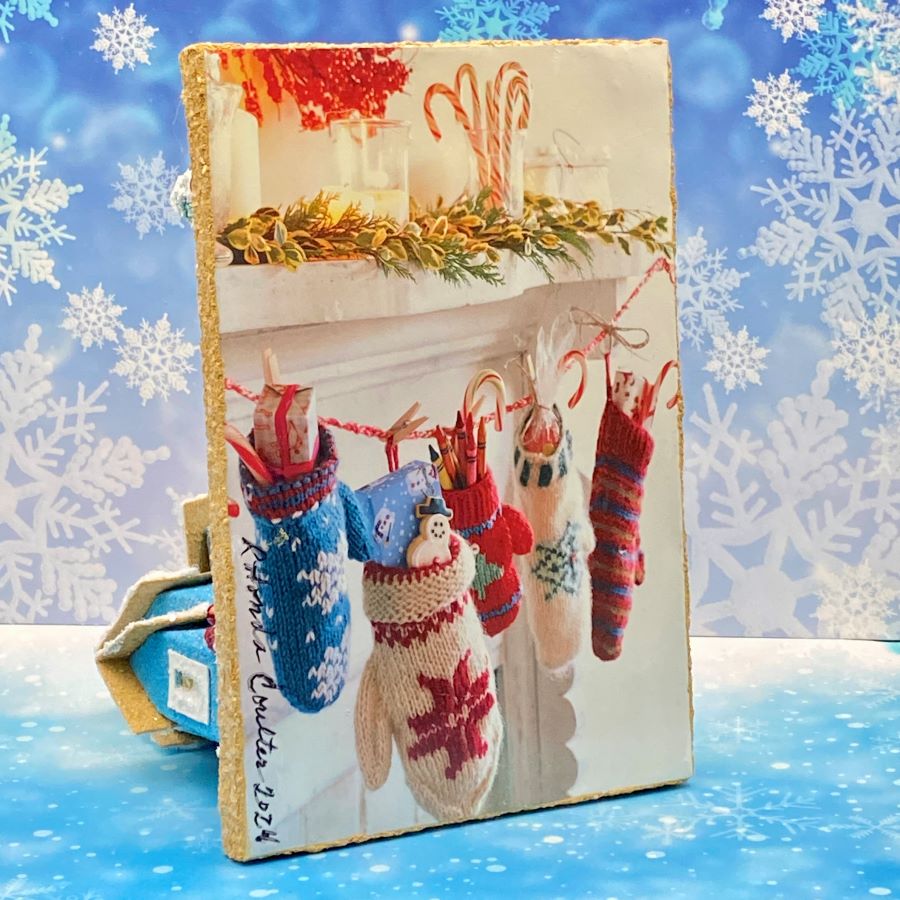
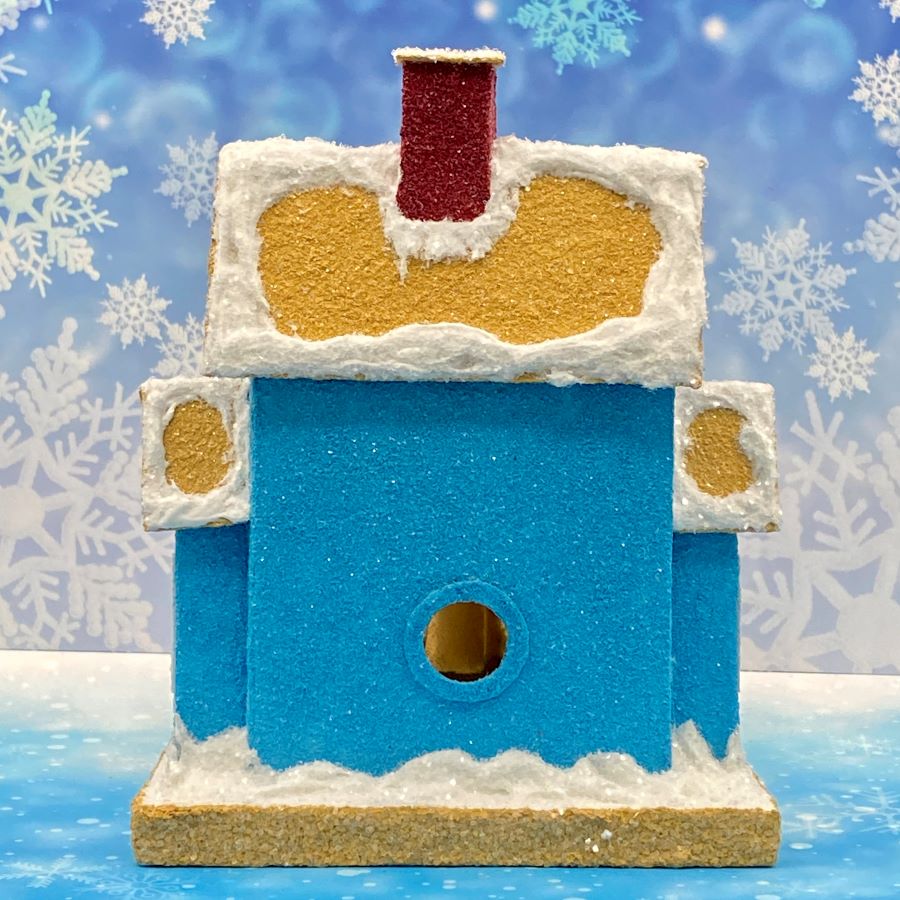
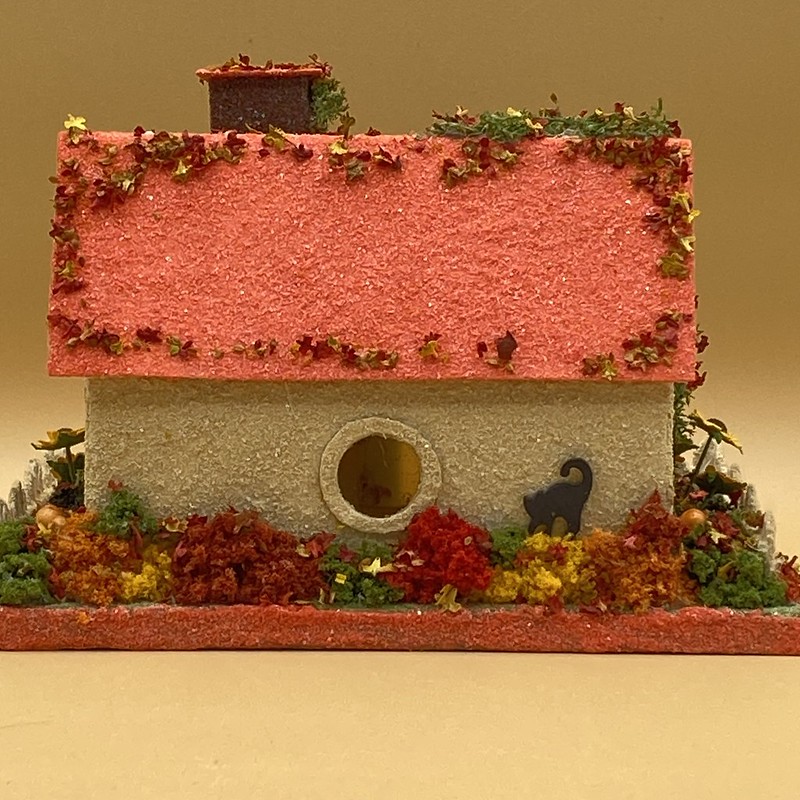
The base is made from an upcycled Christmas card, featuring a fireplace mantel with mittens in place of stockings. A hole in the back allows the use of a small LED light string for lighting this and other glitter houses in your glitter house village.
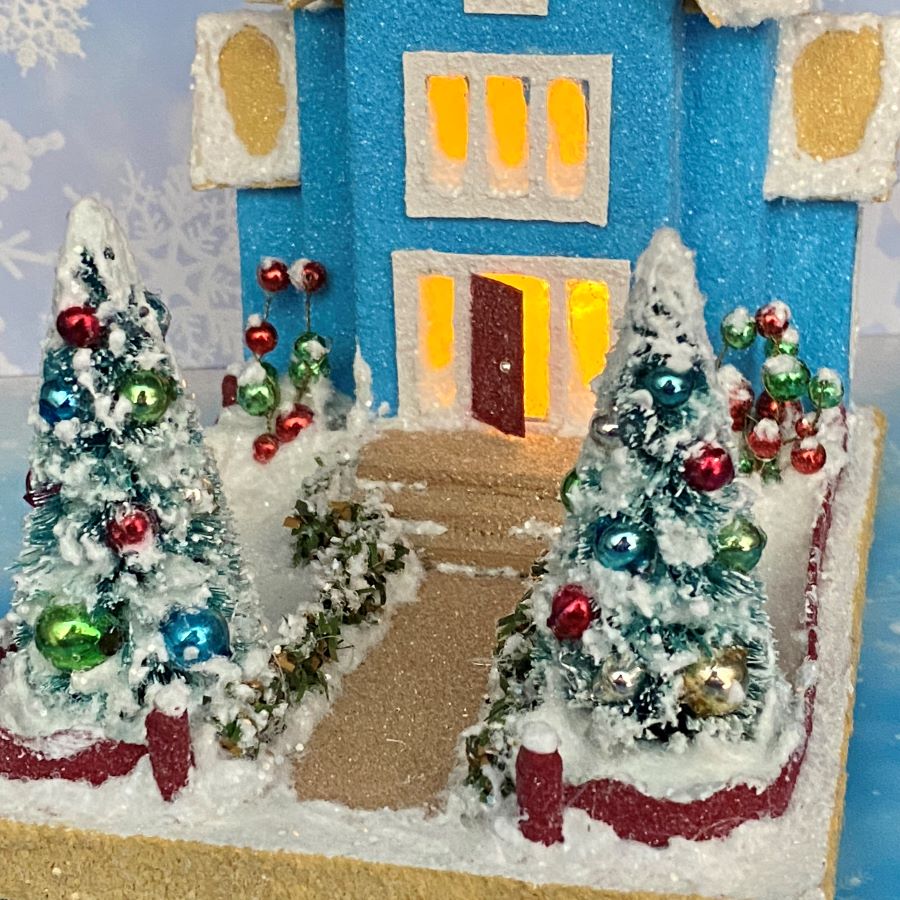
The yard has two bottle brush trees decorated with vintage mercury beads, faux snow and clear glitter. Wired beads decorate both sides of the front steps. While landscaping, I had thought about using several smaller trees, but it just didn’t look right to me. The two taller trees seem to set it off well.
The doors on my putz houses are always open, so guests know they are welcome to drop by any time. Christmas cookies and hot chocolate are waiting for company.
If you would like to see more of my Putz houses, as well as Christmas ornaments I have made from upcycled holiday cards, please visit my Etsy shop.
If you are interested in crafting Putz houses of your own, check out my Putz tutorials for more information. Putz House Tutorials The blog can be searched for “tutorial” to find any that aren’t linked to the tutorial page. Working on that!
I am always happy to answer questions about the process. Please ask, if you are wondering about the details of putzing!
All proceeds from my Etsy shop benefit Kenya Mercy Ministries. They work with the urban poor of Nairobi, Kenya, particularly the children and their families who live in Kibera, the largest urban slum in Africa. Thank you for your part in helping these children when you purchase items from my shop!
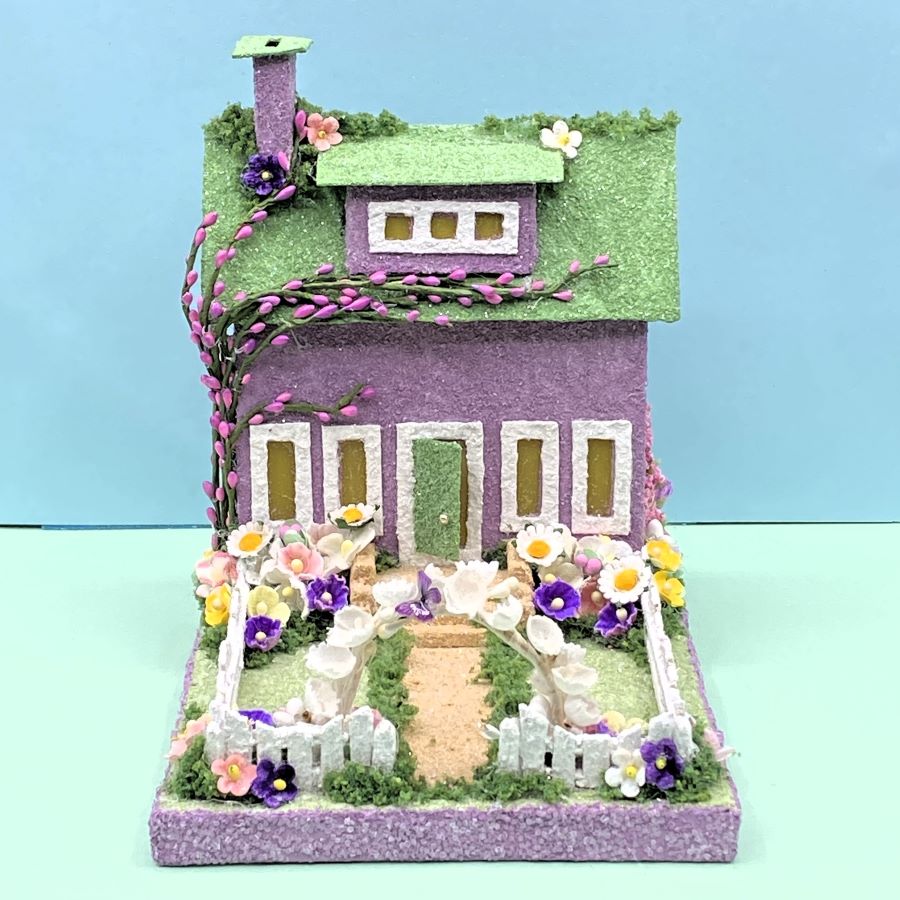
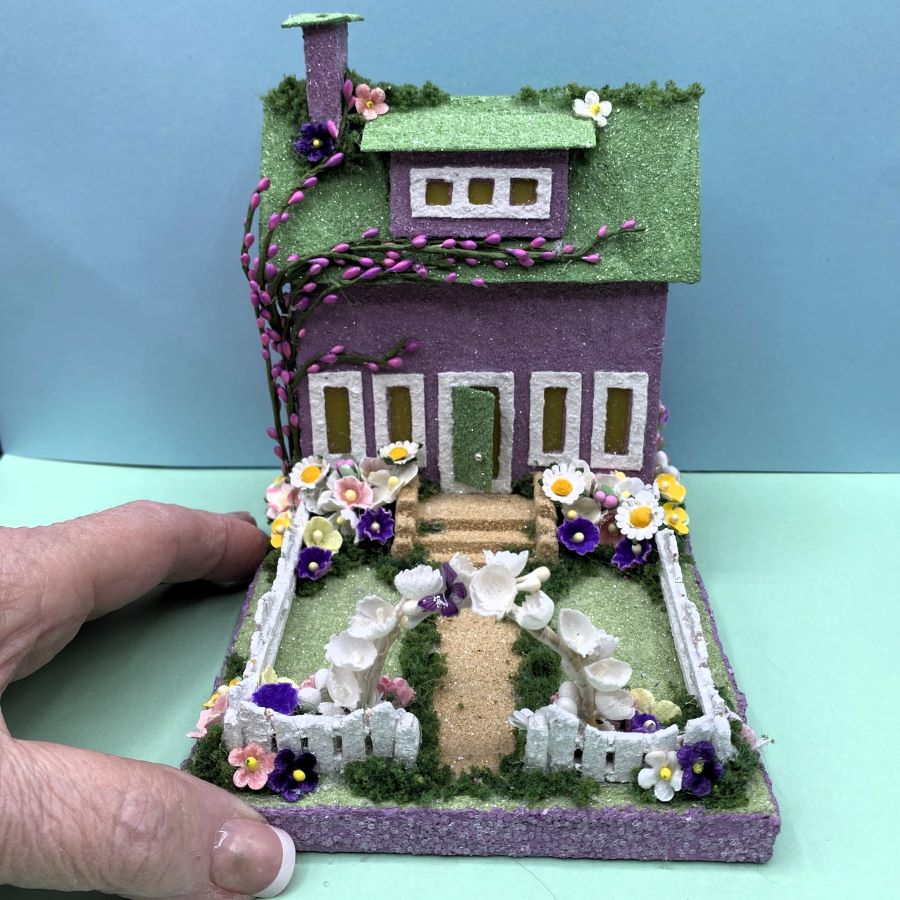
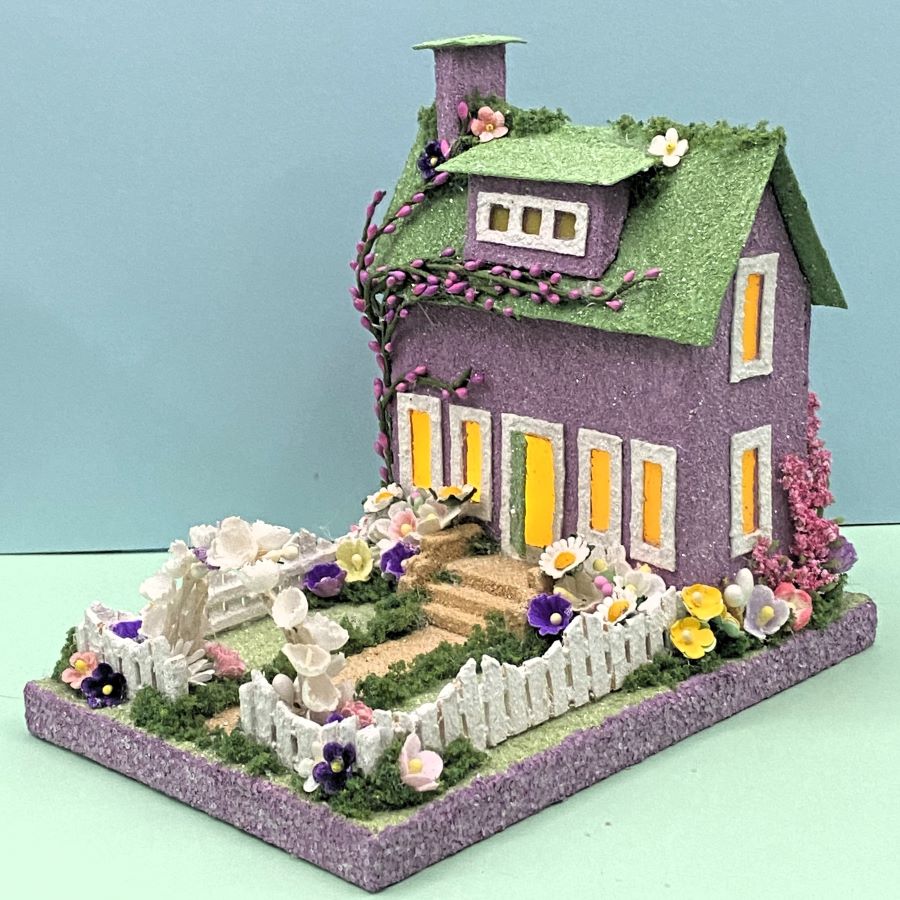
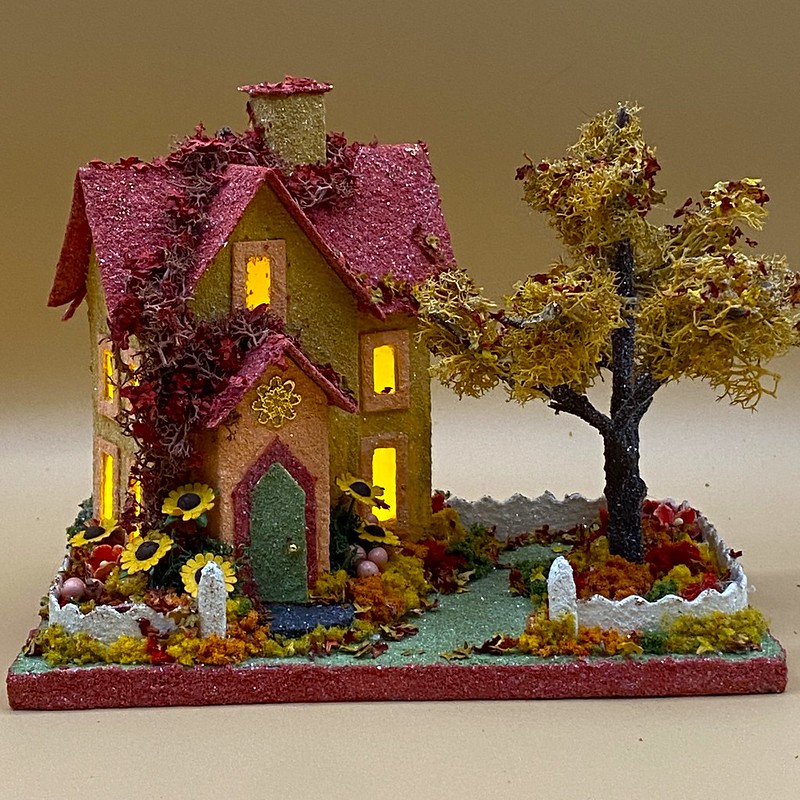
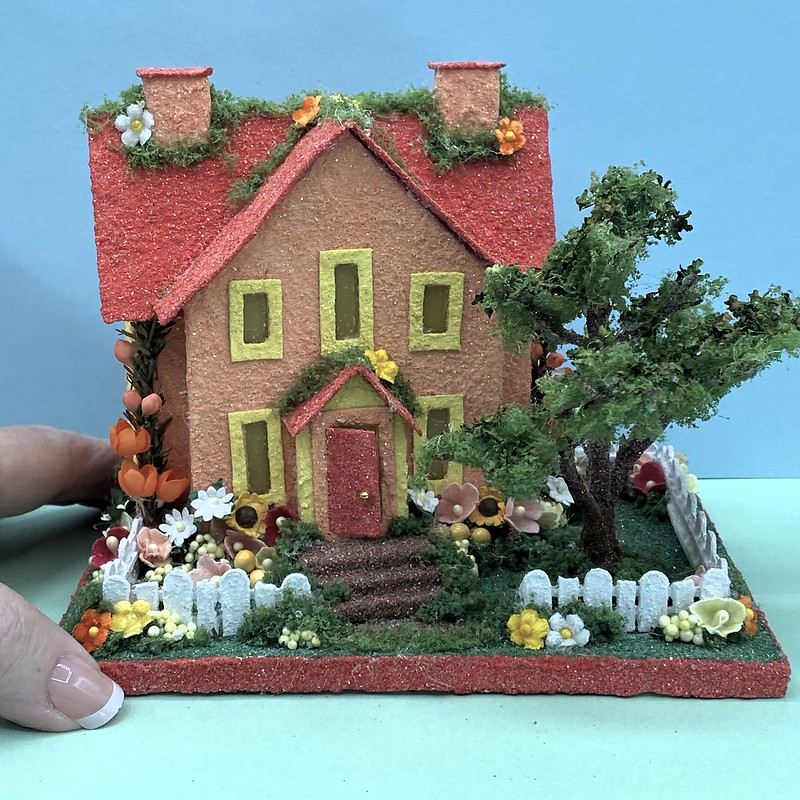
This summer house features a handcrafted wooden picket fence, a floral arbor with a tiny butterfly, and a budding vine growing on the house.
The putz is 4 3/8″ wide by 6″ deep. It is 5 1/2″ tall, as measured from the bottom of the base to the top of the chimney.
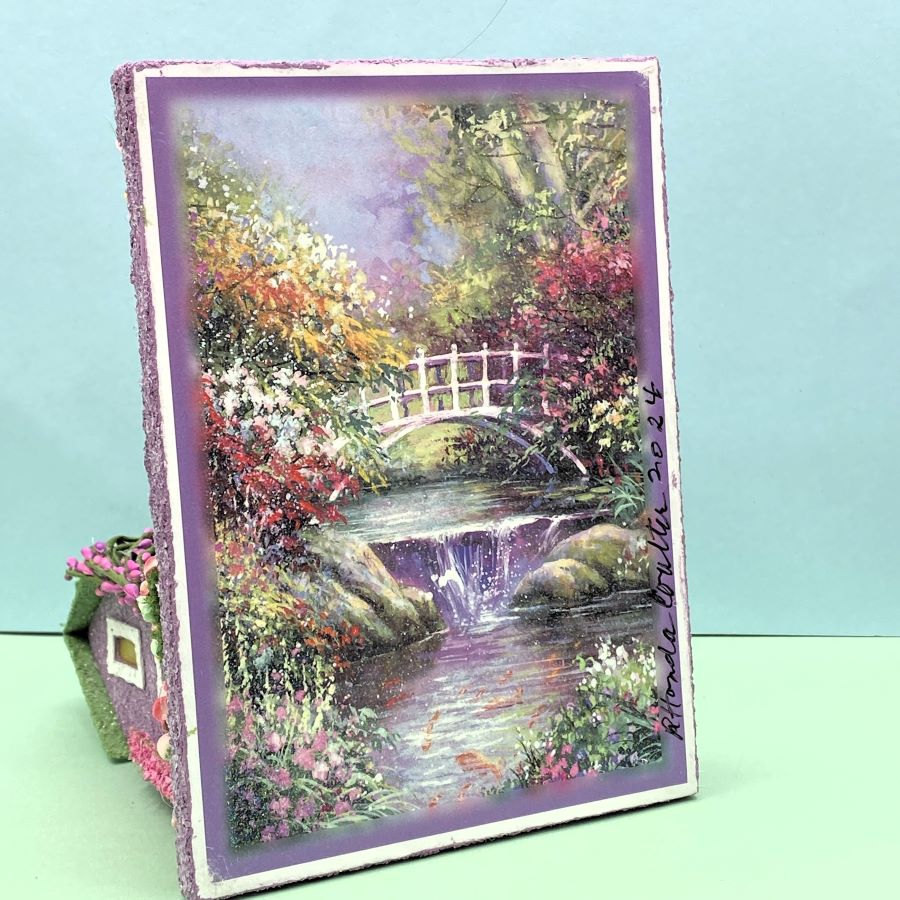
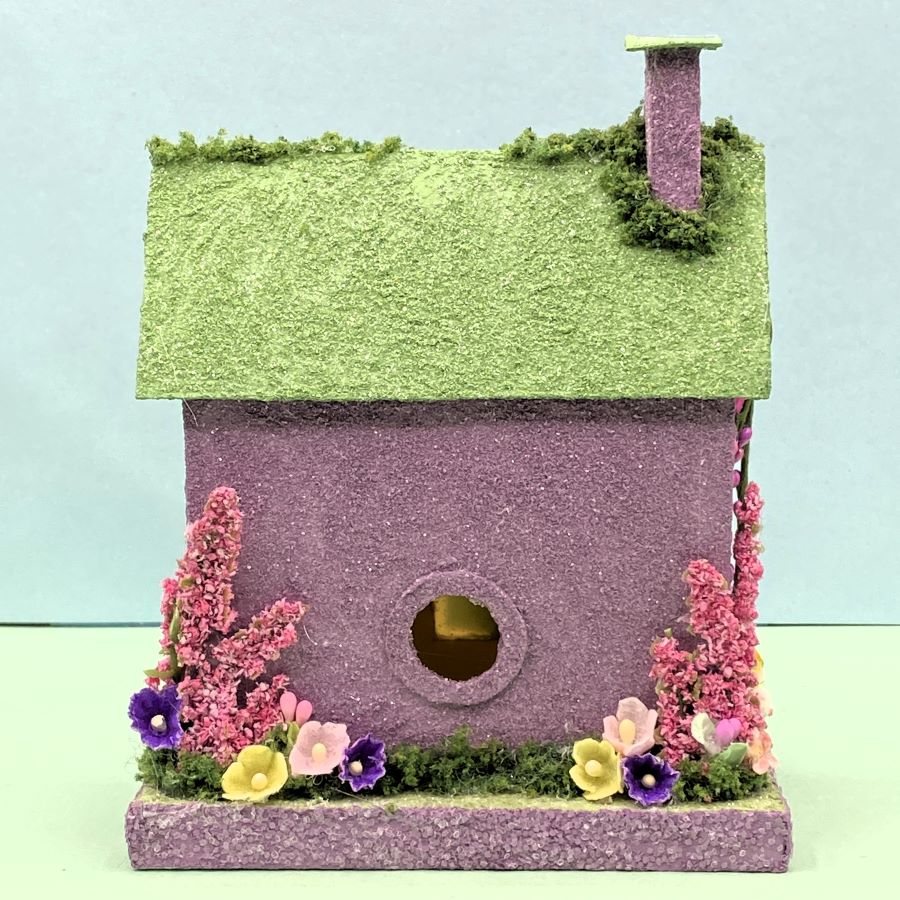
The base is made from an upcycled greeting card. The colors for the putz house are inspired by the colors of the card. This card features a beautiful, lush cottage garden. The house has a hole in the back that allows the use of a small LED light string for lighting the putz.
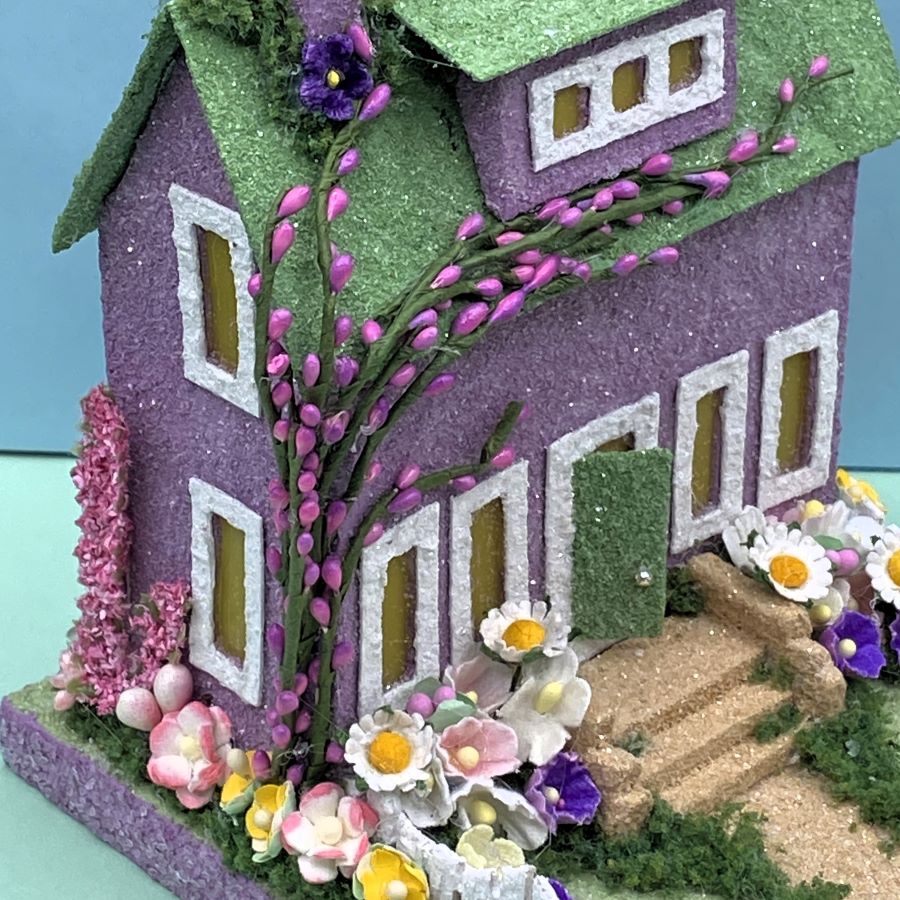
A budding vine grows over the house. The yard is filled with mulberry paper flowers and velvet forget-me-nots. A handcrafted, wooden, picket fence encloses the garden.
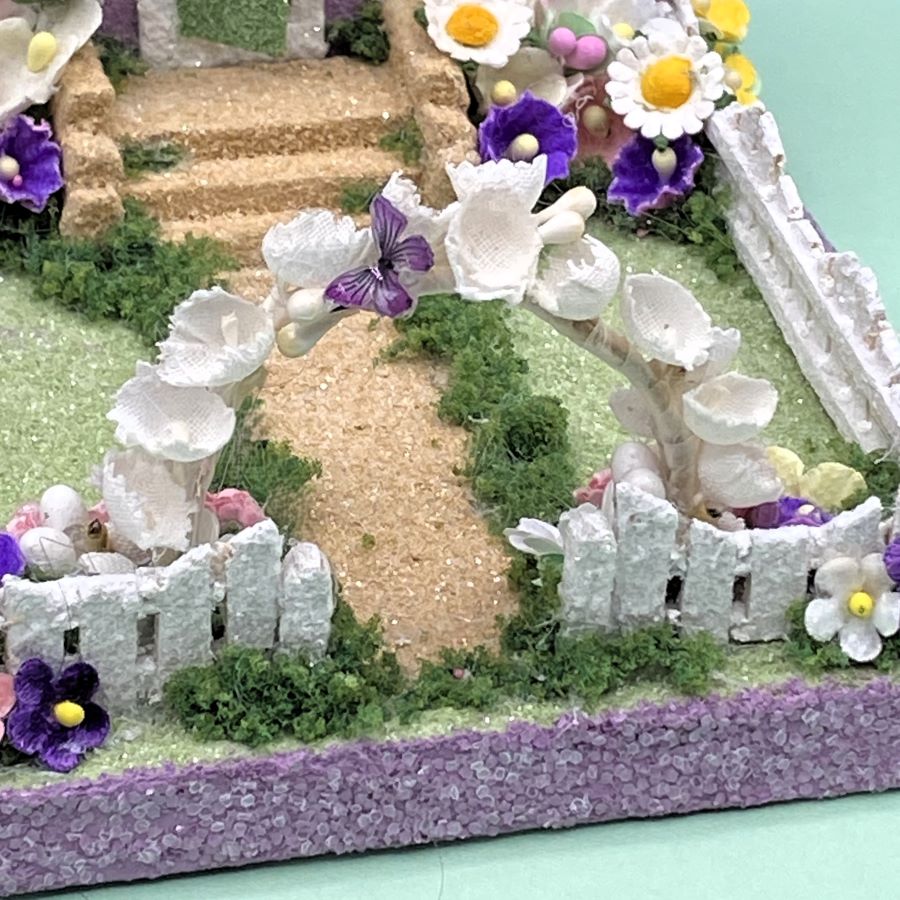
Enter the front yard through a floral arbor. Note the tiny butterfly. A variety of flowers and foliage are used to fill the summer garden with abundant color.
If you would like to see more of my Putz houses, as well as Christmas ornaments I have made from upcycled holiday cards, please visit my Etsy shop.
If you are interested in crafting Putz houses of your own, check out my Putz tutorials for more information. Putz House Tutorials The blog can be searched for “tutorial” to find any that aren’t linked to the tutorial page. Working on that!
I am always happy to answer questions about the process. Please ask, if you are wondering about the details of putzing!
All proceeds from my Etsy shop benefit Kenya Mercy Ministries. They work with the urban poor of Nairobi, Kenya, particularly the children and their families who live in Kibera, the largest urban slum in Africa. Thank you for your part in helping these children when you purchase items from my shop!
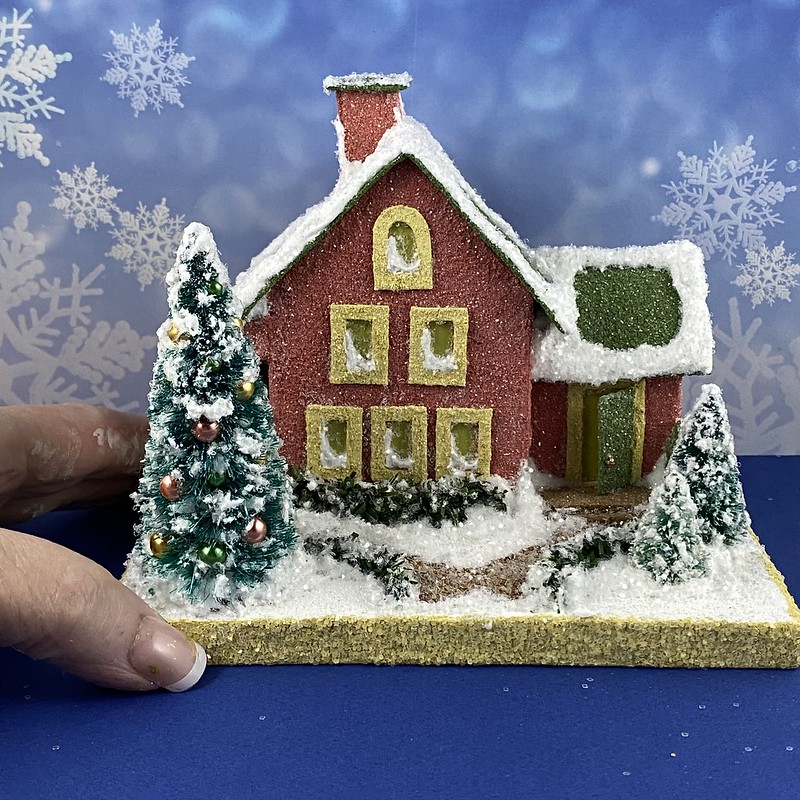
Adding an evergreen hedge to a Putz house adds extra color and a change of pace from a fence cut from poster board. A hedge can be put around the yard, against a building or along a sidewalk.
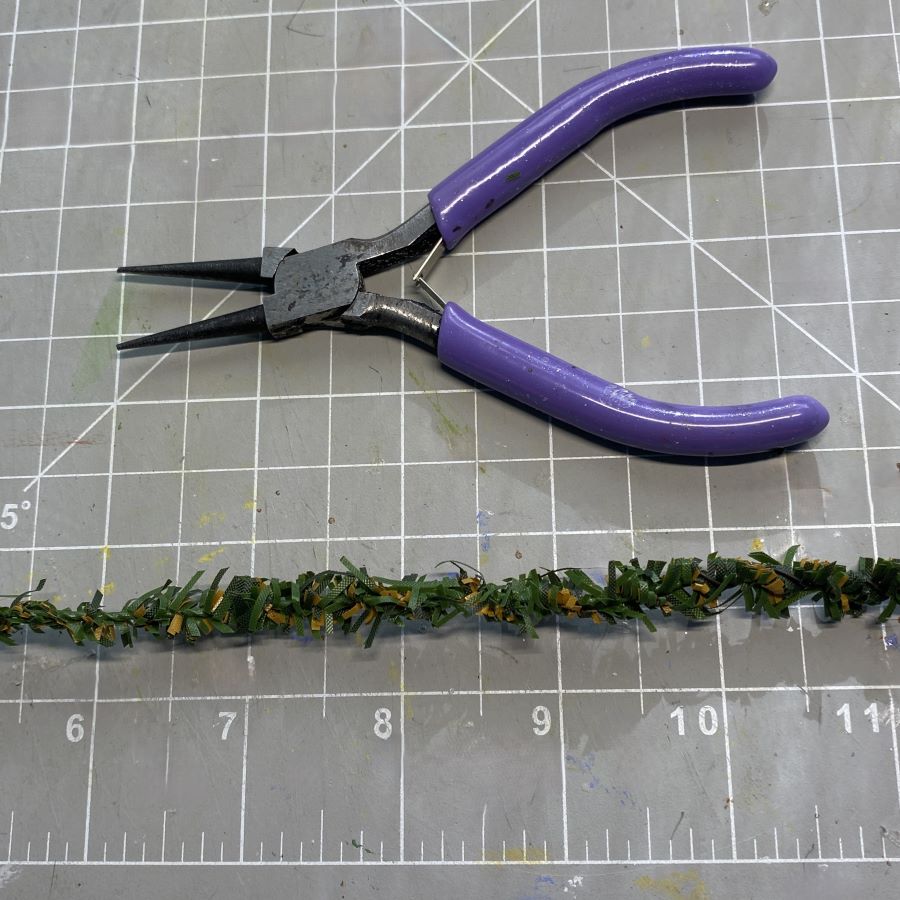
My personal preference is the evergreen that has some brown in it. Completely green is fine, too. I use this kind of roping for making tiny garlands, roping and wreaths, as well as hedges. Making wreaths and garlands for putz houses
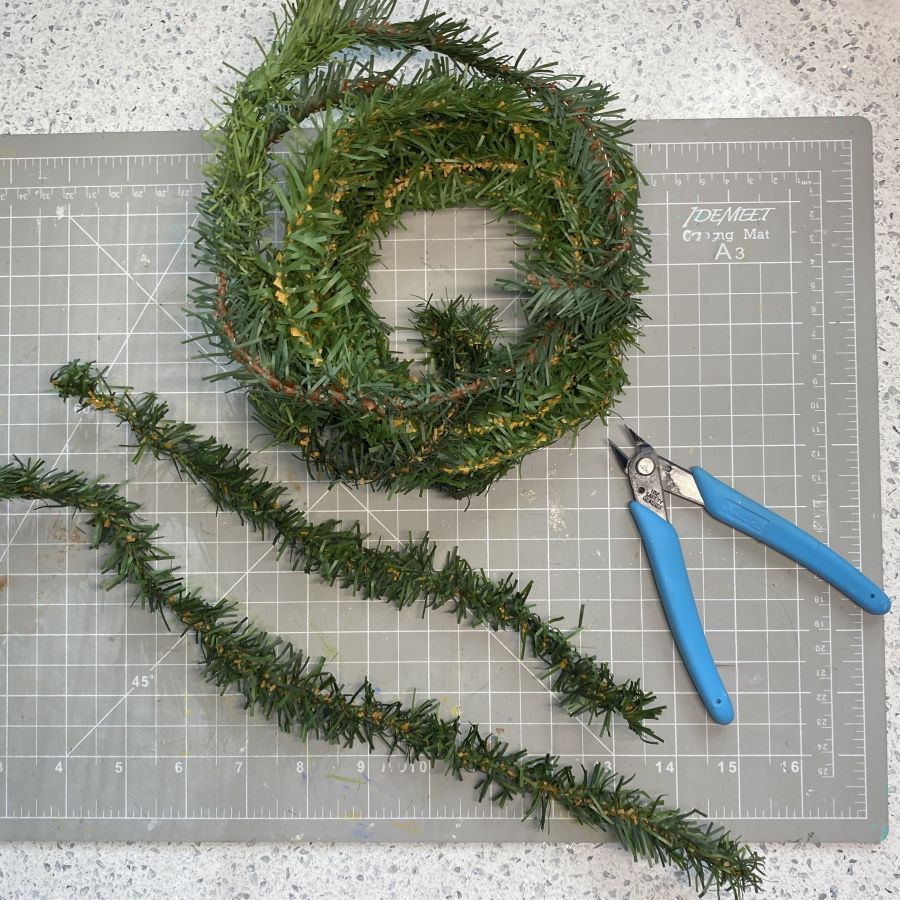
To make a hedge, these supplies are needed.
Evergreen pipe cleaners / chenille stems or roping. Anywhere from a 1/2″ to an inch wide. Search “evergreen chenille stems pipe cleaners” on Etsy.com or on the internet in general. Be sure to check the cost of shipping. The ones currently available on Amazon are much more expensive than the ones I found on Etsy (June 2024). Amazon prices may be better during the fall/winter holiday season.
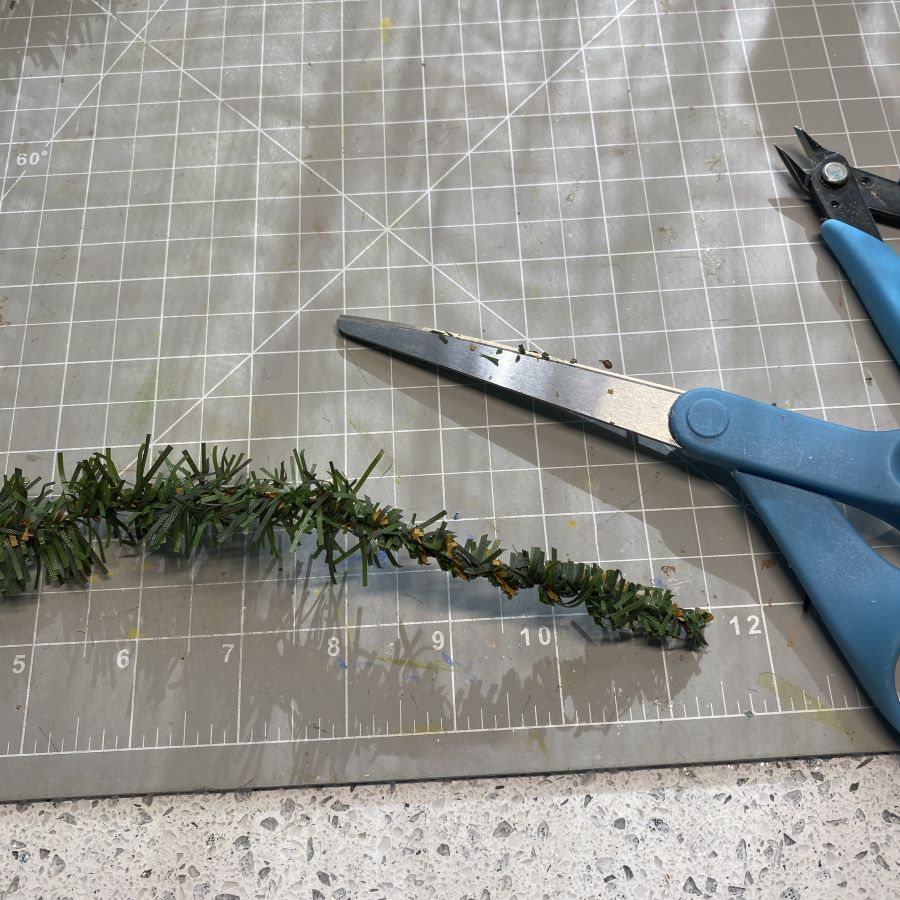
Large scissors for the first trimming of the evergreen stems
Fiskars 6″ scissors or other small scissors for fine-trimming stems. Optional
I don’t receive a commission from items linked on my blog. They are linked for your convenience.
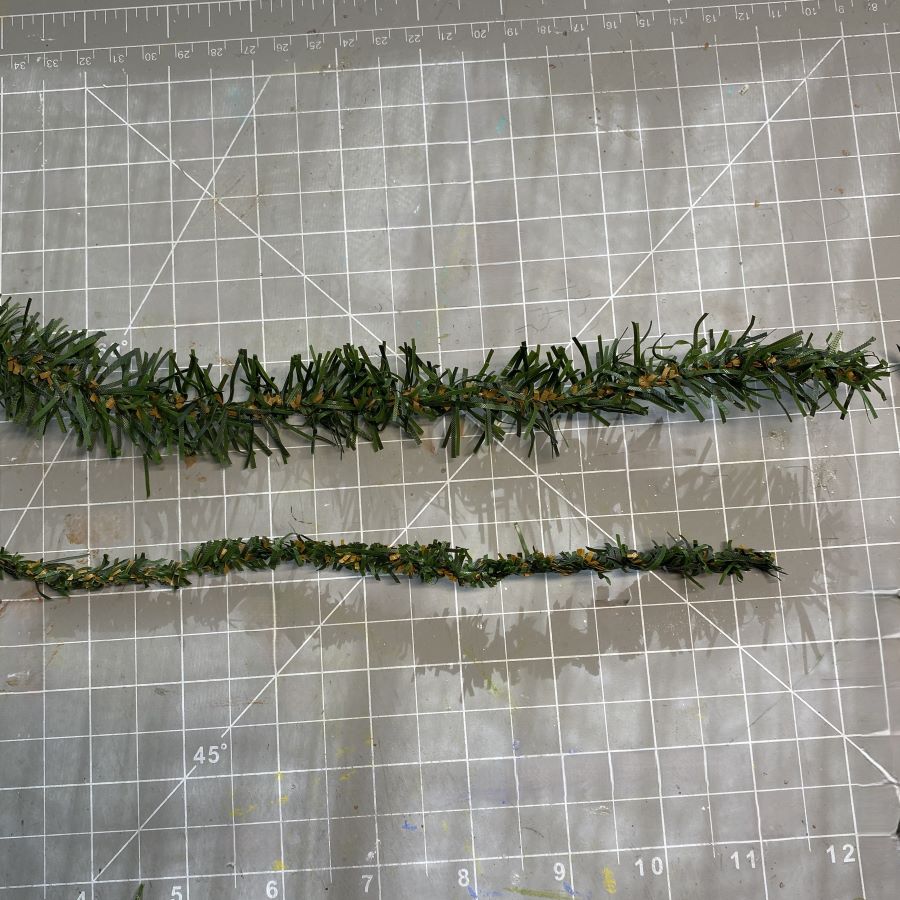
The 1/4″ evergreen chenille stems and garlands are harder to find than the wider stems and garlands. I like using a wider stem, which I cut down nearly to the wire. The leaves are more random when cut by hand than they are on a uniform, manufactured stem. Either way works. This is my way. Your way is whatever you like best. Both are good.
If possible, the stem should be at least twice as long as the space needed to be filled with hedge. As it is shaped, the stem will shorten up a lot. I measured one stem at 16″ before shaping. After shaping, the hedge was 8 1/2″ long. I usually don’t measure ahead of time. I make long pieces of hedge and cut to length as needed. Multiple pieces can be glued to the base so they meet end to end, making a longer hedge, if the first piece is too short. The join won’t be noticable.
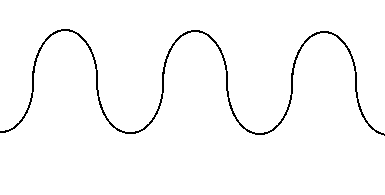
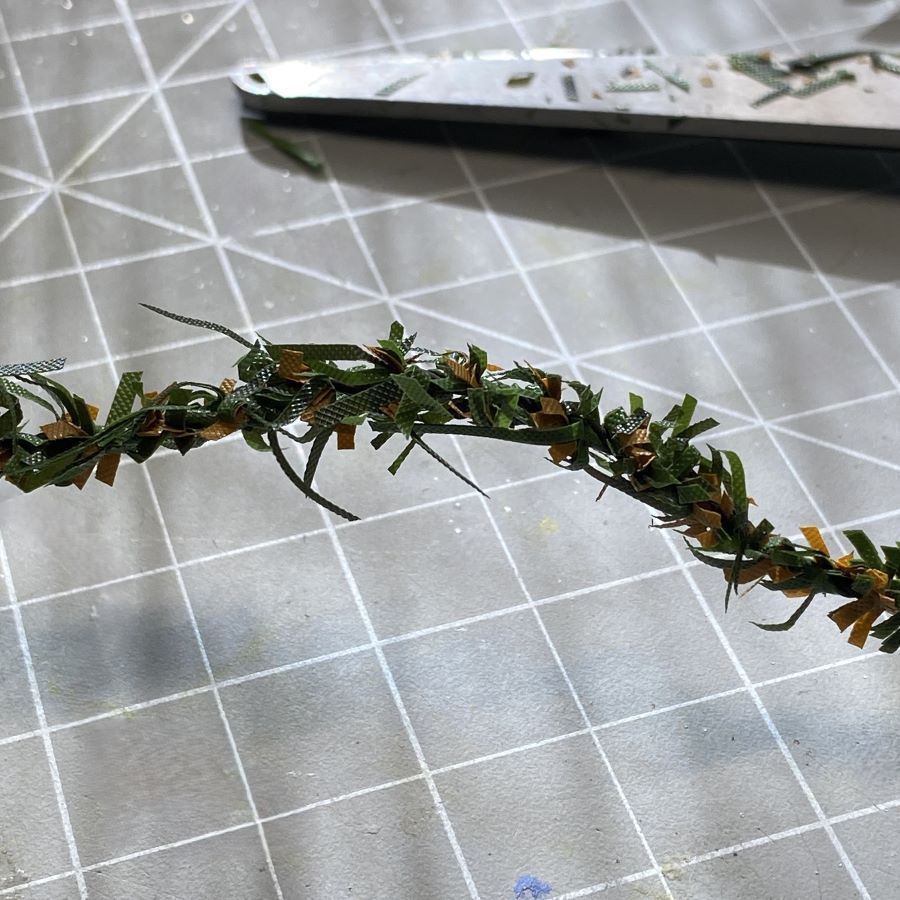
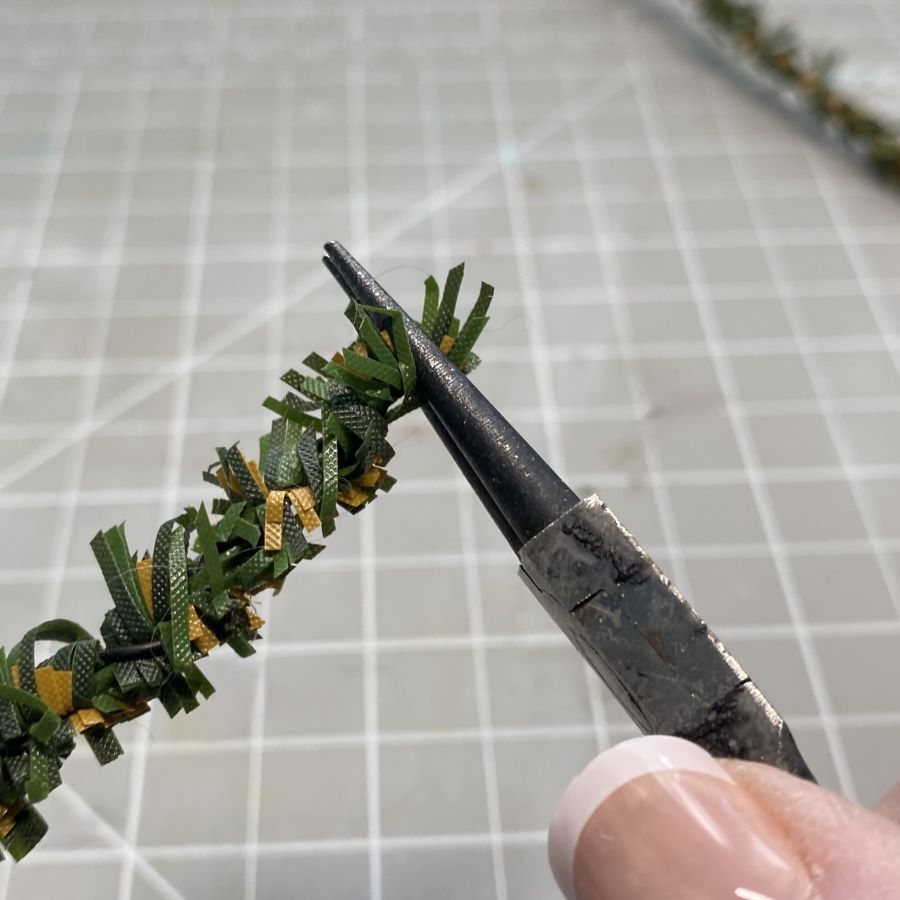
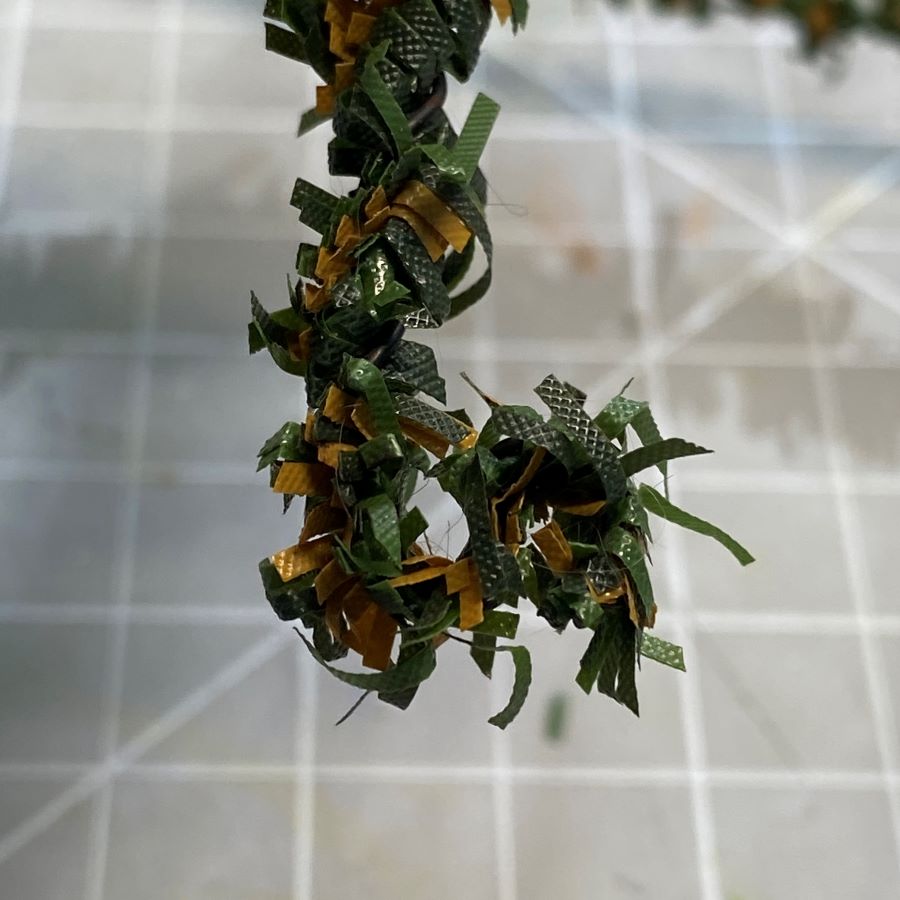
Using the round-nose pliers, the trimmed stem will be bent tightly into this shape. A series of “bumps.”
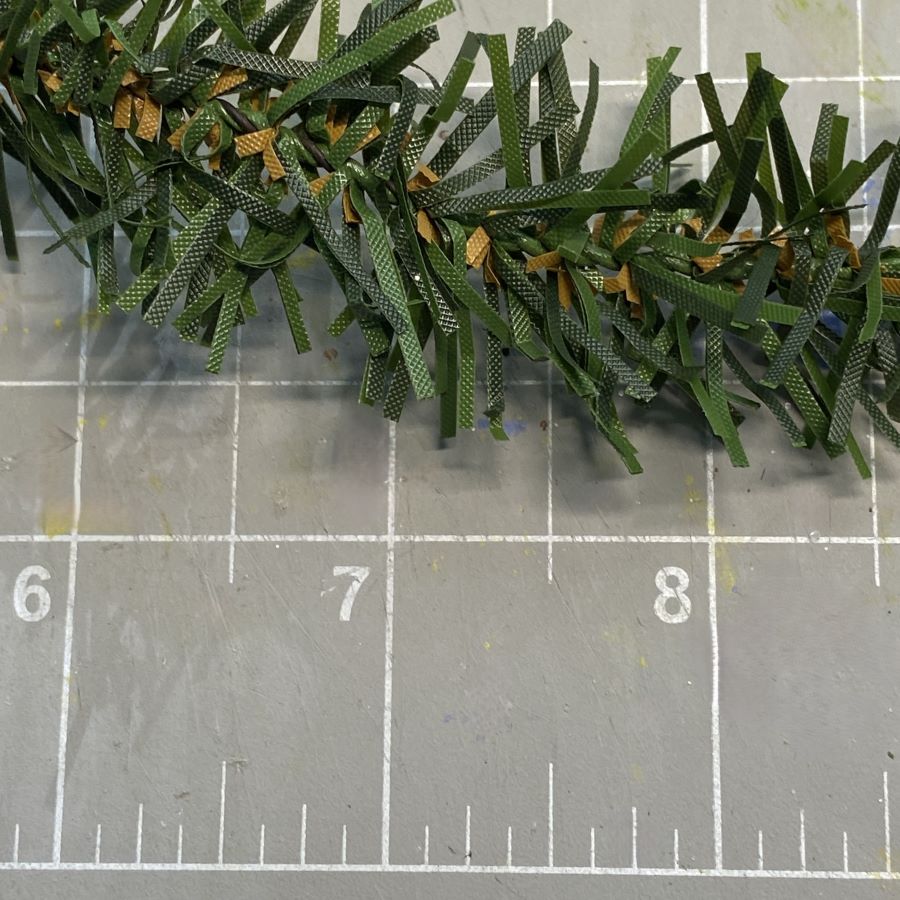
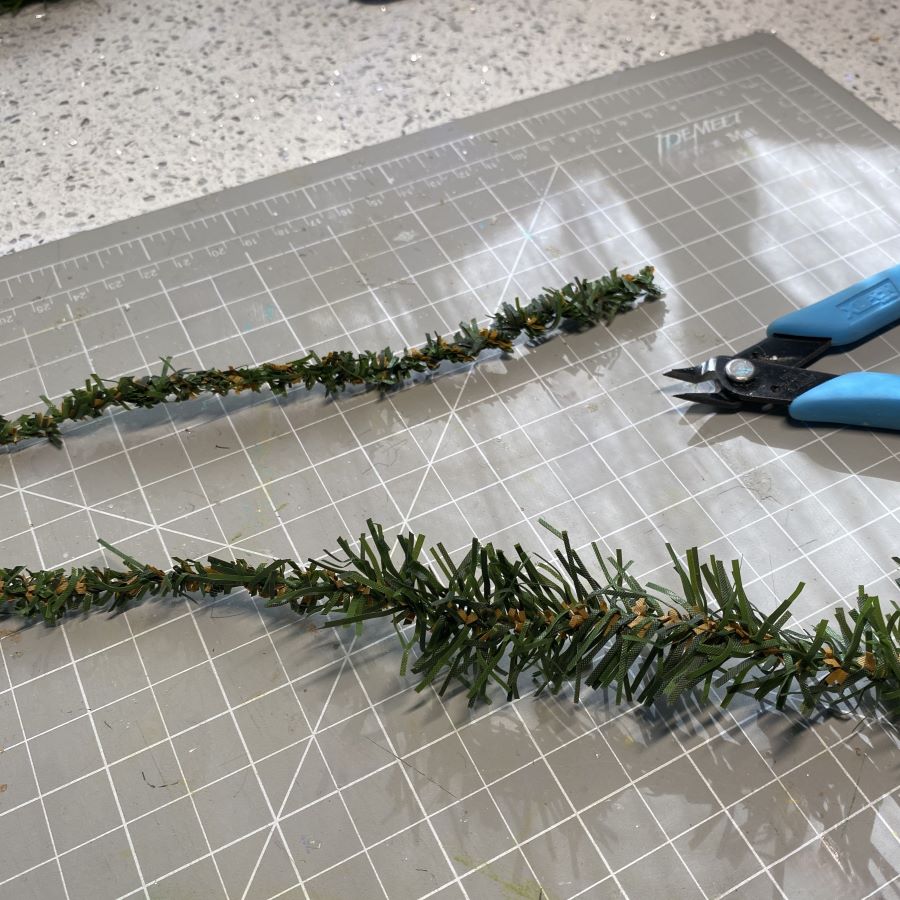
Trim the stem close to the wire. Do this over a wastebasket. It is messy. The bits have some static and will stick to surfaces, scissors, etc.
When a stem has been trimmed, there may be individual bits that are too long. I run my hand up and down the stem to show where these longer bits are. I use my small Fiskar scissors to trim those.
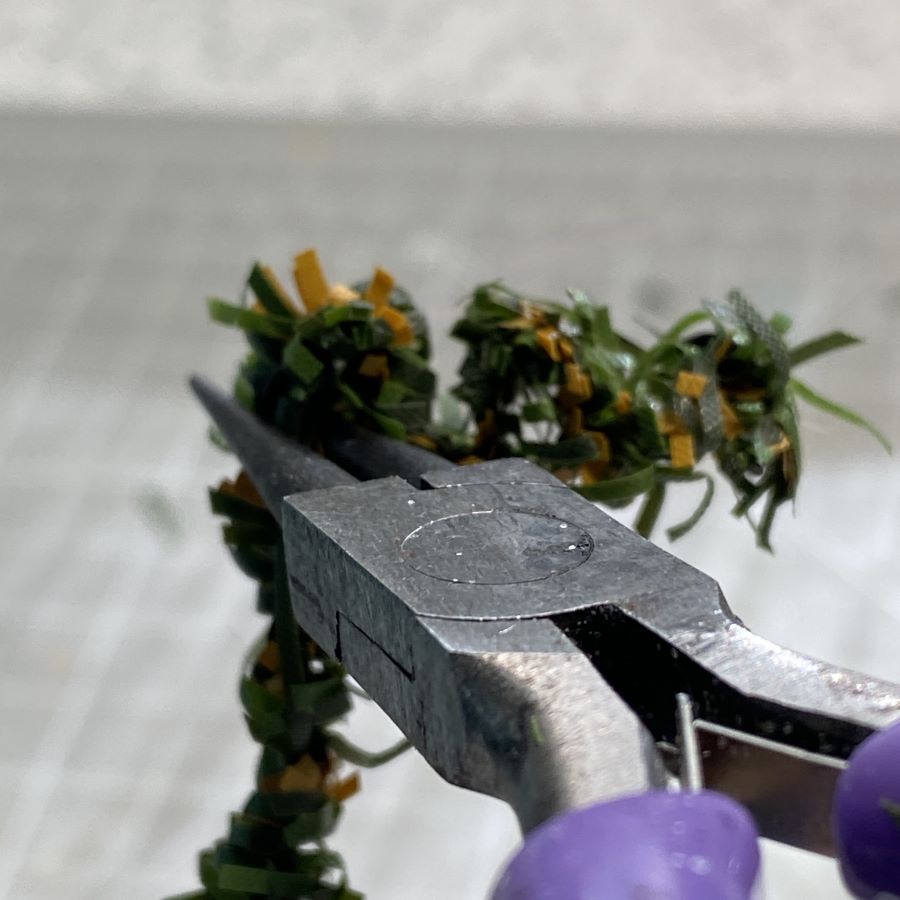
The round-nose pliers make it possible to round the stem into tight curves. Start on one end and turn the stem down into a cane shape.
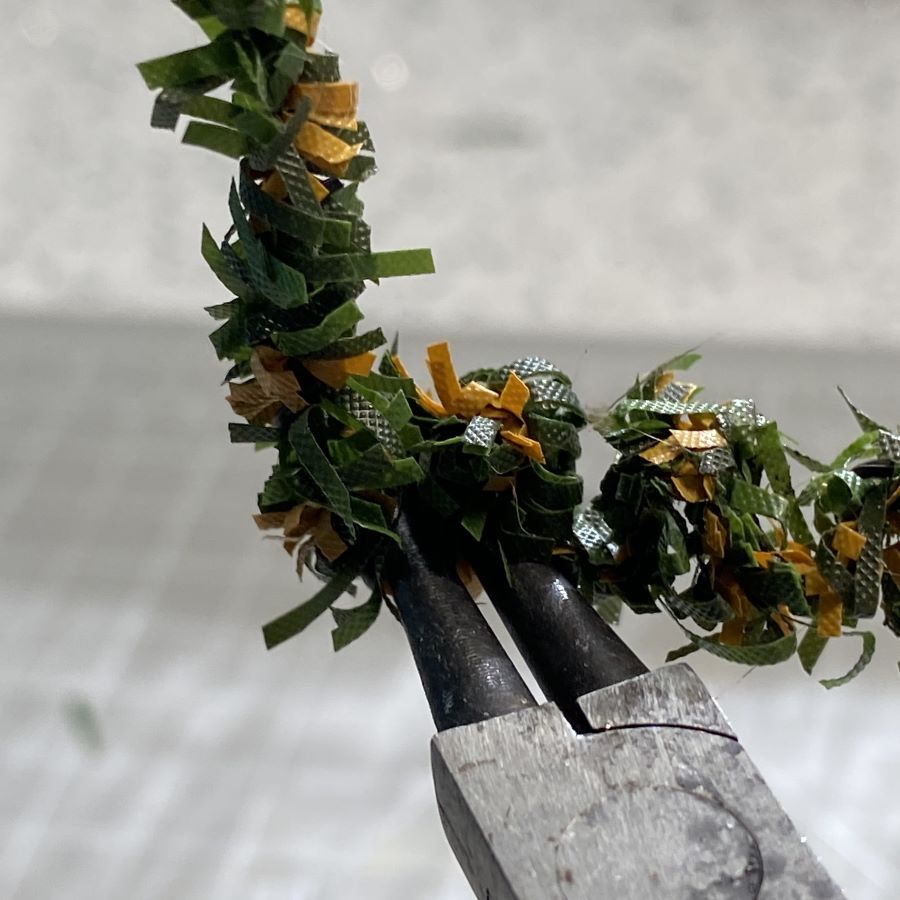
Use the pliers to grip the short section of the stem. Turn stem into a cane shape. This is the first “bump” of the hedge. The short leg should be just long enough to go around the pliers. The first photo shows the first curve finished. Move the pliers from the short end of the stem directly across to the long part of the stem. In the left, the pliers are holding the short leg of the cane shape. In the second picture, the pliers have been moved to the long leg of the evergreen. Pull the long piece up, over the pliers, so it is headed in the opposite direction from where it started. Refer to the picture of the curved line above.
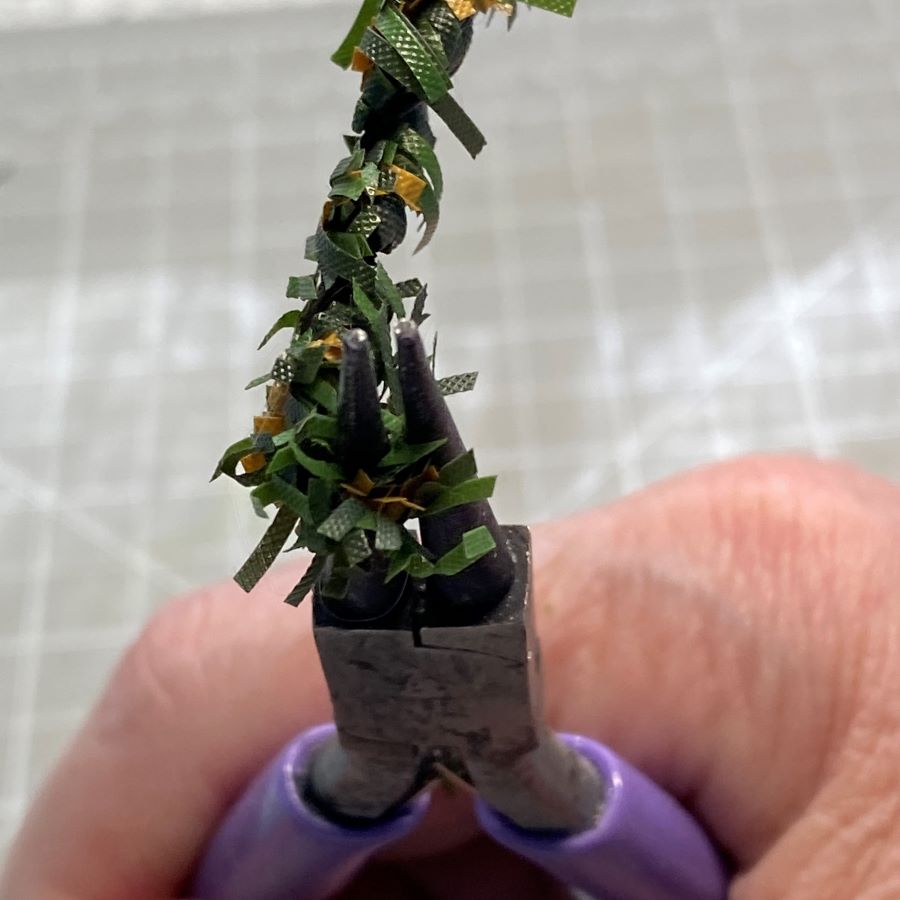
The first picture shows the next loop made. Repeat: After pulling the long end over the pliers, move the pliers over to what is now the longer leg and pull the leg over the pliers. The tighter the curves are made, the better the hedge will look. Try to keep the hedge “bumps” the same size.
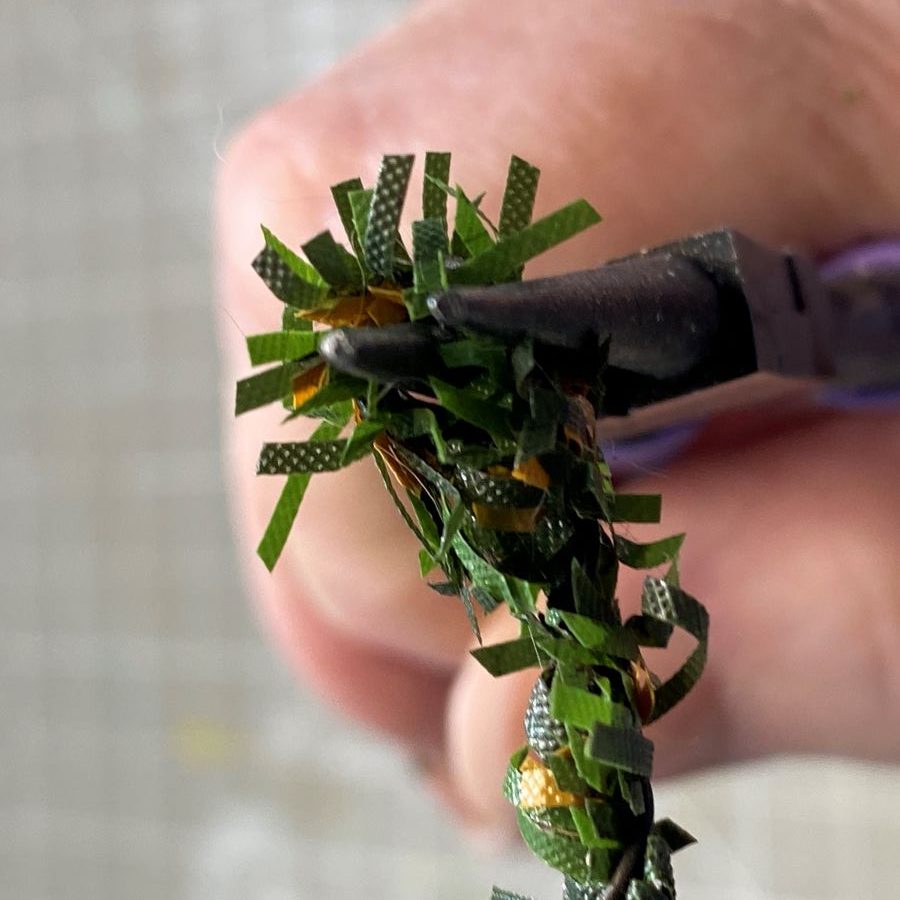
Repeat until the hedge is complete. Insert the pliers. Pull the long end up over the pliers. Move the pliers over to the long leg and pull it down over the pliers. Repeat.
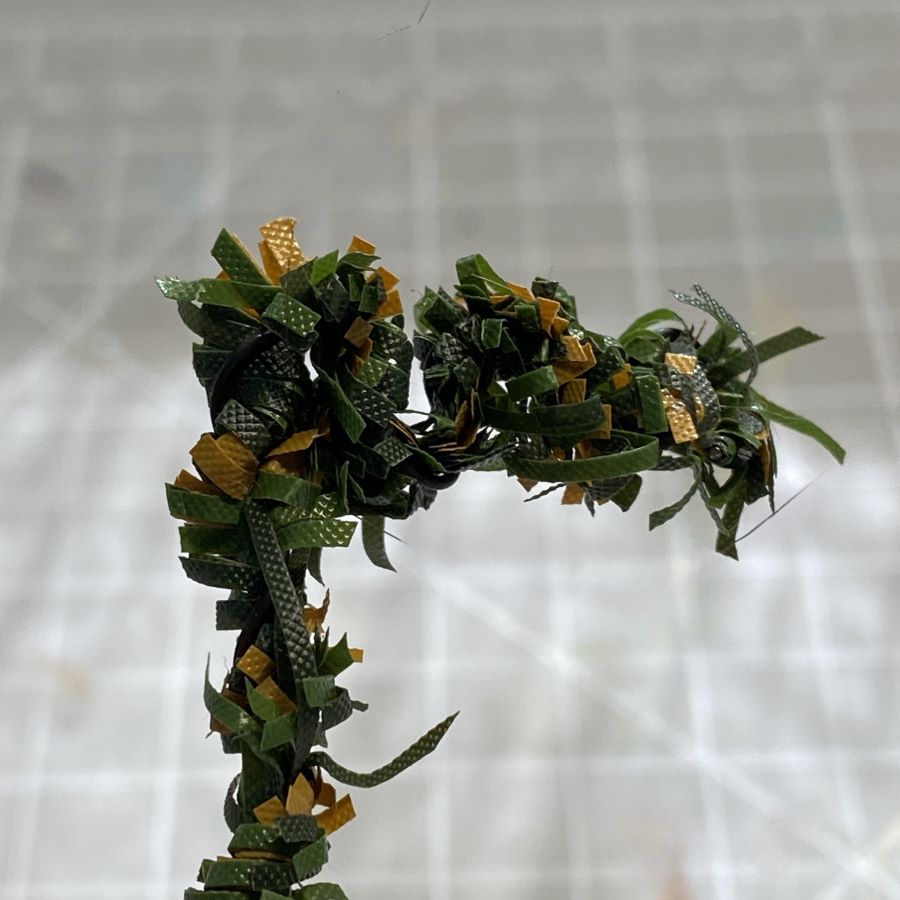
It’s a back and forth action. Keep going until the entire stem is done. When finished, check the beginning and the end of the stem to find the wire. It’s sharp. Be careful. When applied to a base, the sharp end should point down. Don’t leave it up where it could snag a finger. I always cut the ends of my hedge so both wires are pointing down to the bottom of a bump. If the stem is trimmed to fit a space during landscaping, it should be trimmed so the wire is pointing down. That wire will be enclosed in hot glue when the hedge is glued to the based, making the hedge safe to touch.
The finished hedge will look like the one pictured below. Trim any longer bits as needed. The individual bumps are not noticable. Even less so when snow has been applied.
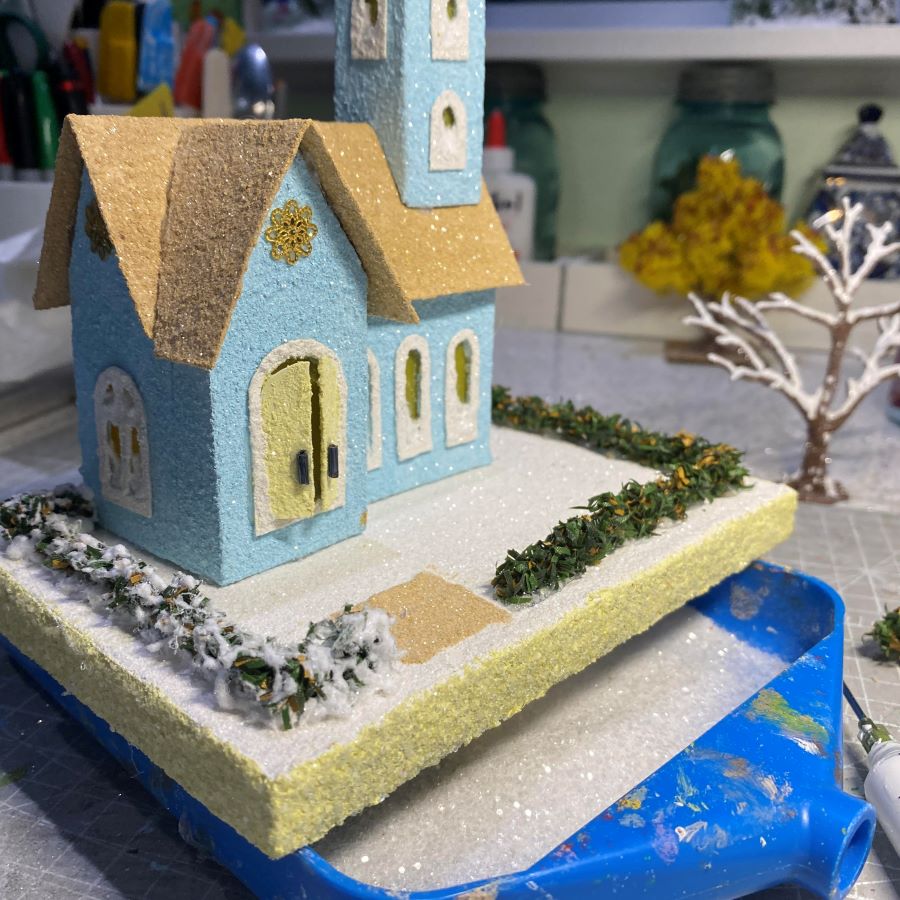
The church, pictured below, has a pieced hedge. I didn’t have a length long enough to do the right side of the church and then all the way to the sidewalk. About two inches of hedge was glued down, at the sidewalk end, to finish the full piece.
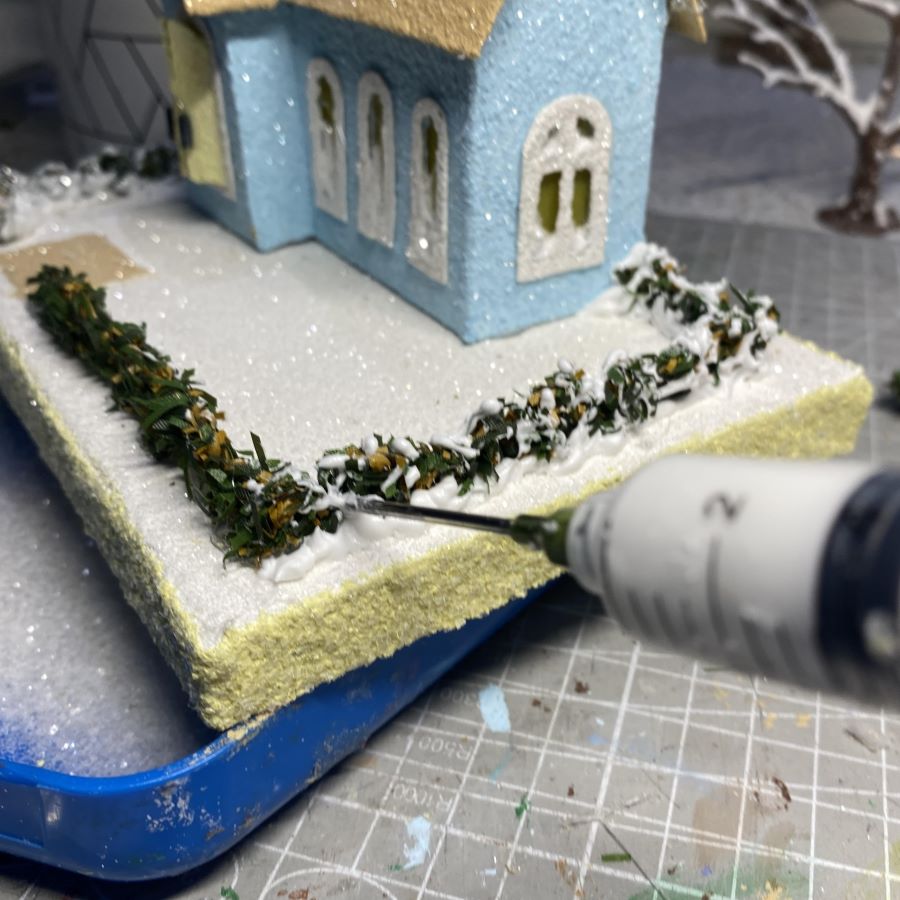
In the first picture below, you may be able to see where I added an extra piece to the hedge. Once the snow is applied, the join doesn’t show. To snow the hedge, I use a syringe filled with Aleene’s True Snow. With slow pressure, I apply it to the hedge, while moving the syringe back and forth. A little goes a long way. I try not to cover the hedge. I also run the syringe along the bottom of the hedge, on both sides to cover any glue that may be showing. That can be seen in the second picture. Immediately, glitter the wet snow with the glitter of your choice. Allow to dry.
Note: Aleene’s True Snow and Aleene’s Glitter Snow look the same when applied. No glitter shows, so I buy the one that is currently cheaper.
The hedge has a little give for filling a space. If it’s a bit too long, it can be gently squeezed together to make it shorter. If it isn’t long enough, and the remaining space is small, the hedge can be gently pulled to stretch it a bit.
I am happy to answer any questions you may have about making hedges. Please ask!
If you would like to see more of my Putz houses, as well as Christmas ornaments I have made from upcycled holiday cards, please visit my Etsy shop.
If you are interested in crafting Putz houses of your own, check out my Putz tutorials for more information. Putz House Tutorials The blog can be searched for “tutorial” to find any that aren’t linked to the tutorial page. Working on that!
I am always happy to answer questions about the process. Please ask, if you are wondering about the details of putzing!
All proceeds from my Etsy shop benefit Kenya Mercy Ministries. They work with the urban poor of Nairobi, Kenya, particularly the children and their families who live in Kibera, the largest urban slum in Africa. Thank you for your part in helping these children when you purchase items from my shop!
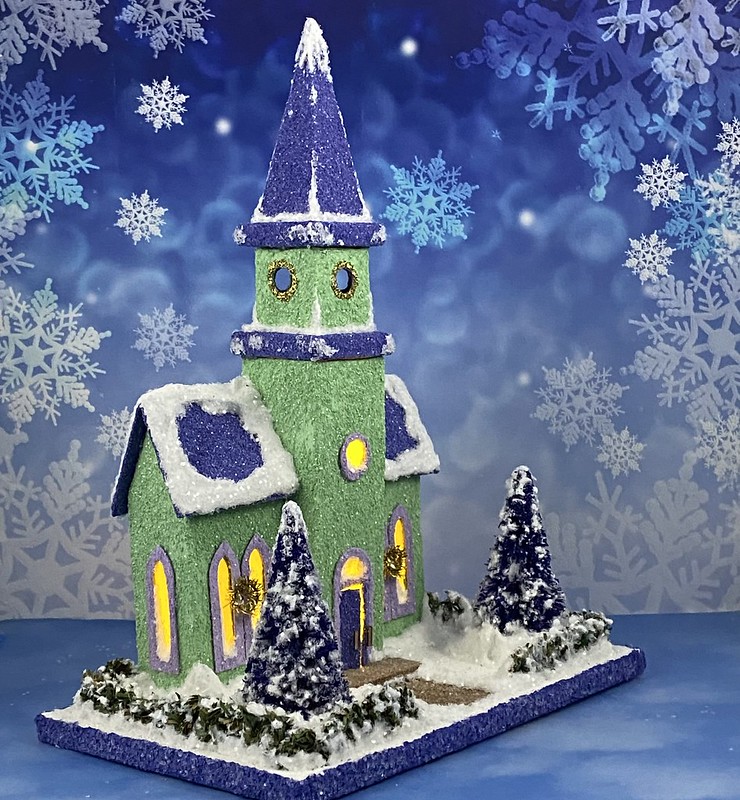
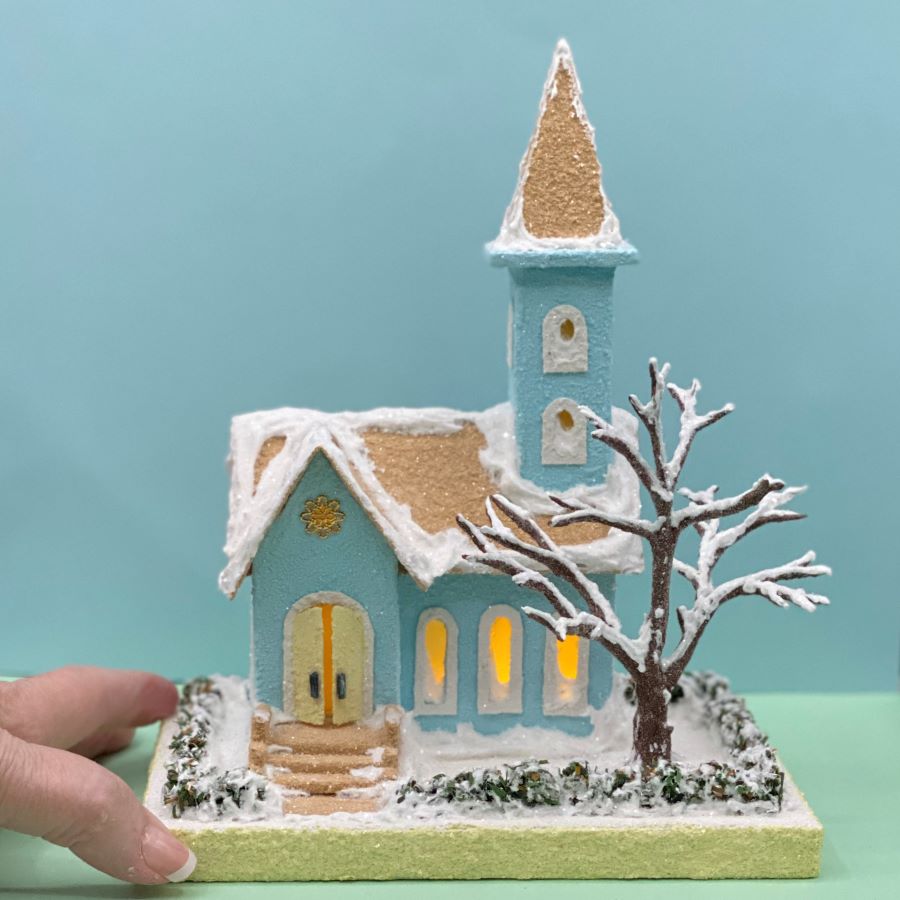
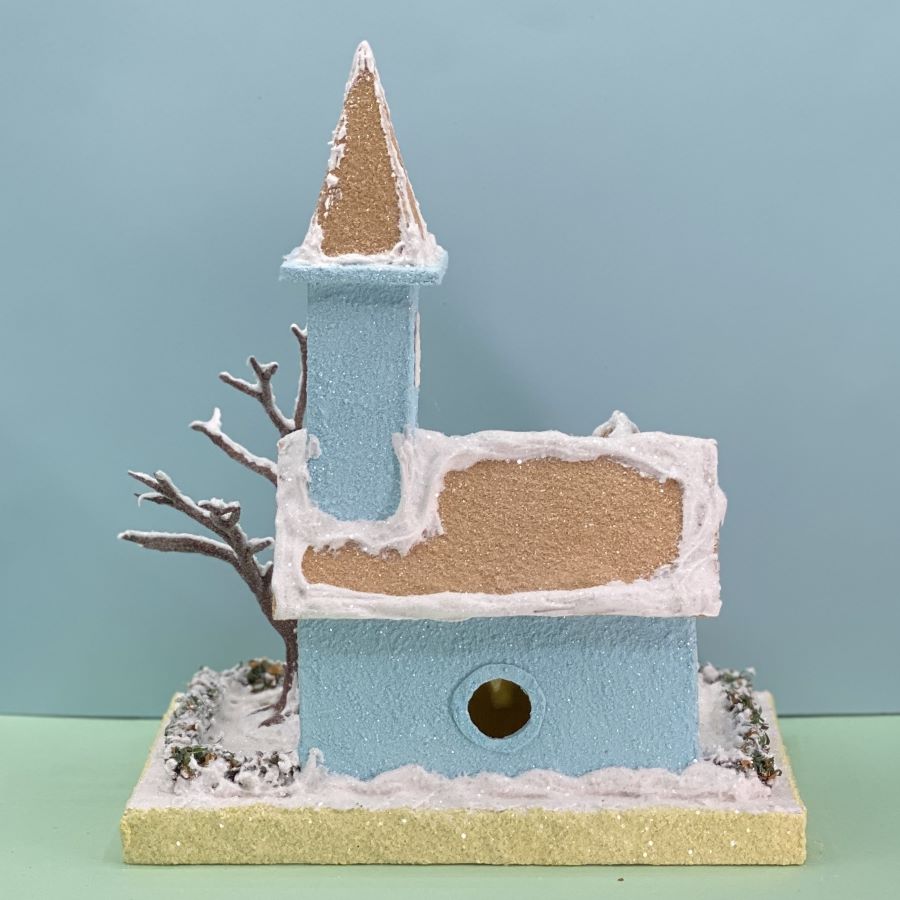
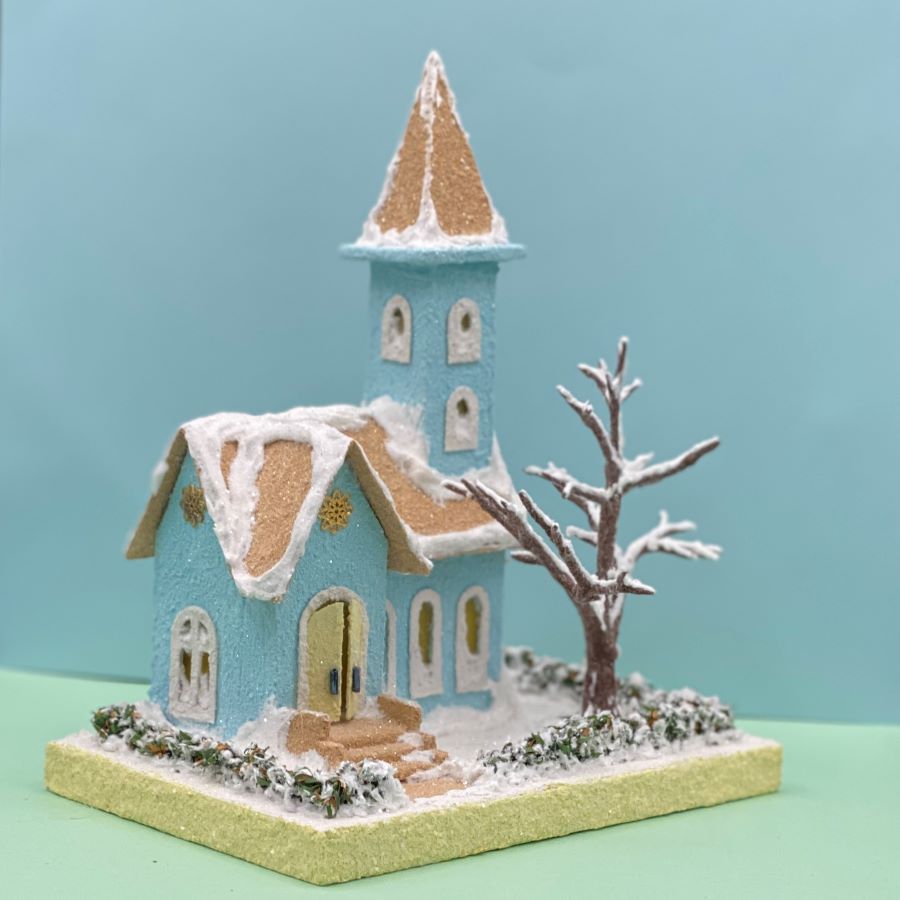
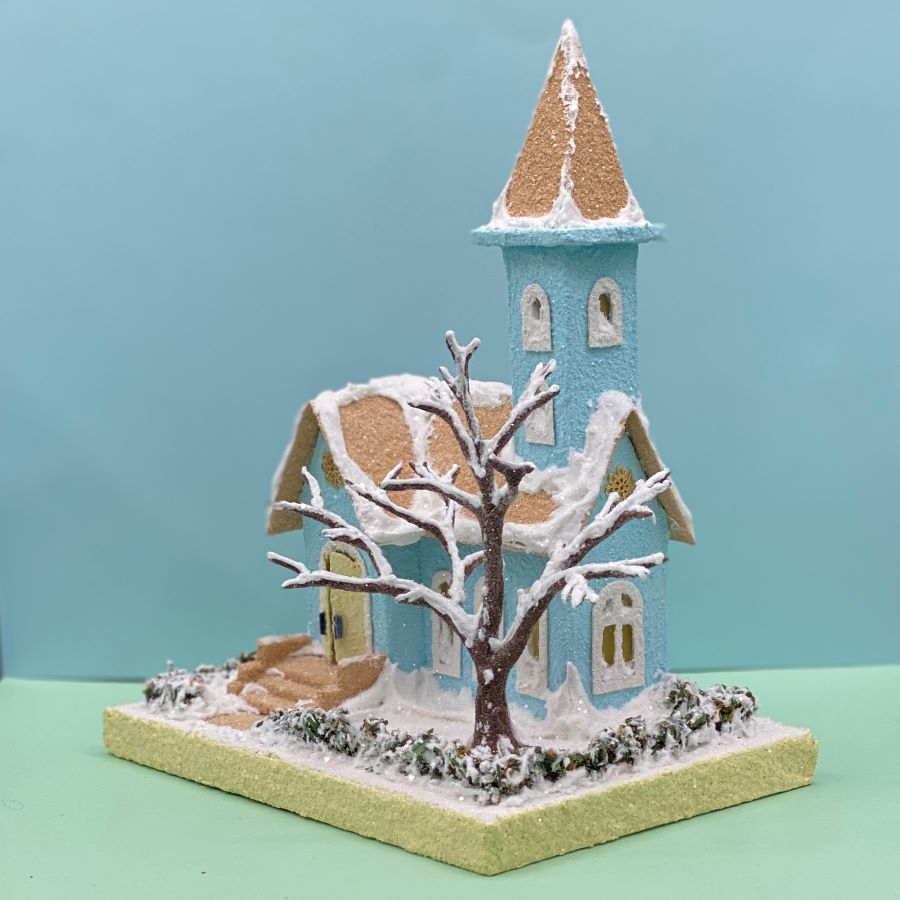
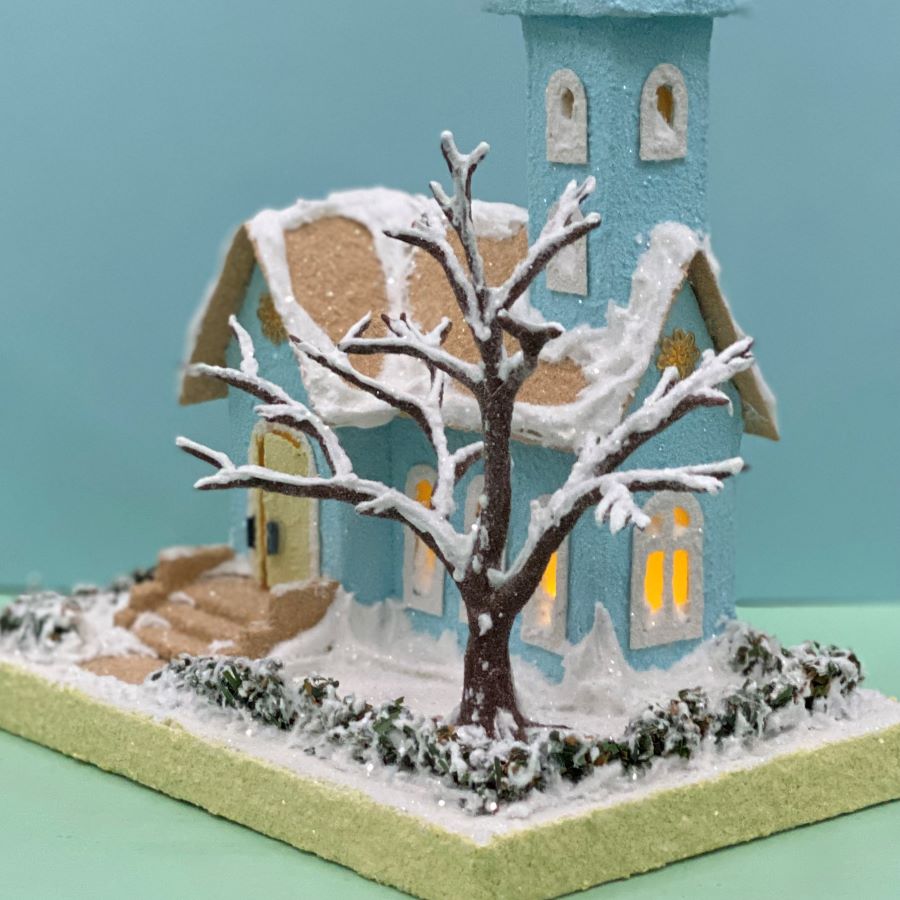
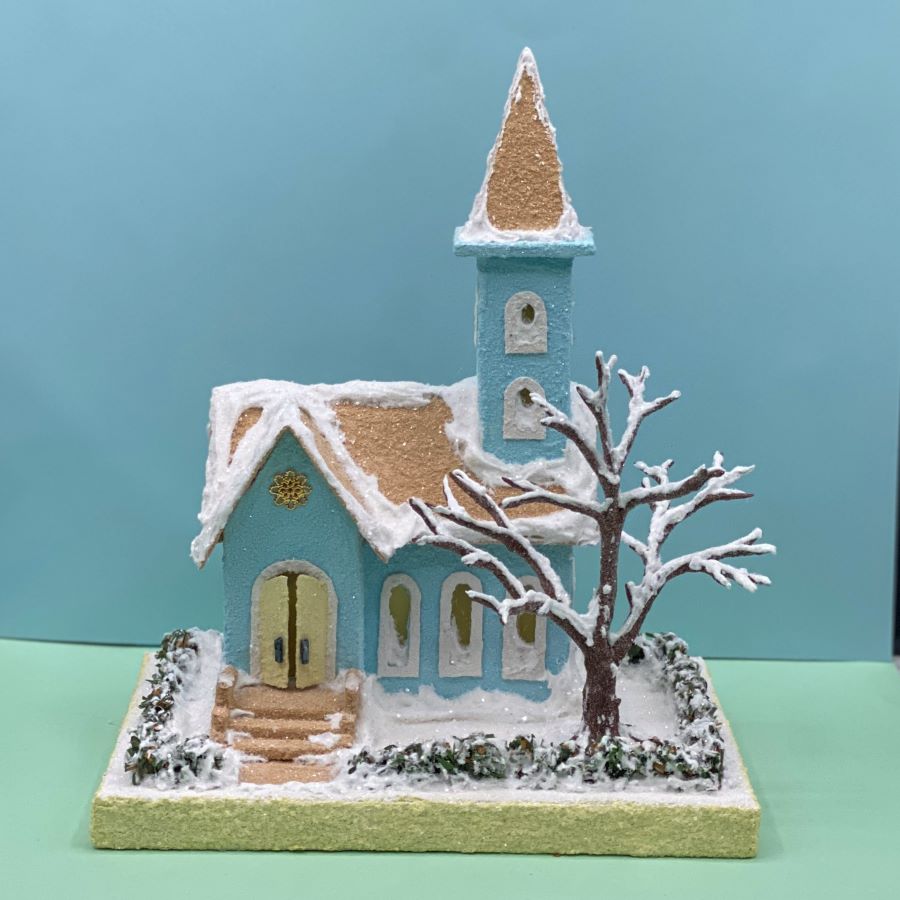
I finished the winter church yesterday. The faux snow (Aleene’s True Snow) takes a few hours to set and a few days to completely dry. I photographed it today, but it won’t be ready to ship for a few more days.
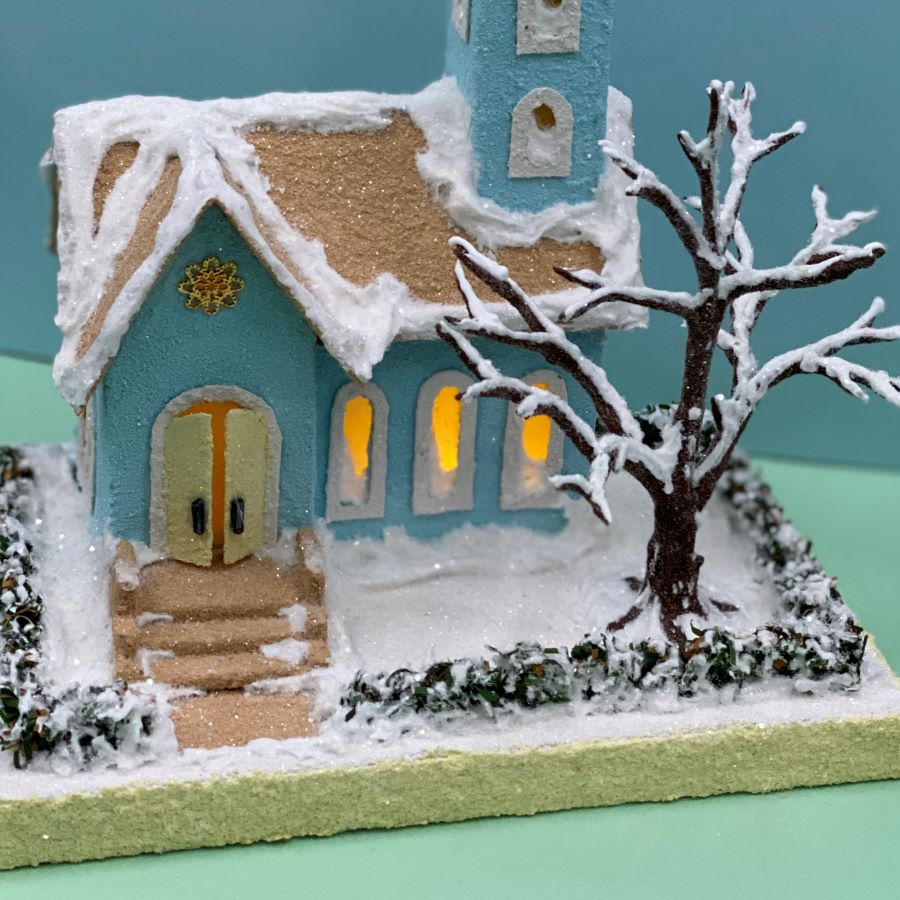
Three steps lead to the arched front door. The church has a hole in the back that allows the use of a small LED light string for lighting the Putz.
The winter tree is made from an armature and lined with faux snow, using a syringe. The evergreen hedge is made from pine chinelle stems and shaped with round-nose pliers.
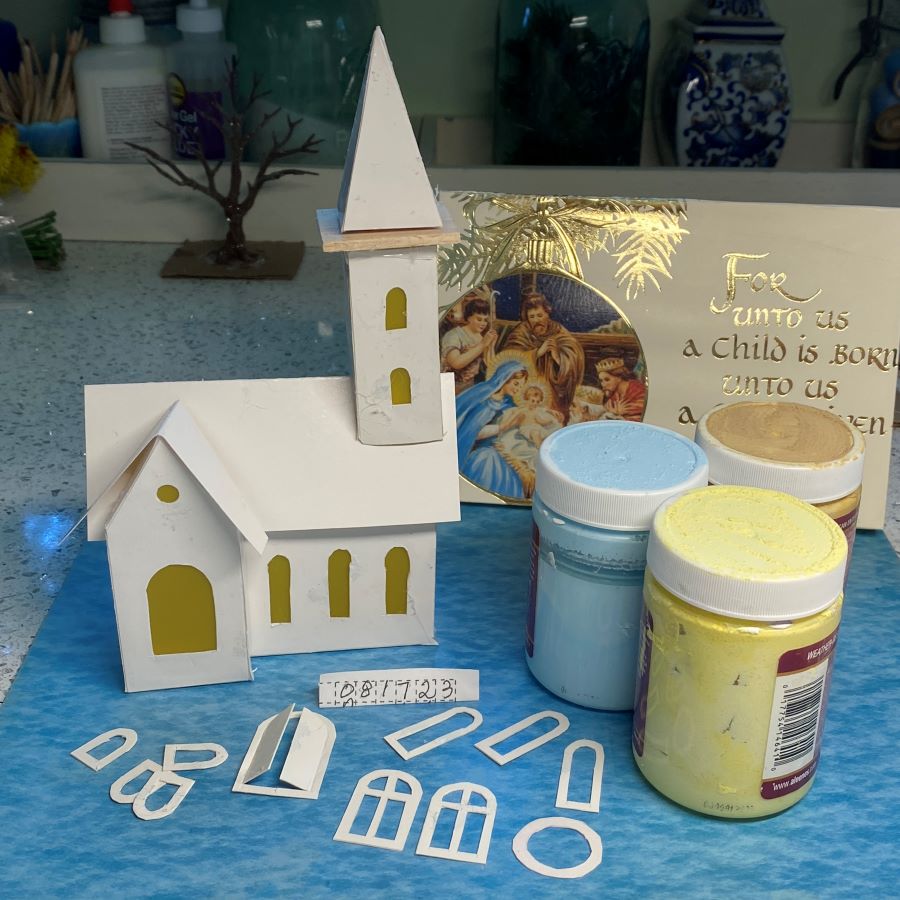
My Putz houses are constructed of white poster board, from patterns I draw myself. I cut each piece by hand. No diecuts are used in the creation of my Putz houses. The base is made from an upcycled greeting card. The doors of my Putz houses, churches, etc., are always open so visitors know they are welcome to stop by at any time.
If you would like to see more of my Putz houses, as well as Christmas ornaments I have made from upcycled holiday cards, please visit my Etsy shop.
If you are interested in crafting Putz houses of your own, check out my Putz tutorials for more information. Putz House Tutorials The blog can be searched for “tutorial” to find any that aren’t linked to the tutorial page. Working on that!
I am always happy to answer questions about the process. Please ask, if you are wondering about the details of putzing!
All proceeds from my Etsy shop benefit Kenya Mercy Ministries. They work with the urban poor of Nairobi, Kenya, particularly the children and their families who live in Kibera, the largest urban slum in Africa. Thank you for your part in helping these children when you purchase items from my shop!
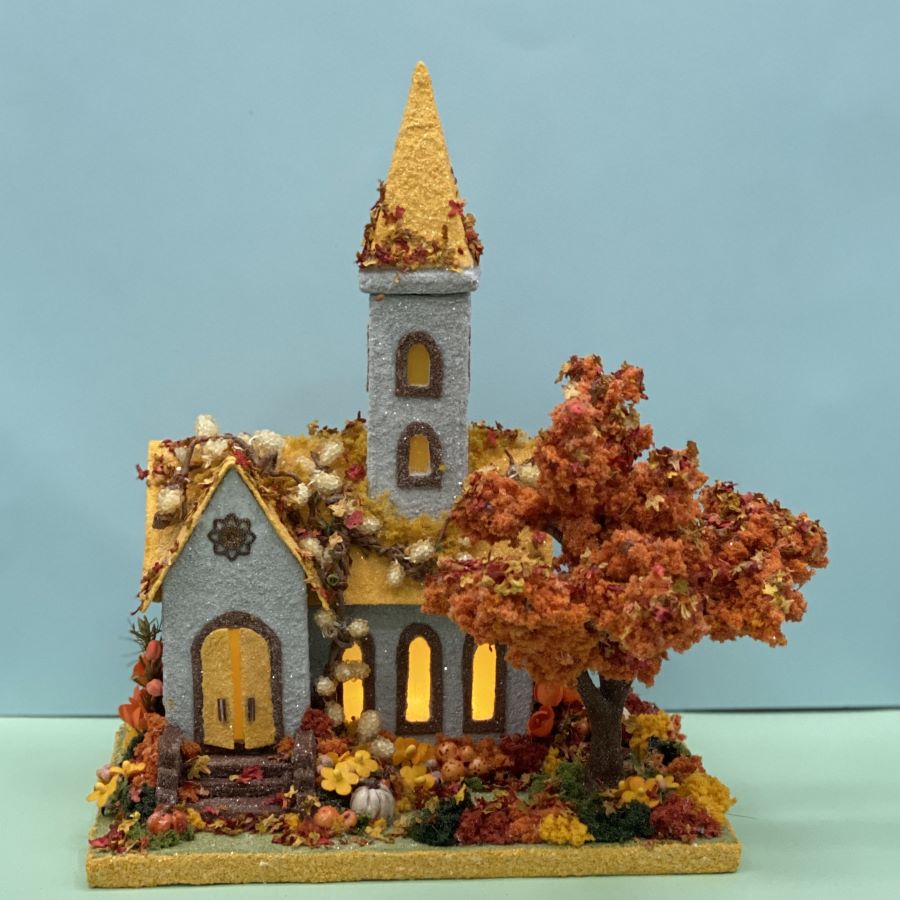
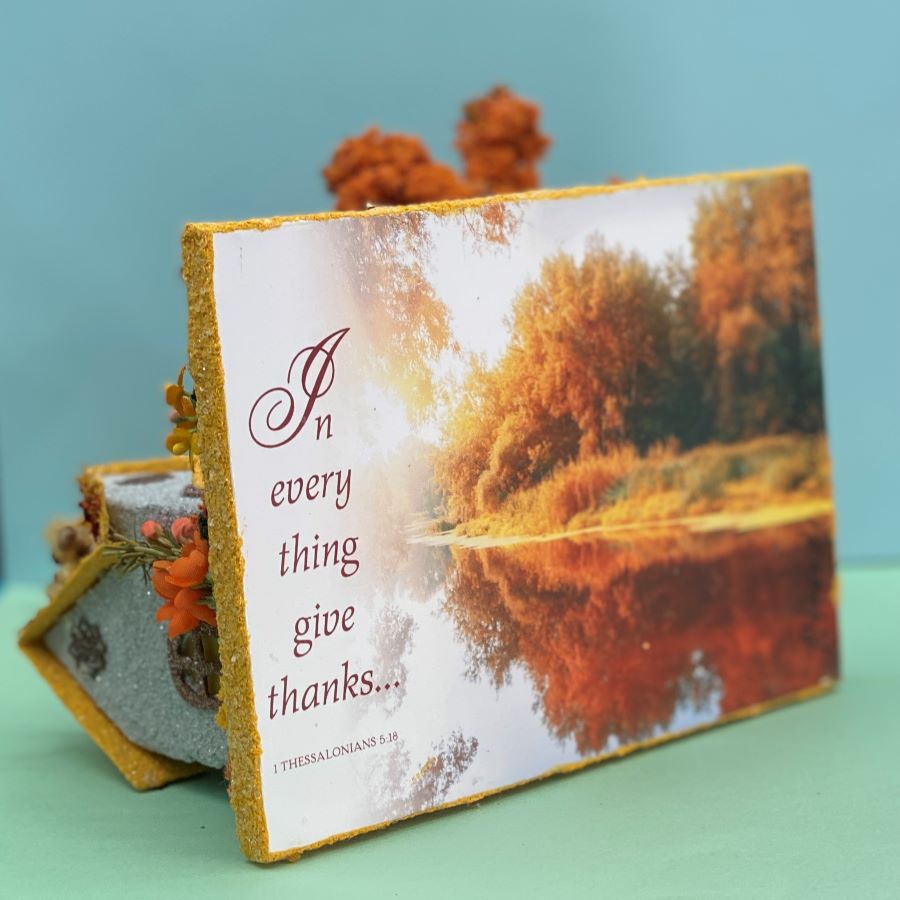
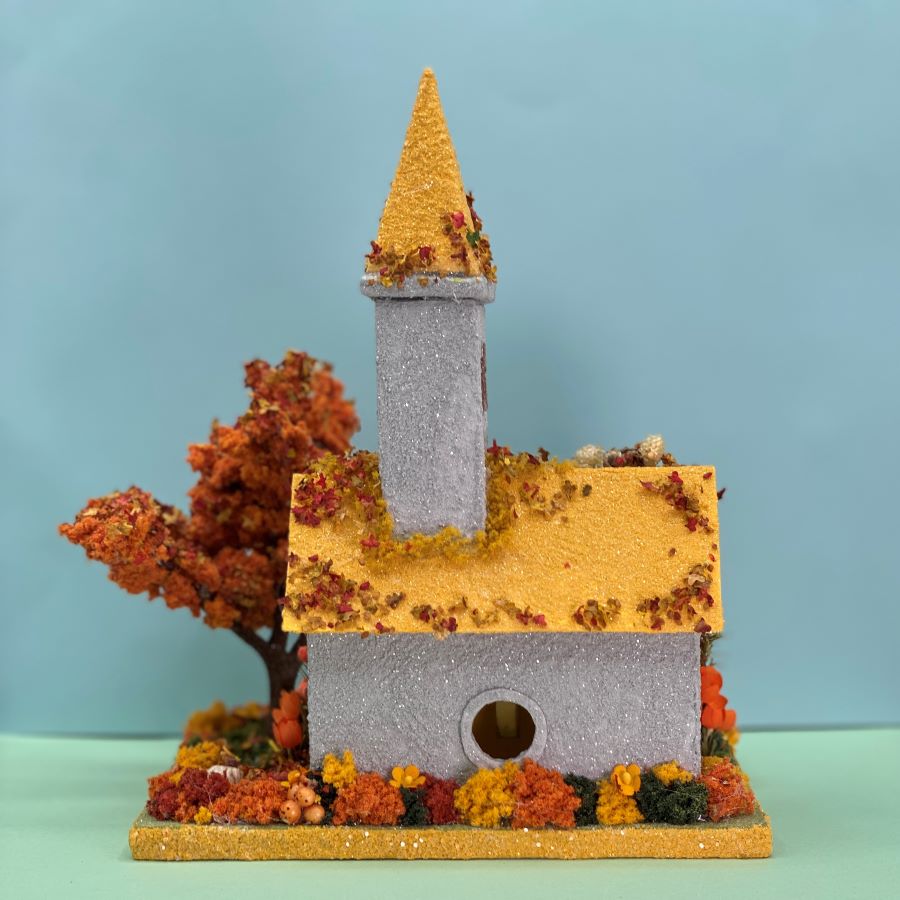
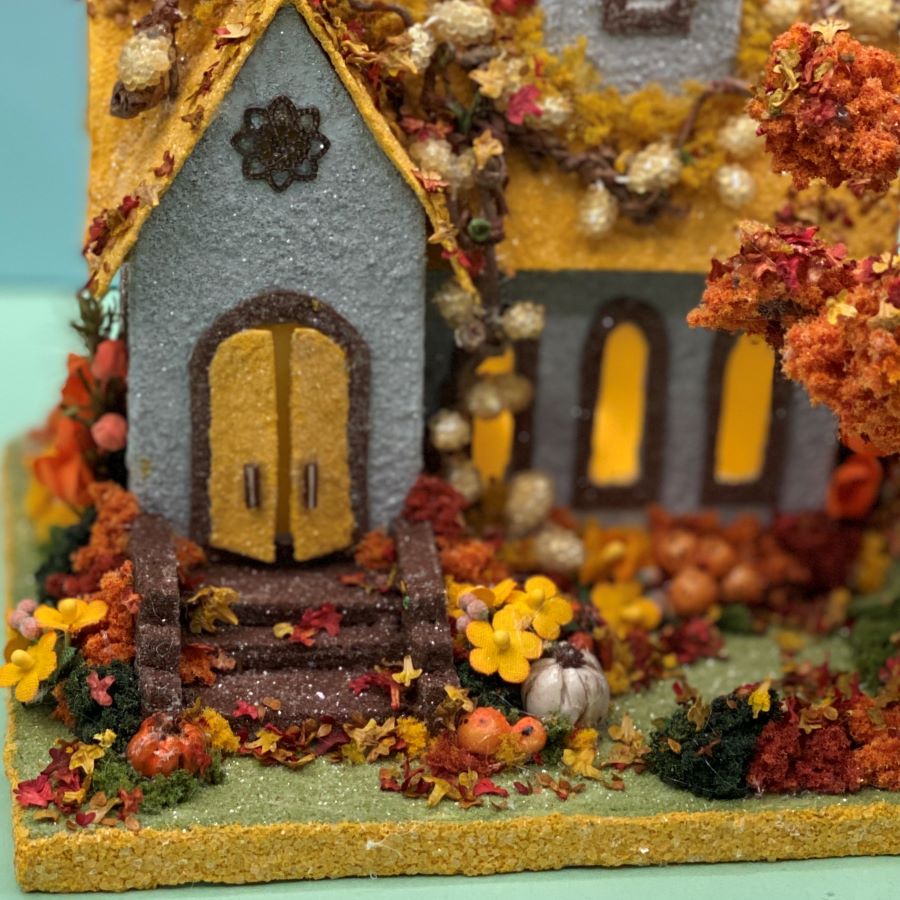
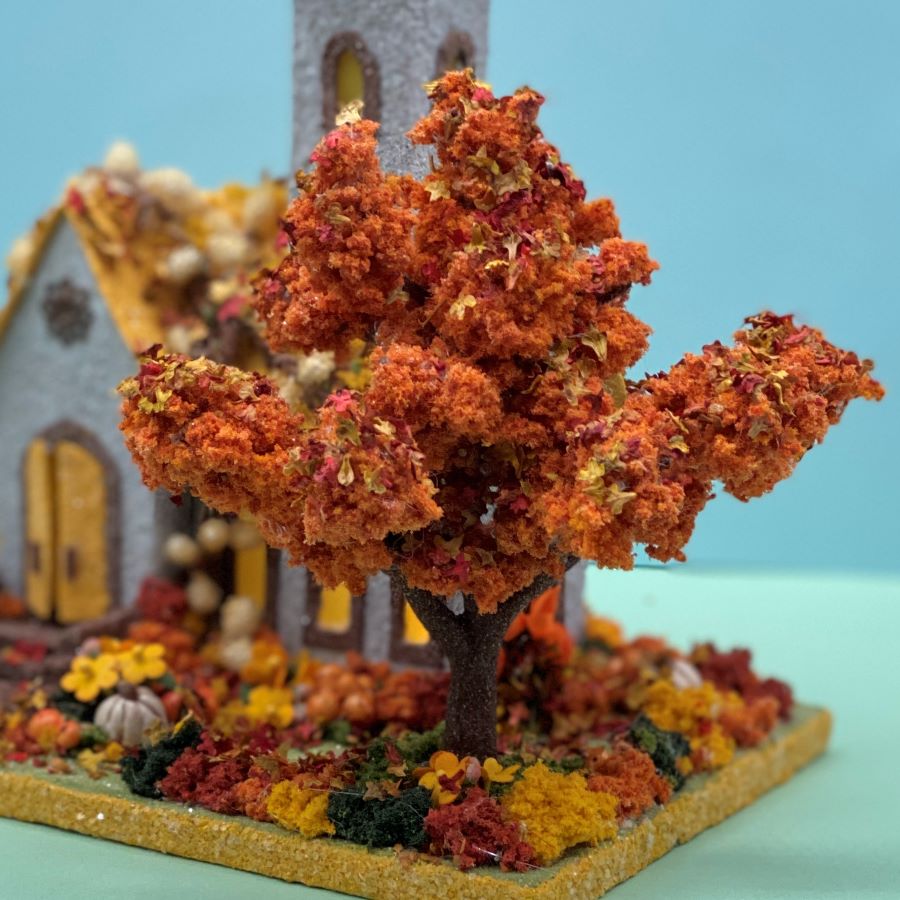
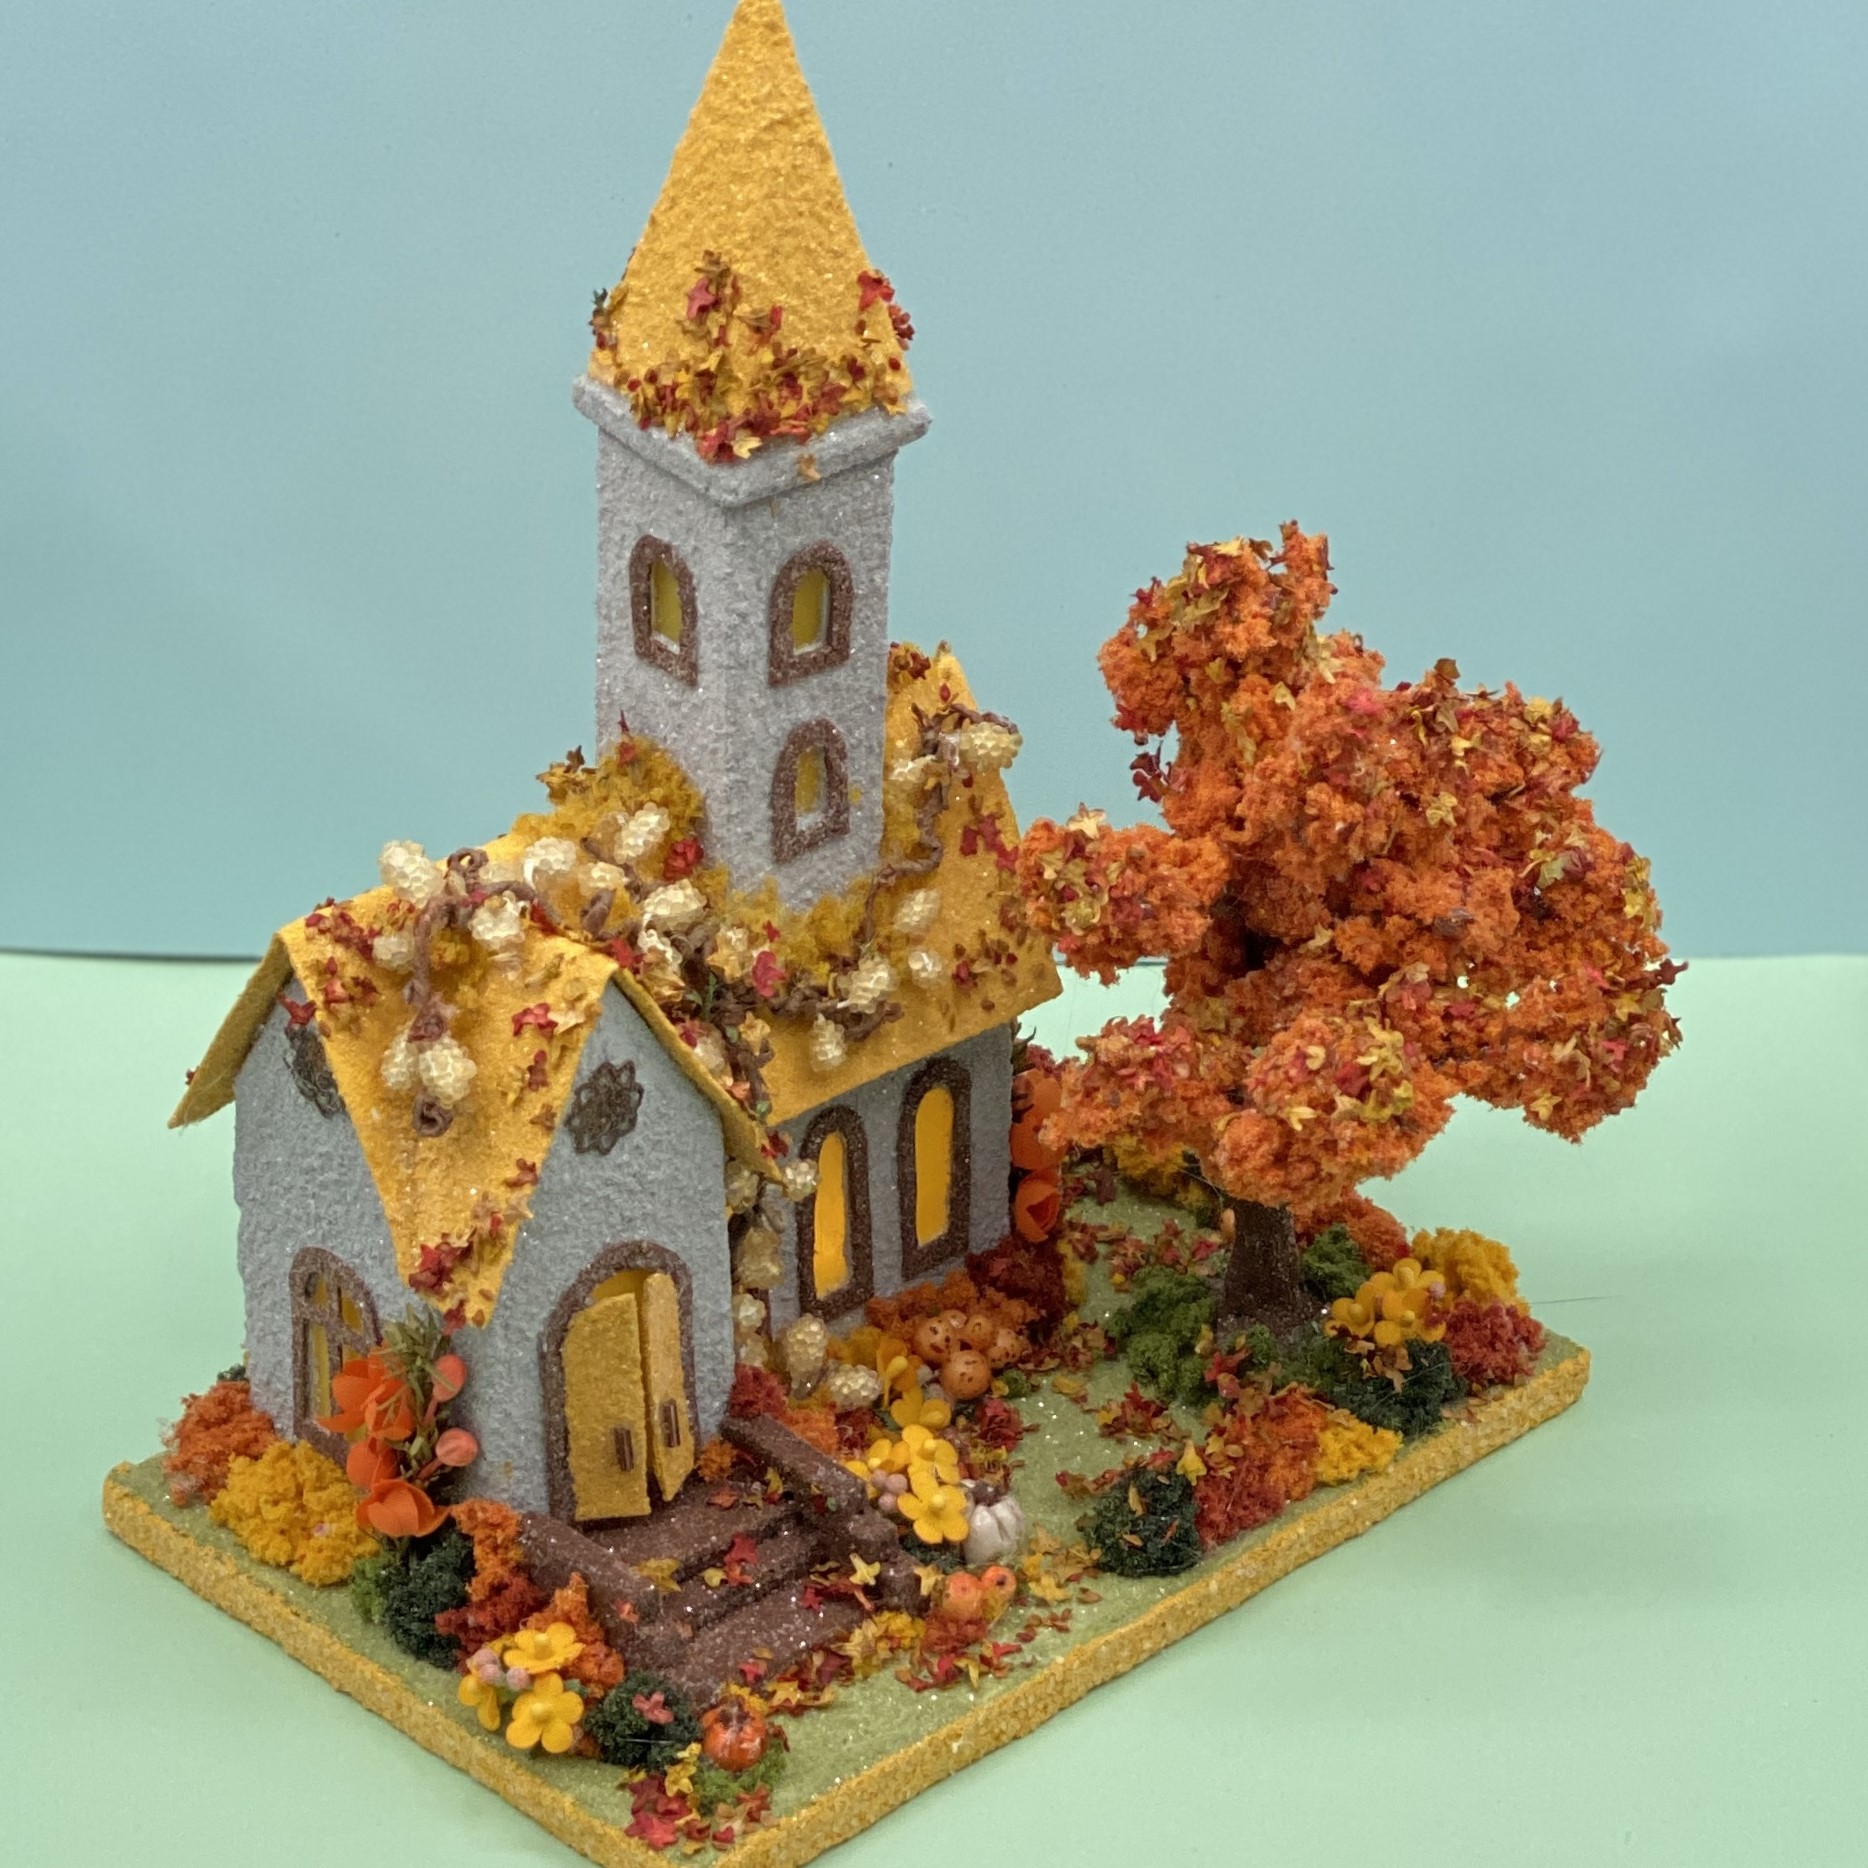
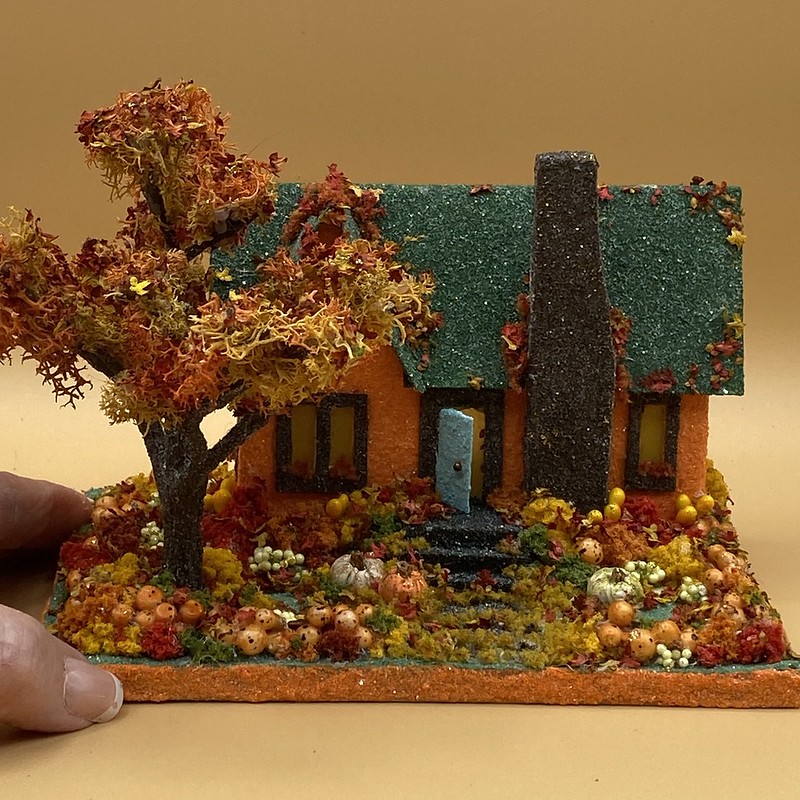
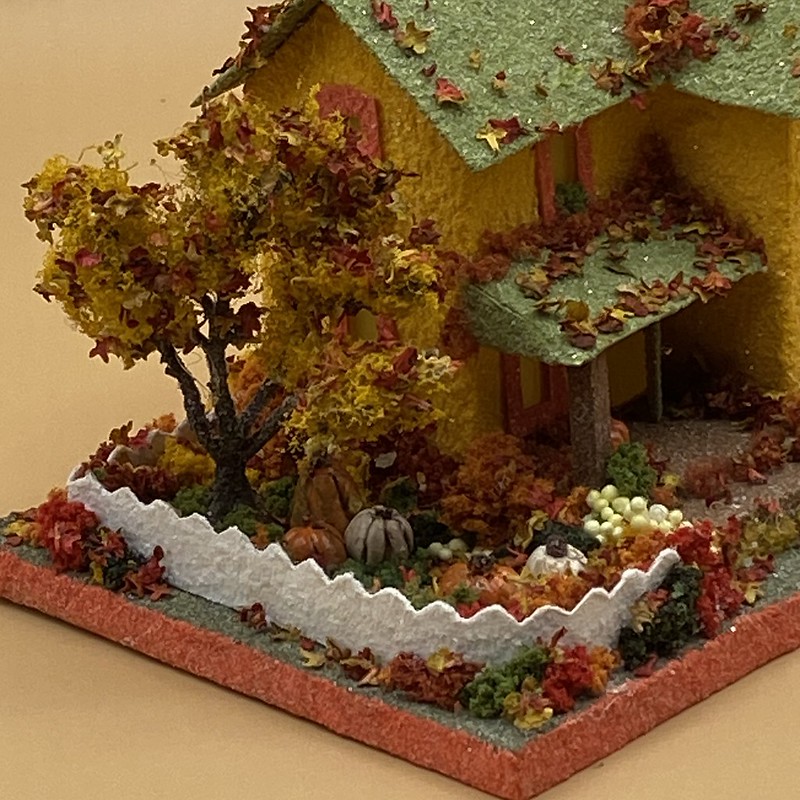
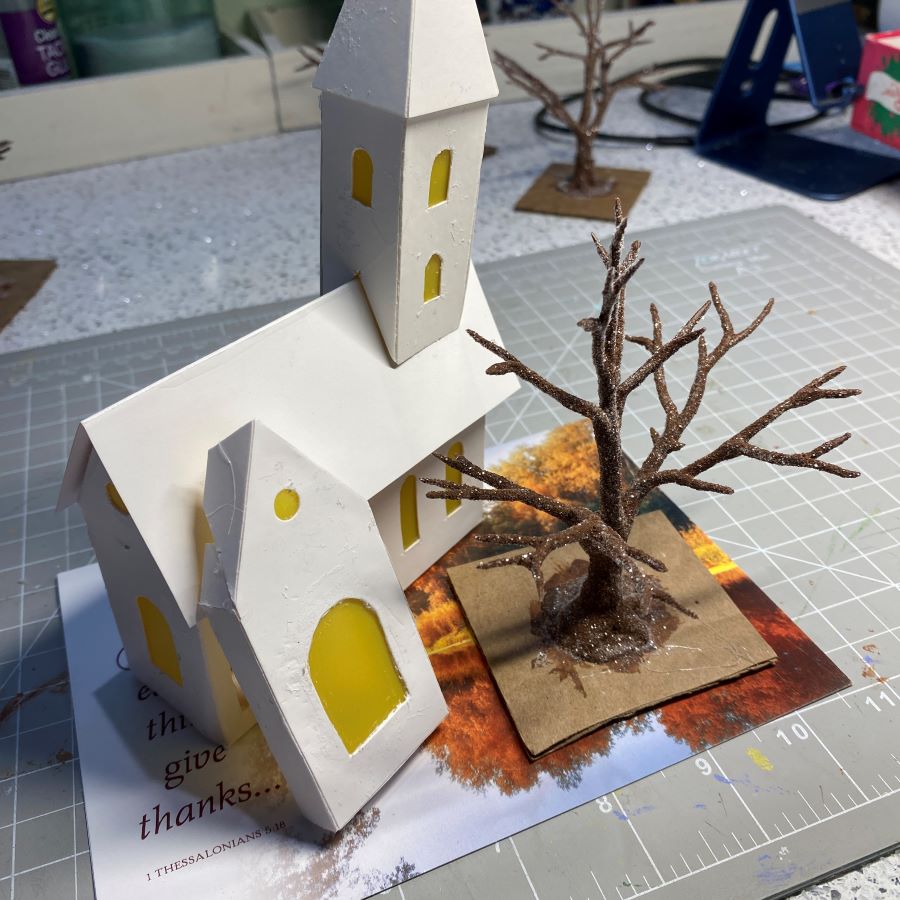
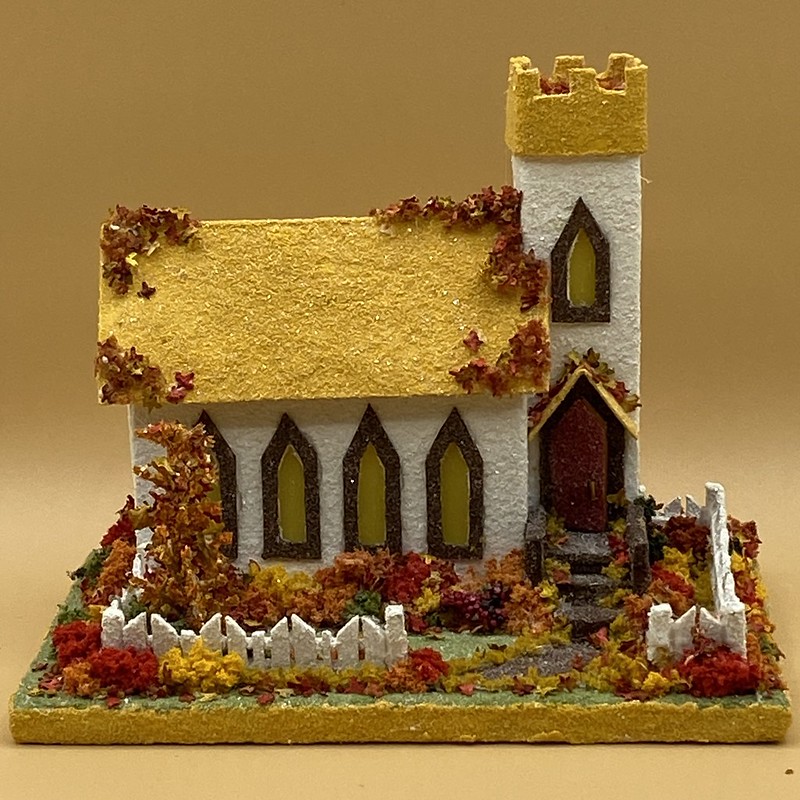
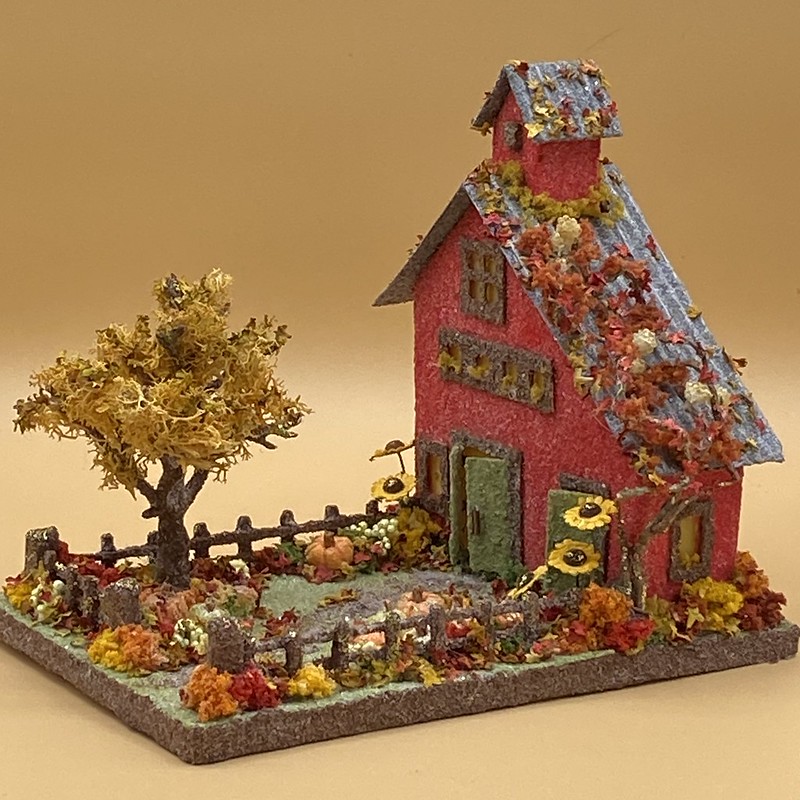
The gray Thanksgiving / Autumn church is listed in my Etsy shop. It has a deep yellow roof and steeple. The Putz features a handcrafted autumn tree, four handcrafted pumpkins, a surrounding autumn hedge and a vine growing over the church roof. The base is made from an upcycled greeting card which features a beautiful wooded autumn scene.
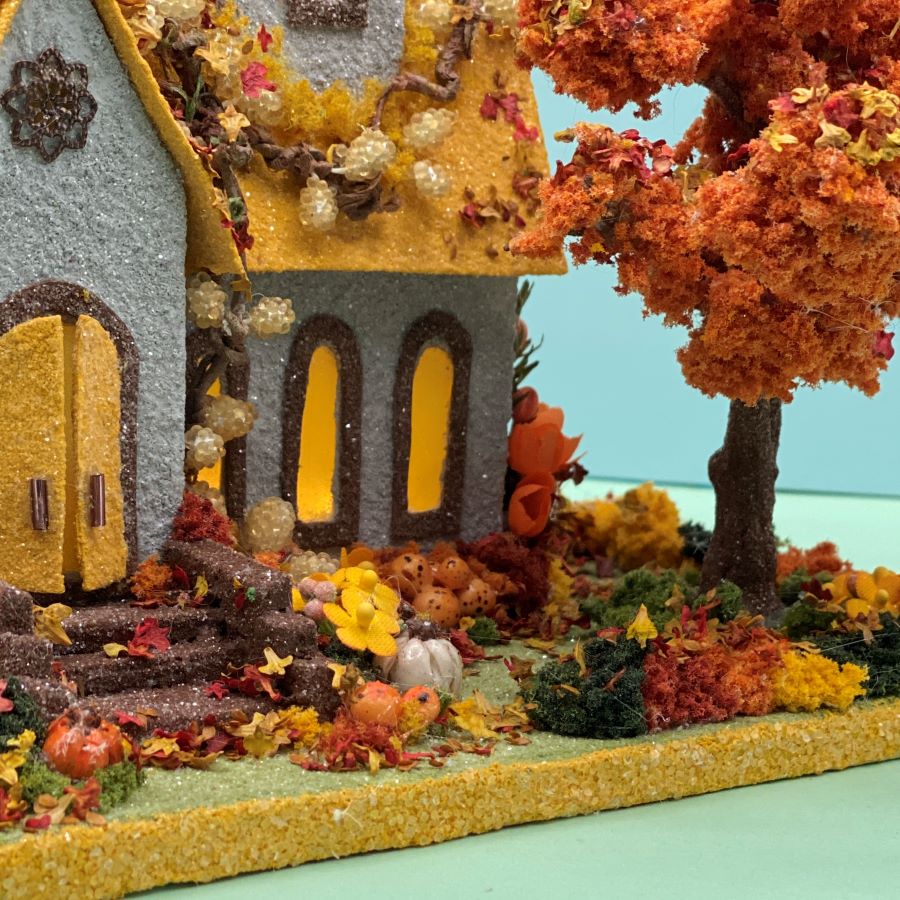
A hole in the back allows the use of a small LED light string for lighting this and other glitter houses in your glitter house village.
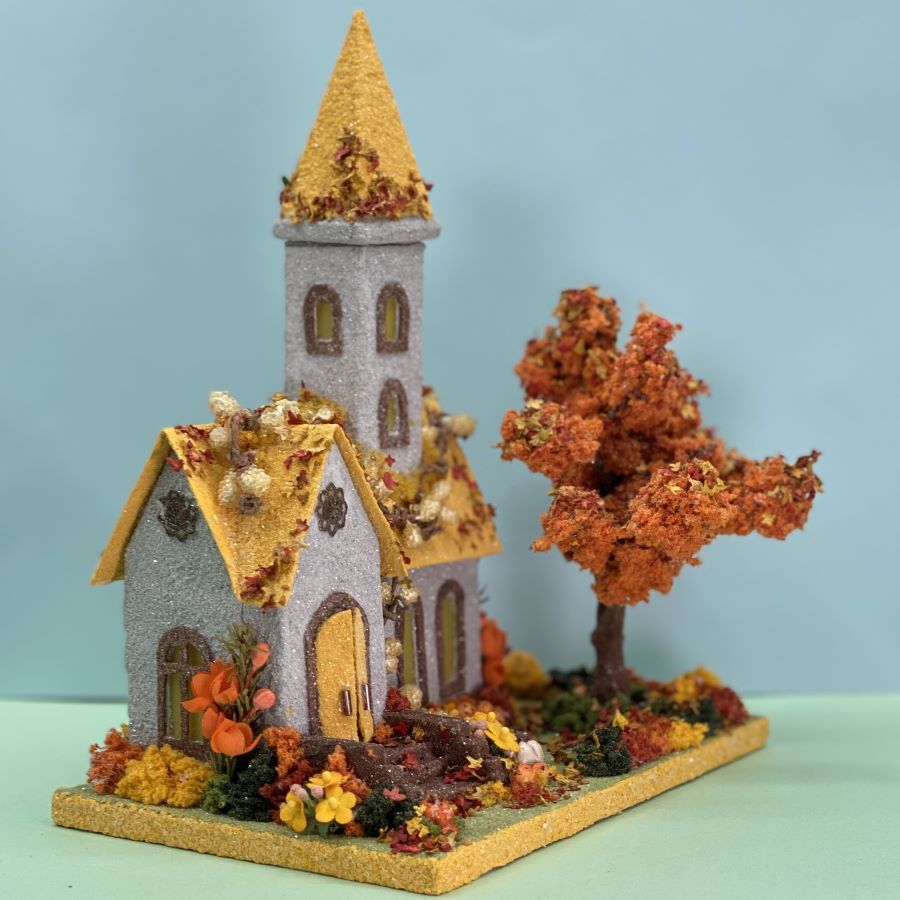
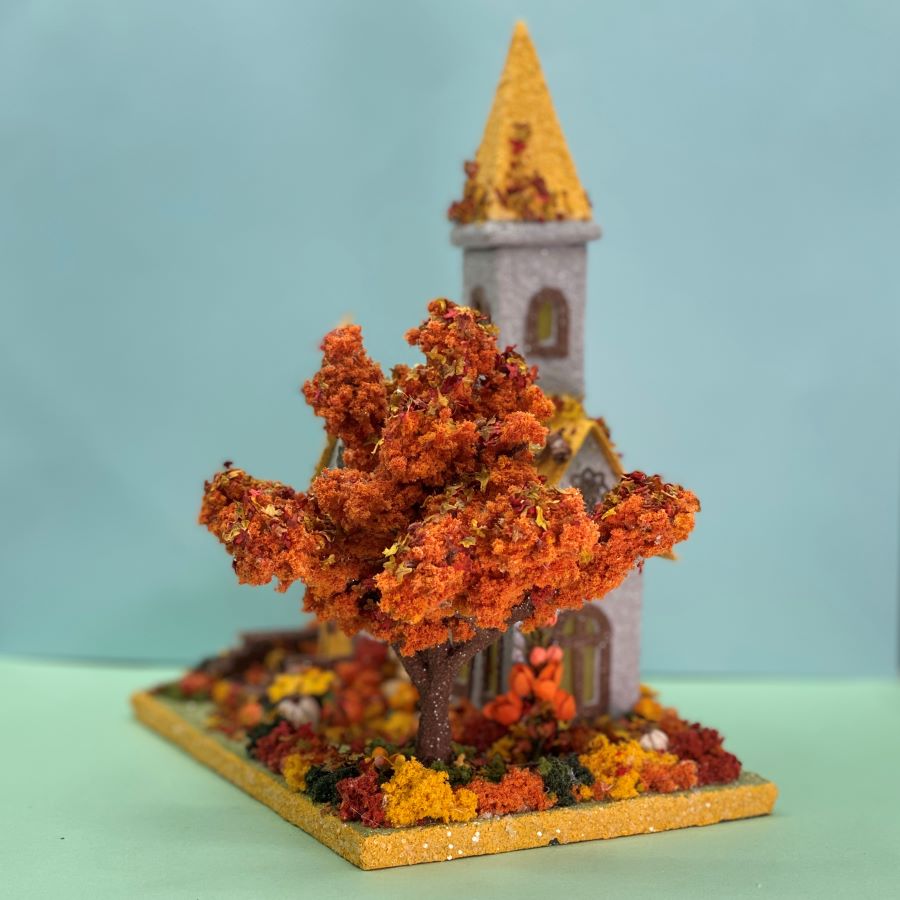
The autumn details are abudant. An autumn hedge surrounds the church yard. I handcrafted the colorful fall tree, using an armature and sponge foliage. Tiny fallen leaves are sprinkled across the church yard.
Three steps lead up to the arched front door. There are four handcrafted pumpkins in the yard. Tiny paper flowers grow among the hedges. Three round windows are covered with flattened, metal bead caps.
Stroll through the church yard and enjoy the autumn scenery. The vine that covers the roof is made from brown paper-covered wire and beaded ivory pips.
If you would like to see more of my Putz houses, as well as Christmas ornaments I have made from upcycled holiday cards, please visit my Etsy shop.
If you are interested in crafting Putz houses of your own, check out my Putz tutorials for more information. Putz House Tutorials The blog can be searched for “tutorial” to find any that aren’t linked to the tutorial page. Working on that!
I am always happy to answer questions about the process. Please ask, if you are wondering about the details of putzing!
All proceeds from my Etsy shop benefit Kenya Mercy Ministries. They work with the urban poor of Nairobi, Kenya, particularly the children and their families who live in Kibera, the largest urban slum in Africa. Thank you for your part in helping these children when you purchase items from my shop!
This tutorial shows how I use preserved, dyed reindeer lichen to make autumn trees for Putz houses. Lichen is not a moss. Moss is a plant. Lichen is not a plant, but a combination of fungi and algae. Just FYI. 🙂
To make an autumn tree, you will need the following supplies.
I don’t receive a commission from items linked on my blog. They are linked for your information.
NOTE: Sometimes it is difficult to find leaf litter in yellow. I found it on the Walmart site today (June 2024). Sometimes the color received doesn’t match the exact shade of the color shown in the ad. I hope for the best! Walmart Leaf Litter
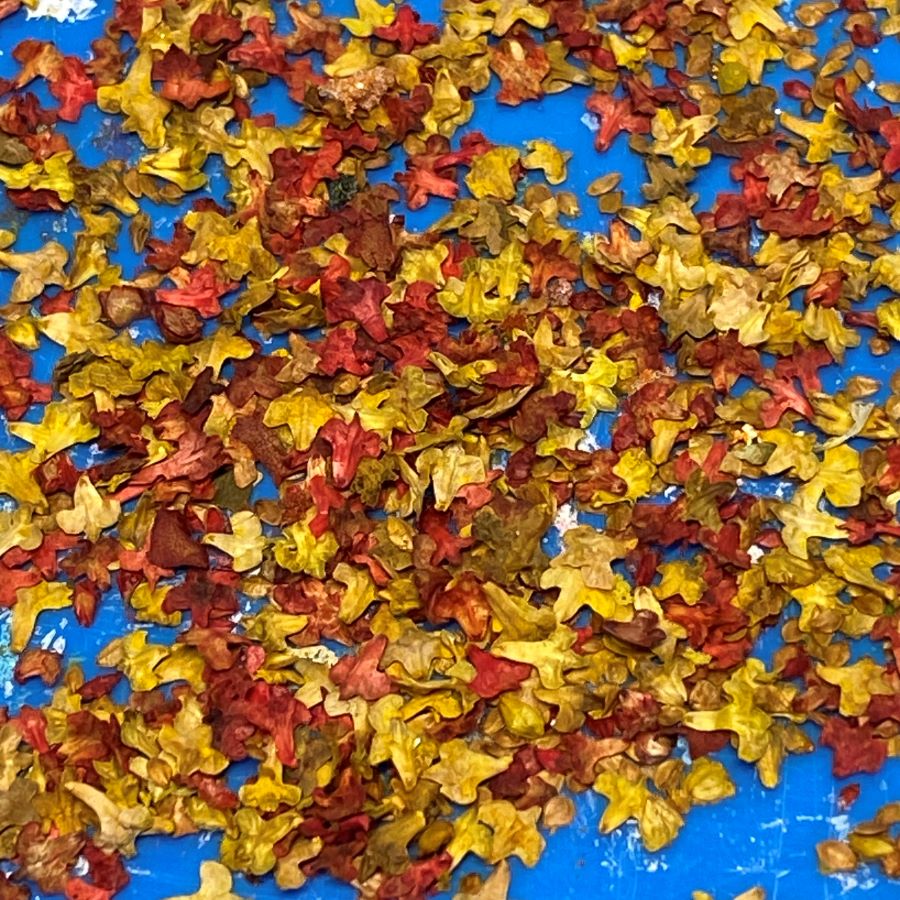
The leaf litter is made from the dried, dyed scales of birch tree seed pods. They make great tiny leaves. Check different sources for different shades of green, brown, red, orange and yellow. Some are brighter than others. If you have a silver birch, you can make your own. I don’t know if all birch trees make the same kind of seed pod. Silver birch is the only one I’ve seen mentioned online for making leaf litter. Making Miniature Leaves from Birch Seed Pods
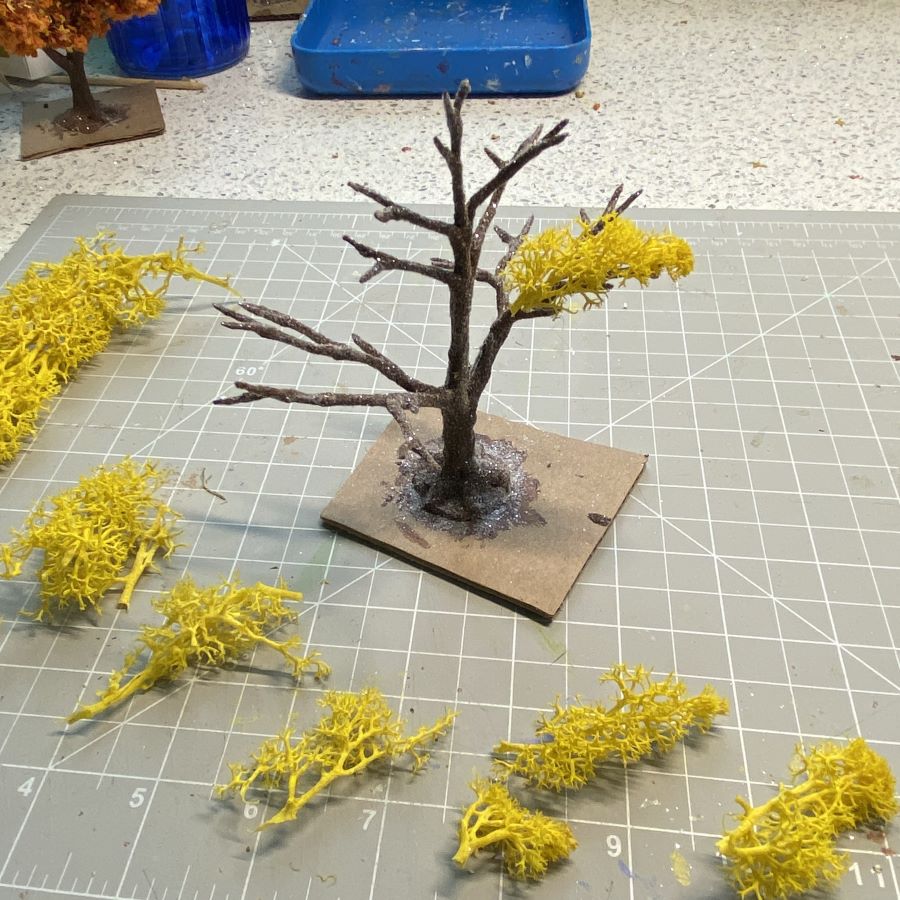
When making a tree for a particular house, set the tree armature on the base next to the house and decide how it will fit. With a smaller base, the branches of the tree may need to be moved to fit the space. The branches can be gently bent, even when painted and glittered. In most cases, the branches shouldn’t touch the house. That can look crowded. Take into account that leaves will be added and the tree will be a bit larger than the bare branches are. If you have a tree that won’t fit, another option is to make another tree, with a smaller size armature. Or make a larger base.
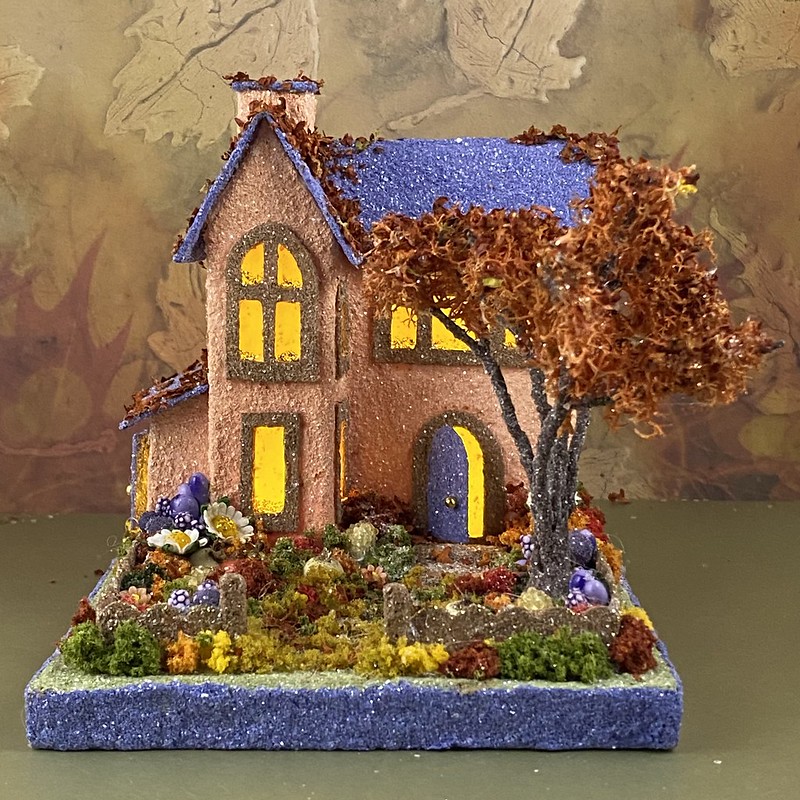
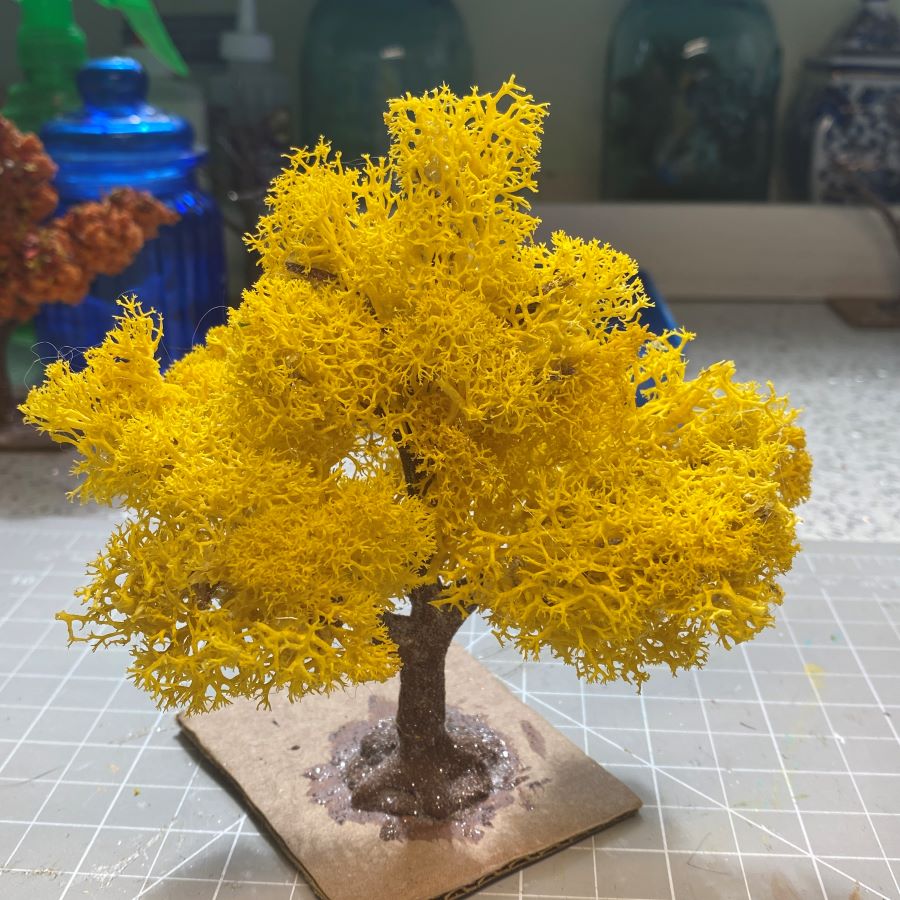
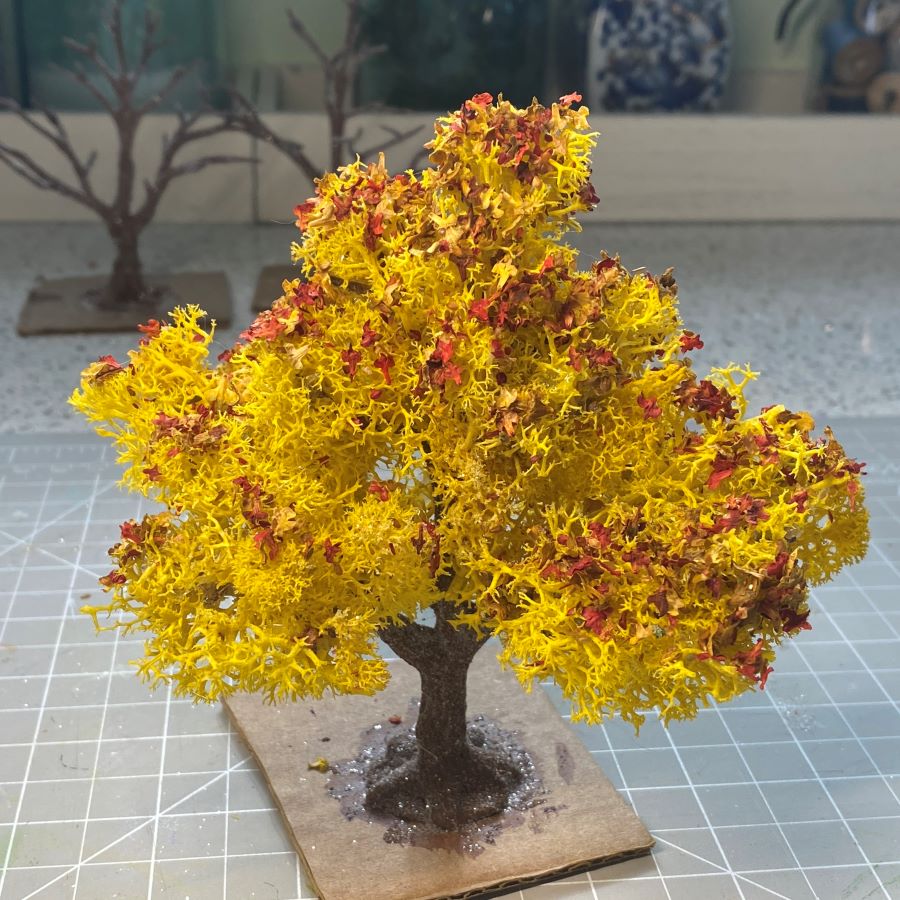
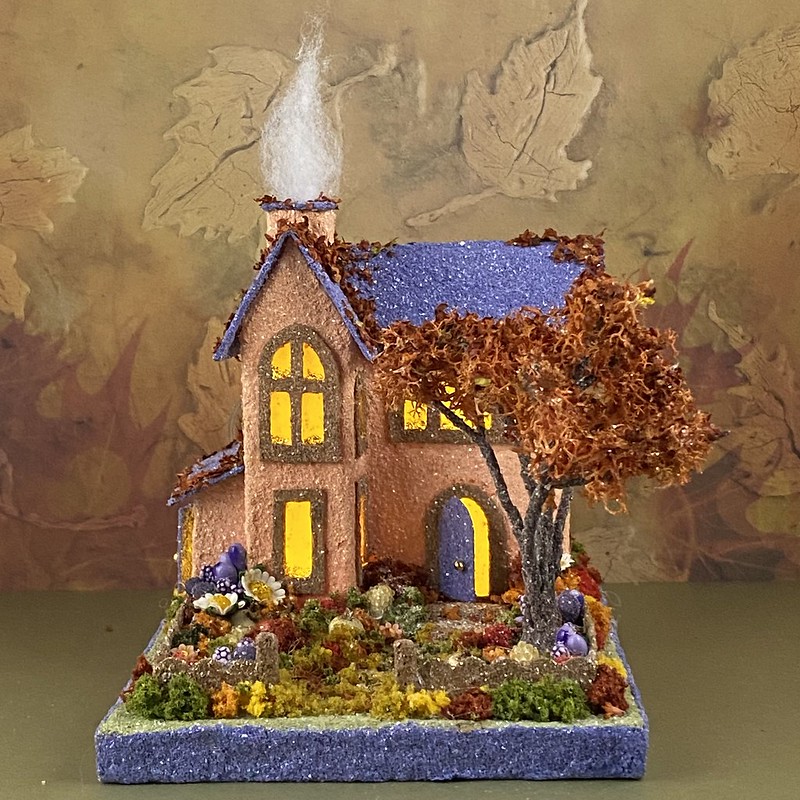
I am using yellow lichen to make the autumn tree in this tutorial. Any color can be used as the base color, but I like to match the colors of the Putz house and the embellishments to the colors on the greeting card I used to make the base. When the lichen is done, leaf litter will be glued over the tops of the branches. Here are two examples of lichen trees with leaf litter.
The leaf litter adds detail to the yard of the Putz house. Below left, the individual leaves can be seen against the wall of the house and on the tree. Below right, I used leaf litter on the roof, on the tree, and on the ground. Note the leaf litter at the base of the fence.
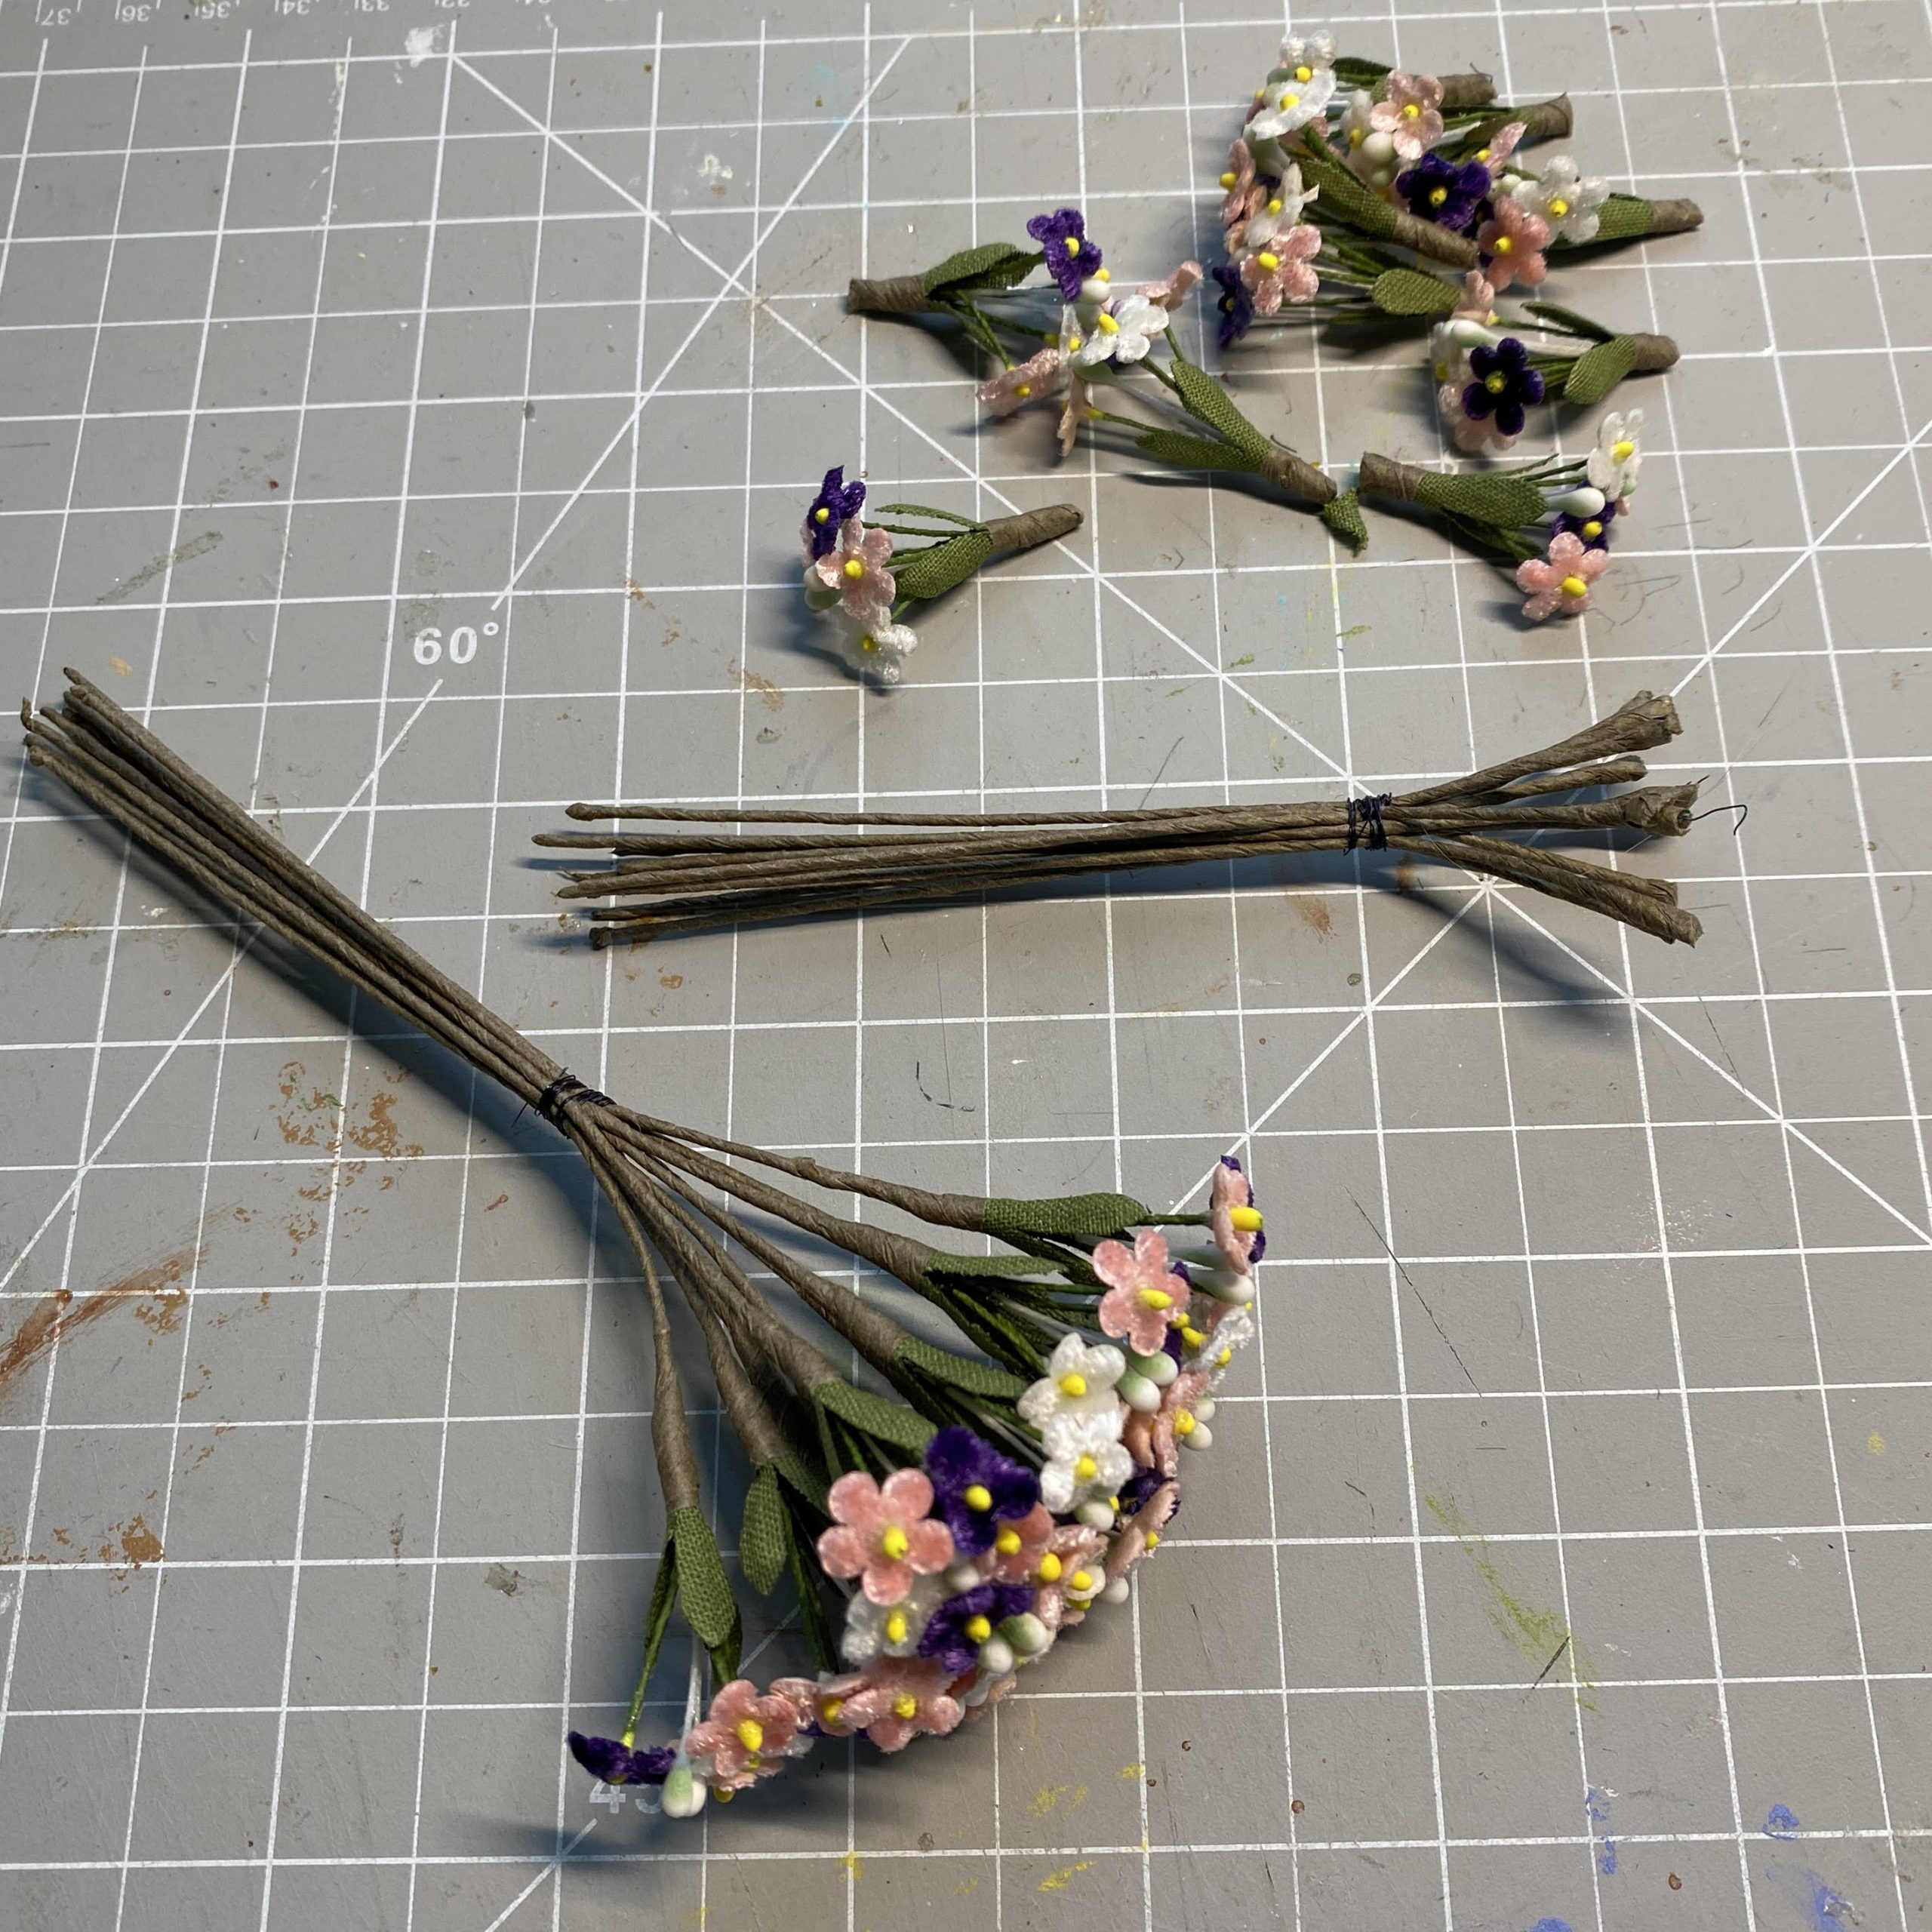
The house below has a tree which was made from the wired stems of a flower bundle, with lichen and leaf litter. I will write a tutorial about making armatures from these stems in the next few weeks. It makes a tree with a different style than the store-bought armatures make. I use the flowers for my spring and summer Putz houses. I cut them off the stems so they take less space in my flower storage drawer. I didn’t want to throw the stems away, so I tried making a tree from them and it worked well!
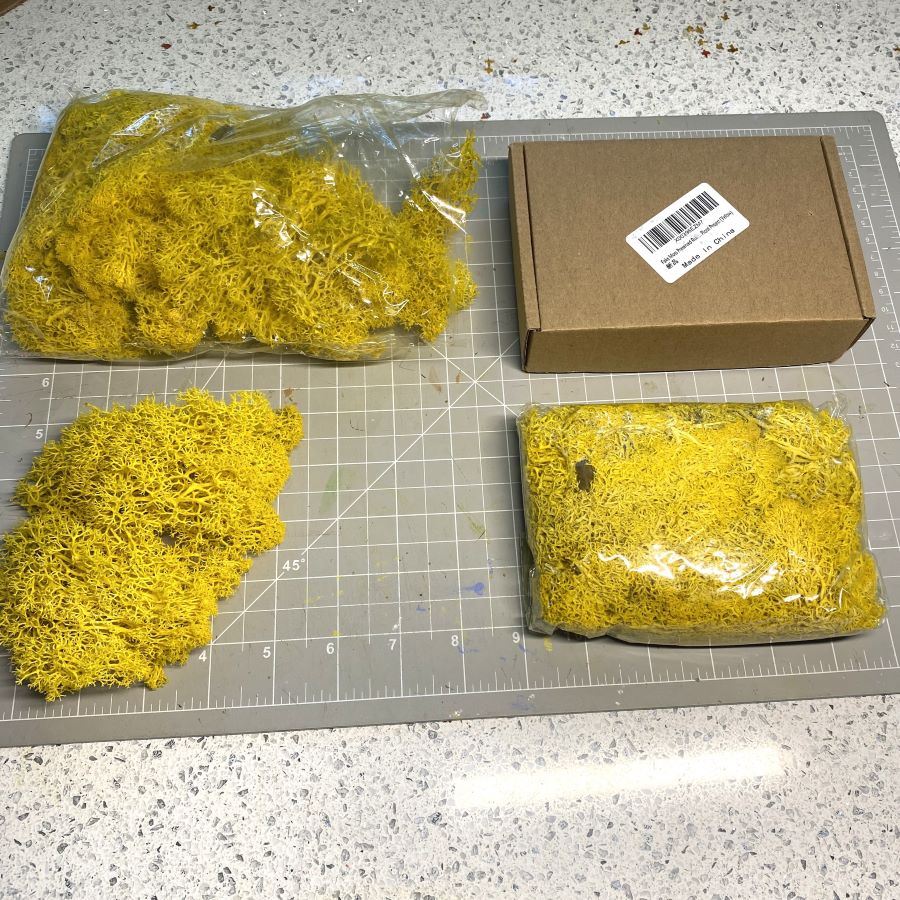
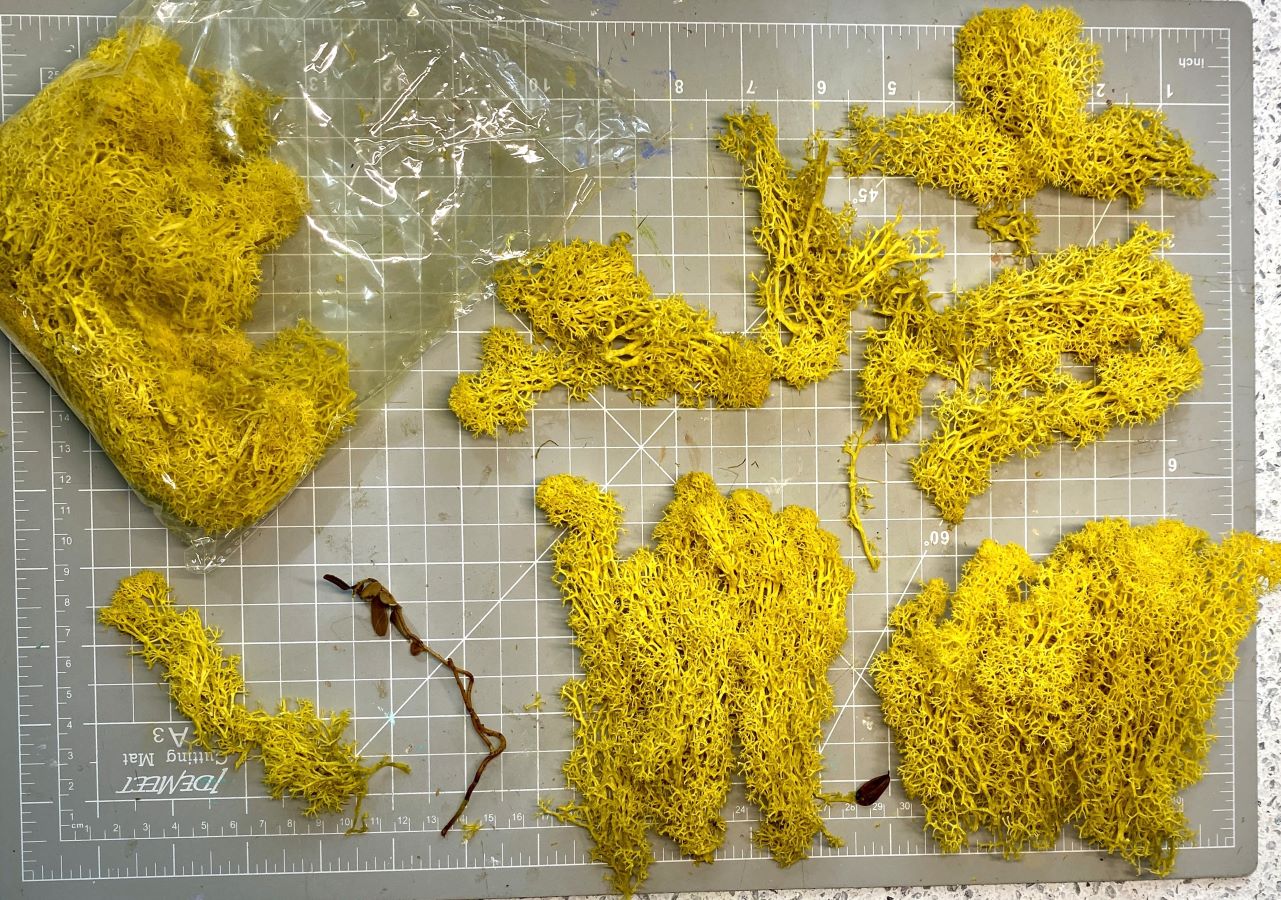
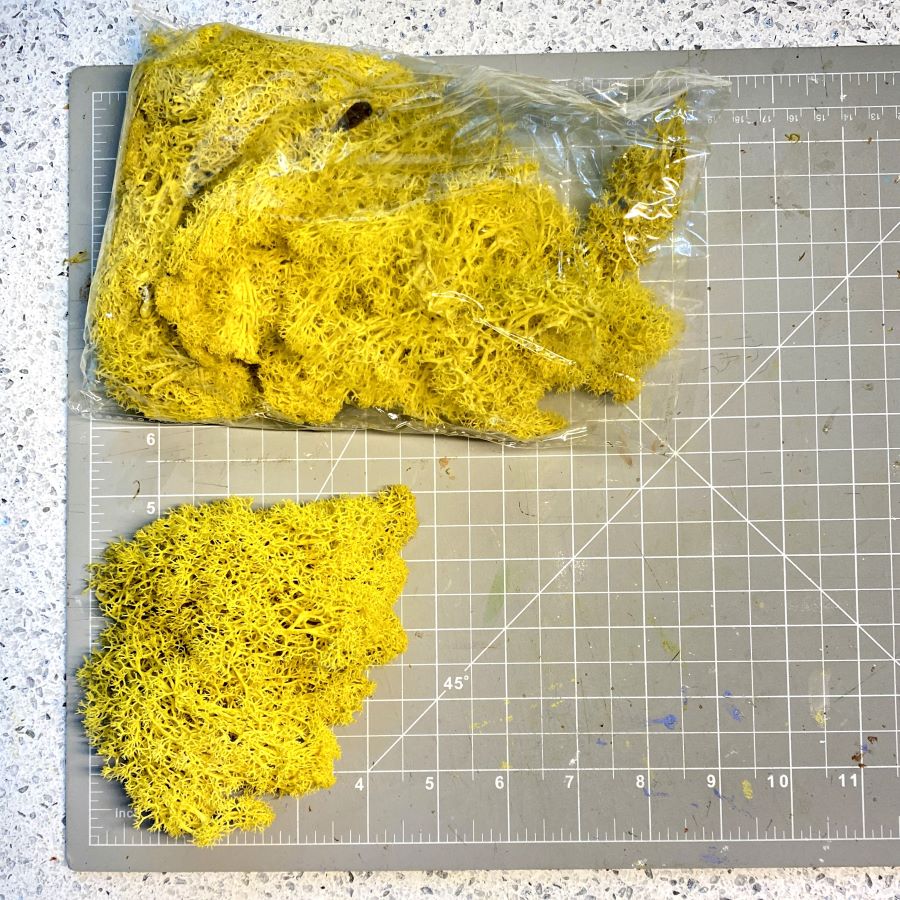
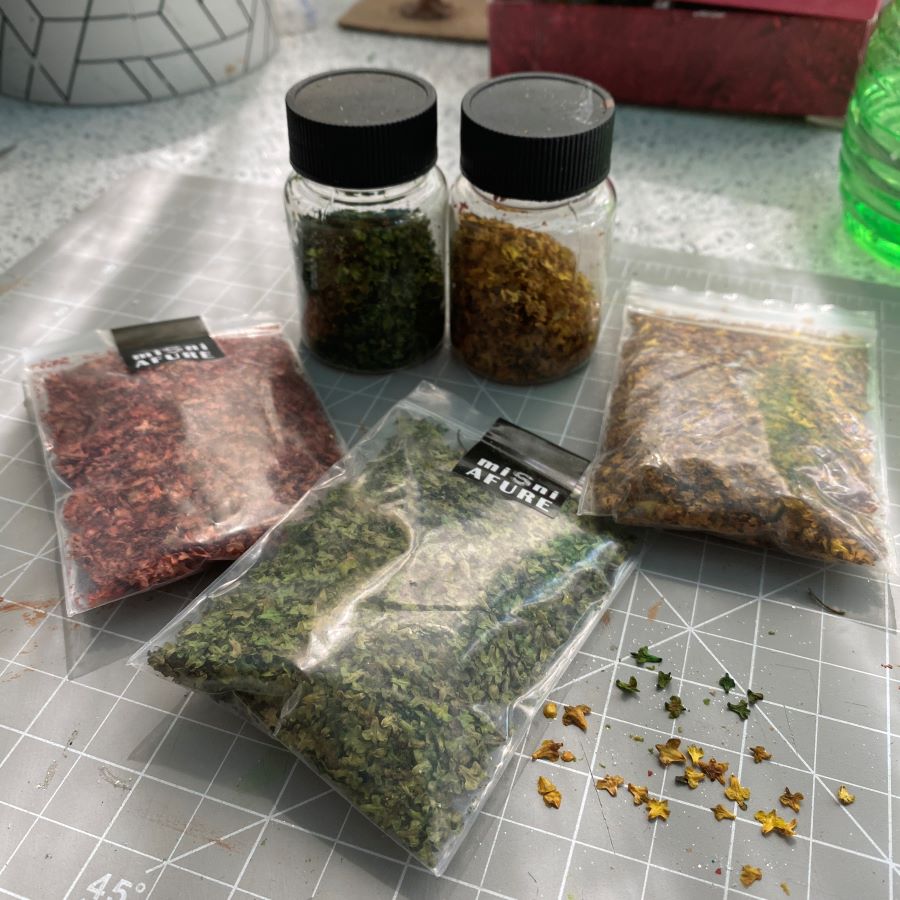
The left picture below shows how the lichen was packaged. The bag at the bottom came in the small box. I ordered two boxes. Probably enough for 15-20 trees. On the left, half the lichen is still in the bag and half of it out. It fluffs a bit when it is taken out of the plastic bag. Lichen isn’t very stretchable however. It should fit the branch. It won’t help much to try to stretch it over a branch. There may be other bits of foliage or little sticks in the bag. Discard those. If the lichen has dark bits or spots, just cut them off.
The lichen has rounded tops of fine branching. As you go down the stem, branching becomes larger and more coarse. I usually discard the bottom third or so.
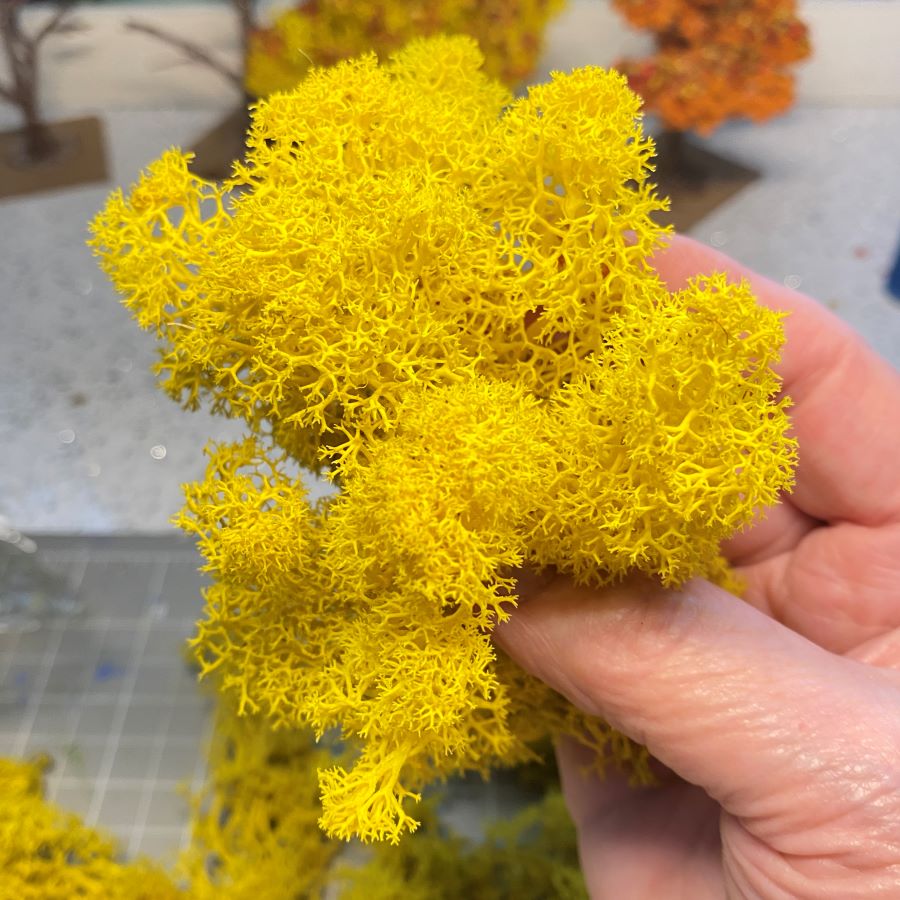
The lichen comes dyed in many colors. The color is water soluble, so don’t wet it. It may lightly color your fingers as you work with it, but it will wash off easily.
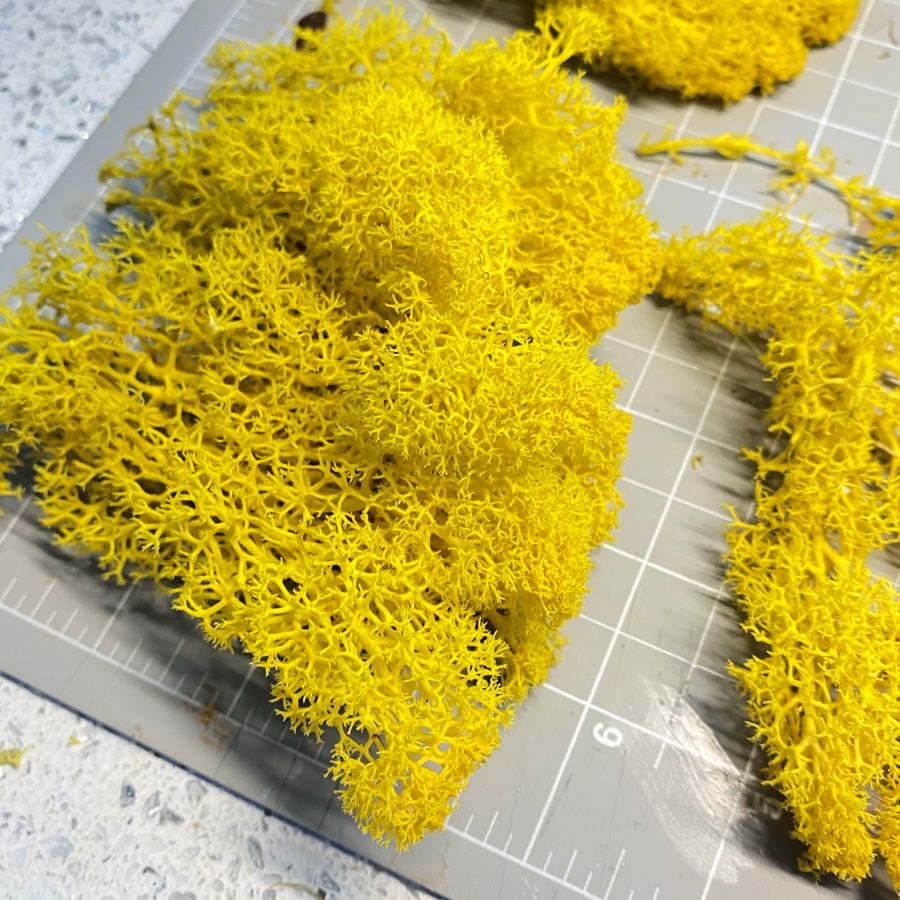
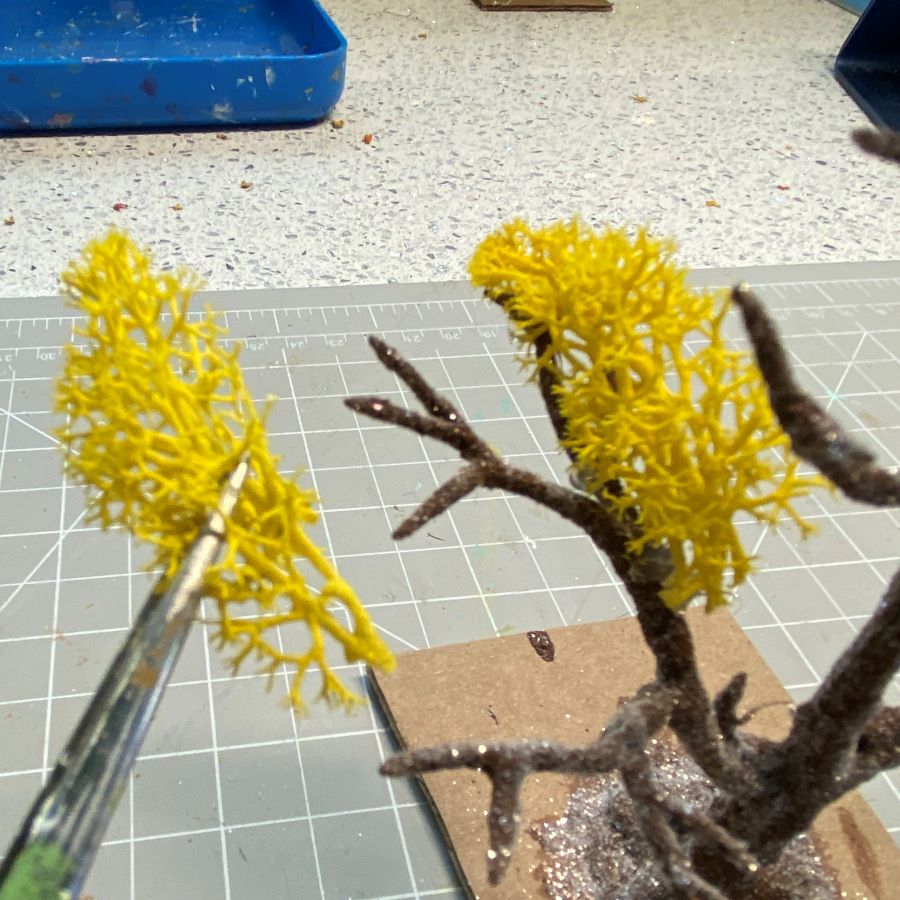
Tear the lichen to fit the branch to be covered. It pulls apart easily. A large clump can be divided vertically. The three pieces below left came from the end of the clump in the background of the picture. I glue the small, rounded ends on the ends of the armature branches. Lay a bead of hot glue as far down the branch as the lichen will cover and gently press the lichen into the glue.
I start at the bottom and work my way up the tree. If a bit of lichen looks too thin, as in the middle of the branches in the left photo below, glue another piece of lichen on top of it. Proceed until the tops of all branches are covered. At the top of the tree, cover one side of any vertical branches.
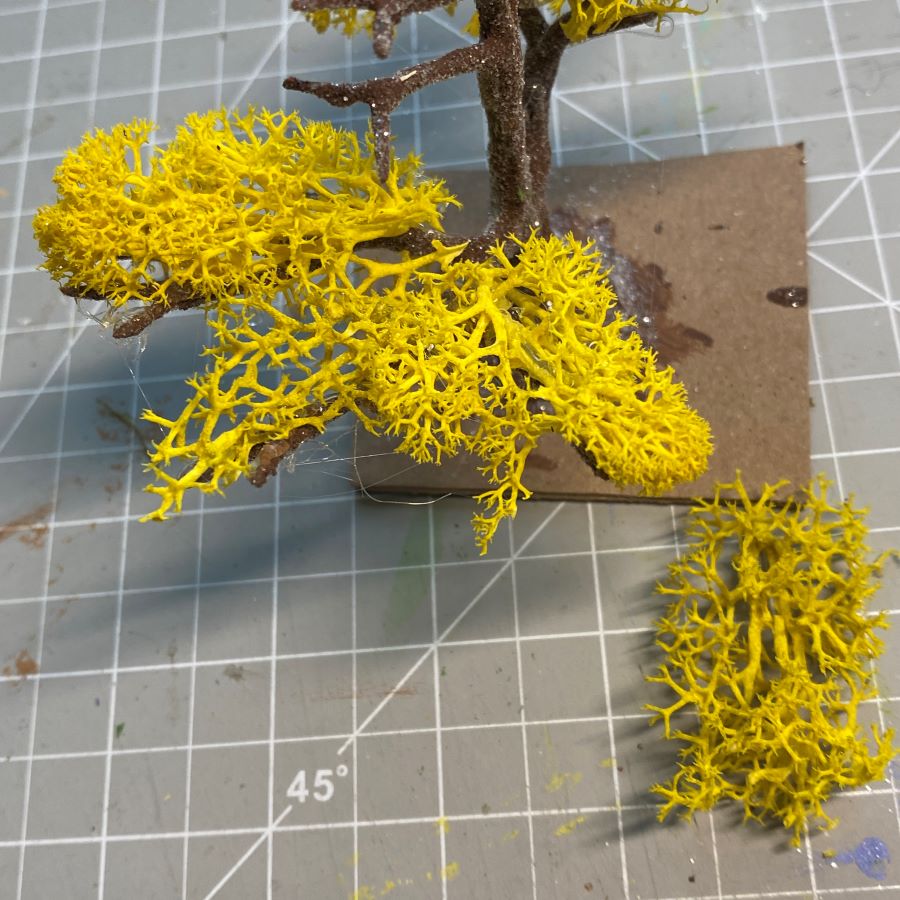
The next step is to cover the back of the top branches of the tree.
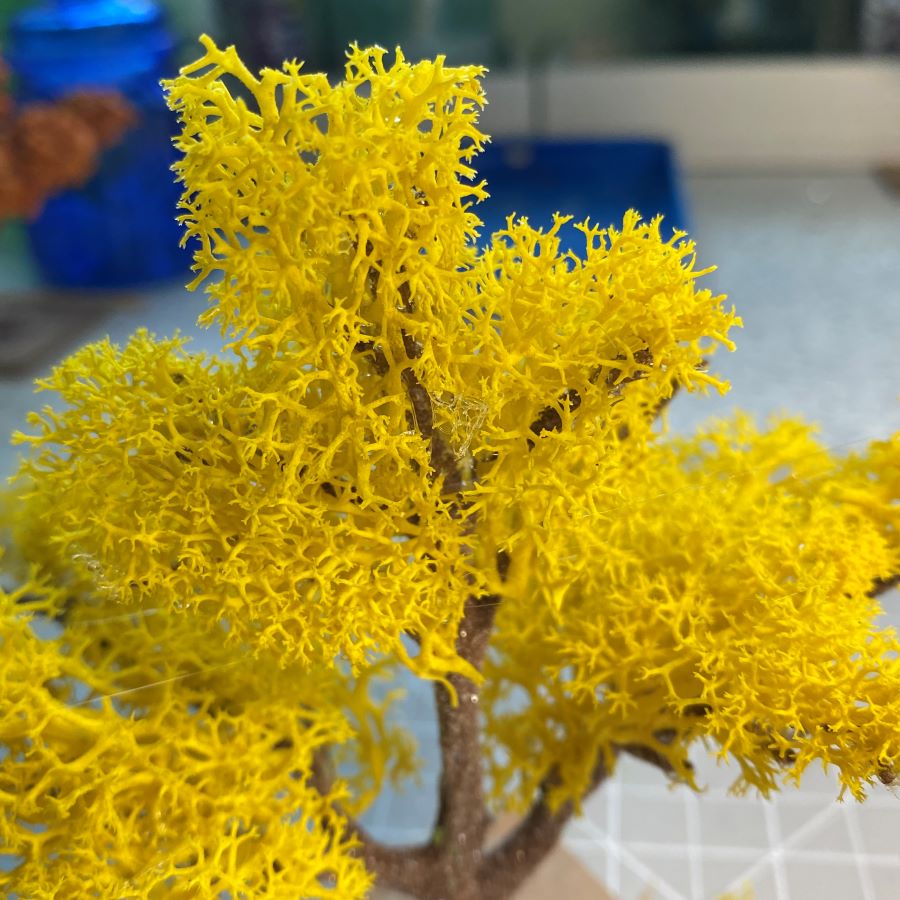
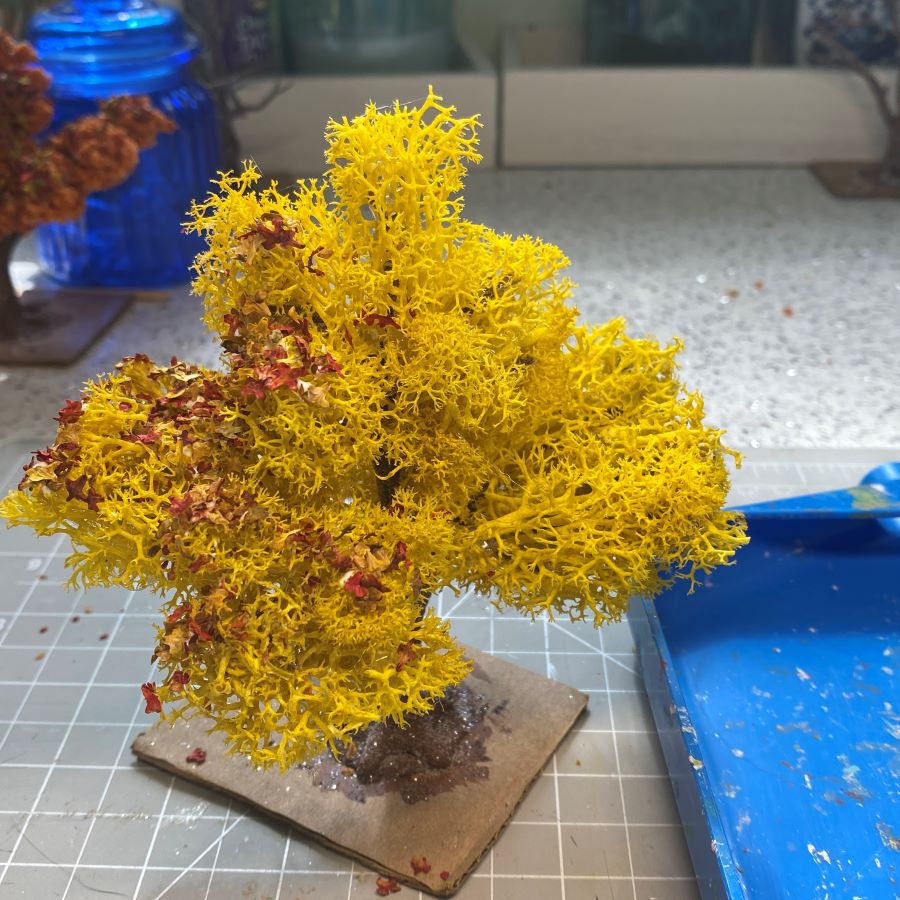
Next, turn the tree over to see the bottoms of the other branches. Cover as needed. Coarser lichen branches can be used as they won’t be as visible as the tops of the branches. Before adding leaf litter, check the tree for hot glue strings, globs of glue that are showing, and spaces in the tree that look like they need more lichen. Cover the ends of branches that are showing. At this point the tree can be considered done. Perfectly fine to use it as is, but I add leaf litter for detail and interest.
Time to add the leaf litter. Daub the branches, a small section at a time, with tacky glue. Don’t cover the whole area with glue. White or clear tacky glue is fine. Pour leaf litter over the glue and press it gently into the glue. Shake the tree over a glitter tray or a sheet of paper to collect the fallen leaves.
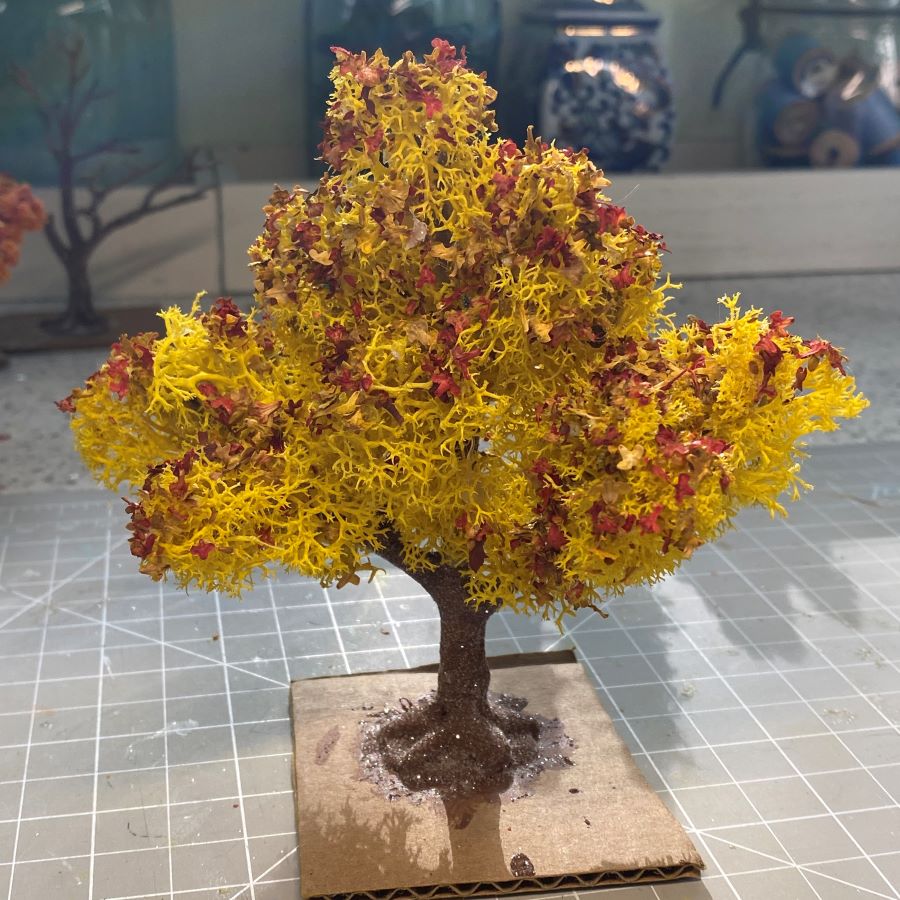
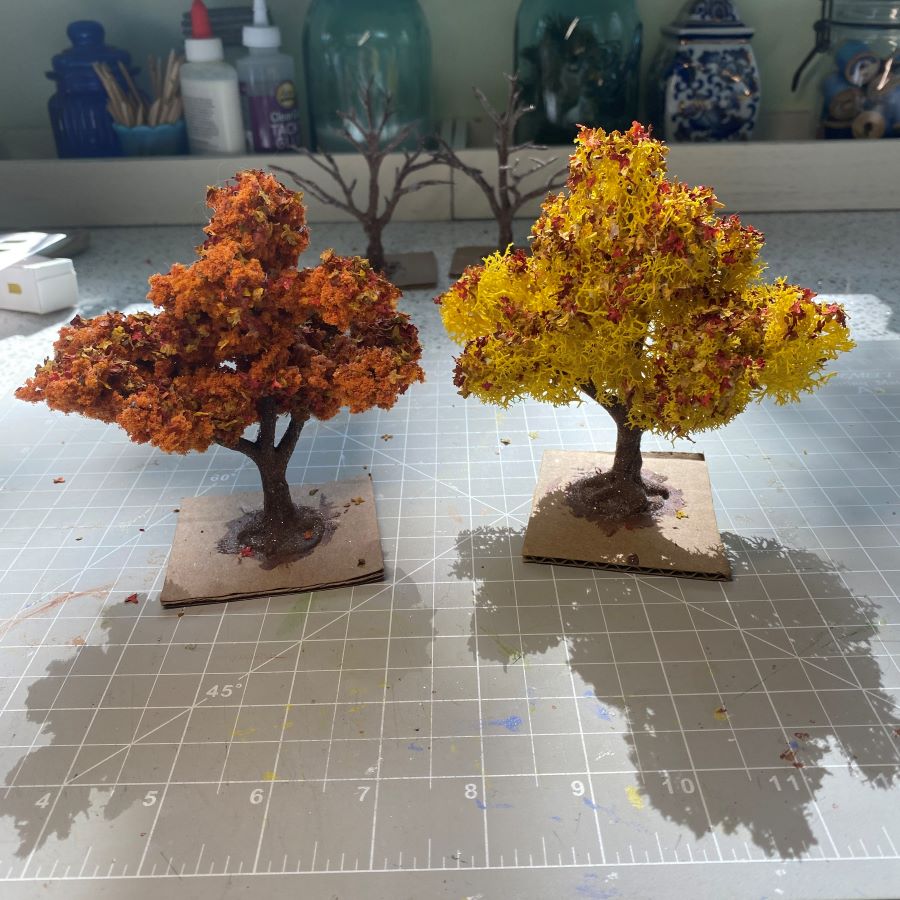
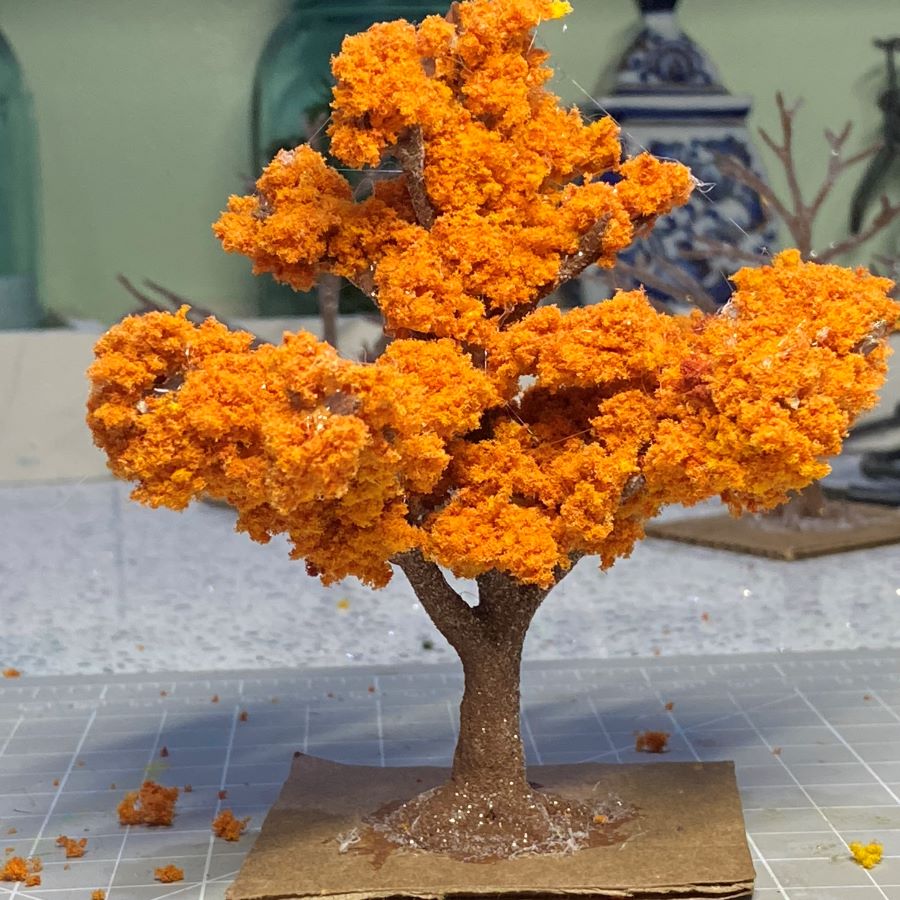
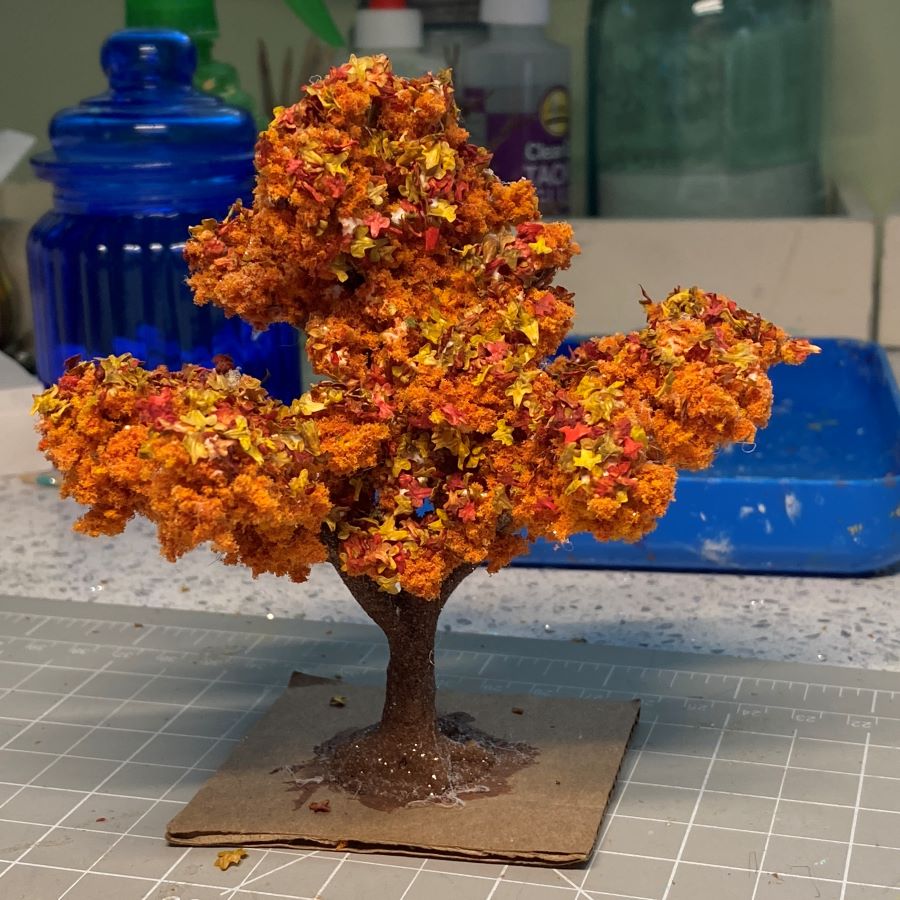
Continue to add leaf litter until the tree is finished. Look the tree over, and add extra leaf litter to any spots that need it. Below, in the picture to the right, the left tree is made with orange sponge foliage, and the right one is made with yellow lichen. The same leaf litter mixture of red, orange and yellow leaves was used on both trees.
To loosen the tree from the cardboard, slide a palette knife or other flat metal tool under the tree roots and pry the tree off.
If you have any questions about the process of making an autumn tree, please ask!
If you would like to see more of my Putz houses, as well as Christmas ornaments I have made from upcycled holiday cards, please visit my Etsy shop.
If you are interested in crafting Putz houses of your own, check out my Putz tutorials for more information. Putz House Tutorials The blog can be searched for “tutorial” to find any that aren’t linked to the tutorial page. Working on that!
I am always happy to answer questions about the process. Please ask, if you are wondering about the details of putzing!
All proceeds from my Etsy shop benefit Kenya Mercy Ministries. They work with the urban poor of Nairobi, Kenya, particularly the children and their families who live in Kibera, the largest urban slum in Africa. Thank you for your part in helping these children when you purchase items from my shop!
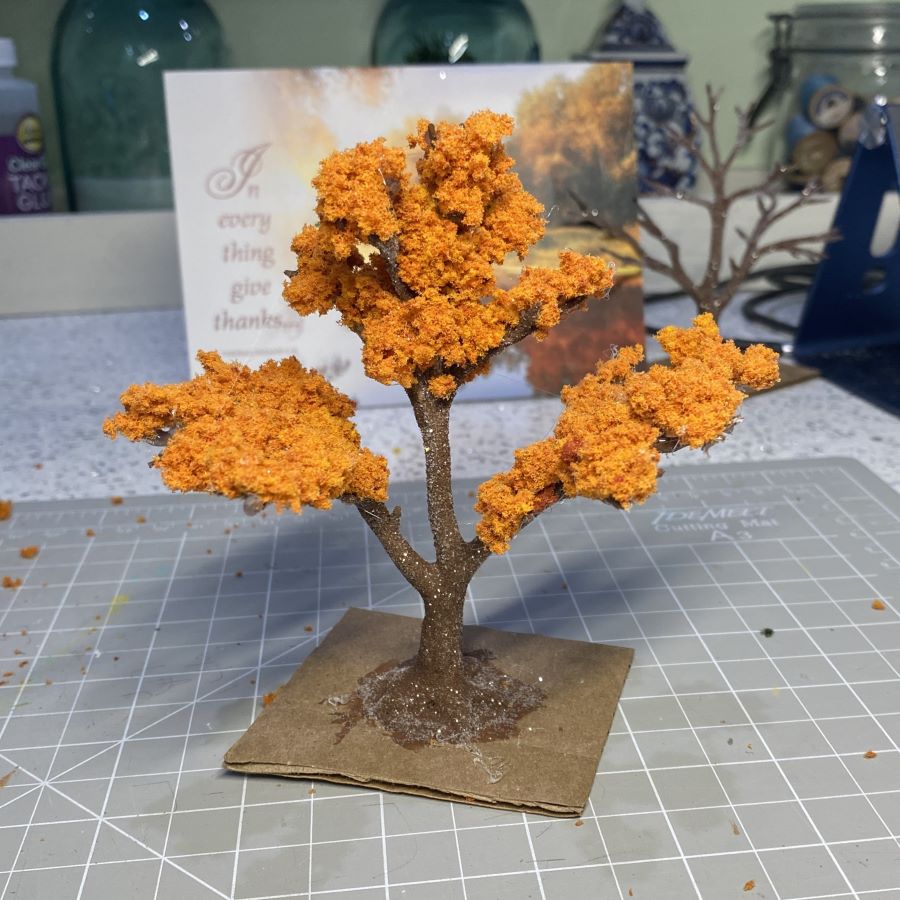
In this tutorial, I will explain how to make autumn trees using sponge clump foliage, as shown below in the first picture. Also note the way the sponge material is used as shrubs in all four pictures.
I will publish a second post explaining how I use preserved lichen. The second picture above, and two pictures below, show lichen trees. Lichen gives a lighter, airier appearance. I have one disclaimer regarding lichen. I have used it for just over two years. So far, it remains soft and pliable. I don’t know if it will remain that way over time.
May 2026 / UPDATE re: lichen. I looked over the lichen stored in my craftroom. It’s the same batch I used for this post. It is still as soft and pliable as when I first used it. No loss in color, either.
Sponge clump foliage, lichen, and leaf litter come in several autumn colors. I used two boxes from Christmas cards to make trays for sorting the sponge flock. In the top row are bits and pieces of autumn embellishments that were left over from other projects, black-green sponge, red, and yellow. The bottom row has medium green, a mix (not sure why…) red and rust. The yellow is more yellow than it shows in the photo. I store these in my flock drawer and can quickly pull out an assortment of colors when needed.
The leaf litter is made from the dried, dyed scales of birch tree seed pods. They make great tiny leaves. Check different sources for different shades of greens, browns, reds and oranges. Some are brighter than others. If you have a silver birch, you can make your own. I don’t know if all birch trees make the same kind of seed pod. Silver birch is the only one I’ve seen mentioned online for making leaf litter. Making Miniature Leaves from Birch Seed Pods
To prepare the trees (trunk and branches) for the autumn trees, see this tutorial.
When making a tree for a particular house, set the tree on the base next to the house and decide how it will fit. With a smaller base, the branches of the tree may need to be moved to fit the space. The branches can be gently bent, even when painted and glittered. In most cases, the branches shouldn’t touch the house. Remember there will be leaves added and the tree will be a bit larger than the bare branches are. If making a Halloween house, you may want bare branches to brush against the roof for a spooky effect.
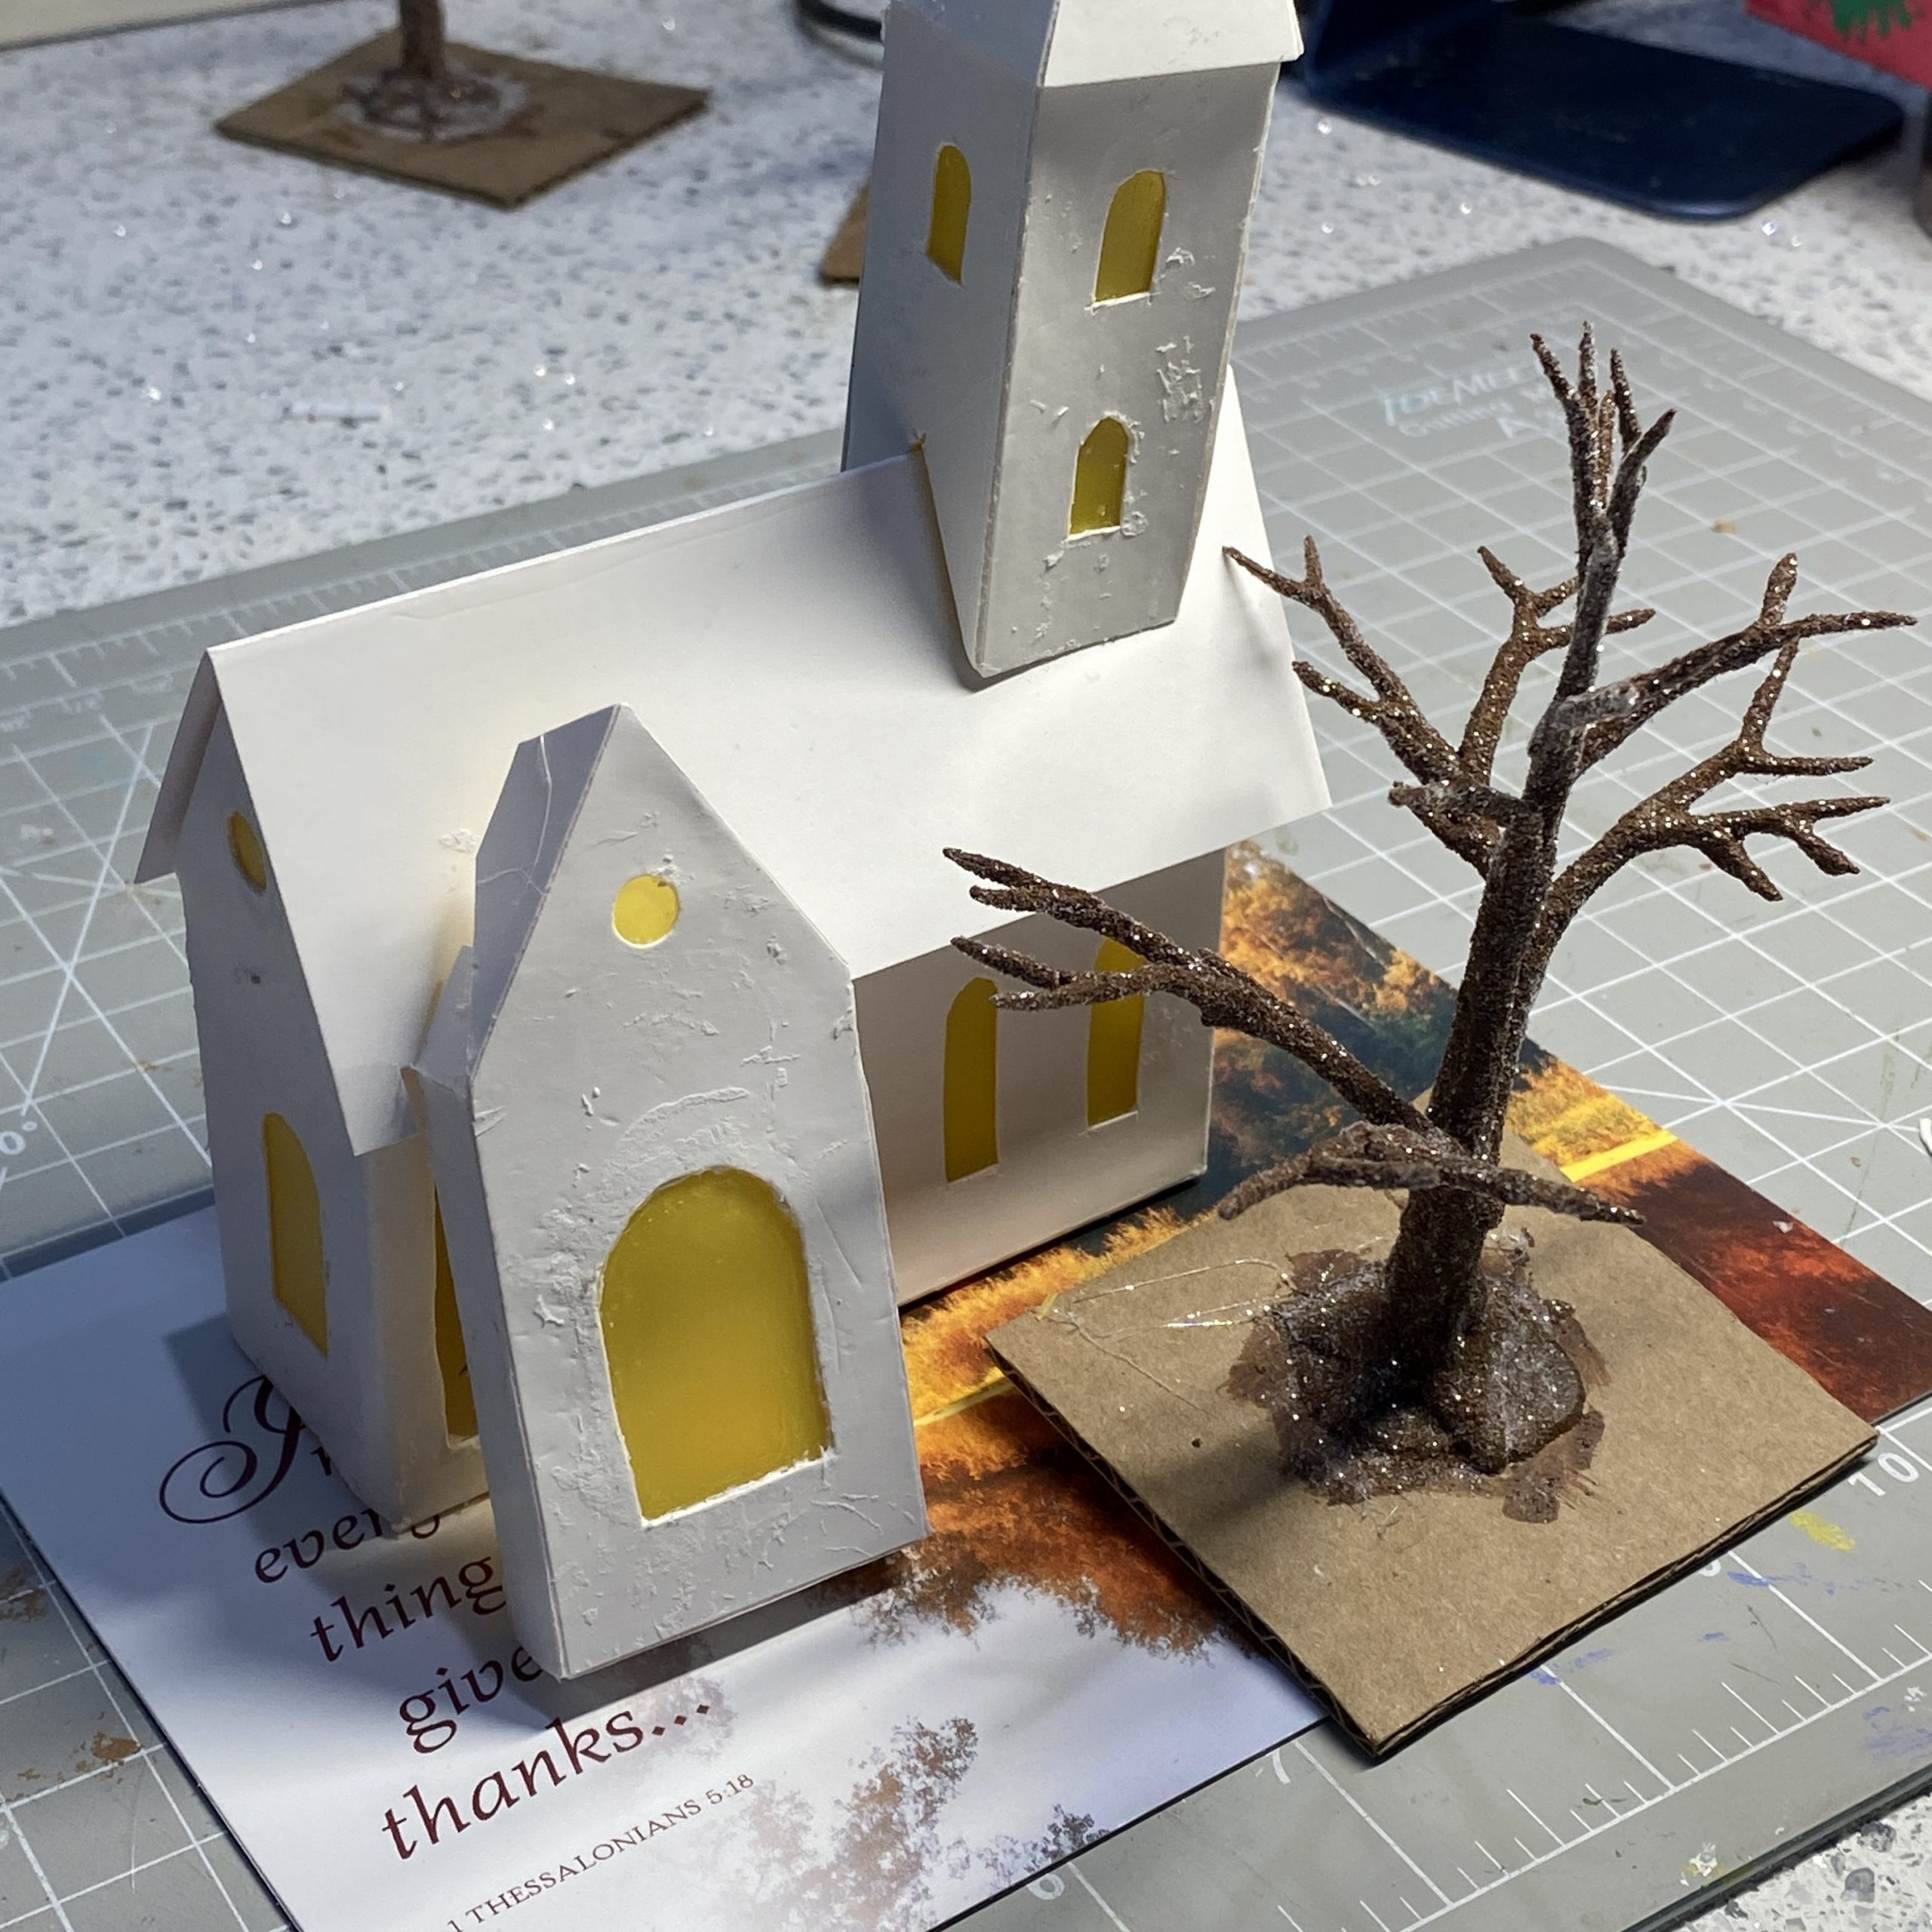
In the left picture below, with the church set straight on the base, there isn’t enough room for the tree branches. They are touching the church. In the second picture, the church is set an angle on the base at and that allows enough room for the tree.
In the picture below, note how the branches on the back of the tree (top side in the picture), have been moved toward the front (bottom side in the picture), which makes it easier to fit the tree close to a building without touching the building. If you have a tree that won’t fit, another option is to make another tree, with a smaller size armature. Or make a larger base.
To make an autumn tree, you will need the following supplies.
I am using orange as the base for my autumn tree. Yellow would have been a good color, as well. I like to use the colors of the greeting card I am using to make the base to choose colors for my putz house and landscaping.
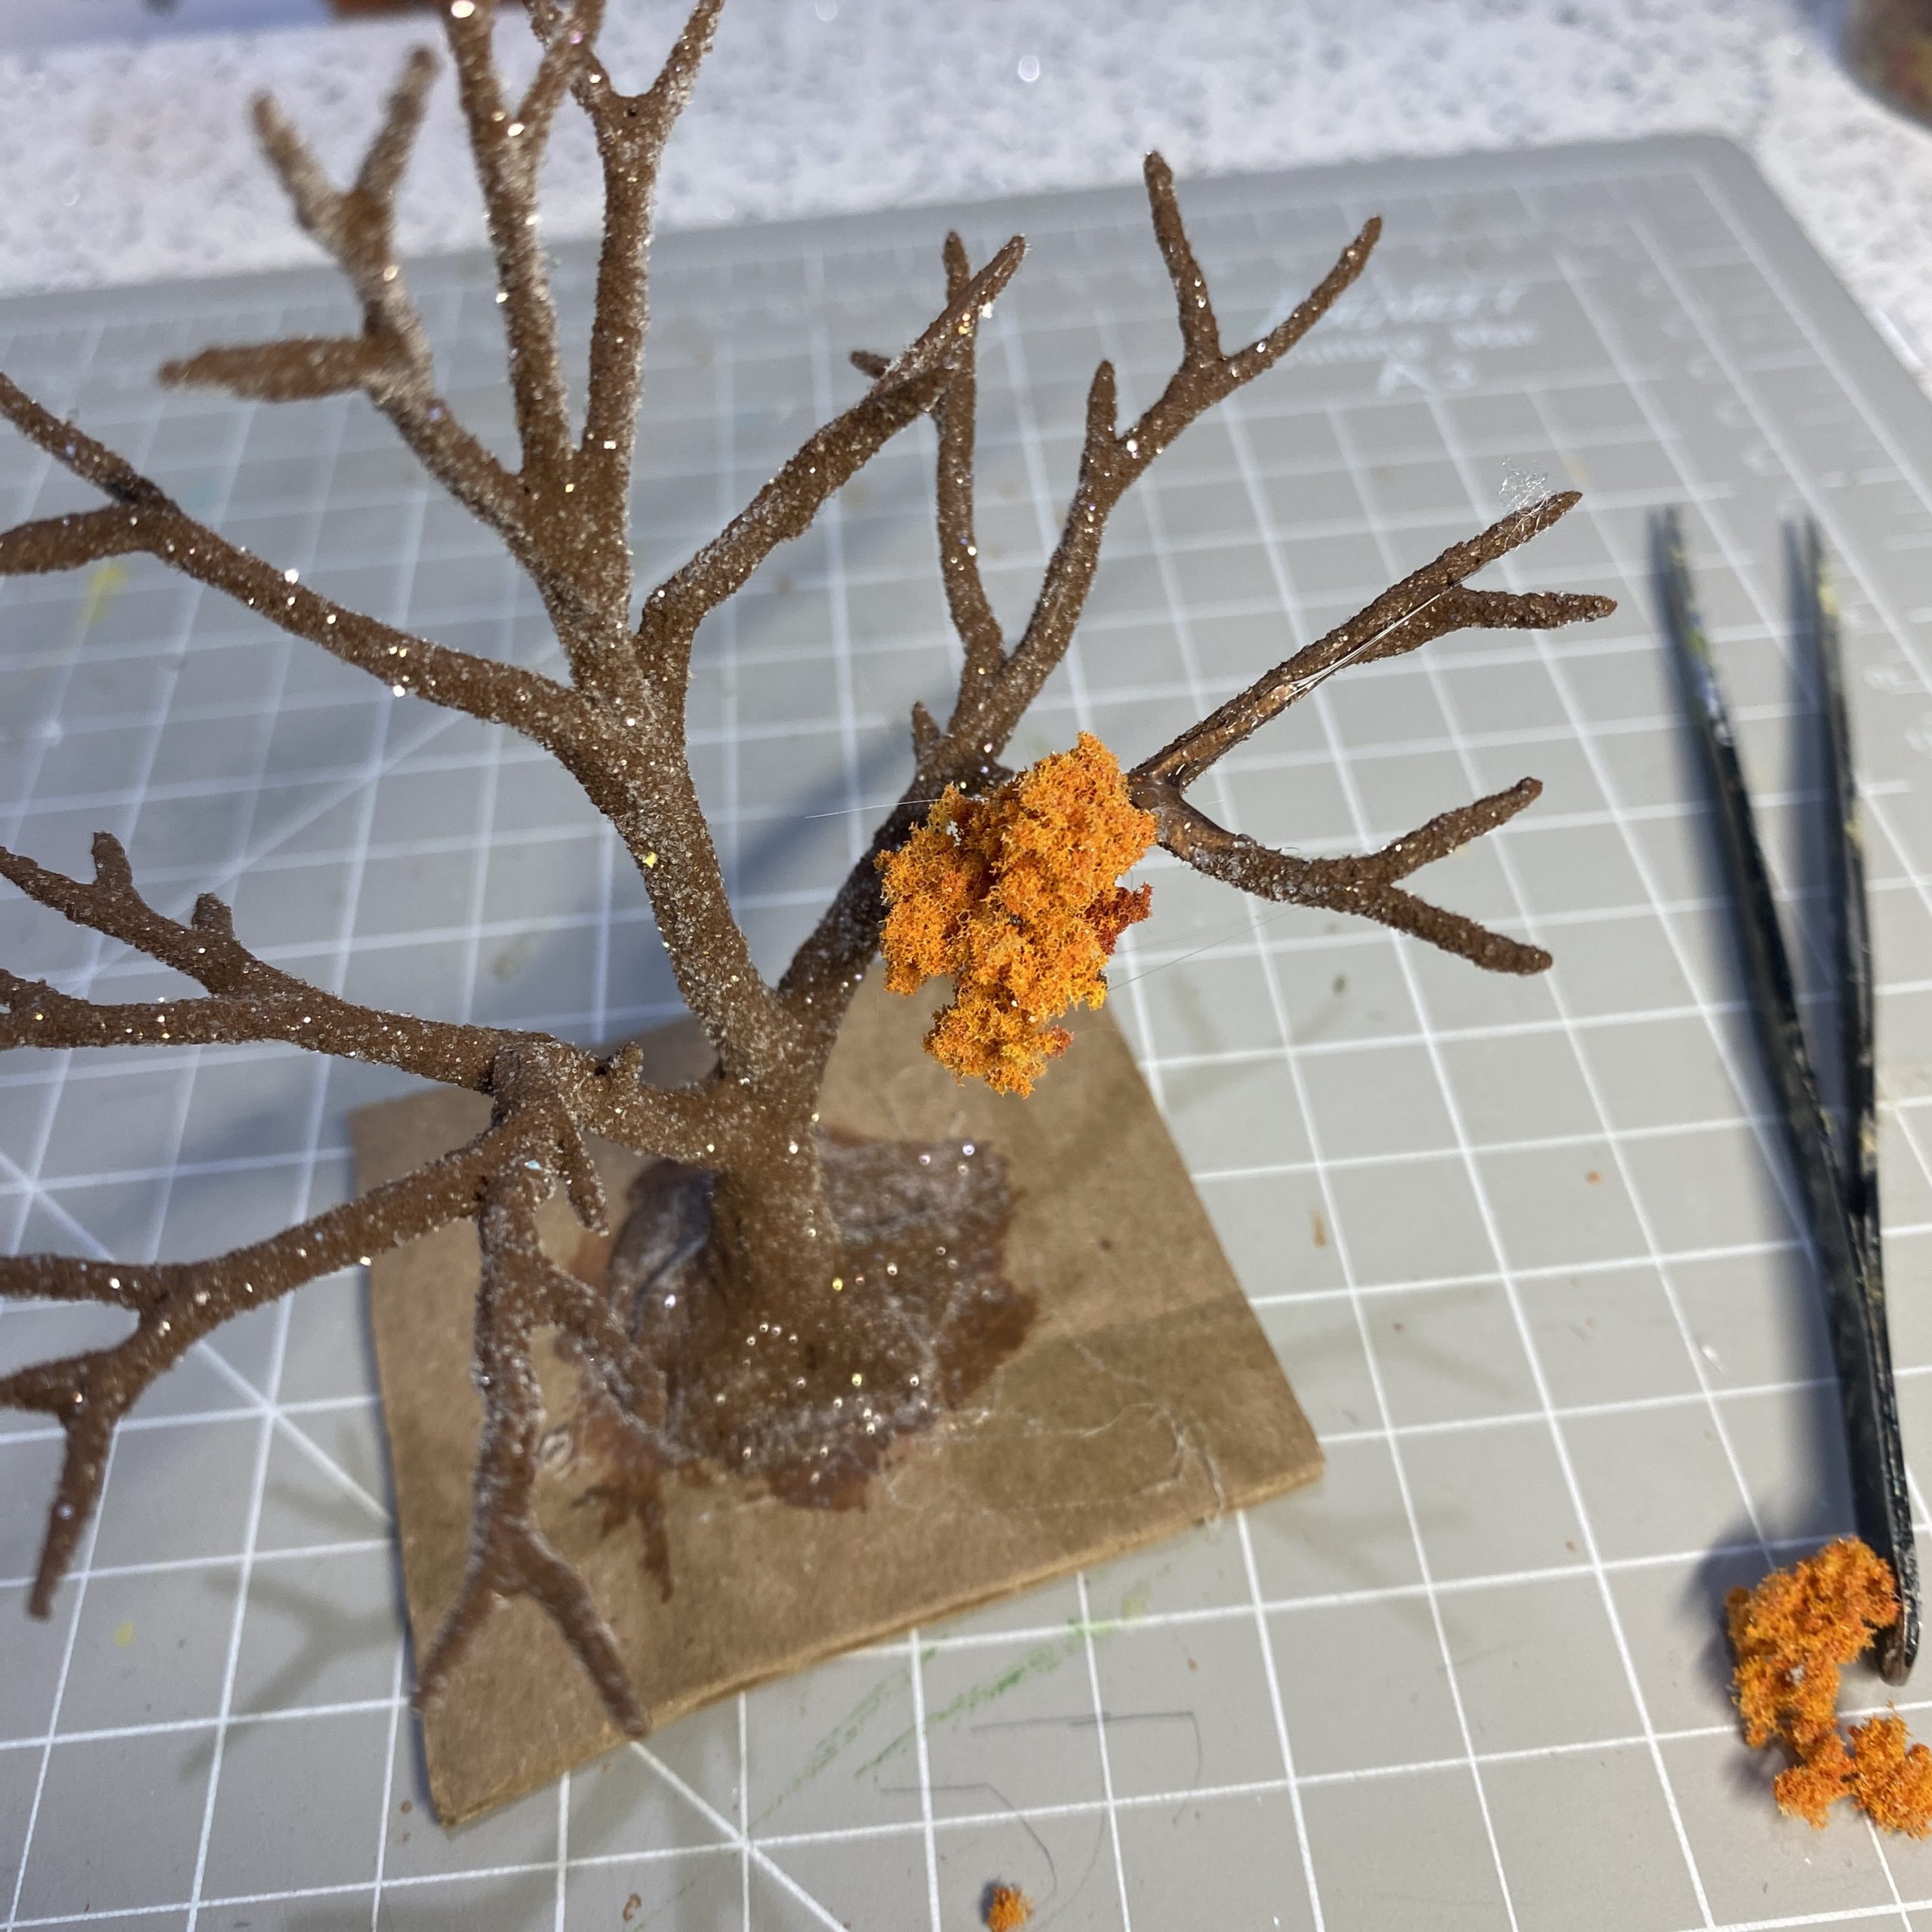
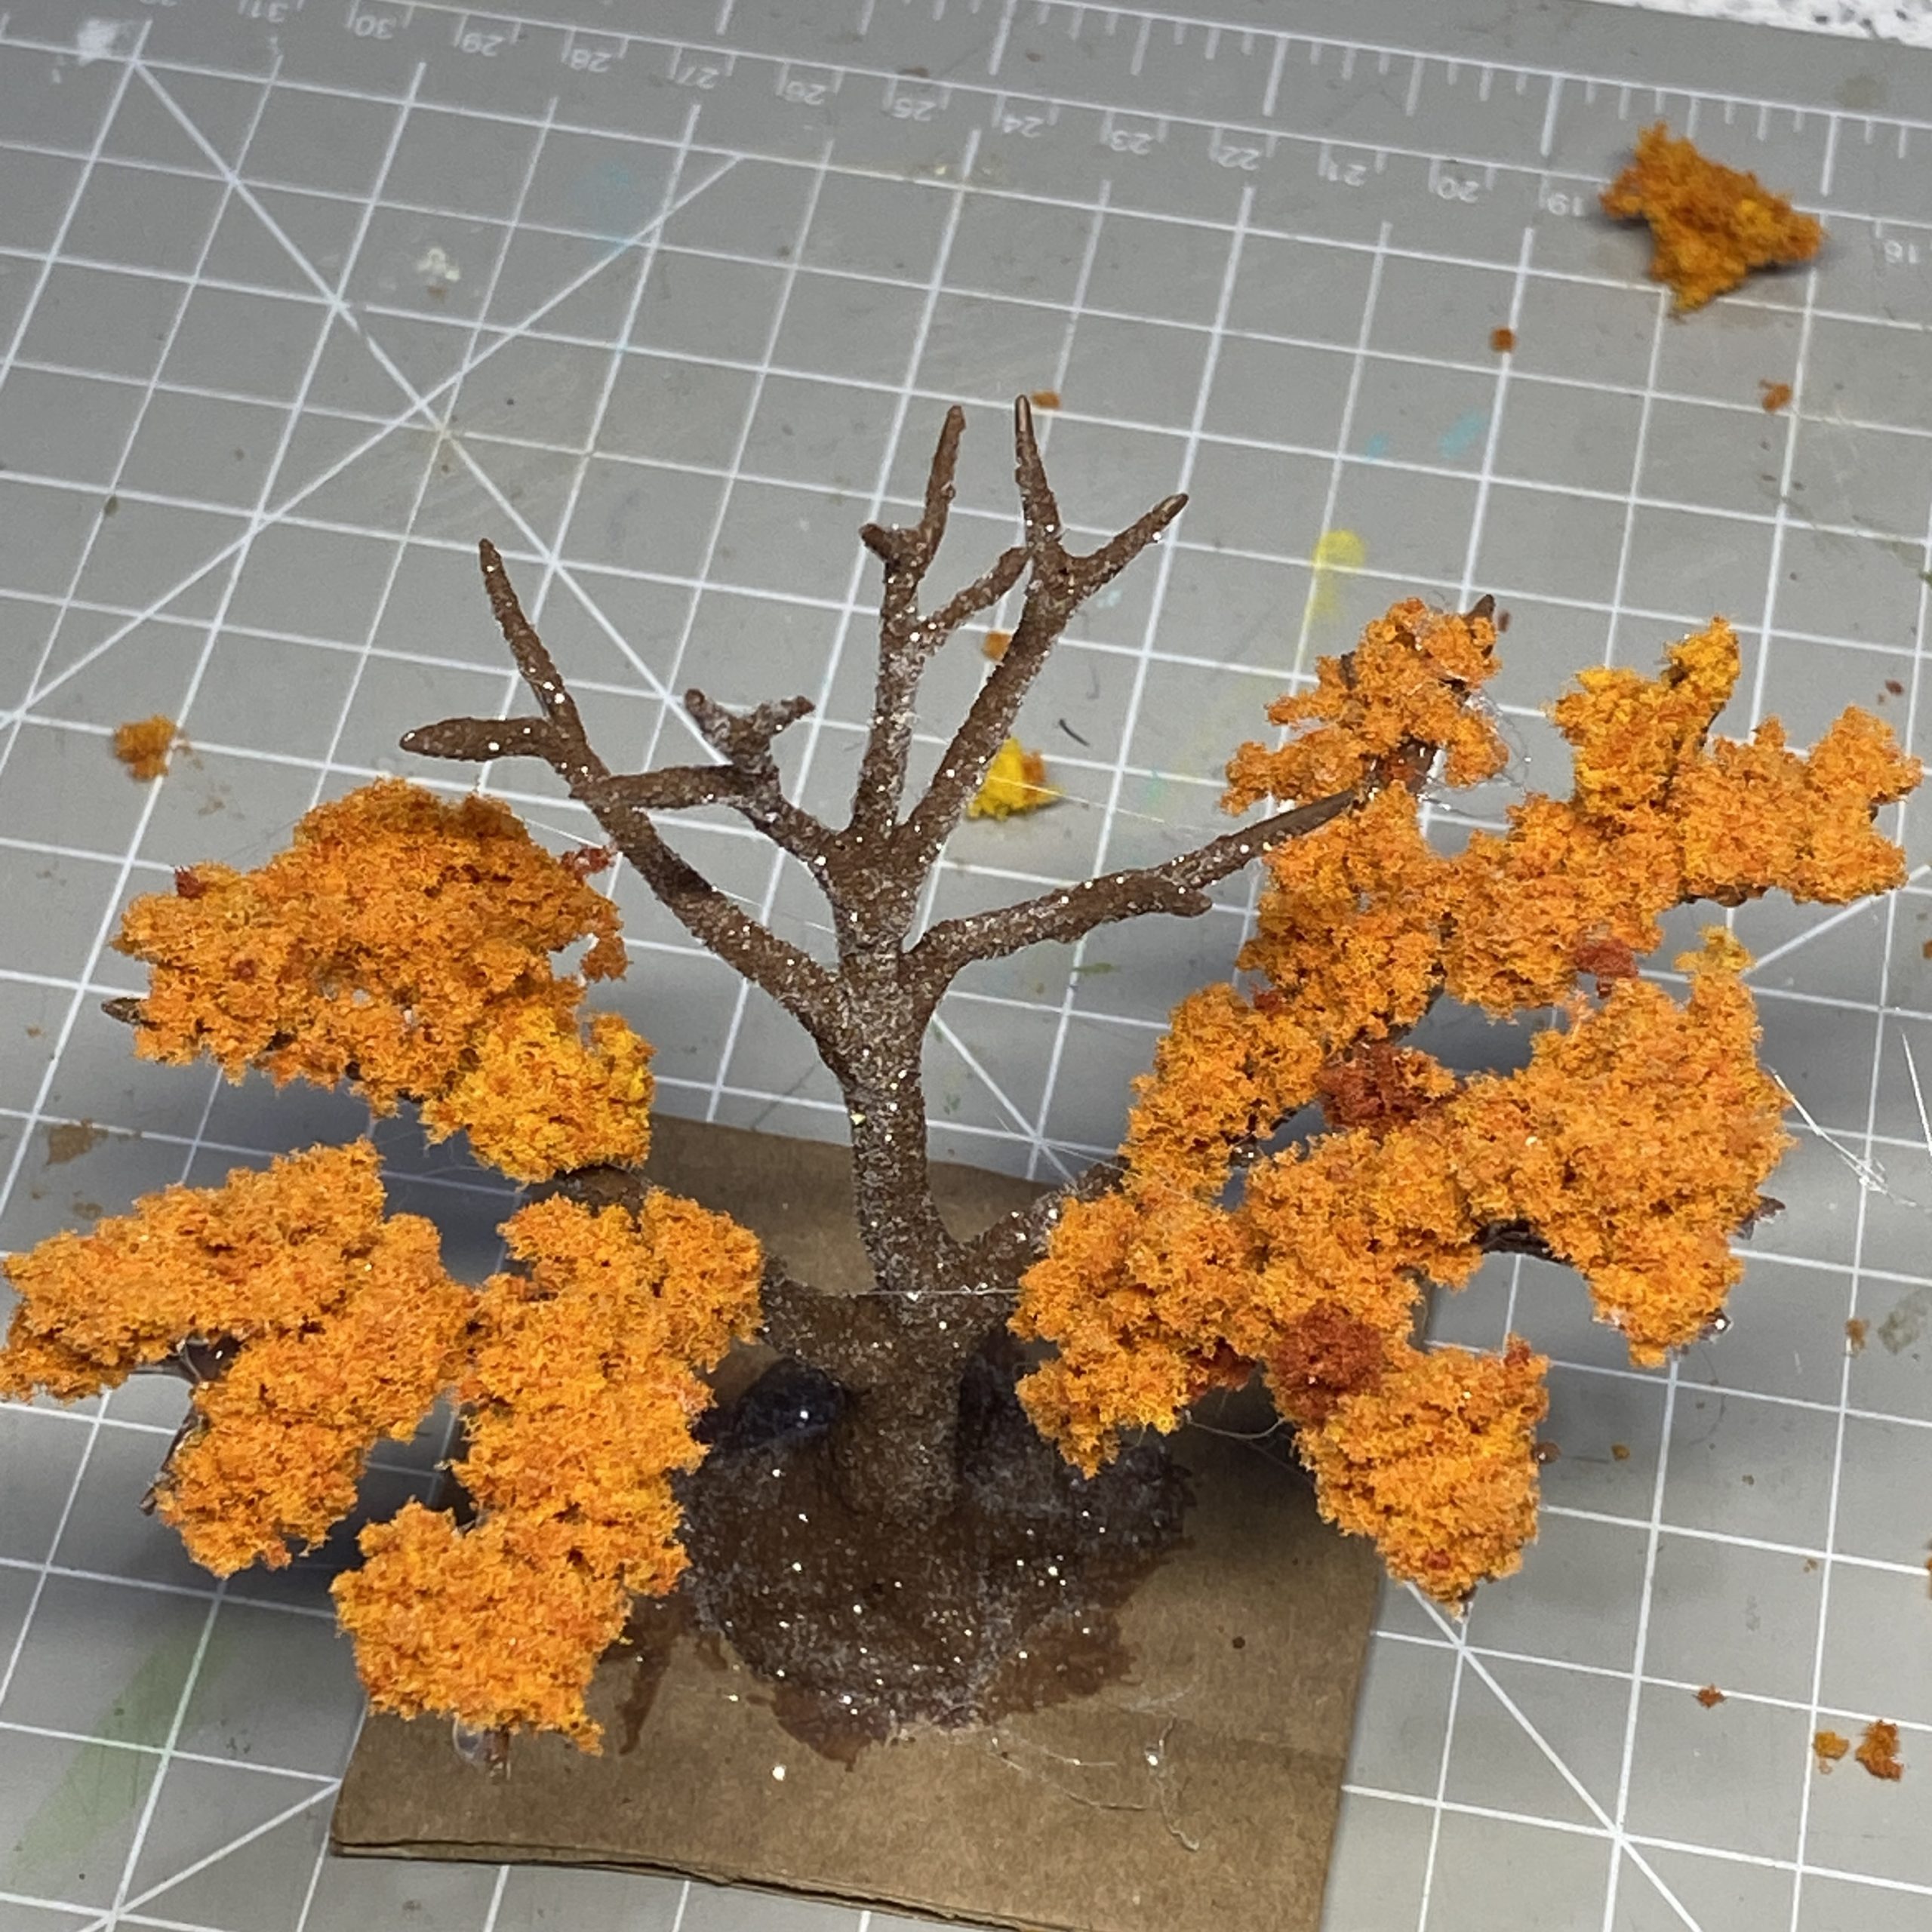
I start with larger bits of sponge clumps to begin at the bottom of the tree and work my way up. Choose the clump and have it ready before putting hot glue on the branch. It cools quickly while searching for the right size piece to use. Place glue only where it will be covered by the sponge. Finish the tops of all the branches.
The first photo below shows all the bottom tier branches covered with clump foliage. The second picture is the tree at the same stage and photographed from the side. It shows how the branches are bent to a more horizontal angle.
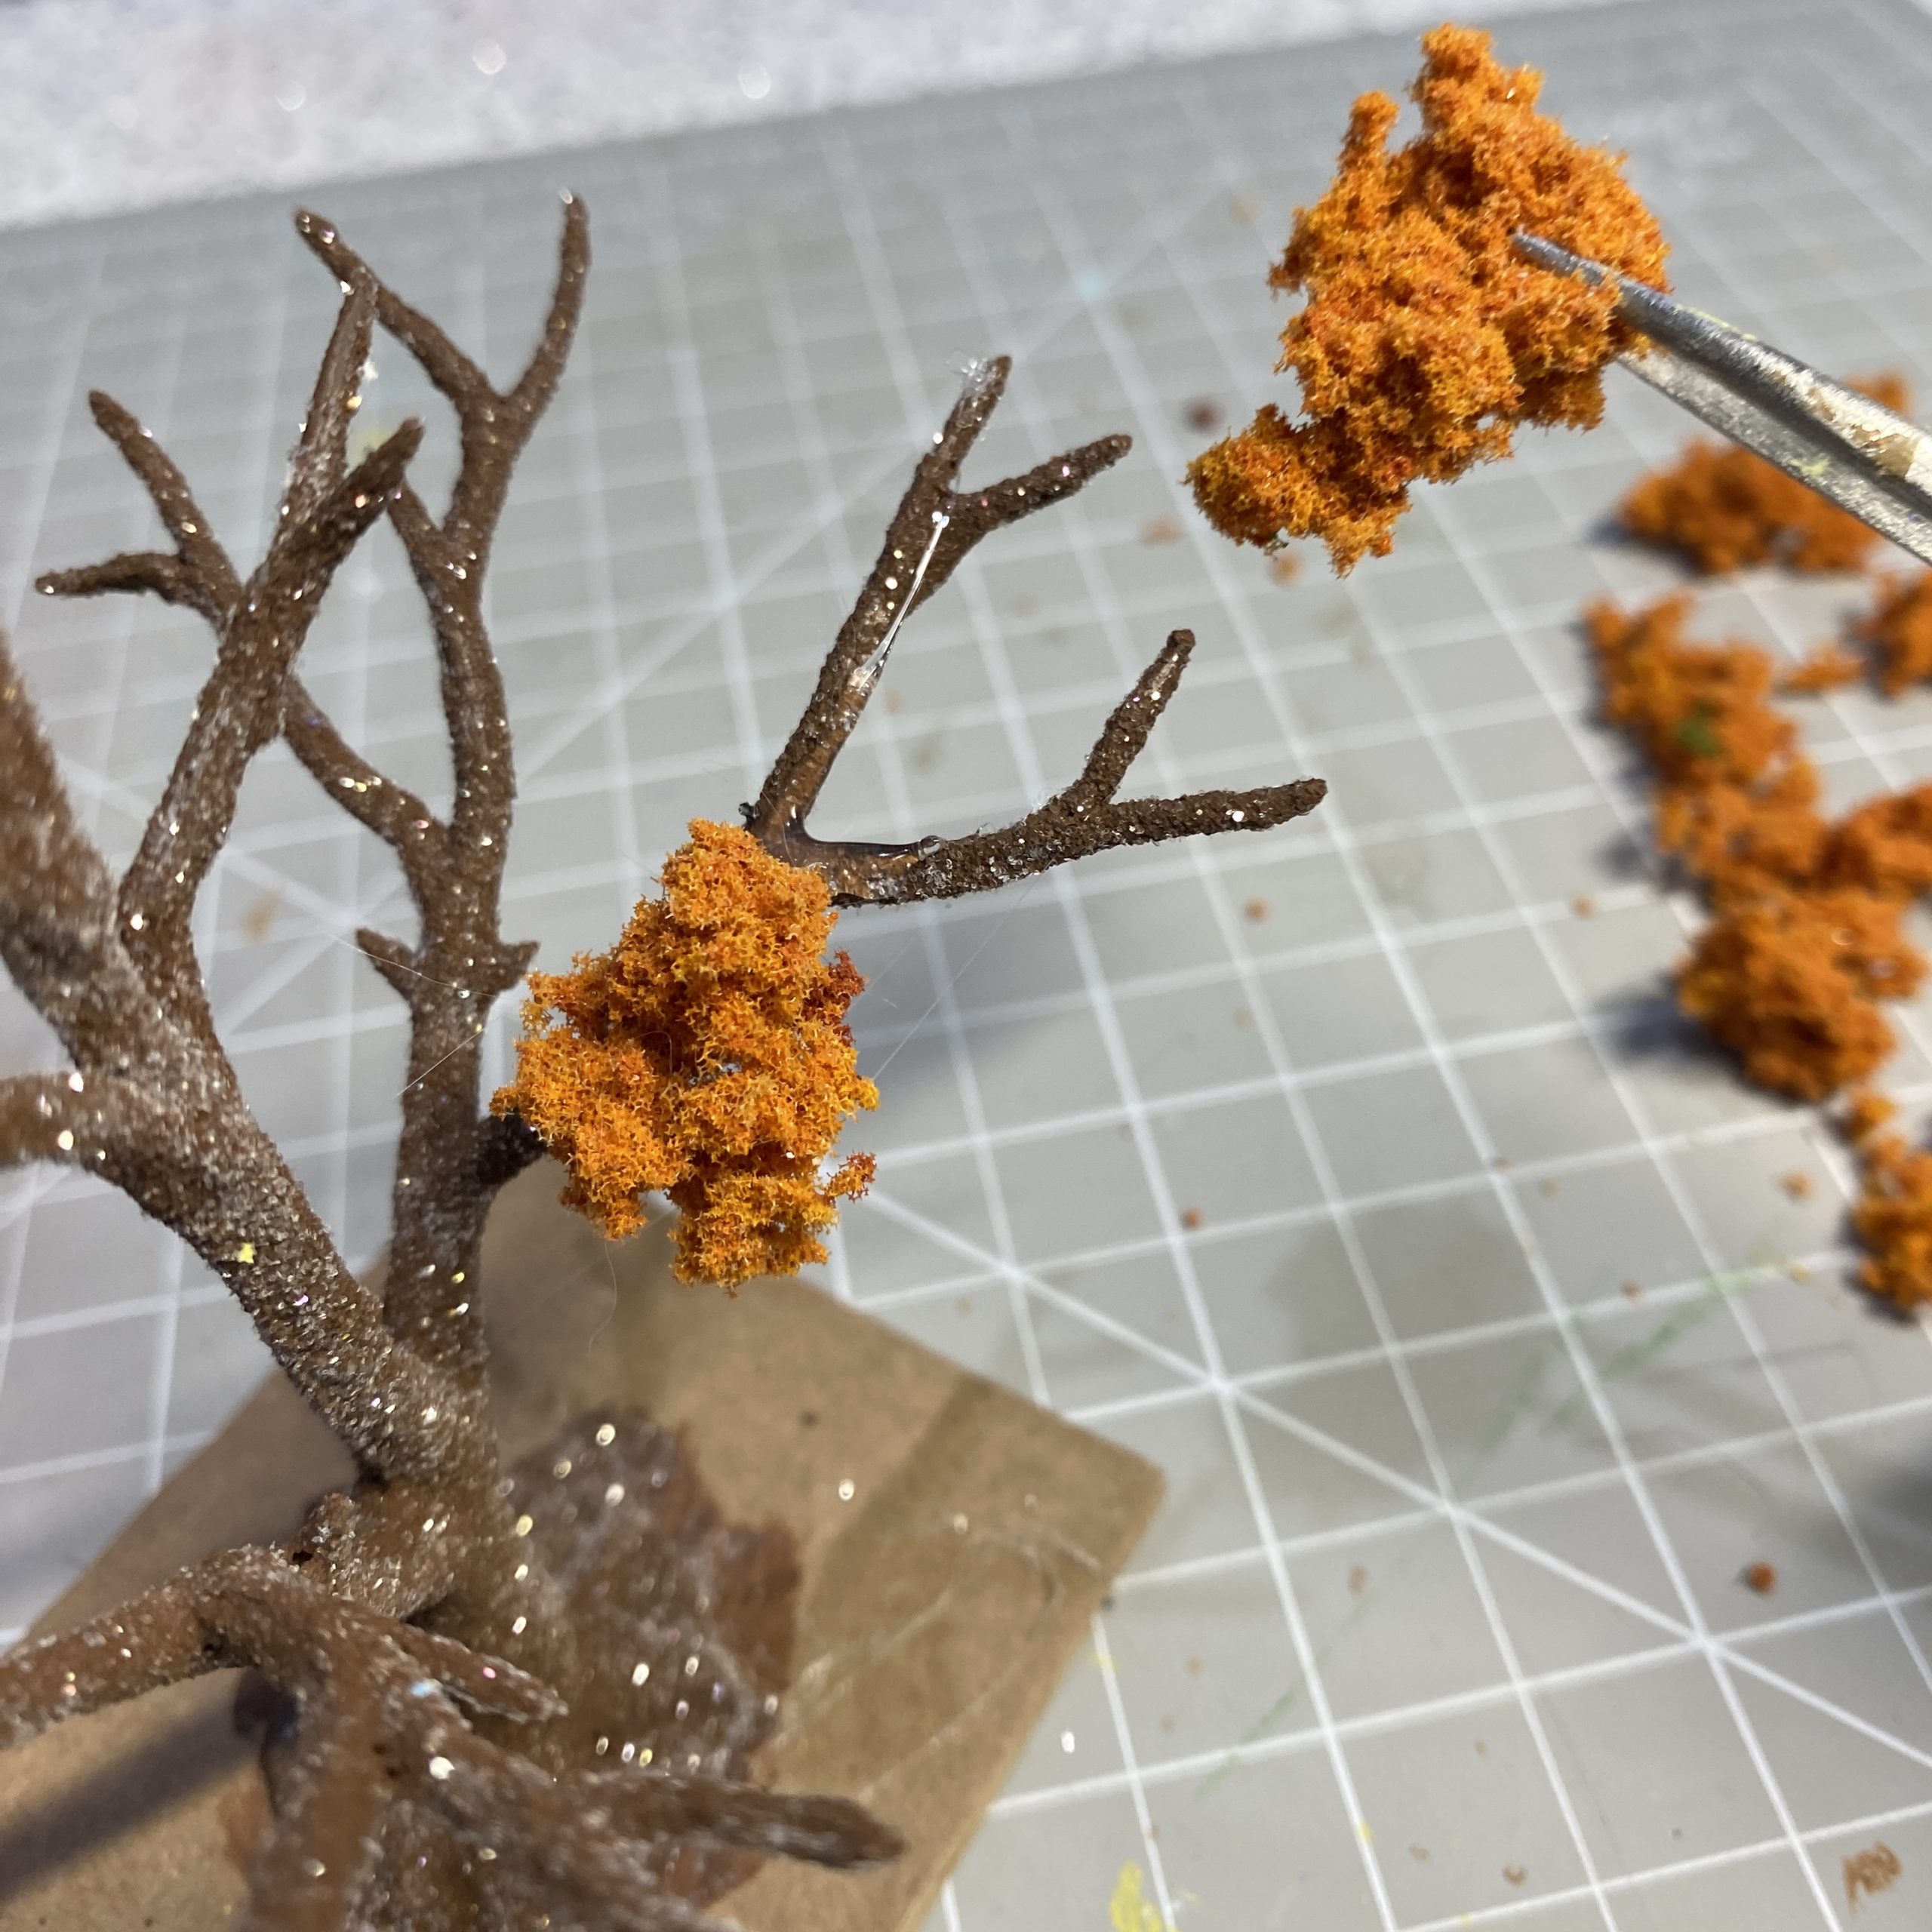
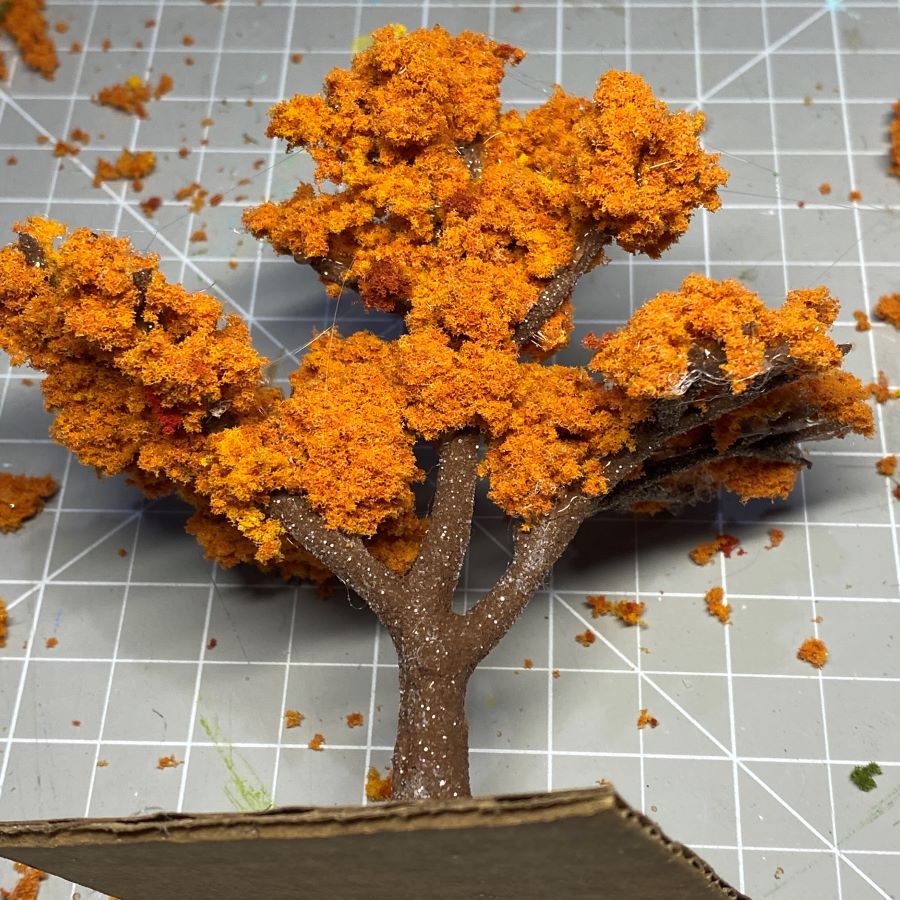
When starting on the top layer of branches, I like to glue clumps into the angle between branches. Then I cover the branches with smaller clumps.
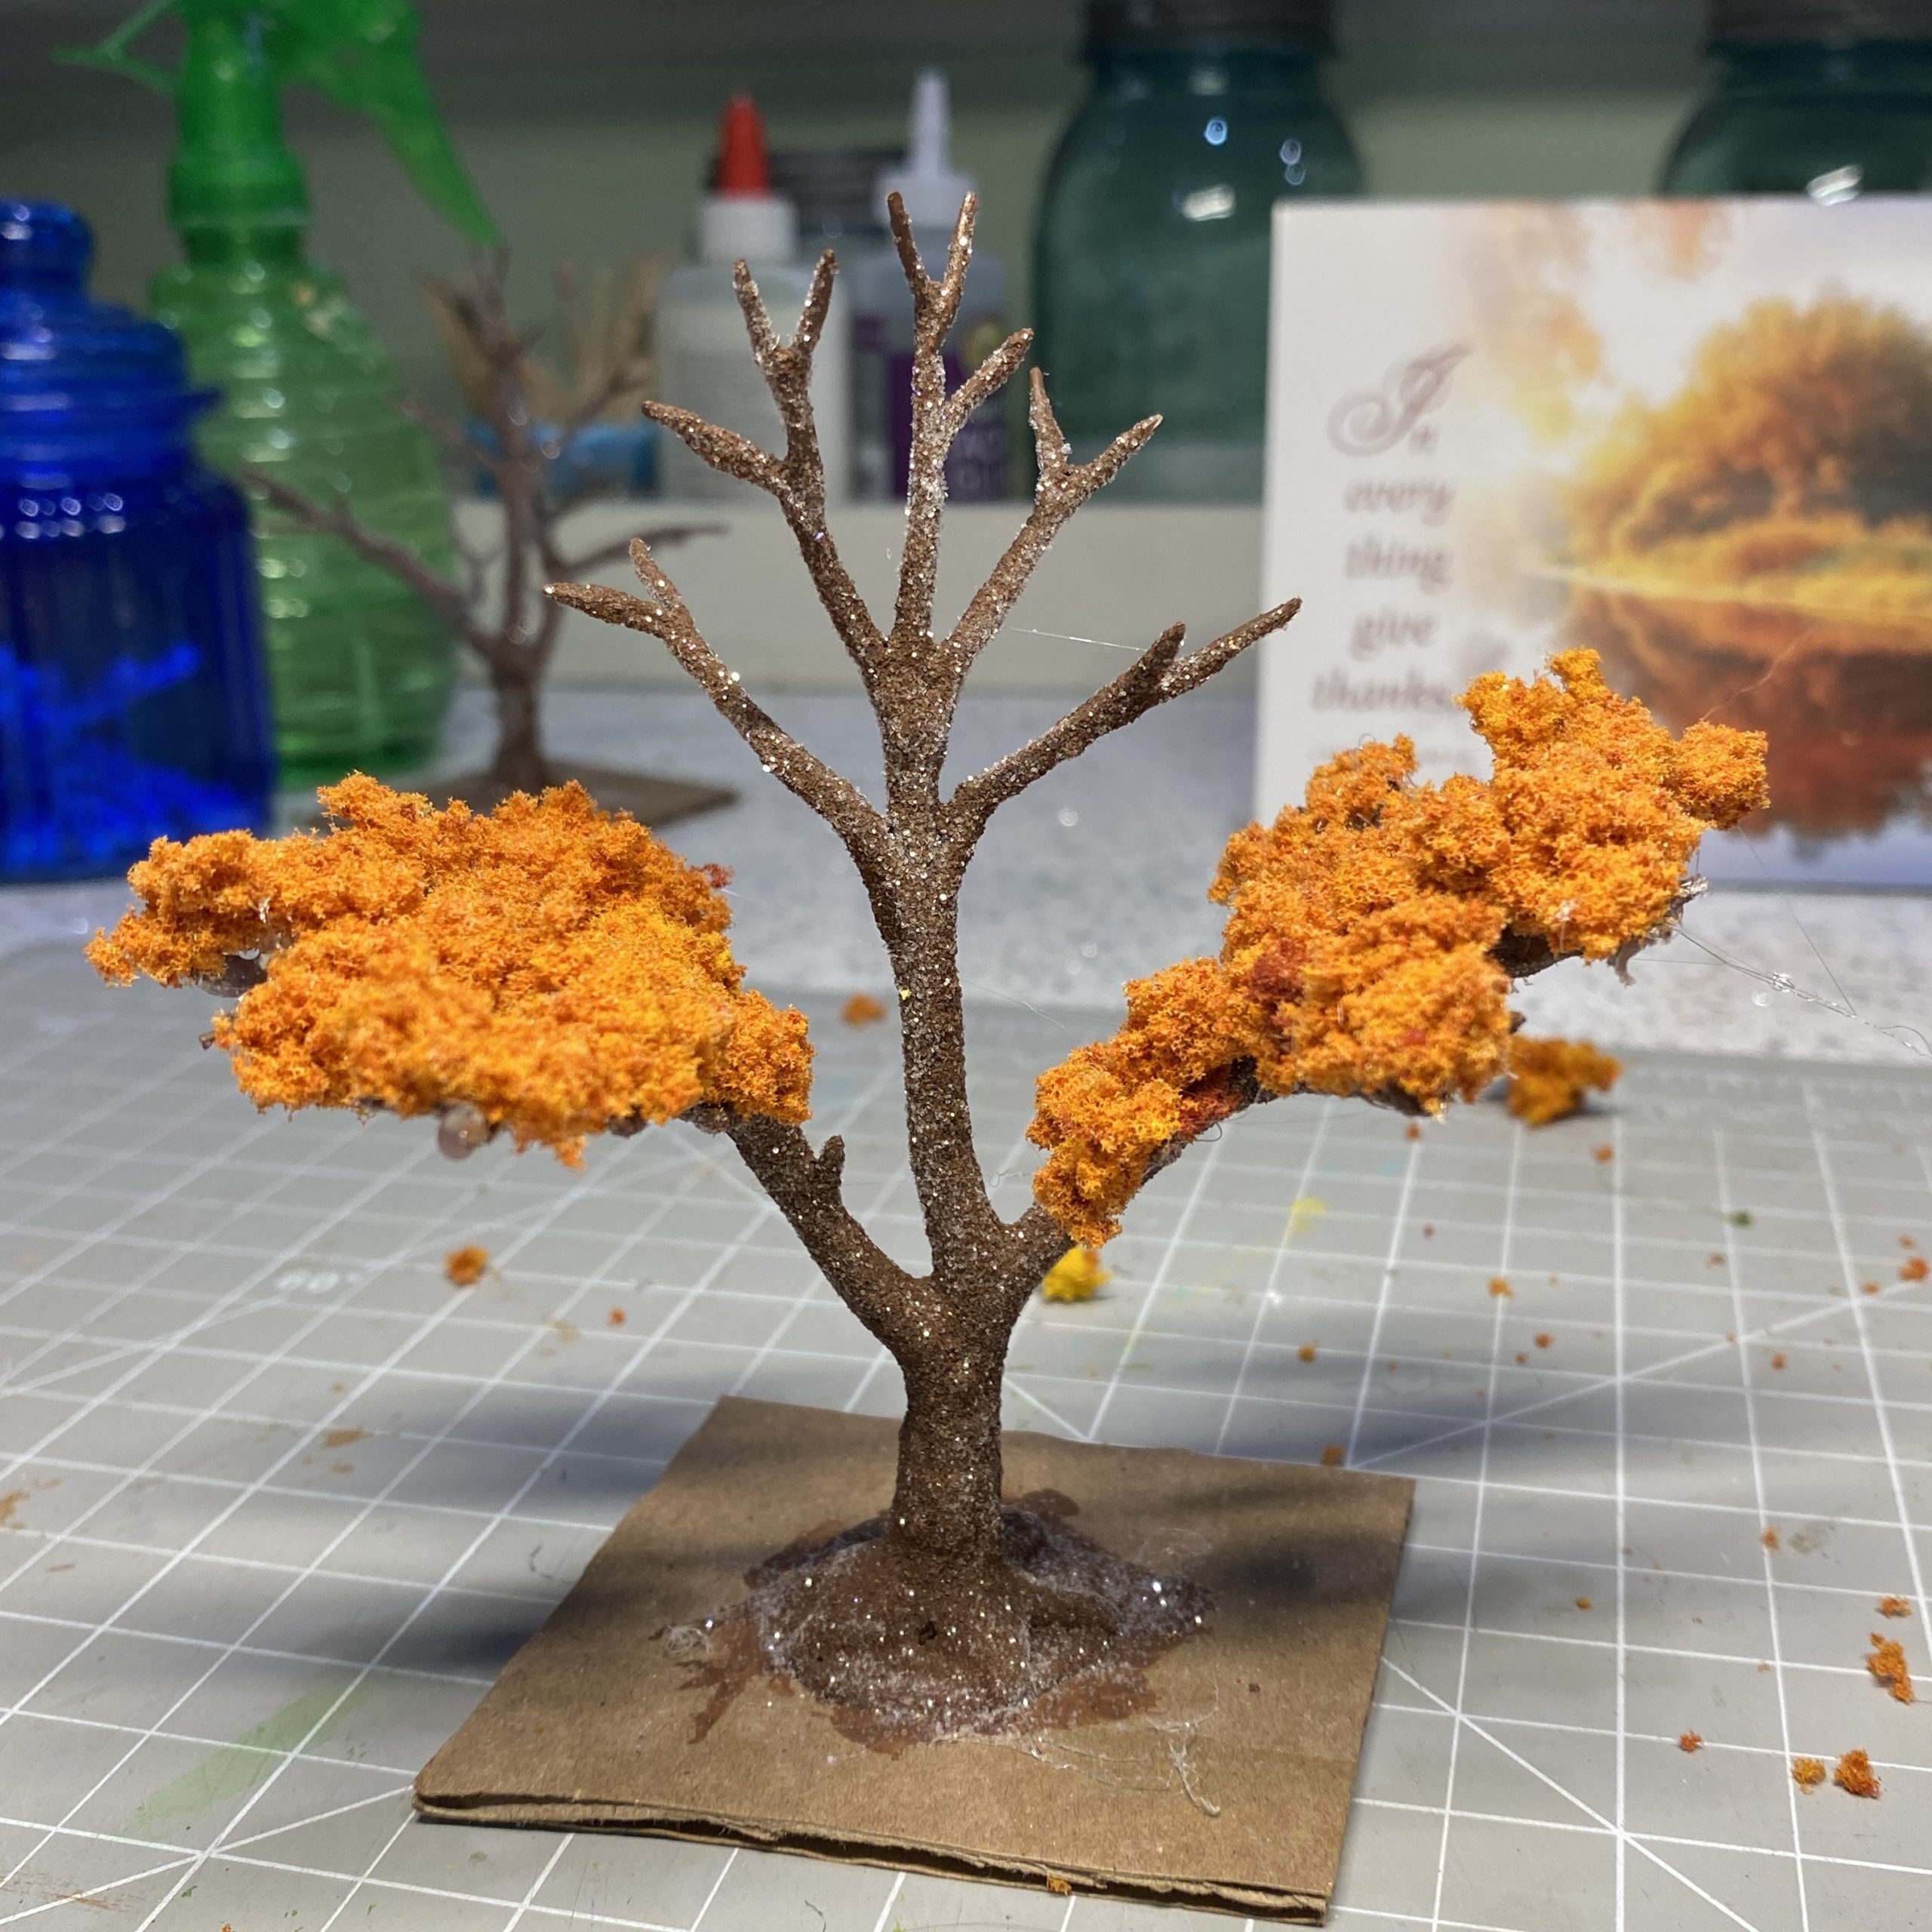
The next step is to cover the backs of the branches at the top of the tree. I use smaller clumps toward the top. The first picture shows the hot glue applied. The second picture shows the branches covered.
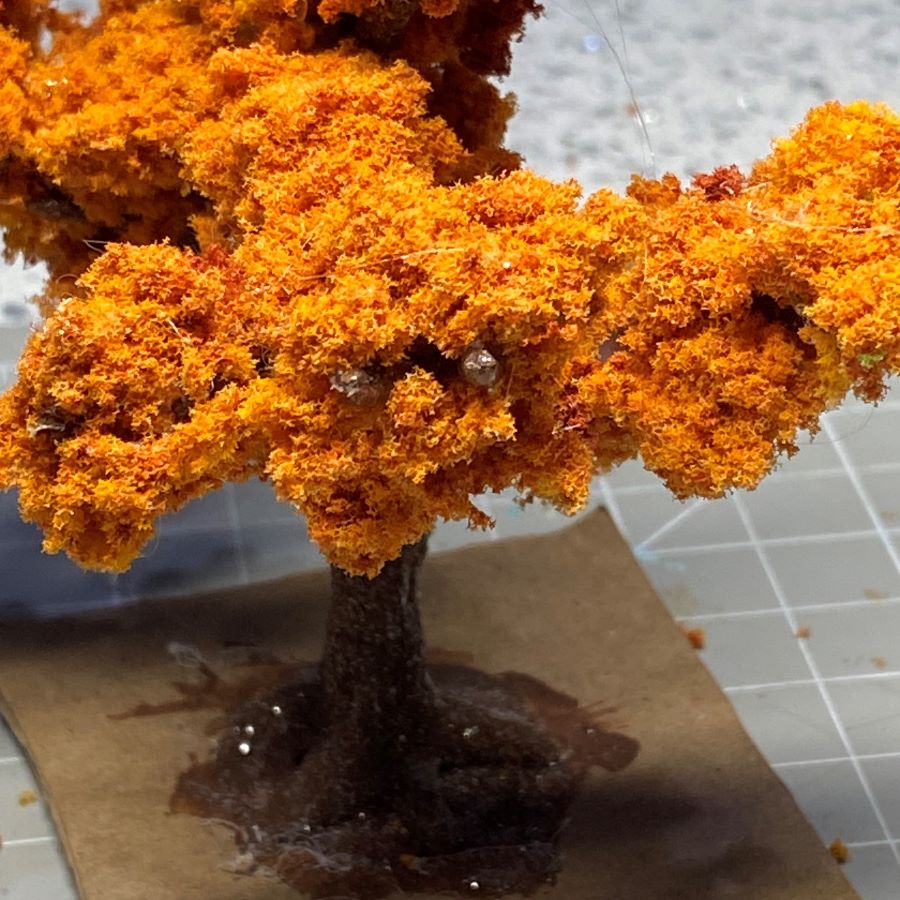
The next step is to fill in large gaps with large clumps. Place clumps between the branches above the place where the lower limbs join. I leave open space beneath the large clumps. The filler clumps will make the tree look fuller and will make a connection between the lower branches and the top of the tree. When that is done, cover the bottoms of the branches. With the clumps already glued to the top the branches, you will make a clump, branch, clump sandwich. I use medium to small clumps to cover the bottoms of the branches. That helps keep the tree from looking overloaded.
Turn the tree and look for places that need a clump to fill gaps. Clumps can be glued directly to other clumps or to exposed branches.
When you like the way the tree looks as a whole, look for little things that need tweaking. I put a little dab of hot glue on the ends of any branches that are visible. The ends of the branch can be seen in the first picture. In the second picture, I have covered them with a small bit of sponge.
Look for exposed, hardened clumps of glue. Cover them with sponge. Sometimes the clump of glue can be pressed with the hot glue gun nozzle to melt it a bit. Quickly press a small clump onto the glue. If it doesn’t stick, add a drop of hot glue and cover it.
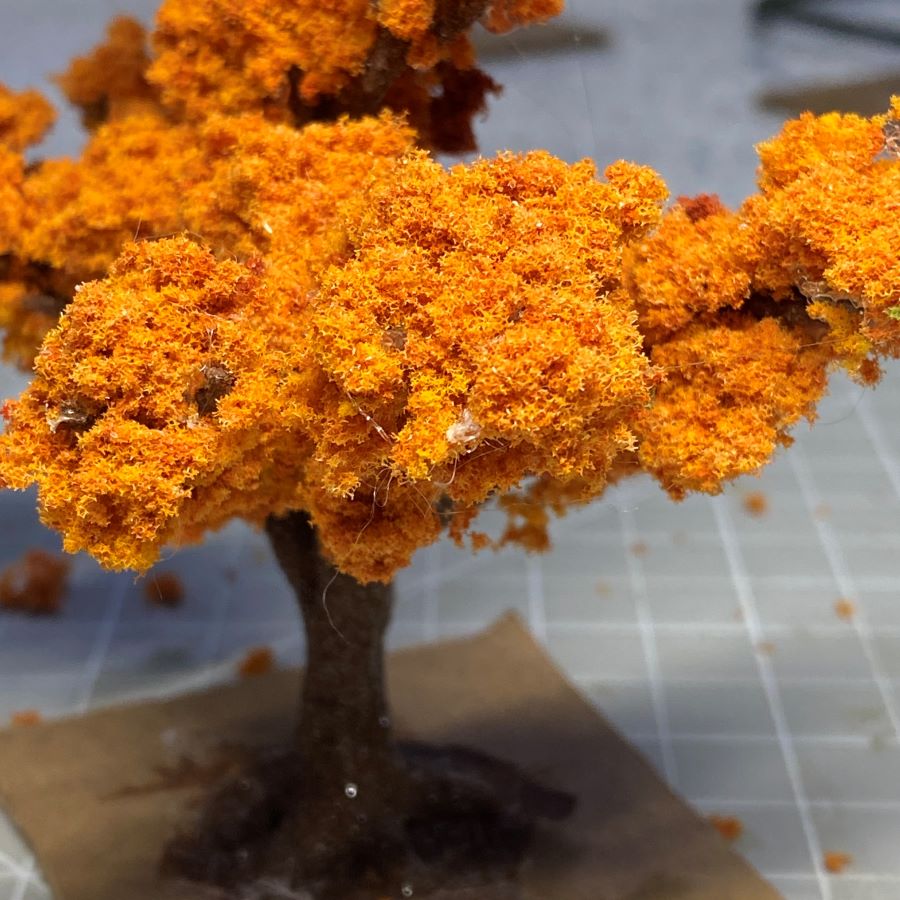
Look for dried clumps of glue and hot glue strings. To find small bits of glue, I use my phone camera to zoom in tight. It shows me things I wouldn’t notice otherwise. To find strings of hot glue, I hold the tree close to my desk lamp and turn the tree so the light catches the strings. You will be surprised how many you find. I use the needle-nosed tweezers to pull these off the tree.
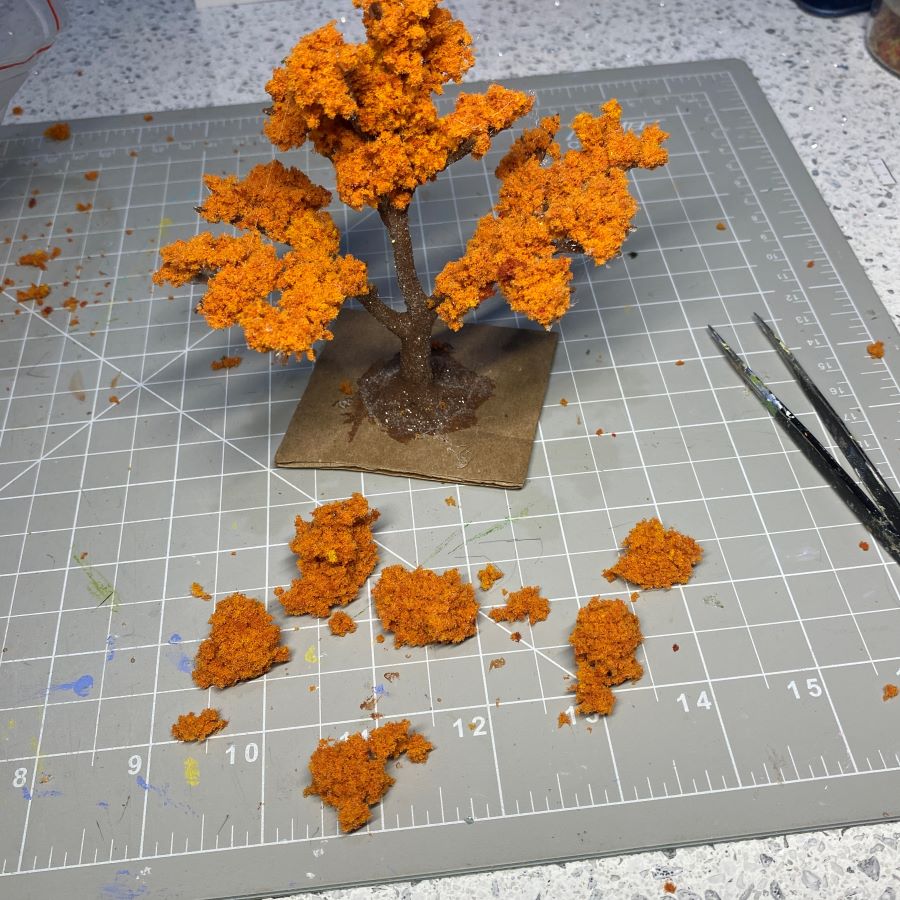
Using sponge can make a mess on the desk top. I keep a Dustbuster handy and use it several times during the process to pick up the bits and bobs.
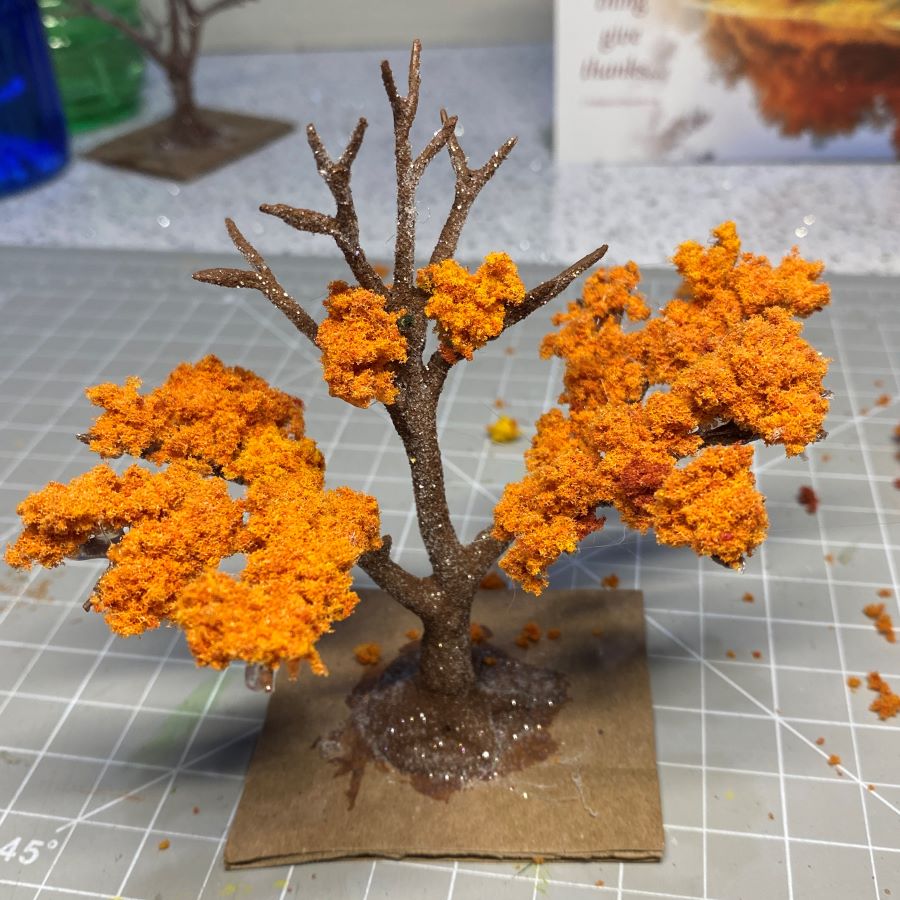
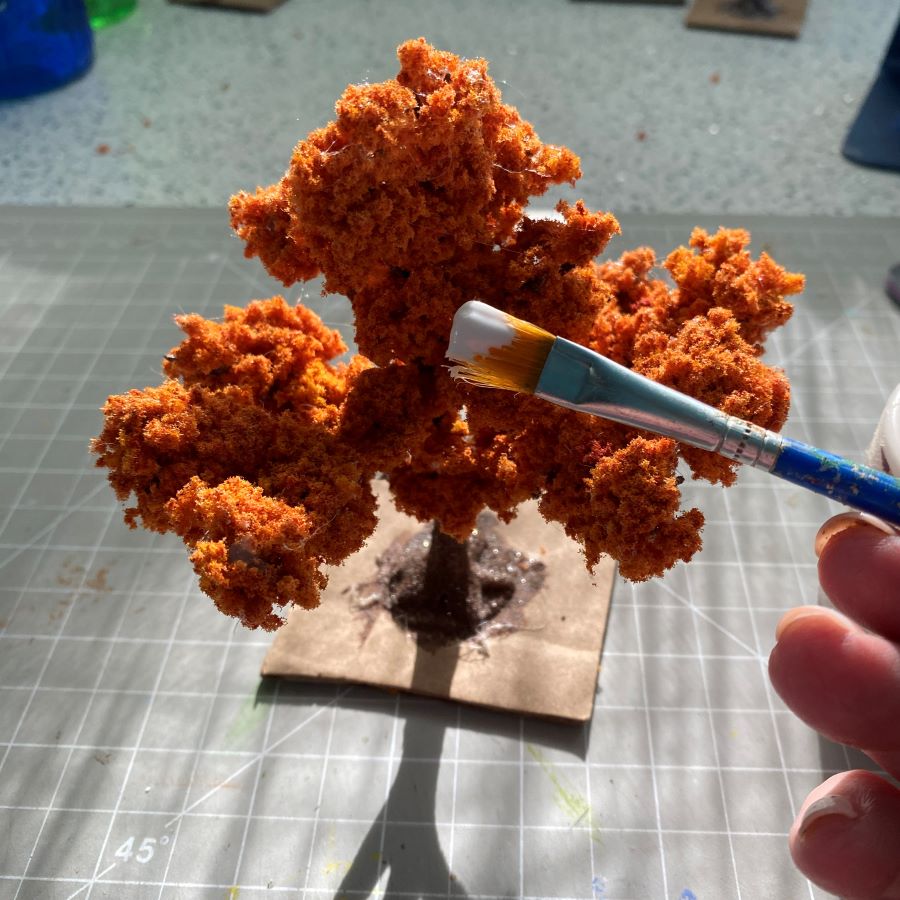
The last step is to add the leaf litter. I mixed red, orange and yellow for this tree.
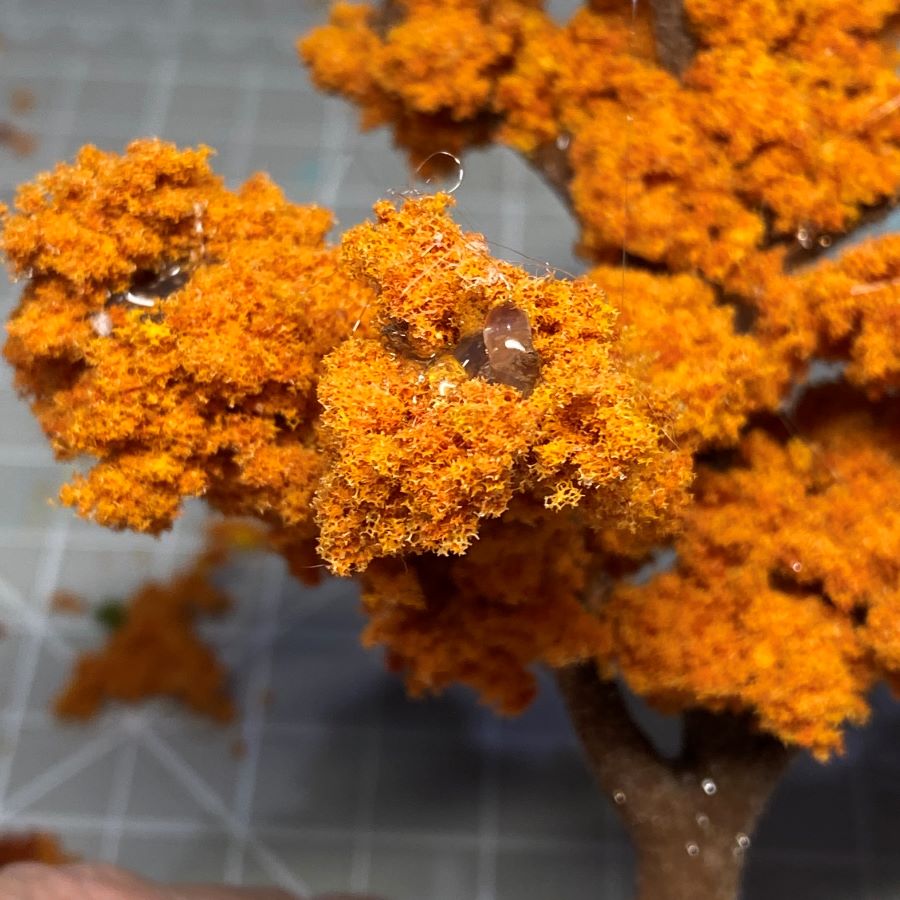
I use clear tacky glue for applying the leaves, but am using white, tacky glue here, so it’s easier for you to see what I’m doing. I use a small paintbrush and dab on the glue. It doesn’t need to be spread out.
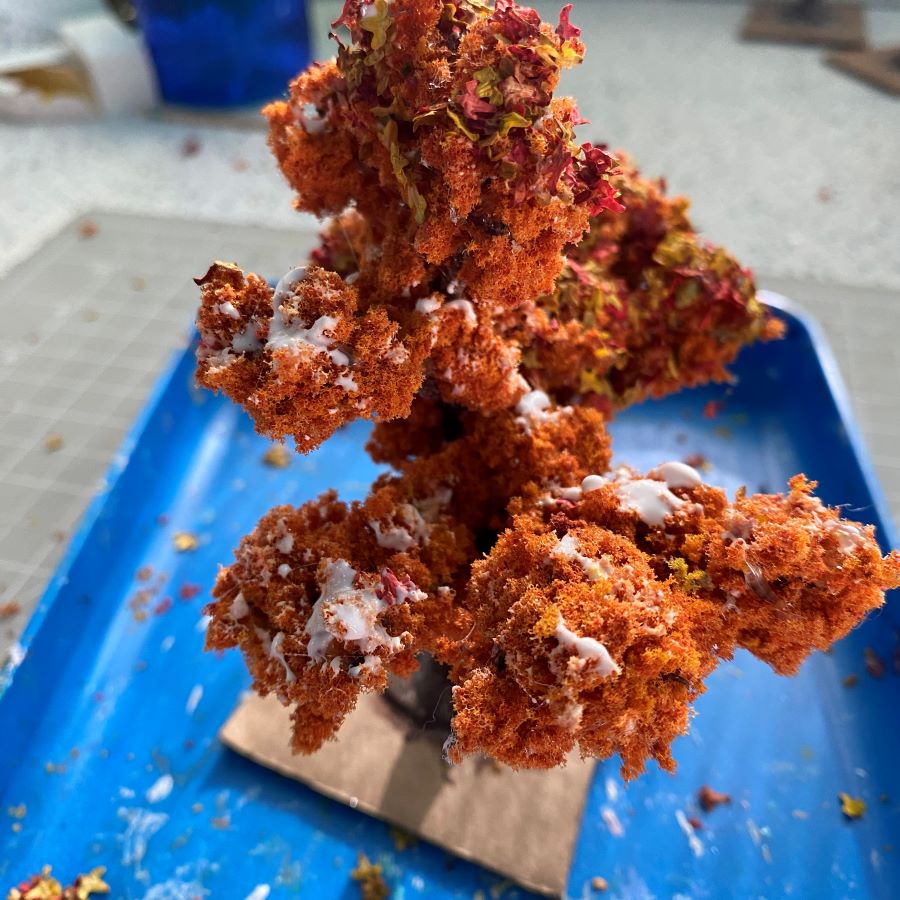
Pour the leaves over the glue. Gently press them into the glue with your finger. Shake the tree to remove loose leaves. I shake the tree over my glitter tray, but a piece of paper works fine.
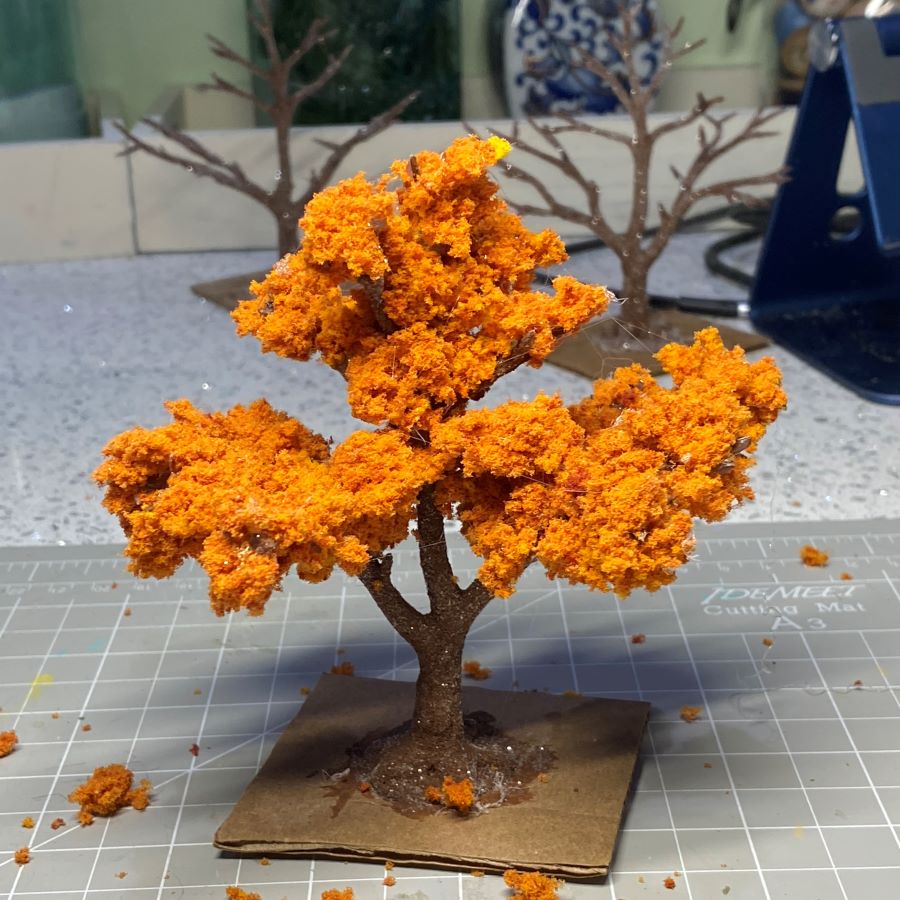
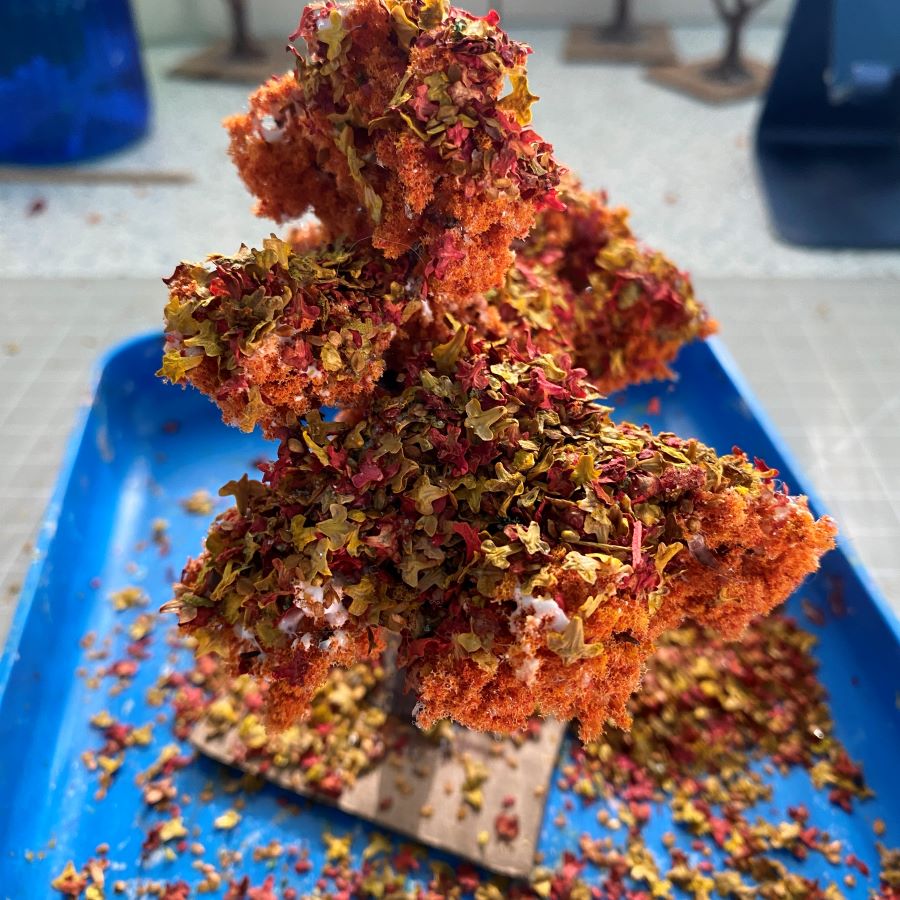
Finish the rest of the limbs. I don’t do the bottoms of the branches, but it’s fine if you want to do that. Check the tree for dangling leaves that didn’t stick. Look over the tree for any wet glue that needs to be covered with a few leaves. Looking at the tree below, left, I realized I had missed leafing the middle branch near the trunk. I fixed that and now the tree is ready to be removed from the cardboard for use with an autumn putz house. To remove the tree, I slide a palette knife under the roots. It pops right off.
If you have any questions about the process of making an autumn tree, please ask!
If you would like to see more of my Putz houses, as well as Christmas ornaments I have made from upcycled holiday cards, please visit my Etsy shop.
If you are interested in crafting Putz houses of your own, check out my Putz tutorials for more information. Putz House Tutorials
I am always happy to answer questions about the process. Please ask, if you are wondering about the details of putzing!
All proceeds from my Etsy shop benefit Kenya Mercy Ministries. They work with the urban poor of Nairobi, Kenya, particularly the children and their families who live in Kibera, the largest slum in Africa. Thank you for your part in helping these children when you purchase items from my shop!
Part 1 explained how I use wired tree armatures to make the trunk and branches for Putz house trees. I also make trees from the stems of flowers I use for embellishing Putz houses. That’s a future tutorial.
In Part 2, I will show how I add leaves to summer trees. There are many ways to do this. If you google “trees for model railways,” you will find many videos on making model trees. The process in this post is the way I craft summer trees. I encourage you to take a look at other methods, as well as this one, and find the way that suits your own crafting style.
To make an armature tree, you will need these supplies, also listed in Part 1 of this tutorial.
leaf litter / Just green leaves are available, but the other colors are great for autumn trees. These tiny leaves are the scales that protect seeds in a birch tree catkin. If you have a silver birch, you can make your own. I don’t know if all birch trees make the same kind of seed pod. Making Miniature Leaves from Birch Seed Pods
clear tacky glue, or white that dries clear
When I craft a building, embellishment or a tree for putzing, I aim for the “impression” of the item, rather than an exact copy. I have learned it doesn’t have to be exact to be a creative and joyful object. Does it look like a tree without being an exact copy? Yes? We’re good to go! I’m not saying exact copies don’t express someone else’s creative abilities. There are many amazing artists online who make miniature, exact copies of buildings and natural features. You may be one of them. I am astounded when I see what they are creating. I subscribe to some of their feeds and have learned a lot from them. There’s room for everyone’s individual style. My style leans to the impressionistic side. Find your own style by crafting and crafting and crafting. Your personal likes and dislikes will guide you to a form or style that suits you.
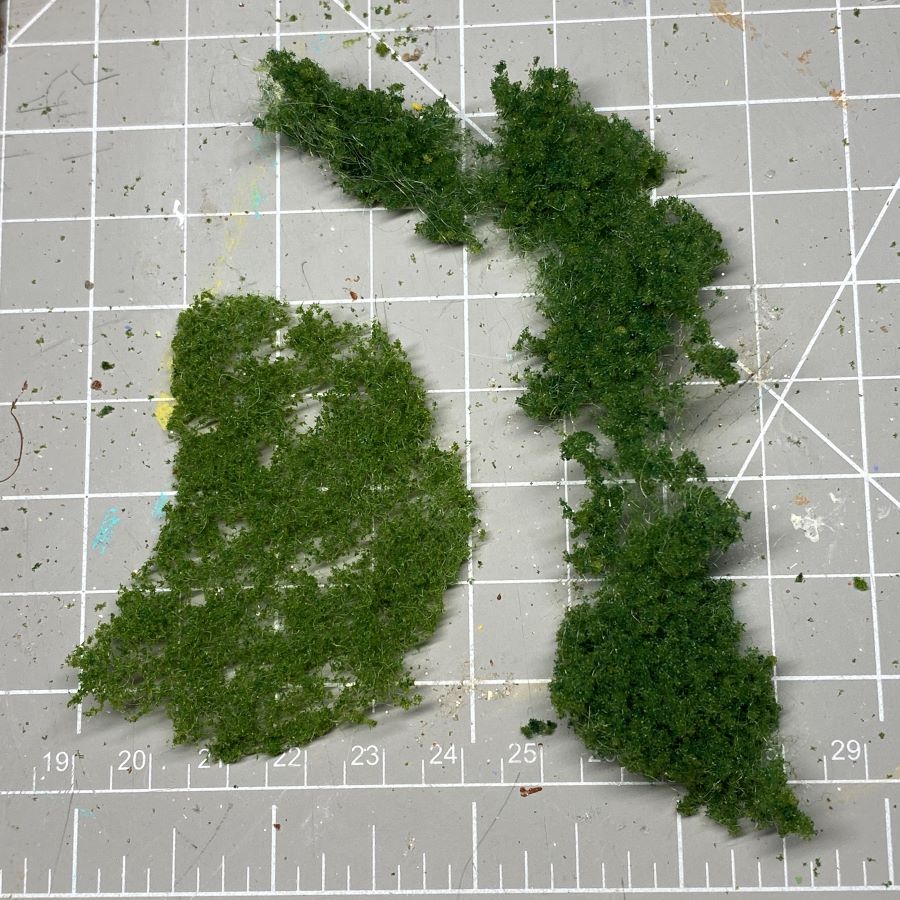
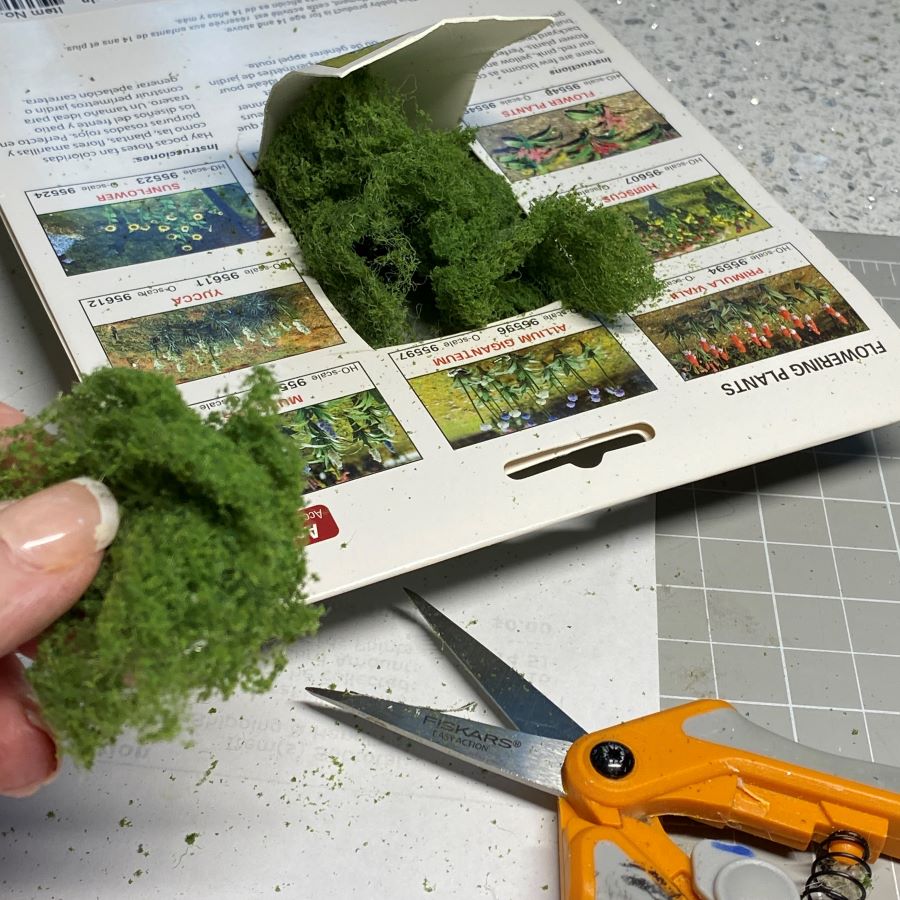
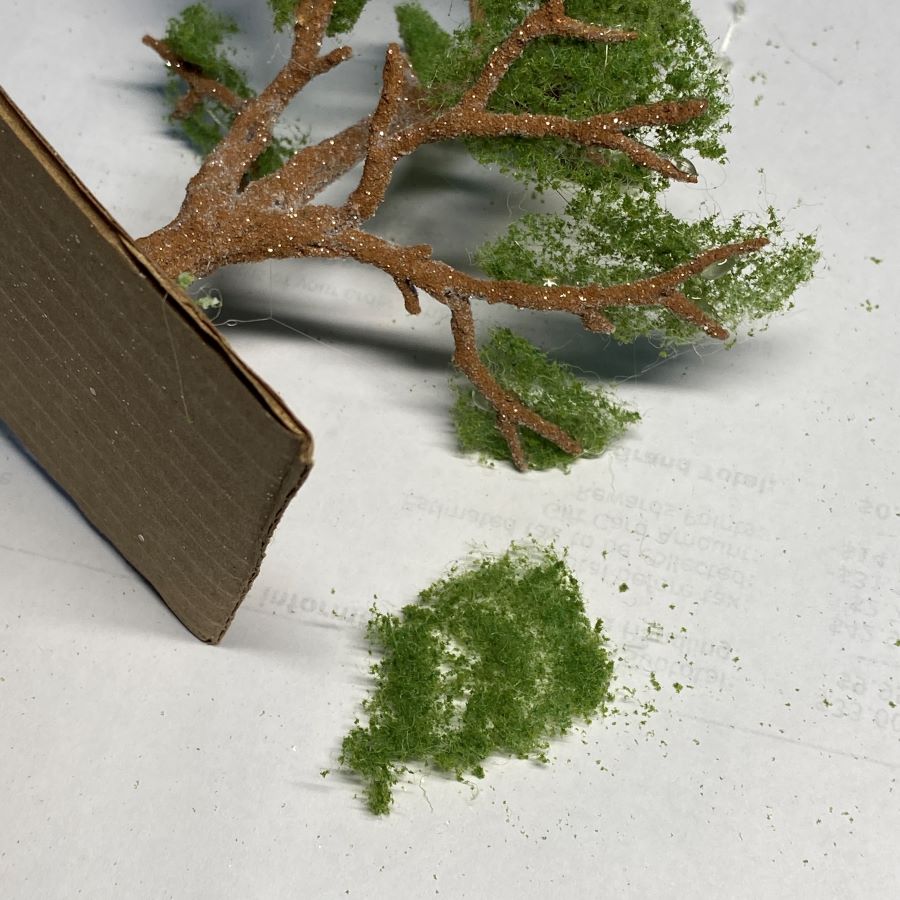
I use this landscaping material for summer trees. I get it on Amazon, but it is available in hobby stores and online. It is used for model railway layouts. I have two kinds of landscaping material. This one is made of tiny bits of green material held together with very fine filament.
The product number for the kind I use, is 95064. The other package in the first picture below contains a different material made from sponge. It can’t be stretched over the branches. In the second picture below, the one on the right is made of clumps of sponge material. The sponge material can be pulled apart by hand. It’s great for making shrubs.
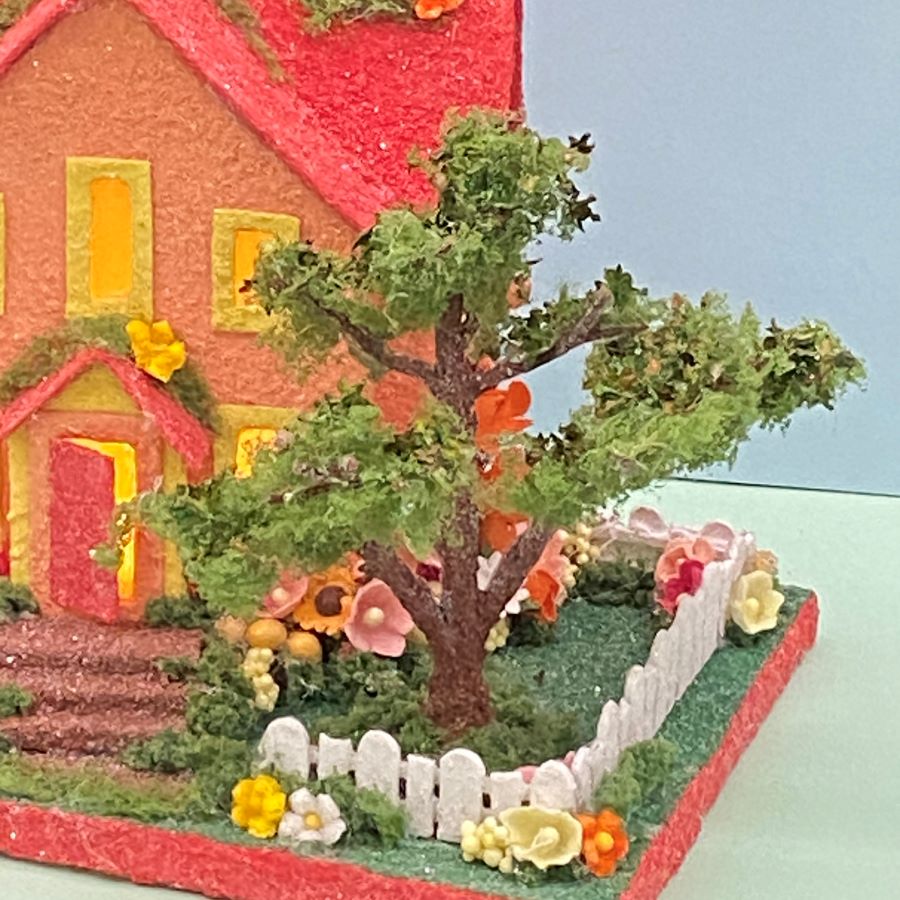
Sponge examples / The first example below shows sponge “shrubs” along the back of an autumn house. In the second picture, they are used along the side of a church. I think they make great shrubs. They are easy to pull apart into different shapes and sizes. I do use the sponge for making autumn trees because I haven’t found the stretchy kind in autumn colors. I’ll write a tutorial for autumn trees soon.
I cut a flap on the back of the box. As I work, I can pull out as much foliage material as I need, cutting it from the rest with scissors. This way, I can store the extra material in its packaging. Do not try to pull pieces of this product apart by hand. That exposes the tiny fibers that hold it together and causes extra trimming as you work. The cut piece from the package may be folded on itself. Open it up so it is one layer.
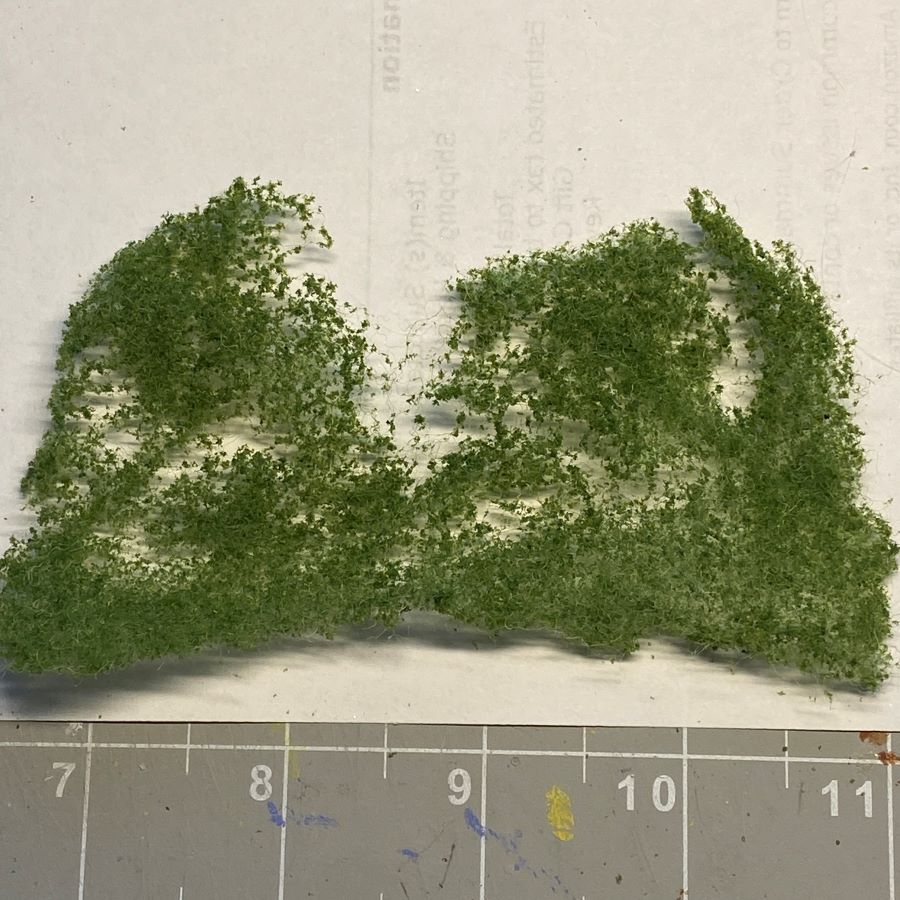
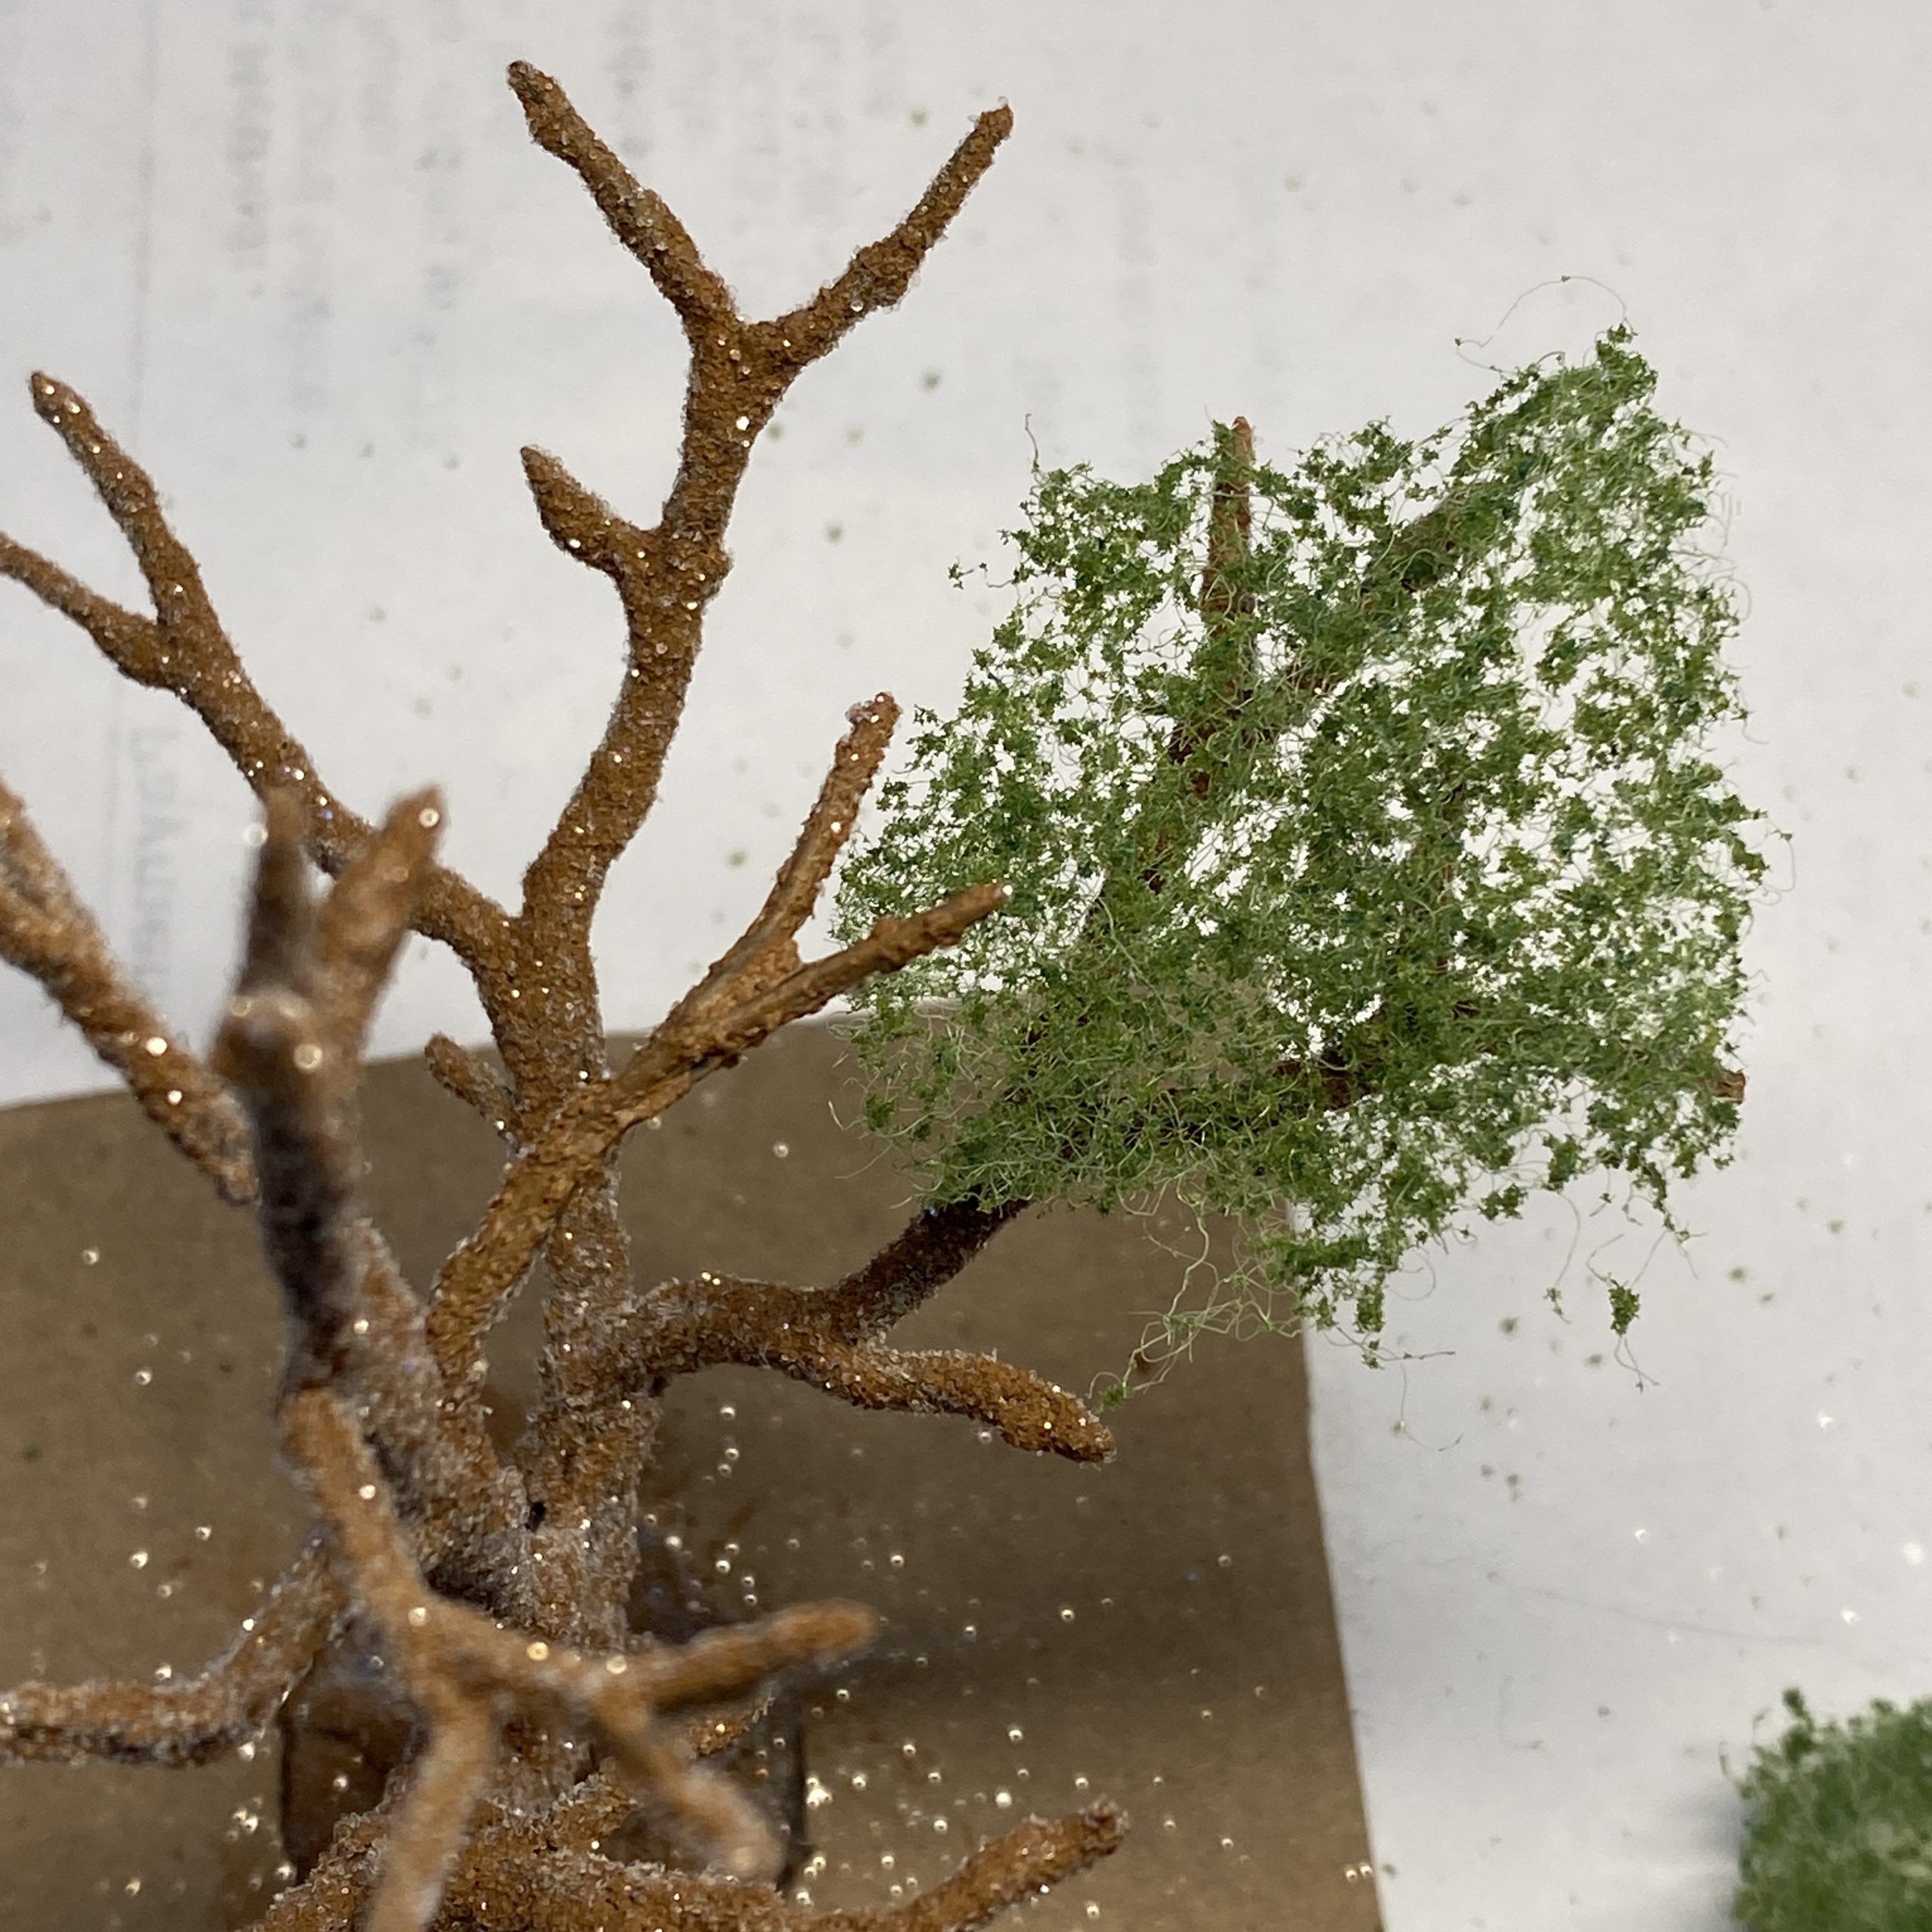
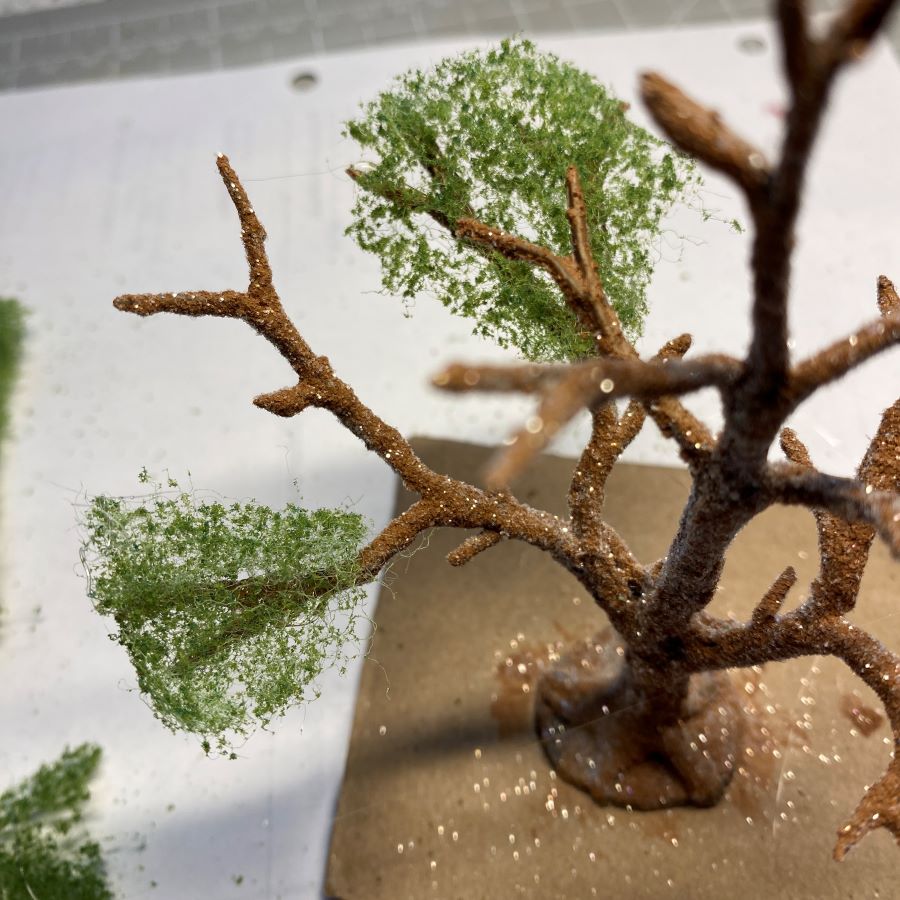
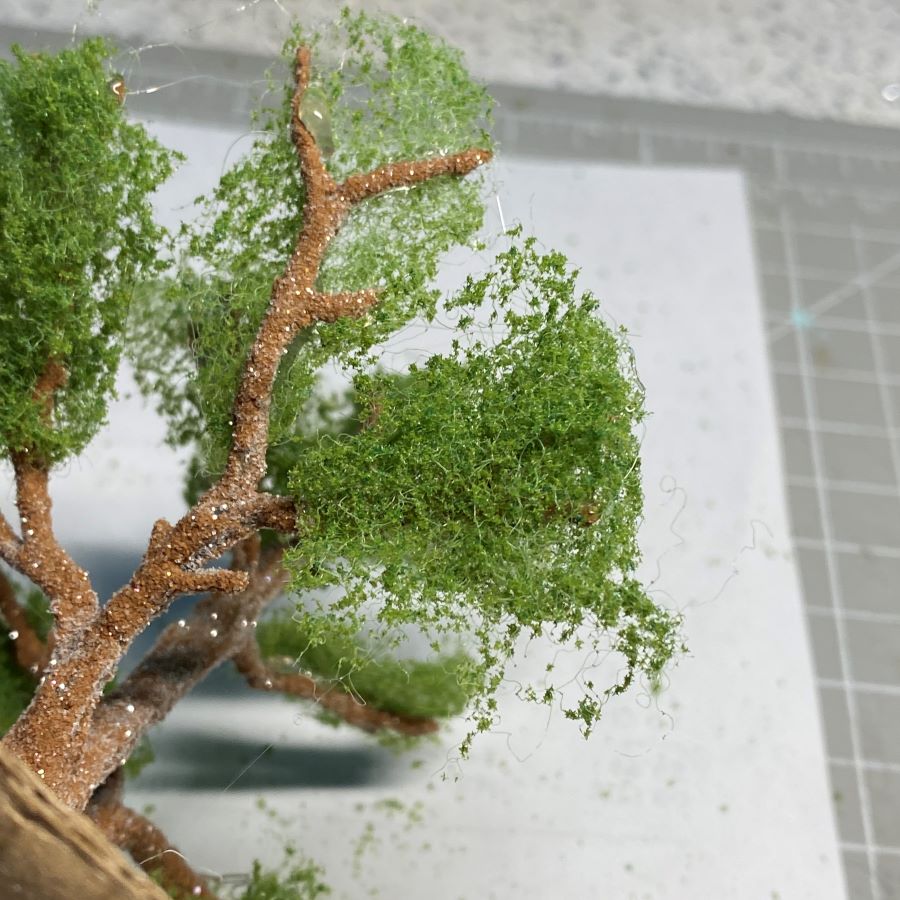
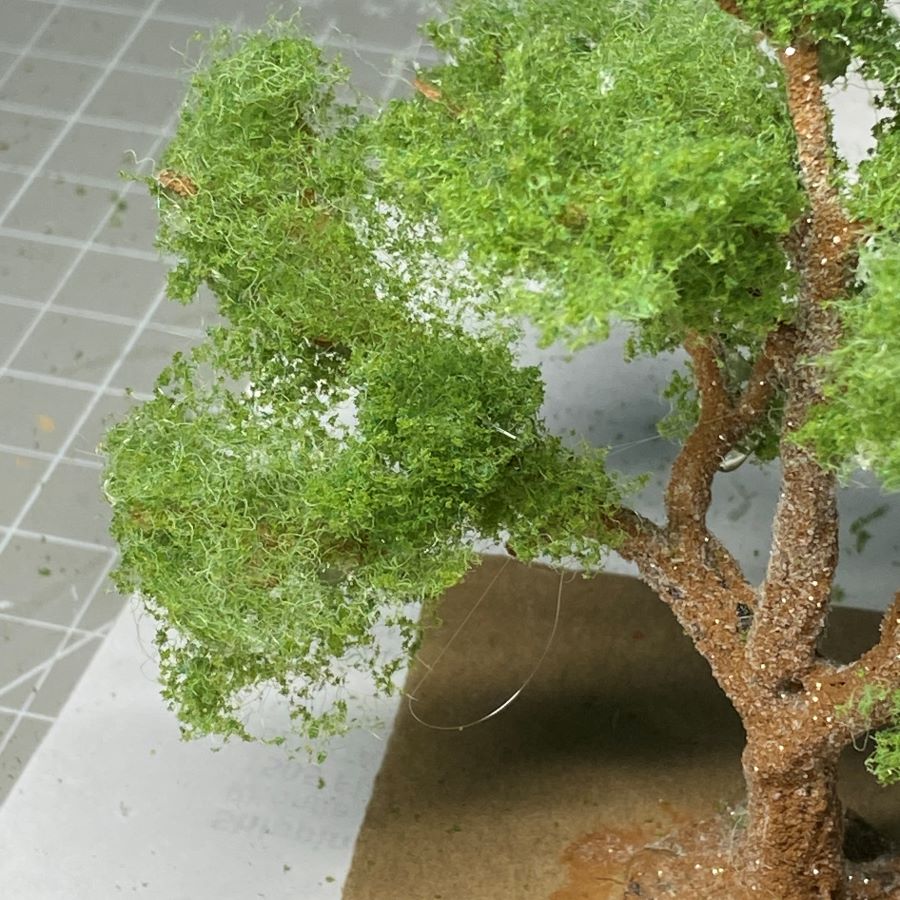
Cut some small shapes. Triangles fit well on the branches. After cutting them, stretch them in different directions to make the material thinner. Check the piece of foliage against the branch to be covered. If it doesn’t fit as it should, it can be bunched up to make it smaller, trimmed with scissors, or stretched a bit to make it larger. It should extend past the tip of the branch. Put hot glue on the part of the branch to be covered. It doesn’t take a lot. I apply foliage by starting at the bottom branches and working my way upto the top of the tree. Cover the tops of the branches before applying foliage to the bottoms of the branches.
My glue picture for the top of the branches was out of focus, so here’s one from the bottom of the branches. Avoid big globs of glue because they will have to be removed if they show when the tree is finished. That’s extra work you can avoid.
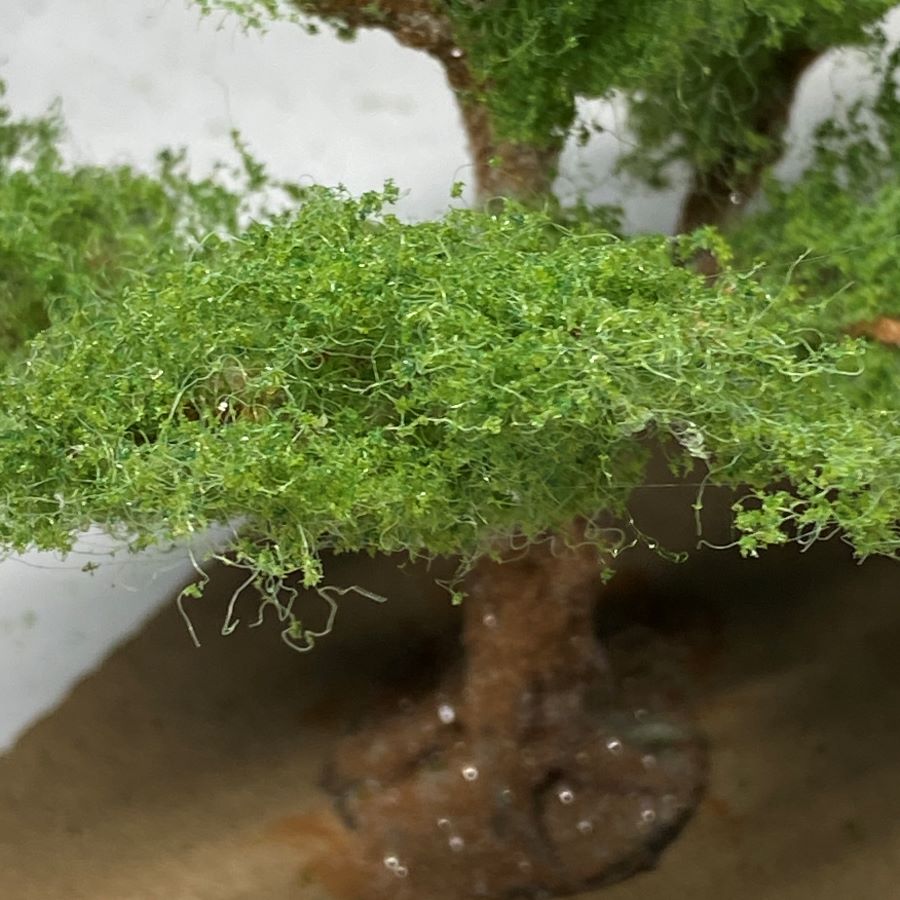
As you can see in these pictures, I am covering only the top half to two-thirds of each branch. We’ll fill in later.
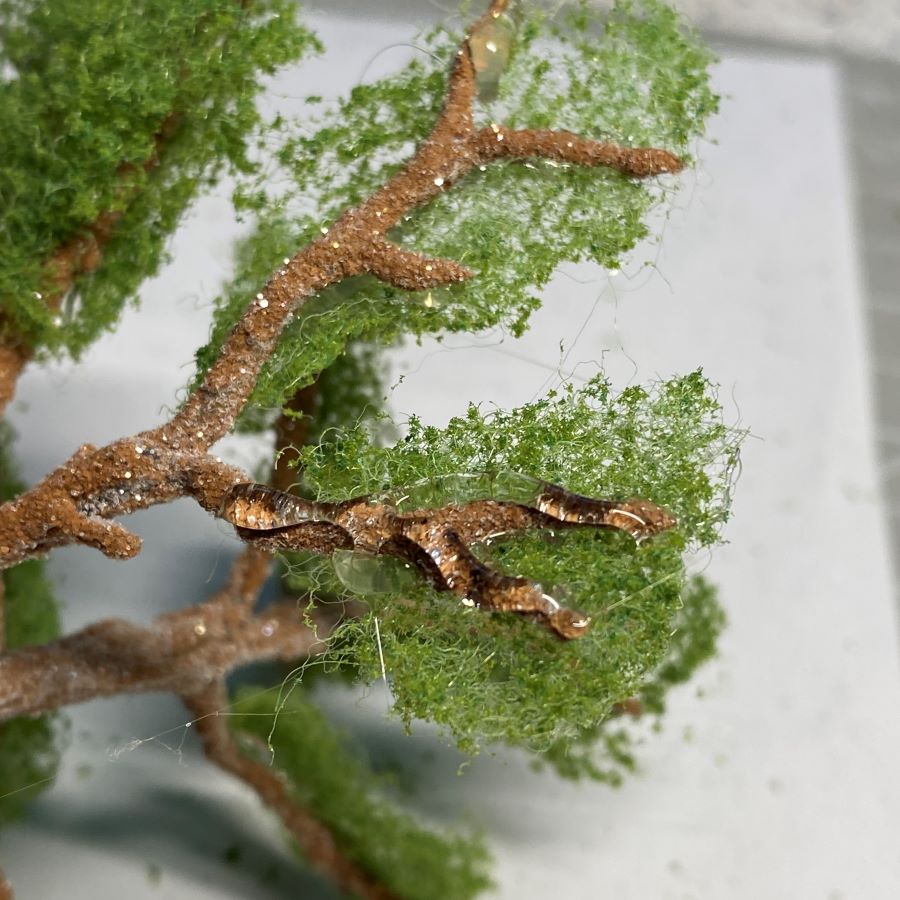
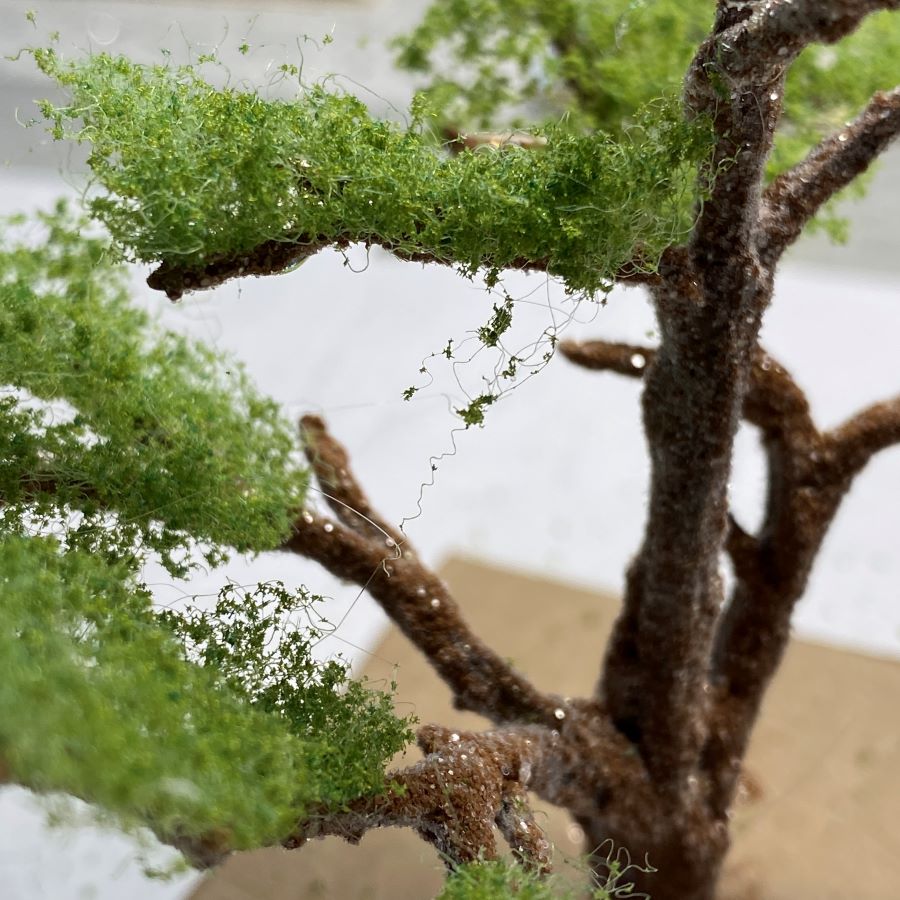
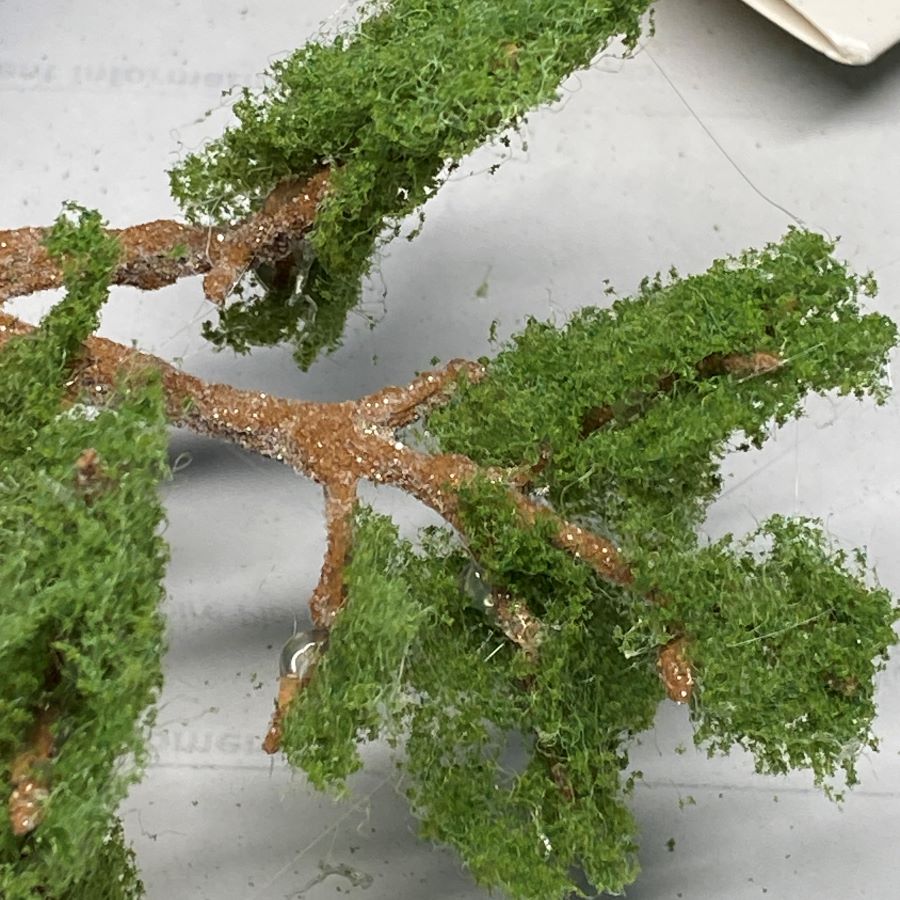
Look closely at the first photo below. You will see the tiny filaments that hold the green material together. Don’t pull at them by hand. It will make the problem worse. Trim them with scissors. In the second photo, note the hot glue hairs and the tiny white wad of hot glue. Don’t pull at these either. Use the hot nozzle of the glue gun to melt glue strings. Remove the white wads of hot glue with scissors.
The bottom of the branch is done the same way the tops were done. Cut a small piece, stretch it to fit the space, and glue it to the bottom of the branch so it fits against the piece on top. It will be like a foliage-branch-foliage sandwich.
The branch in the left picture has been covered with foliage. In the right picture, all the branches have been sandwiched with foliage.
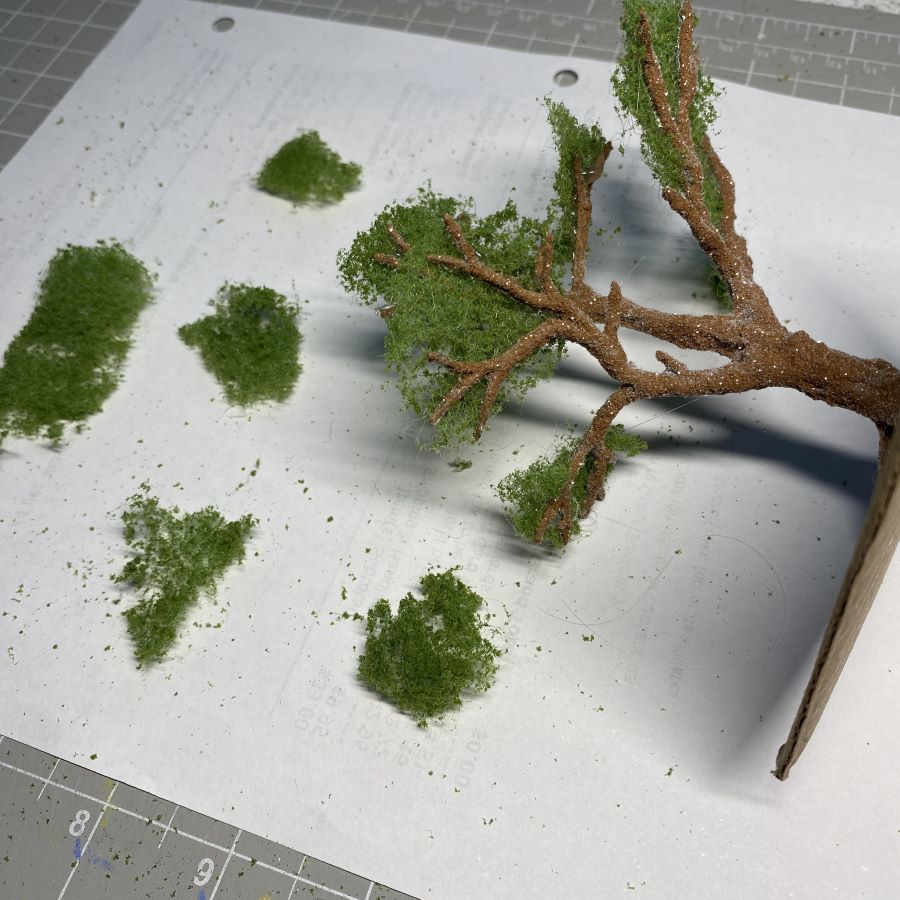
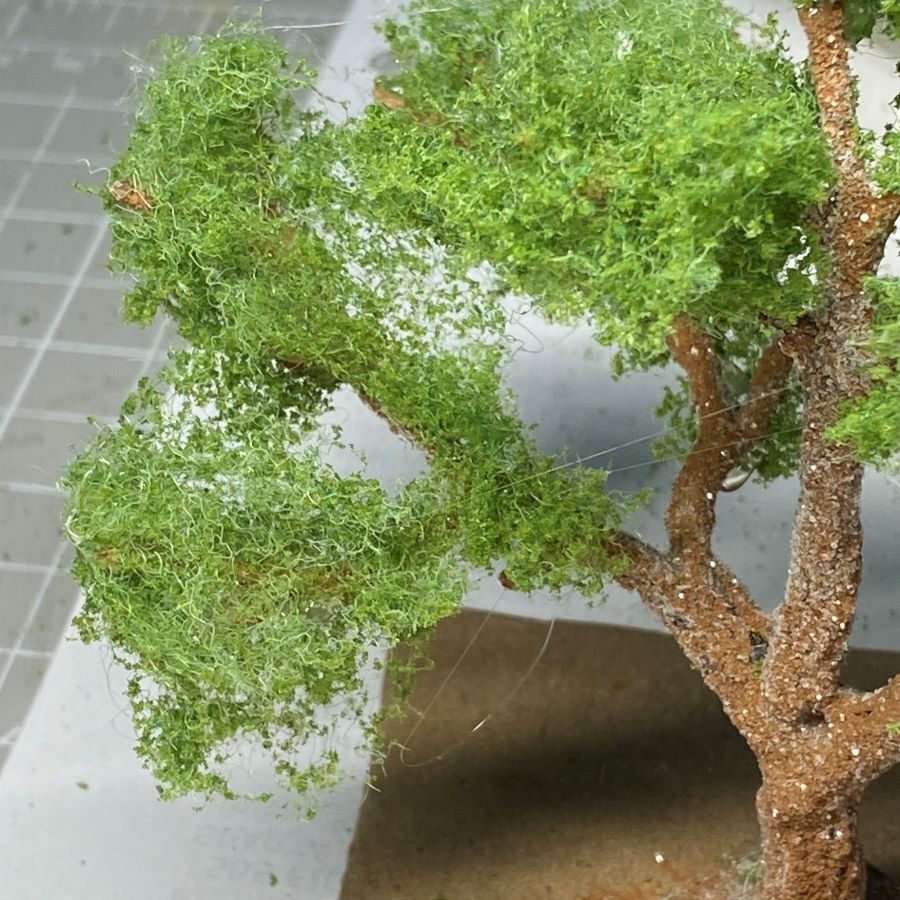
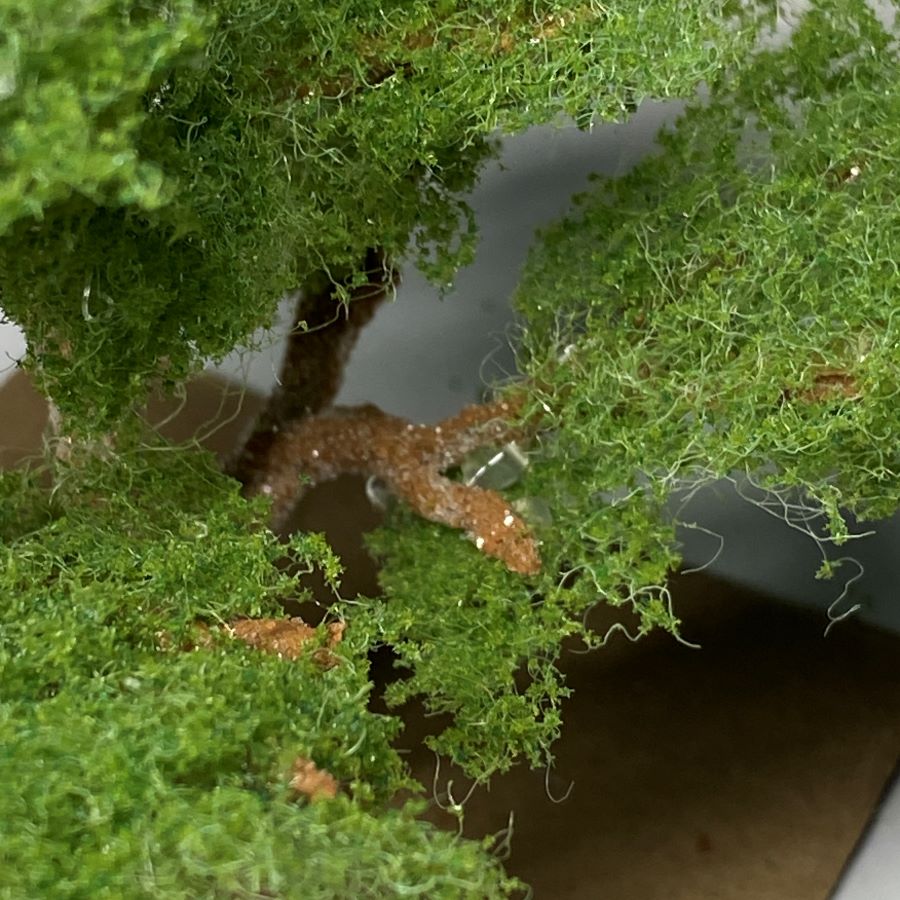
Now it’s time to fill in foliage gaps. I decided the branch in the middle needed a filler (first picture). I put the hot glue on the foliage already on the tree and attached a another clump of foliage on top of the glue (second picture).
In this shot, I wanted to cover the bare branch. In the right you can see that I added a clump of foliage to the branch. Check your tree for gaps and fill them as needed.
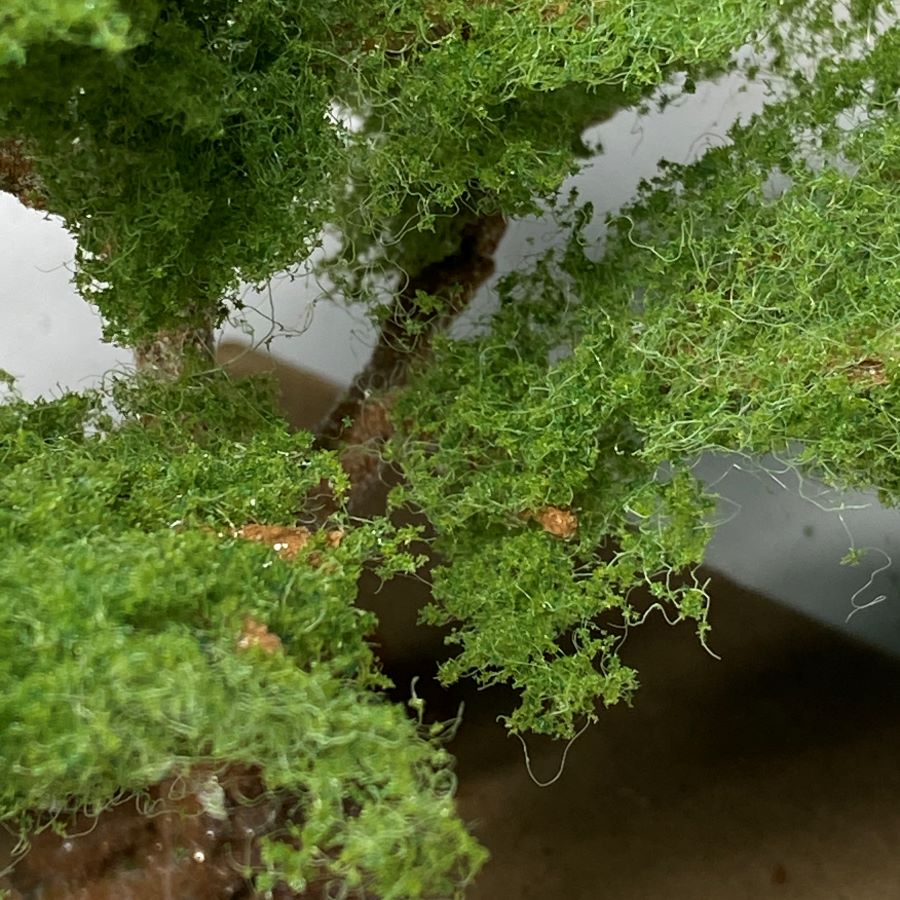
Another thing I check for are the ends of branches. I like to cover those, too, though leaving a few uncovered can make the tree look more natural. Clumps can be added to the main trunk if it looks too bare.
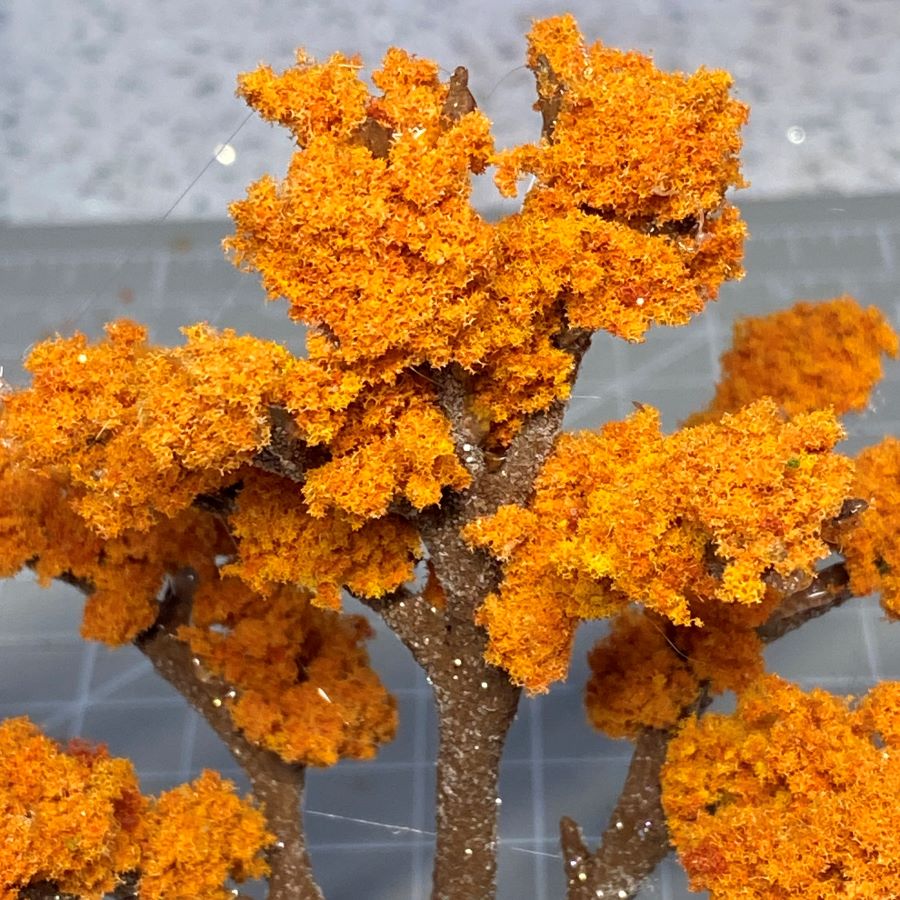
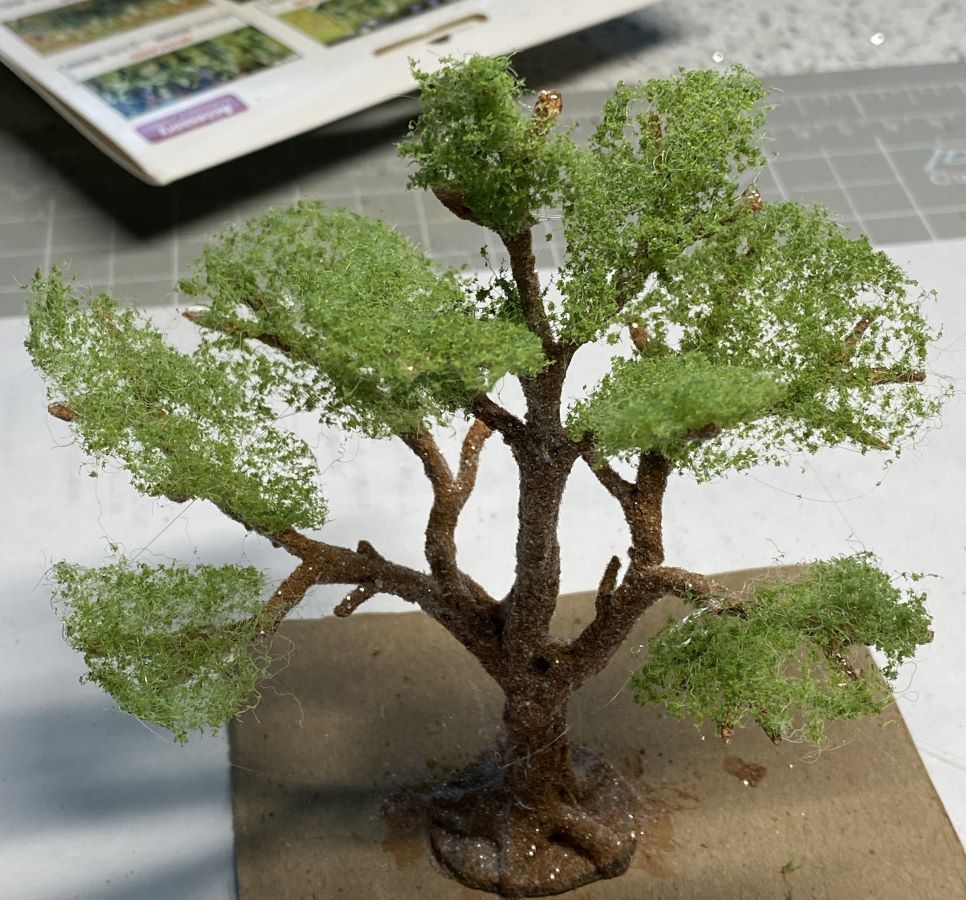
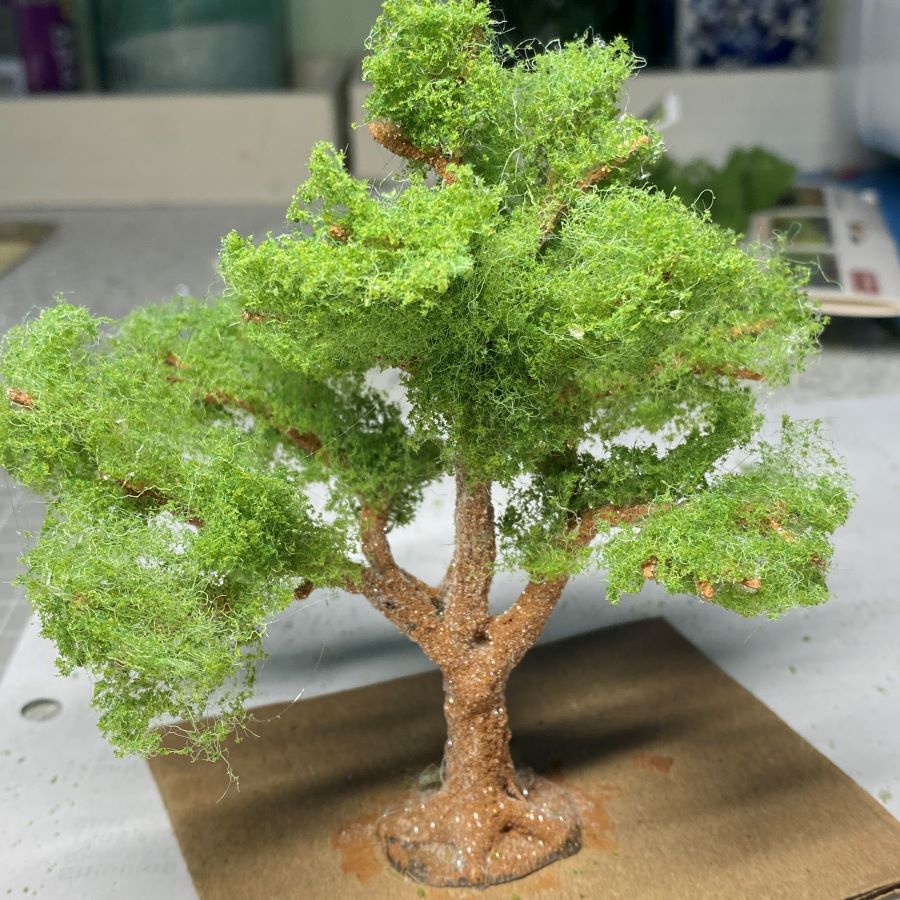
The next step is to fluff the foliage. I use needle-nose pliers to lightly pluck the tops and bottoms of the foliage. The picture on the right shows the fluffed tree.
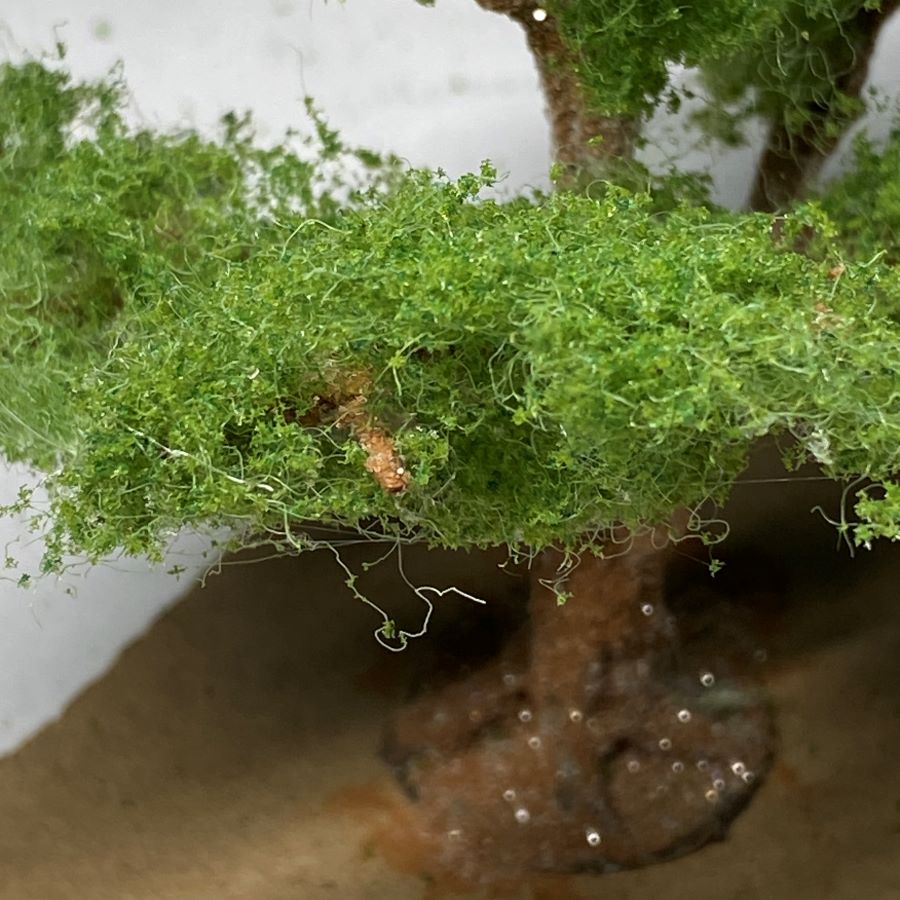
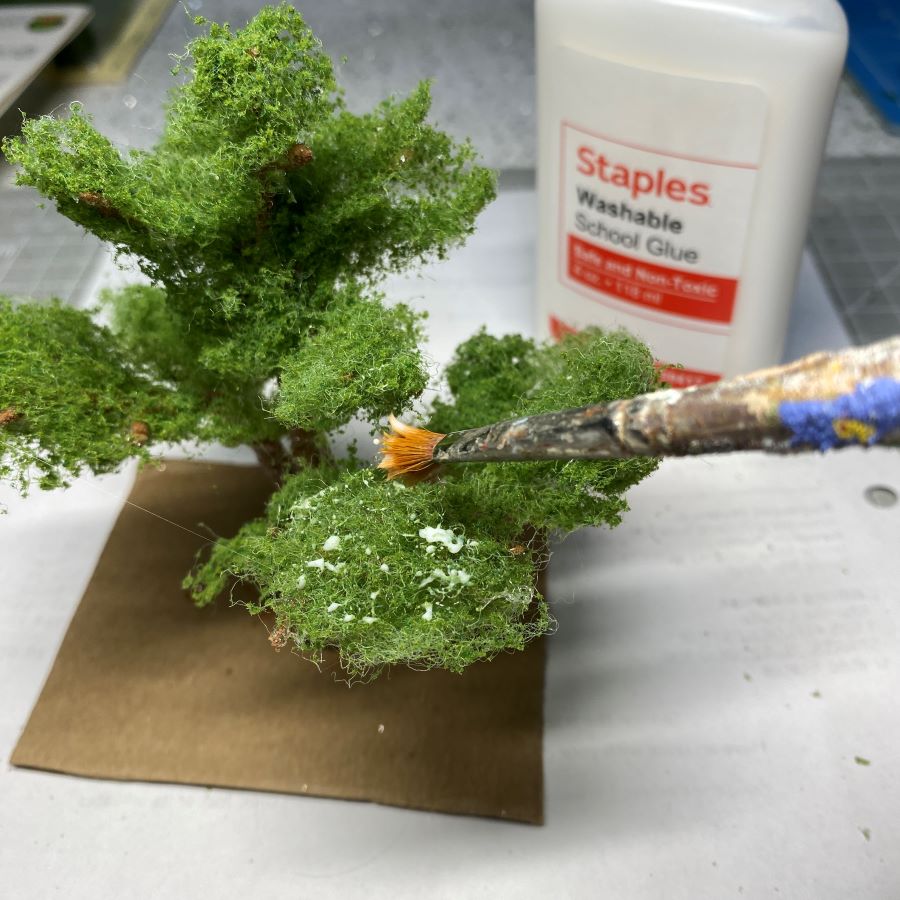
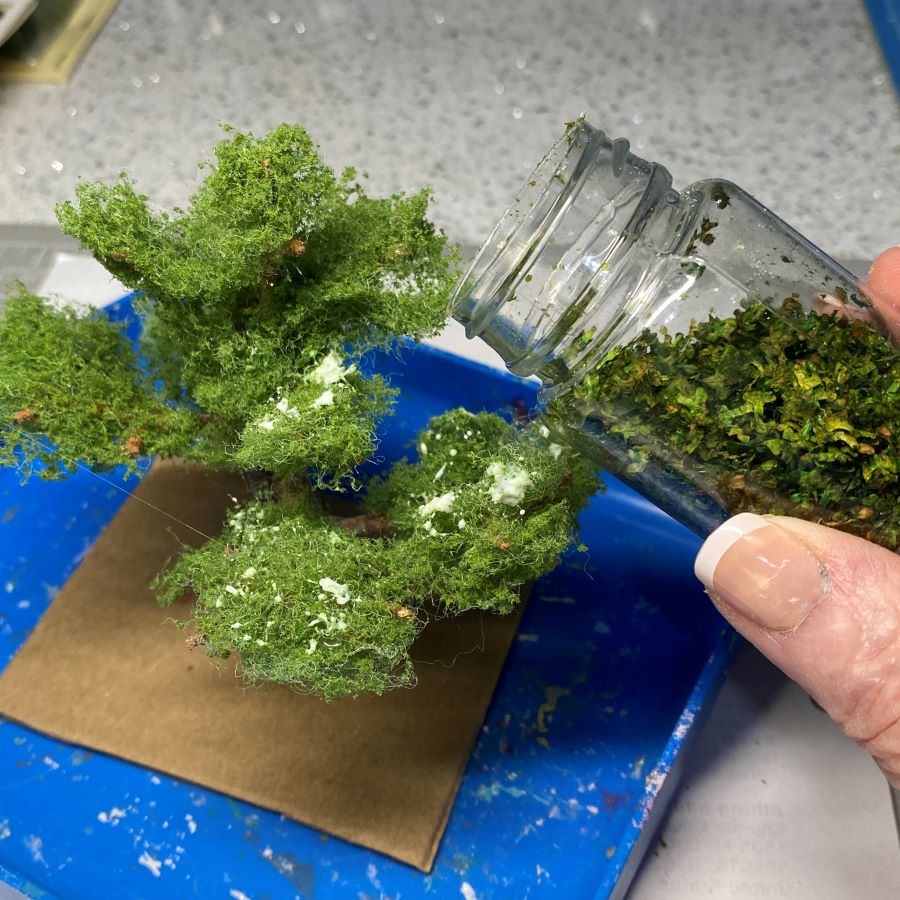
The final step is to add the leaf litter. I use clear tacky glue for this step, but white glue works, too. I used white for the tutorial so you can see the glue. Dab the glue on the tops of the foliage. Sprinkle a good cover of tiny leaves over the glue.
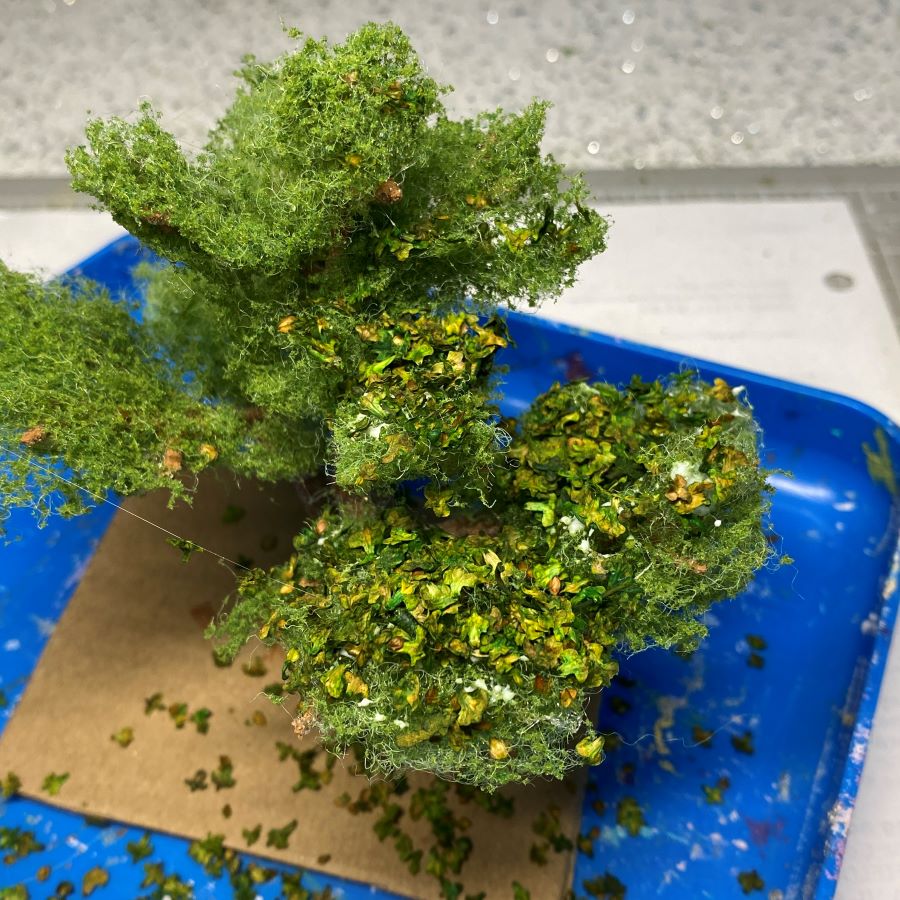
Gently pat the leaves into the glue. Turn the tree upside down over a glitter tray or a sheet of paper. Tap the bottom of the cardboard to shake off the excess. Keep covering bare foliage with dabs of glue and the tiny leaves. I don’t glue leaves to the bottom of the branches, but that is certainly fine if it suits you to do so.
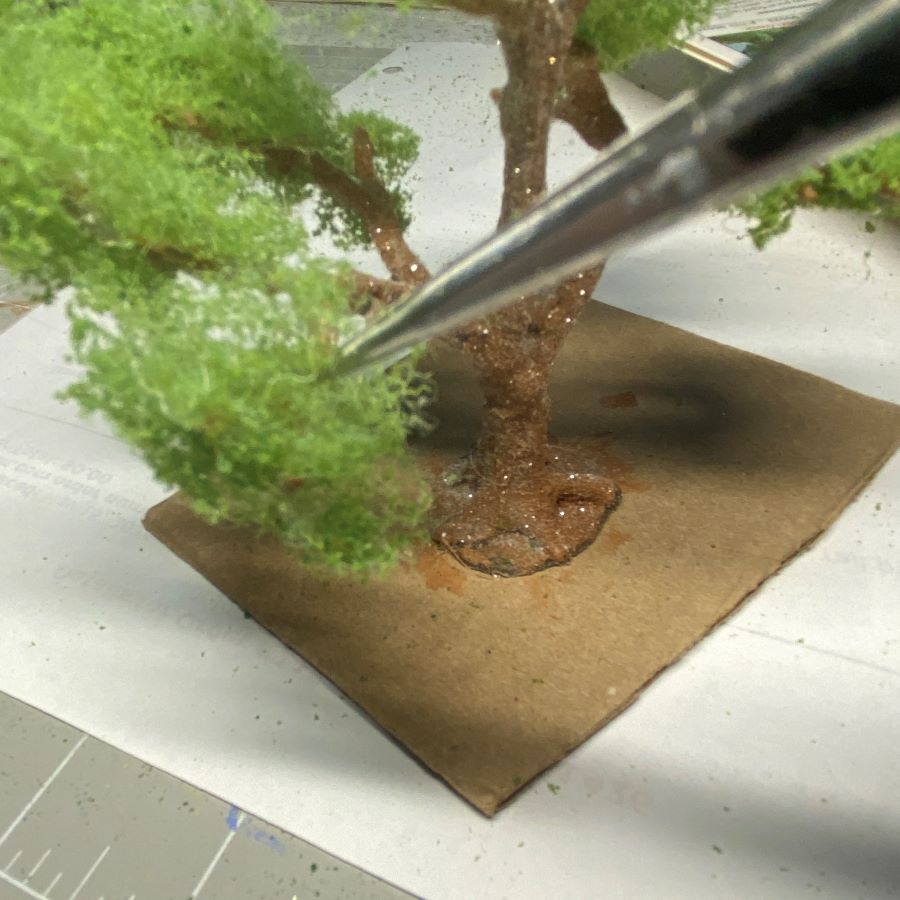
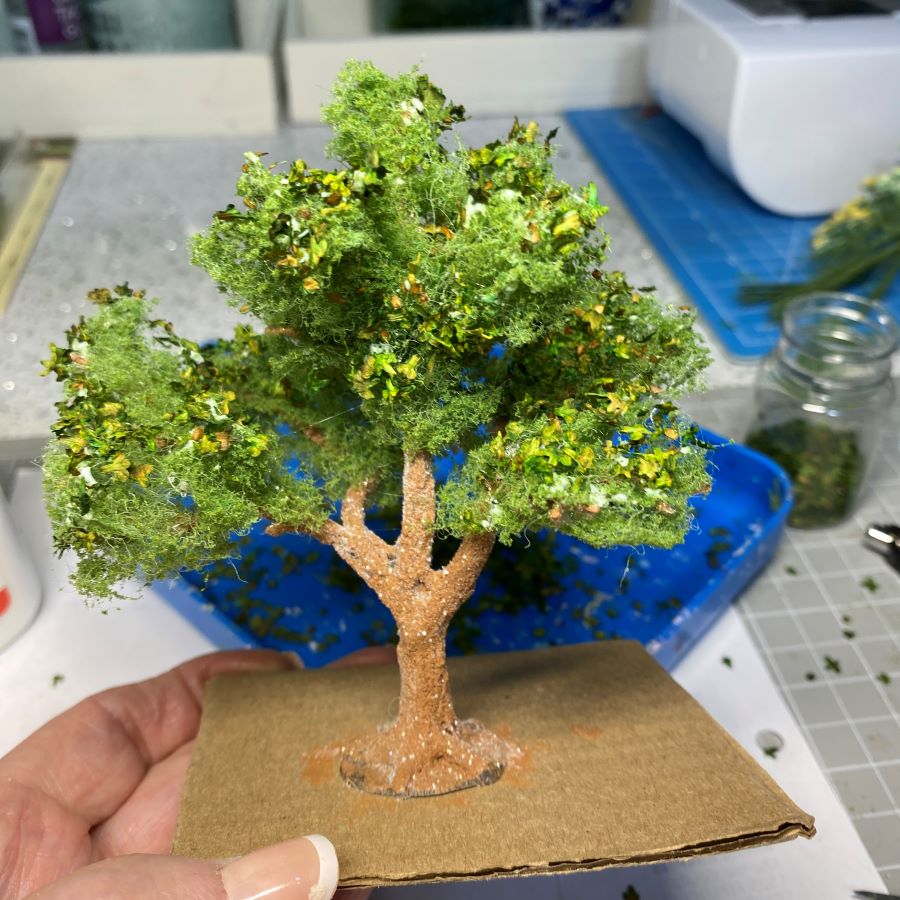
The finished tree. The tree can be pried off the cardboard with something flat, like a putty knife or a palette knife. When I attach a tree to the base of a putz house, I leave the tree base intact and cover the spaces between the roots with faux moss. If the parts between the roots are cut from the base, it is harder to make the tree secure. Leaving the tree base intact gives more area to secure the tree to the putz base.
If you have any questions about the process of making a leafed tree, please ask!
If you would like to see more of my Putz houses, as well as Christmas ornaments I have made from upcycled holiday cards, please visit my Etsy shop.
If you are interested in crafting Putz houses of your own, check out my Putz tutorials for more information. Putz House Tutorials
I am always happy to answer questions about the process. Please ask, if you are wondering about the details of putzing!
All proceeds from my Etsy shop benefit Kenya Mercy Ministries. They work with the urban poor of Nairobi, Kenya, particularly the children and their families who live in Kibera, the largest slum in Africa. Thank you for your part in helping these children when you purchase items from my shop!
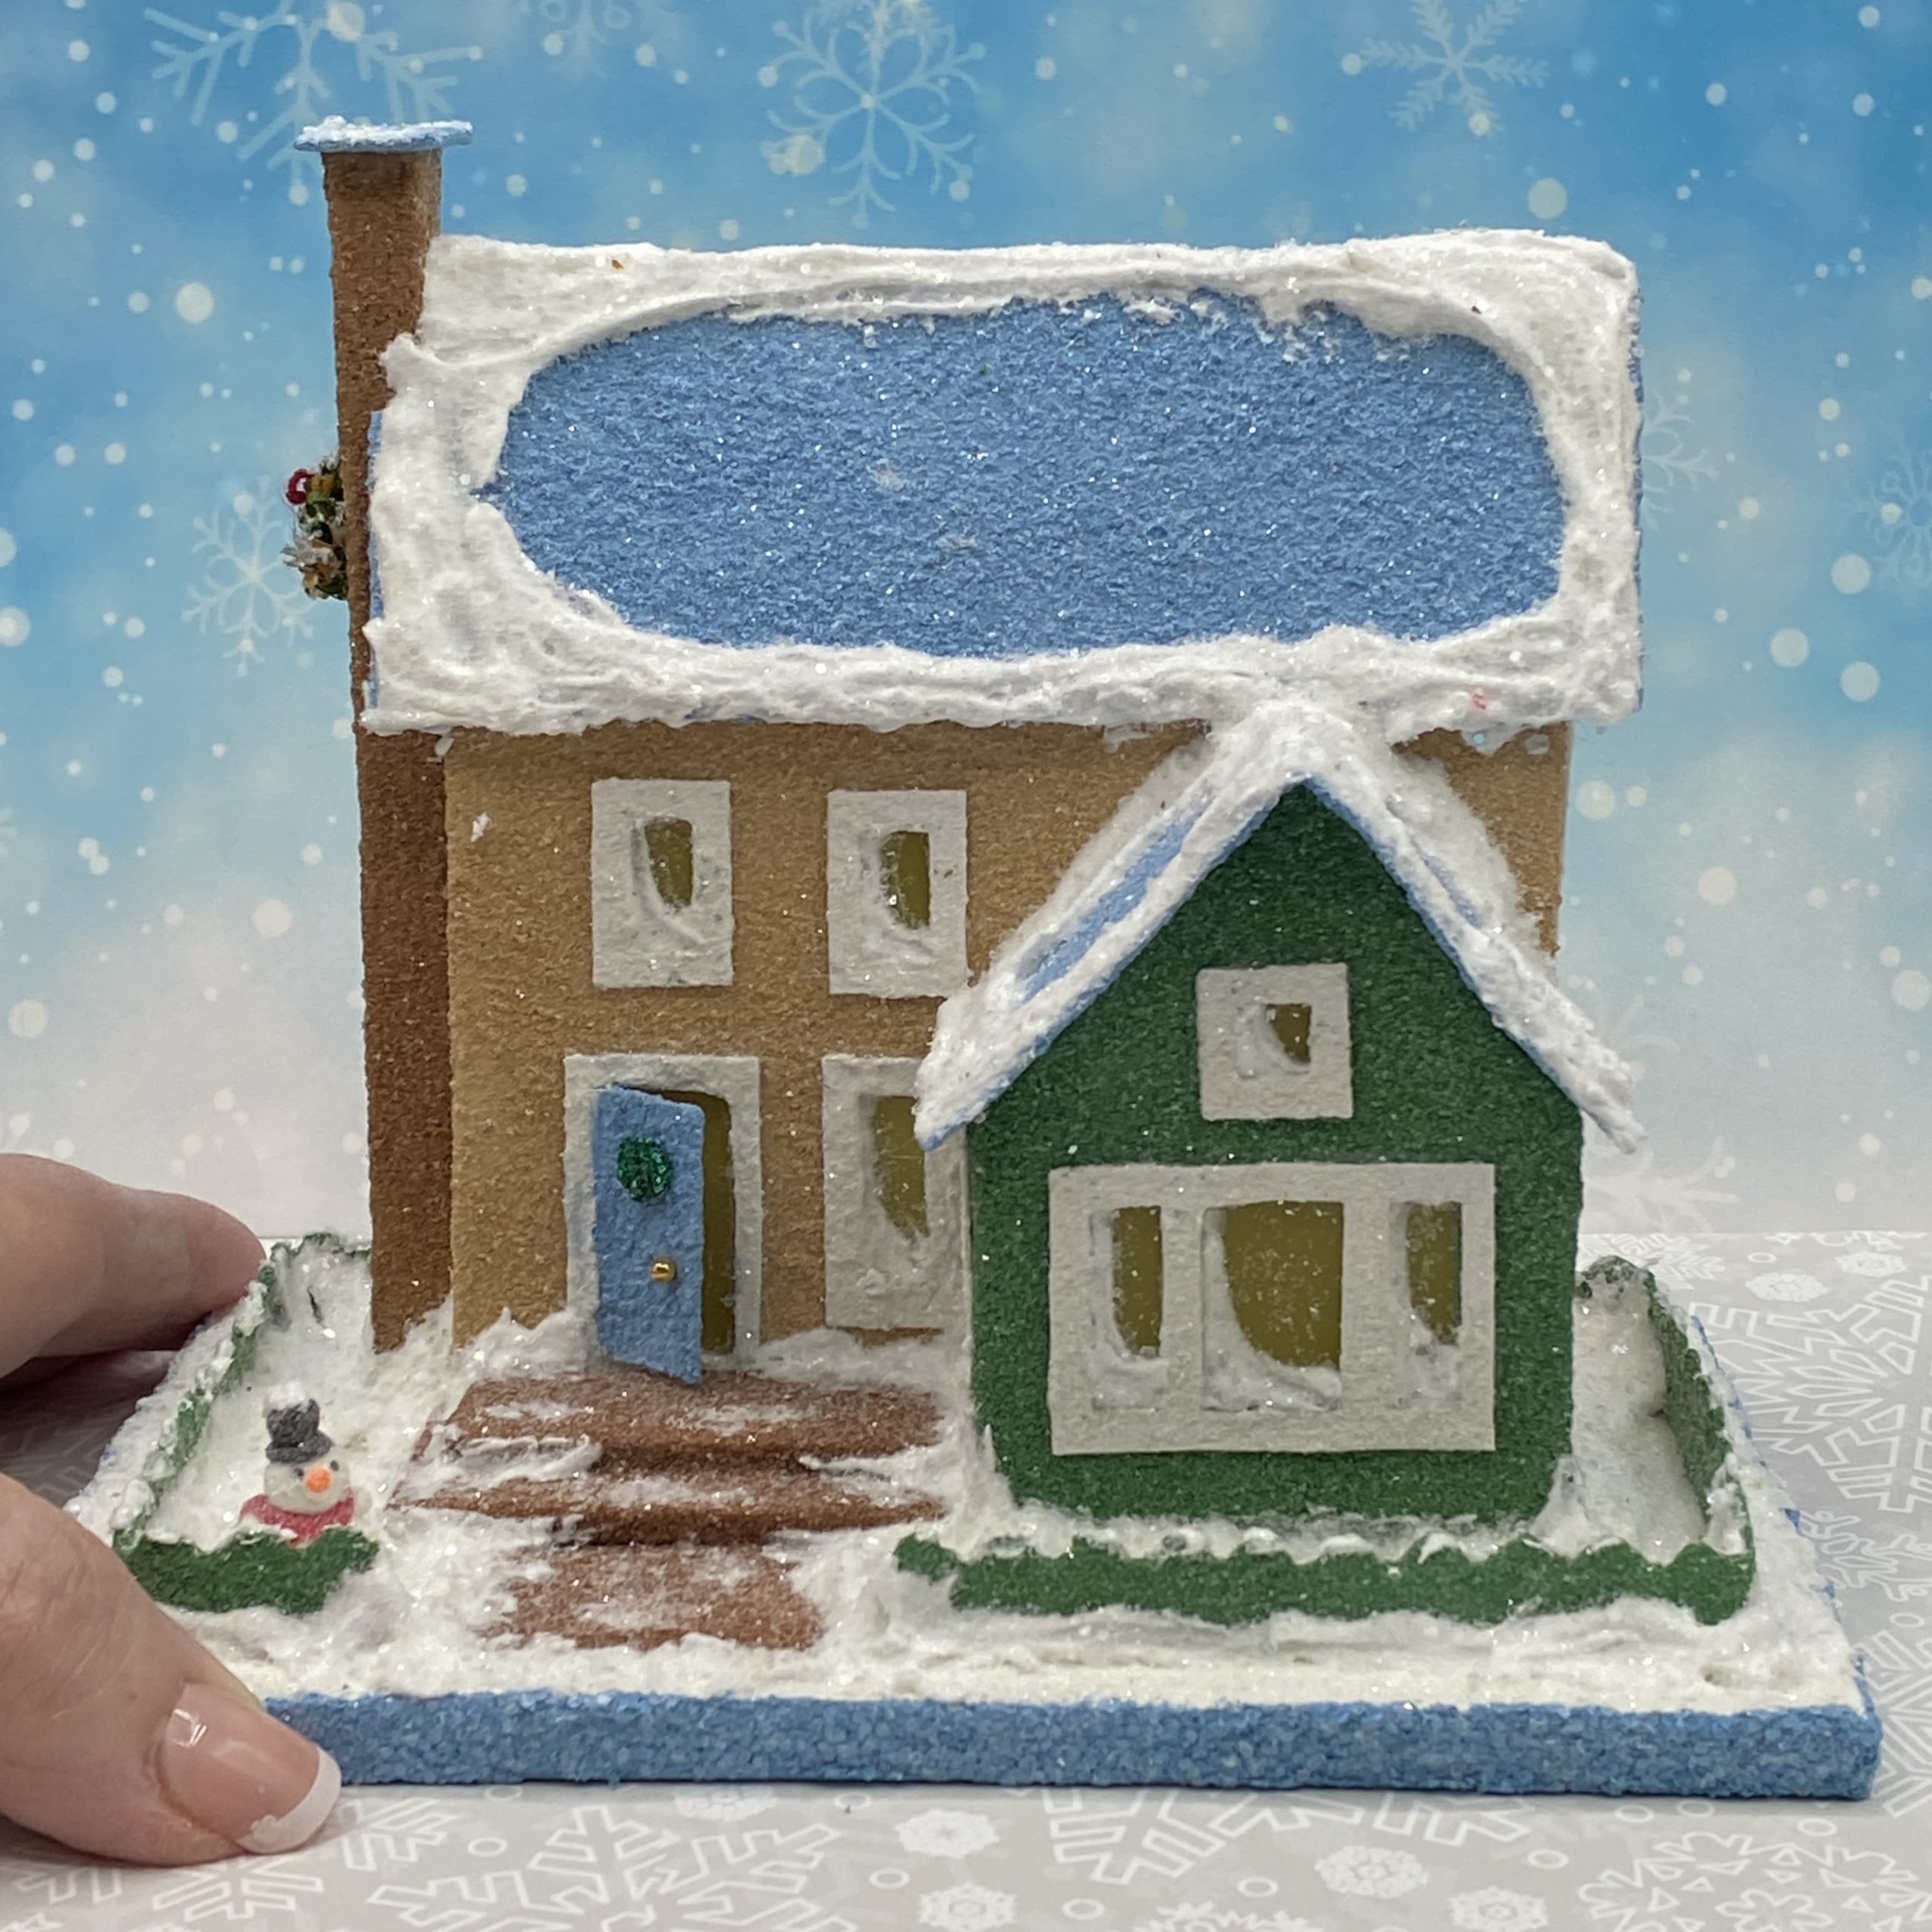
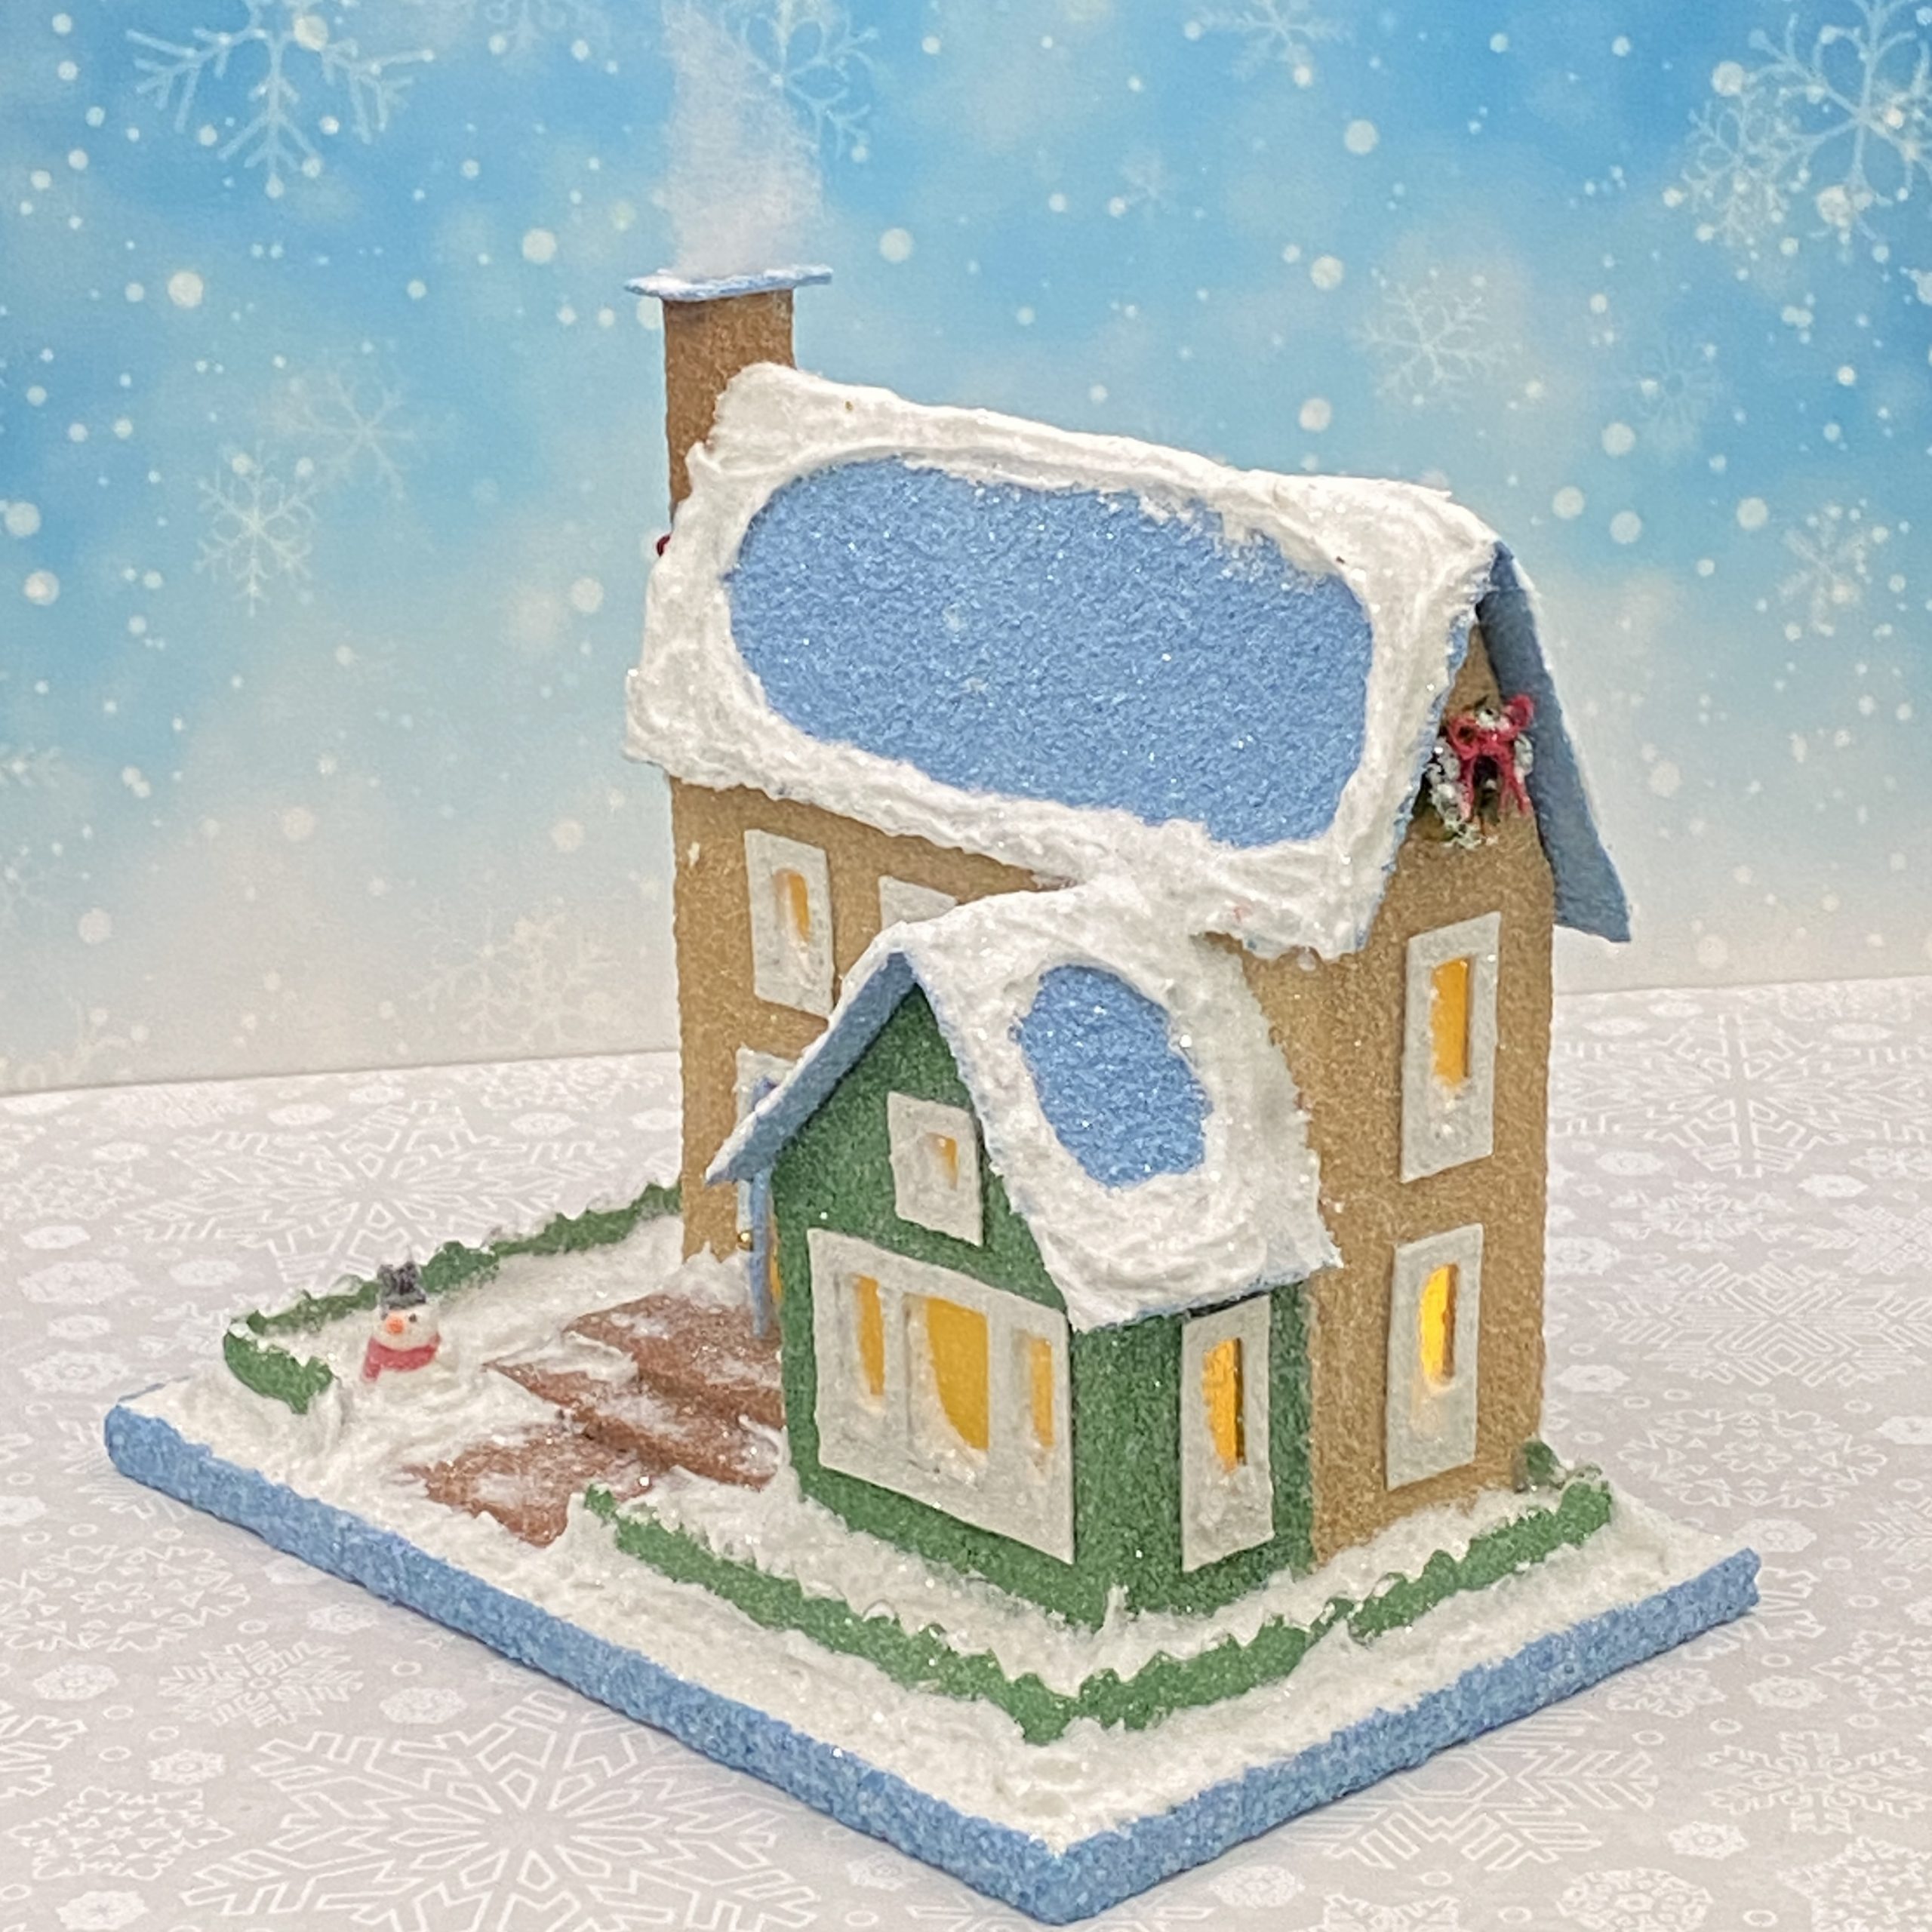
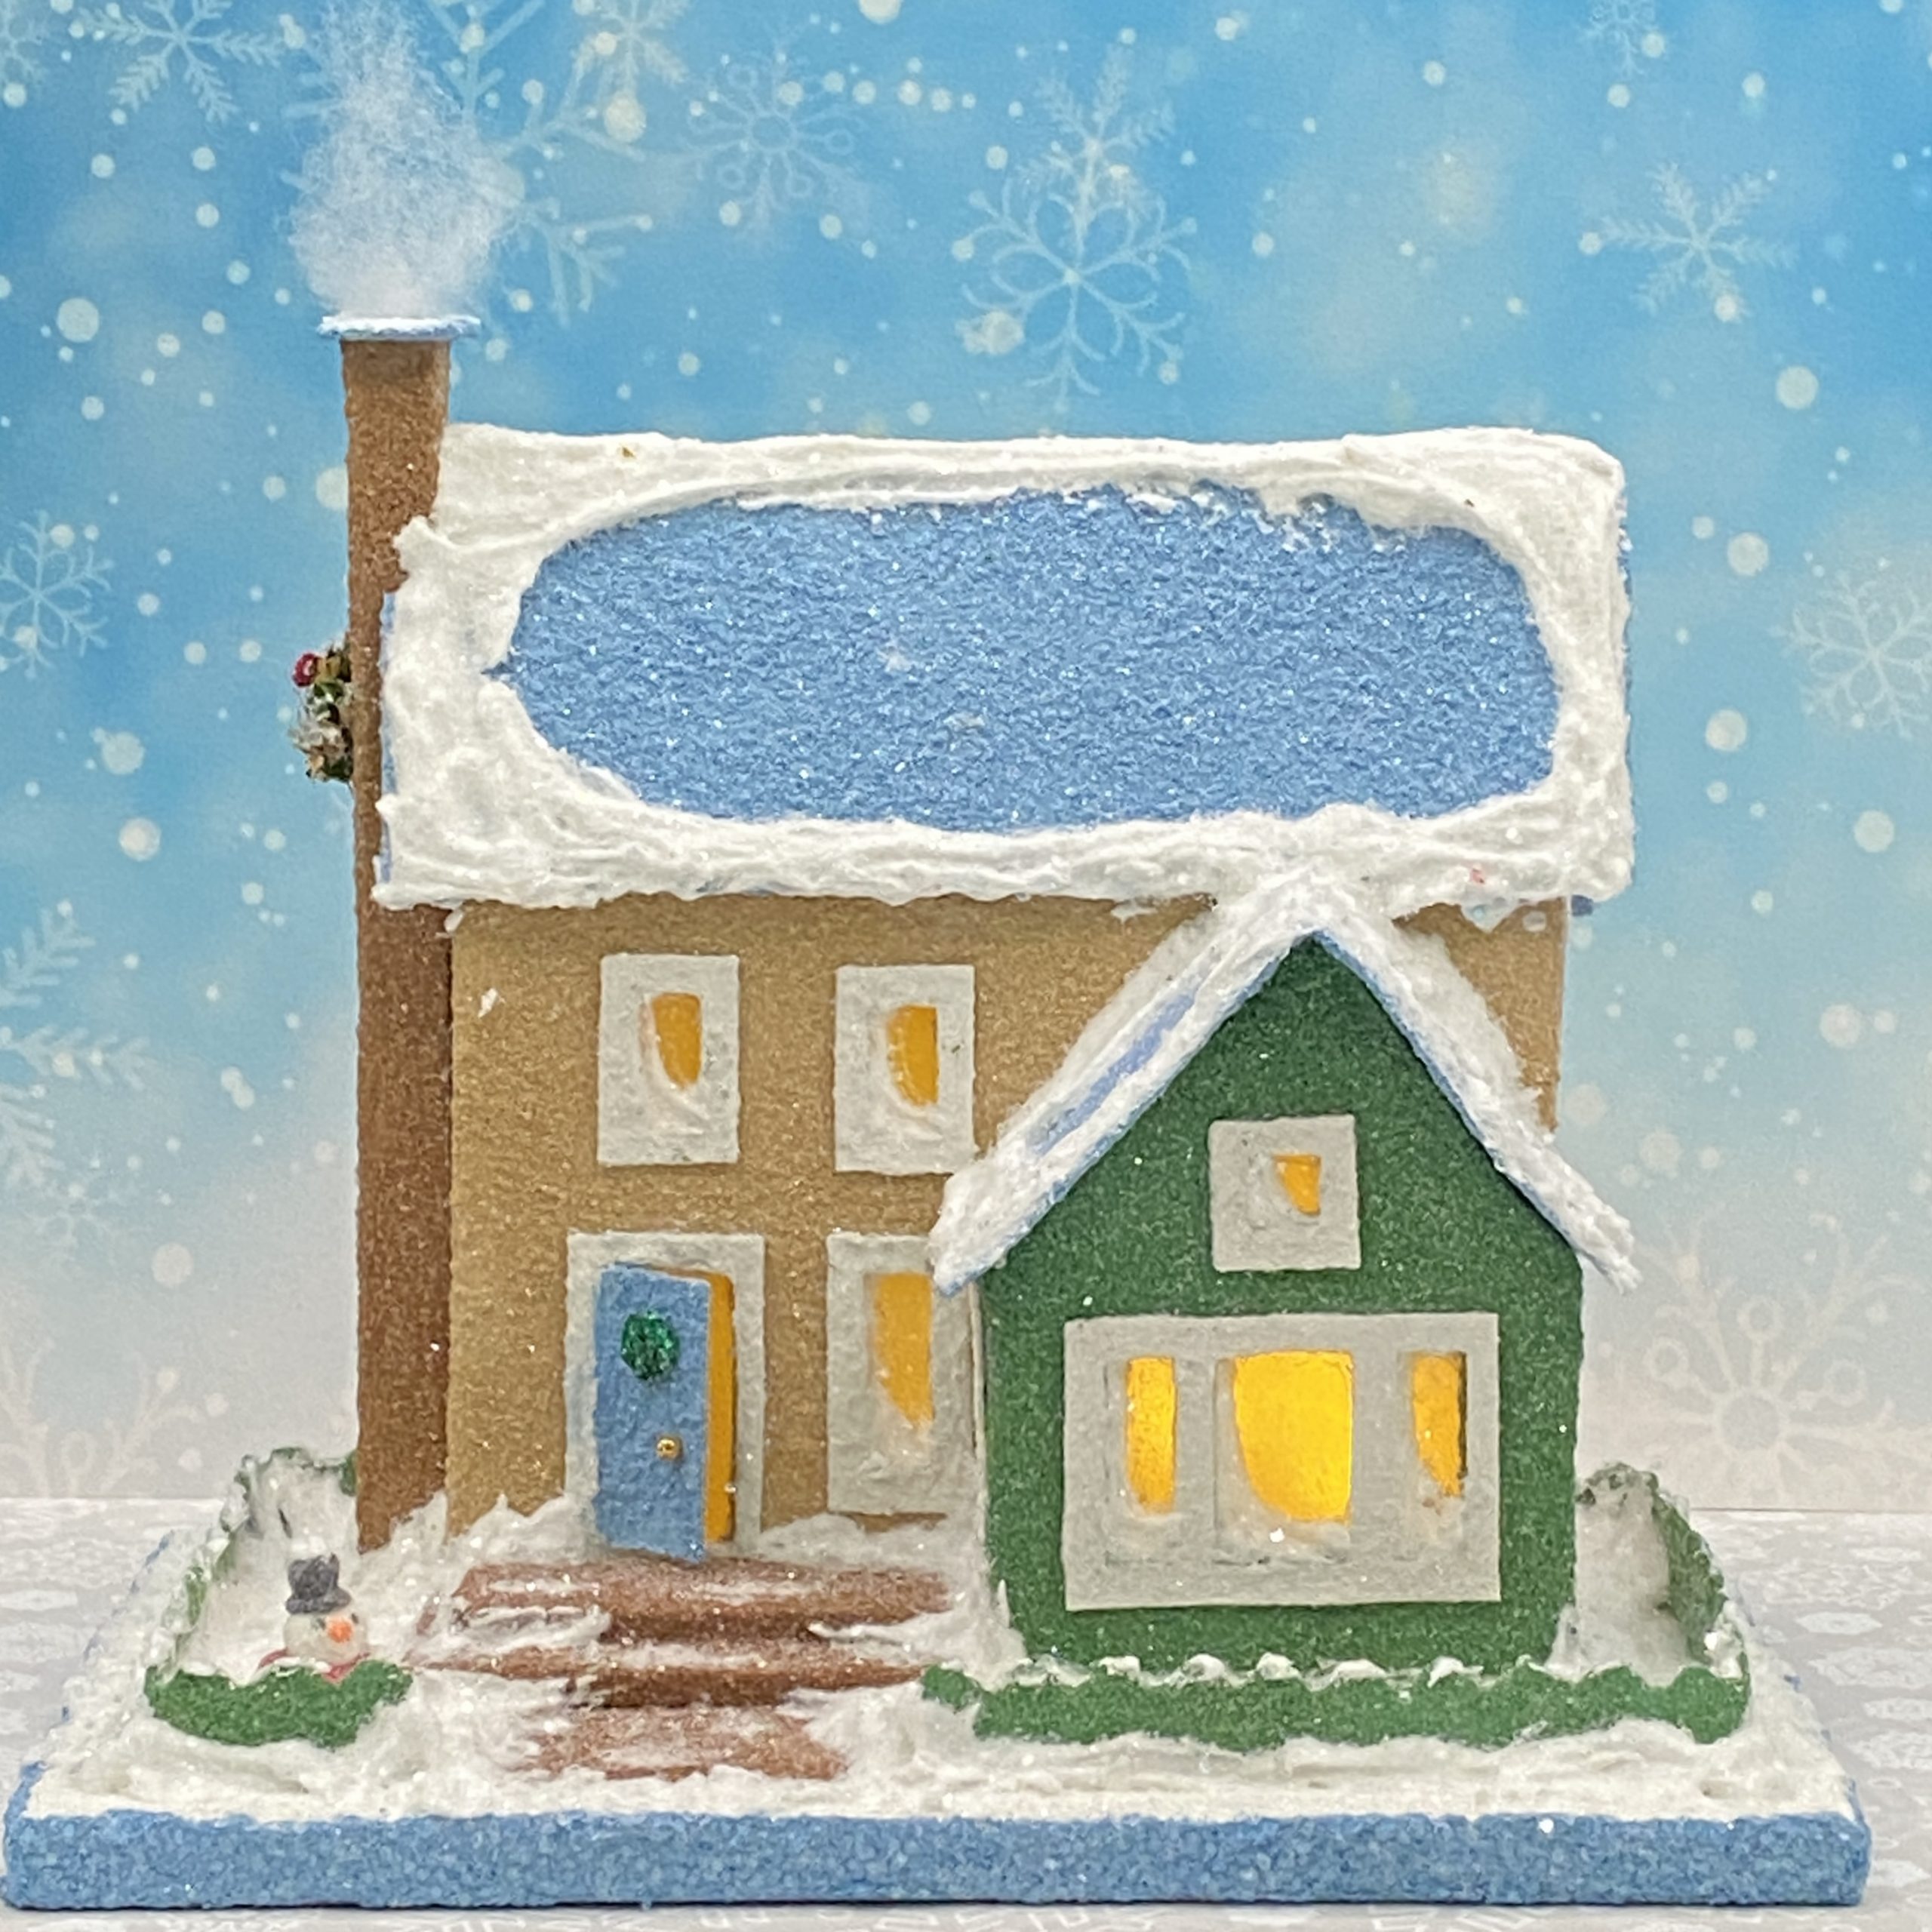
I haven’t made many winter houses lately. It’s fun to get back into that season. I used the same pattern (020824) for this house as the summer one I just finished. I added two windows above the door, and used a long chimney on the left side, rather than a small chimney on the roof.
This summer house was made recently from the same pattern.
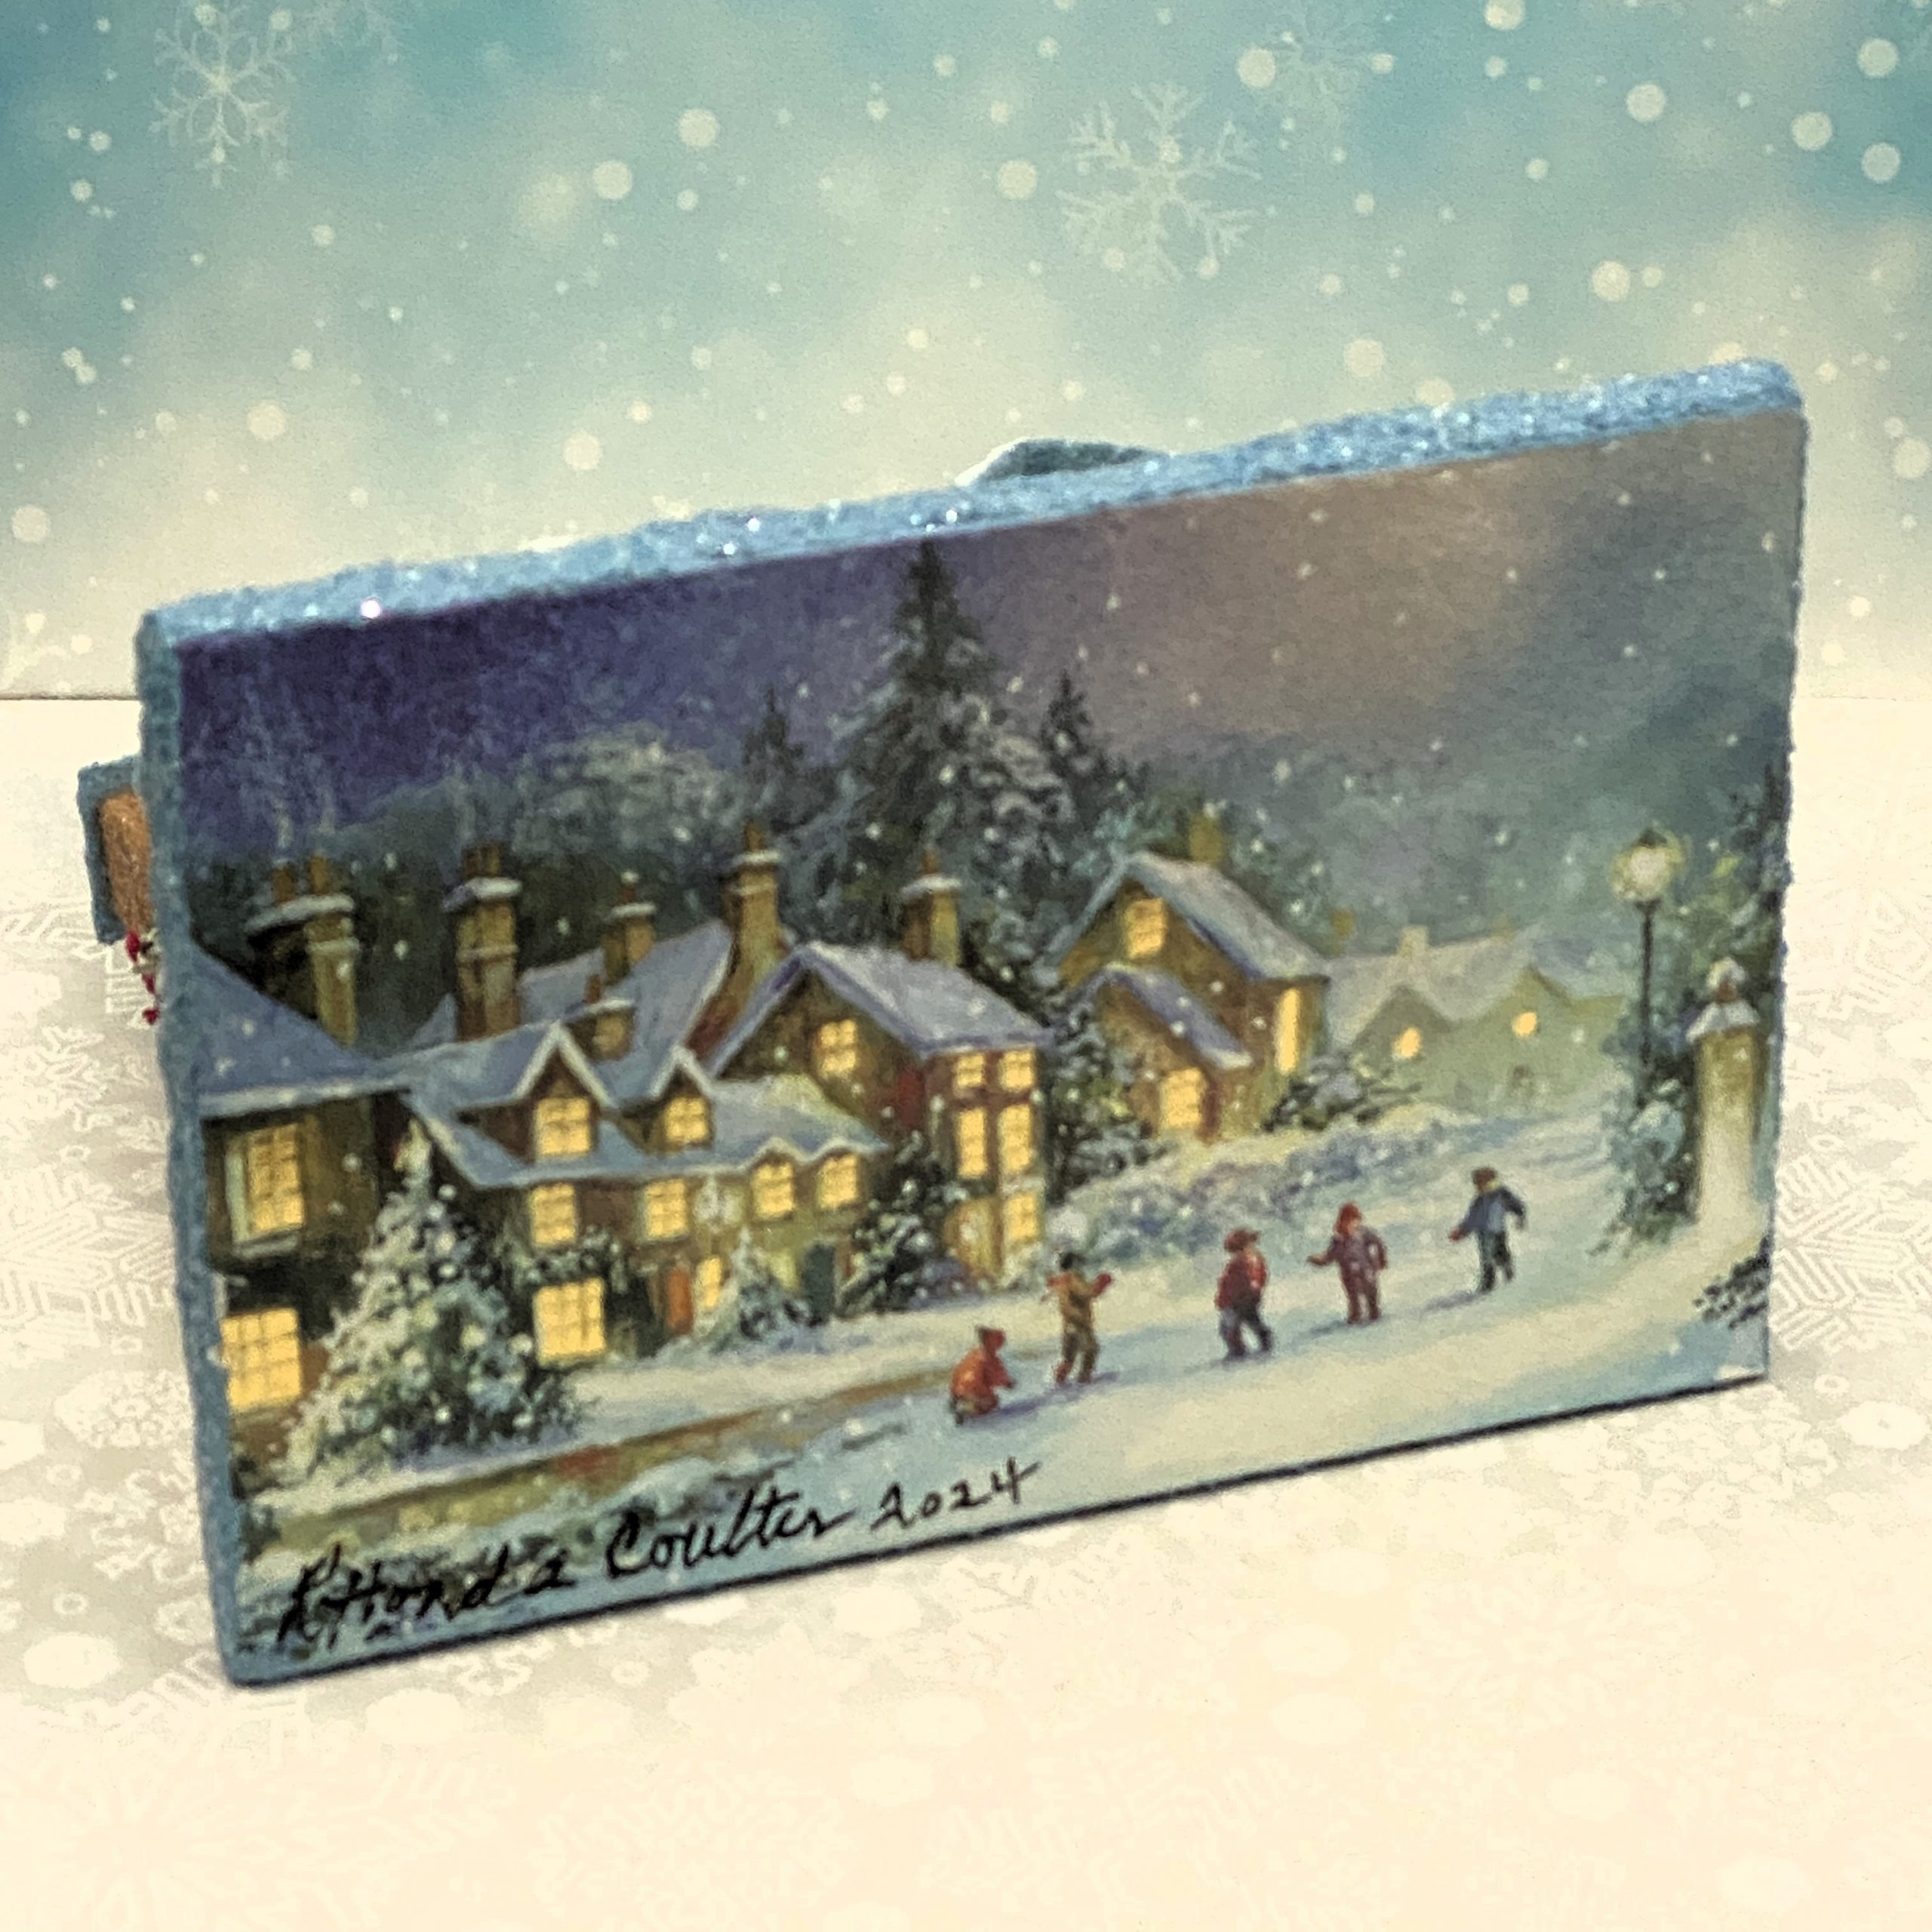
The base is made from an upcycled Christmas card, featuring a winter’s eve village. Gold foil highlights the windows on the card. The base measures 6 1/4″ wide by 4 1/8″ deep. The house is 5 1/4″ tall as measured from the bottom of the base to the top of the chimney.
The house has a hole in the back that allows the use of a small LED light string for lighting the Putz.
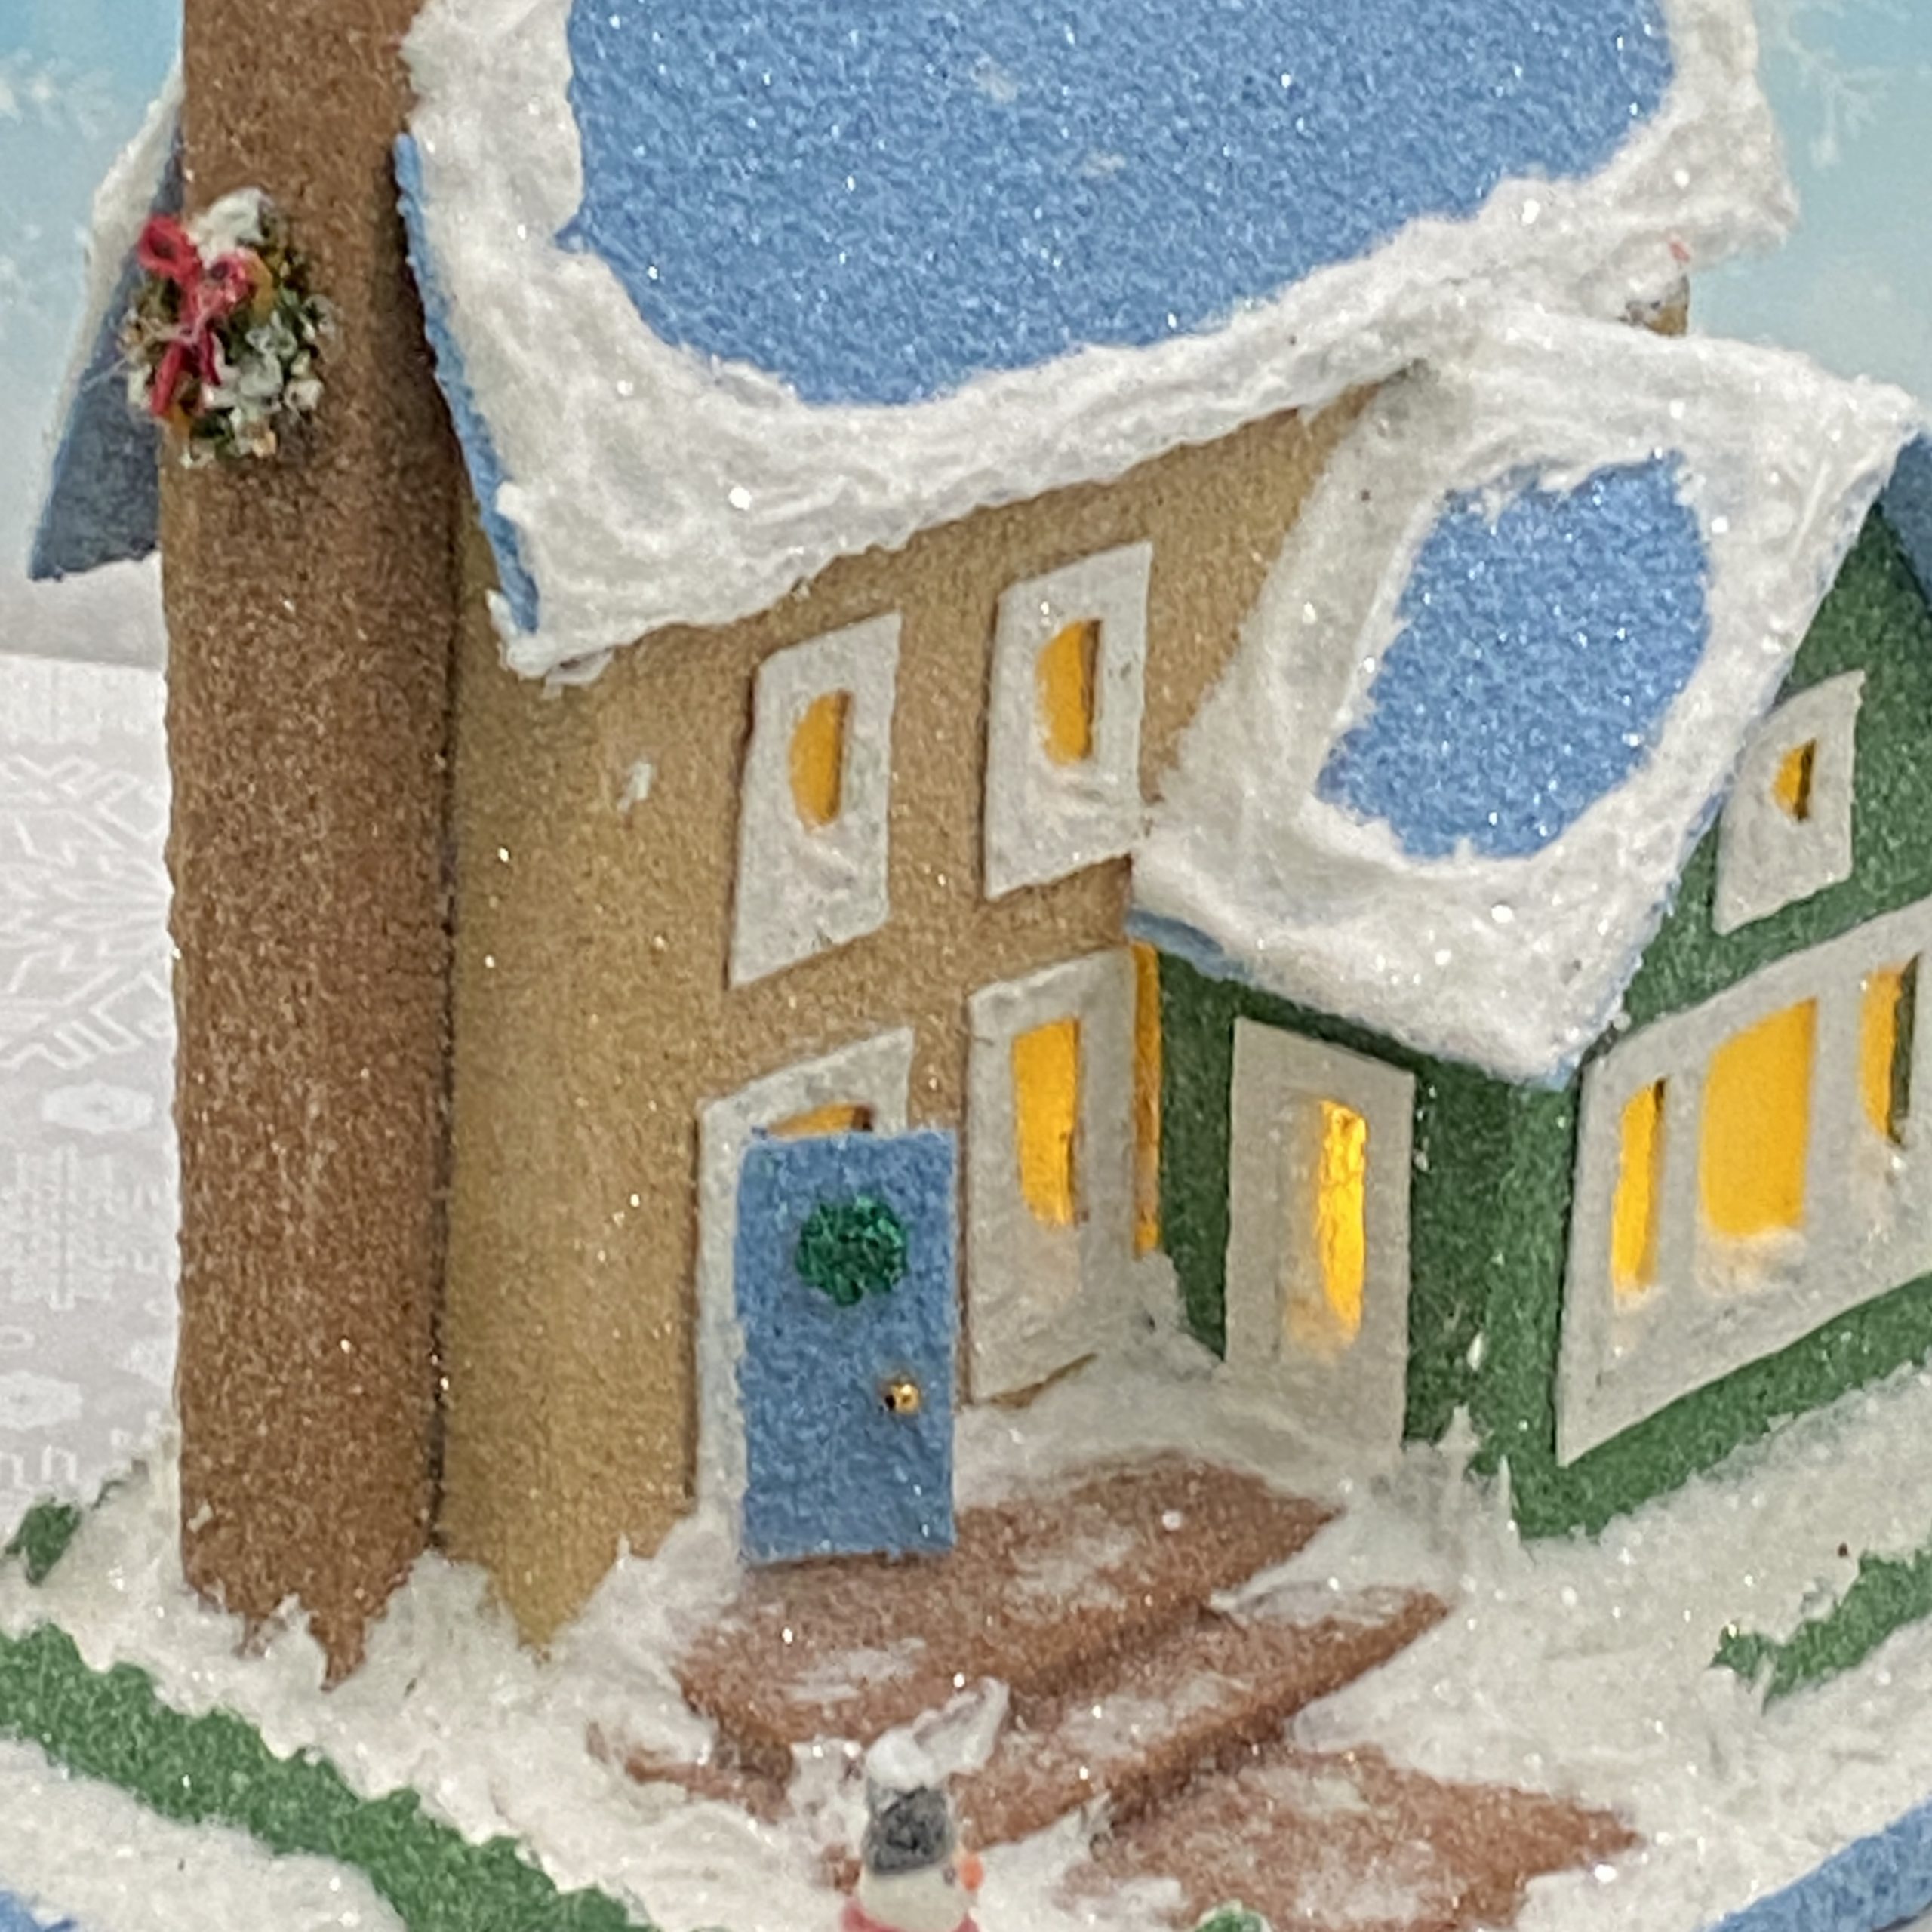
A tiny snowman greets visitors and a handcrafted wreath hangs on each side of the house.
A puff of smoke is tucked into the chimney, and is easily removed if not needed.
If you would like to see more of my Putz houses, as well as Christmas ornaments I have made from upcycled holiday cards, please visit my Etsy shop.
If you are interested in crafting Putz houses of your own, check out my Putz tutorials for more information. Putz House Tutorials
I am always happy to answer questions about the process. Please ask, if you are wondering about the details of putzing!
All proceeds from my Etsy shop benefit Kenya Mercy Ministries. They work with the urban poor of Nairobi, Kenya, particularly the children and their families who live in Kibera, the largest slum in Africa. Thank you for your part in helping these children when you purchase items from my shop!
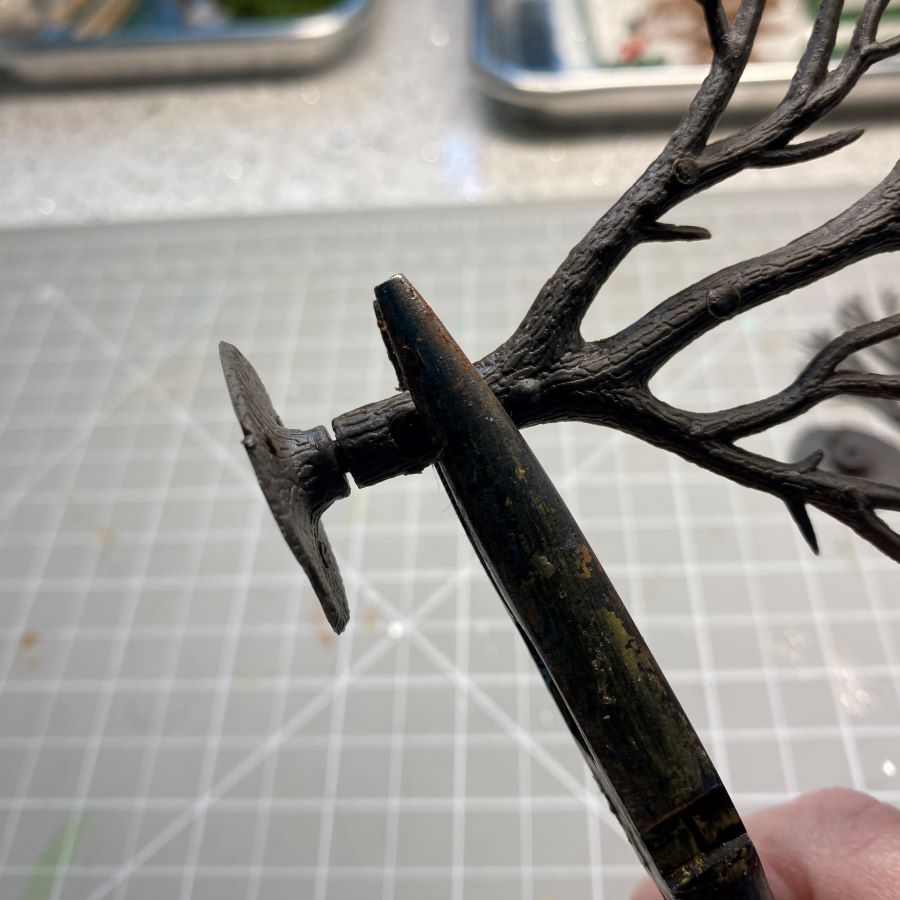
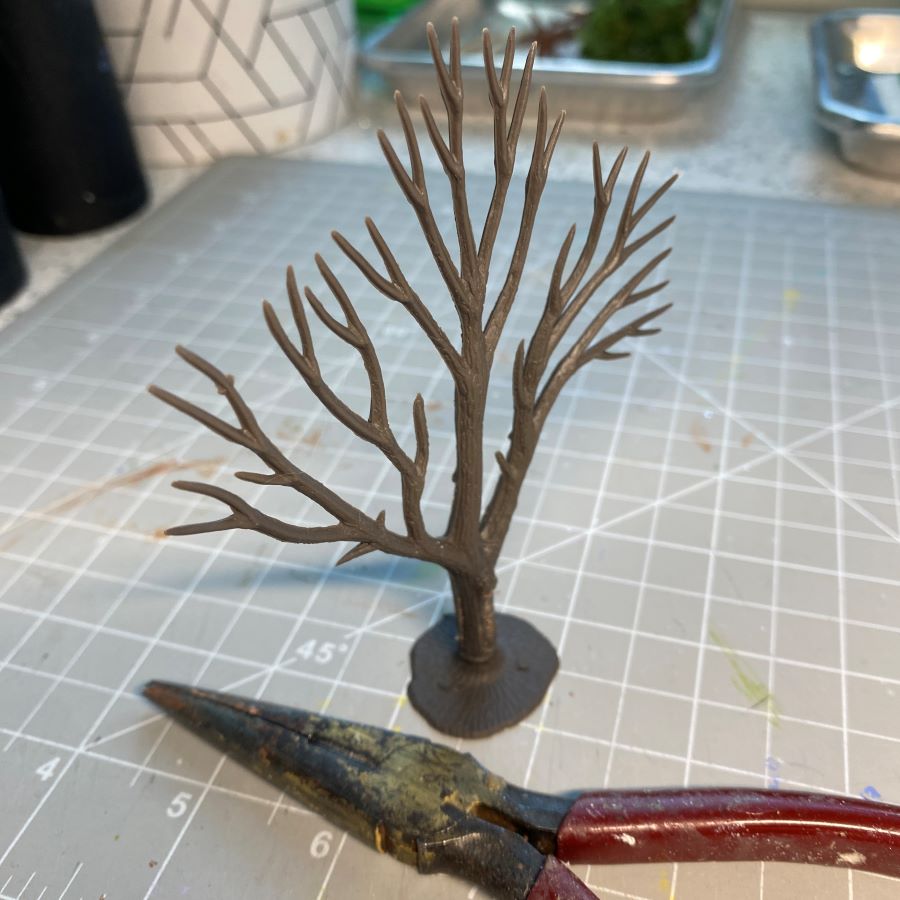
Armatures come in several sizes. I use the 3″ to 5″ sizes most often, and I purchase them on Amazon. A bag contains 28 armatures. In the picture, the two at the top are from the 3″ to 5″ bag. The two at the bottom are from a bag of 3/4″ to 2″ sizes. This bag contains 117 pieces. The armatures arrive flat, with the base connected. Pull the base off and connect it to the trunk of the tree.
The base and the tree trunk may have a gap.
To reduce the gap, I hold the trunk tightly with the pliers and bang it on the desk top .
If that doesn’t close the gap completely, no worries. We’ll add some hot glue later and that will cover the connection.
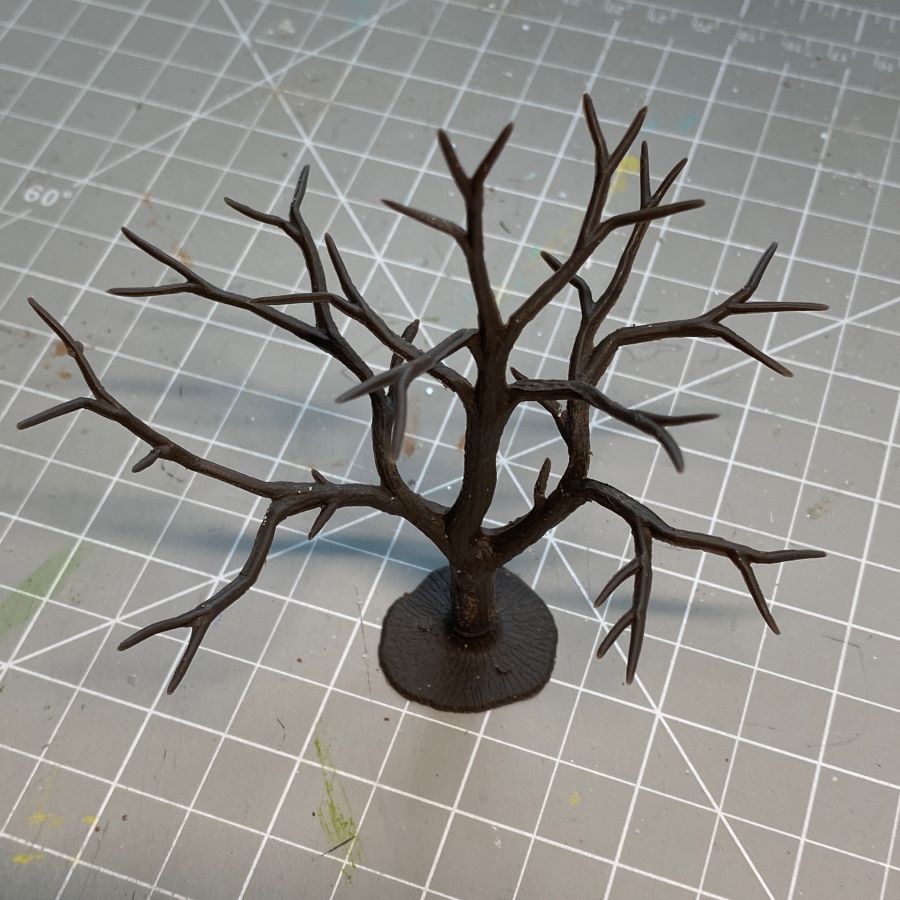
At this point, the tree is still flat. By the way, the pliers belonged to my mother for use in her crafting projects. She made floral arrangments and wreaths from dried flowers and seed pods she collected in the countryside. I think of her each time I use them. I know I inherited my creative crafting skills from Mom.
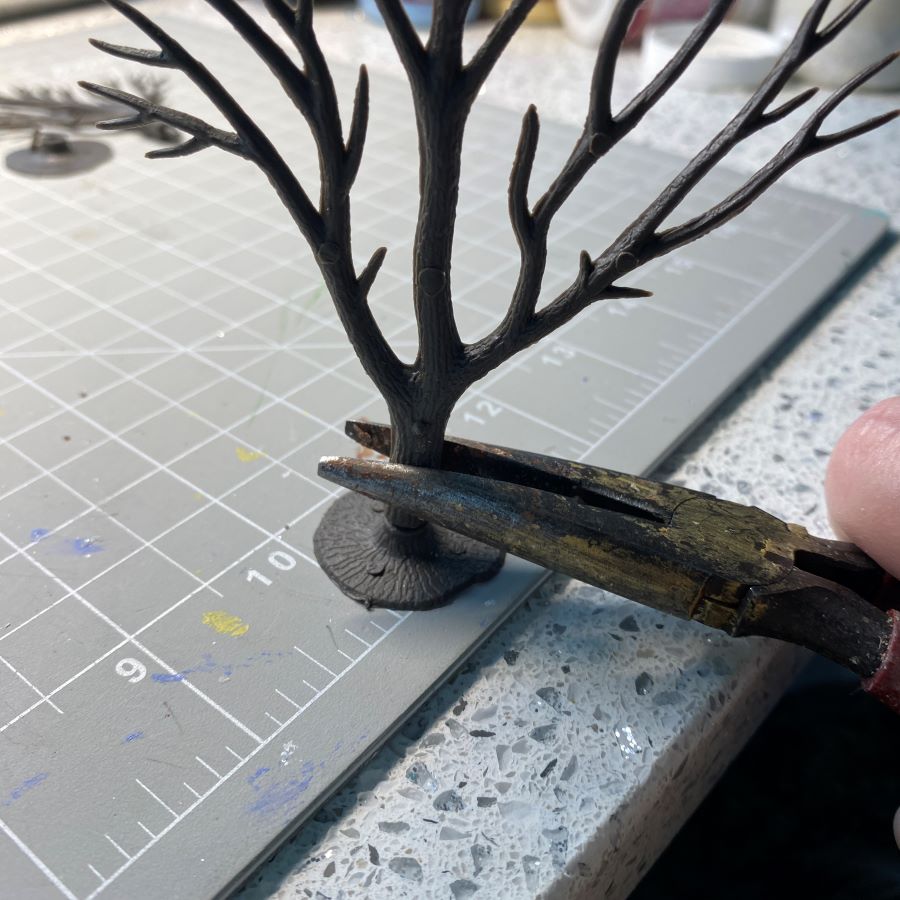
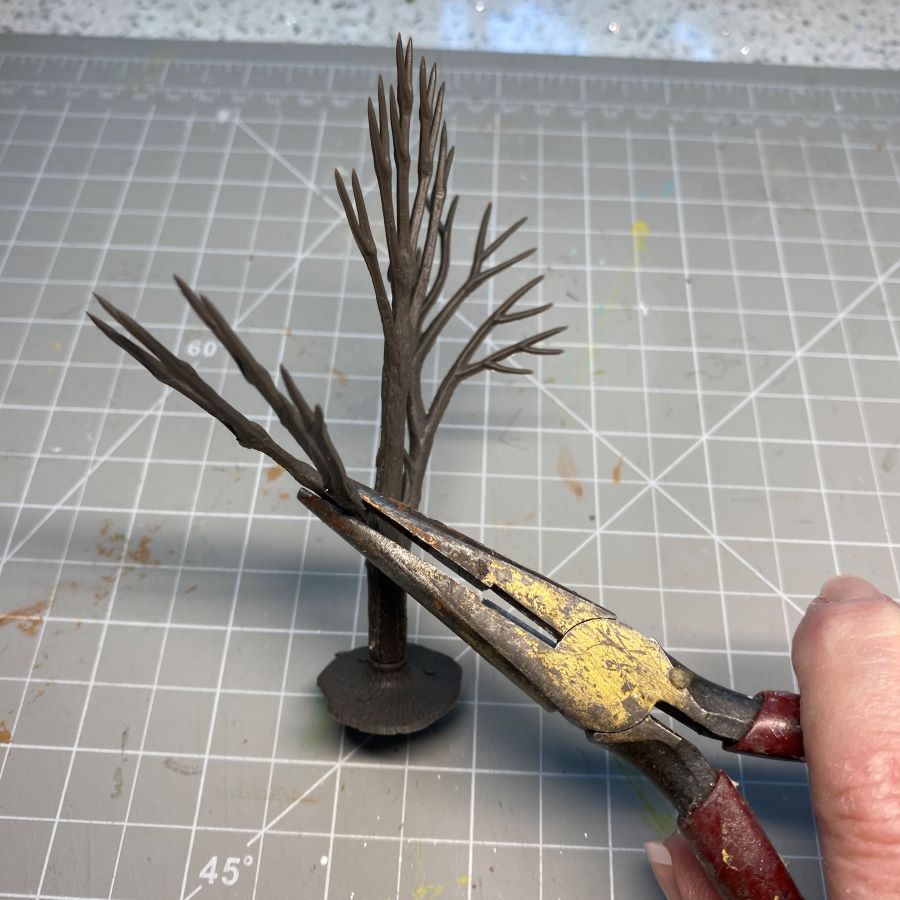
Using the pliers, begin to bend the tree into a pleasing shape. I strive to make the branches, other than the trunk, lie horizontally. That gives a place to lay the greenery. It also makes a better form for lining the branches with snow for winter houses.
NOTE / If making a tree for a particular house, it is helpful to have the house and base at hand. As you bend the armature, set the tree next to the house to decide which is the best way to bend the branches. If the tree sits right up against the house, the branches need to be shaped to fit that space. A tree close to a house will need to be flatter on the back than a tree that has plenty of room all the way around.
Anywhere a branch divides, the stems should be bent apart and moved to a horizontal position.
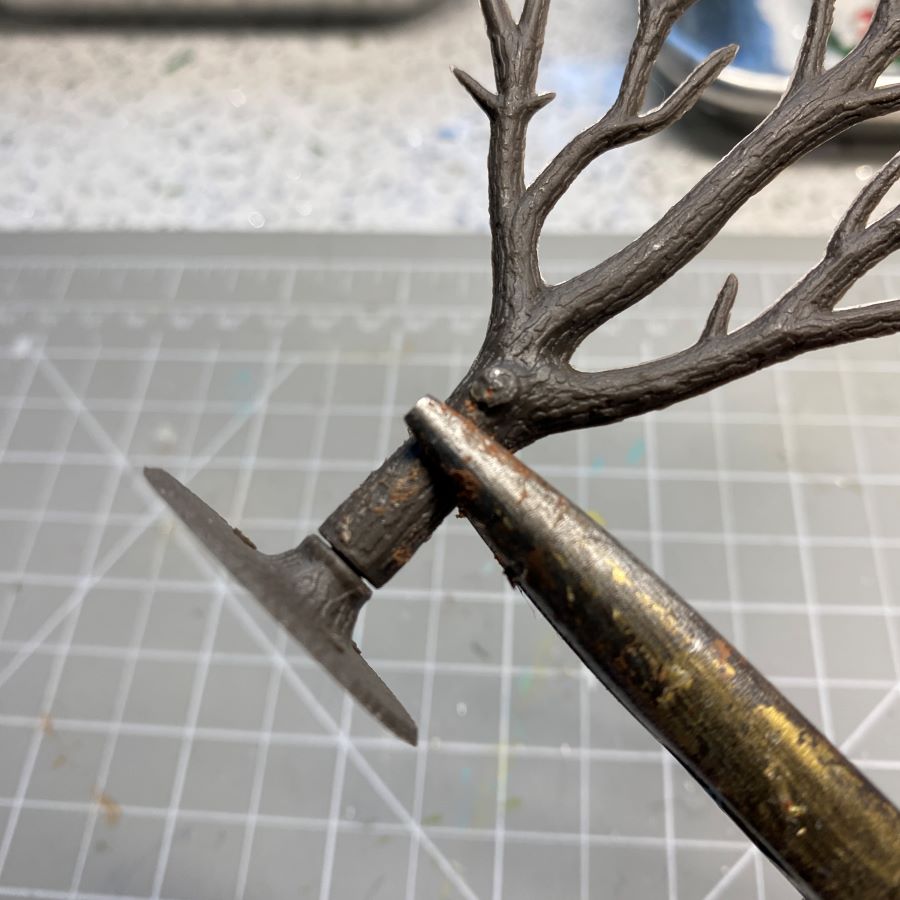
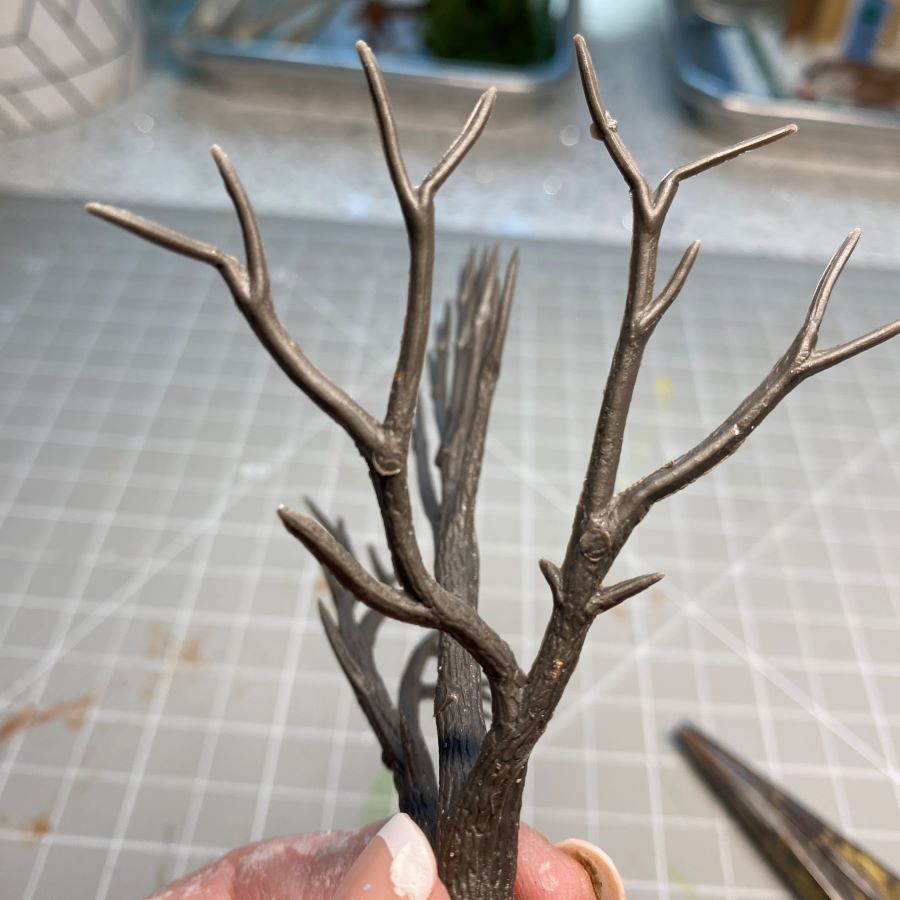
Bending every branch and twig gives the tree a more natural shape.
The same armature, the view from above. Note how even the larger branches are bent slightly.
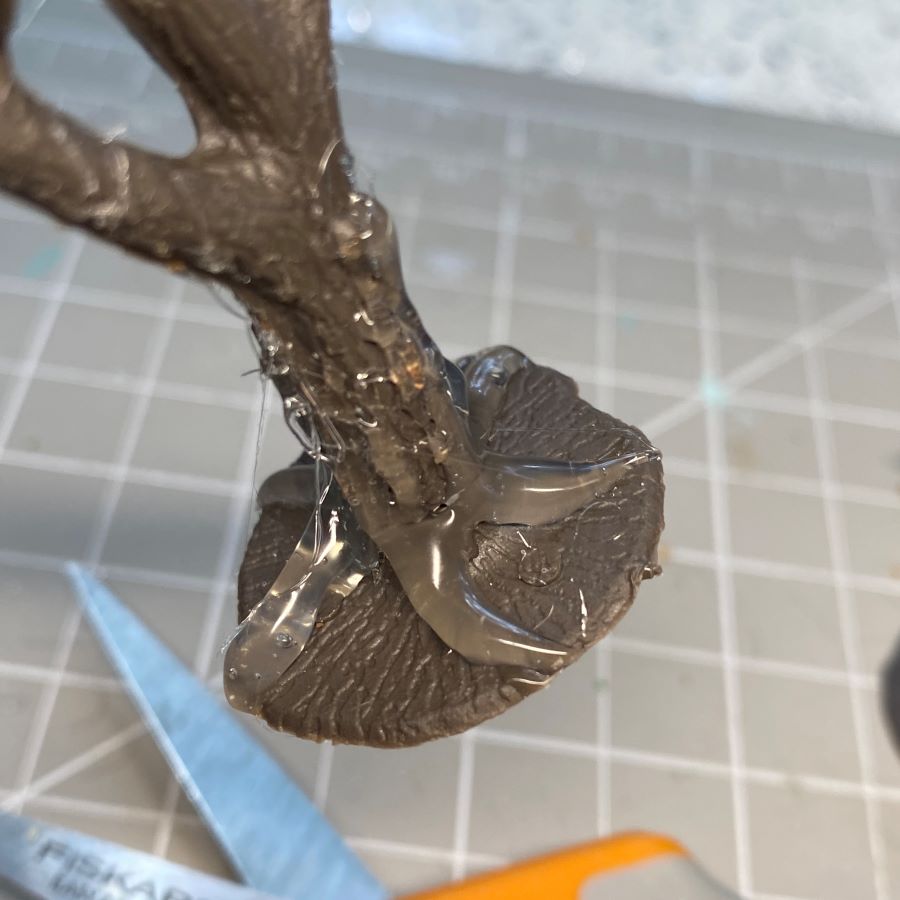
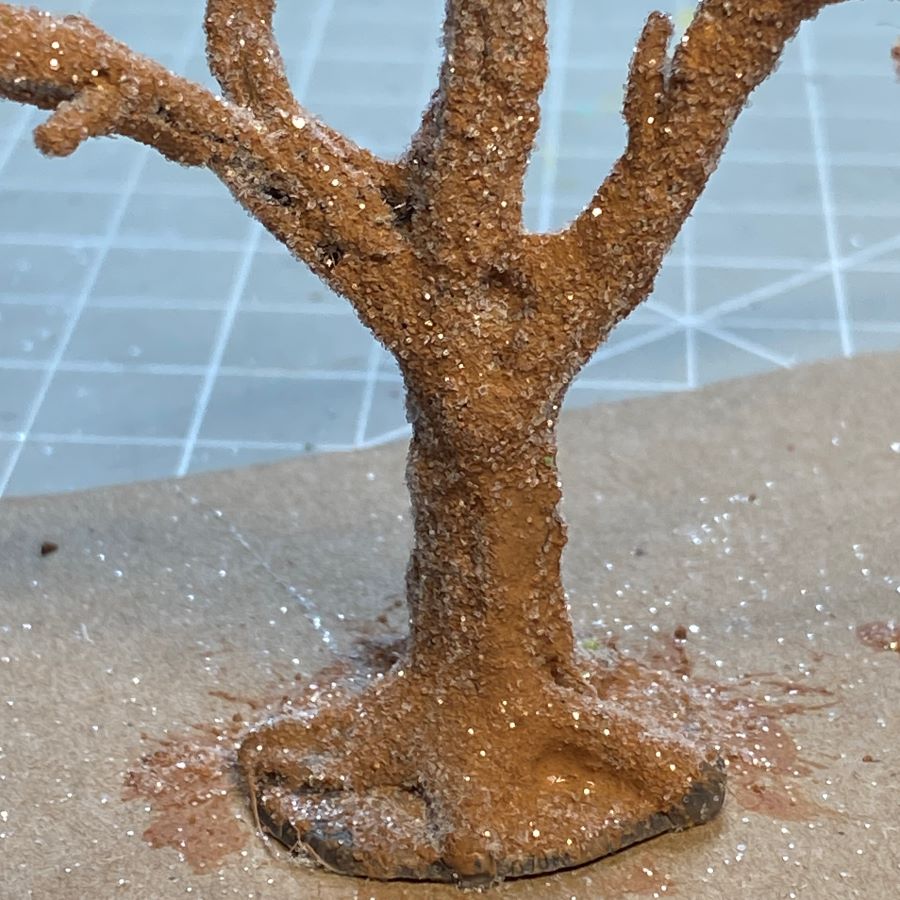
At this point, I add some hot glue to form roots. Start about half way between the base and the first branch. Pull to a point at the edge of the base. I cover any gap between the tree and the base. I also use the nozzle to rub hot glue up and down the bottom half of the trunk. It adds texture and interest.
I use hot glue to beef up the spaces between branches on the lower part of the trunk. Get rid of hot glue strands by touching them with the hot nozzle of the glue gun or pick them off after the glue cools.
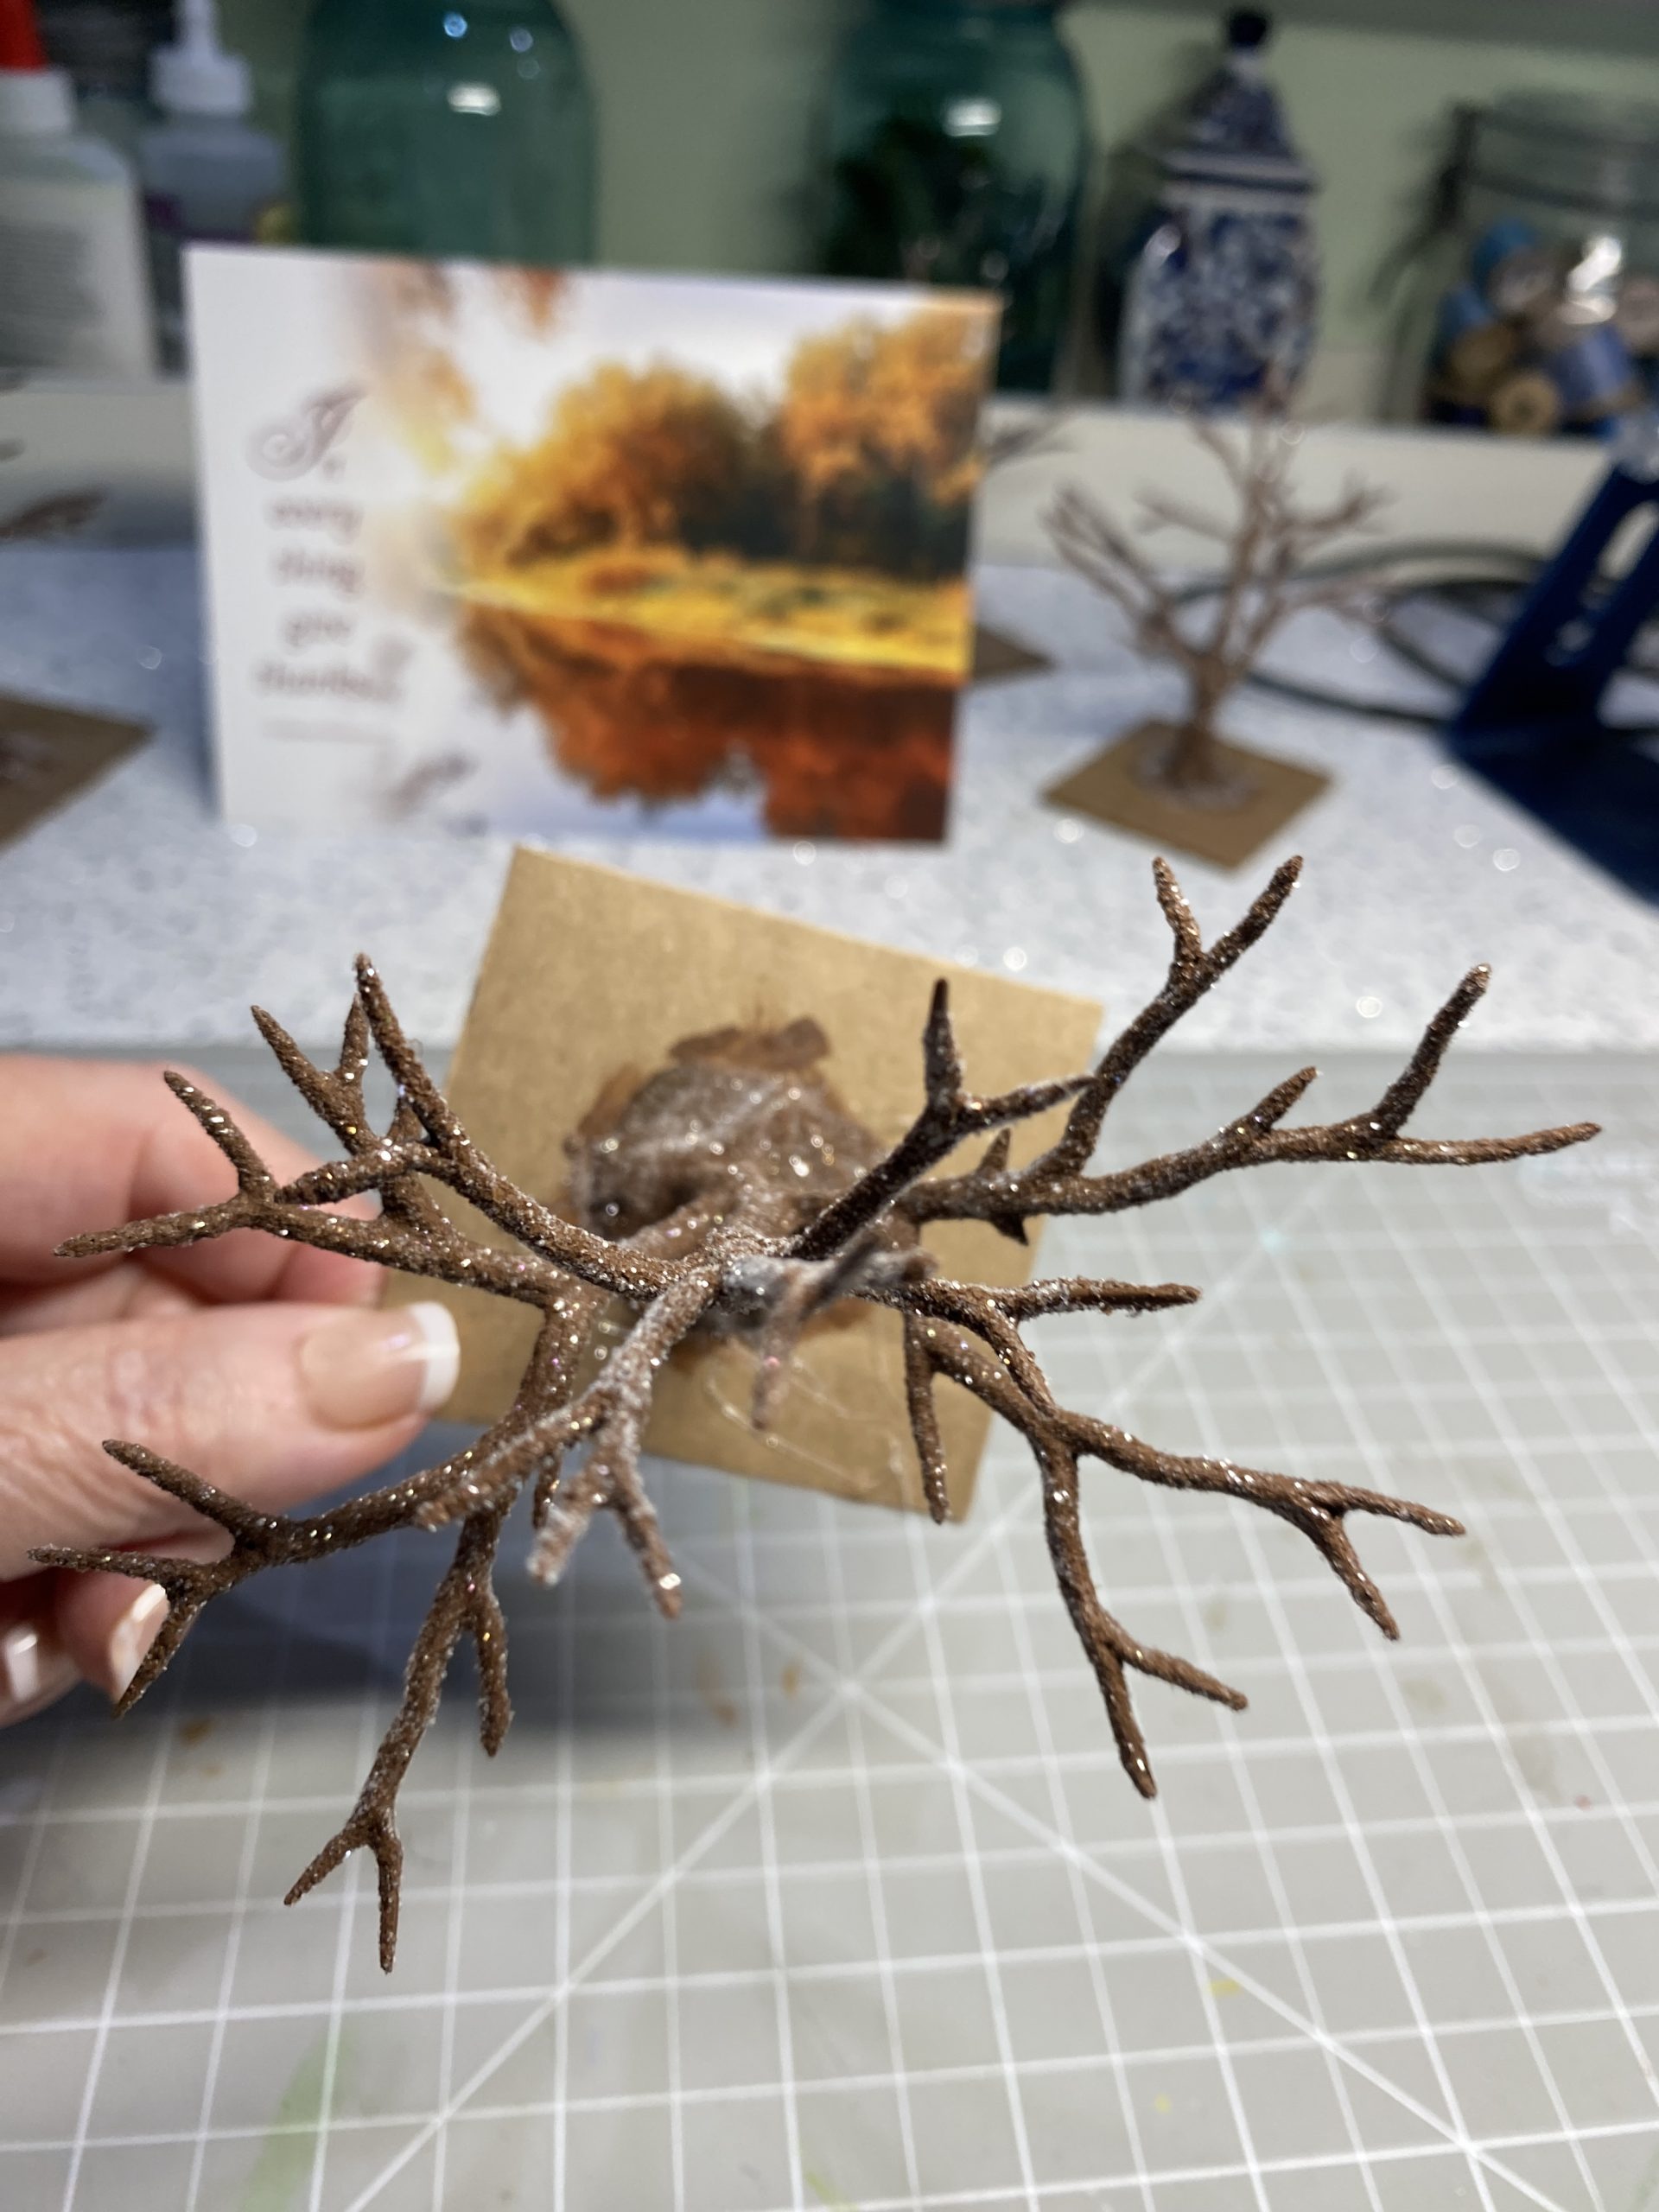
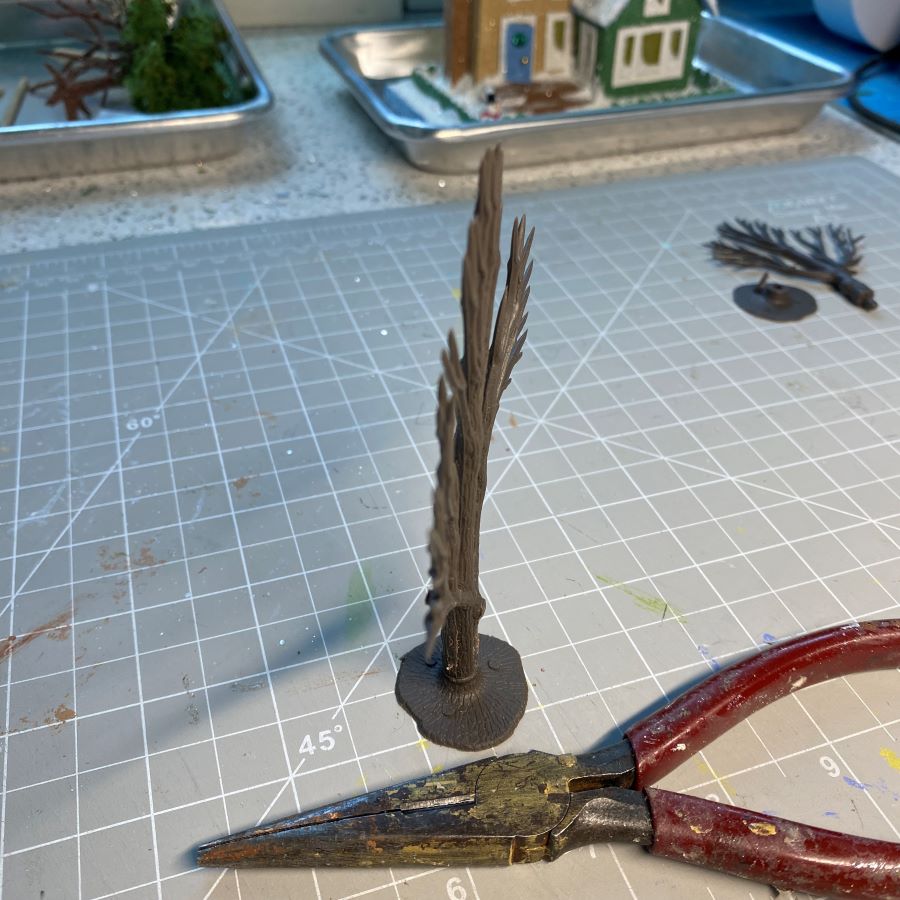
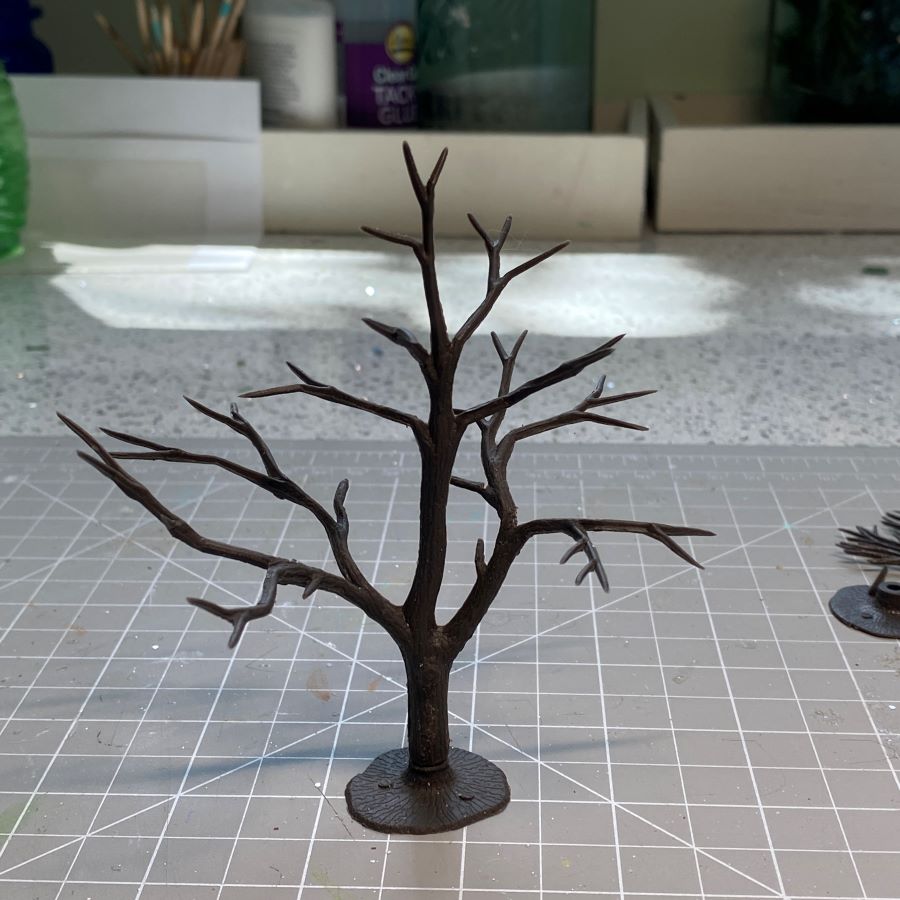
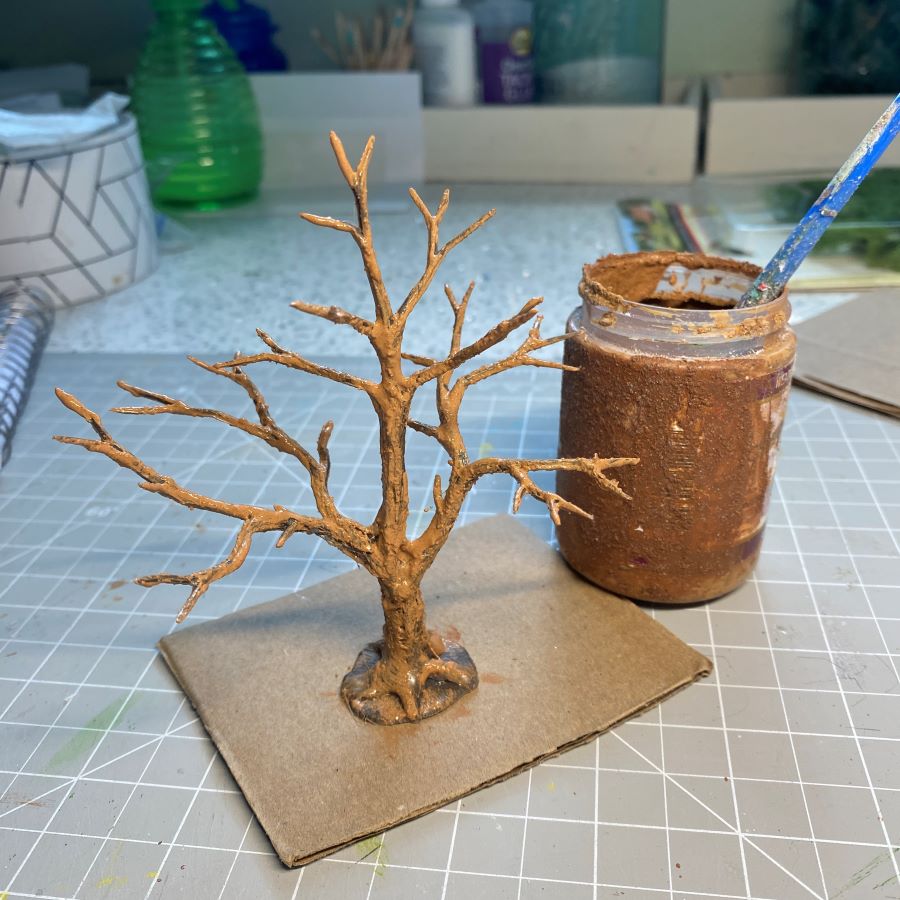
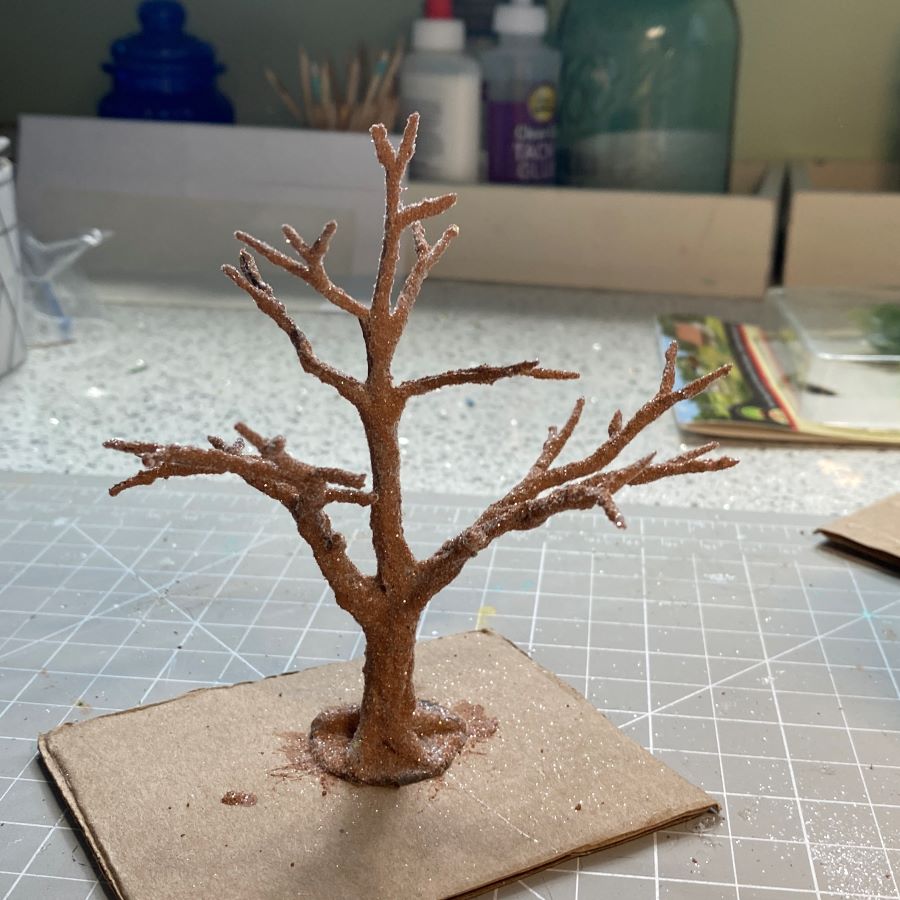
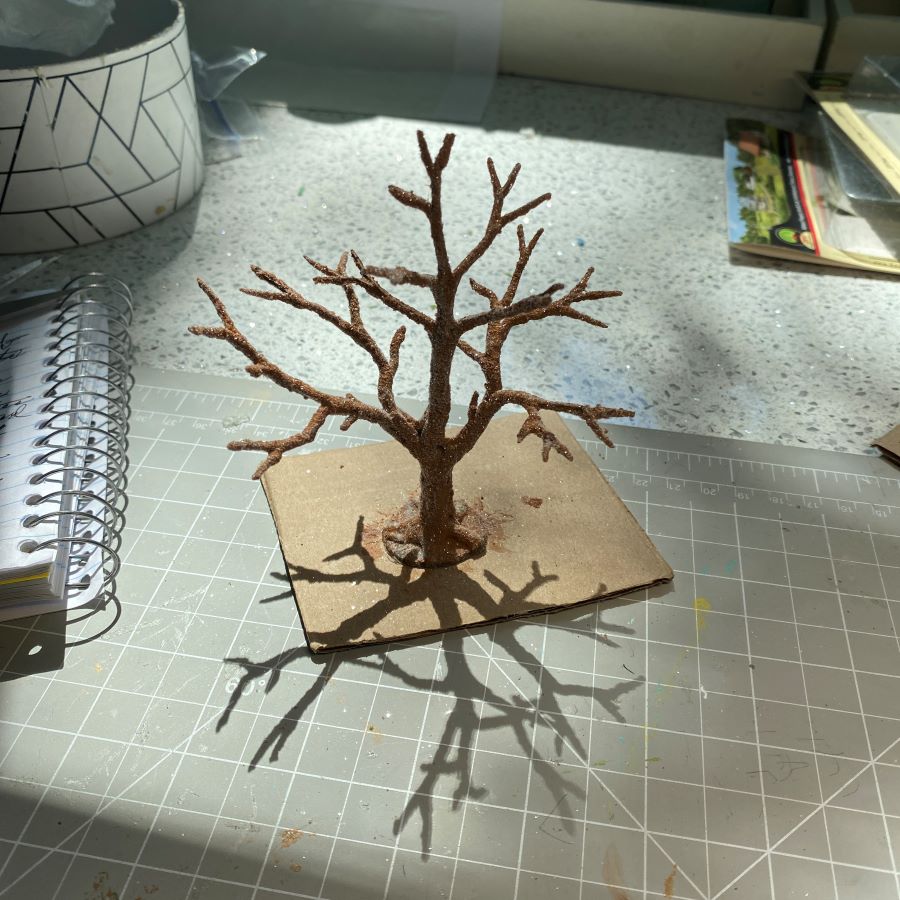
Using a dab of hot glue, glue the tree to a small scrap of cardboard. This makes the tree easier to handle while painting. Give the tree one coat of paint. Let it dry completely, then add a second coat. The paint I use is a mixture of acrylic paint, paint conditioner and very fine sand. I use it on my Putz houses to produce a vintage style texture. Plain acrylic paint will work fine on the tree, if you don’t want to mix textured paint.
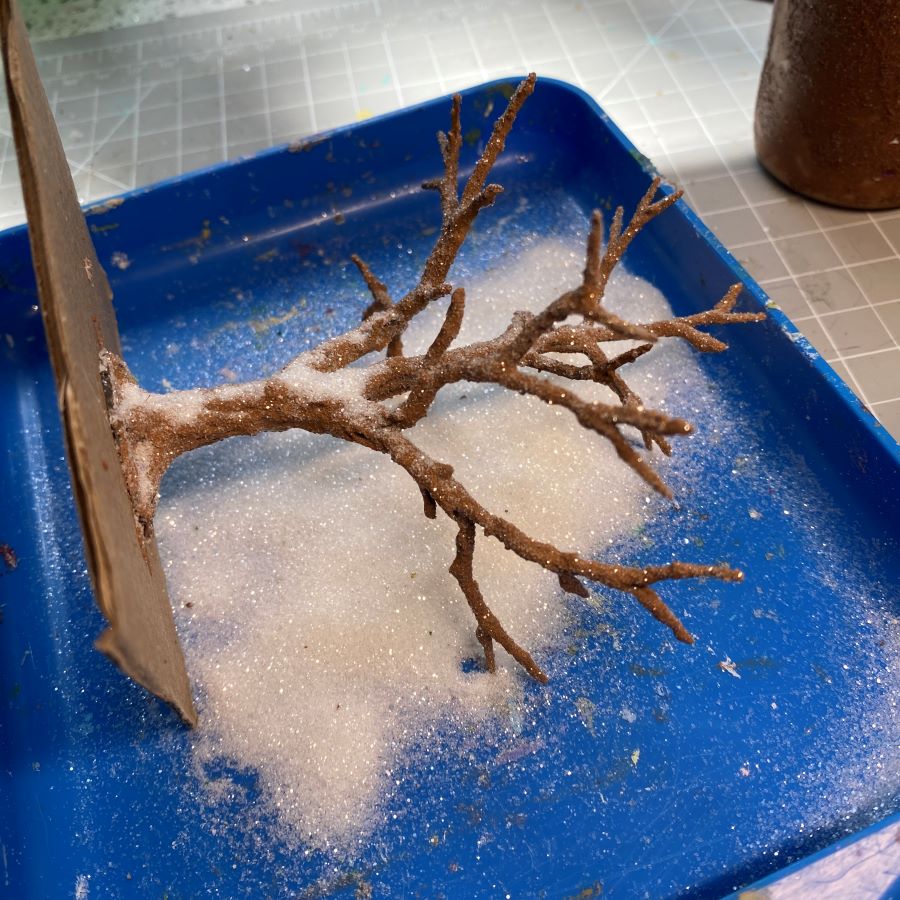
While the second coat of paint is still wet, cover the tree with fine glitter. Of course, you can skip the glitter if you prefer.
Allow the tree to dry completely.
Note the details the hot glue adds. With this method, each tree will be unique.
The tree is ready for adding foliage.
The tutorial for adding foliage to the finished armature can be found here:
If you are interested in crafting Putz houses of your own, check out my Putz tutorials for more information. Putz House Tutorials
I am always happy to answer questions about the process. Please ask, if you are wondering about the details of putzing!
All proceeds from my Etsy shop benefit Kenya Mercy Ministries. They work with the urban poor of Nairobi, Kenya, particularly the children and their families who live in Kibera, the largest slum in Africa. Thank you for your part in helping these children when you purchase items from my shop!