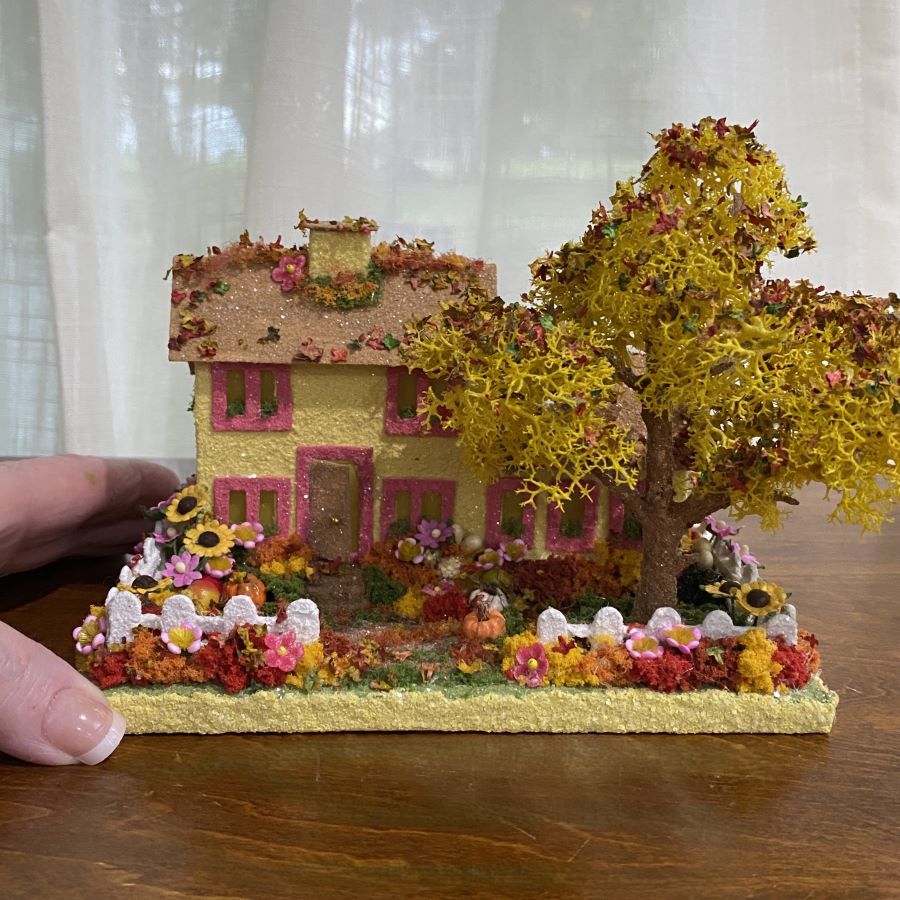
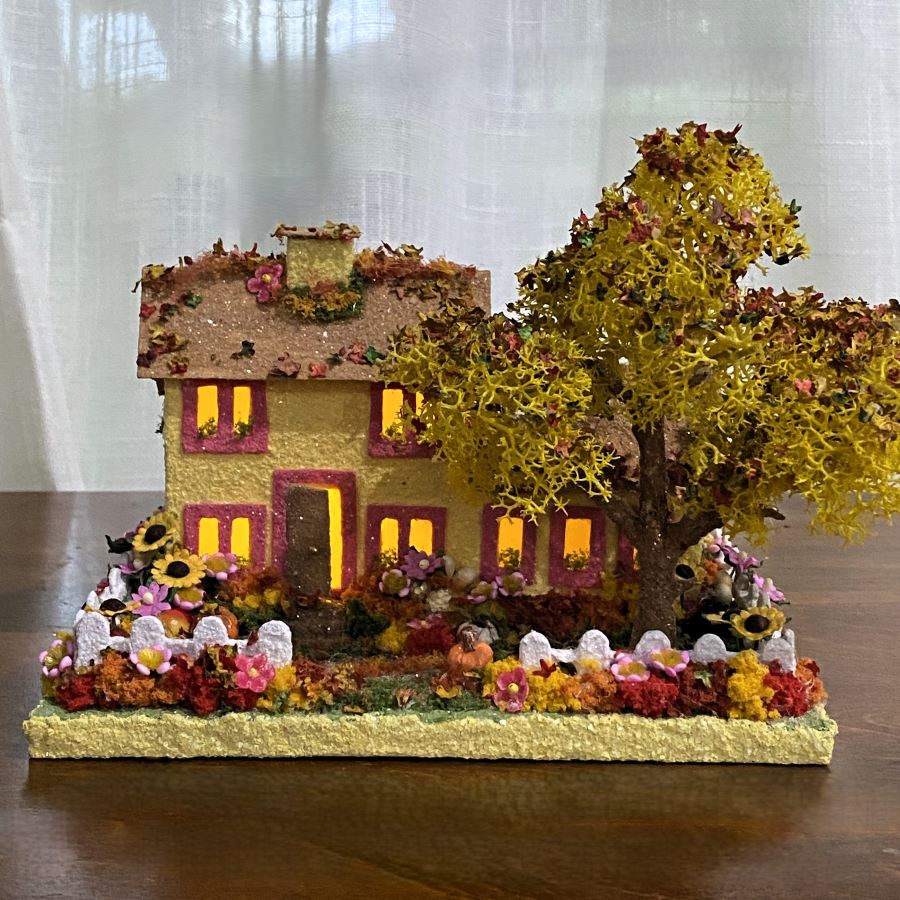
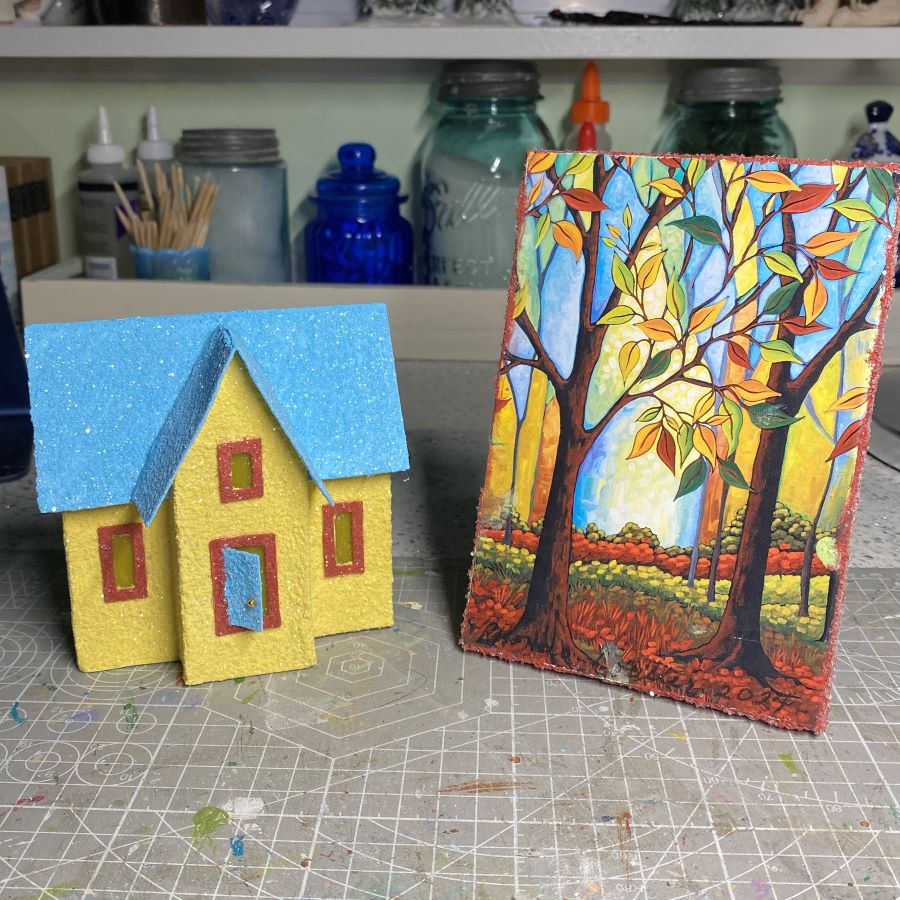
I took photos of this house in my light box, but the colors were wrong. I tried again, by placing the house on a table by the window and took the pictures in natural light. A much better match.
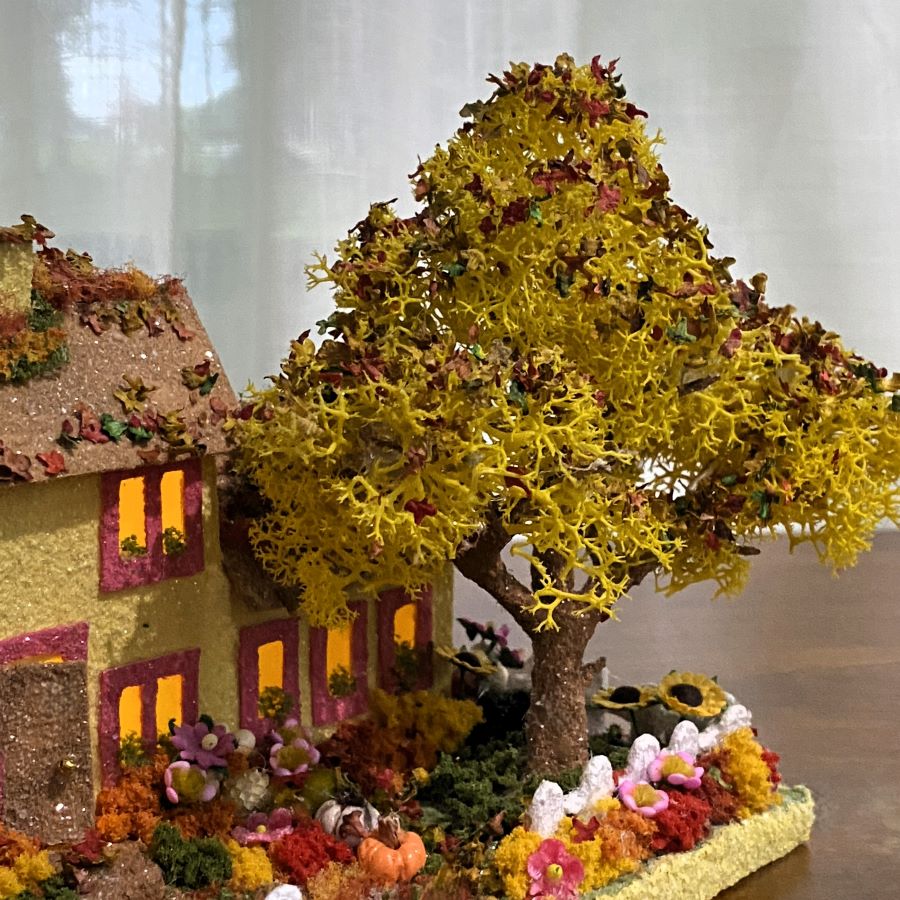
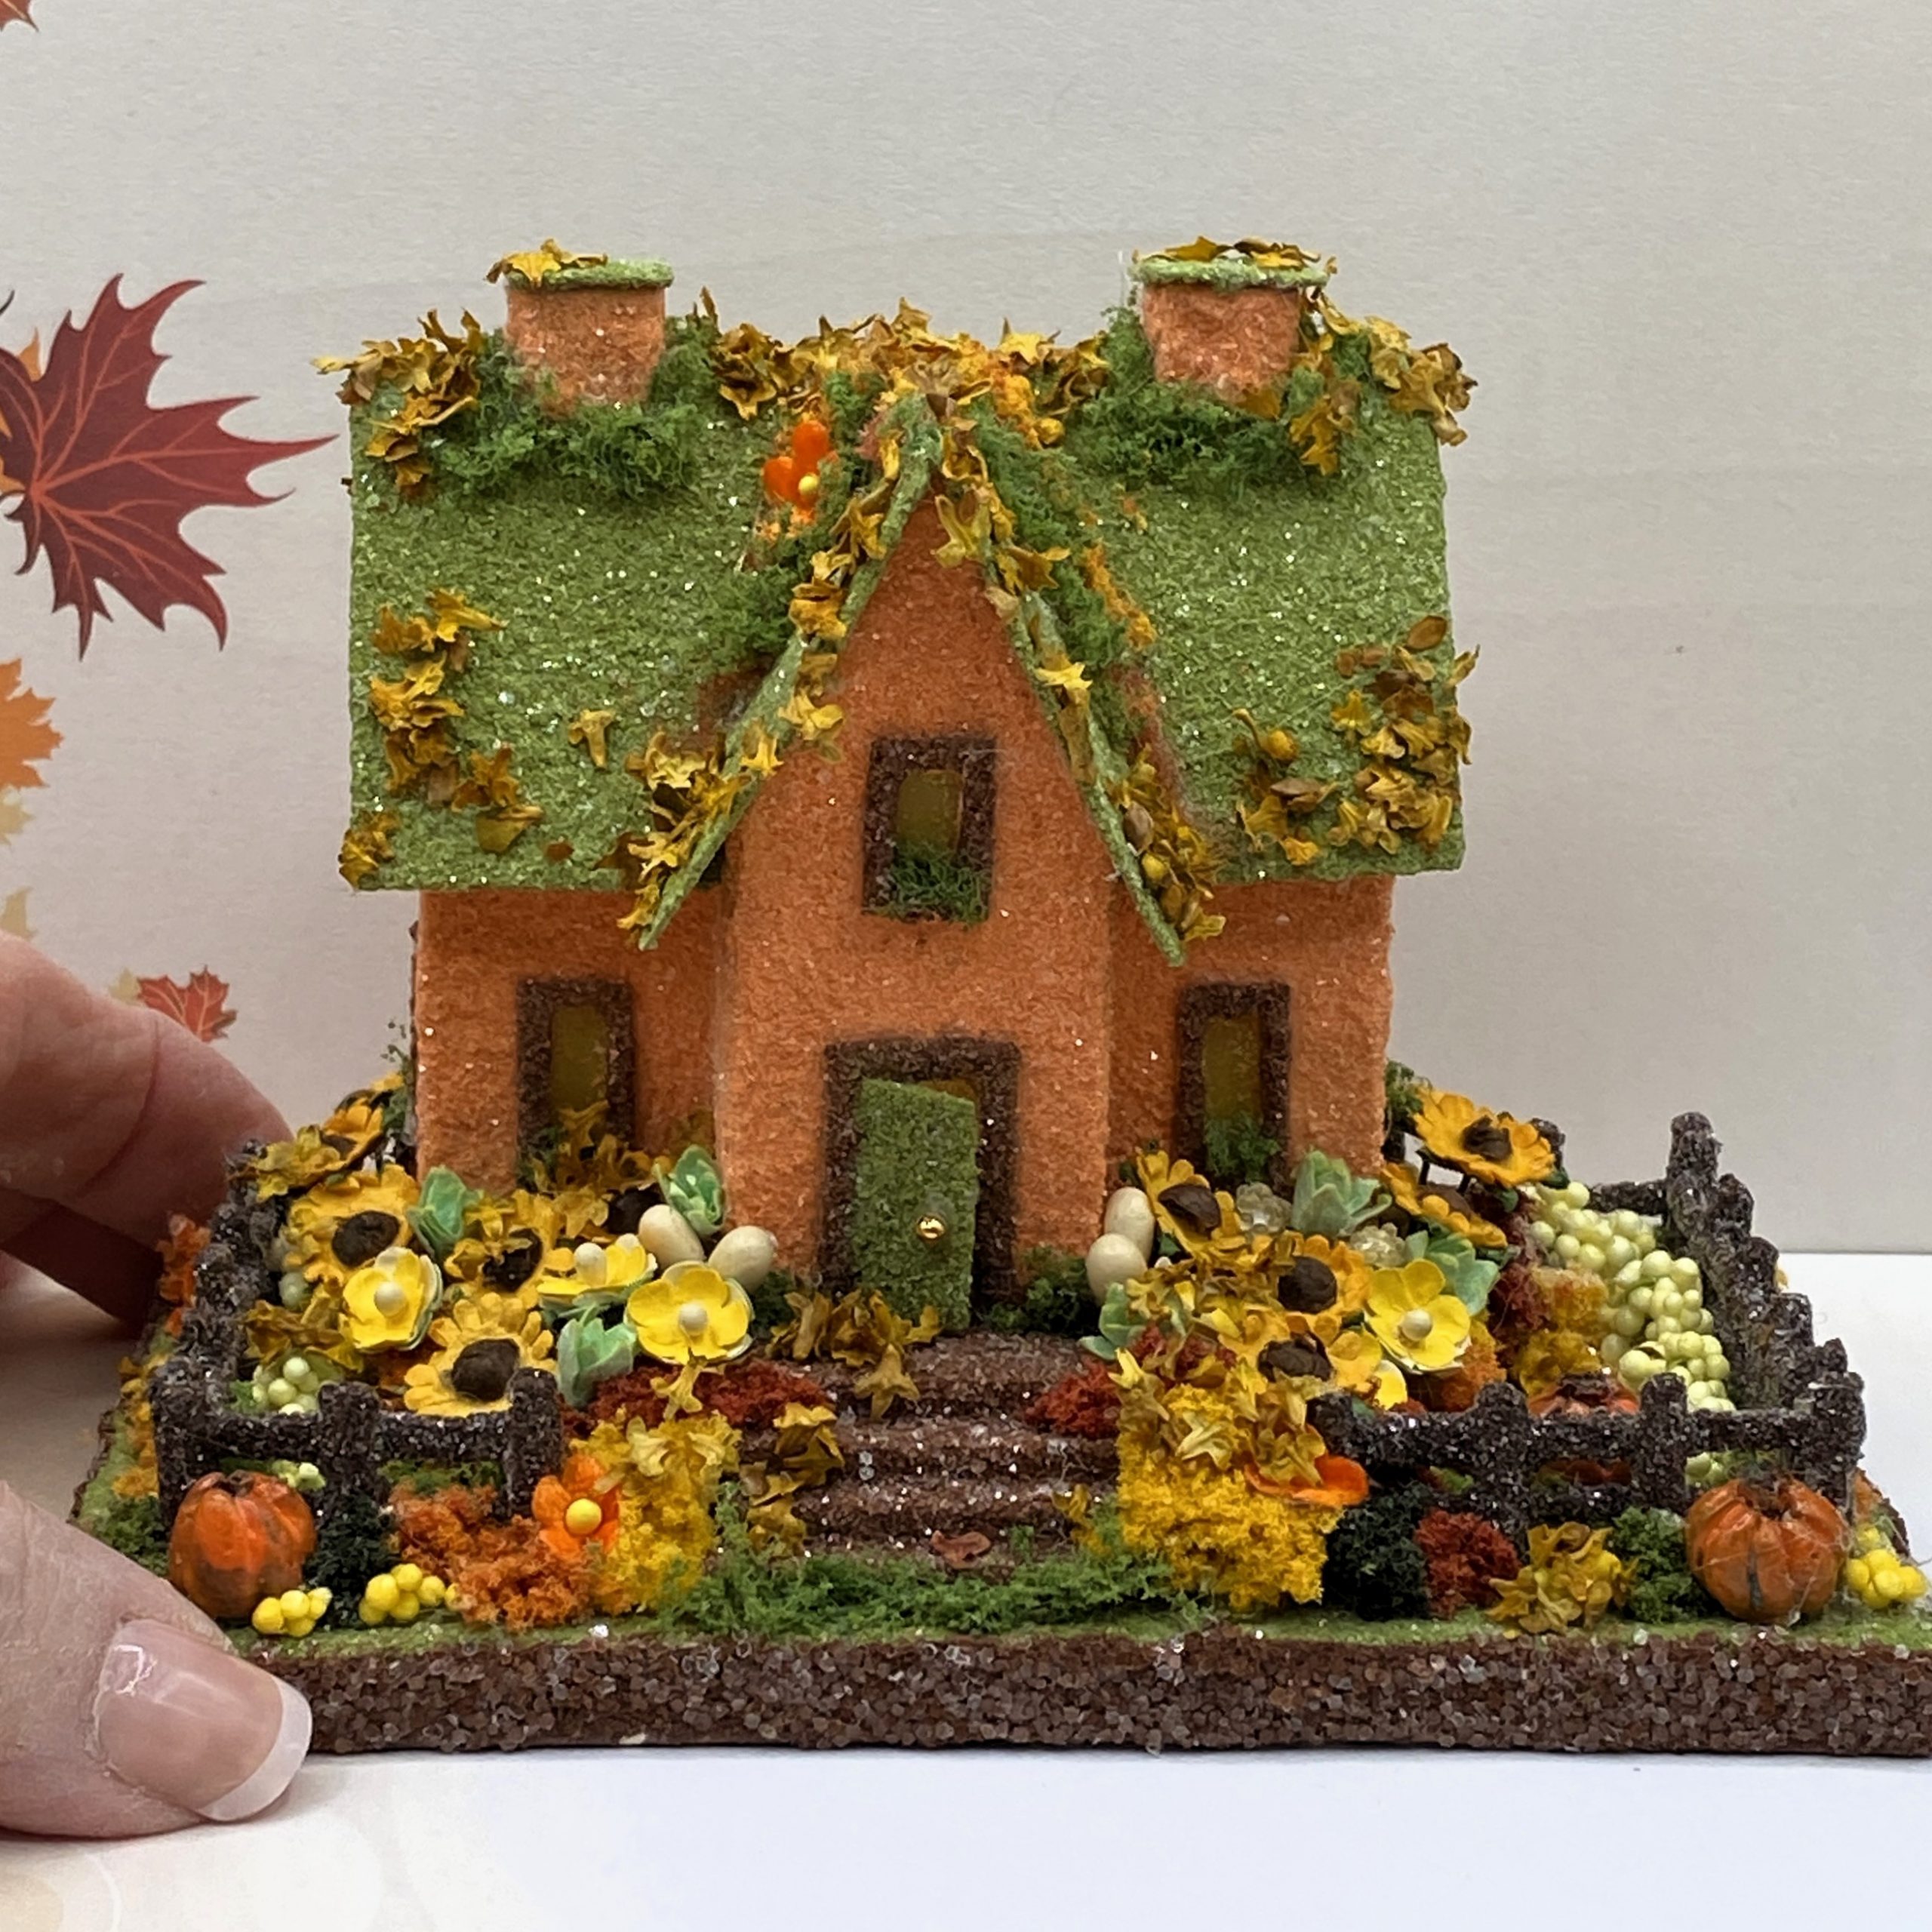
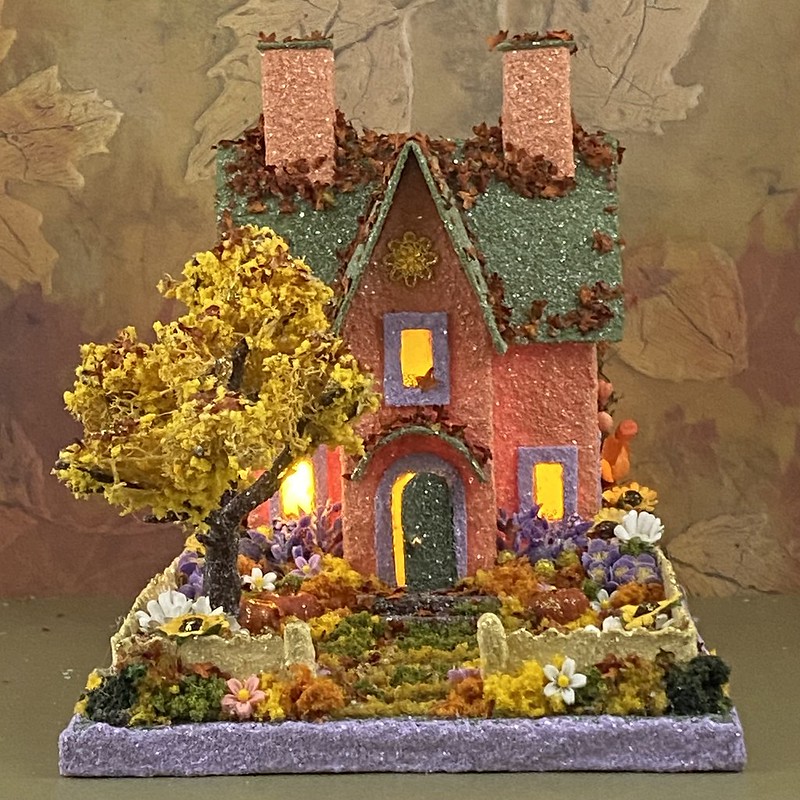
The autumn house is 6 1/2″ wide by 4 1/2″ deep. The putz is 5″ tall as measured from the bottom of the base to the top of the tree.
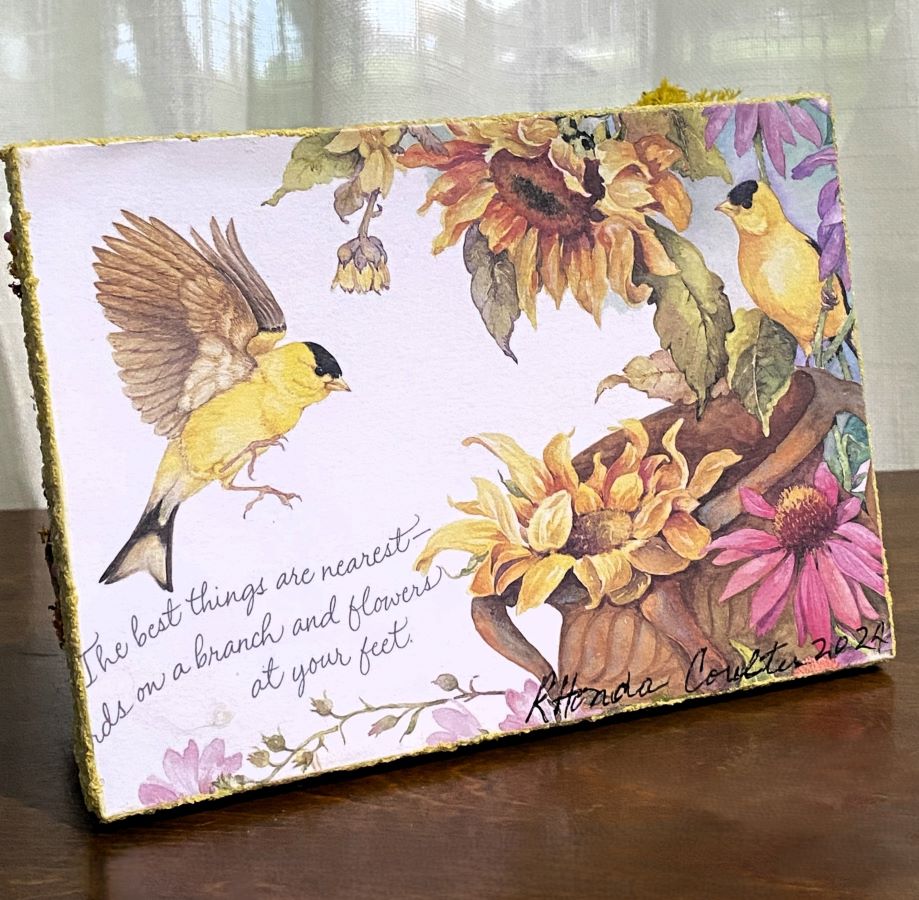
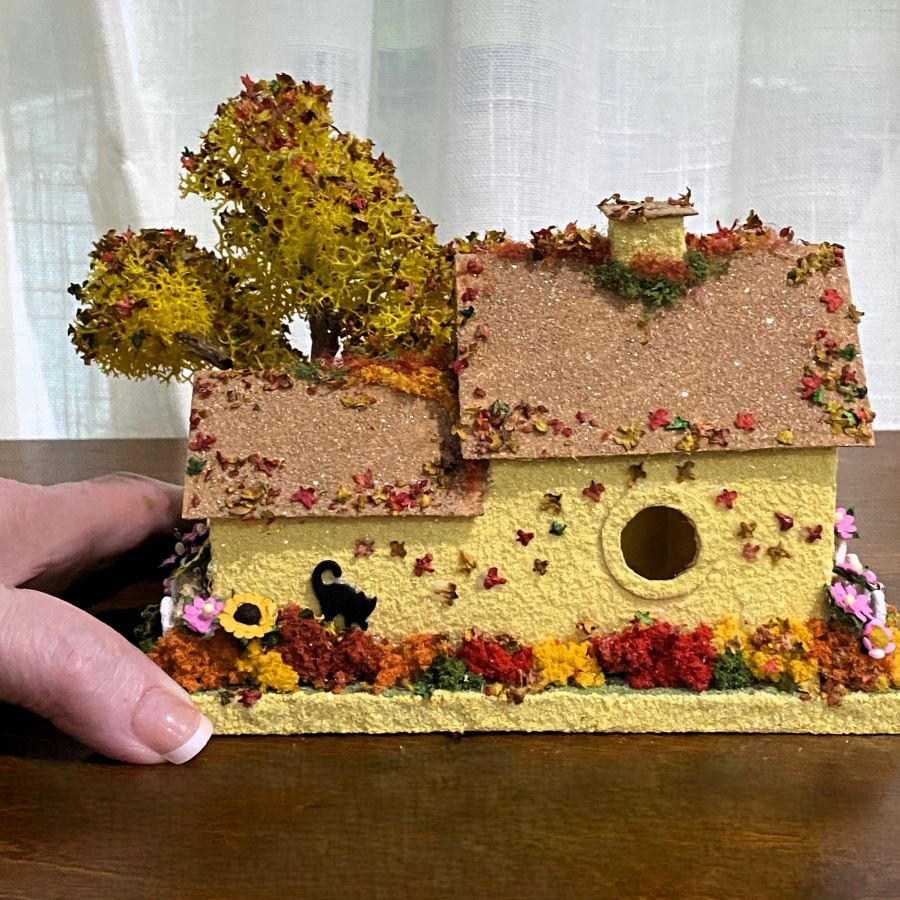
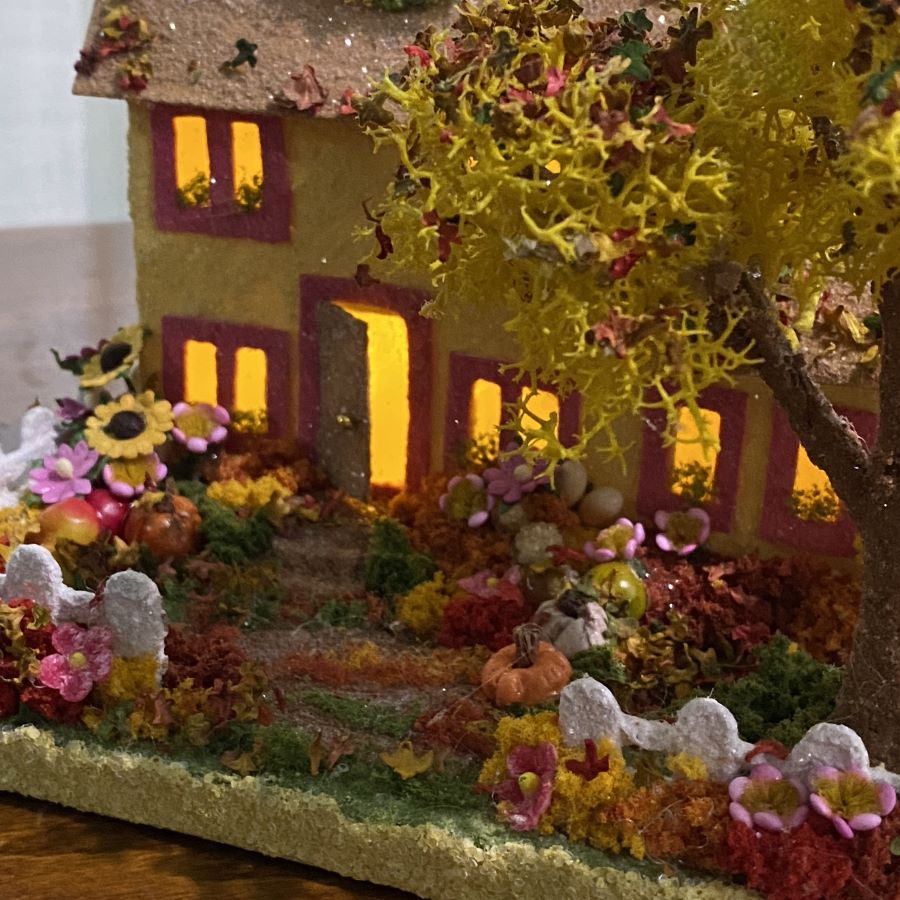
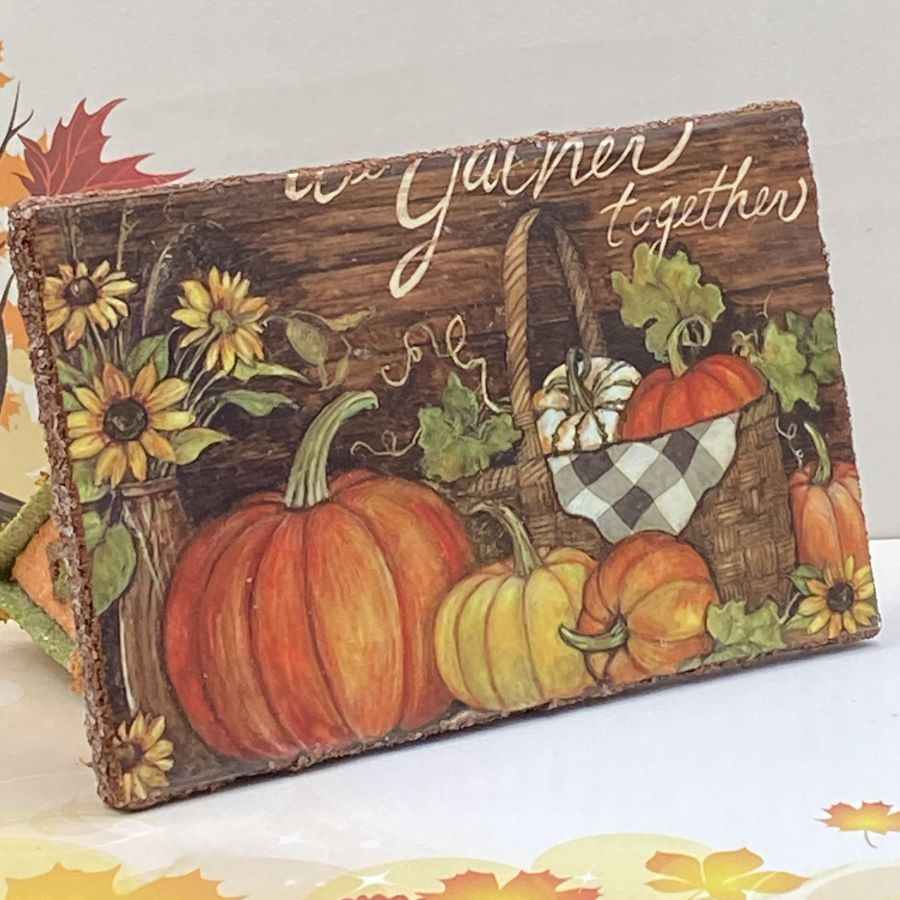
The base is made from an upcycled greeting card, featuring two goldfinches and a bounty of sunflower and purple coneflower seeds. If you have ever planted coneflowers, you have surely seen the goldfinches swarming the flowers for the seeds. A delightful sight! On the back of this card, a little black cat is chasing the autumn leaves.
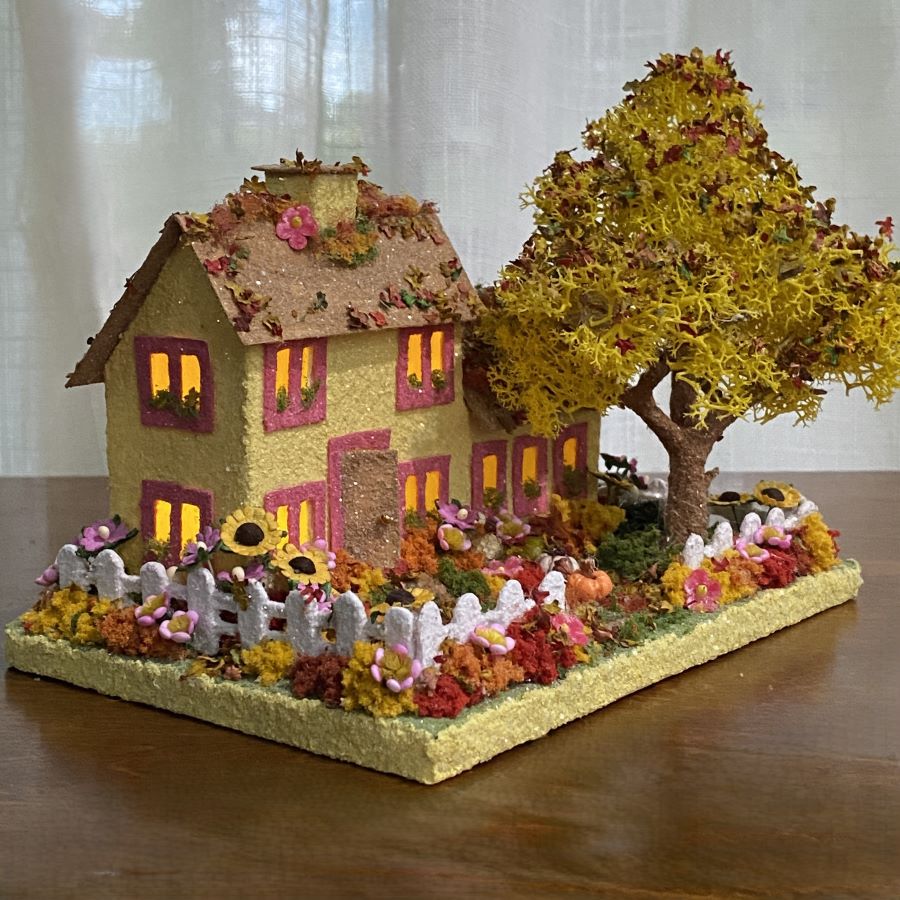
The putz house has a beautiful, handcrafted autumn tree. It is made from an armature, dried moss and leaf litter. The yard sports a handcrafted, wooden picket fence, made from wooden coffee stir sticks.
Enjoy the autumn evening, the yard full of flowers and the beautiful tree.
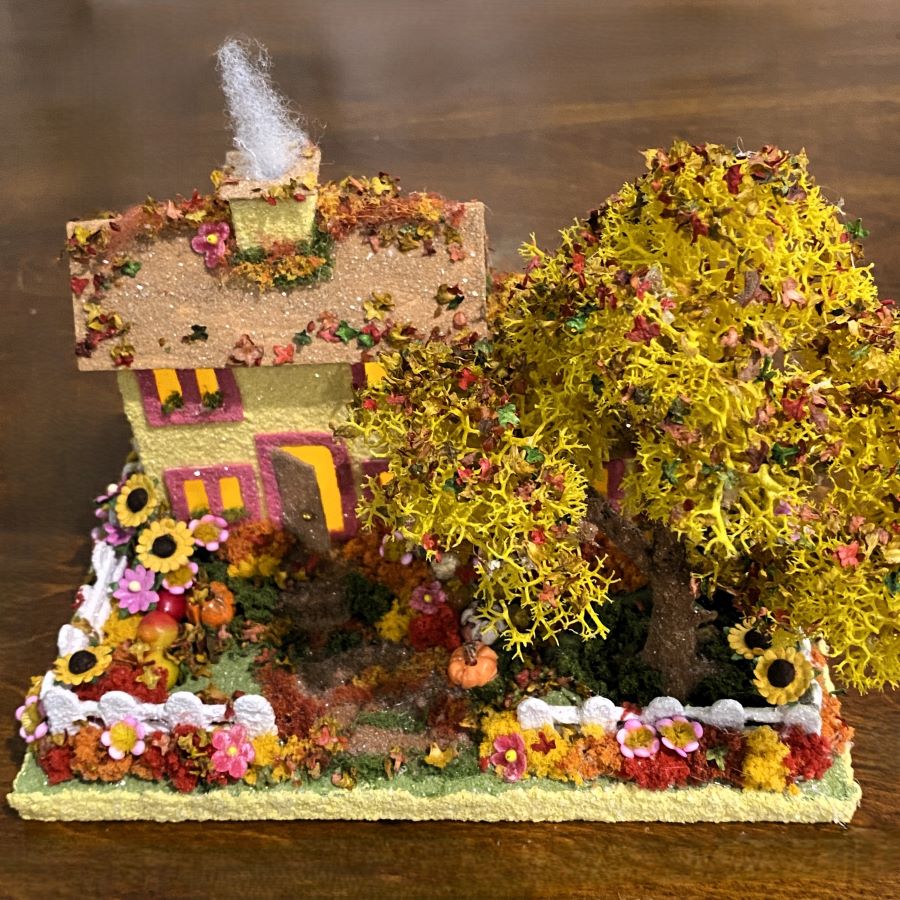
A puff of smoke is included. You may want to light the fireplace and cozy up for hot chocolate and Christmas cookies.
If you have any questions about these houses, or about creating your own putz houses, please ask. I am happy to share what I have learned about the art of putzing.
If you would like to see more of my putz houses, as well as Christmas ornaments I have made from upcycled holiday cards, please visit my Etsy shop.
If you are interested in crafting Putz houses of your own, check out my putz tutorials for more information. My blog can be searched, as well. Some of the turorials haven’t been listed on the tutorial page. Working on that!
All proceeds from my Etsy shop benefit Kenya Mercy Ministries. They work with the urban poor of Nairobi, Kenya, particularly the children and their families who live in Kibera, the largest urban slum in Africa. Thank you for your part in helping these children when you purchase items from my shop!
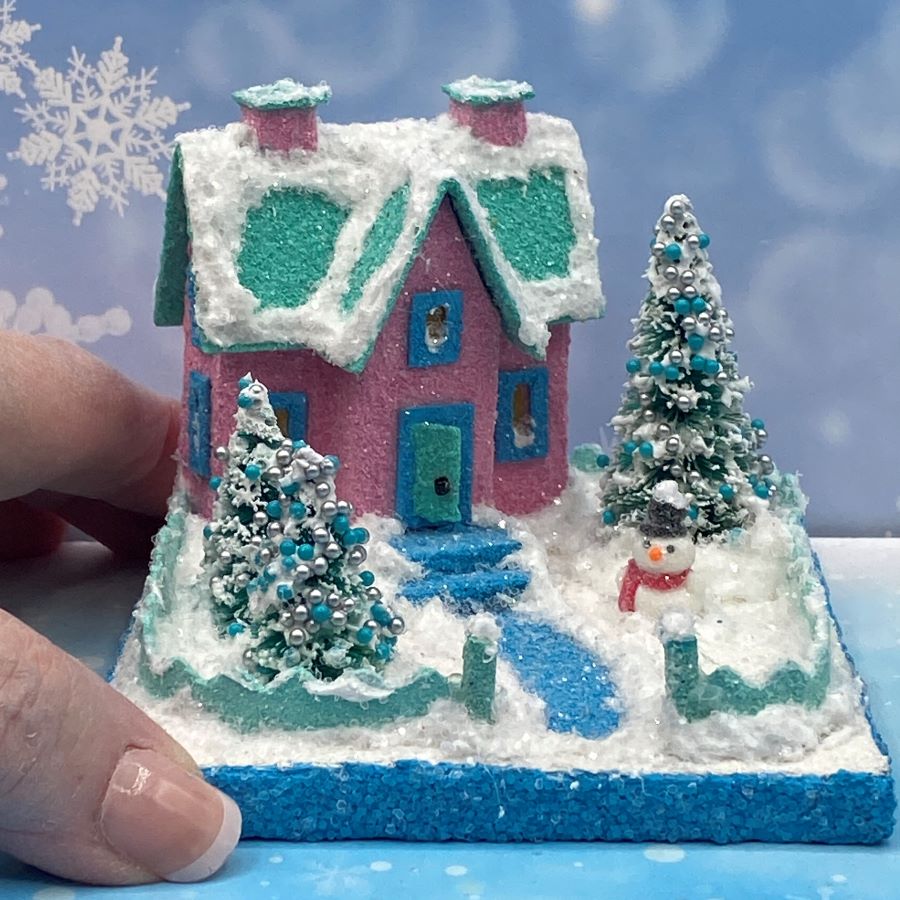
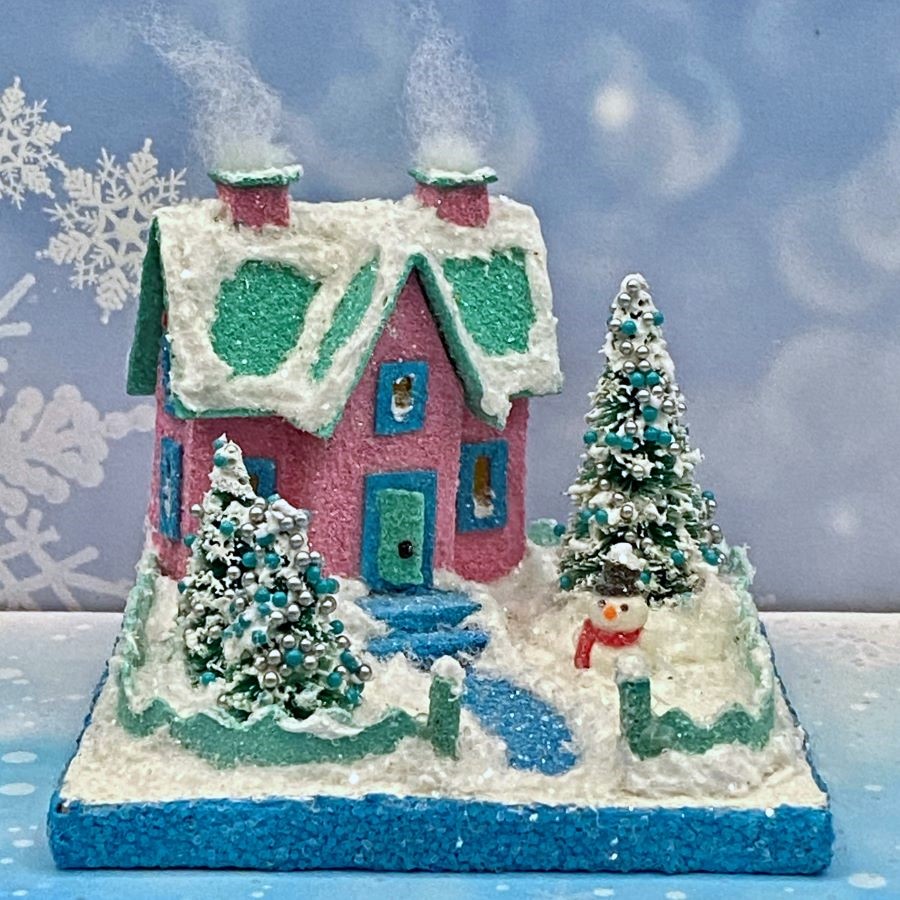
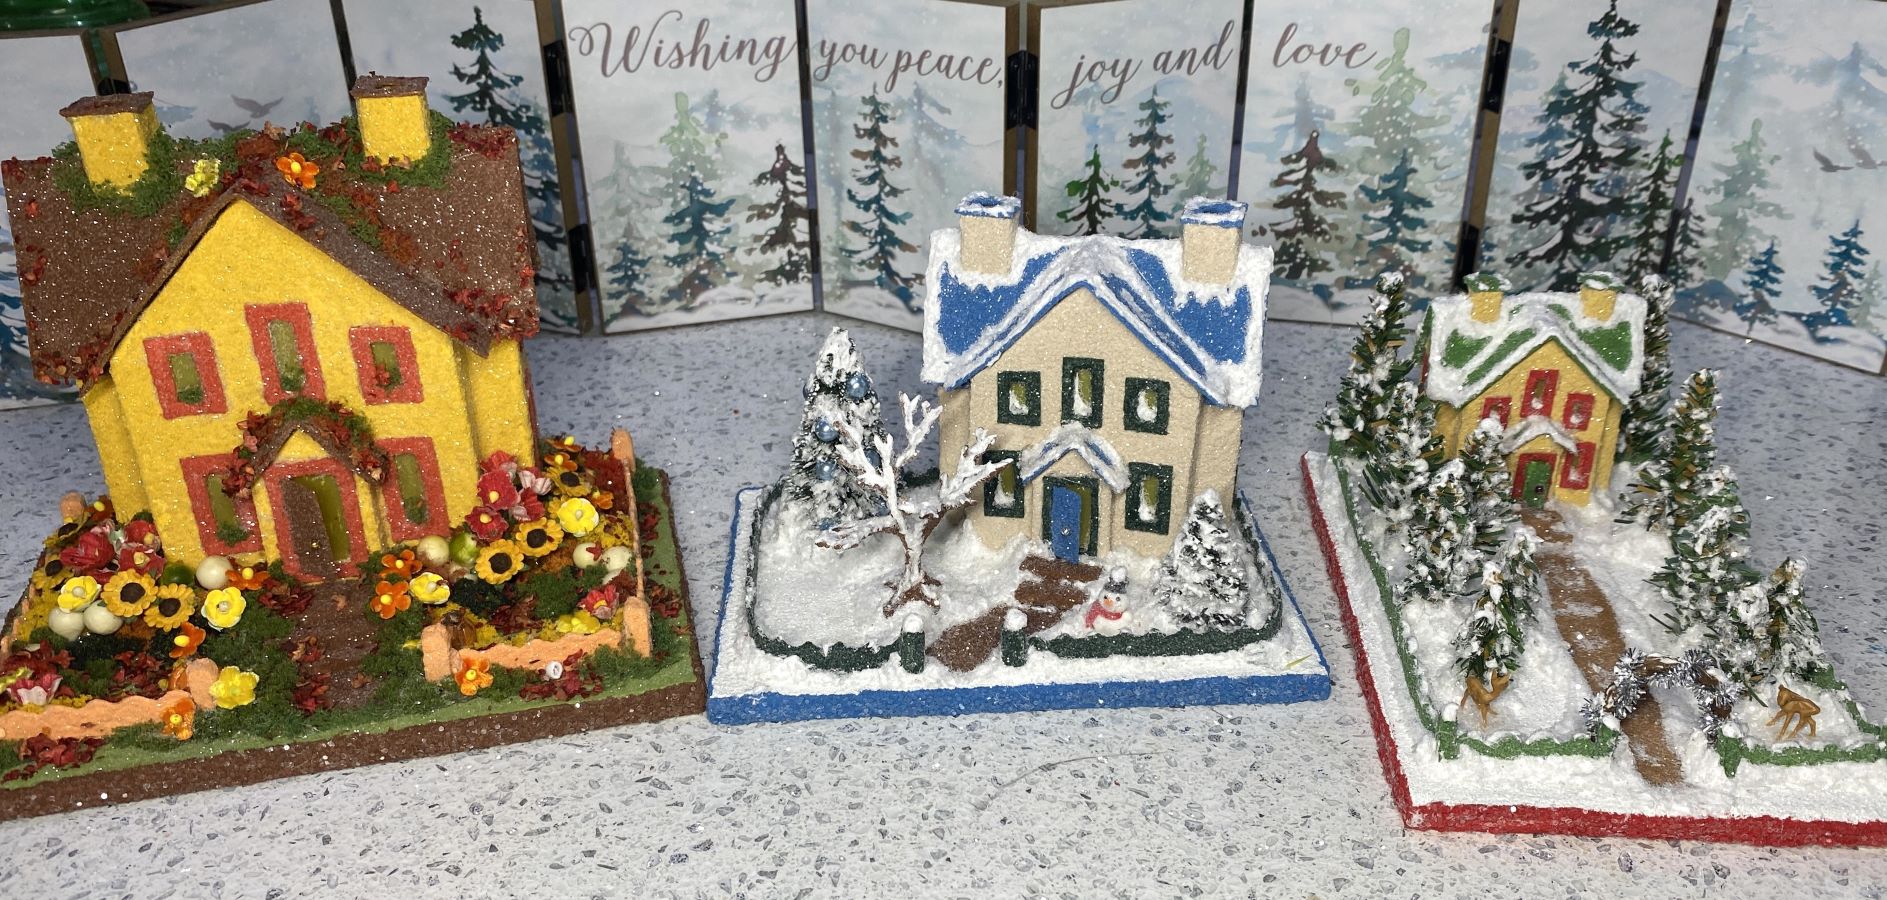
I just finished three sizes of the same pattern. Tiny Mini, Mini, and Original sizes. The smallest (Tiny Mini) is a pink winter house. The tiny snowman is almost too big! The orange Mini putz is made on a horizontal card. The yellow Original size is made on a verticial card base.
A vertical card leaves more room for landscaping than a horizontal card does. A drawback of using a vertical card for the base is the width. Some of my patterns are too wide to fit most vertical cards. I drew a few more narrow patterns, like this one, to take advantage of vertical cards.
The base of the Tiny Mini house is a small, vintage, vertical card. Setting the house at an angle leaves a little more room for landscaping. It also provides some visual interest. The sidewalk will be curved and one side of the yard will be larger than the other.
I think this little house looks cozy and warm.
I like to choose colors from the card to paint the putz house.
I found the tiny snowman on Amazon. He is about 5/8 of an inch tall. The bottle brush trees are decorated with faux snow. While the snow was wet, I sprinkled micro beads in silver and blue on the trees. Search “nail beads” or “caviar beads” for other colors.
There are a lot of ways to embellish and landscape a putz house. As you make putz, you will find the style you enjoy the most. Then practice, practice, practice. Your own style will develop as you make more putz houses.
If you have any questions about these houses, or about creating your own putz houses, please ask. I am happy to share what I have learned about the art of putzing.
If you would like to see more of my putz houses, as well as Christmas ornaments I have made from upcycled holiday cards, please visit my Etsy shop.
If you are interested in crafting Putz houses of your own, check out my putz tutorials for more information. My blog can be searched, as well. Some of the turorials haven’t been listed on the tutorial page. Working on that!
All proceeds from my Etsy shop benefit Kenya Mercy Ministries. They work with the urban poor of Nairobi, Kenya, particularly the children and their families who live in Kibera, the largest urban slum in Africa. Thank you for your part in helping these children when you purchase items from my shop!
When I started the hobby of making putz houses, I made only winter / Christmas houses. Eventually, I thought about making seasonal houses. I expanded into spring, summer and autumn, in addition to the winter putz.
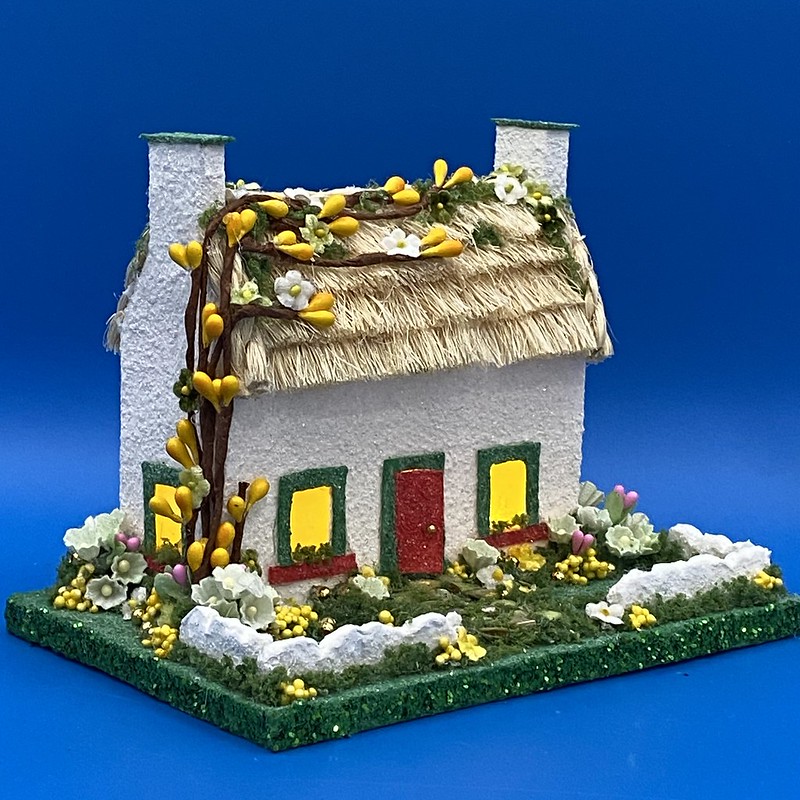
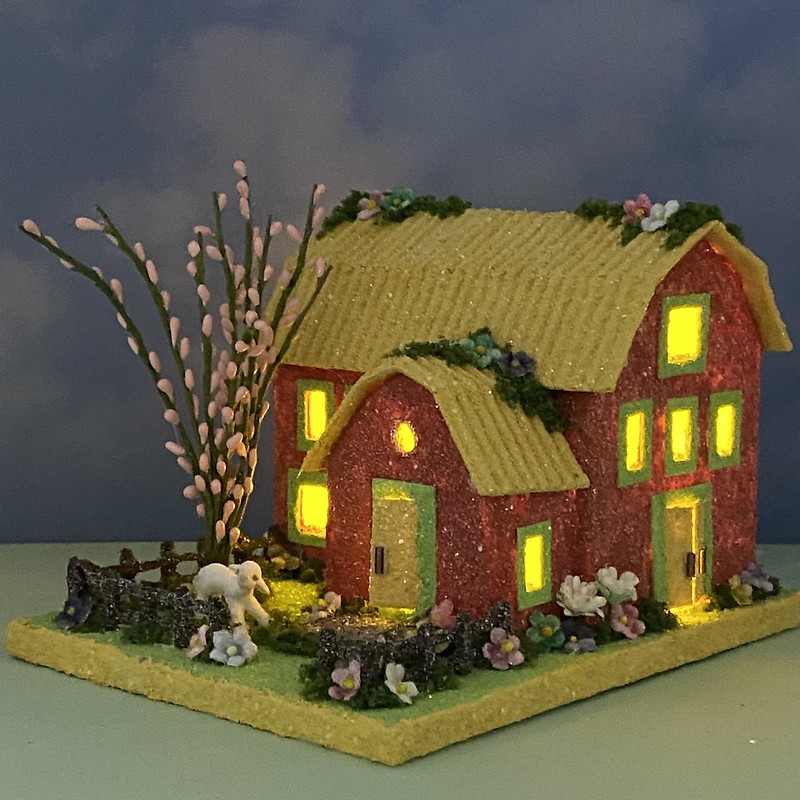
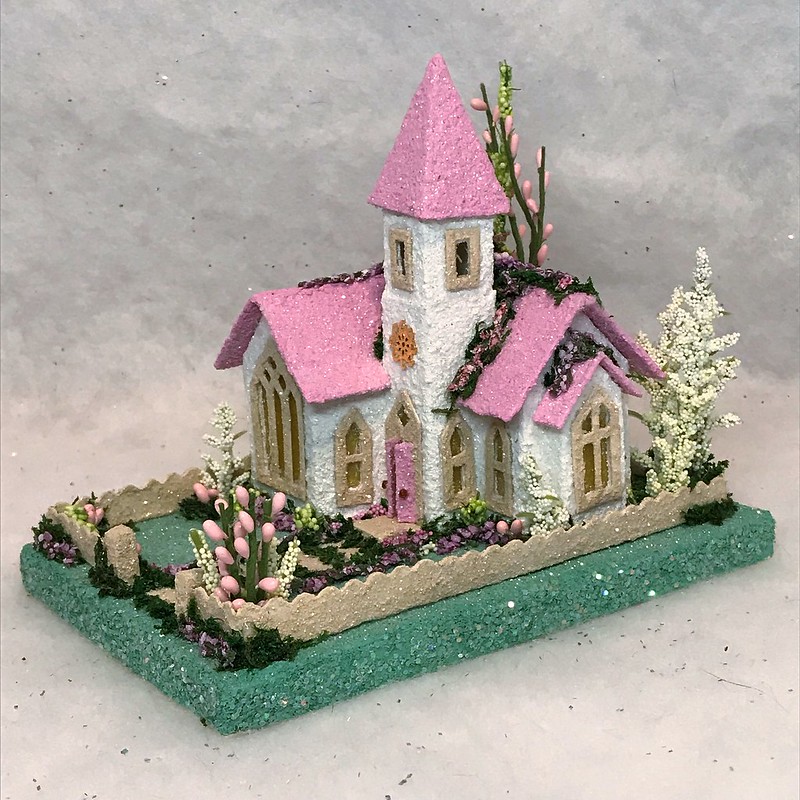
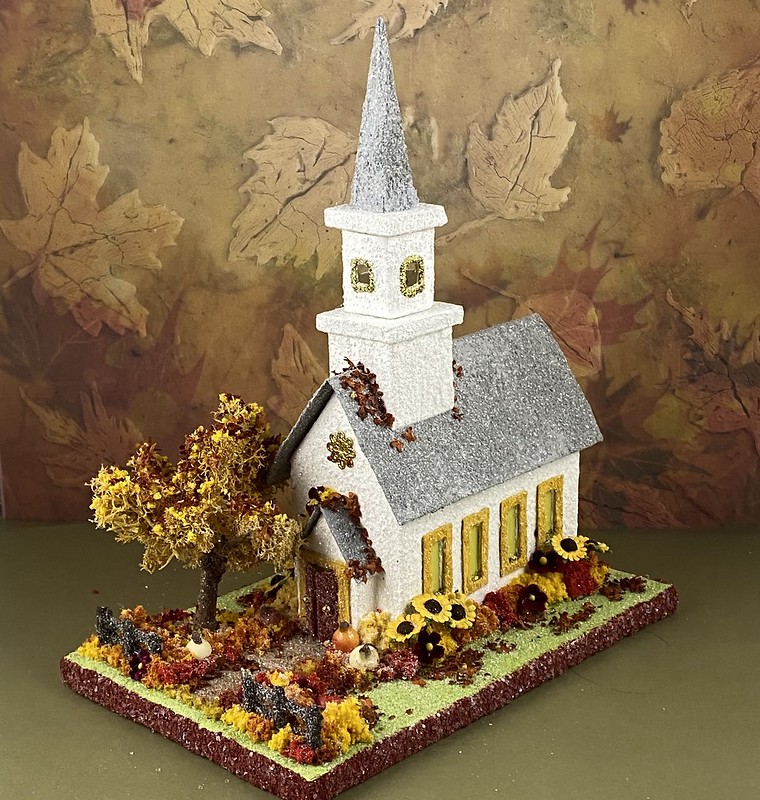
For spring, I make Valentine houses, Irish cottages for St. Patrick’s Day, Easter houses and churches, and spring flowering putz of all kinds. Houses, barns, churches. etc.
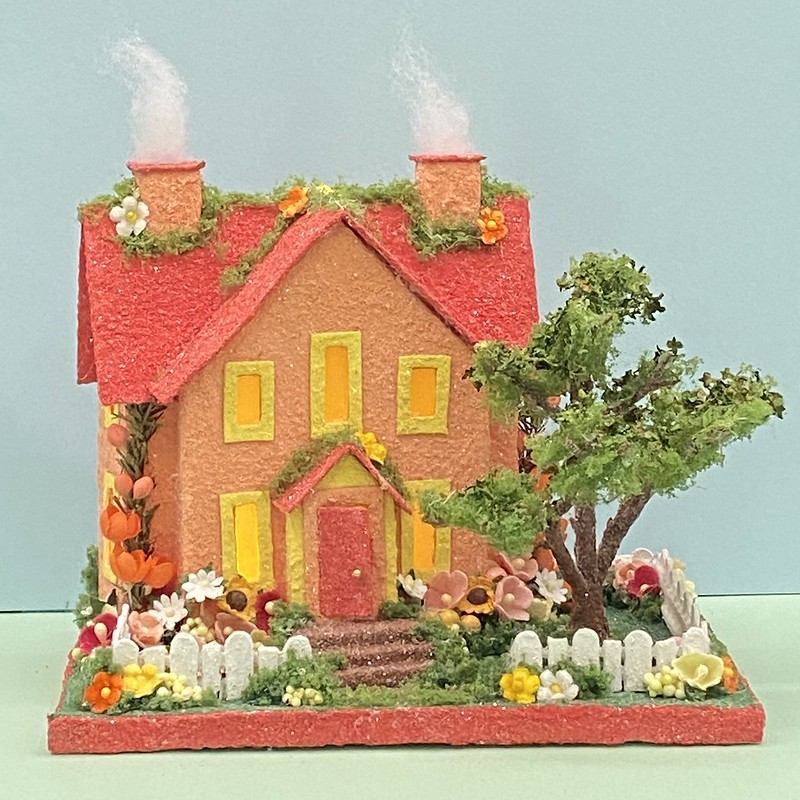
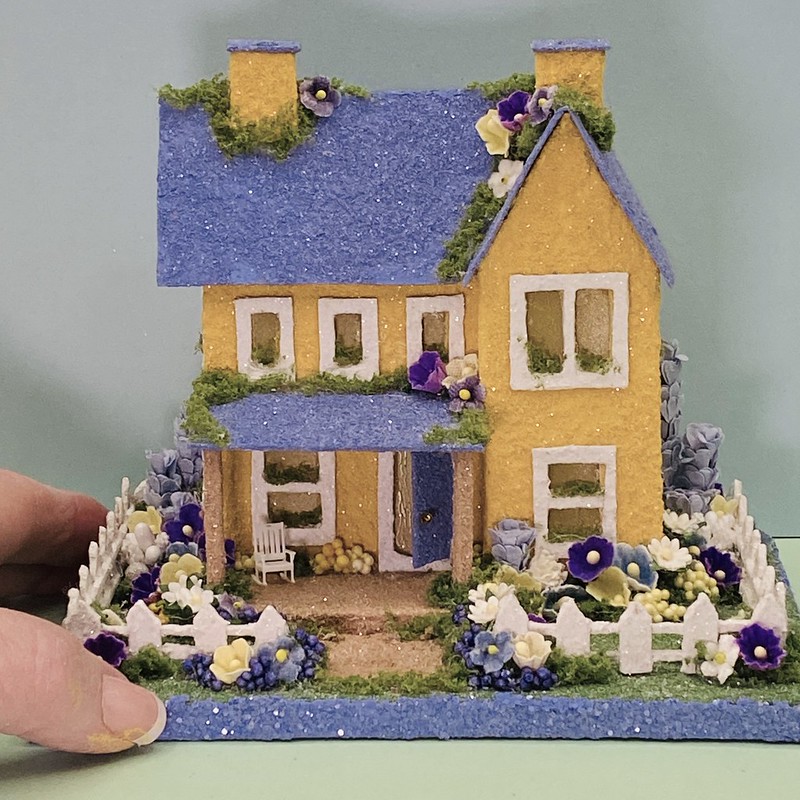
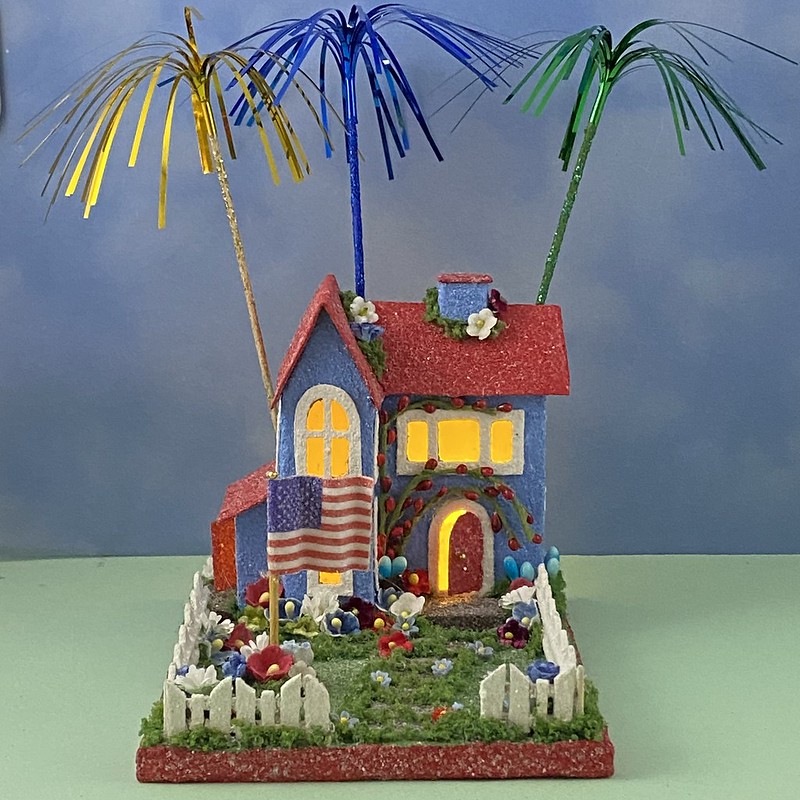
Summer houses are made with flower beds, a summer tree and perhaps a rocking chair on the porch. And, of course, Independence Day fireworks!
Autumn / Thanksgiving houses are all about pumpkins, sunflowers, autumn trees and fallen leaves.
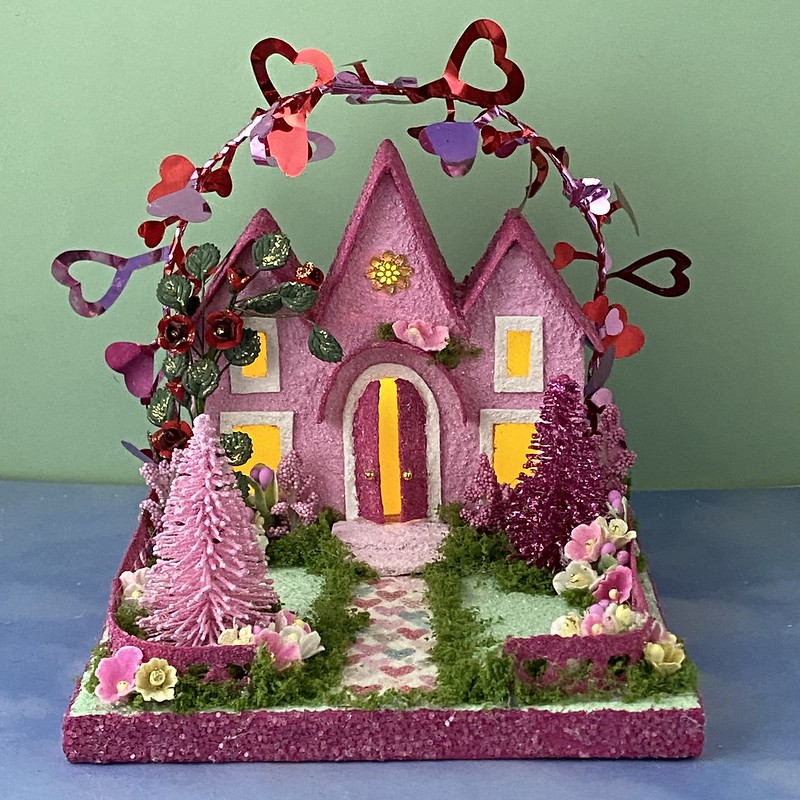
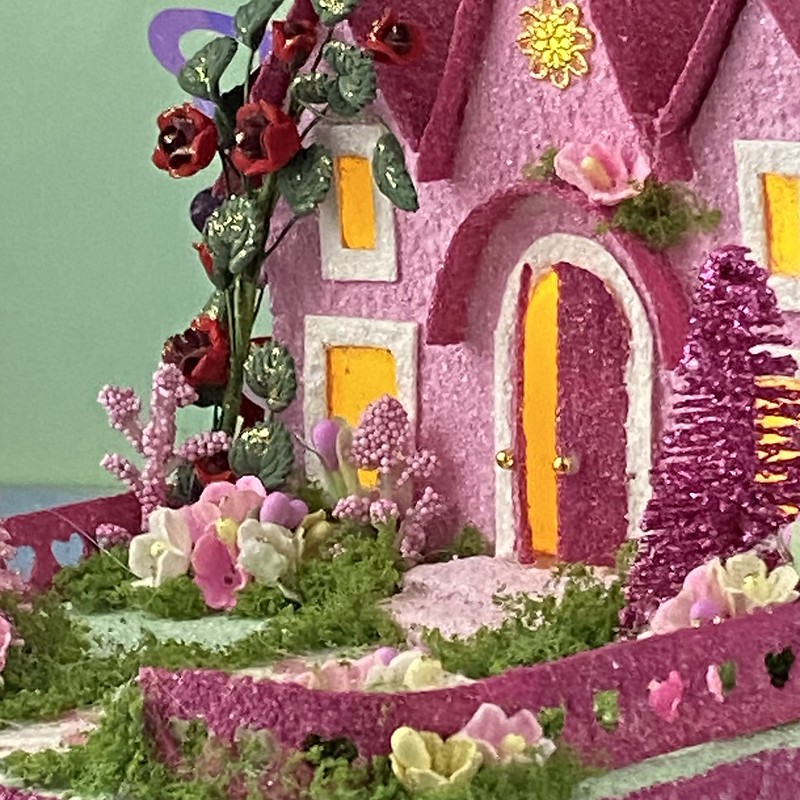
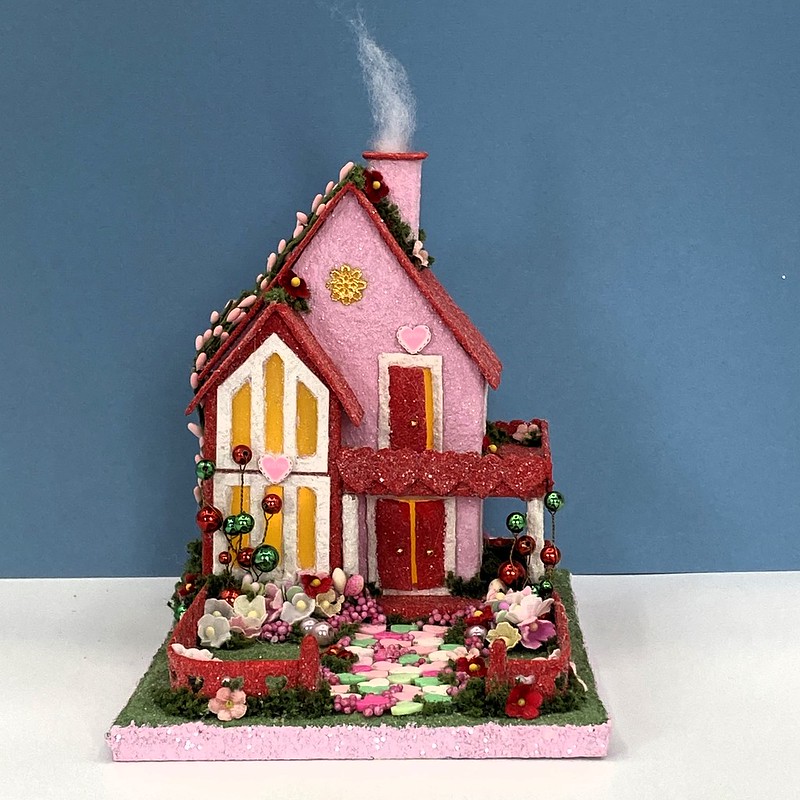
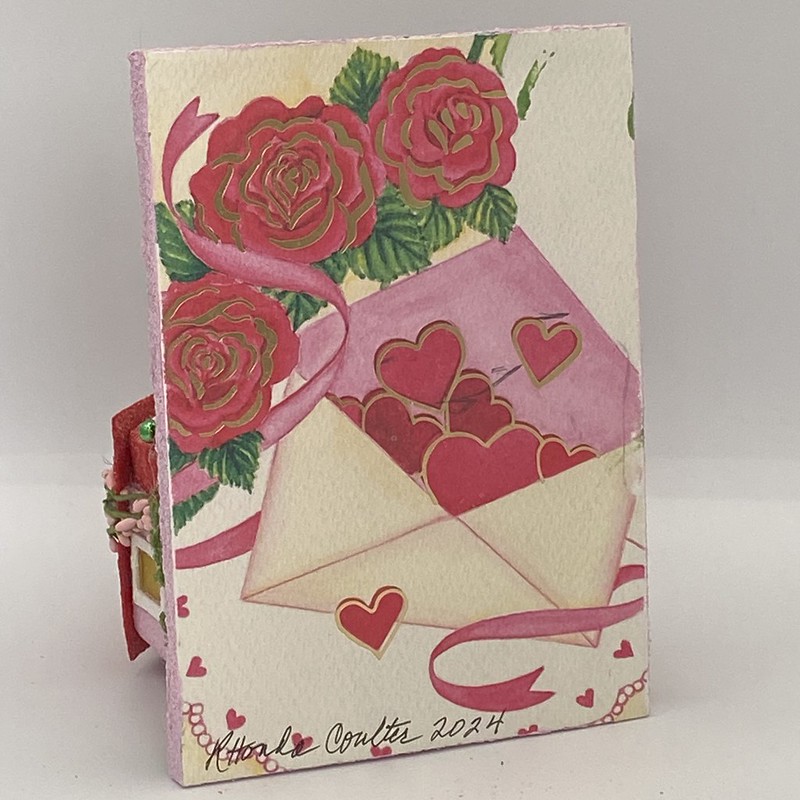
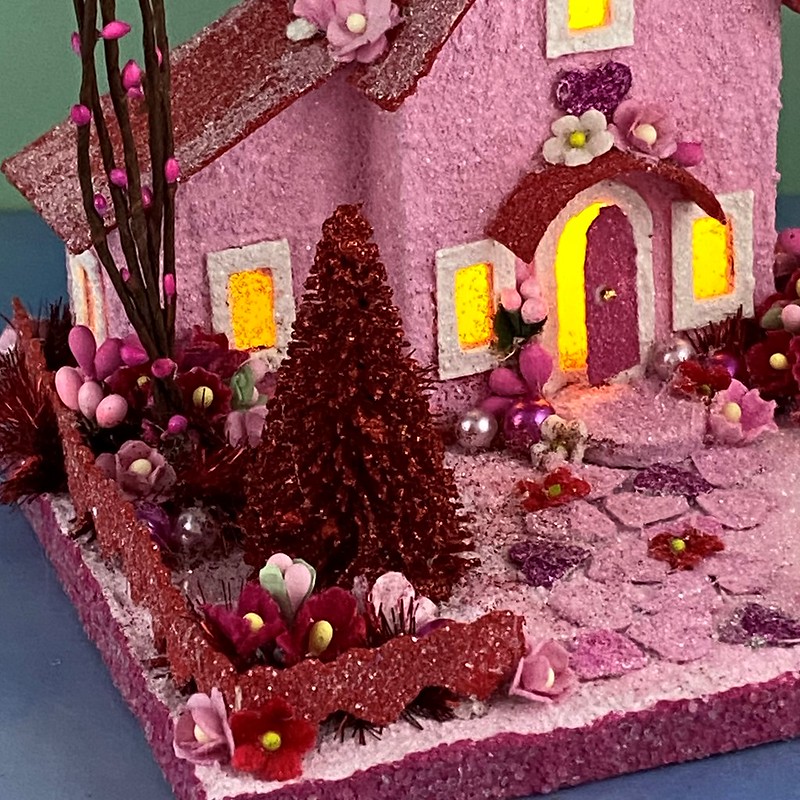
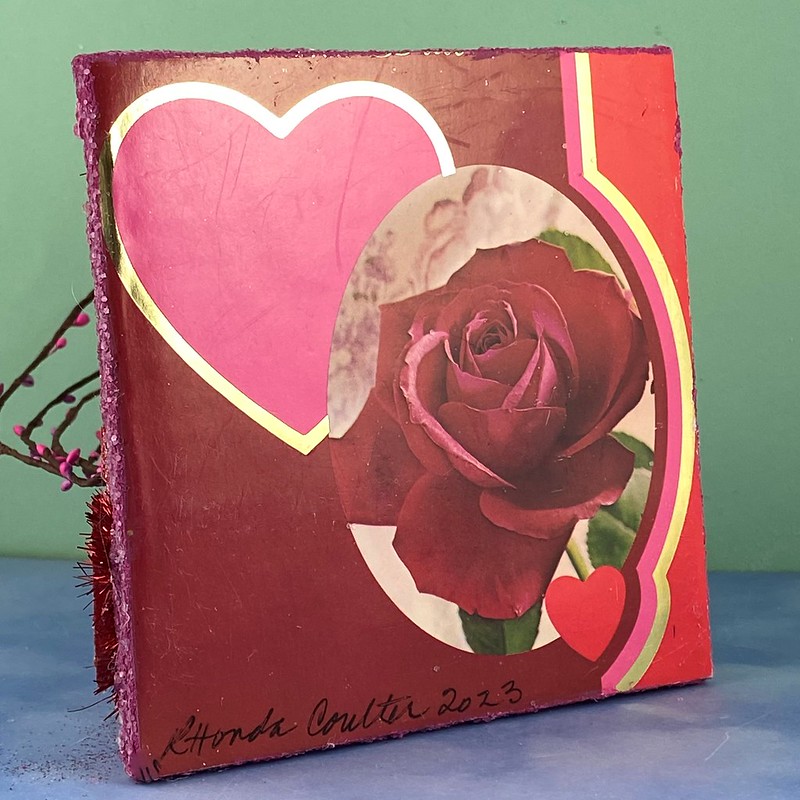
Here are examples of Valentine houses I have made. The heart arch over the first house is made with a piece of wired, foil, heart garland. The sidewalk is made from scrapbook paper. The bottle brush trees were white. I painted them with acrylic craft paint and sprinkled glitter on the wet paint. The base is an upcycled greeting card.
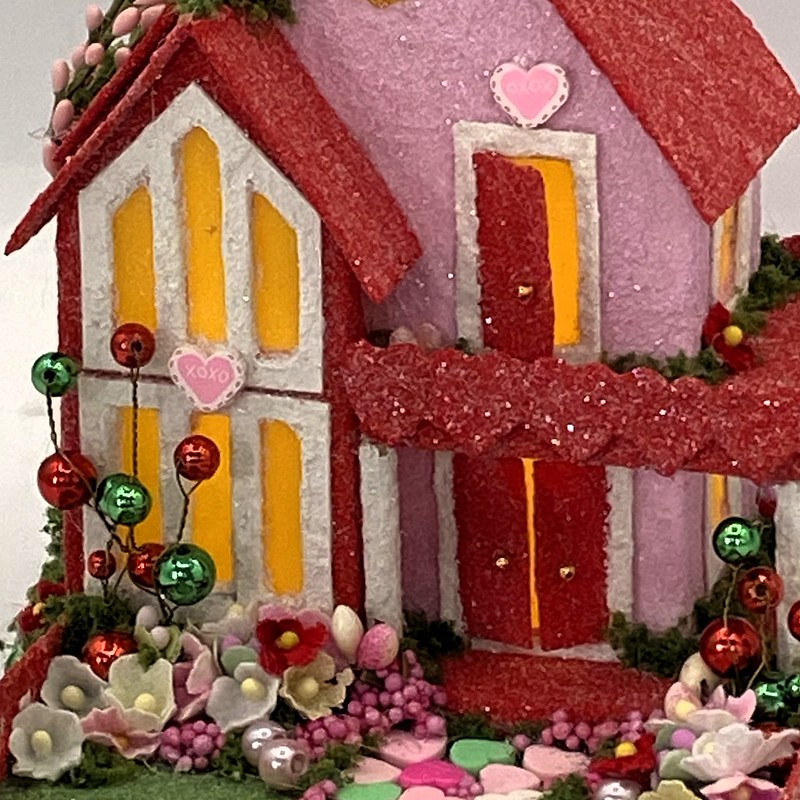
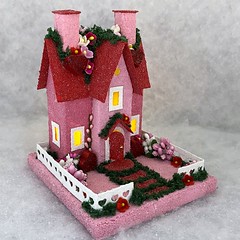
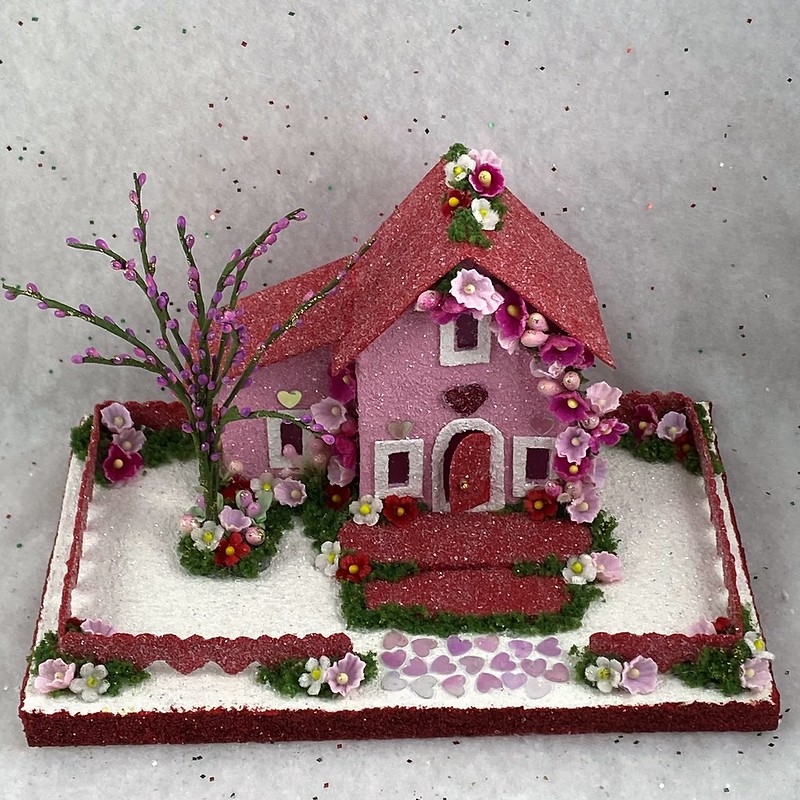
This Valentine house has a second story, wrap-around porch. The porch posts are made from craft match sticks. The green and red, wired beads are from a Christmas garland that I took apart.
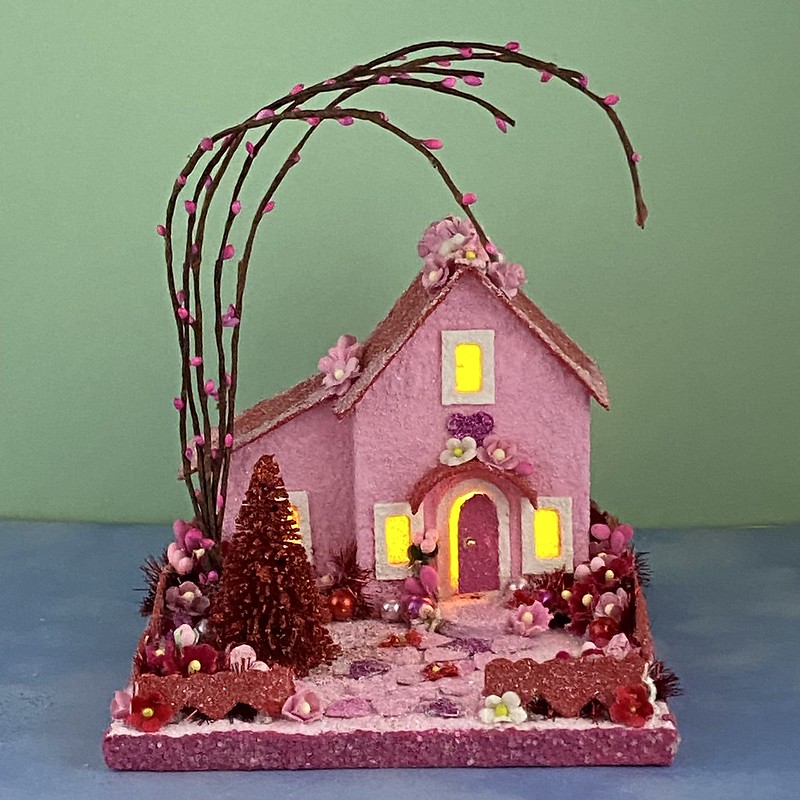
The sidewalk of this house is made with paper hearts. The pip stem tree is made of five pip stems, held together with hot glue at the base. The stems are wired and can be bent to fit the space. I like the way this one arches over the house. I painted the bottle brush tree red, using acrylic craft paint. While the paint was wet, I covered it with glitter.
The heart-punched fence used on this putz isn’t hard to make. You can find my tutorial for making the fence HERE. The stepping stone sidewalk is painted on the base, then outlined with faux moss which is glued down with hot glue.
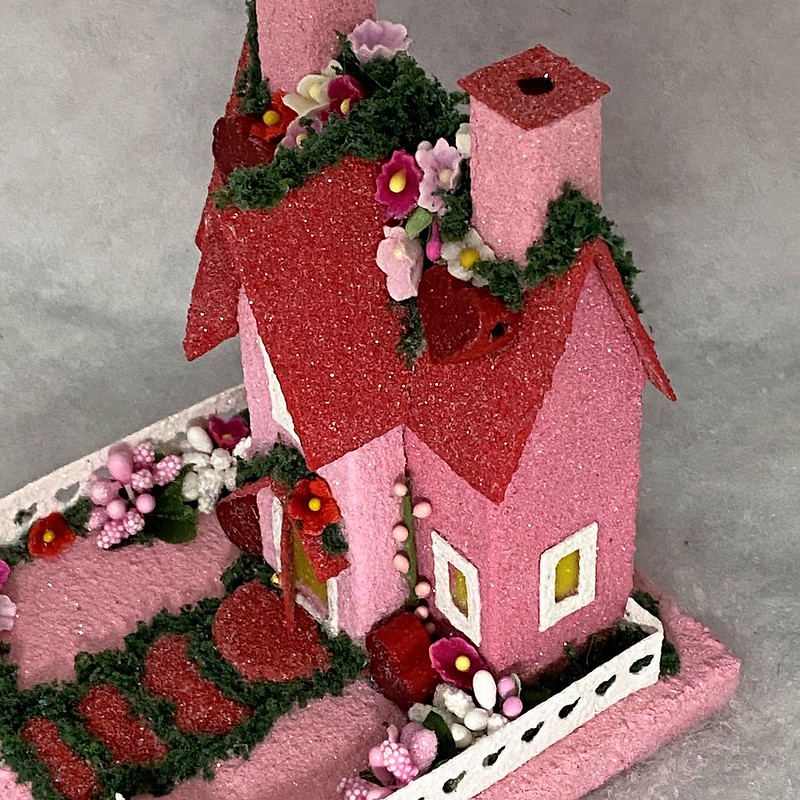
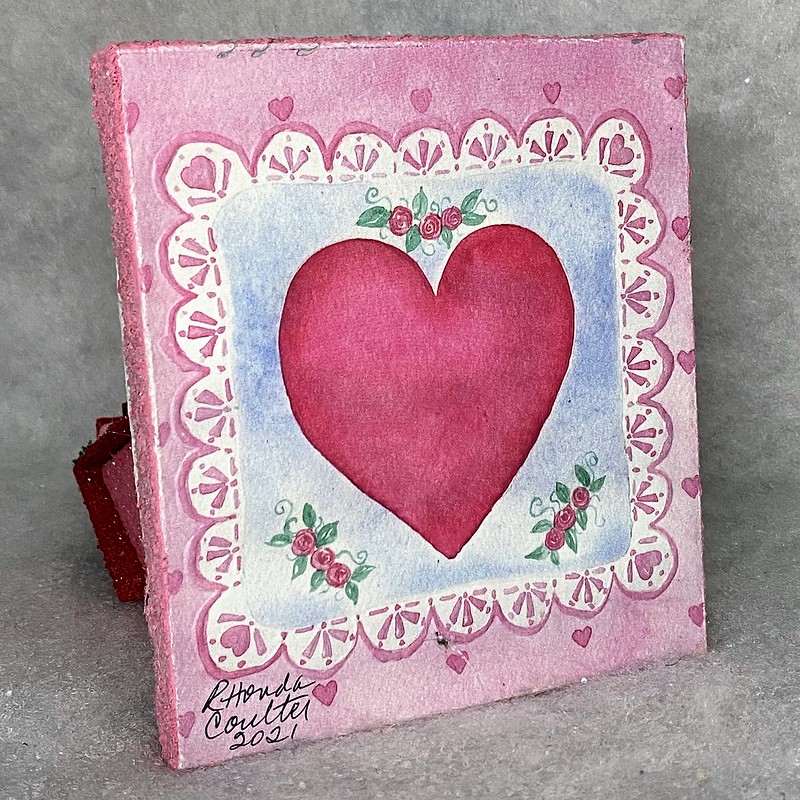
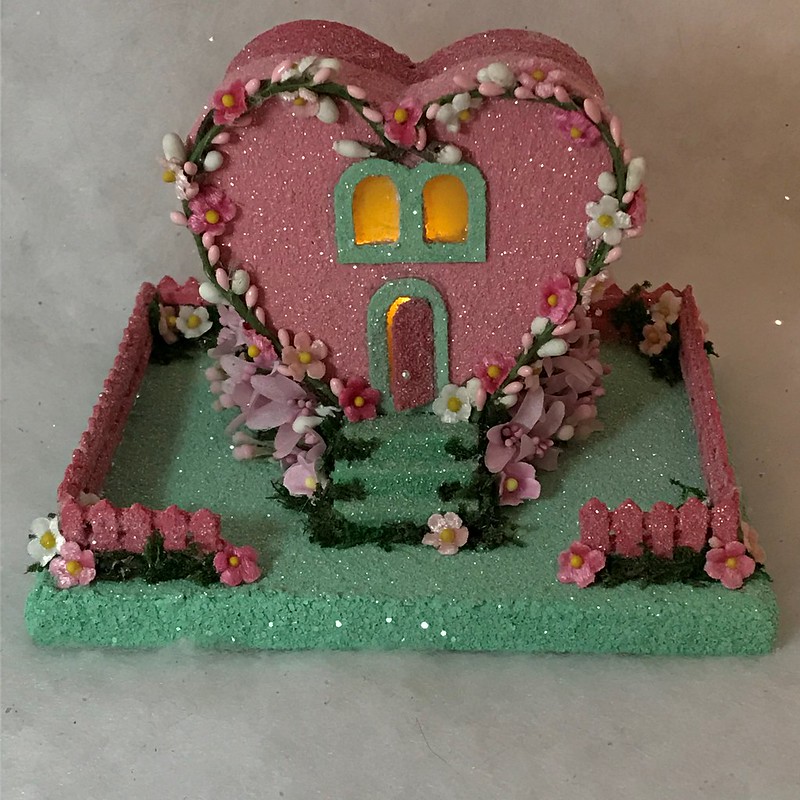
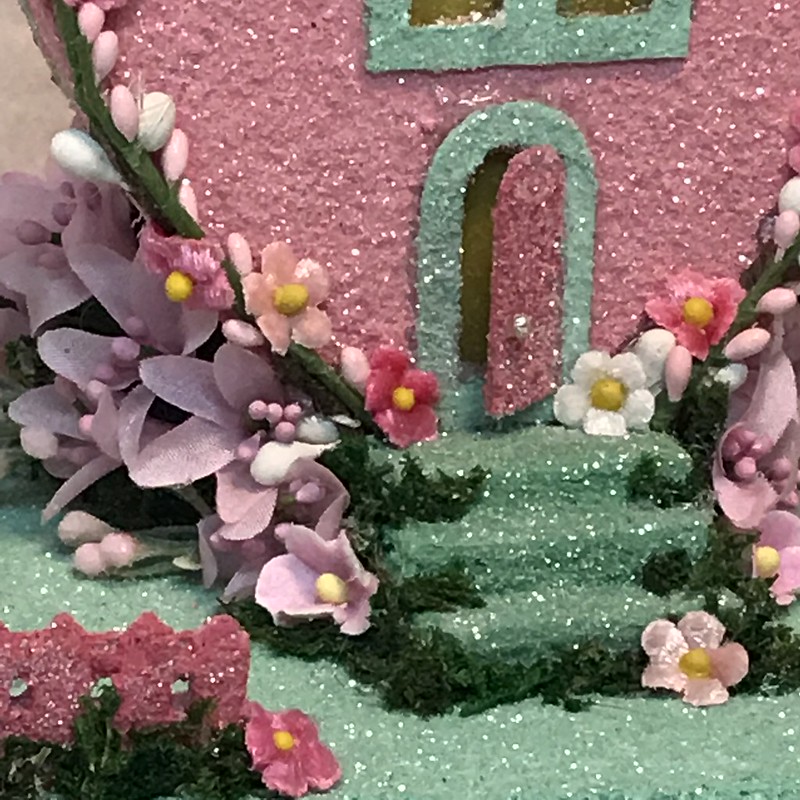
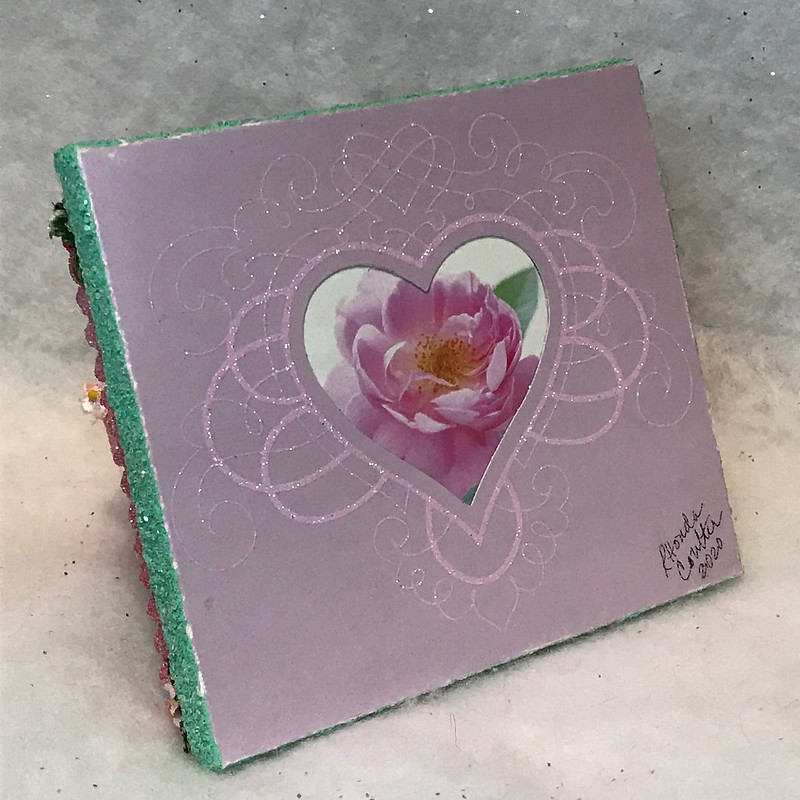
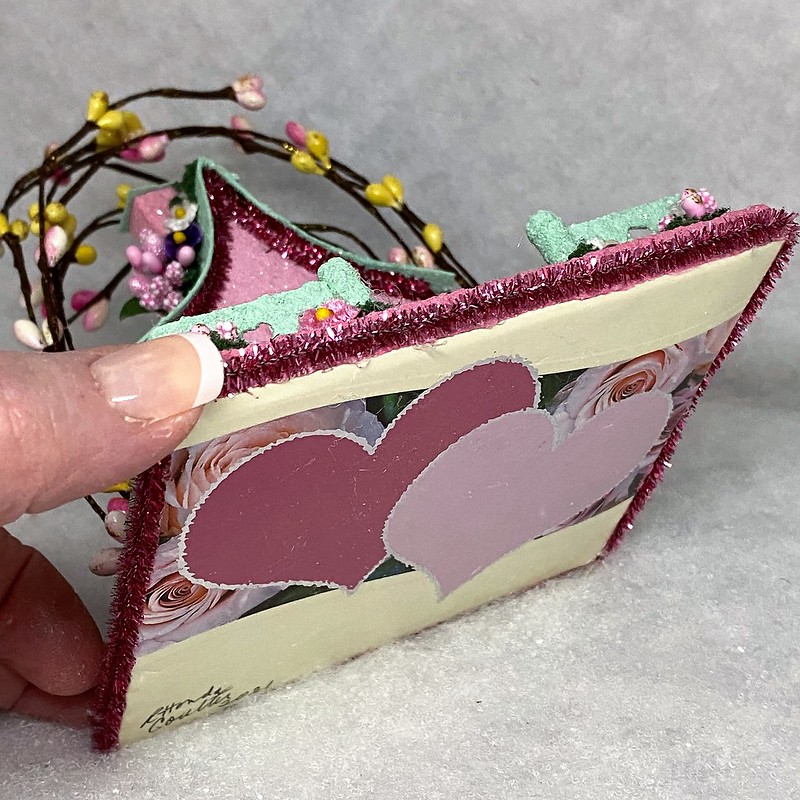
This cute house is made with a heart-shaped cardboard box. The vine outlining the front of the house is made with mini pip stems. The mini-size pip stems can be hard to find. I get the pink ones (also mini red pips) from the Etsy shop SilkyBlossom. The fence is a wooden picket fence. It is made from wooden, coffee stir sticks. My tutorial for making picket fences is HERE.
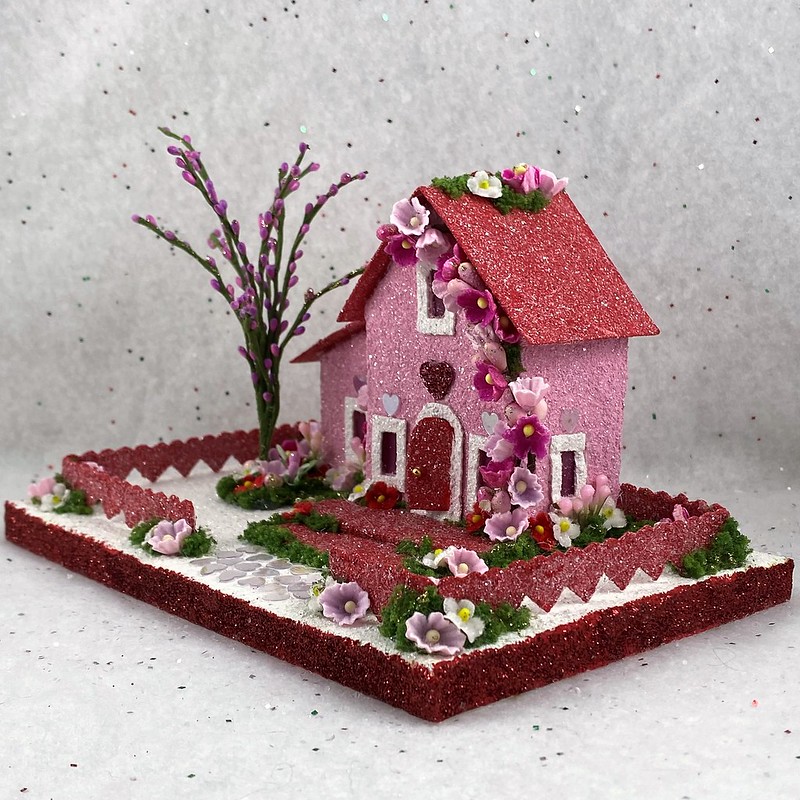
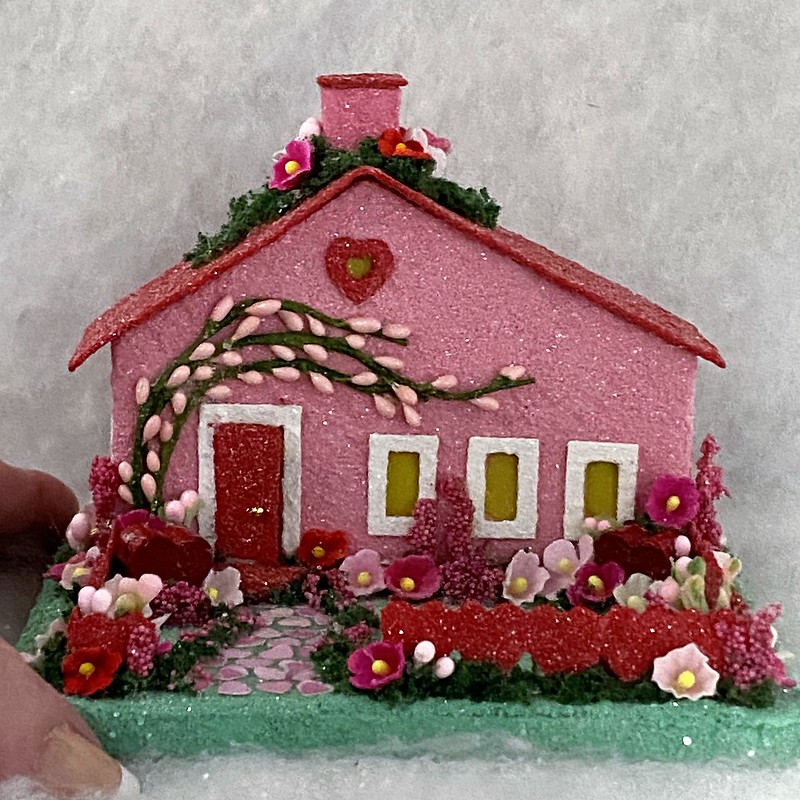
This house features a budding, pip stem tree and a flowering vine. The vine is made by gluing flowers and pips onto the house, then tucking small bits of faux moss into the line of flowers to tie it together. I use hot glue to attach the flowers and moss to the house. The fence is made by using a scallop scissor for the top of a 1/2″ poster board strip, then cutting triangles from the bottom of the strip to make the heart shape.
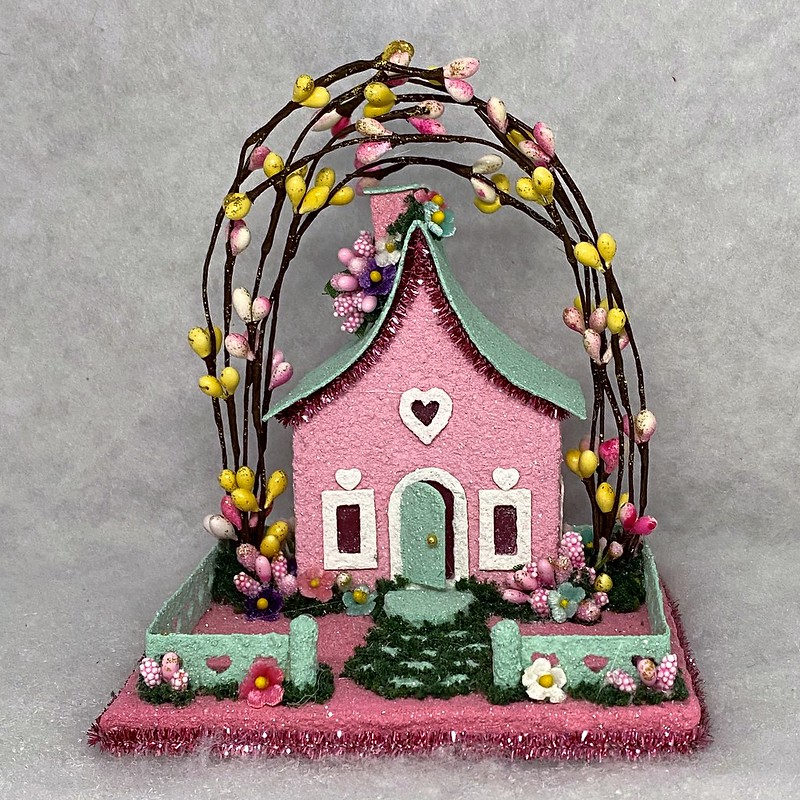
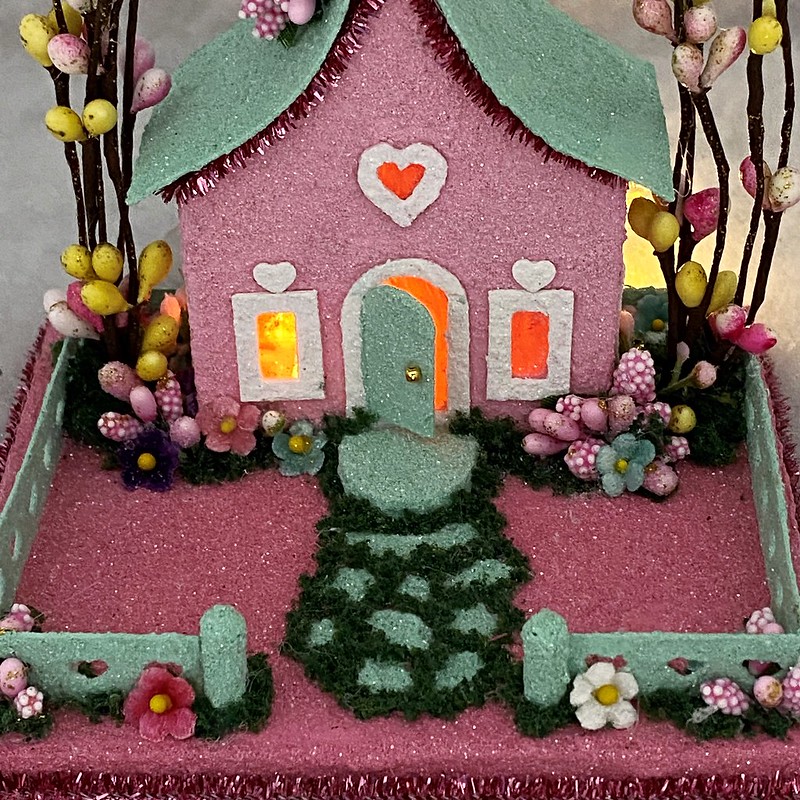
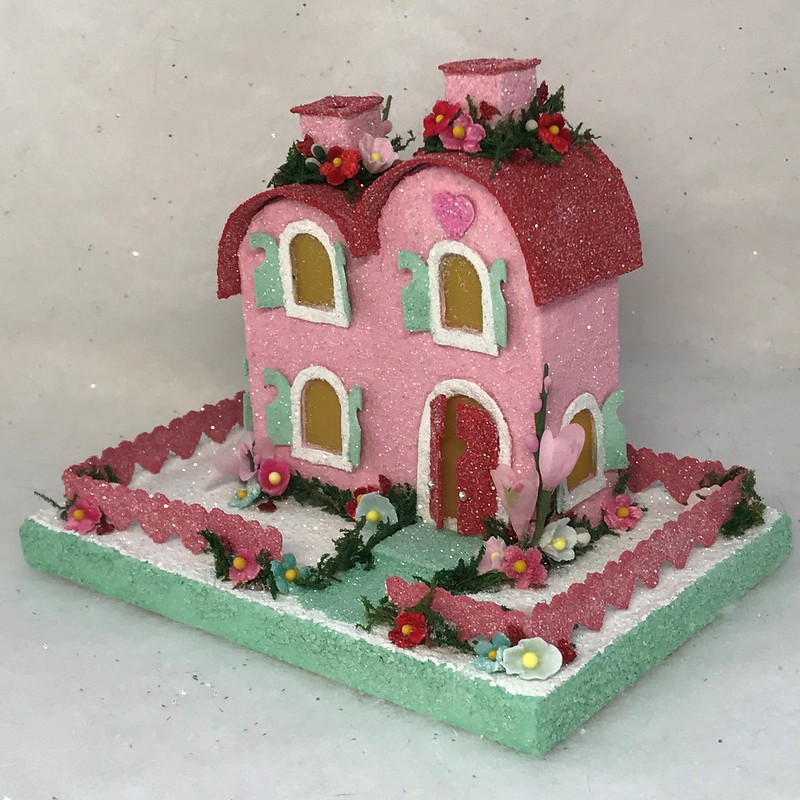
The arch over this house is made from pip stems. They meet in the middle, at the top. Pip clusters were used as flowers on either side of the house. The clusters have shiny pips and berry pips in each little section. Each section can be cut from the main bunch and used as a cluster of flowers or budding flowers. The stepping stone sidewalk is painted on the base and outlined with faux moss.
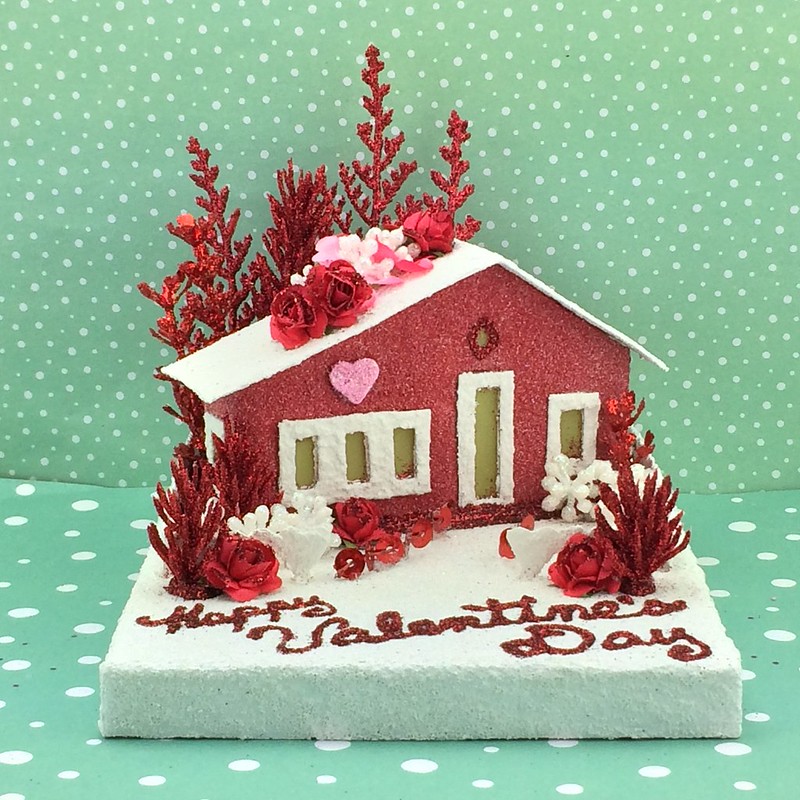
Pip stems make great vines on houses. I almost always put a vine on the Irish cottages I make. The vine on the first house below is made with mini pip stems. I used to decorate the backs of houses with artificial foliage, but don’t do that as often as I used to. The red foliage does look good with the second house. The “Happy Valentine’s Day” is written with Stickles glitter glue. The shutters on the third house form a heart cutout when closed. They are not made to stay closed, however. I made the shutters as part of the window frame.
I will continue this series of seasonal houses with a blog post about the Irish cottages I make for St. Patrick’s Day.
I also plan to write a post on how my putz art has changed over the past fifteen years or so. Stay tuned for that!
If you have any questions about these houses, or about creating your own putz houses, please ask. I am happy to share what I have learned about the art of putzing.
If you would like to see more of my putz houses, as well as Christmas ornaments I have made from upcycled holiday cards, please visit my Etsy shop.
If you are interested in crafting Putz houses of your own, check out my putz tutorials for more information. My blog can be searched, as well. Some of the turorials haven’t been listed on the tutorial page. Working on that! https://christmasnotebook.com/putz-little-glitter-houses/
All proceeds from my Etsy shop benefit Kenya Mercy Ministries. They work with the urban poor of Nairobi, Kenya, particularly the children and their families who live in Kibera, the largest urban slum in Africa. Thank you for your part in helping these children when you purchase items from my shop!
Using the same pattern as the last house I made, I made this one in a MINI size. It is 5 1/2″ wide by 3 1/2″ deep. It is 4″ high, as measured from the bottom of the base to the top of the chimneys.
The smaller sizes are fun to work with, though the smallest, a TINY MINI, is a bit harder to construct and to decorate than the larger sizes. It is challenging to find small enough foliage to embellish the smallest size. Most of my TINY MINI houses are winter houses. The snow makes it easy to decorate them.
Each of my putz houses has the traditional hole in the back to allow the use of an LED light string.
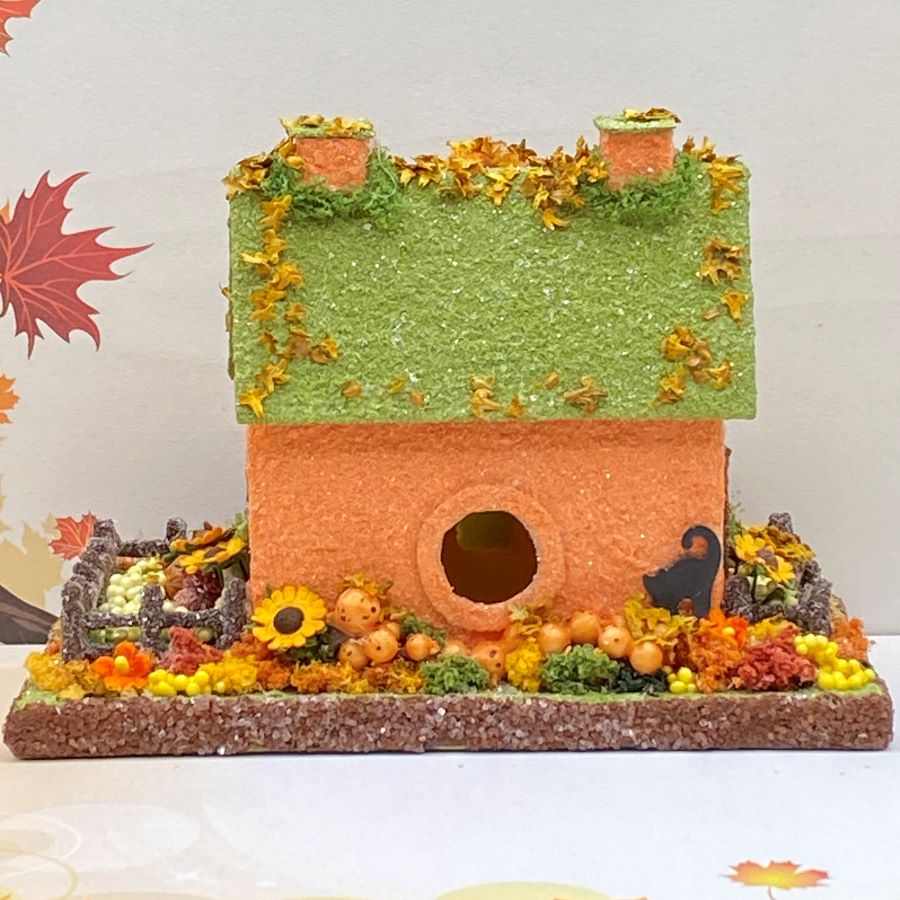
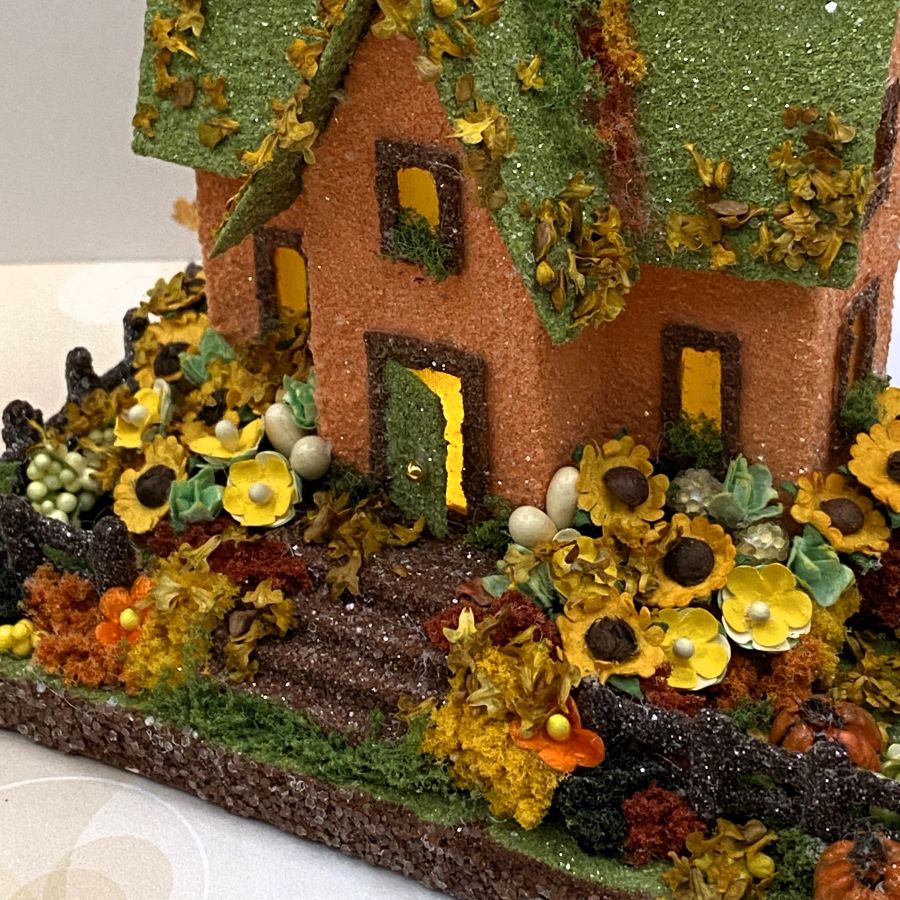
This little house is decorated with sunflowers, other paper flowers and velvet forget-me-nots. It comes with puffs of smoke so the fireplaces can be lit to ward off the autumn chill.
Four steps lead to the front door. Pips can be used as flowers or buds. In the left picture below, the white pips can be seen on either side of the door. The putz is sprinkled with tiny, fallen, autumn leaves.
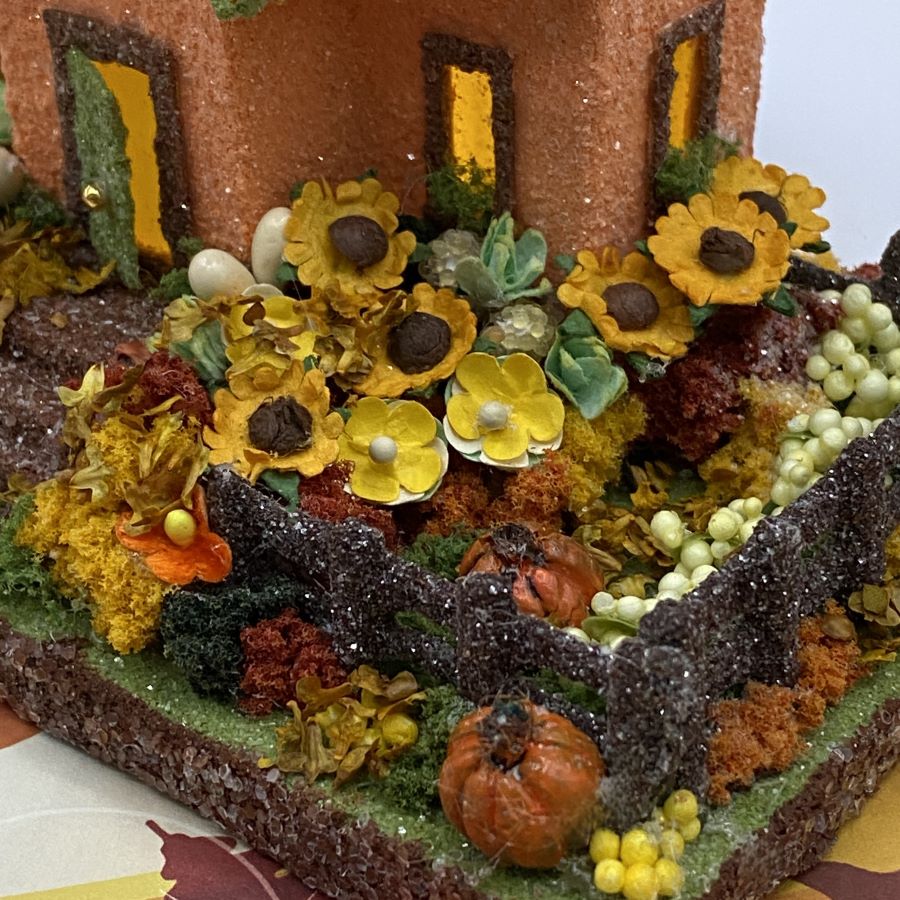
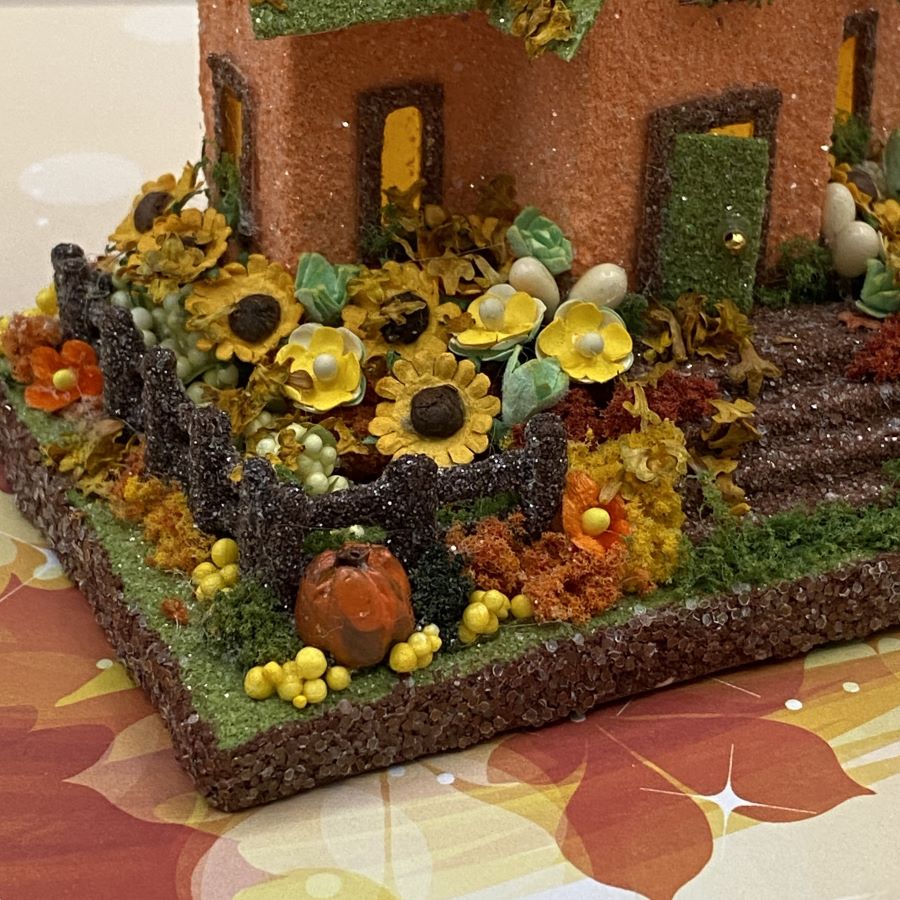
In the right picture, I used stems of tiny foam balls to put down a hedge just inside the fence. They come in many colors and can be found on Etsy. The brighter yellow ones on the corner of the base are the same thing. I stripped them off the stem and glued clumps down along the fence.
Etsy is a great source for flowers and other embellishments, such as the fallen leaves and the black cat on the back of the house.
If you have any questions about creating putz houses, please ask. I am happy to share what I have learned about the art of putzing.
If you would like to see more of my putz houses, as well as Christmas ornaments I have made from upcycled holiday cards, please visit my Etsy shop.
If you are interested in crafting Putz houses of your own, check out my putz tutorials for more information. My blog can be searched, as well. Some of the turorials haven’t been listed on the tutorial page. Working on that! https://christmasnotebook.com/putz-little-glitter-houses/
All proceeds from my Etsy shop benefit Kenya Mercy Ministries. They work with the urban poor of Nairobi, Kenya, particularly the children and their families who live in Kibera, the largest urban slum in Africa. Thank you for your part in helping these children when you purchase items from my shop!
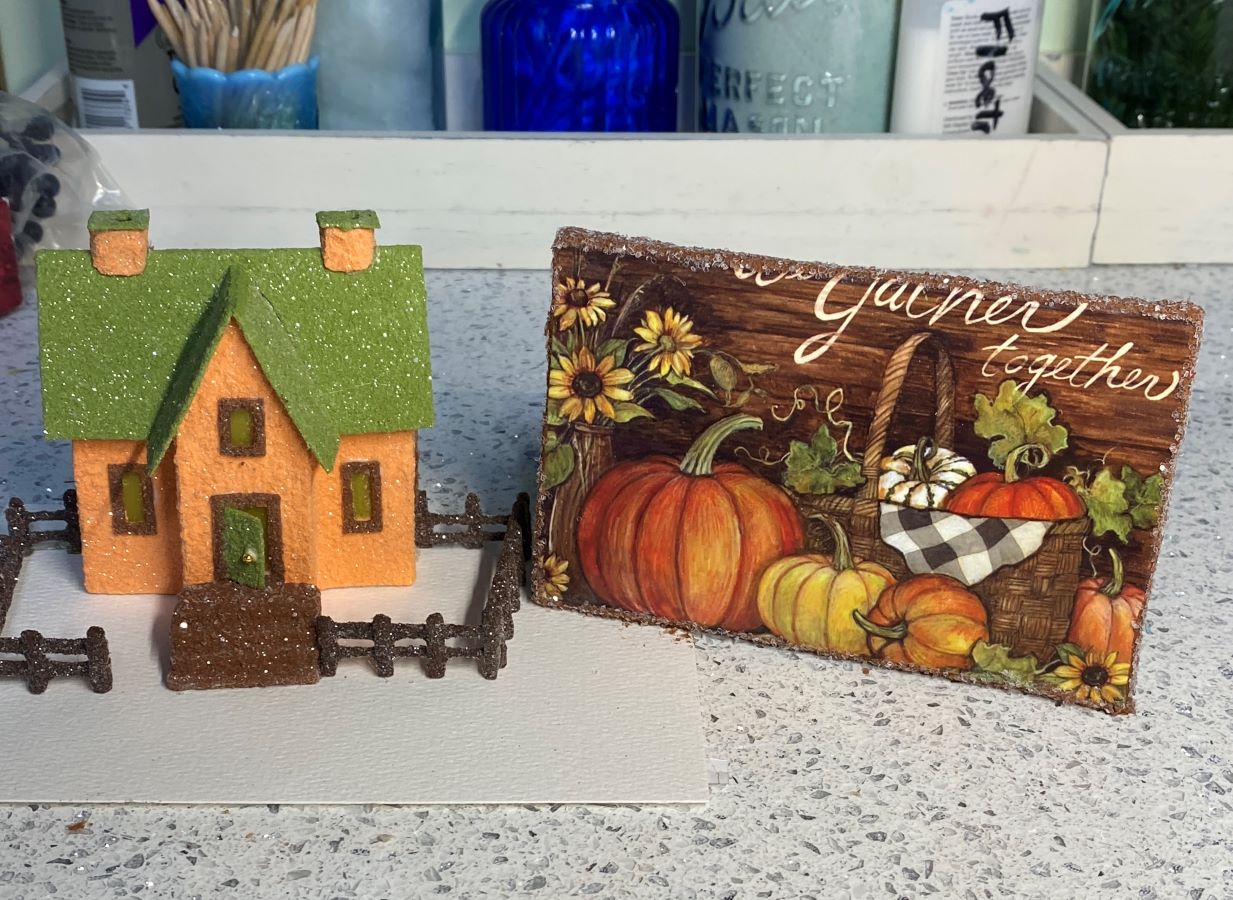
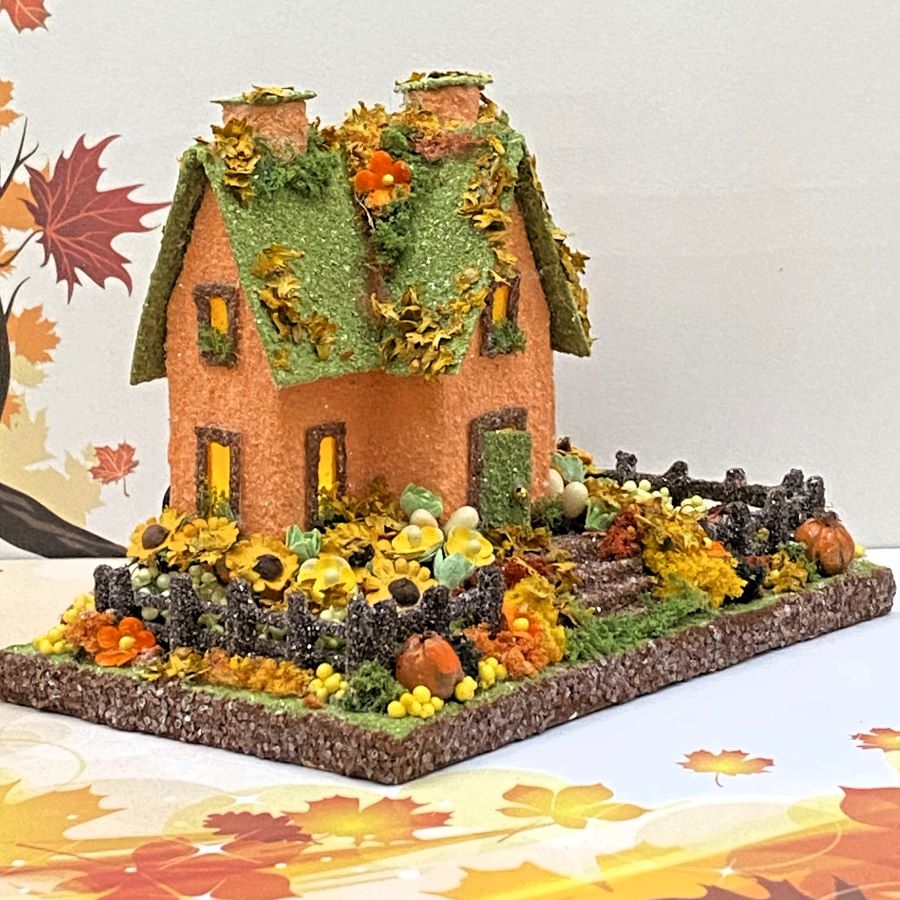
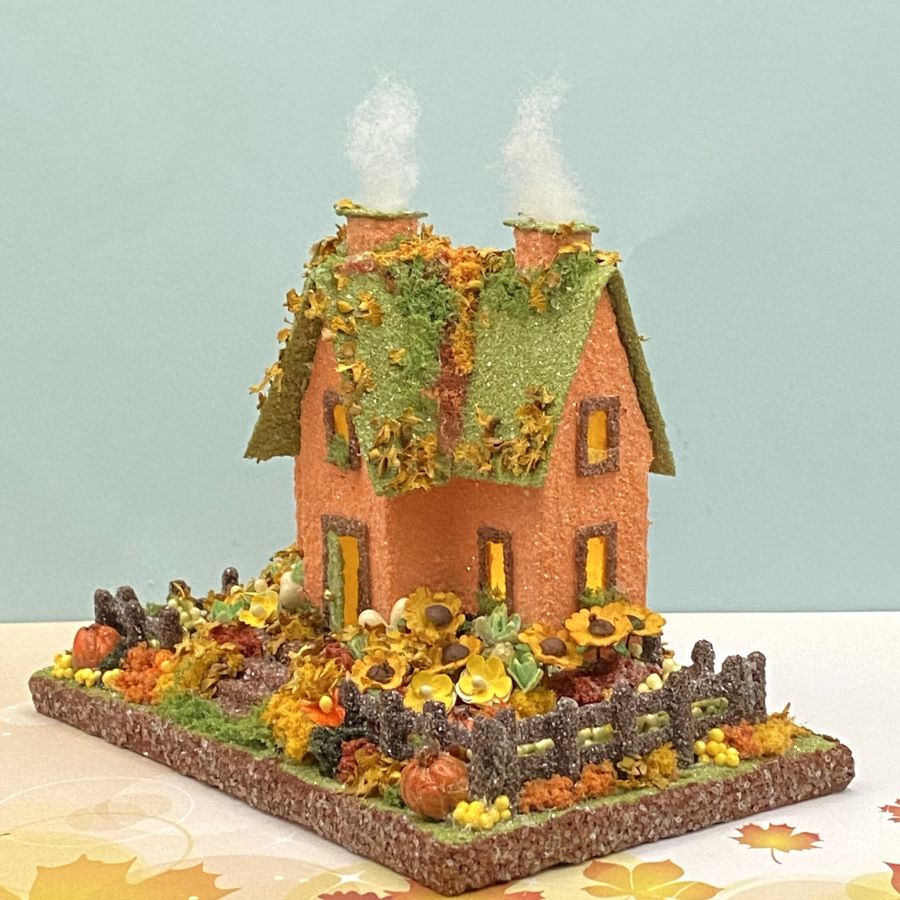
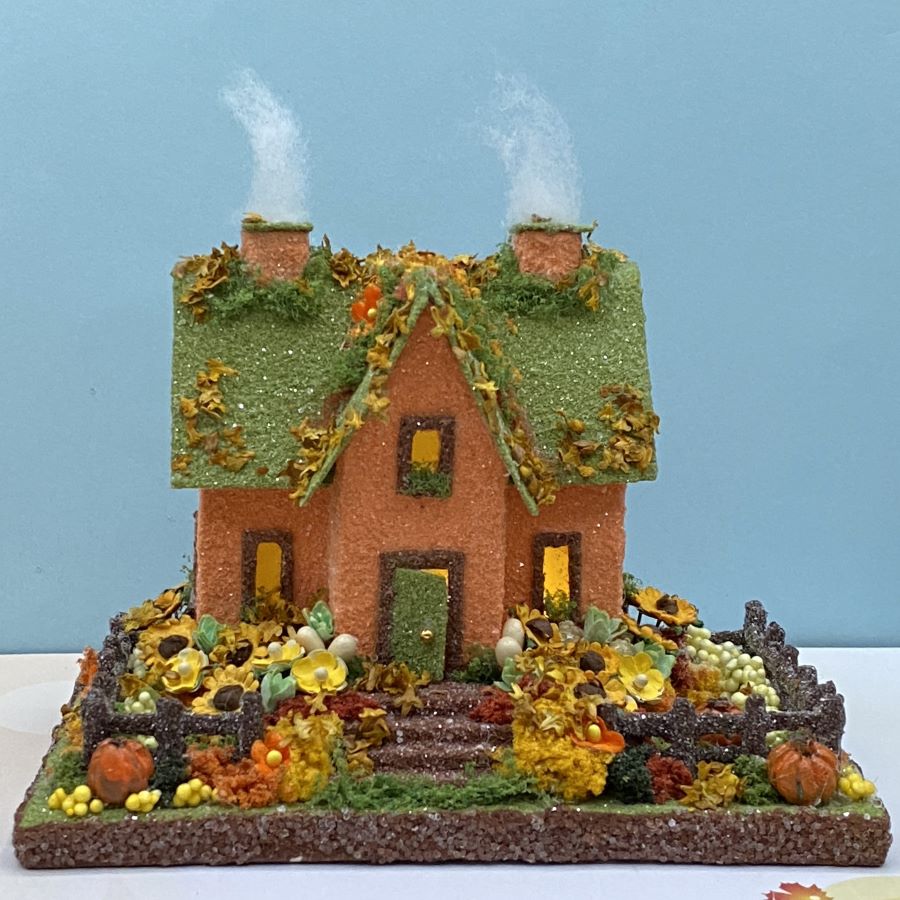
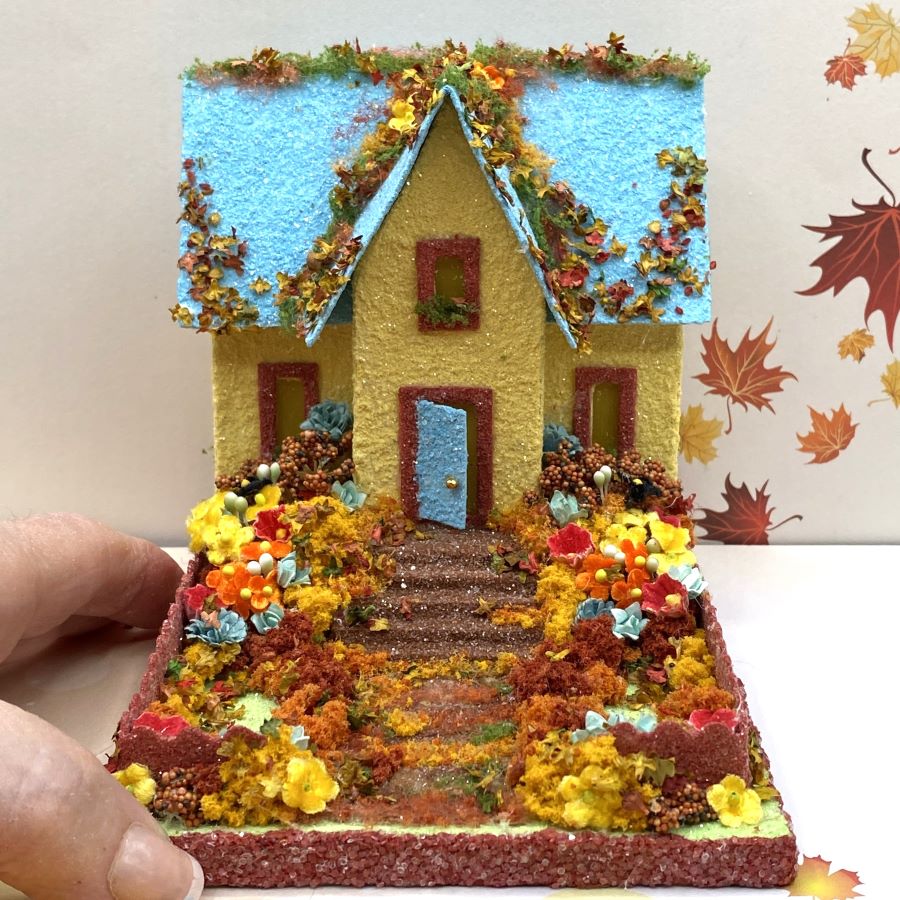
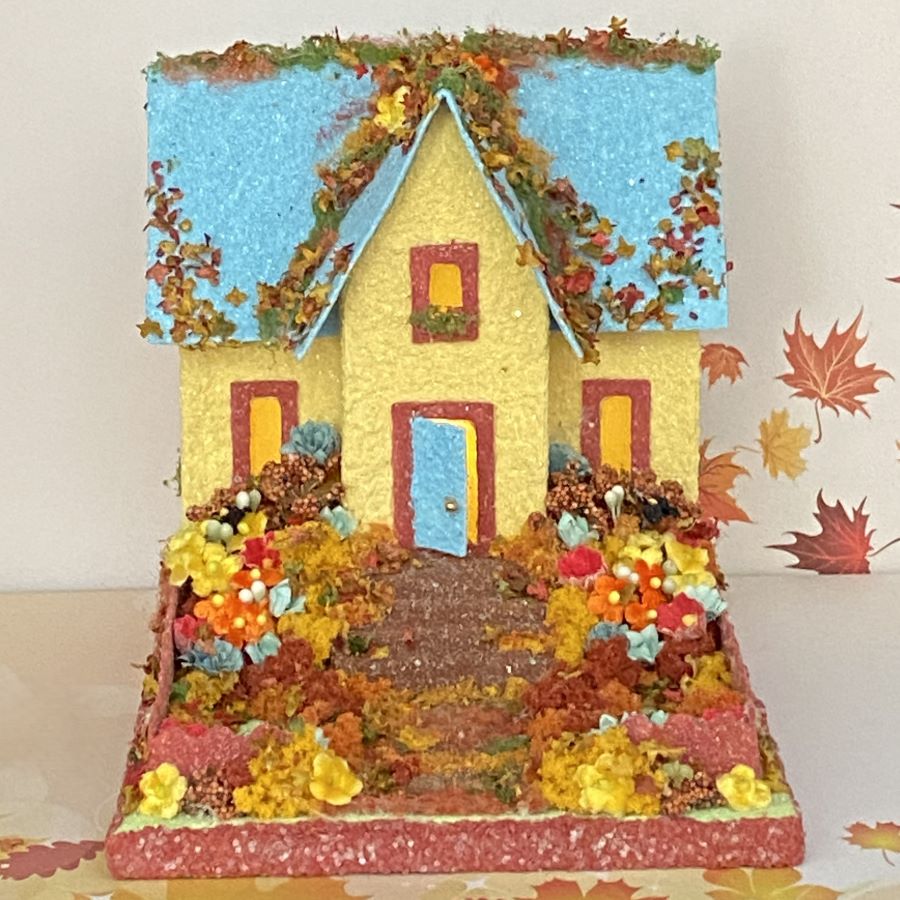
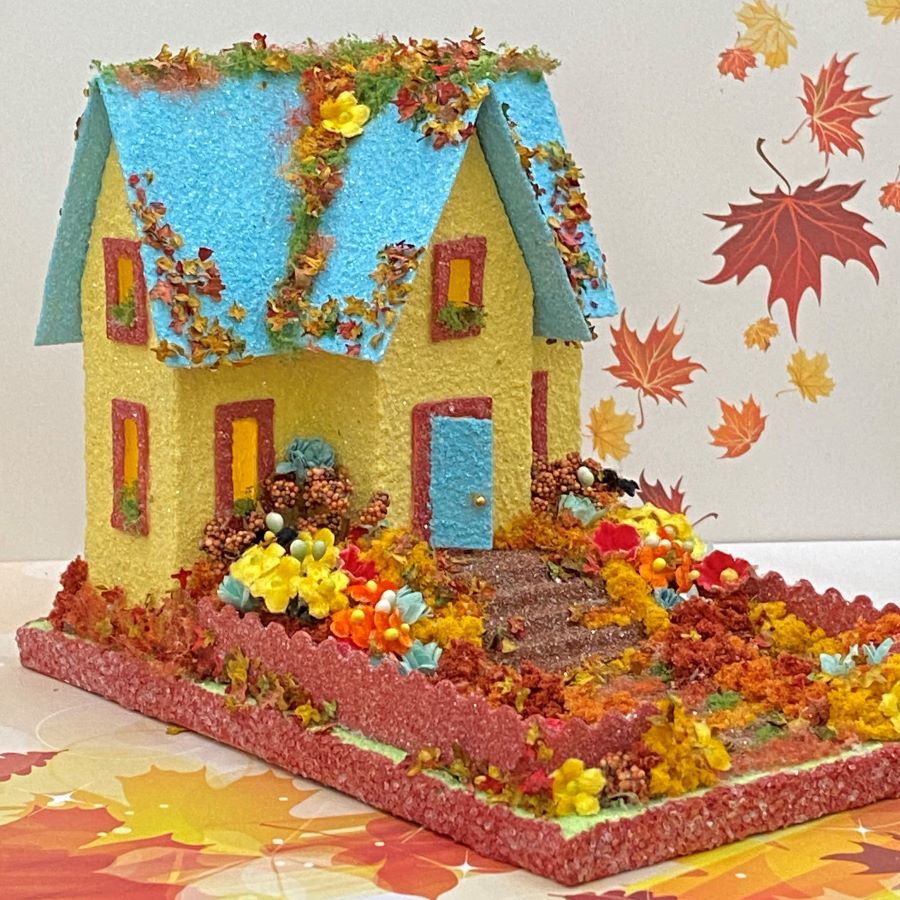
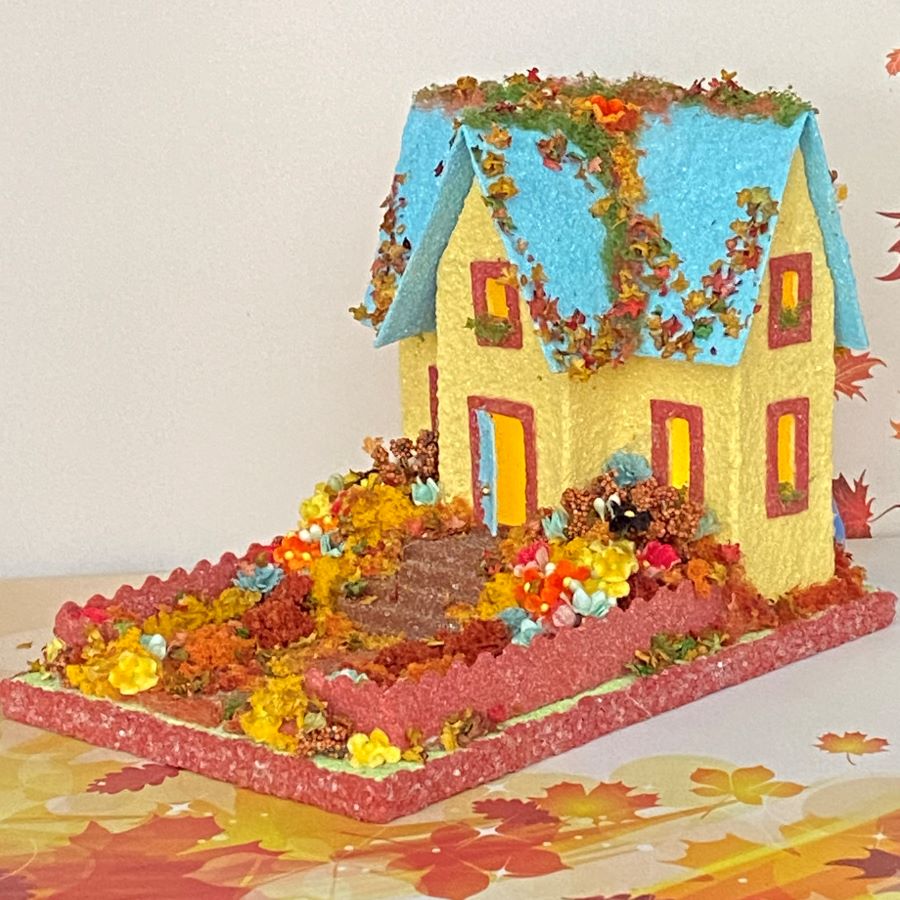
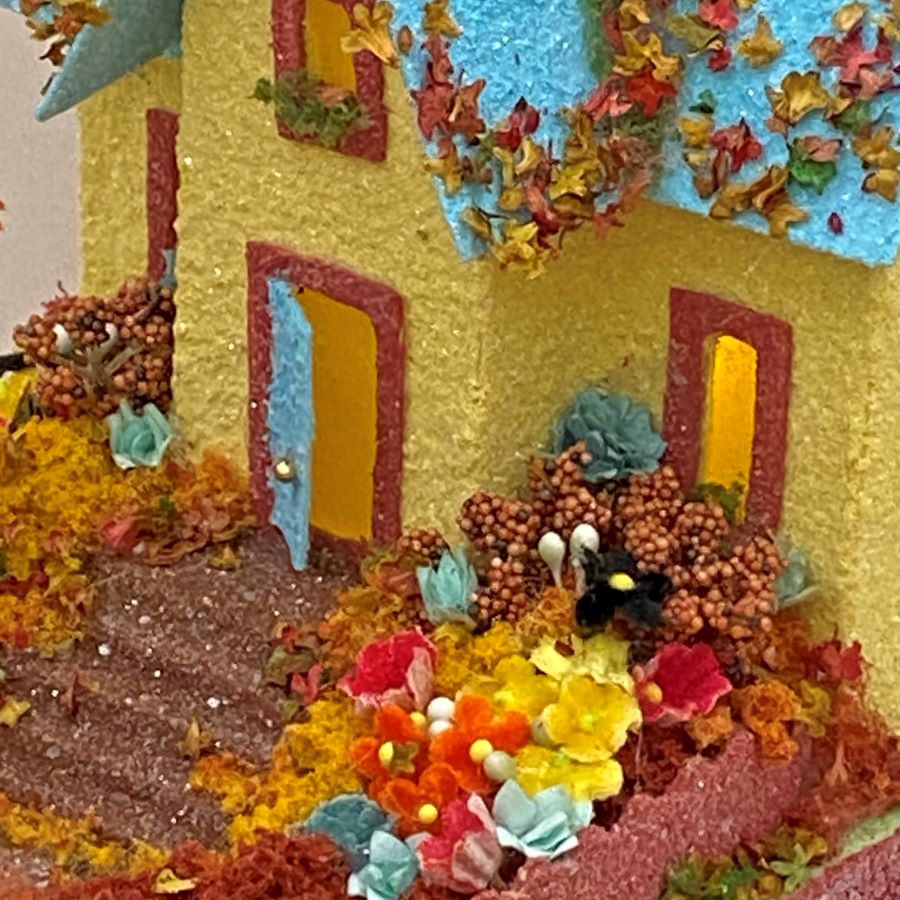
An autumn putz house is always fun to embellish. The base for this house, and the large steps to the front door, didn’t leave room for an autumn tree. I filled the yard with velvet and paper flowers, faux foliage and faux moss. The entire creation is sprinkled with fallen autumn leaves.
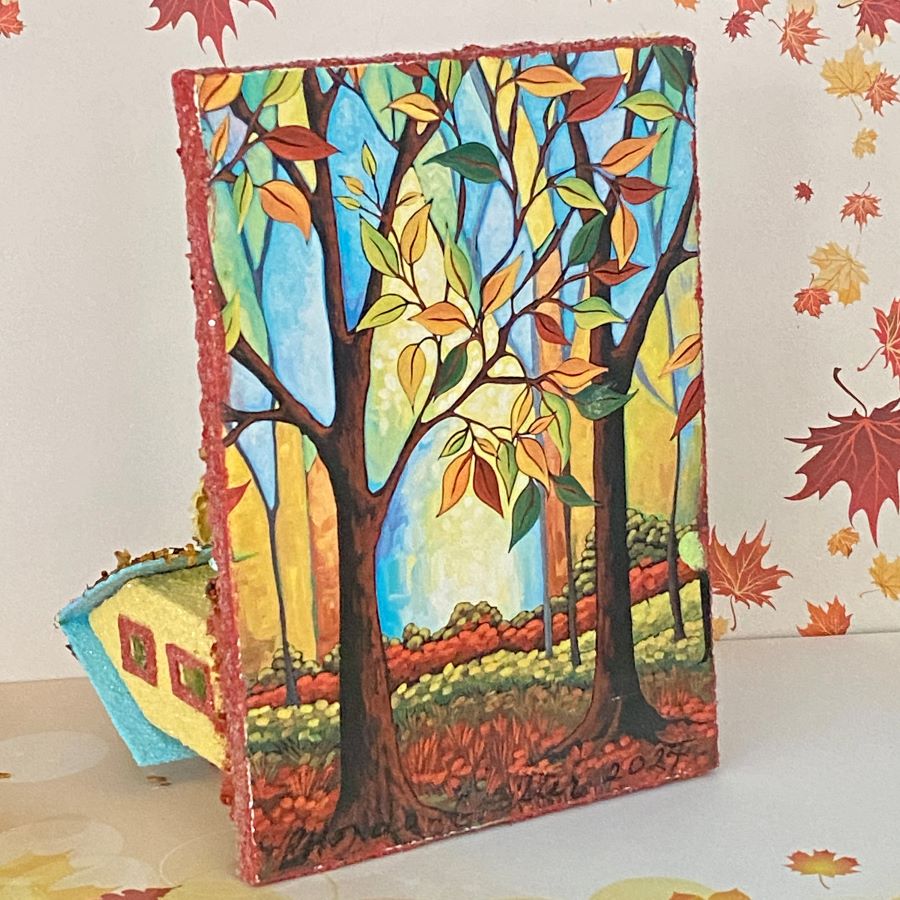
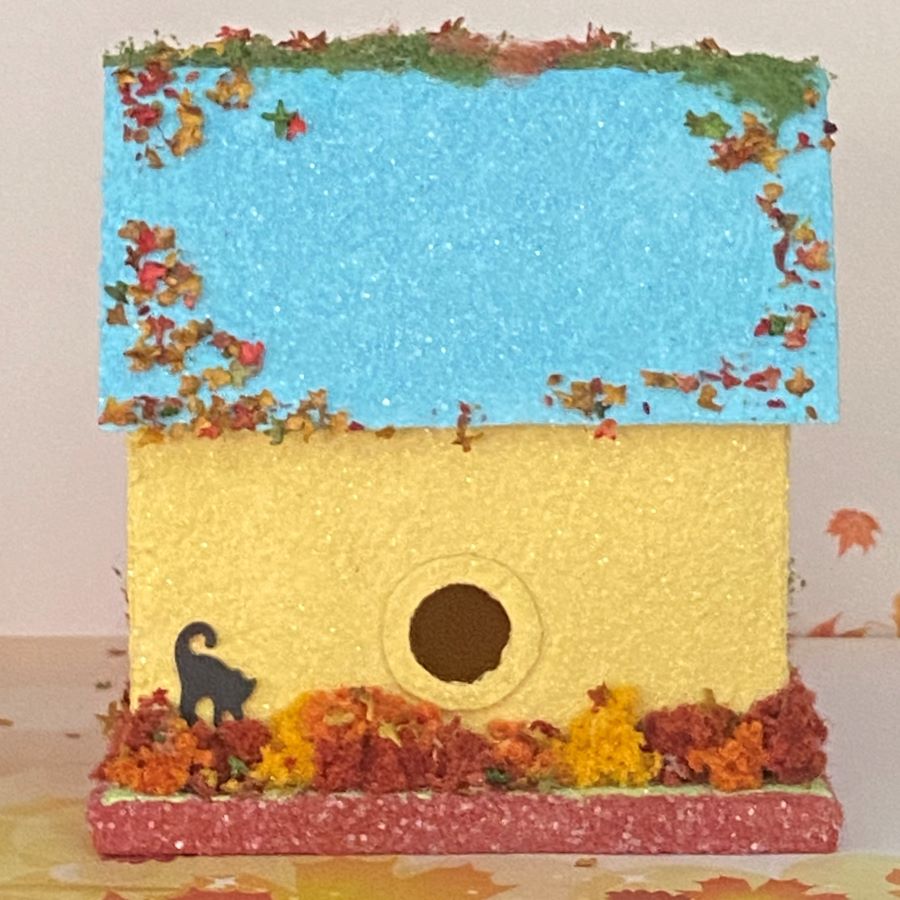
The base is made from a beautiful greeting card. The yellow, blue and dark coral colors of the card inspired the colors of the house. The back has the traditional hole for lighting this little house with an LED light string. Note the tiny black cat chasing leaves in the back yard.
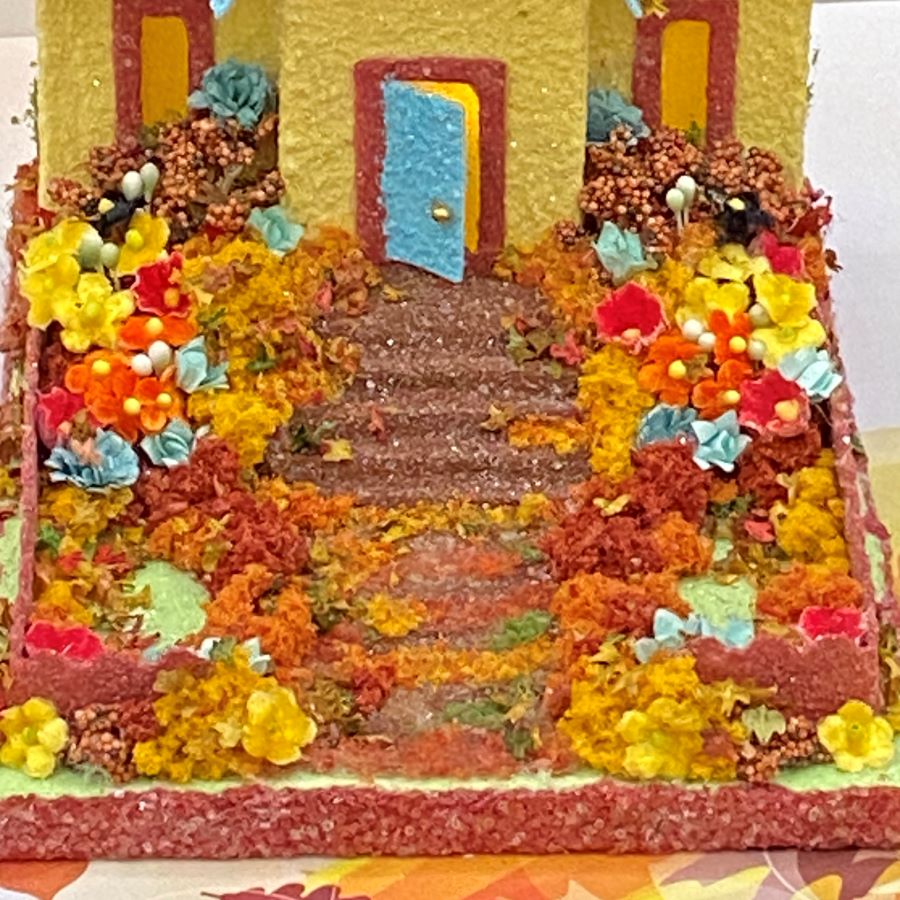
The fence is made from poster board cut with decorative scissors. Five steps lead to the front door.
Fallen leaves are spinkled on the roof and along the sidewalk. I always enjoy the landscaping of an autumn hosue.. The colors, the leaves and the flowers make a beautiful yard.
If you have any questions about creating putz houses, please ask. I am happy to share what I have learned about the art of putzing.
If you would like to see more of my putz houses, as well as Christmas ornaments I have made from upcycled holiday cards, please visit my Etsy shop.
If you are interested in crafting Putz houses of your own, check out my putz tutorials for more information. My blog can be searched, as well. Some of the turorials haven’t been listed on the tutorial page. Working on that! https://christmasnotebook.com/putz-little-glitter-houses/
All proceeds from my Etsy shop benefit Kenya Mercy Ministries. They work with the urban poor of Nairobi, Kenya, particularly the children and their families who live in Kibera, the largest urban slum in Africa. Thank you for your part in helping these children when you purchase items from my shop!
I make putz houses in three sizes. TINY MINI is the smallest size. On average, they are about 2″ tall. This tiny-mini house is 2 1/2″ wide, 1 1/4″ deep and 2″ tall (not counting the base). In the picture on the left, it’s ready for landscaping, which is my favorite part of the process. On the right, the putz is completed.
The base is made from a cute, vintage Christmas greeting card. The base is 3 3/8″ wide and 4 3/4″ tall, as shown in the picture. The putz house has a hole in the back to allow the use of an LED light string for lighting this and other putz houses in your little glitter village.
The colors of the Christmas card inspired the colors of the putz house.
The yard is enclosed with a poster board fence, complete with six fence posts.
There are three bottle brush trees in the yard. They are embellished with faux snow, silver micro beads and clear glitter. The front of the house and the front corners of the fence are decorated with red berries.
A puff of smoke is included, in case your holiday evenings are chilly. The smoke is tucked into the chimney and can be easily removed if not needed
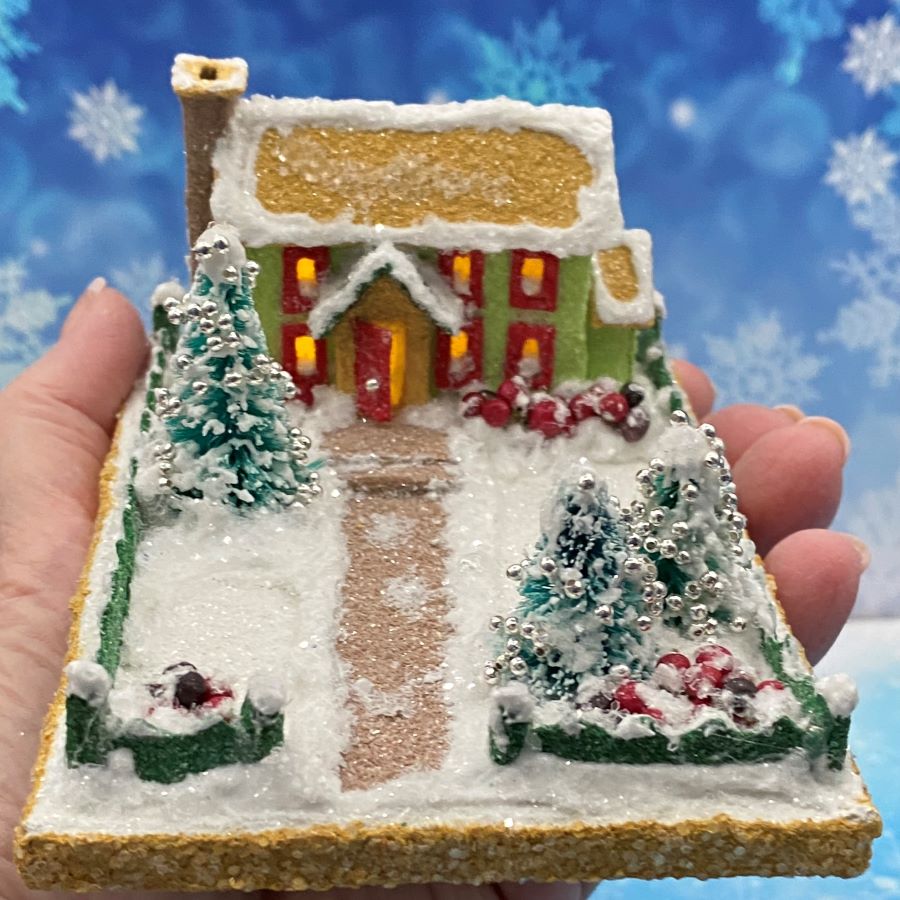
The tiny-mini putz house fits in the palm of my hand.
If you have any questions about creating putz houses, please ask. I am happy to share what I have learned about the art of putzing.
If you would like to see more of my putz houses, as well as Christmas ornaments I have made from upcycled holiday cards, please visit my Etsy shop.
If you are interested in crafting Putz houses of your own, check out my putz tutorials for more information. My blog can be searched, as well. Some of the turorials haven’t been listed on the tutorial page. Working on that! https://christmasnotebook.com/putz-little-glitter-houses/
All proceeds from my Etsy shop benefit Kenya Mercy Ministries. They work with the urban poor of Nairobi, Kenya, particularly the children and their families who live in Kibera, the largest urban slum in Africa. Thank you for your part in helping these children when you purchase items from my shop!
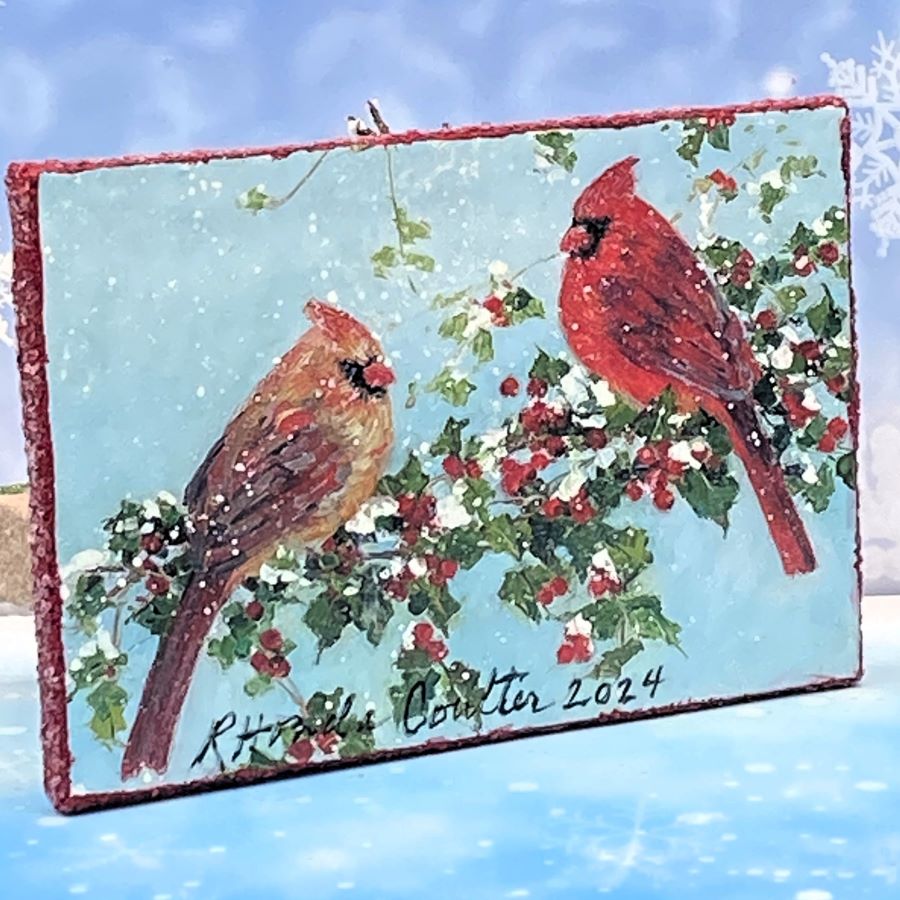
These two putz houses are made from the same pattern. The MINI size house on the left, is 3 7/8″ wide and 2 3/4″ tall. The ORIGINAL size on the right is 5″ wide and 4″ tall.
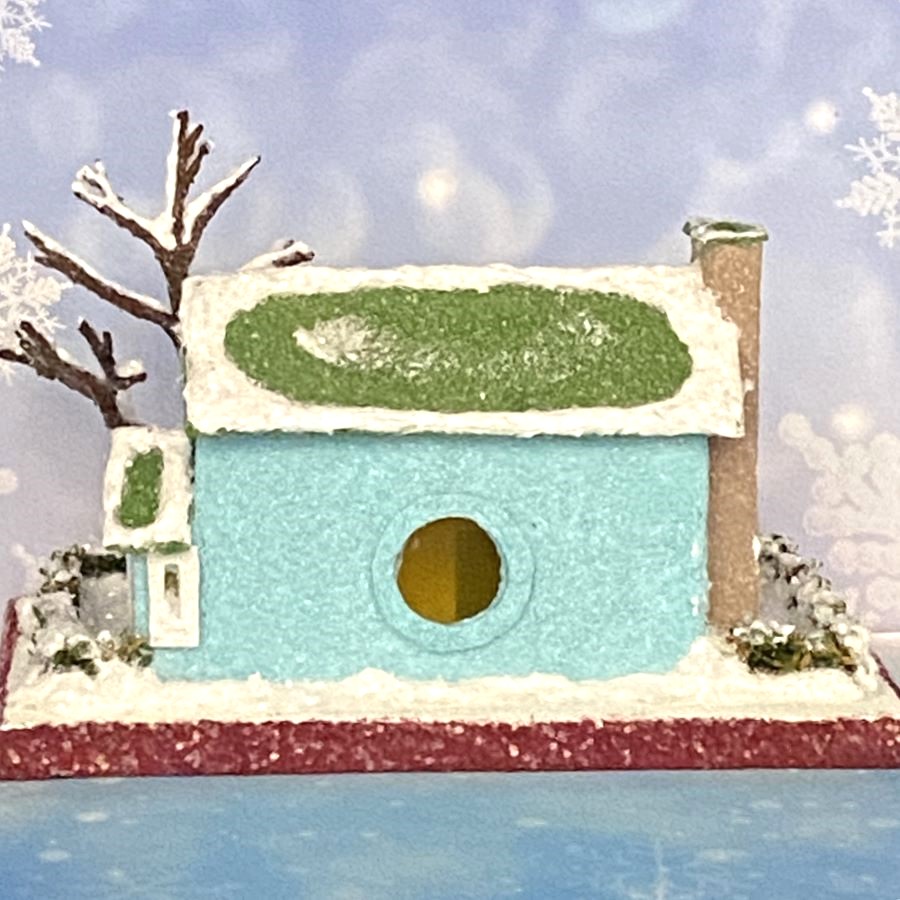
The base features two cardinals on a snowy holly branch. The back of the house has a hole for the use of an LED light string for lighting this little house.
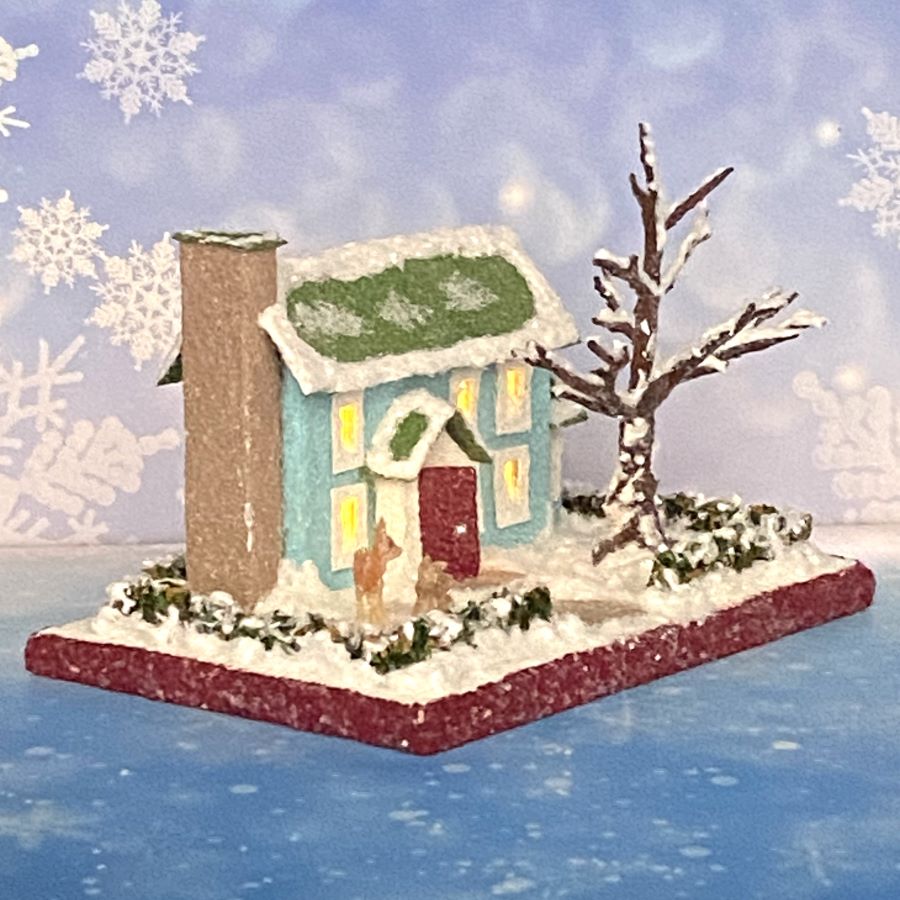
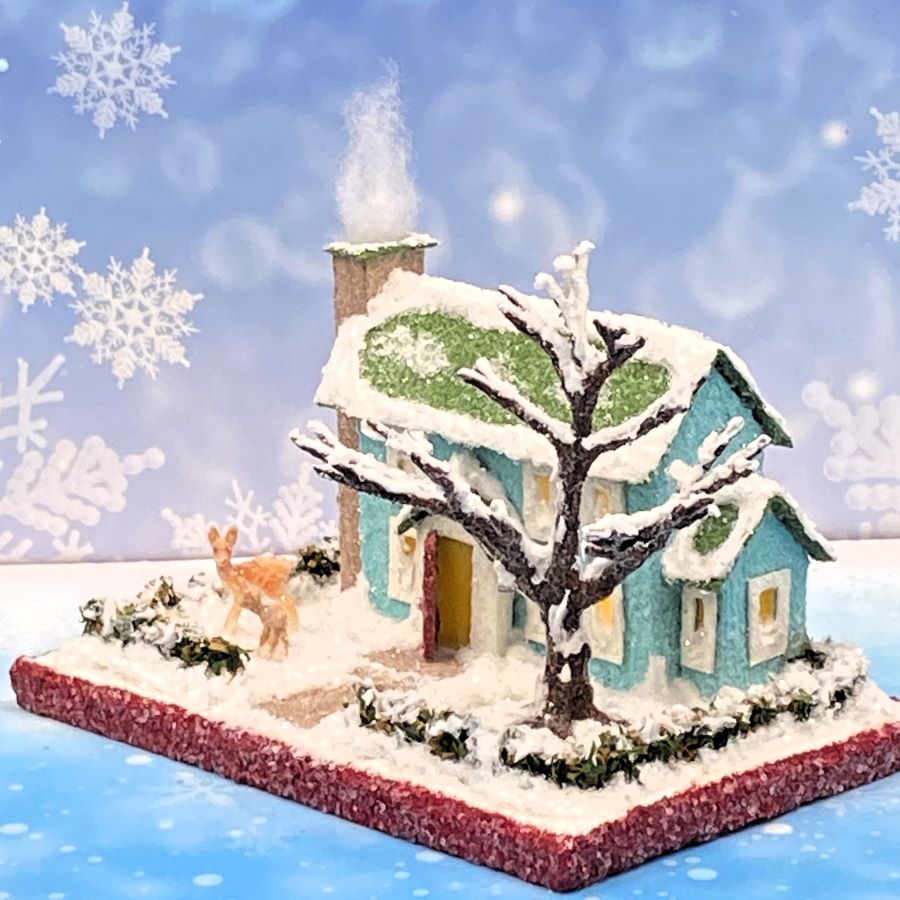
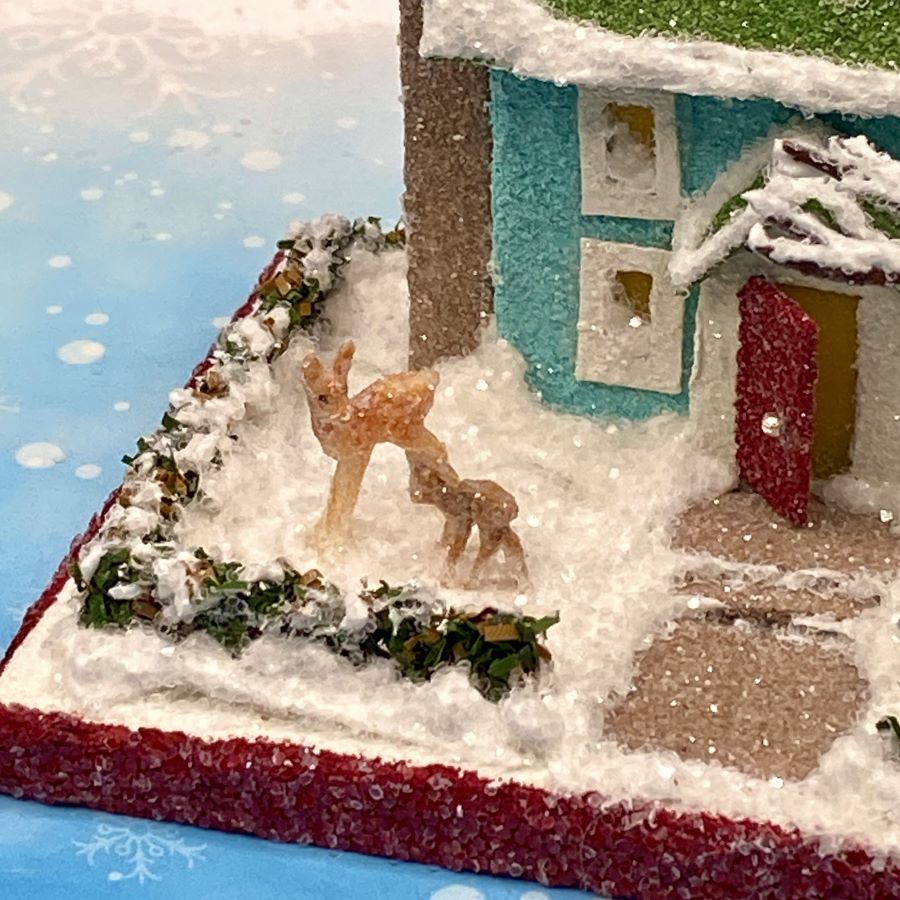
The house features a snow-lined tree and two deer.
The hedge around the yard is made from trimmed, 1/2″ evergreen roping. To learn how to make hedges for your putz houses, click the link to my tutorial. How to make an evergreen hedge for a putz house.
If you have any questions about creating putz houses, please ask. I am happy to share what I have learned about the art of putzing.
If you would like to see more of my putz houses, as well as Christmas ornaments I have made from upcycled holiday cards, please visit my Etsy shop.
If you are interested in crafting Putz houses of your own, check out my putz tutorials for more information. My blog can be searched, as well. Some of the turorials haven’t been listed on the tutorial page. Working on that! https://christmasnotebook.com/putz-little-glitter-houses/
All proceeds from my Etsy shop benefit Kenya Mercy Ministries. They work with the urban poor of Nairobi, Kenya, particularly the children and their families who live in Kibera, the largest urban slum in Africa. Thank you for your part in helping these children when you purchase items from my shop!
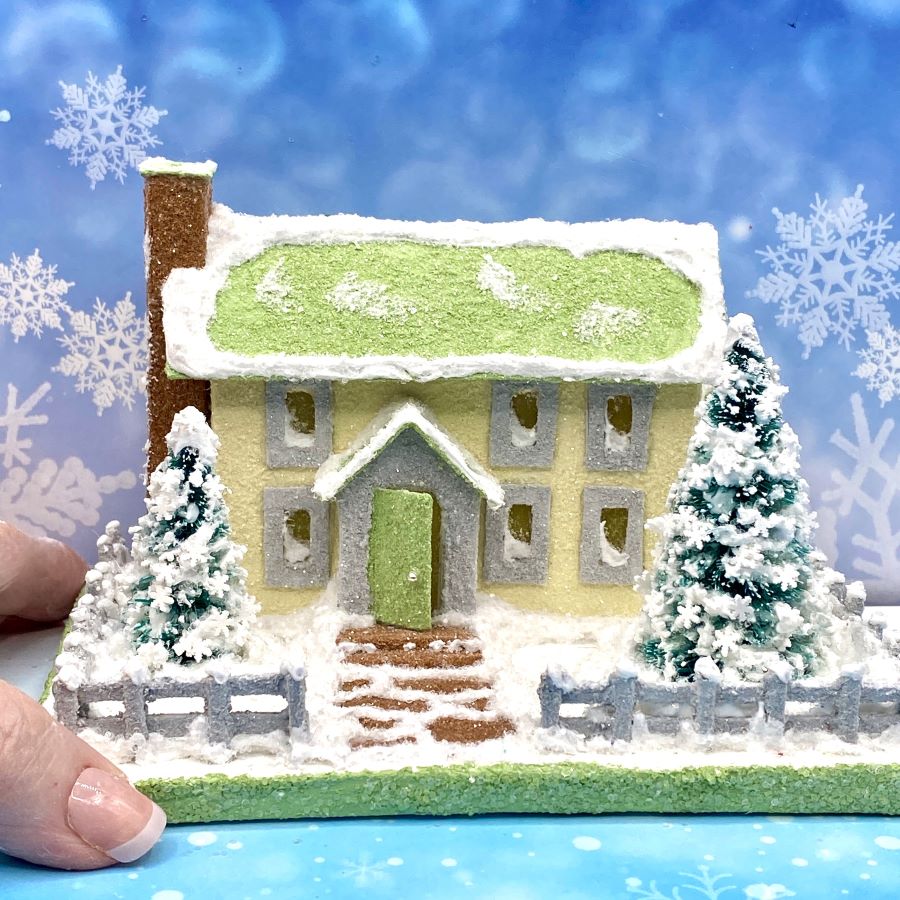
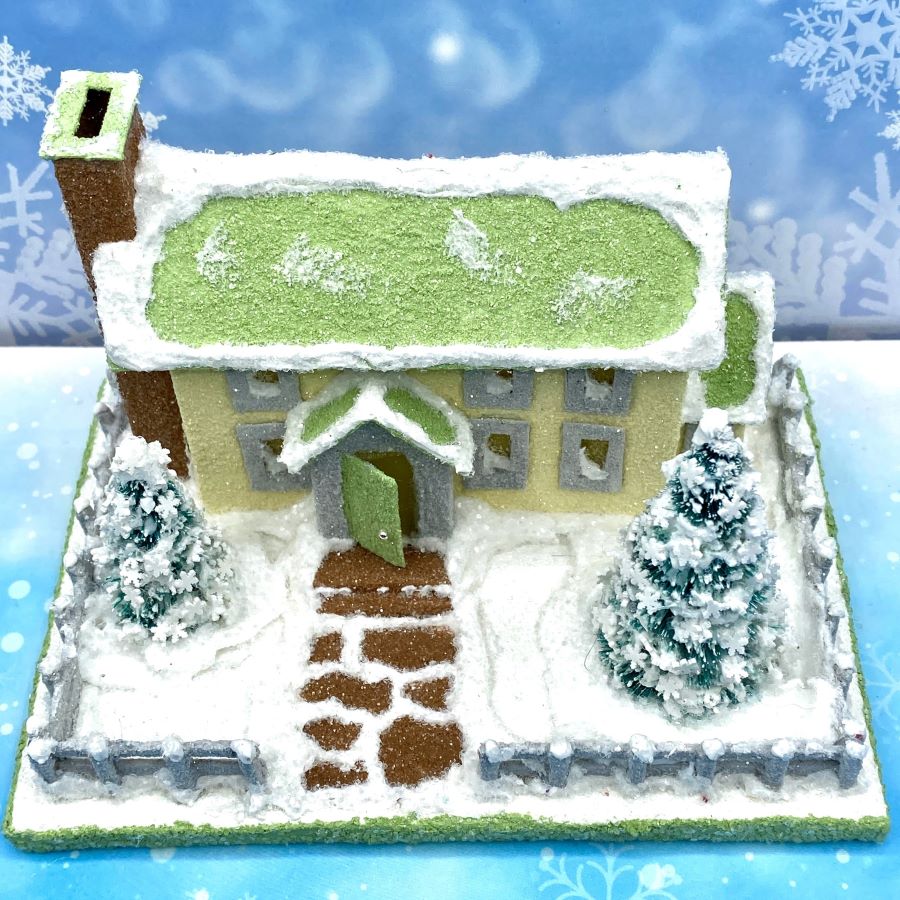
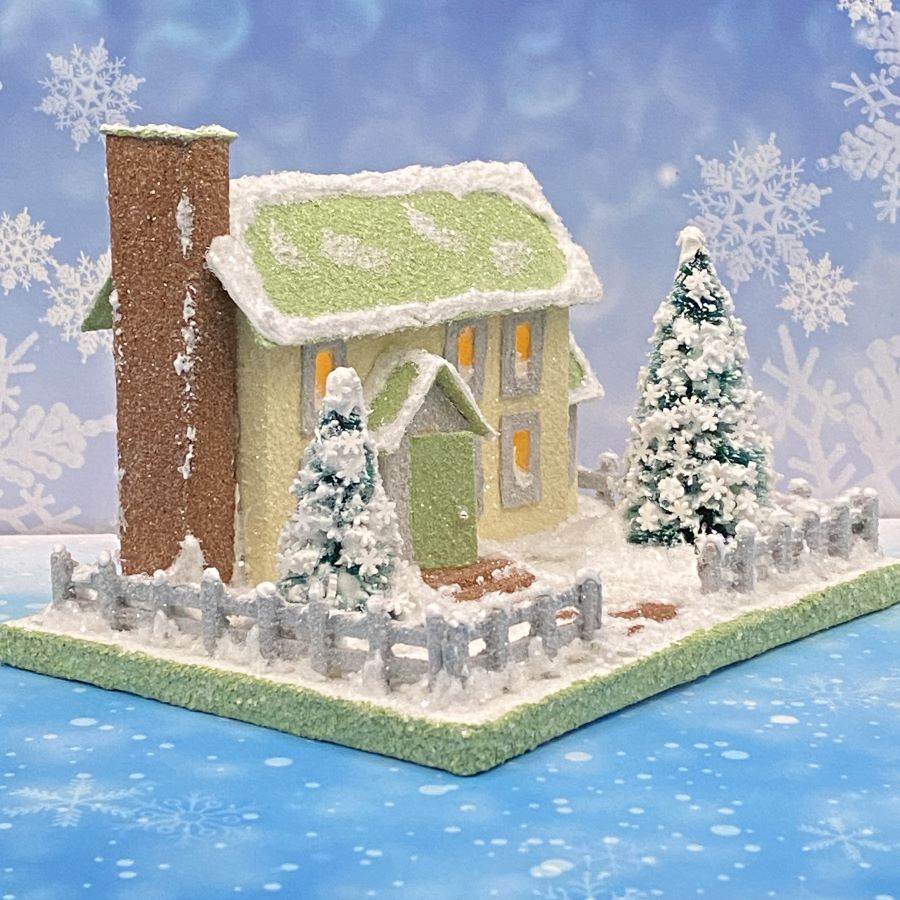
This ORIGINAL size, winter putz house features two bottle brush trees decorated with faux snow, tiny snowflake sprinkles and clear glitter. It is listed in my Etsy shop.
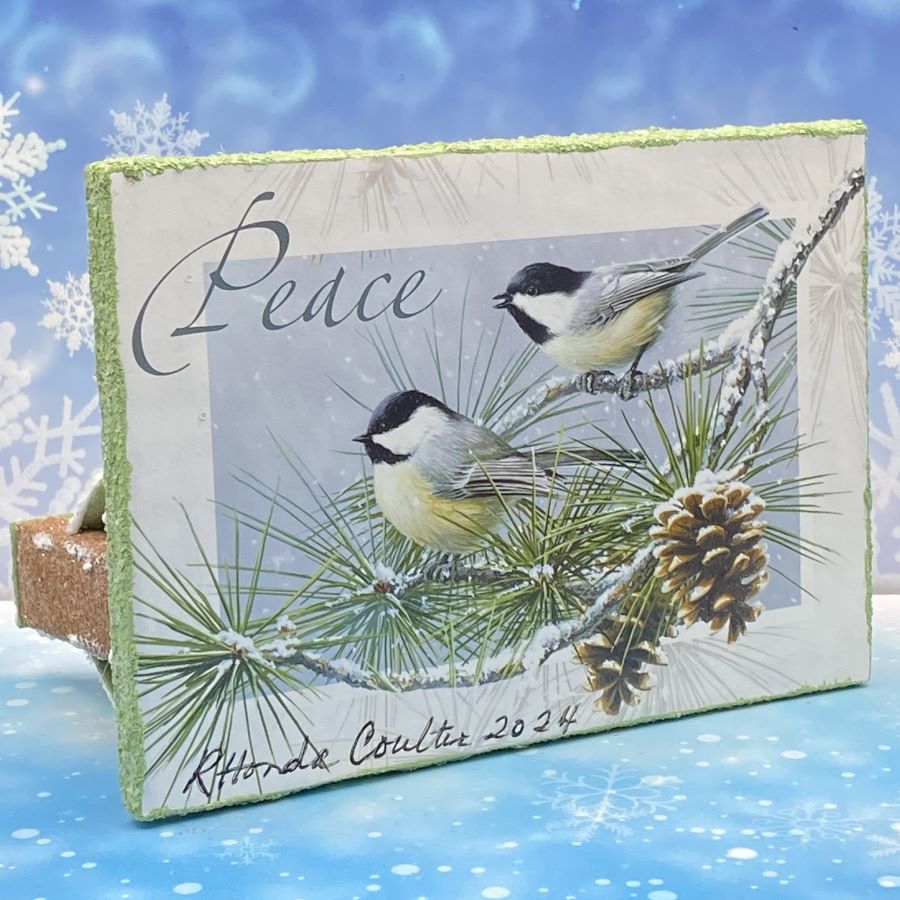
I like the simplified look of this one. The light colors, inspired by the colors of the Christmas card used to make the base, give it a quiet, country home feel.
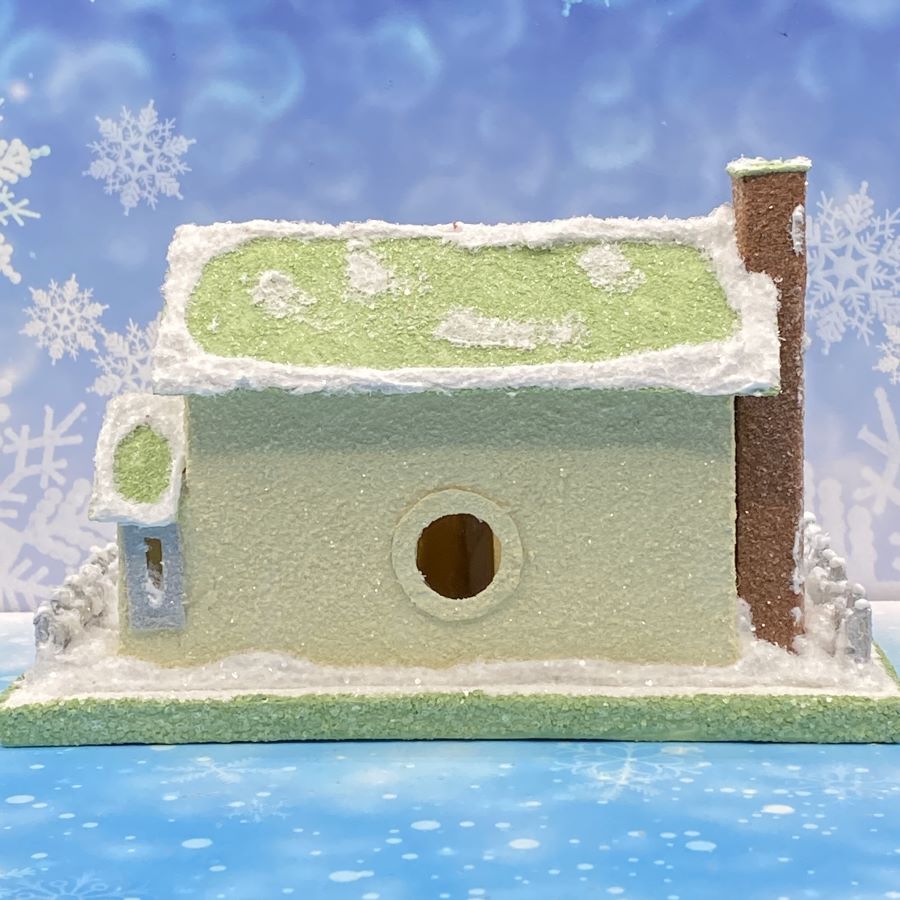
The base is made from a Christmas card with two chickadees on a pine bough. The house has the traditional hole in the back, allowing the use of an LED light string.
The post and board fence is handcrafted from wooden, coffee stir sticks. My tutorial for making wooden picket fences can be found here: Making picket fences for putz houses
The bottle brush trees are embellished with tiny snowflake sprinkles. The faux stepping stone sidewalk is made by painting “stones” on the base. Faux snow is used to outline the stones. The steps at the front door are made from balsa wood.
A puff of smoke is included, just in case you want to snuggle up in front of the fireplace.
If you have any questions about creating putz houses, please ask. I am happy to share what I have learned about the art of putzing.
If you would like to see more of my Putz houses, as well as Christmas ornaments I have made from upcycled holiday cards, please visit my Etsy shop.
If you are interested in crafting Putz houses of your own, check out my Putz tutorials for more information. My blog can be searched, as well. Some of the turorials haven’t been listed on the tutorial page. Working on that! https://christmasnotebook.com/putz-little-glitter-houses/
All proceeds from my Etsy shop benefit Kenya Mercy Ministries. They work with the urban poor of Nairobi, Kenya, particularly the children and their families who live in Kibera, the largest urban slum in Africa. Thank you for your part in helping these children when you purchase items from my shop!
The last three putz I made were made from the same pattern, but in different sizes. In general, ORIGINAL size putz are 5″-6″ tall. MINI tend to be 3″-4″ tall. TINY MINI are most often 1″-2″ tall. Sizes will vary slightly depending on the pattern. Churches will be taller due to the steeple height, but the main body of the church follows the general heights of the three sizes.
Below are different sizes of the same pattern. I also make spring, Easter, summer, and Fourth of July houses, barns, churches, etc.
A TINY MINI house can be more difficult to make, due to the small pieces. Creasing poster board in such a small size is harder than in the larger sizes. Window frames become quite narrow and the little doors require slow and patient cutting. The smaller sizes are adorable, though, and worth the effort.
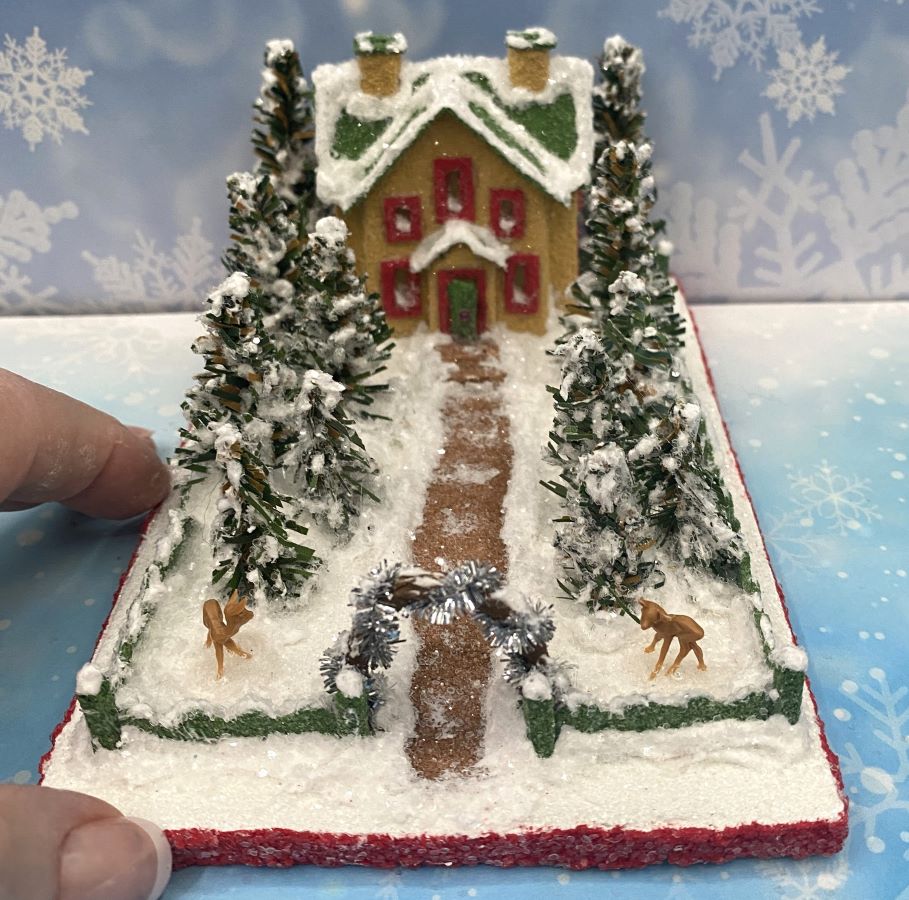
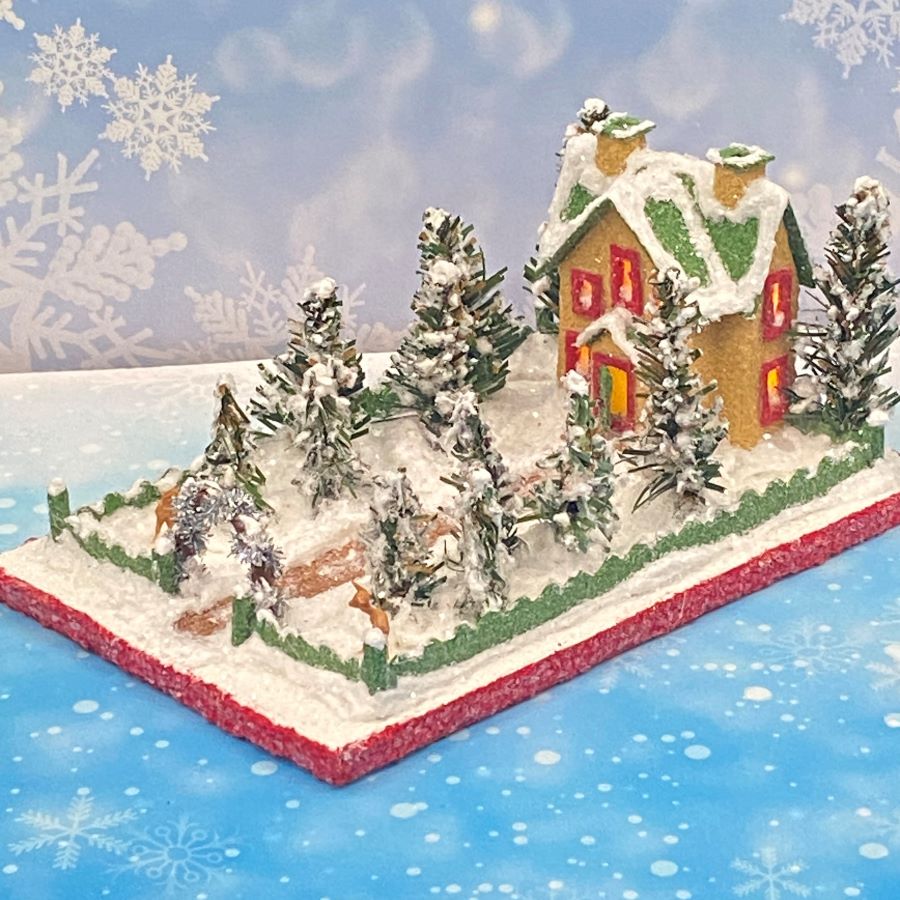
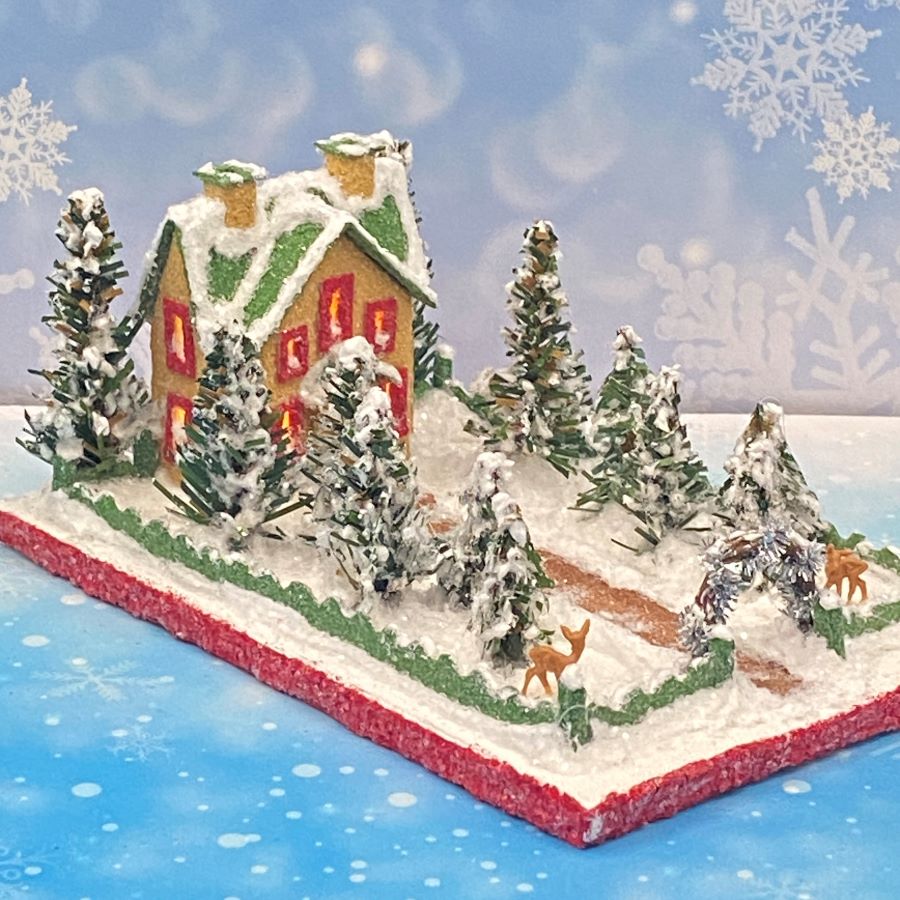
The base measures 4 1/4″ wide by 6 3/8″ deep. The Putz is 2 3/4″ tall as measured from the bottom of the base to the top of the chimneys.
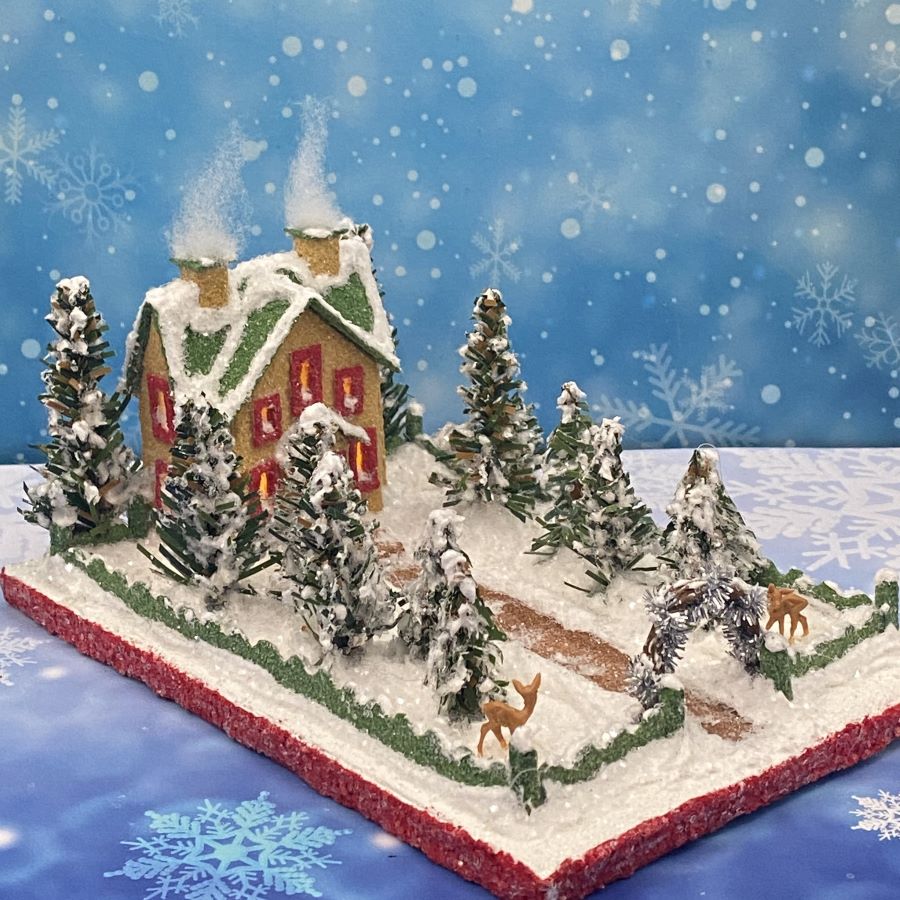
Puffs of smoke are included, for those chilly winter evenings. Grab your favorite hot beverage and cozy up in front of the fire.
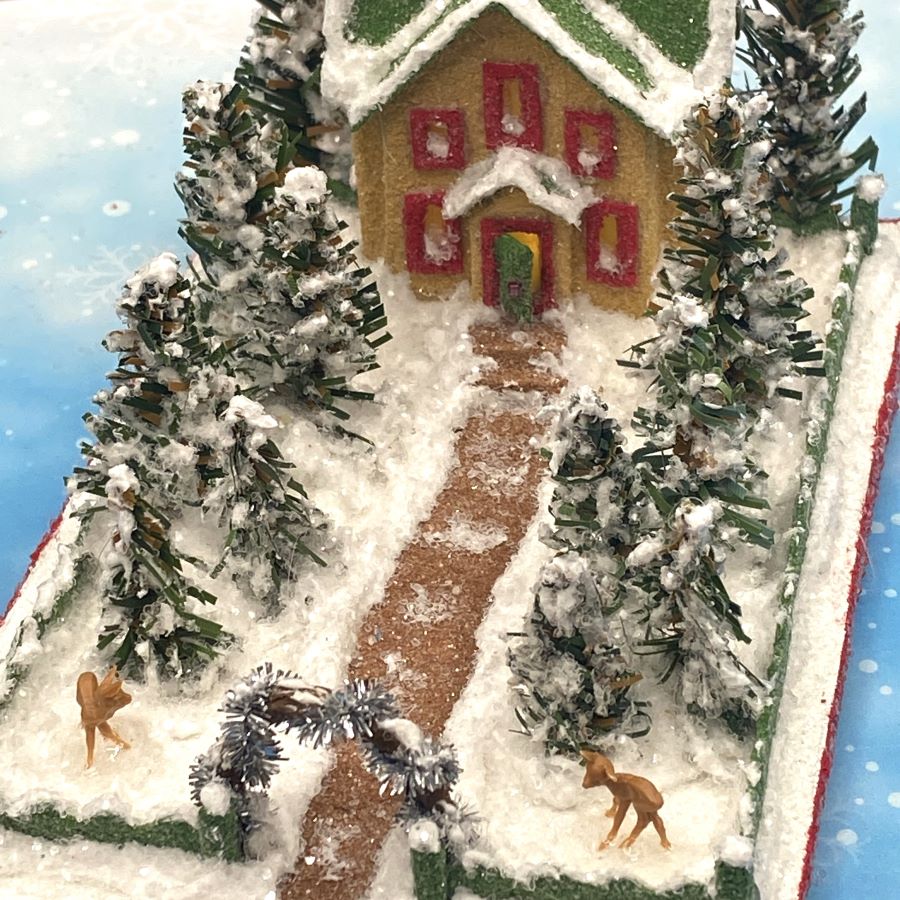
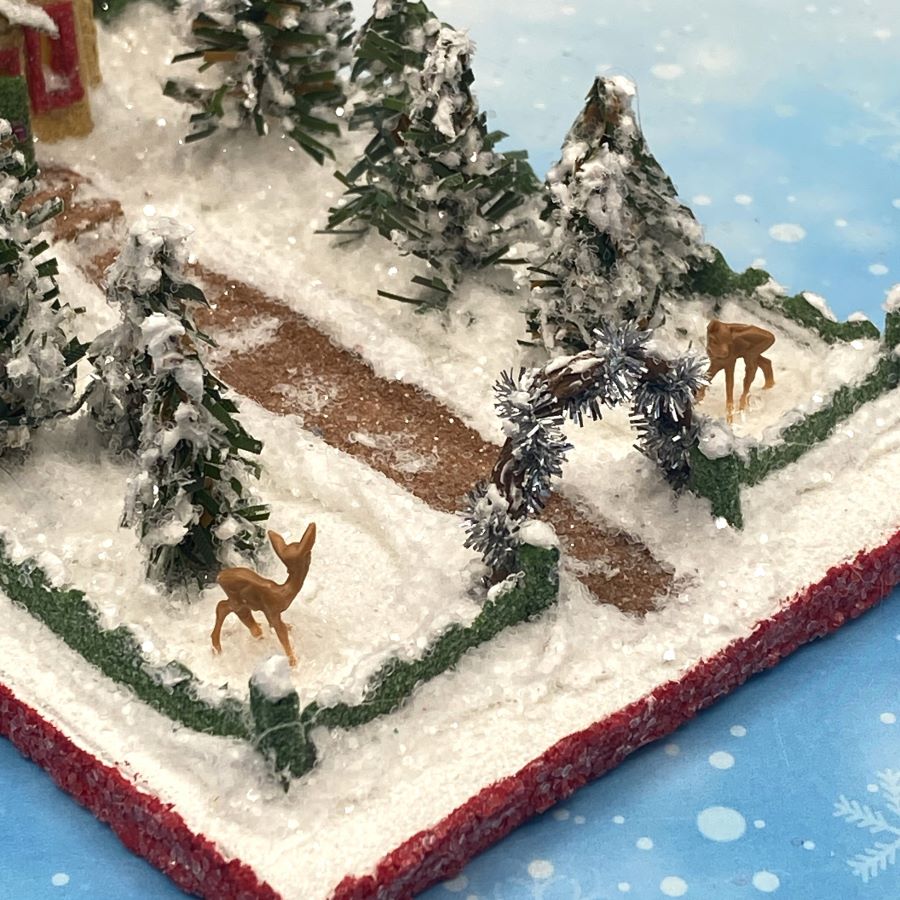
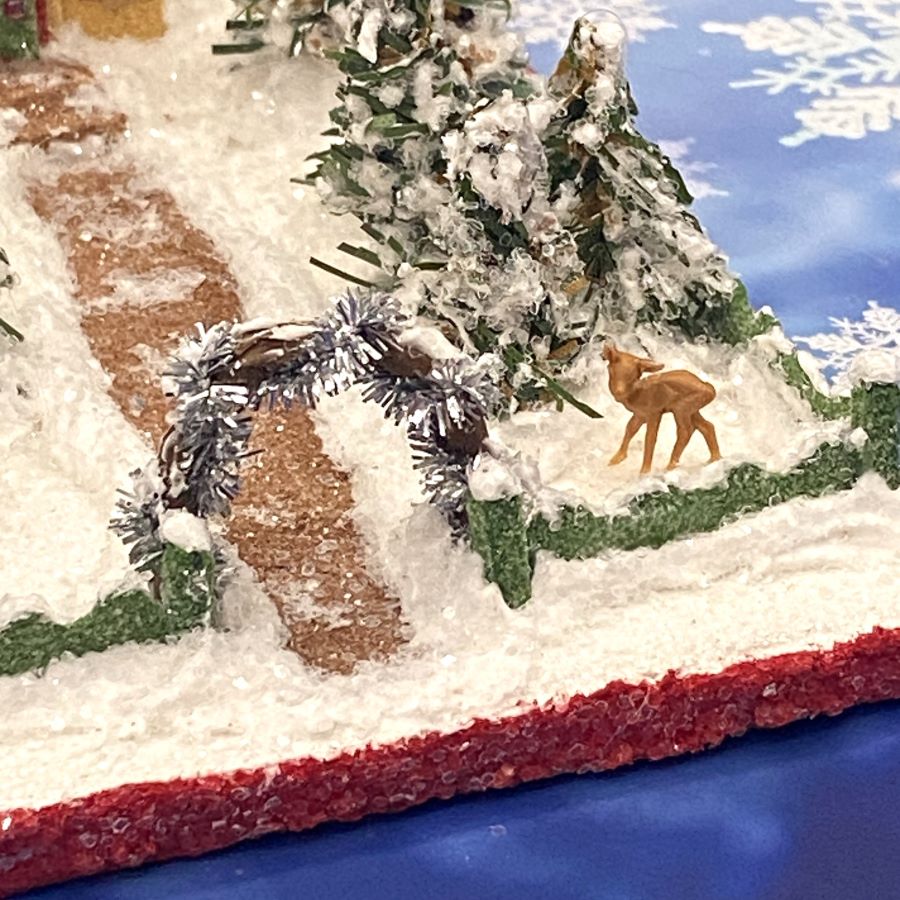
Two tiny deer stand near the front gate, which is covered with an arch. The arch is twined with silver garland.
It’s a winter wonderland, with twelve, handcrafted evergreen trees made from evergreen stems. Some of the stems are made from upcycled, artificial Christmas trees and some are made from evergreen garland.
If you have any questions about creating putz houses, please ask. I am happy to share what I have learned about the art of putzing.
If you would like to see more of my Putz houses, as well as Christmas ornaments I have made from upcycled holiday cards, please visit my Etsy shop.
If you are interested in crafting Putz houses of your own, check out my Putz tutorials for more information. My blog can be searched, as well. Some of the turorials haven’t been listed on the tutorial page. Working on that! https://christmasnotebook.com/putz-little-glitter-houses/
All proceeds from my Etsy shop benefit Kenya Mercy Ministries. They work with the urban poor of Nairobi, Kenya, particularly the children and their families who live in Kibera, the largest urban slum in Africa. Thank you for your part in helping these children when you purchase items from my shop!
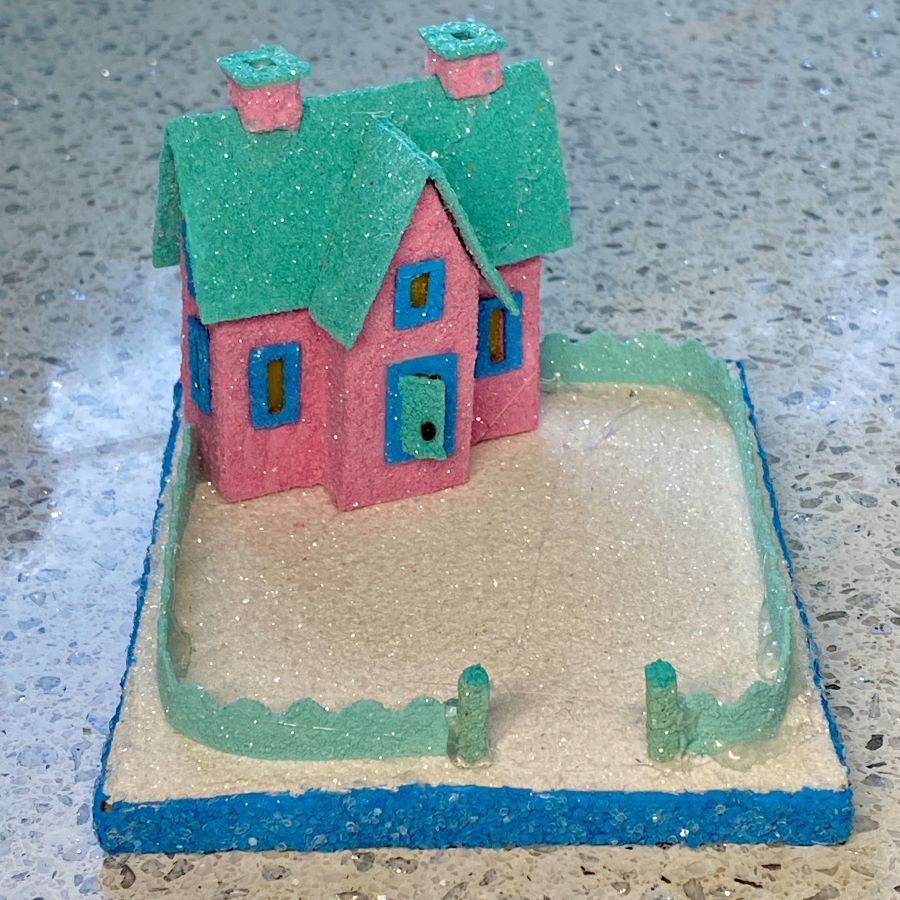
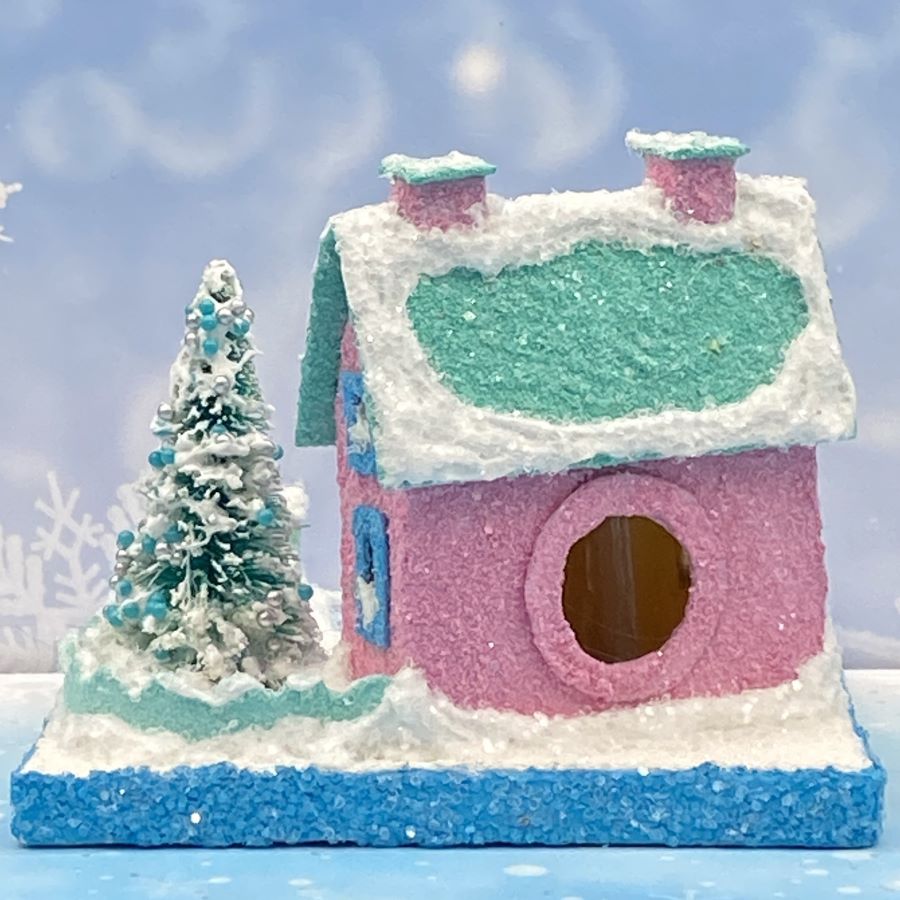
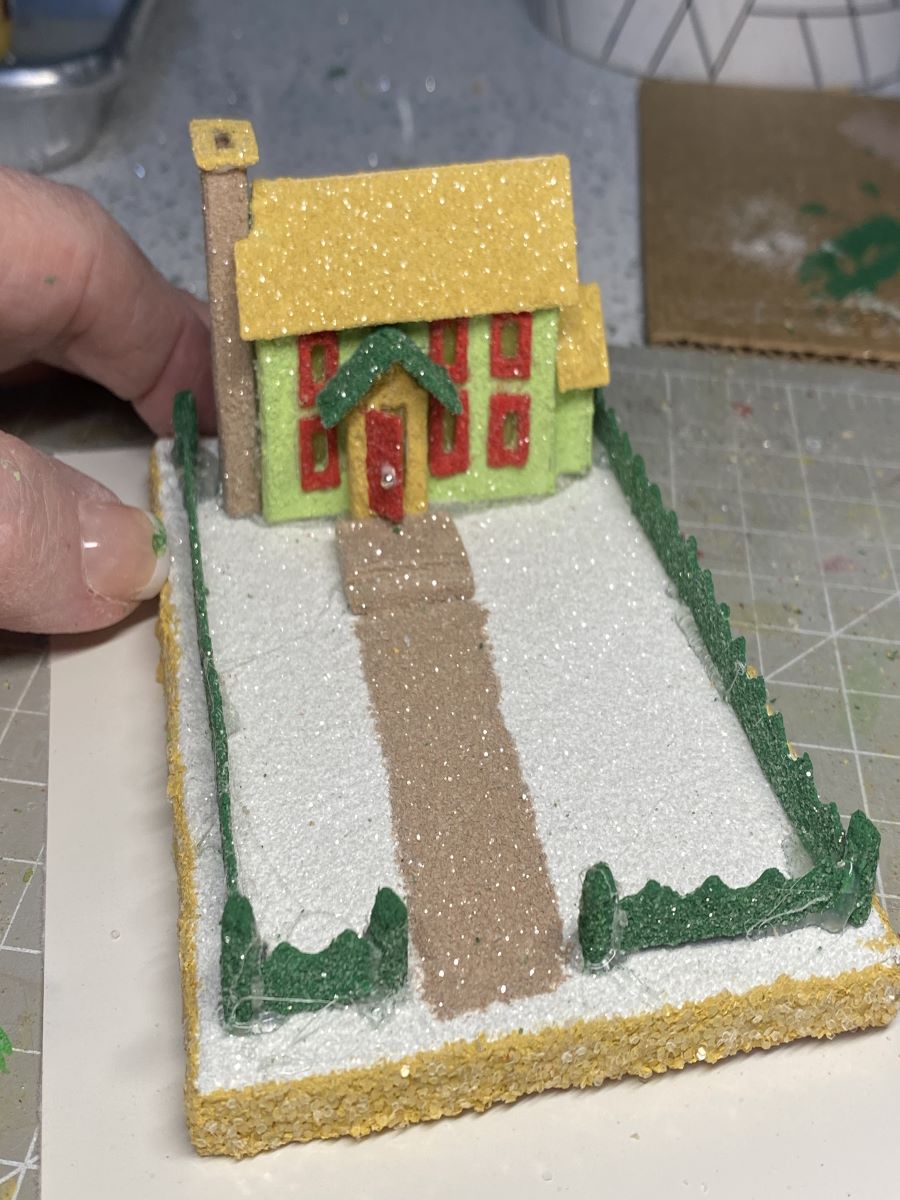
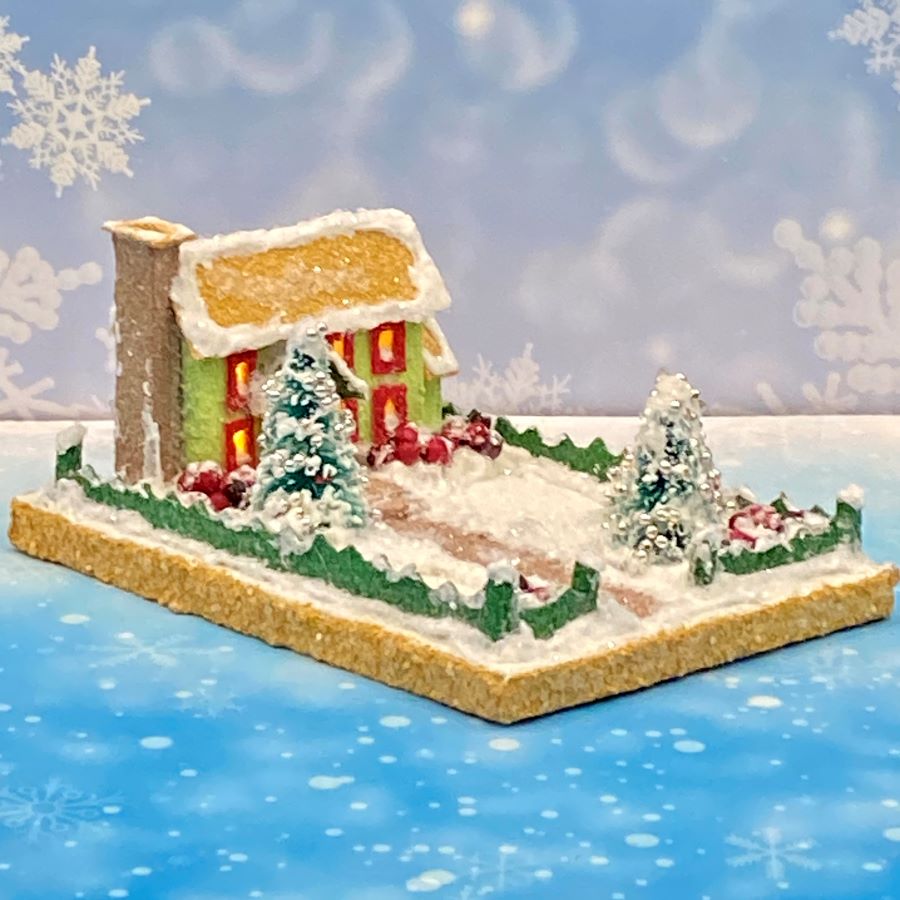
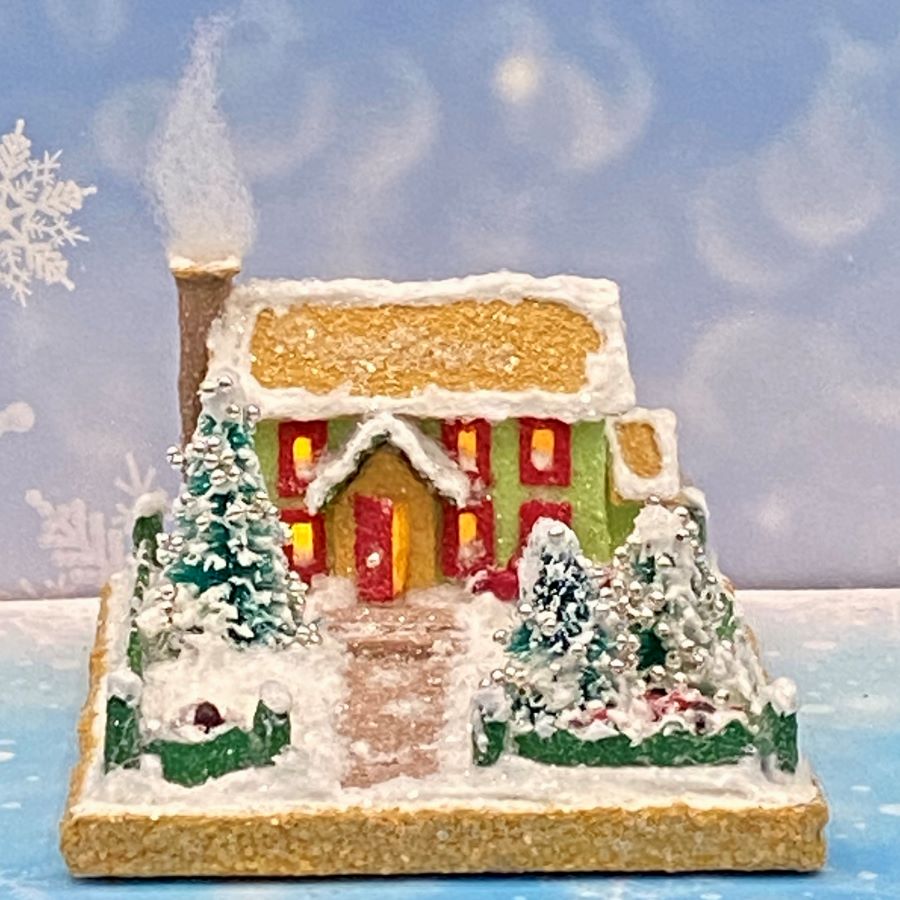
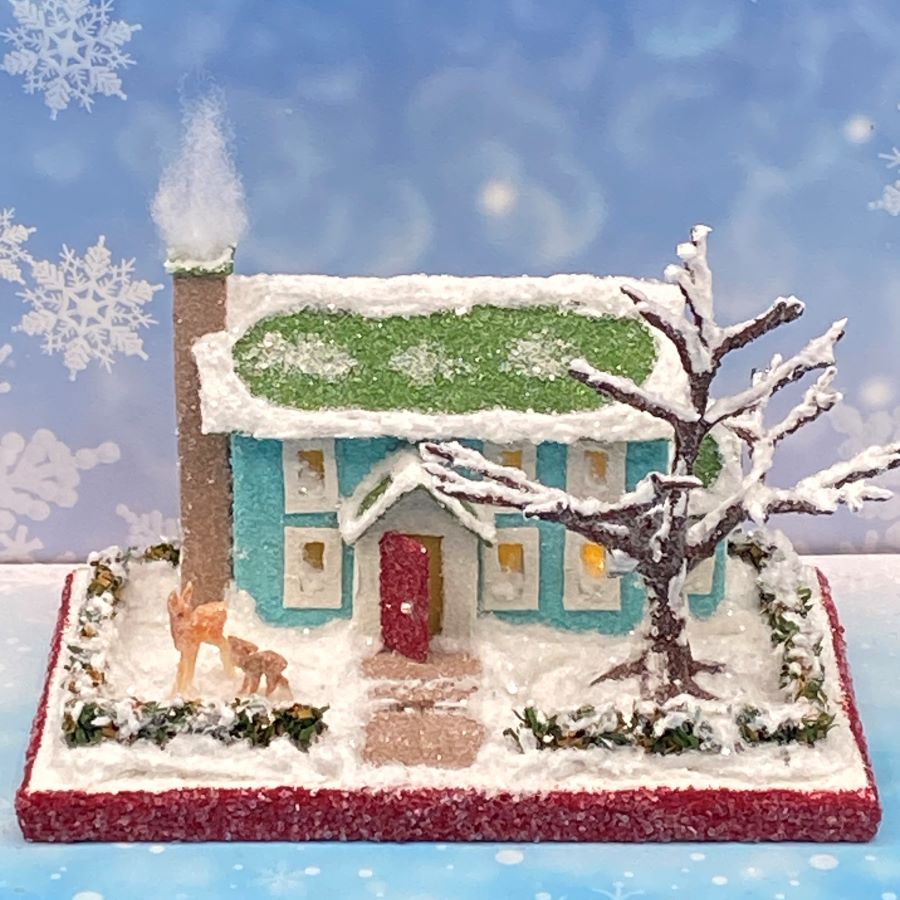
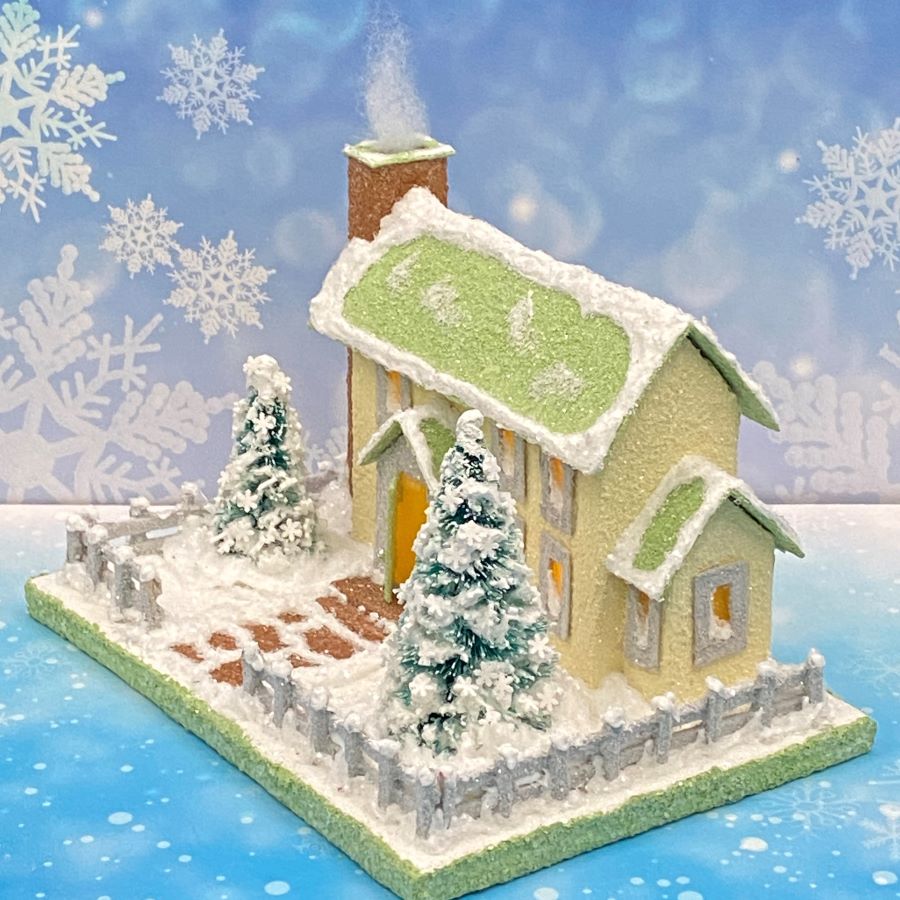
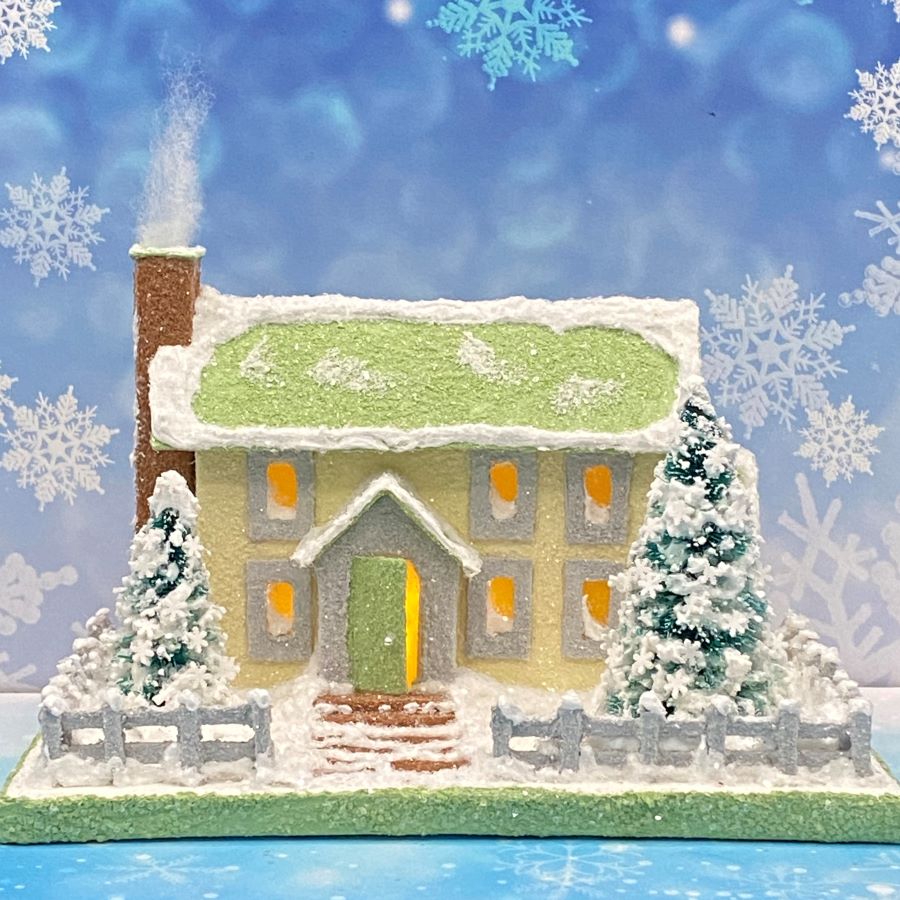
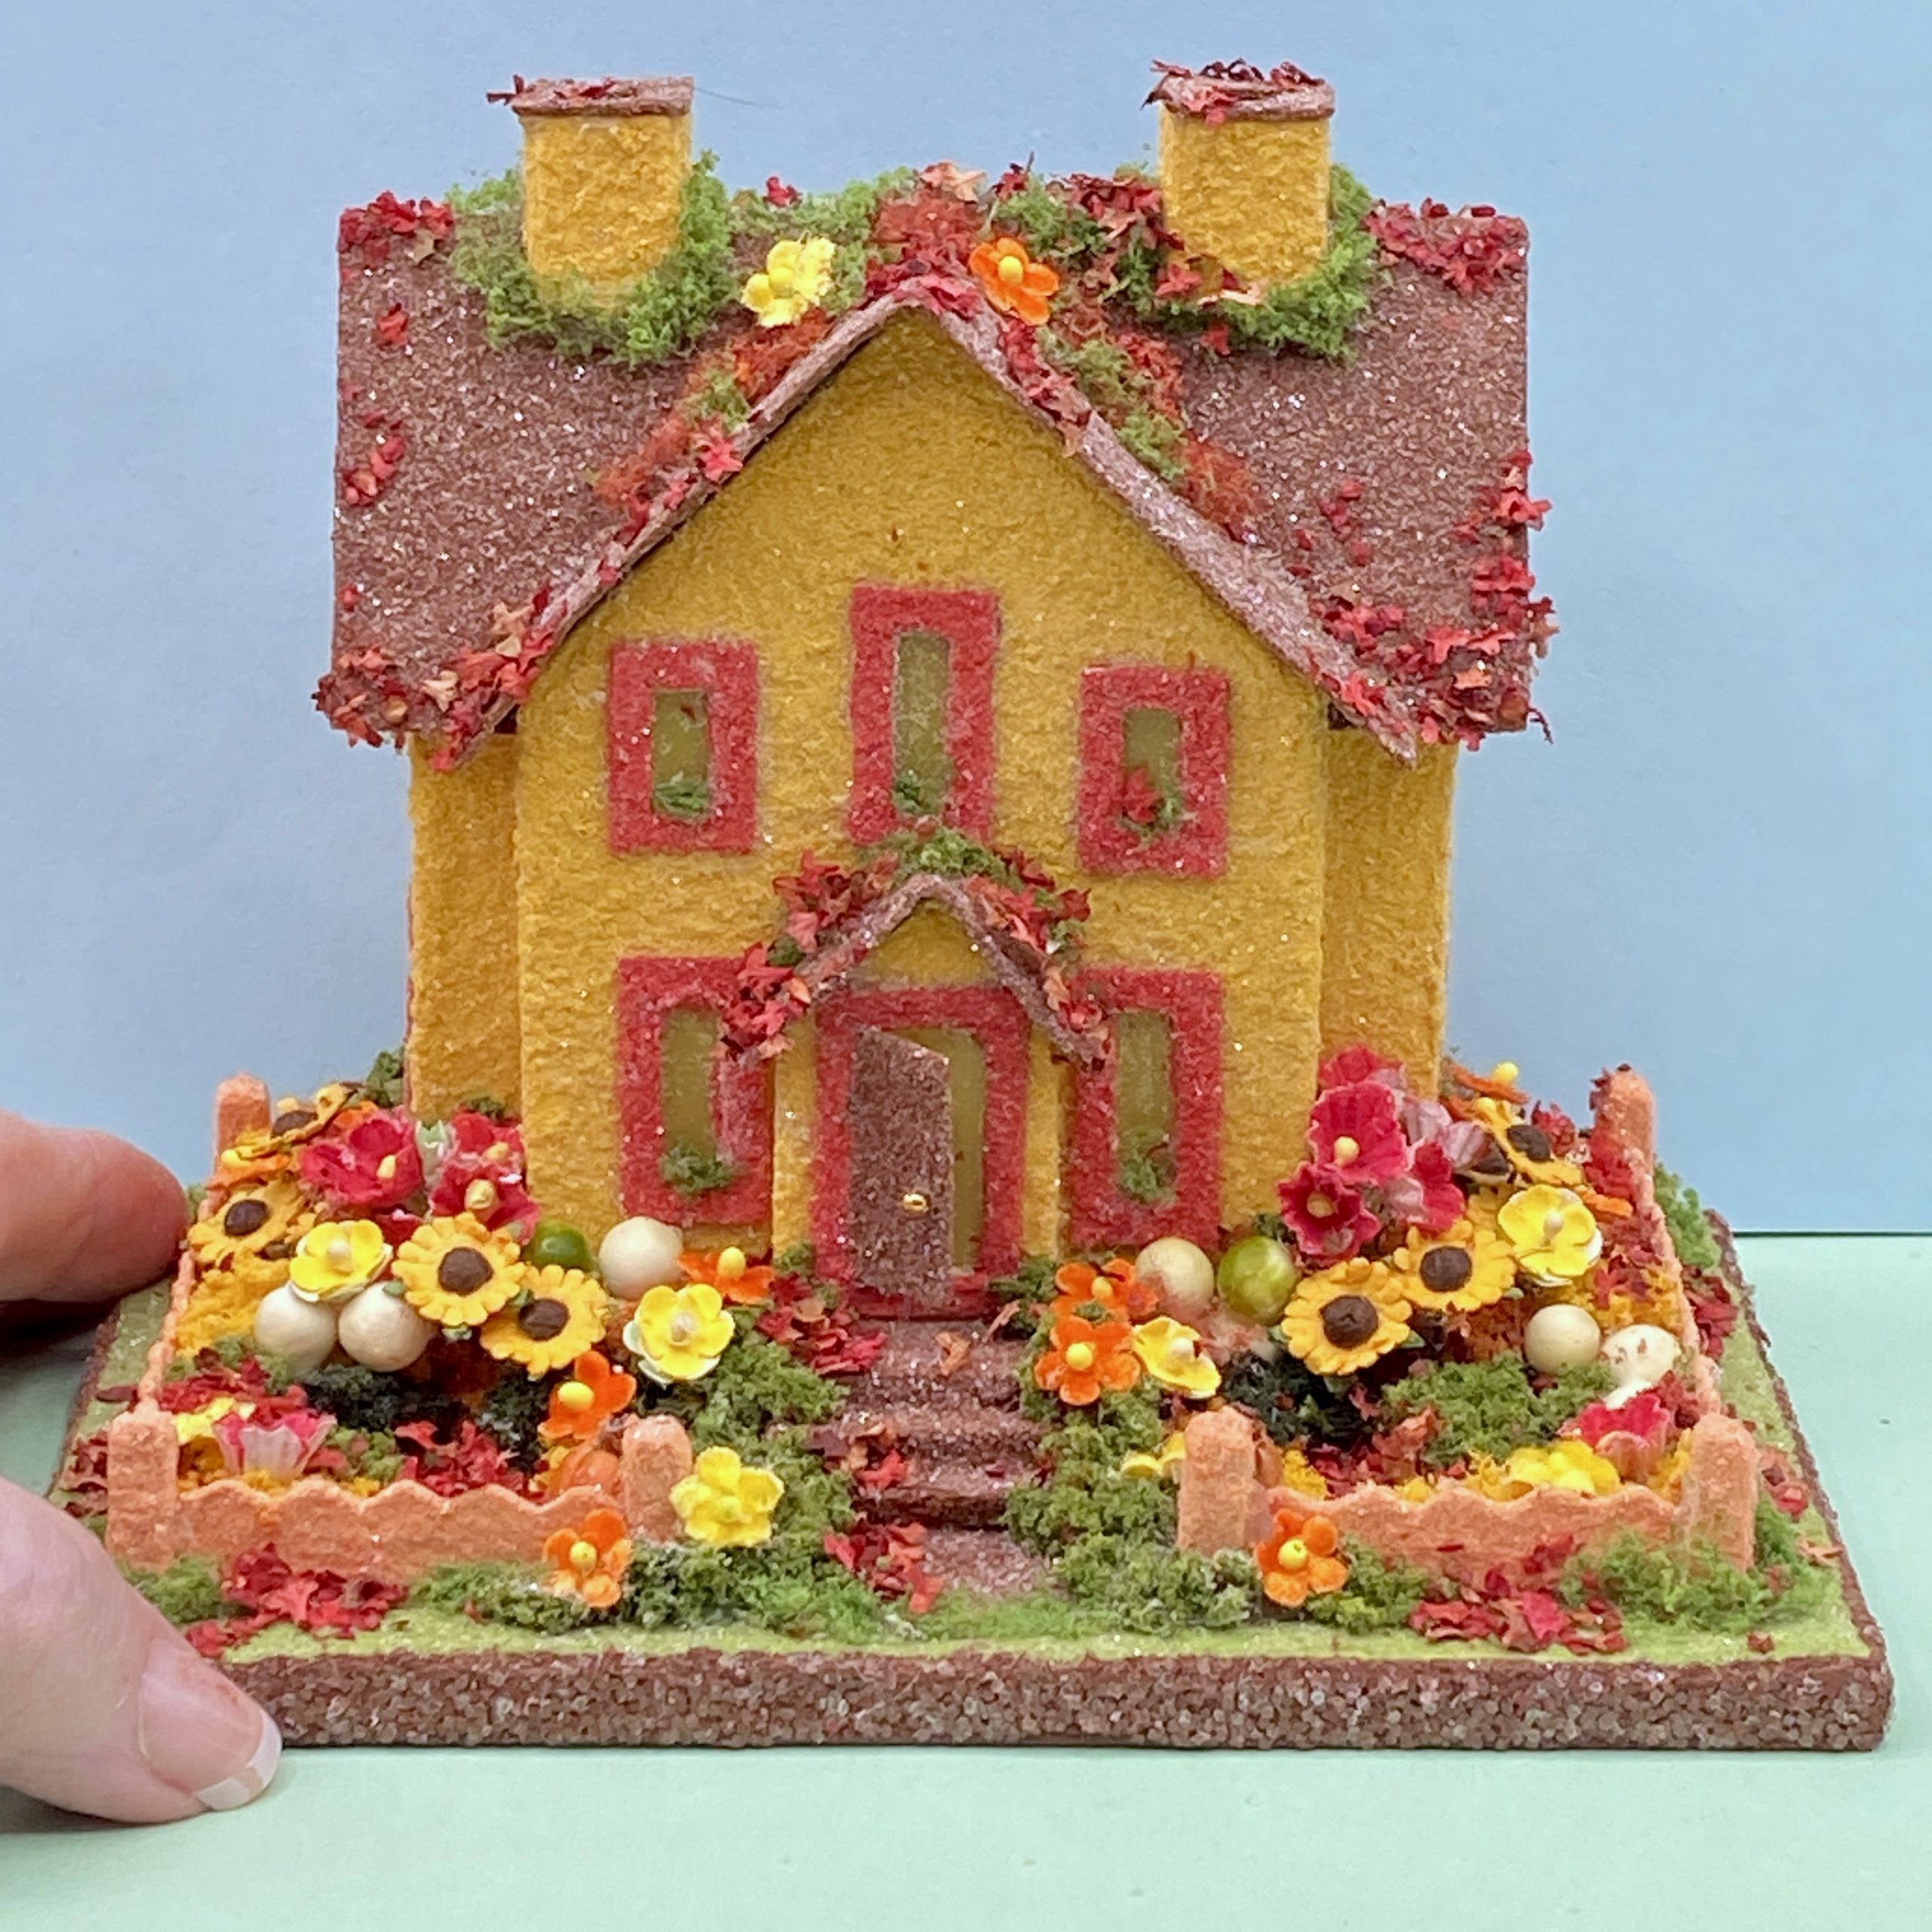
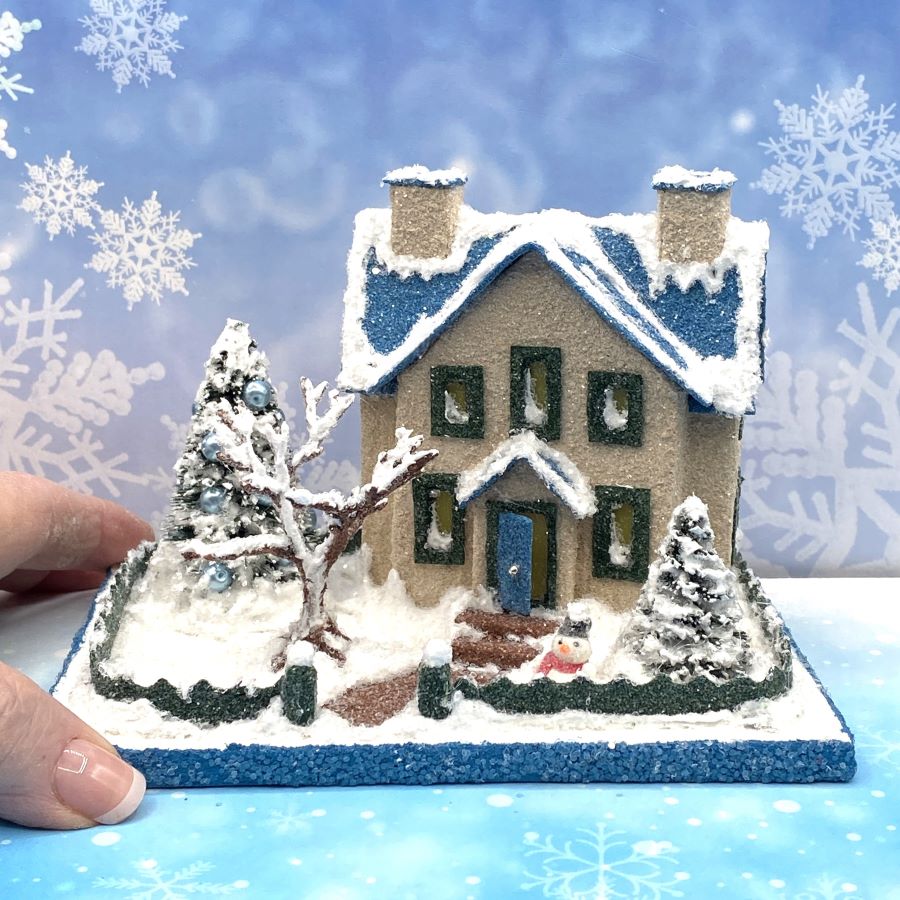
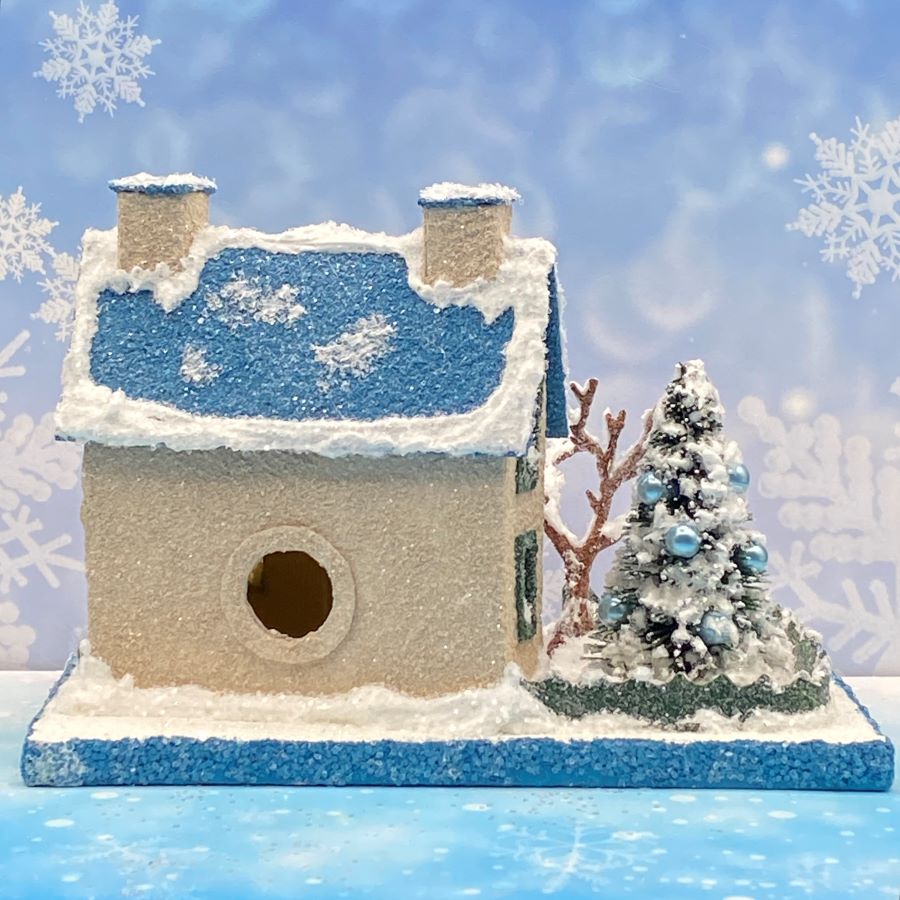
My Etsy shop is low on MINI sized putz houses. I decided to use the same pattern to make a MINI winter house as I just used for an ORIGINAL size autumn house. The autumn base is 6 1/2″ wide by 4 1/2″ deep, and the house is 5 1/8″ tall. The base for the winter house is 5 3/4″ wide by 4″ deep. The Putz is 4″ tall.
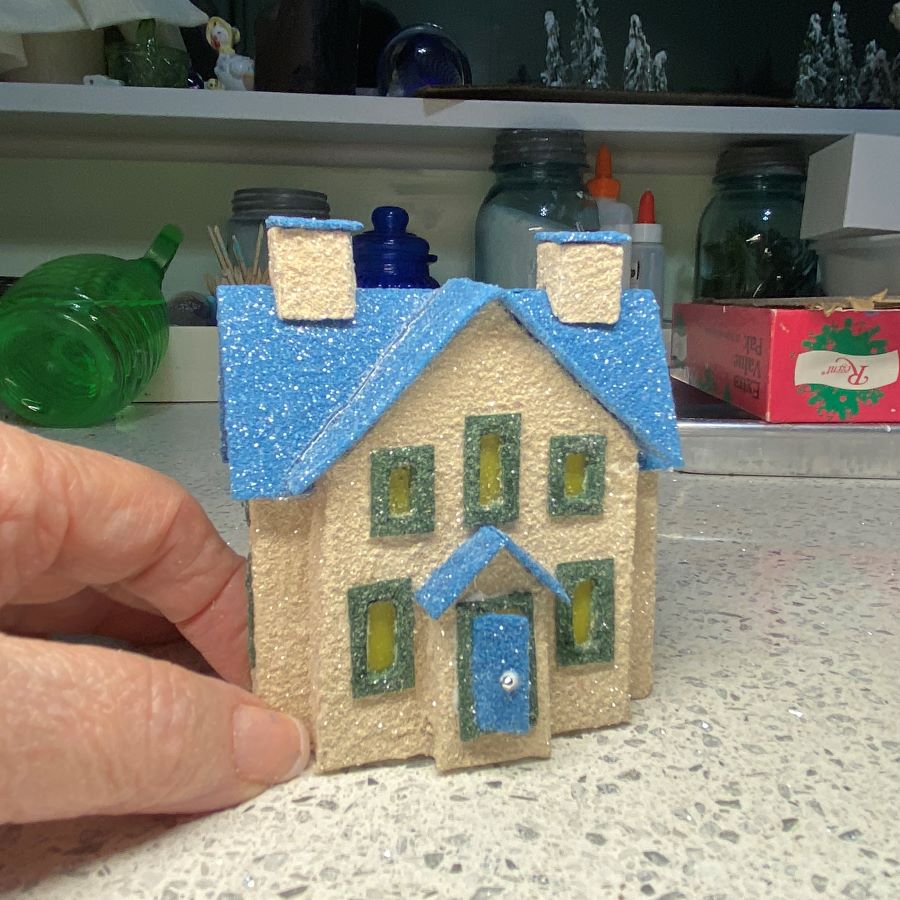
To make a pattern in a MINI size, I copy it at 75% of the original pattern. The smaller size is a bit harder to work with. The hardest part for me is to make sure the window and door frames aren’t too wide for the size. That’s even harder with a TINY MINI size which is copied at 50% of the original. I cut one of those out today, in this same pattern. I’ll be constructing it tomorrow. Stay tuned!
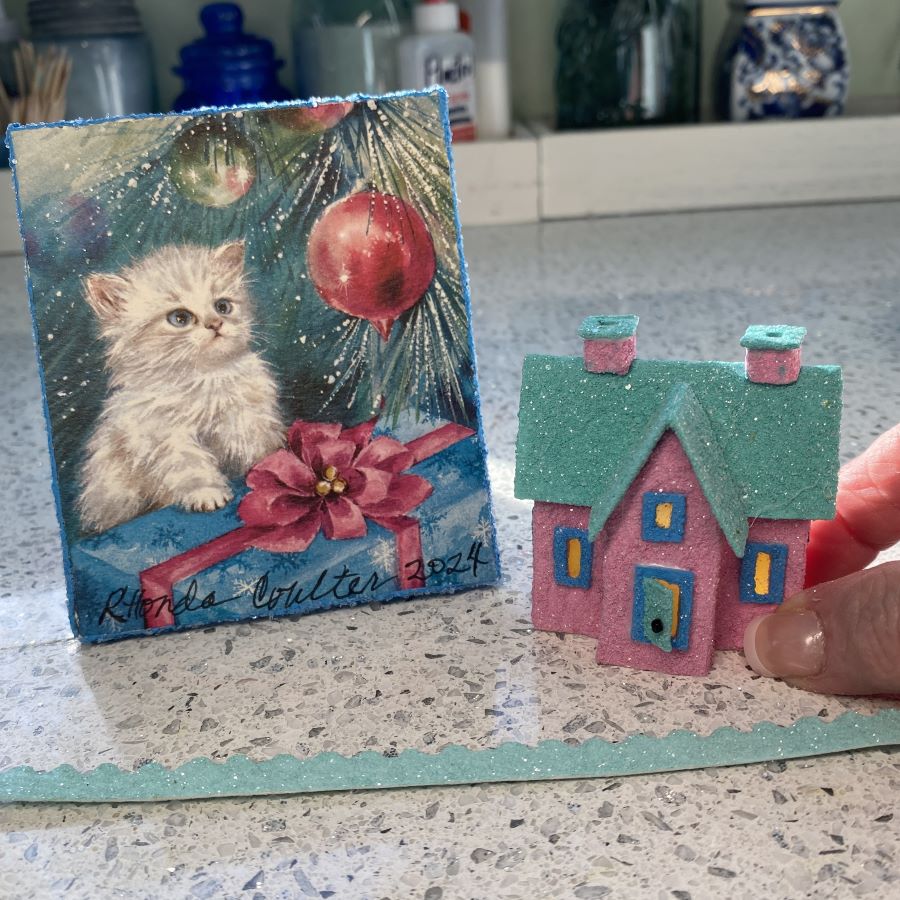
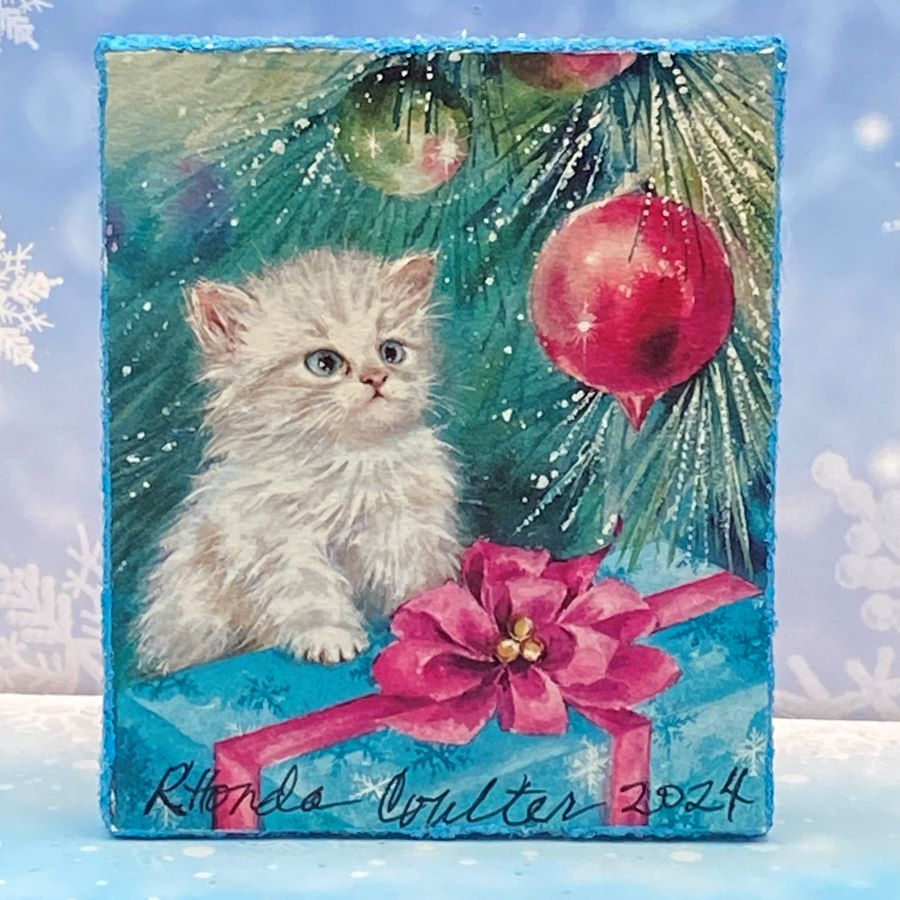
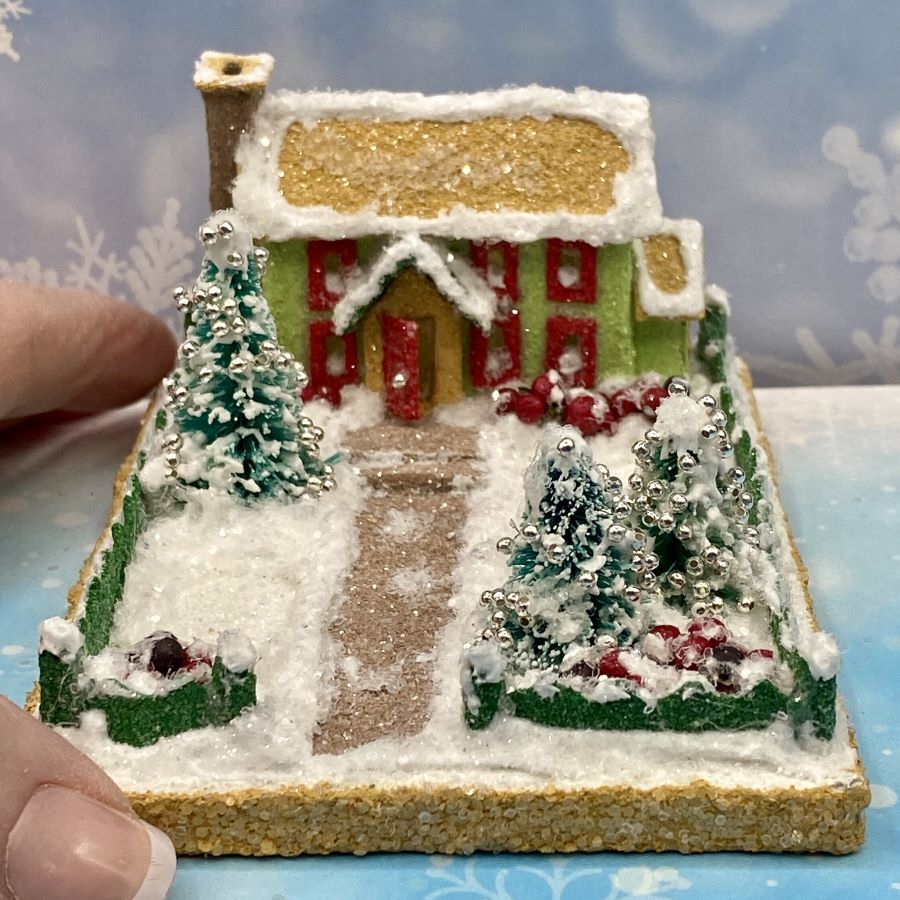
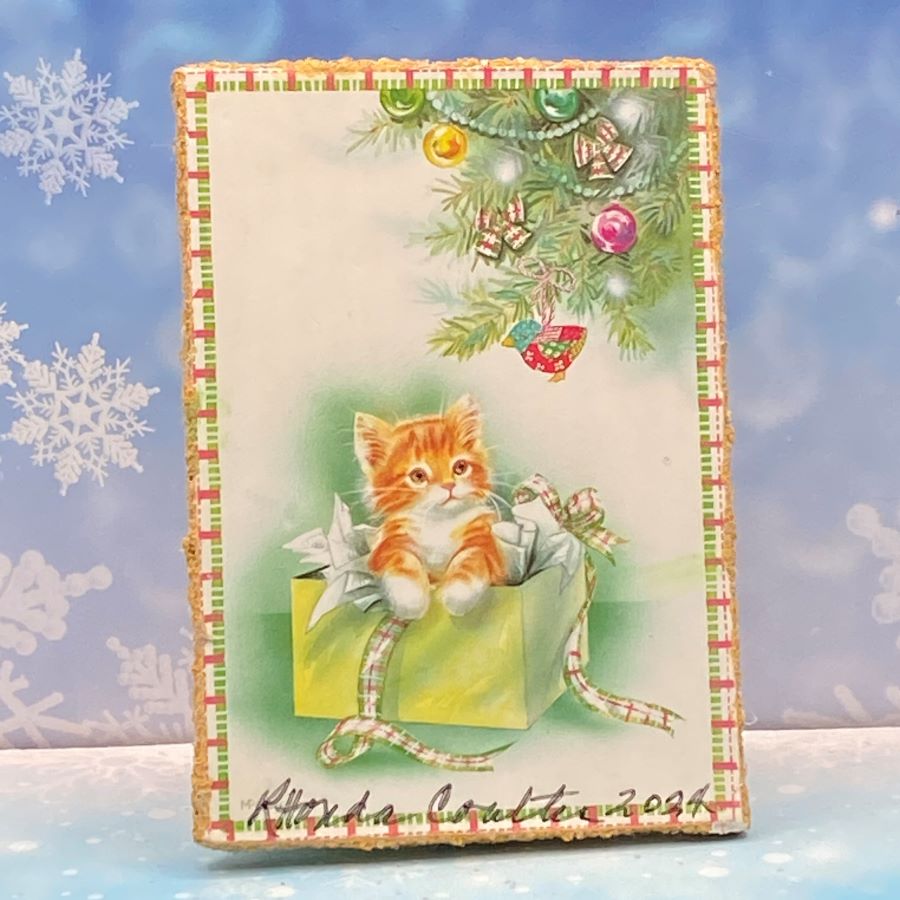
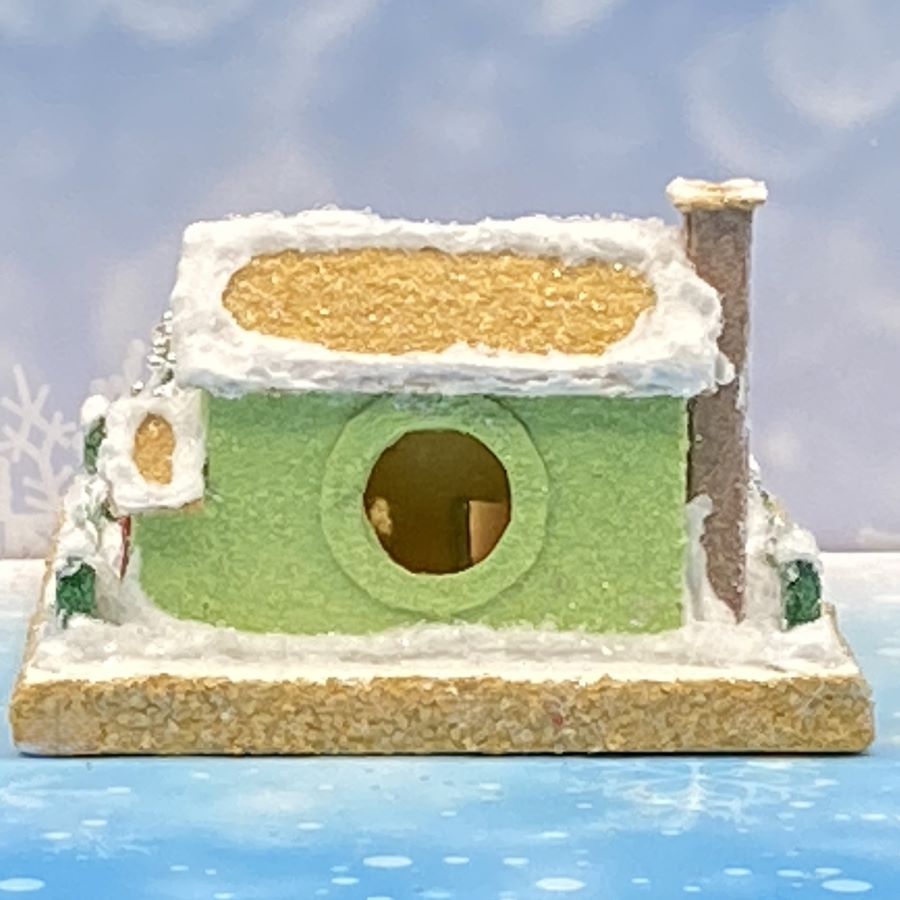
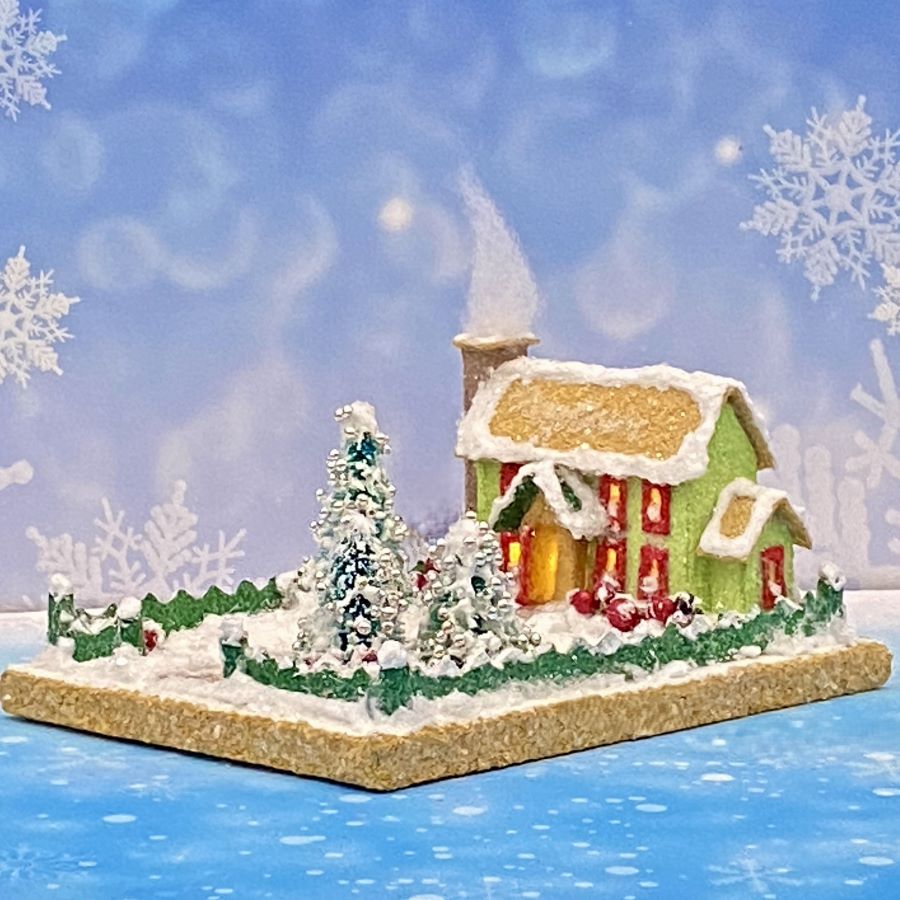
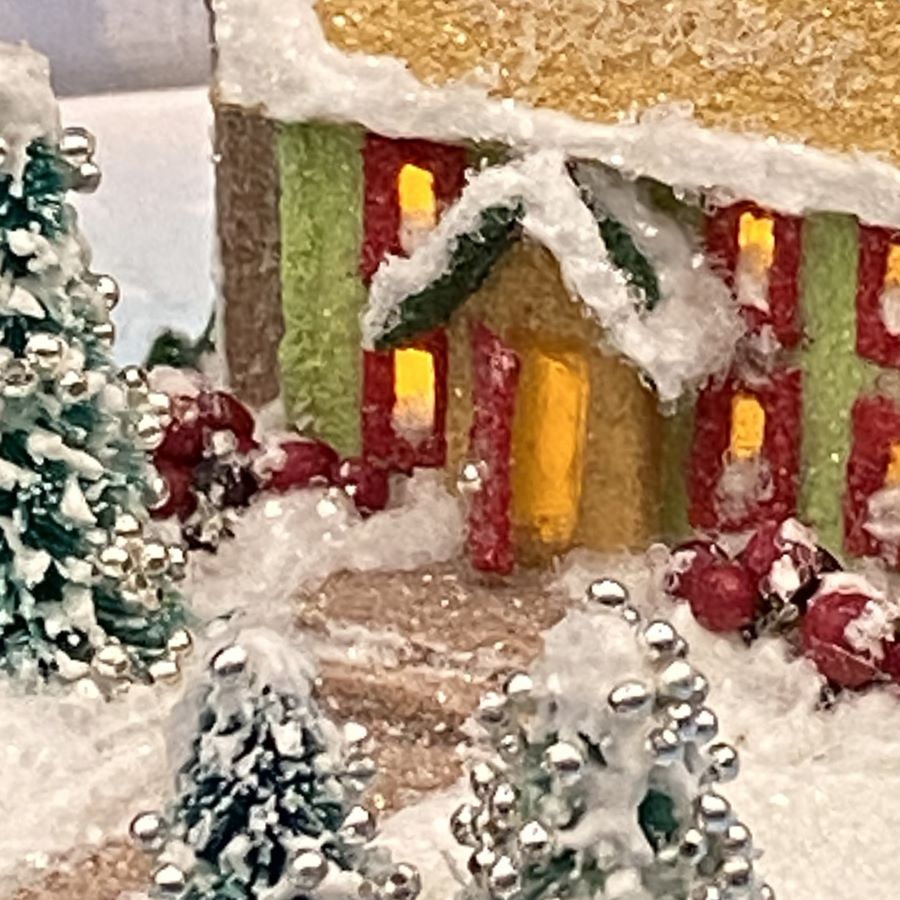
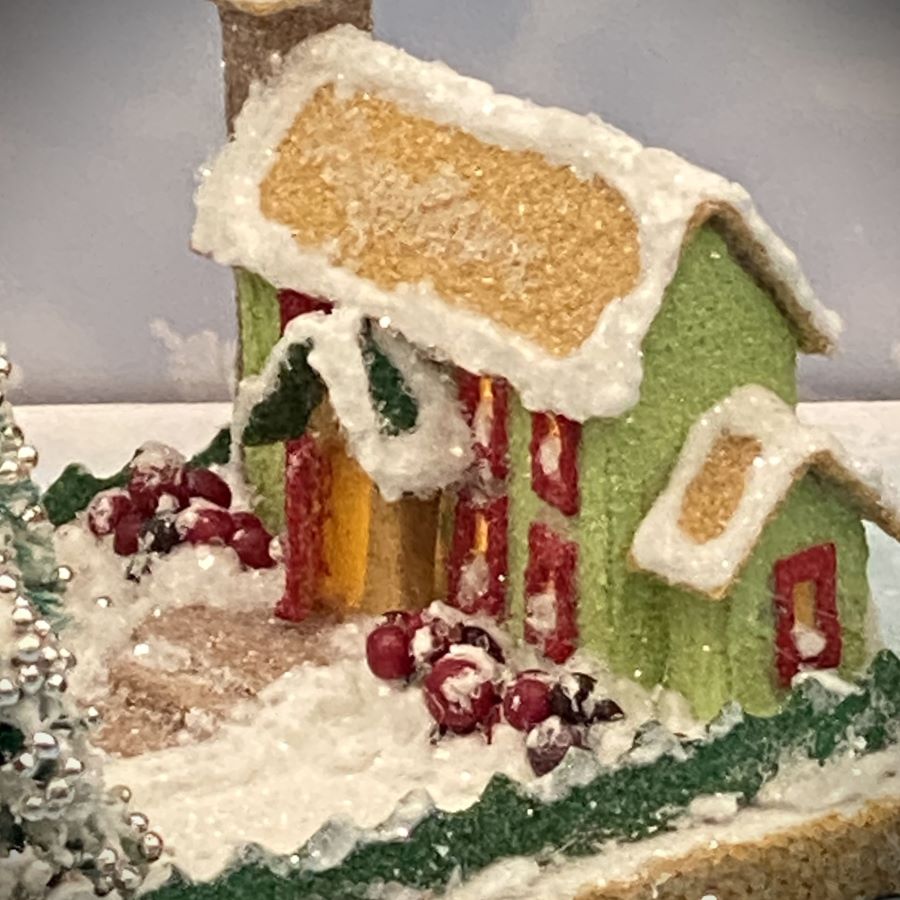
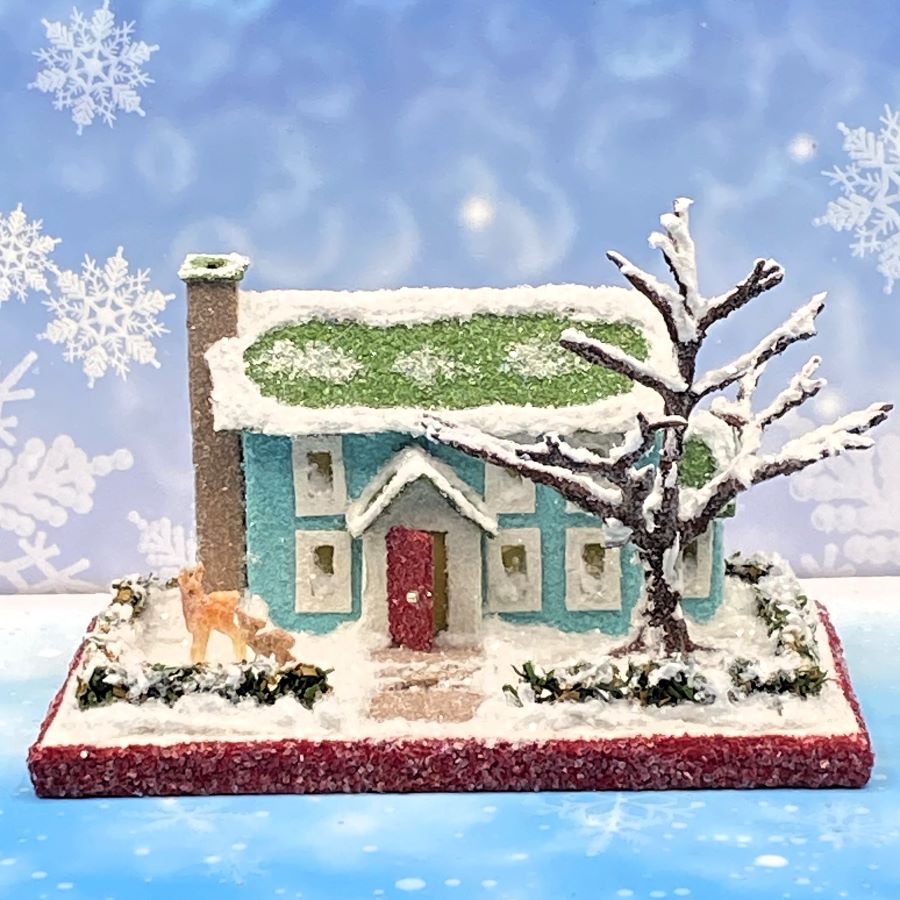
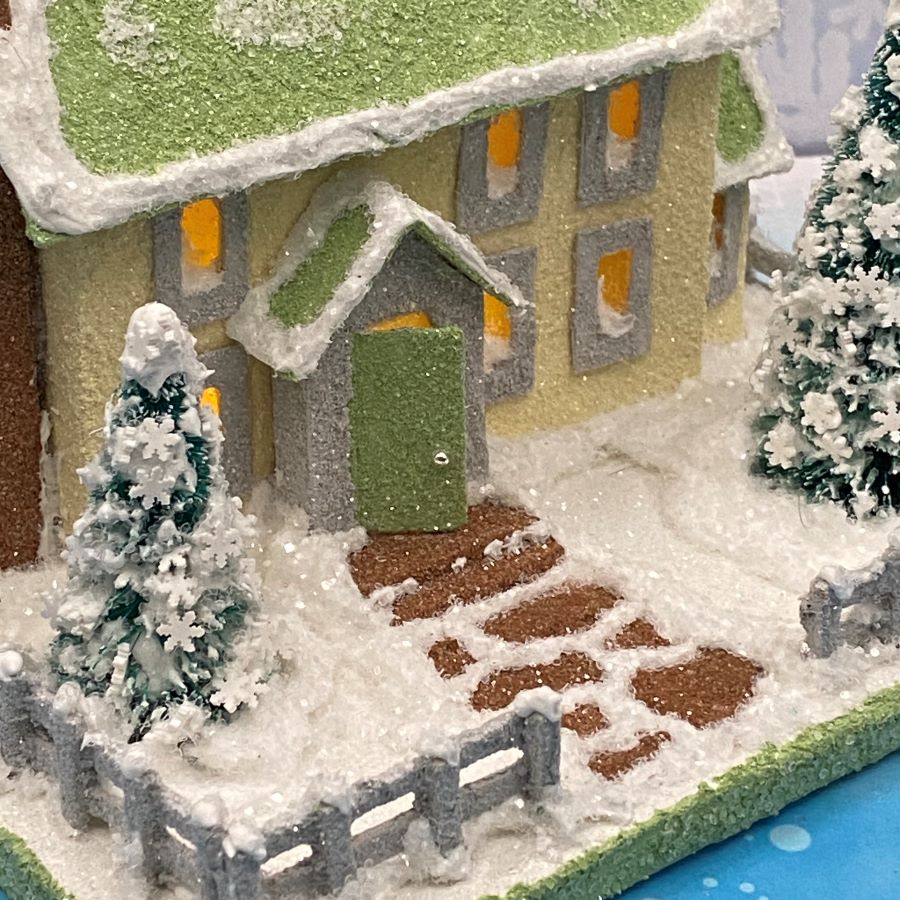
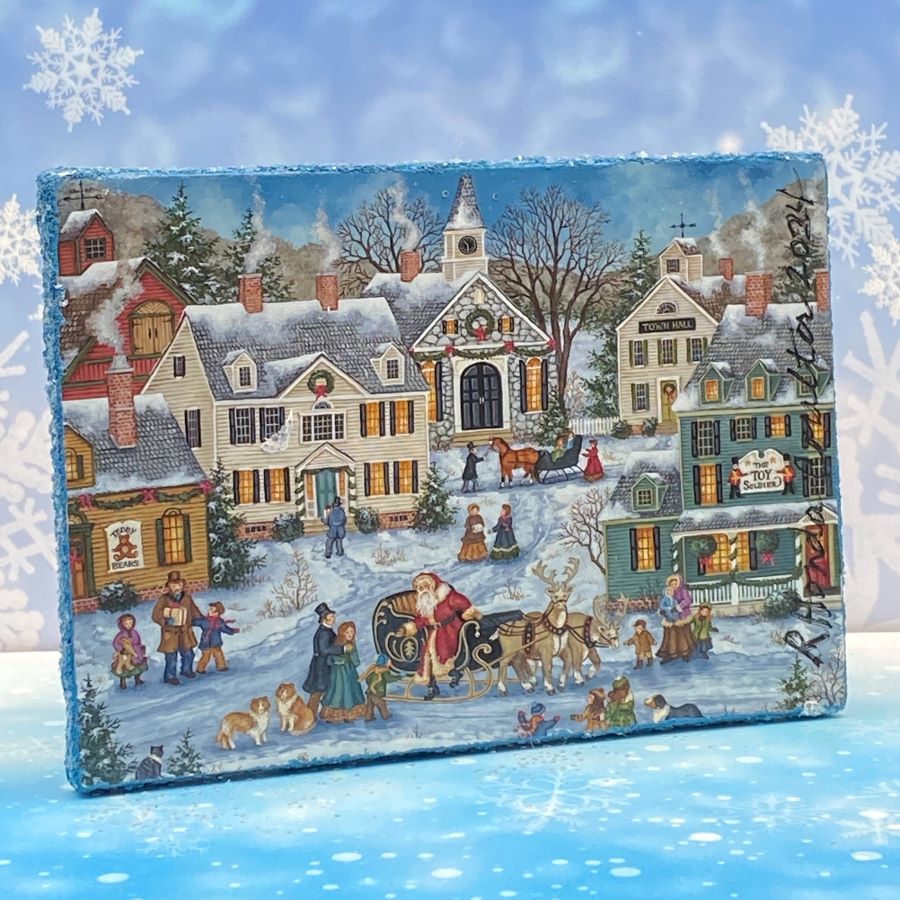
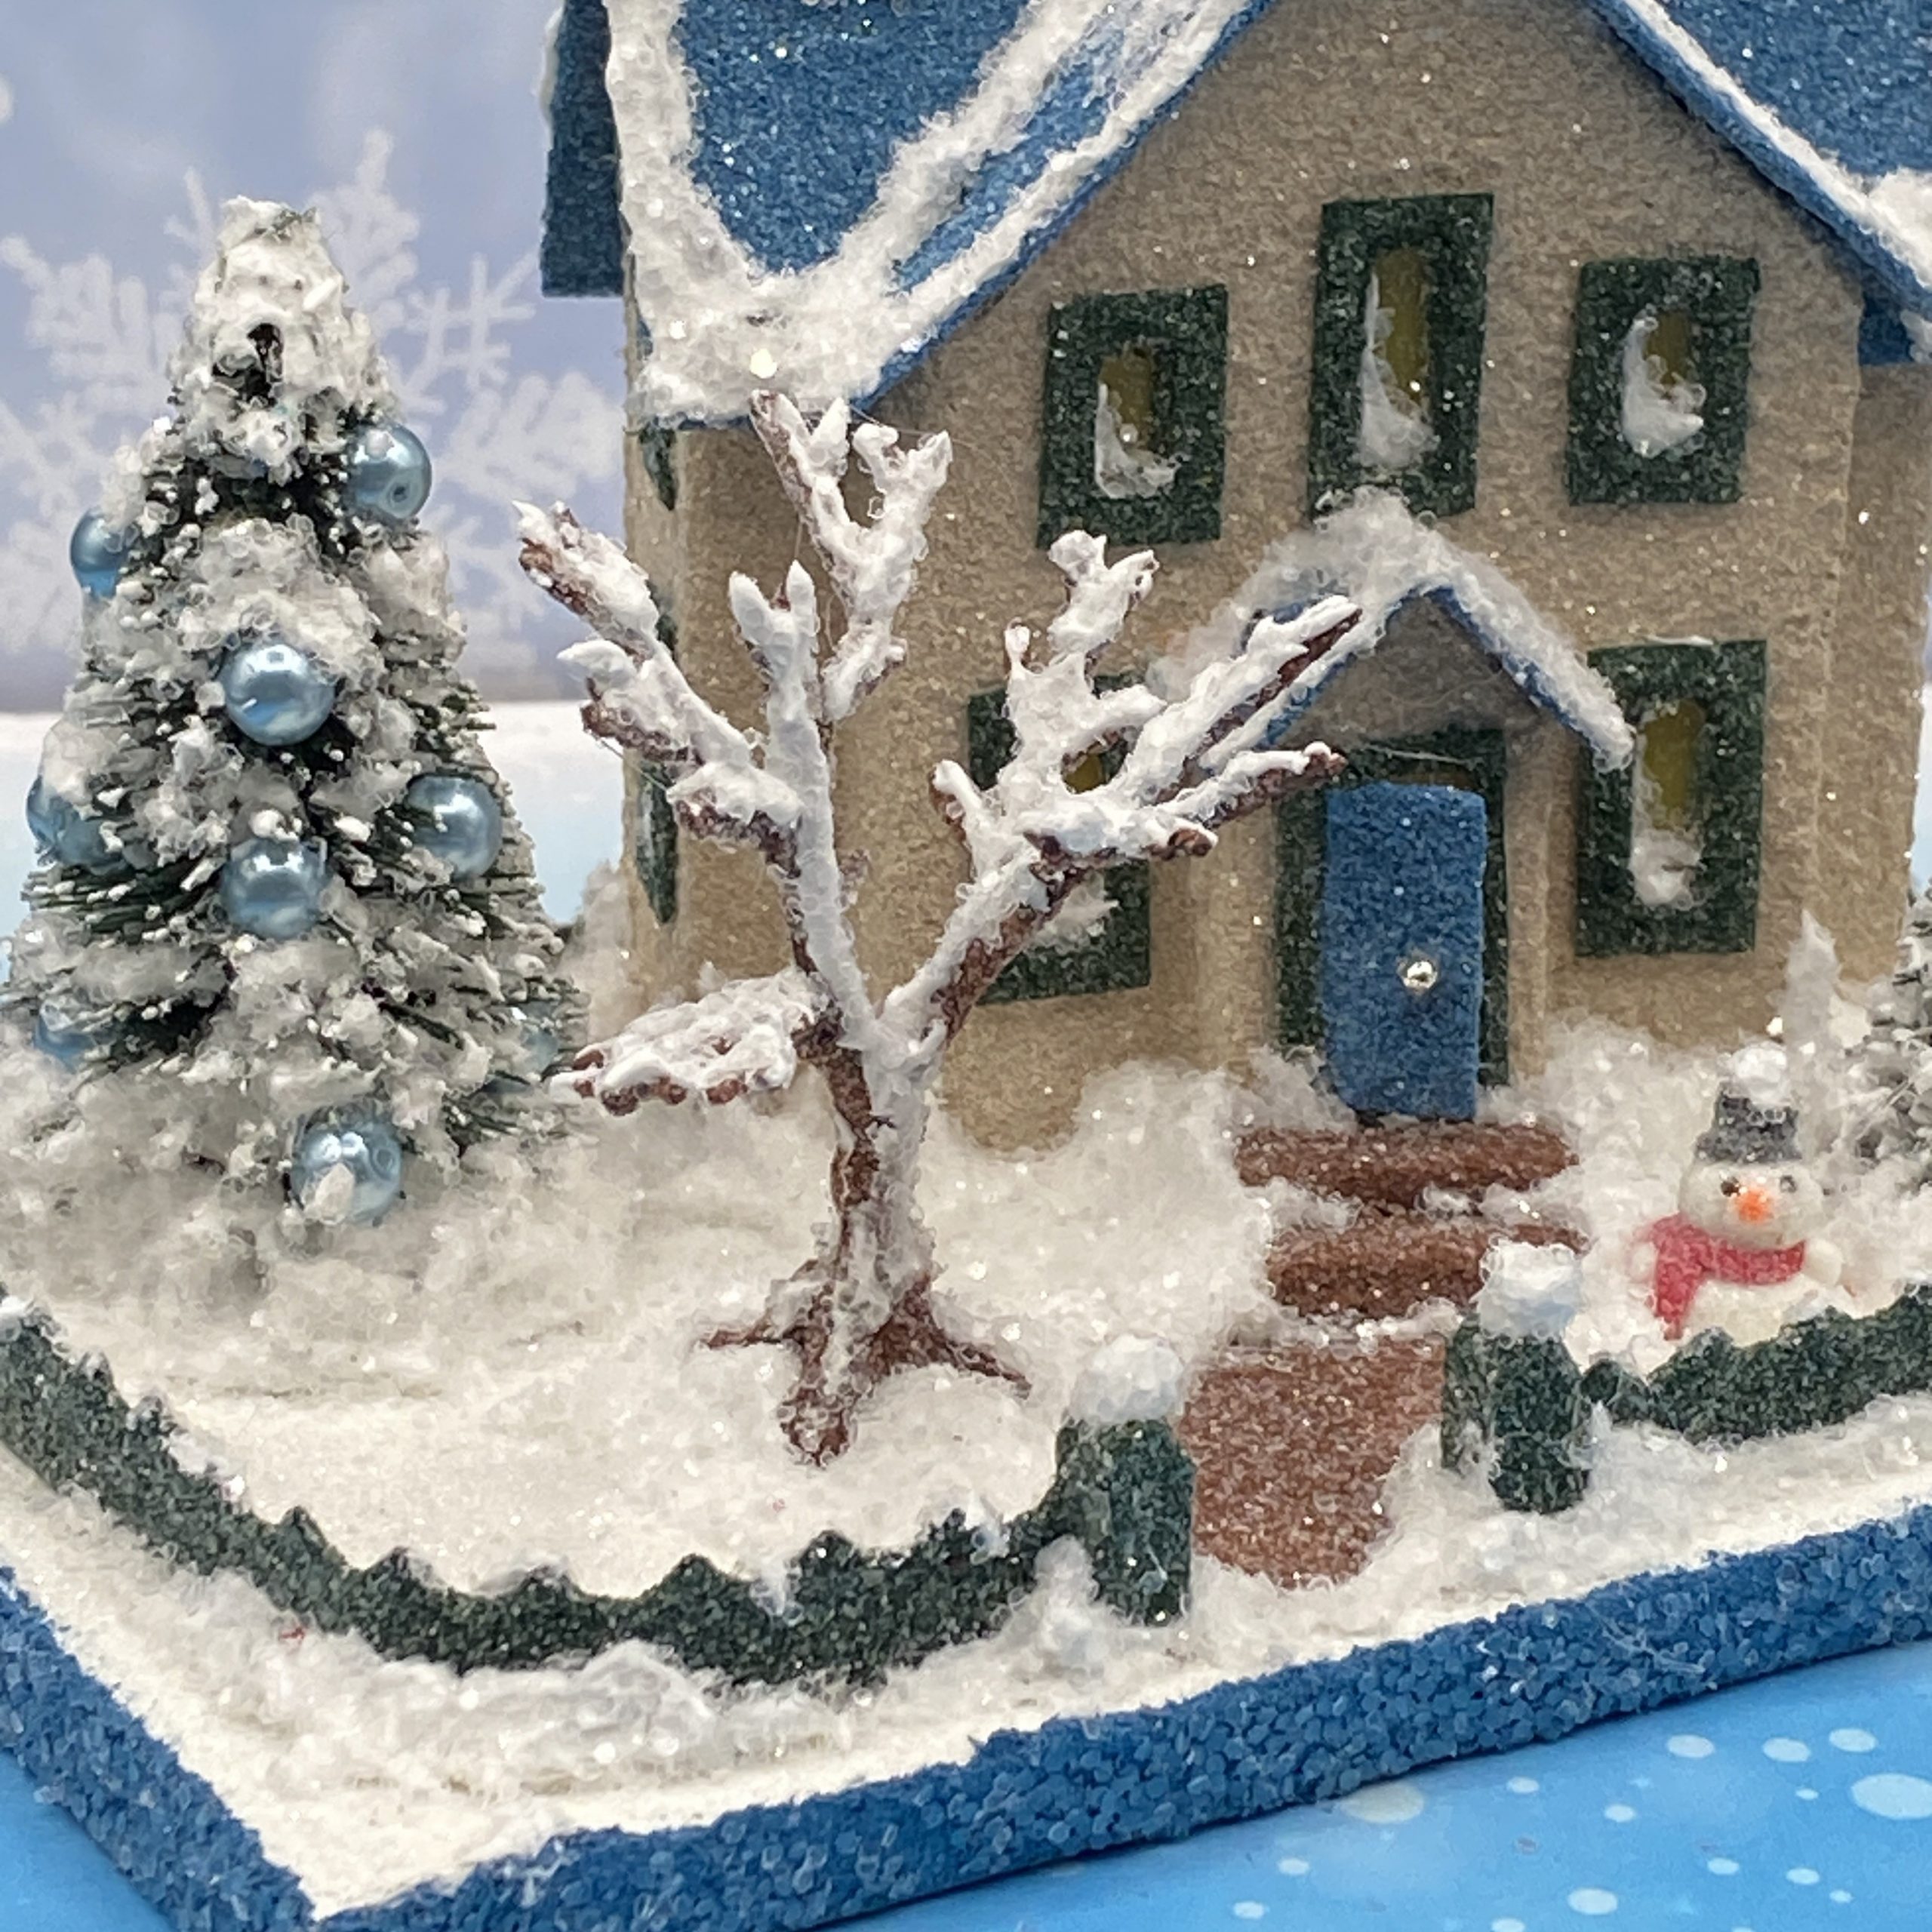
The base is made from an upcycled greeting card. The picture doesn’t show when the house is displayed, but it is a fun surprise when the house is picked up and the picture is discovered. I use the colors on the card to determing the colors of the putz house. This card features a vintage town scene, with Santa in attendance. The back of the house has a hole to permit the use of an LED light string to bring the house to life.
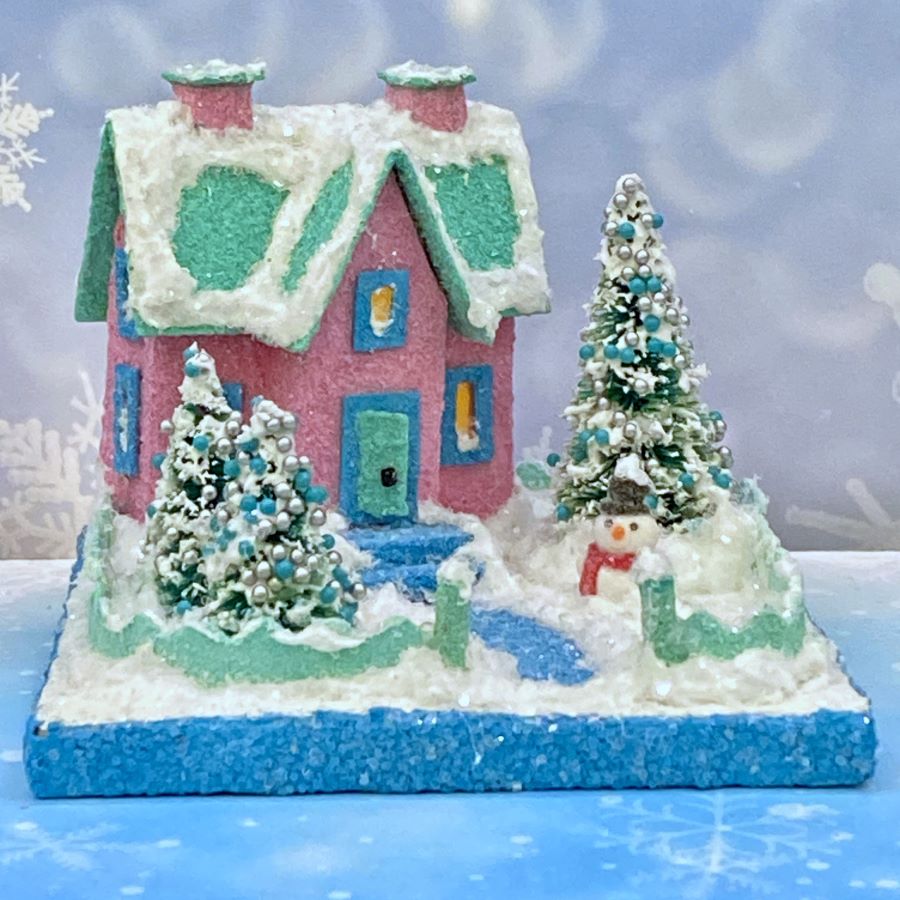
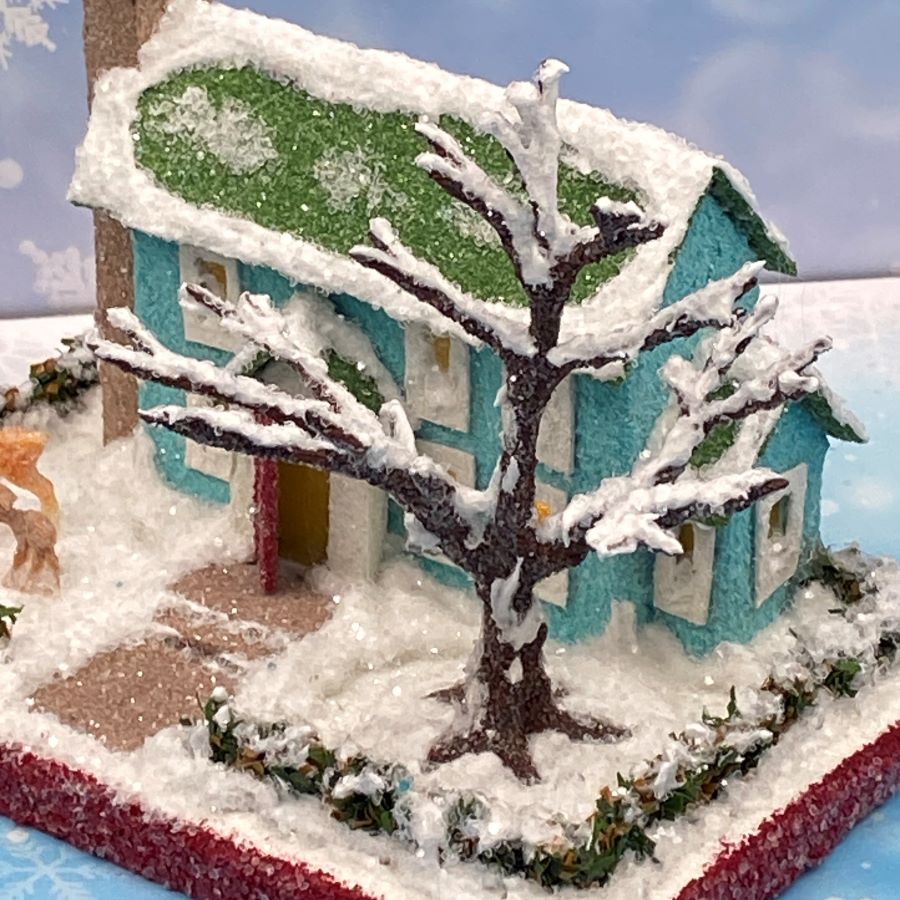
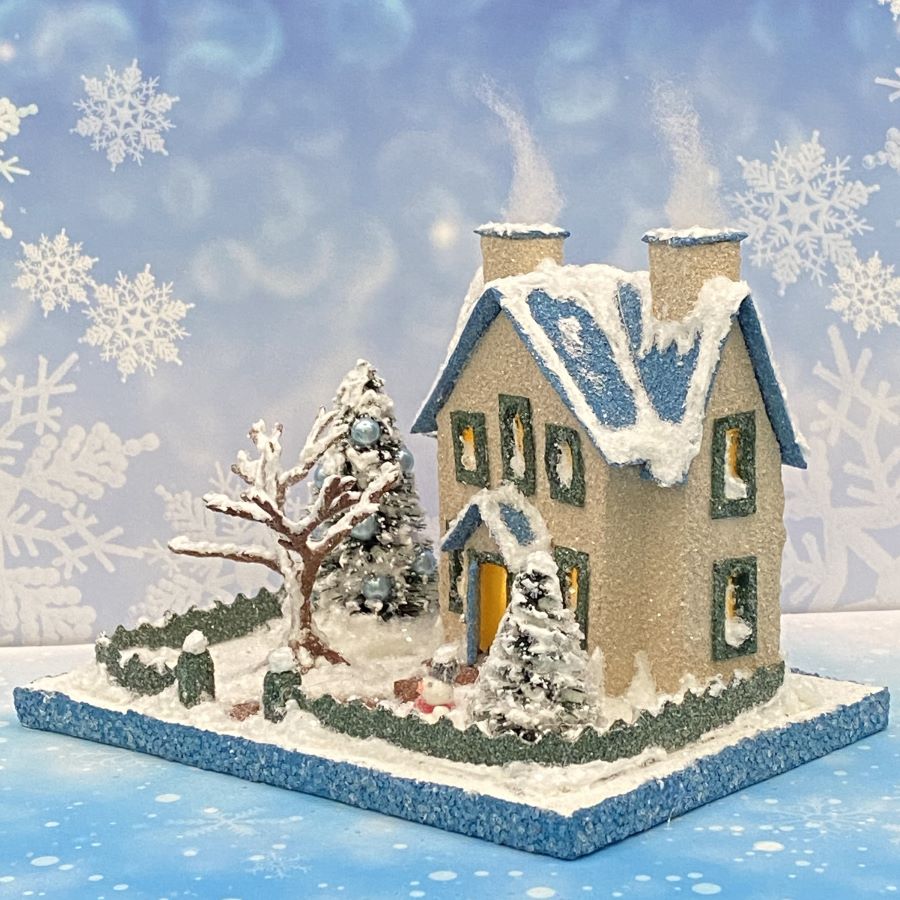
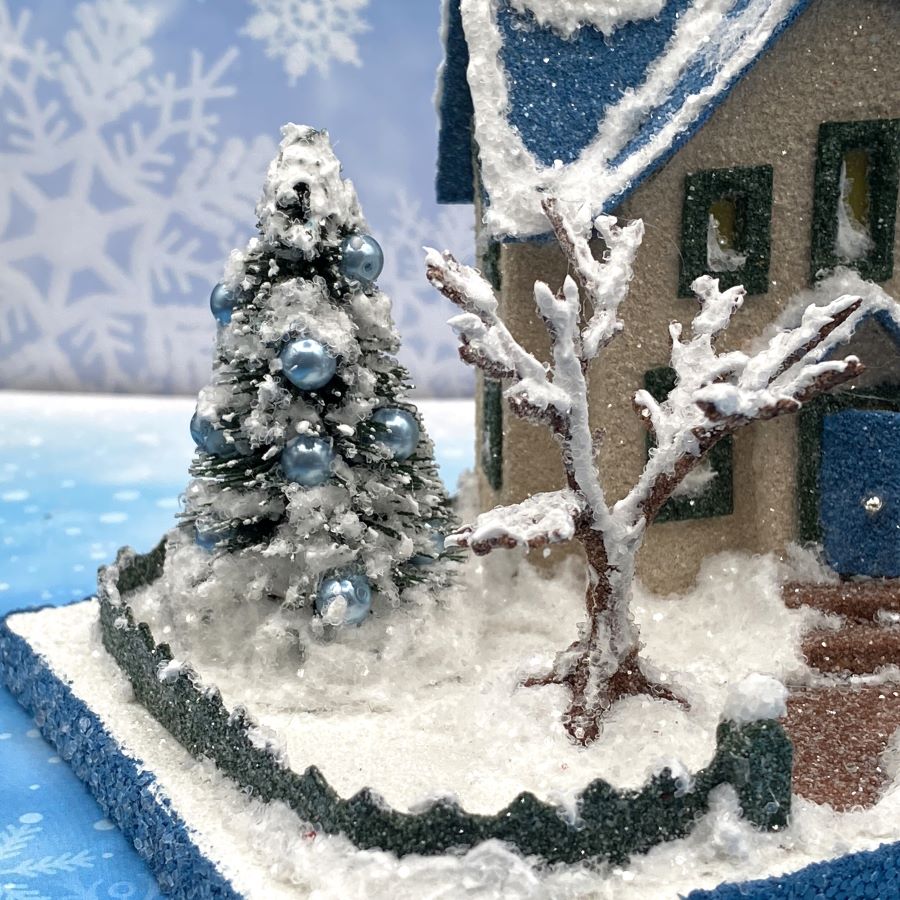
The barren, snow-covered tree is made from an armature. You can see my tutorial for leafed armature trees on my blog. I plan to write a tutorial for making snow-covered trees soon.
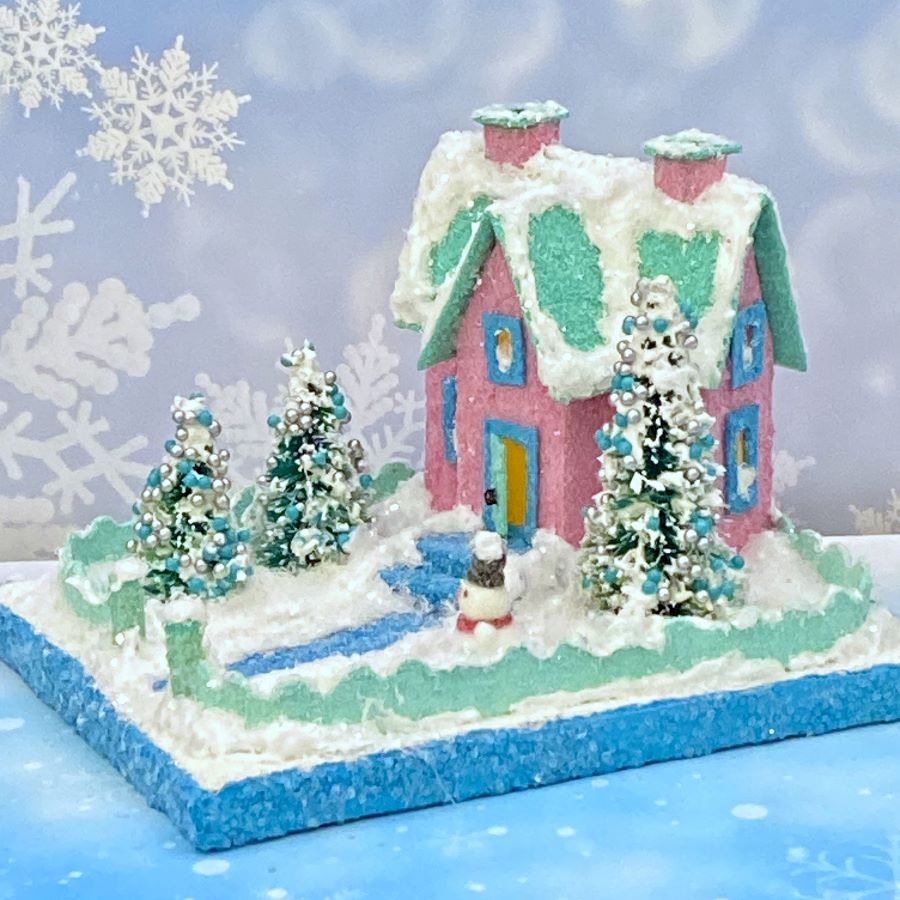
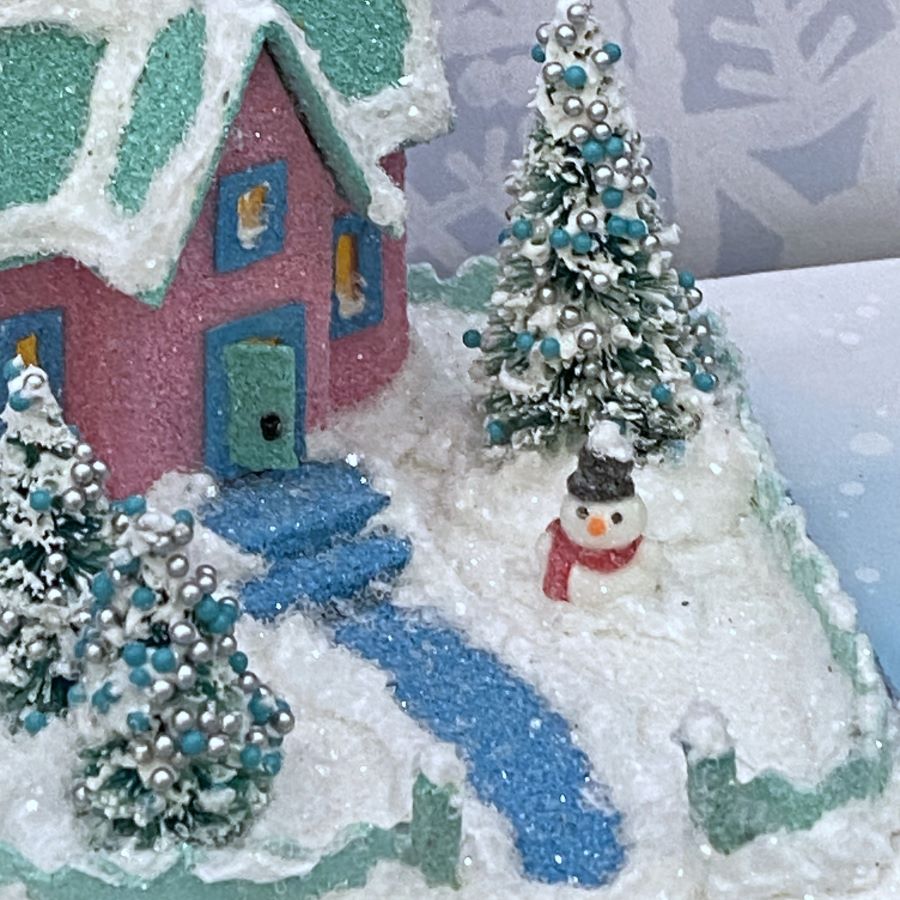
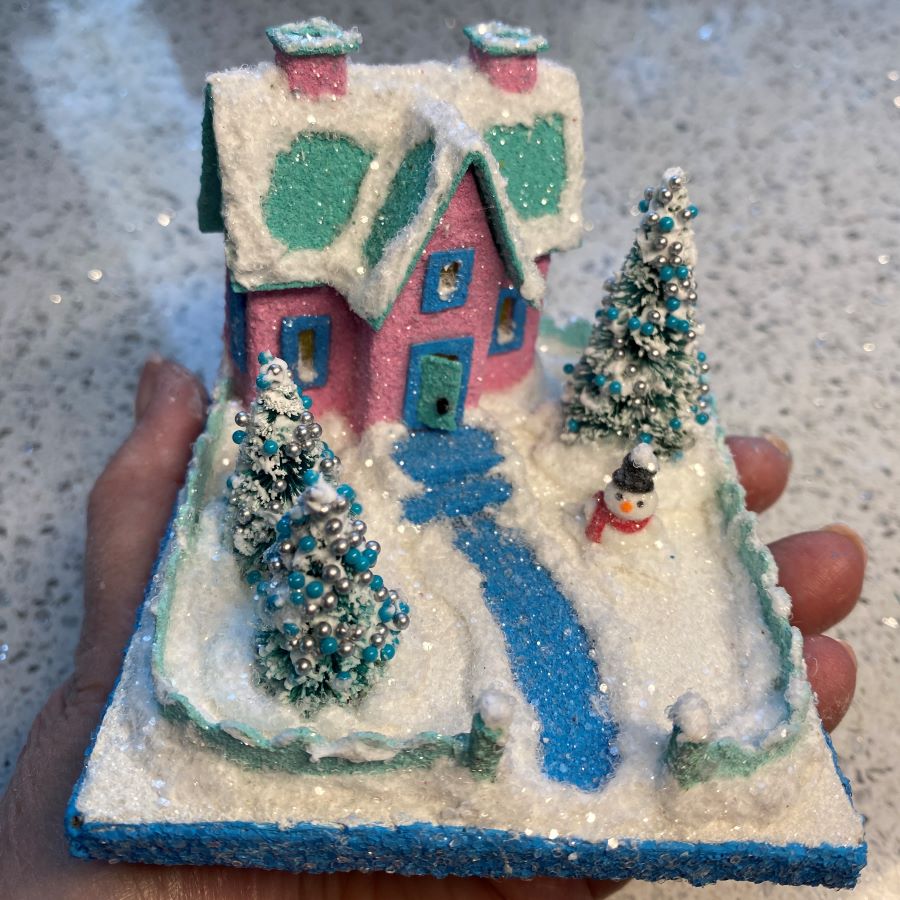
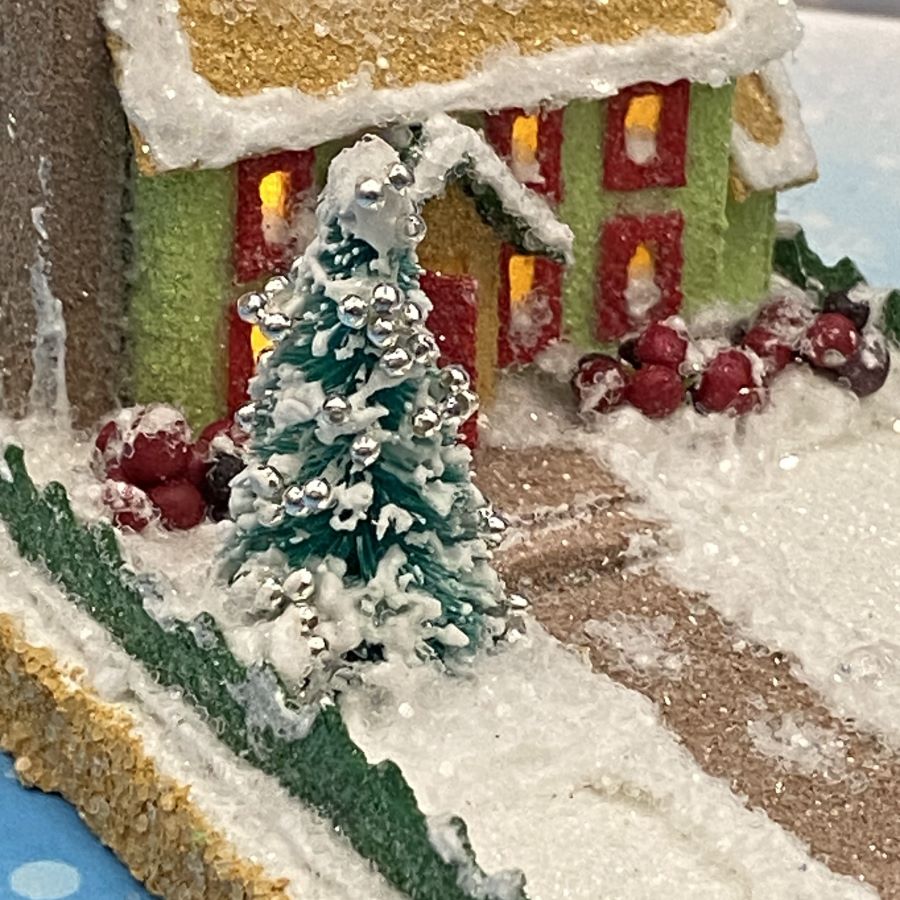
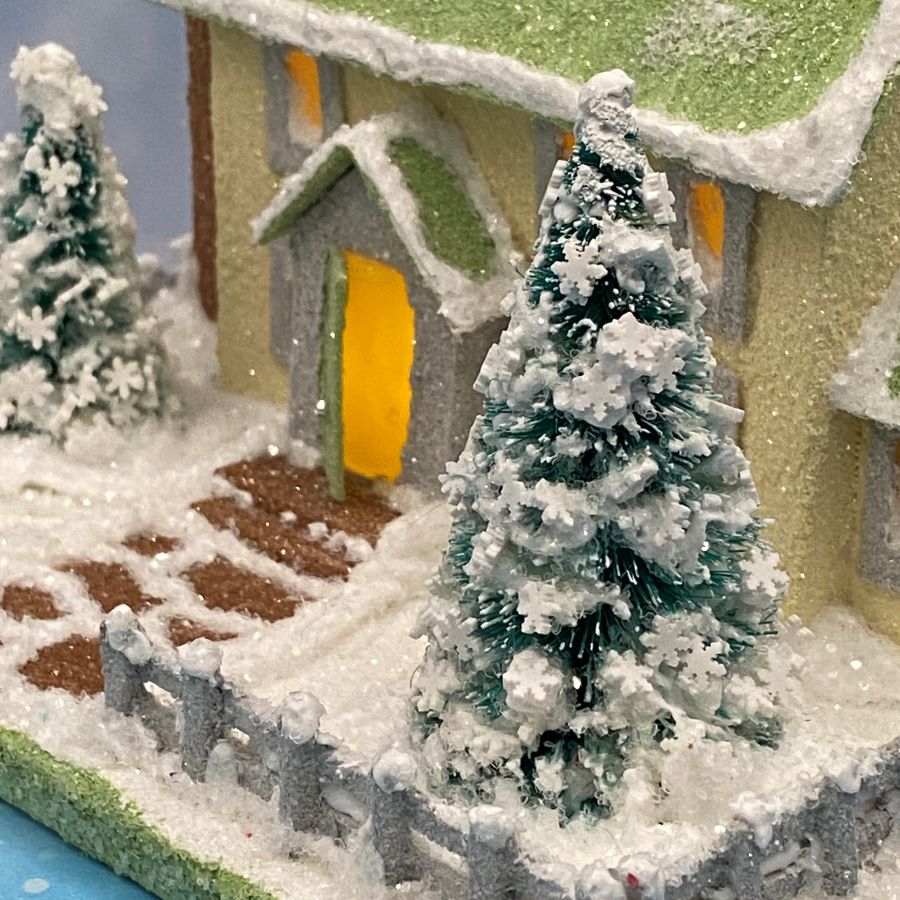
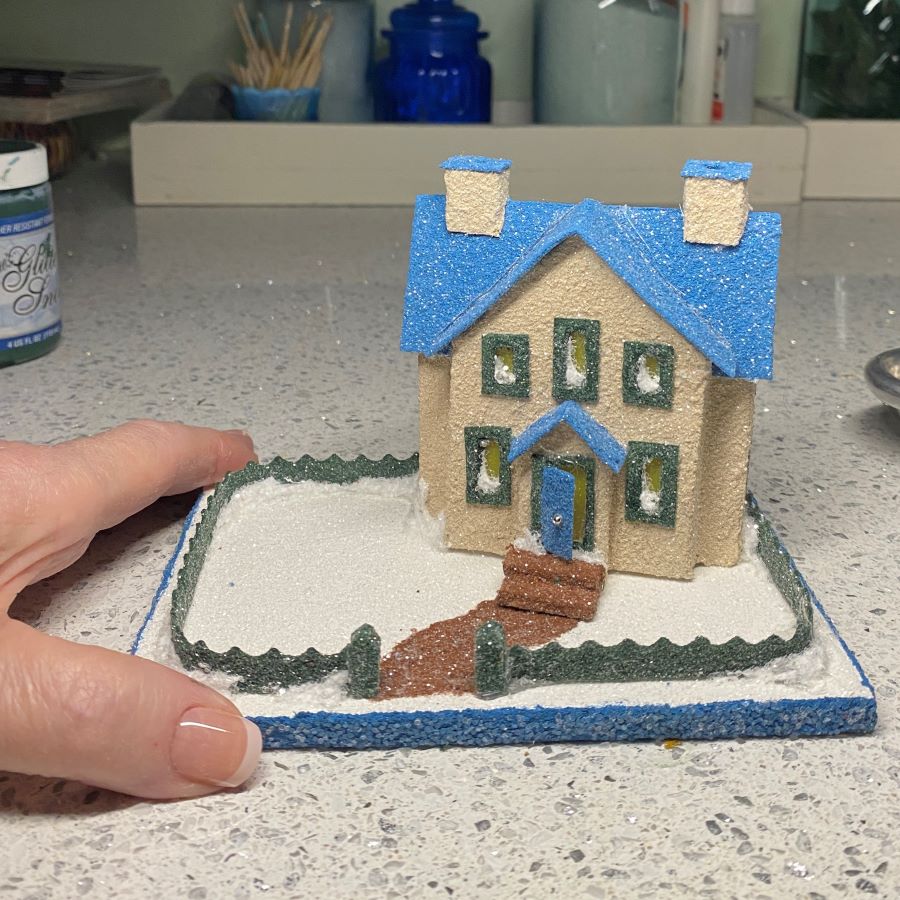
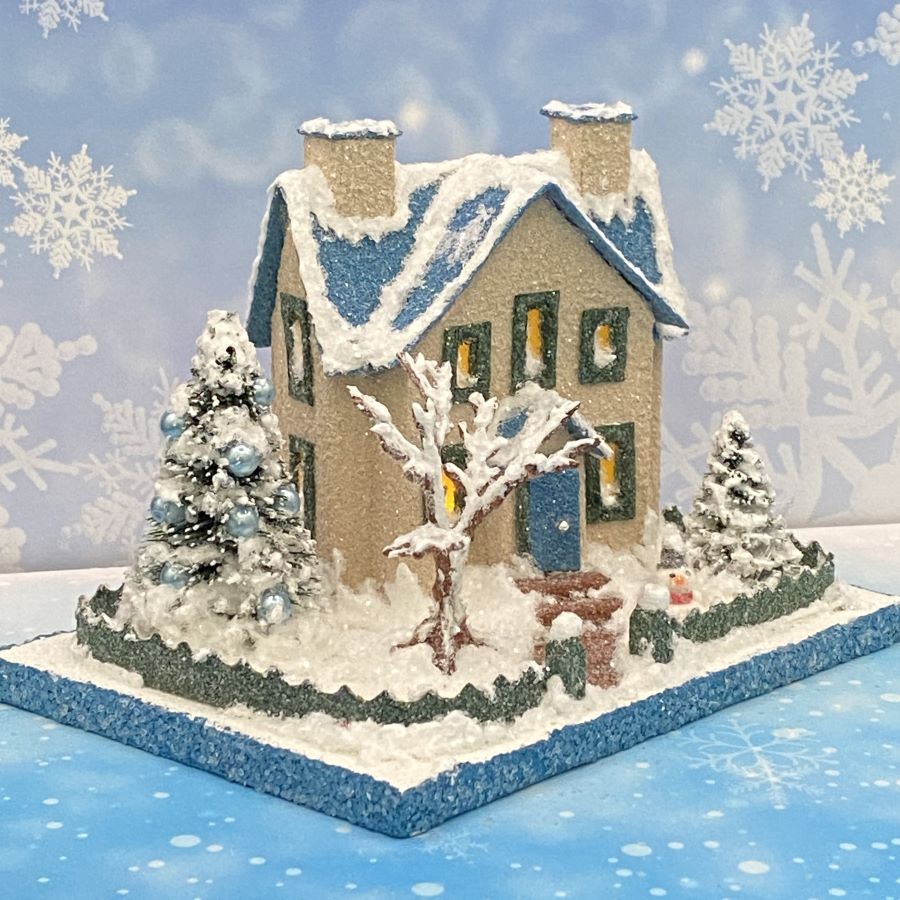
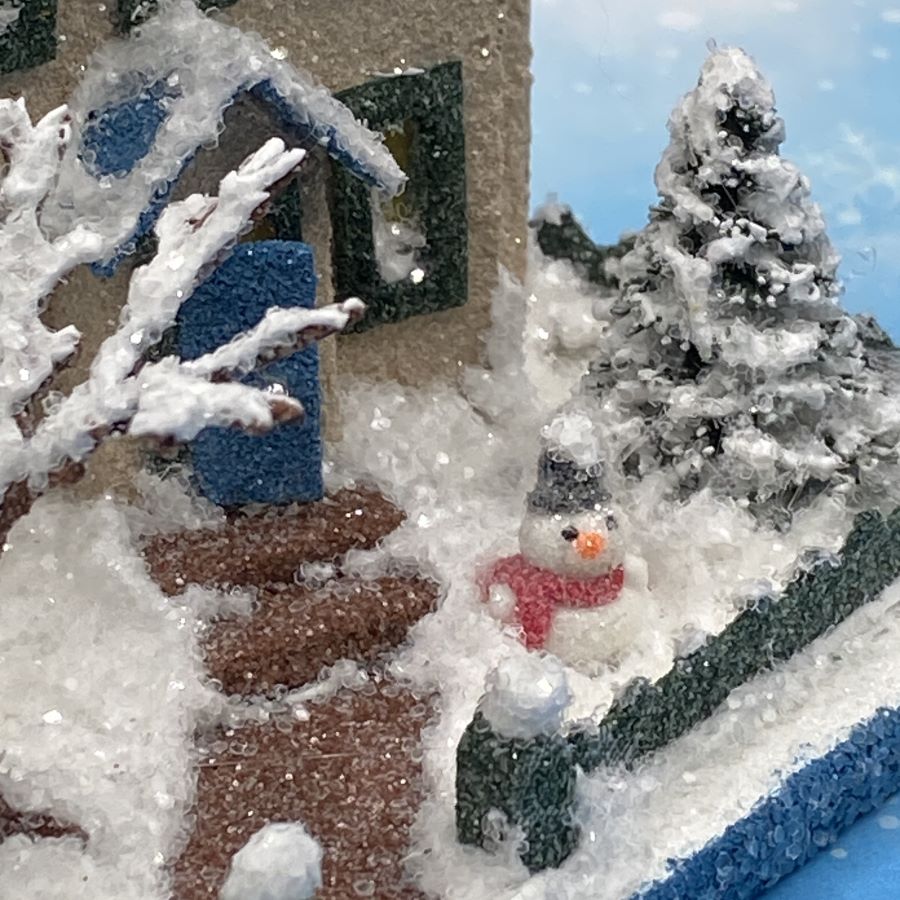
There are two bottle brush trees on this putz. The larger one is decorated with pearl beads in a coordinating shade of blue. The smaller tree has snow and clear glitter. A tiny snowman stands nearby.
The fence is made from poster board, cut with scallop scissors. When I cut poster board for fencing, I cut a 1″ wide strip of poster board, divide it in half the long way with a pencil line, then cut along that line to get two pieces of fencing. When using a scallop scissor, the result is a rounded, scallop fence on one strip and a pointed fence on the other. I trimmed the flat side of the strip to shorten the fence a little bit to keep it in proportion for the MINI size house.
If you have any questions about creating putz houses, please ask. I am happy to share what I have learned about the art of putzing.
If you would like to see more of my Putz houses, as well as Christmas ornaments I have made from upcycled holiday cards, please visit my Etsy shop.
If you are interested in crafting Putz houses of your own, check out my Putz tutorials for more information. My blog can be searched, as well. Some of the turorials haven’t been listed on the tutorial page. Working on that! https://christmasnotebook.com/putz-little-glitter-houses/
All proceeds from my Etsy shop benefit Kenya Mercy Ministries. They work with the urban poor of Nairobi, Kenya, particularly the children and their families who live in Kibera, the largest urban slum in Africa. Thank you for your part in helping these children when you purchase items from my shop!