This tutorial shows how I use preserved, dyed reindeer lichen to make autumn trees for Putz houses. Lichen is not a moss. Moss is a plant. Lichen is not a plant, but a combination of fungi and algae. Just FYI. 🙂
To make an autumn tree, you will need the following supplies.
- finished armature / See tree tutorial Part 1 to make the armature.
- hot glue
- Lichen Bag, Autumn Mix or lichen in your choice of colors
- needle-nose tweezers / One of my top 10 must-haves for putzing.
- scissors / I prefer these small 6″ Fiskars for delicate jobs.
- autumn leaf litter / Just green leaves are available, but the other colors are great for autumn trees.
- glitter tray / optional but useful
- clear tacky glue, or white that dries clear
I don’t receive a commission from items linked on my blog. They are linked for your information.
NOTE: Sometimes it is difficult to find leaf litter in yellow. I found it on the Walmart site today (June 2024). Sometimes the color received doesn’t match the exact shade of the color shown in the ad. I hope for the best! Walmart Leaf Litter
The leaf litter is made from the dried, dyed scales of birch tree seed pods. They make great tiny leaves. Check different sources for different shades of green, brown, red, orange and yellow. Some are brighter than others. If you have a silver birch, you can make your own. I don’t know if all birch trees make the same kind of seed pod. Silver birch is the only one I’ve seen mentioned online for making leaf litter. Making Miniature Leaves from Birch Seed Pods
When making a tree for a particular house, set the tree armature on the base next to the house and decide how it will fit. With a smaller base, the branches of the tree may need to be moved to fit the space. The branches can be gently bent, even when painted and glittered. In most cases, the branches shouldn’t touch the house. That can look crowded. Take into account that leaves will be added and the tree will be a bit larger than the bare branches are. If you have a tree that won’t fit, another option is to make another tree, with a smaller size armature. Or make a larger base.
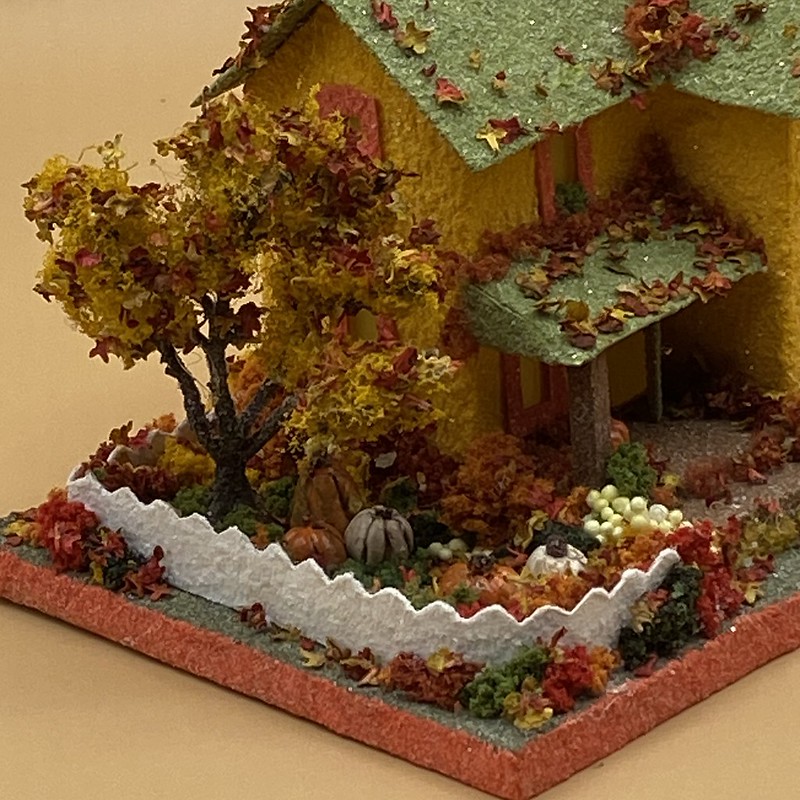
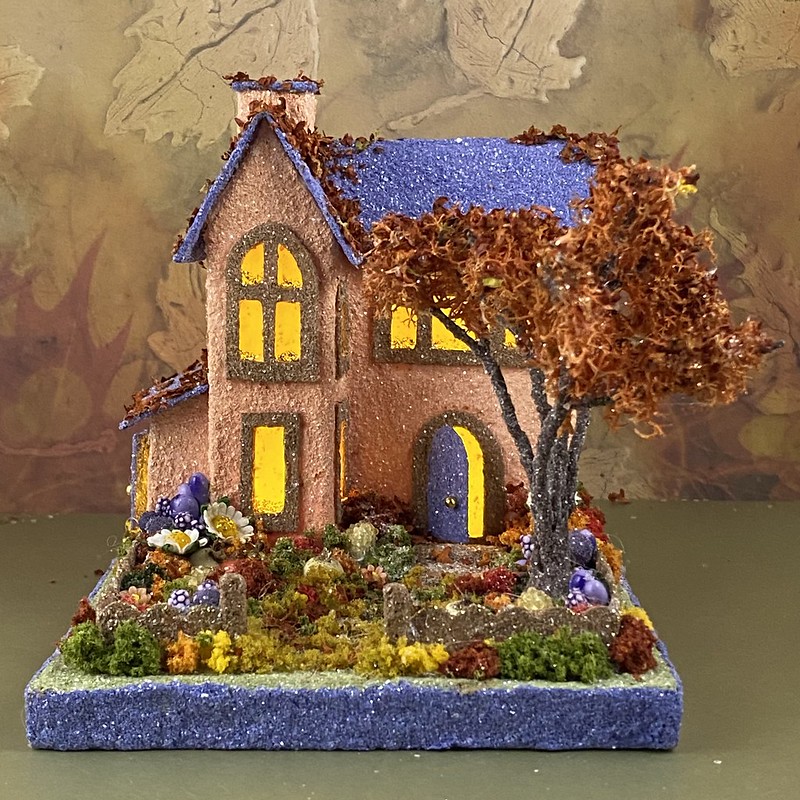
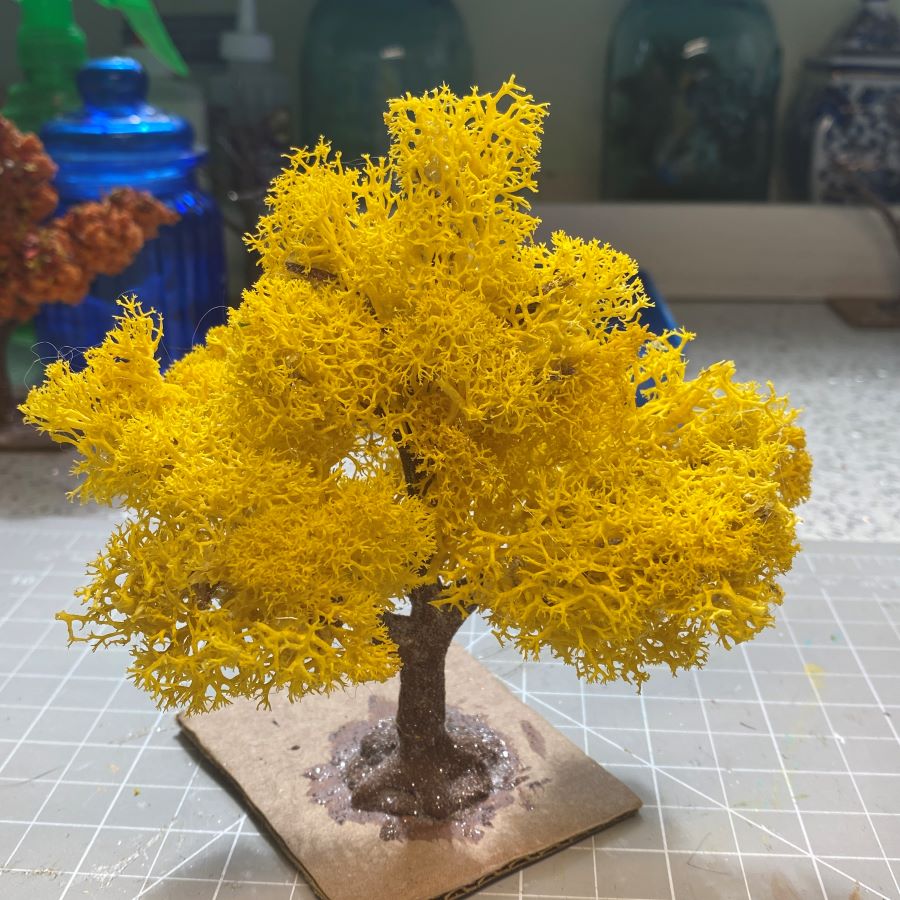
I am using yellow lichen to make the autumn tree in this tutorial. Any color can be used as the base color, but I like to match the colors of the Putz house and the embellishments to the colors on the greeting card I used to make the base. When the lichen is done, leaf litter will be glued over the tops of the branches. Here are two examples of lichen trees with leaf litter.
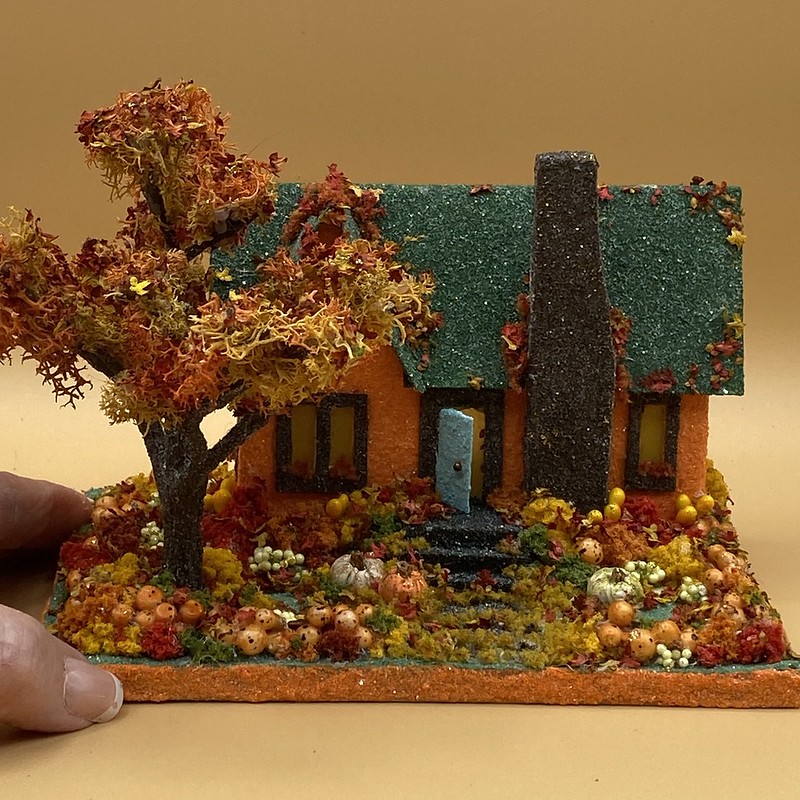
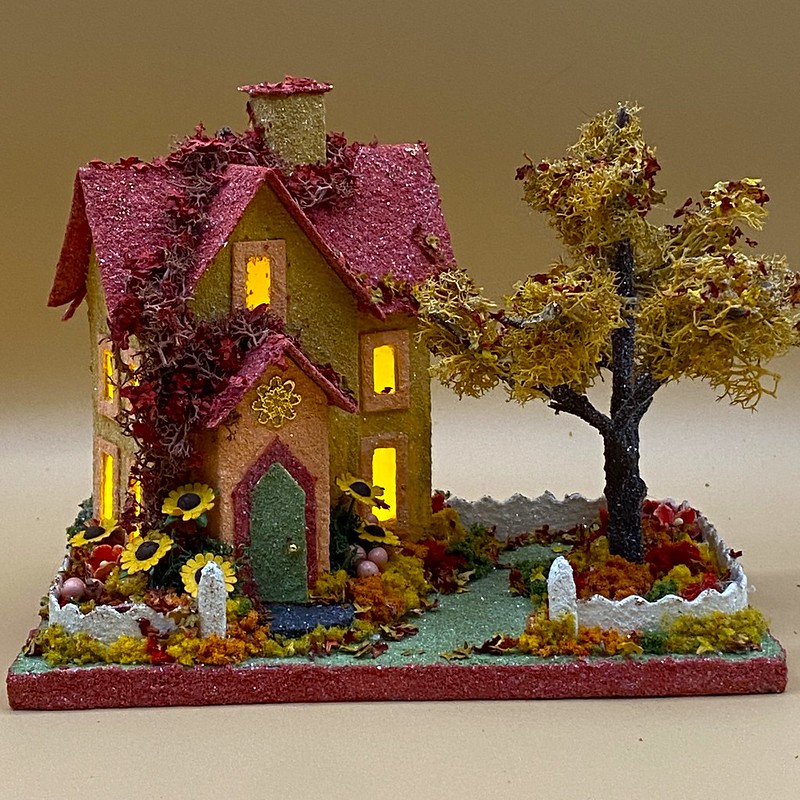
The leaf litter adds detail to the yard of the Putz house. Below left, the individual leaves can be seen against the wall of the house and on the tree. Below right, I used leaf litter on the roof, on the tree, and on the ground. Note the leaf litter at the base of the fence.

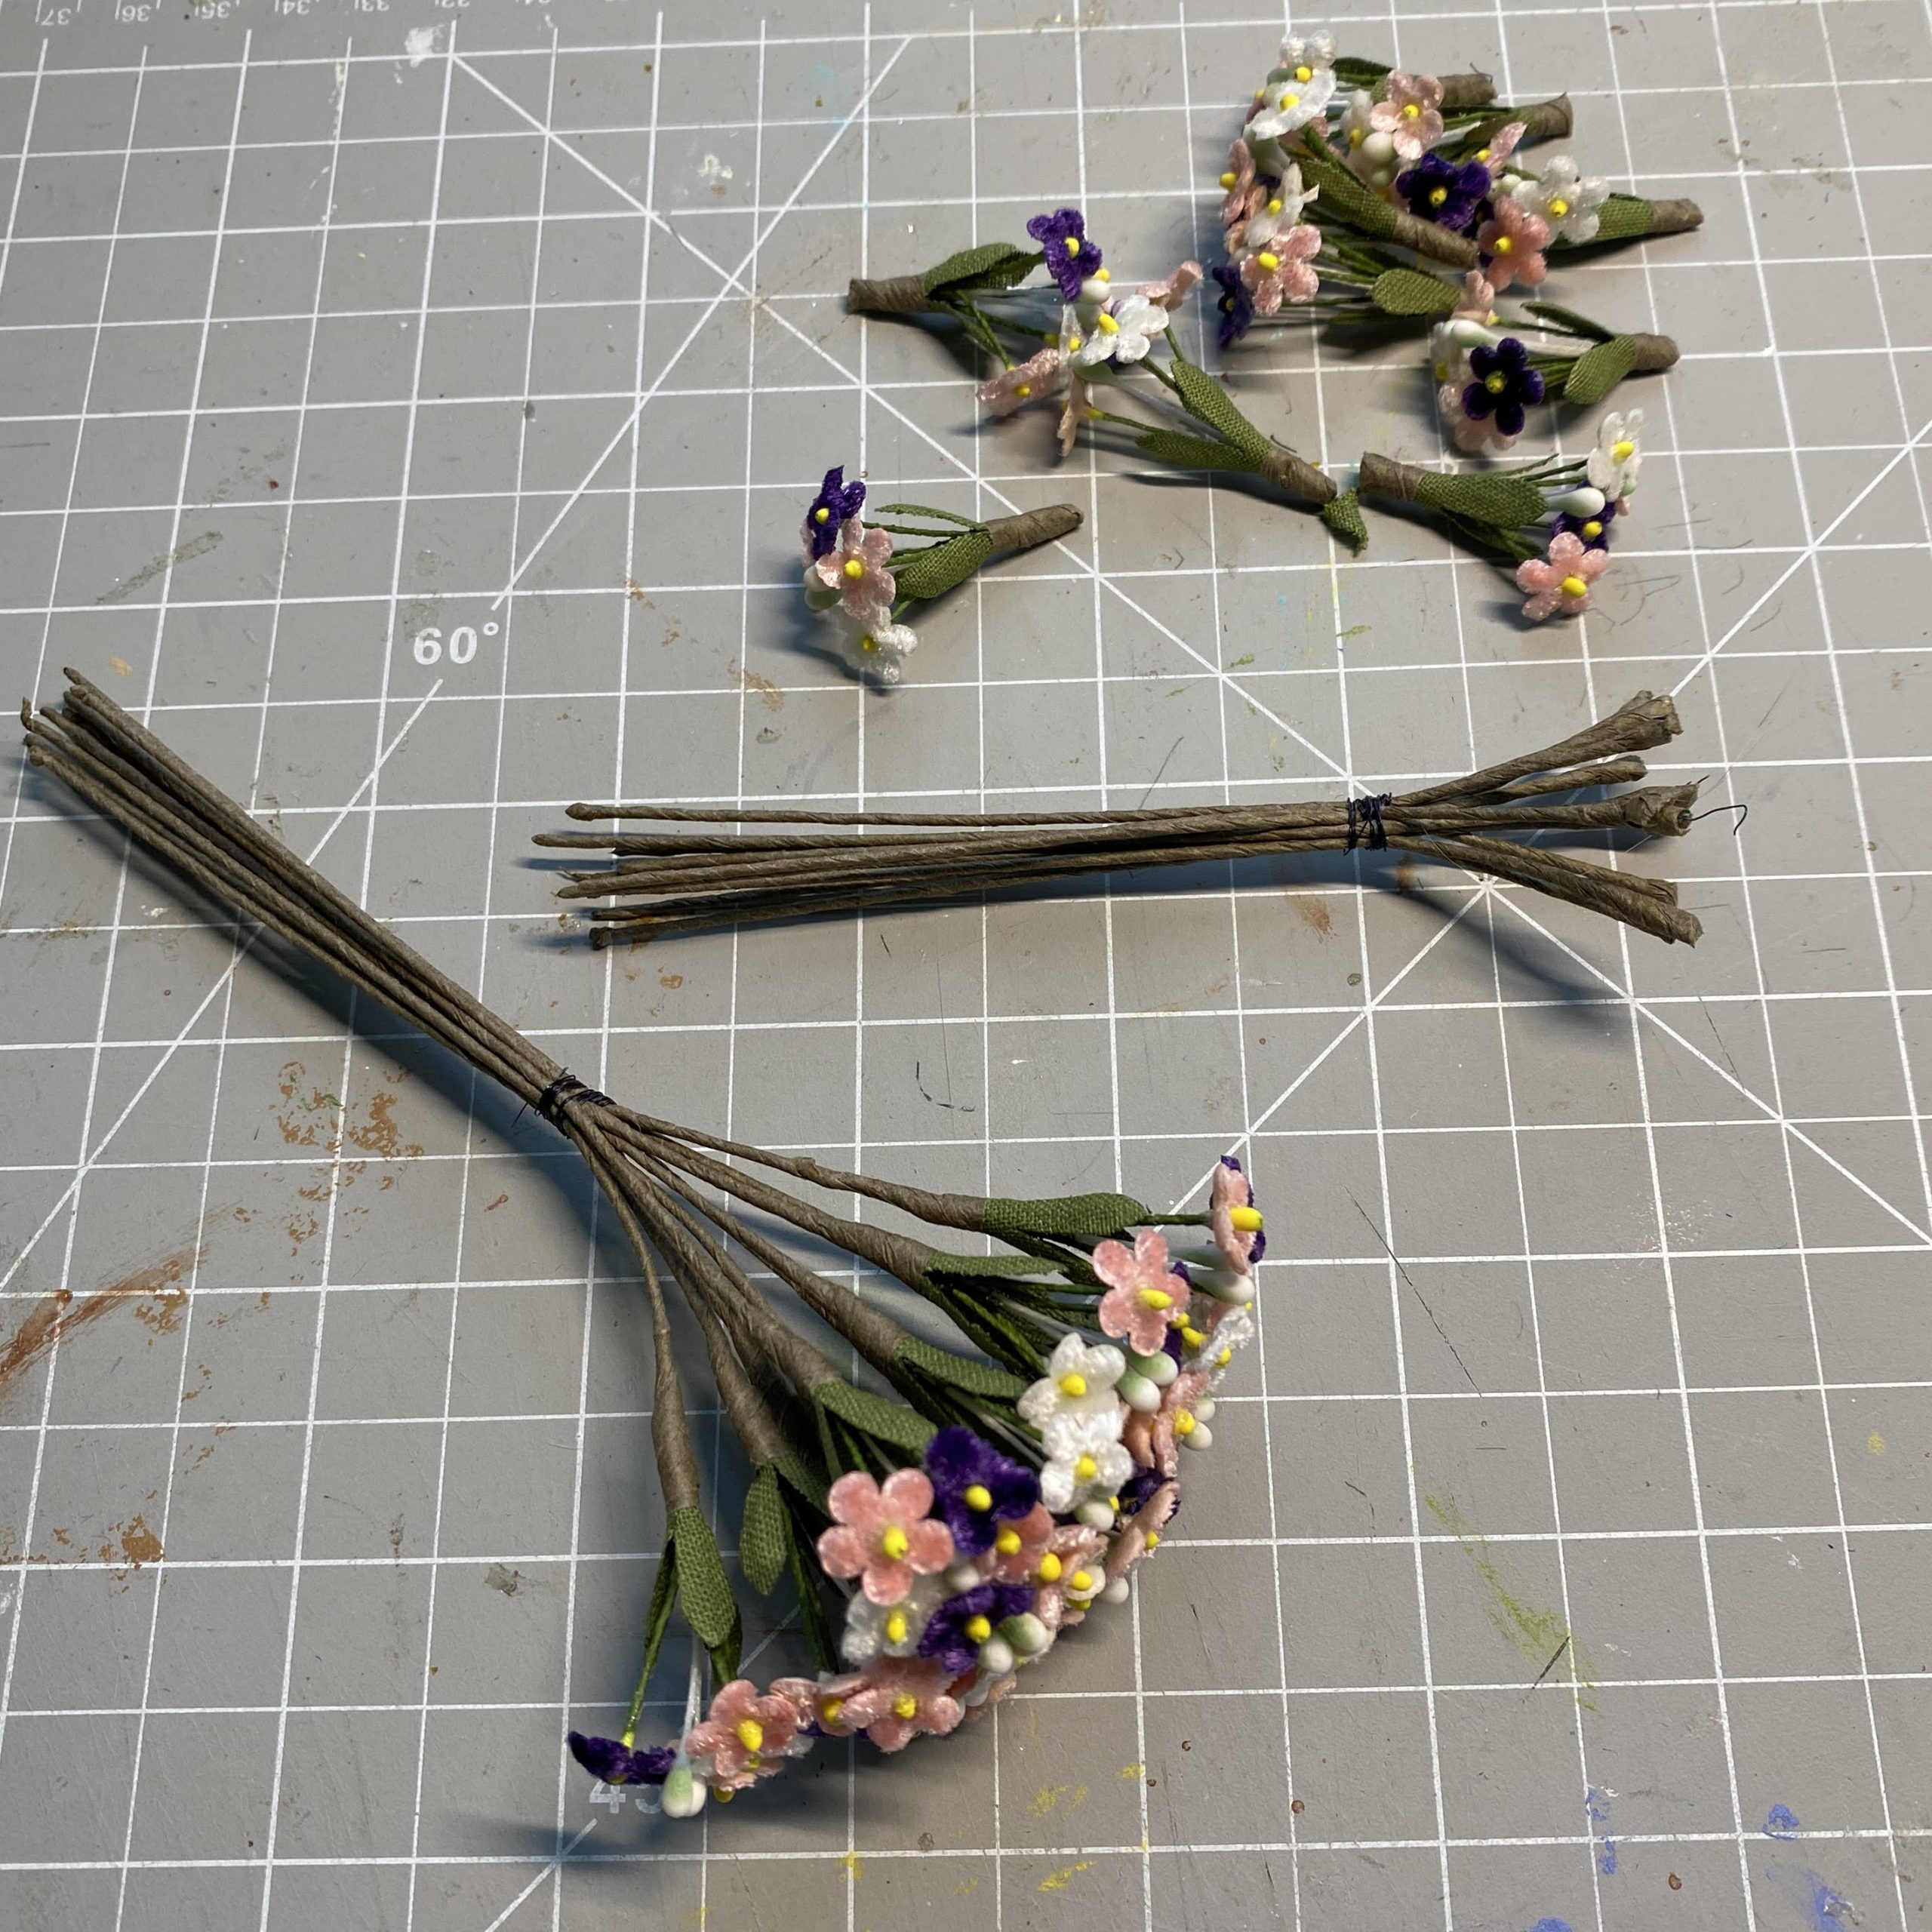
The house below has a tree which was made from the wired stems of a flower bundle, with lichen and leaf litter. I will write a tutorial about making armatures from these stems in the next few weeks. It makes a tree with a different style than the store-bought armatures make. I use the flowers for my spring and summer Putz houses. I cut them off the stems so they take less space in my flower storage drawer. I didn’t want to throw the stems away, so I tried making a tree from them and it worked well!
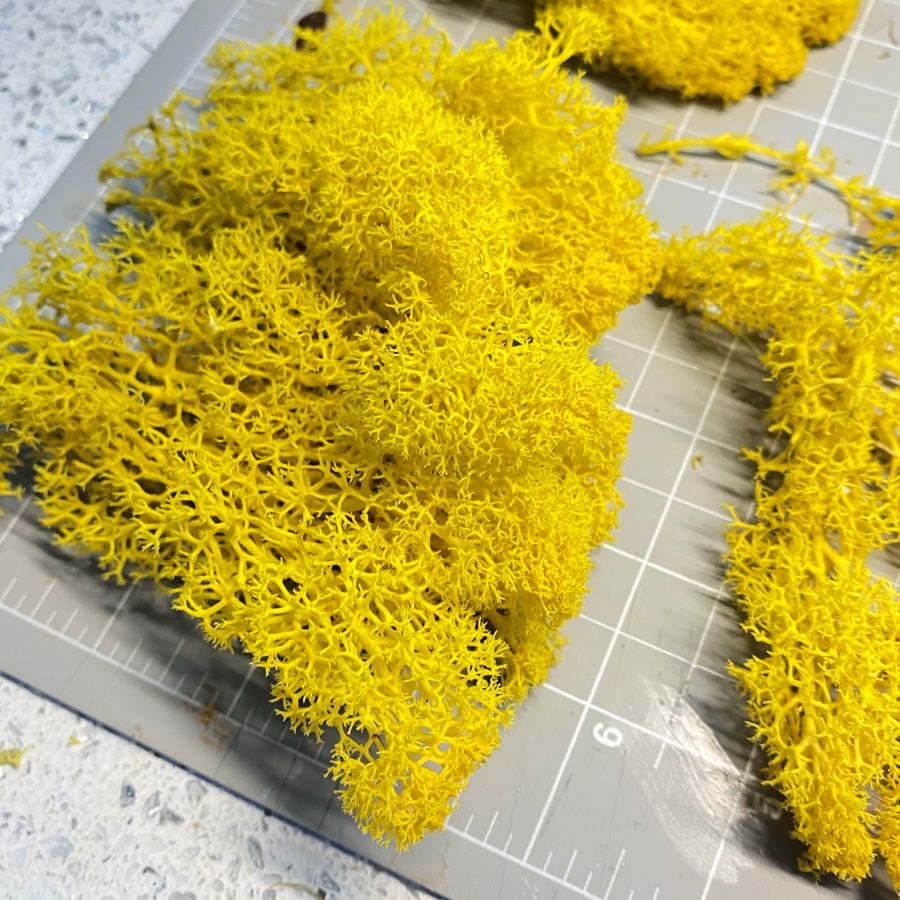
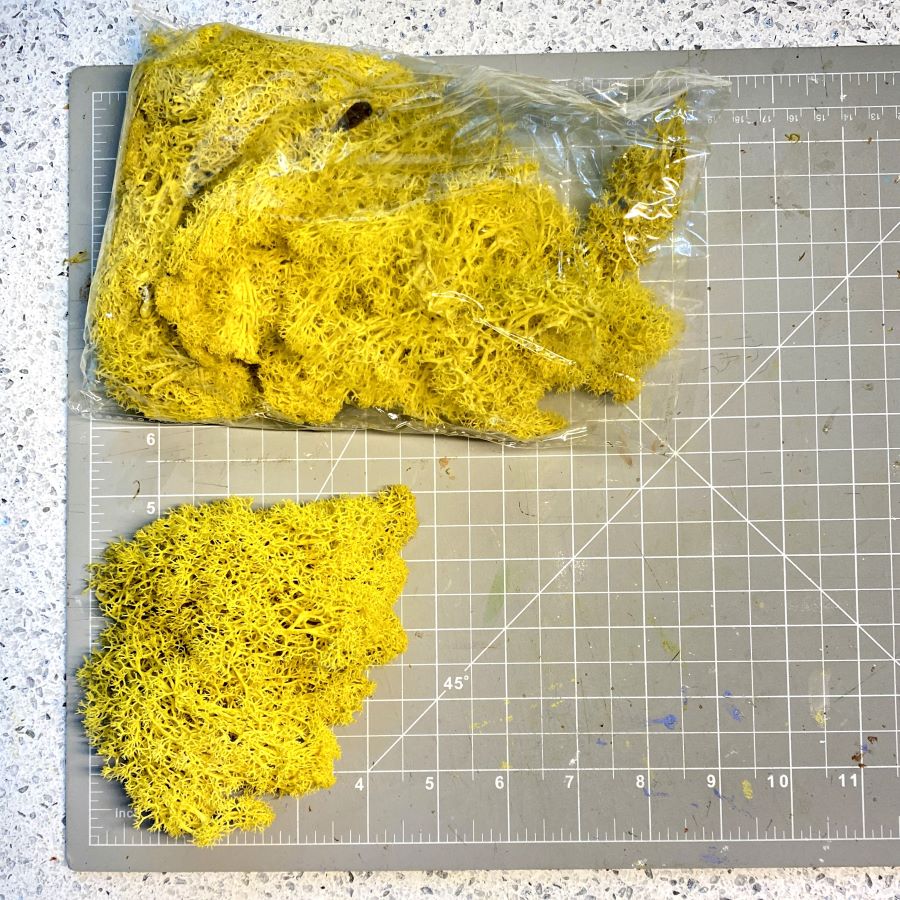
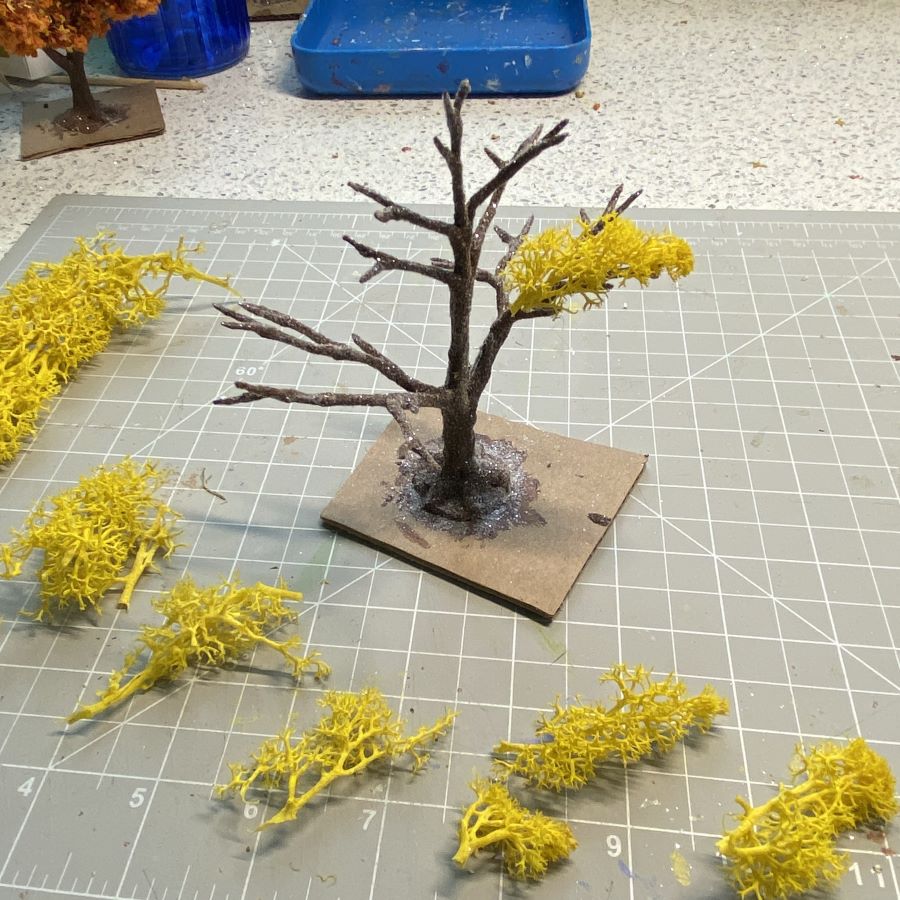
The left picture below shows how the lichen was packaged. The bag at the bottom came in the small box. I ordered two boxes. Probably enough for 15-20 trees. On the left, half the lichen is still in the bag and half of it out. It fluffs a bit when it is taken out of the plastic bag. Lichen isn’t very stretchable however. It should fit the branch. It won’t help much to try to stretch it over a branch. There may be other bits of foliage or little sticks in the bag. Discard those. If the lichen has dark bits or spots, just cut them off.
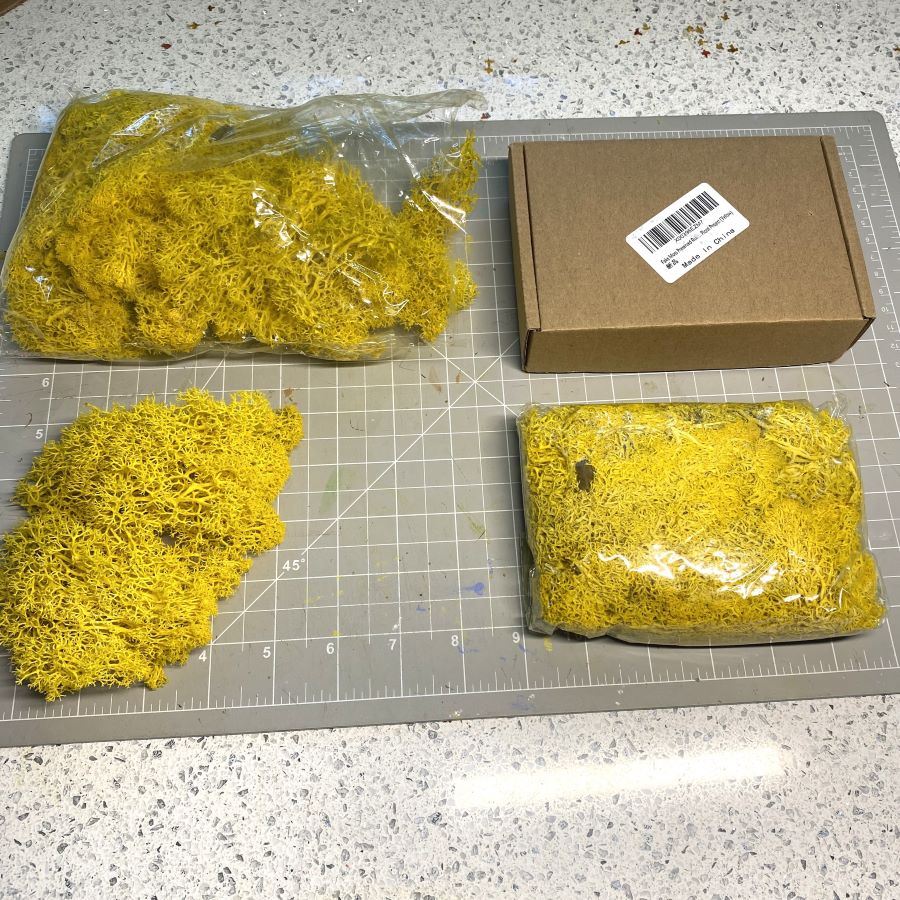
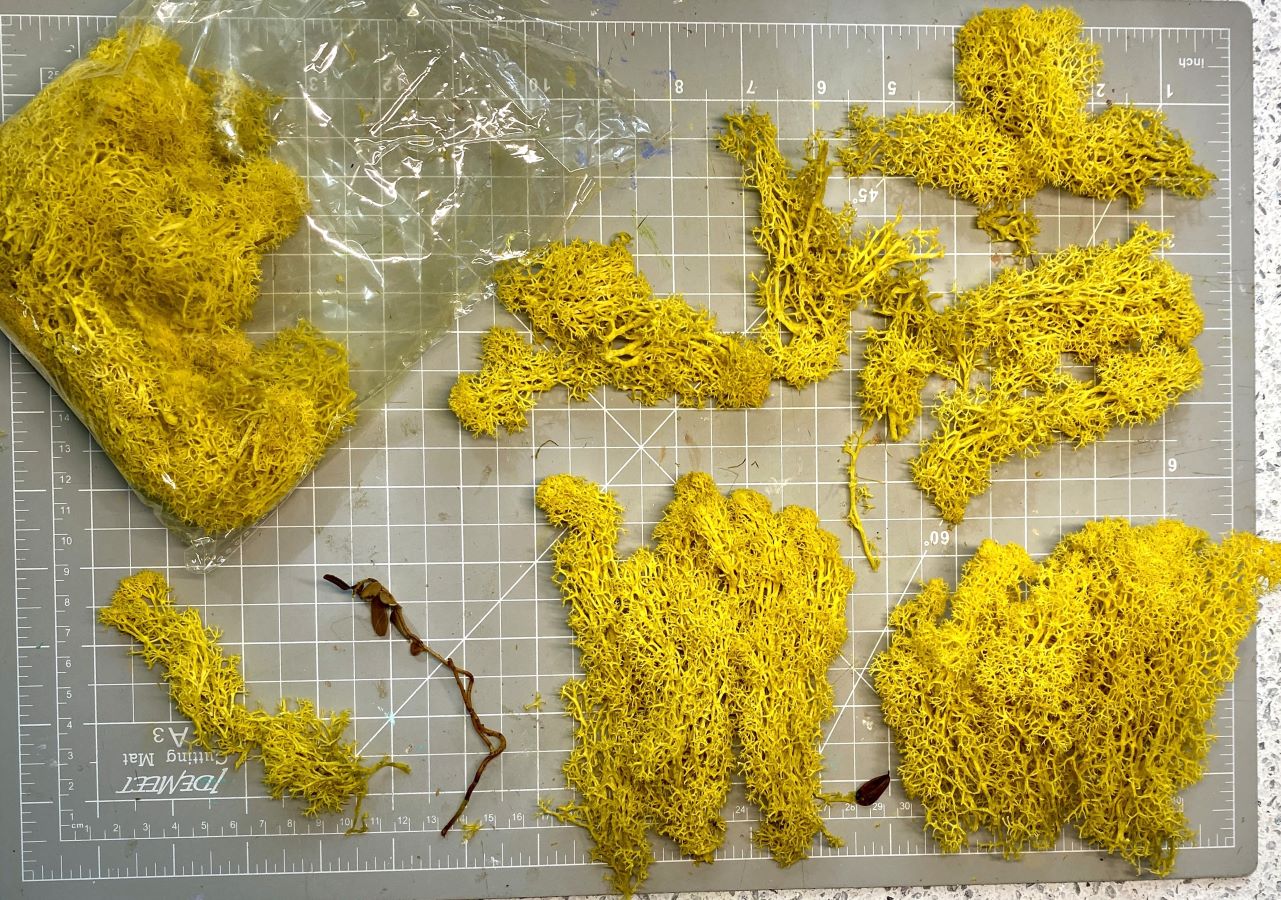
The lichen has rounded tops of fine branching. As you go down the stem, branching becomes larger and more coarse. I usually discard the bottom third or so.
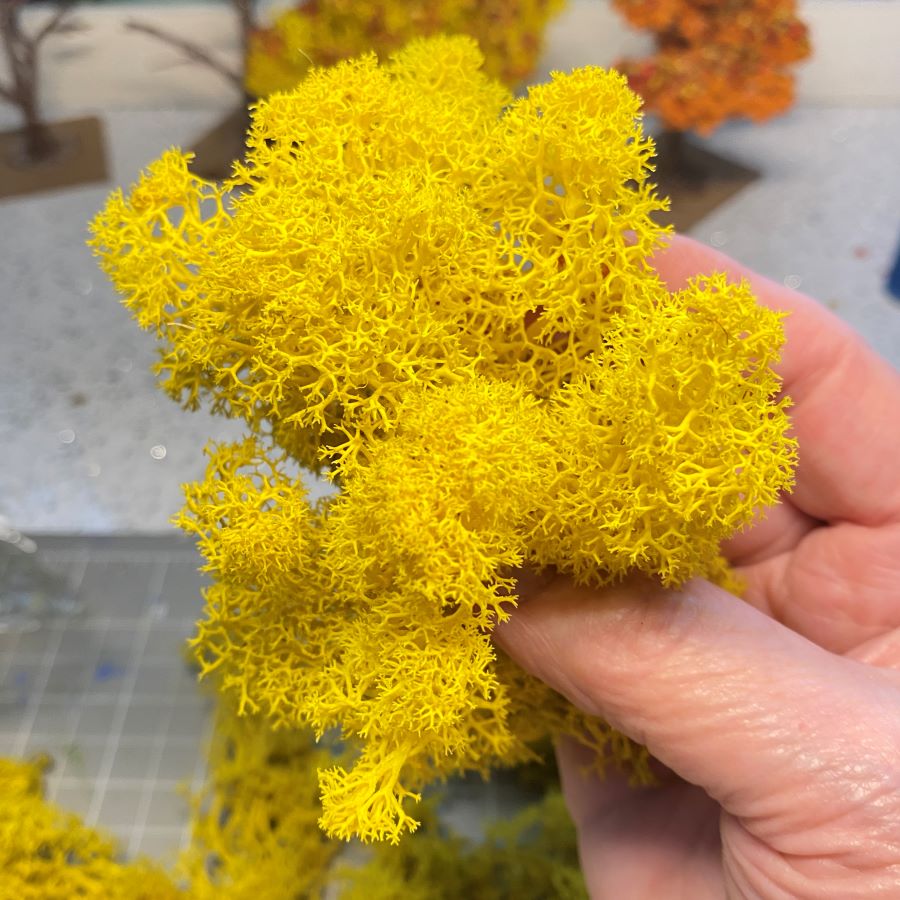
The lichen comes dyed in many colors. The color is water soluble, so don’t wet it. It may lightly color your fingers as you work with it, but it will wash off easily.
Tear the lichen to fit the branch to be covered. It pulls apart easily. A large clump can be divided vertically. The three pieces below left came from the end of the clump in the background of the picture. I glue the small, rounded ends on the ends of the armature branches. Lay a bead of hot glue as far down the branch as the lichen will cover and gently press the lichen into the glue.

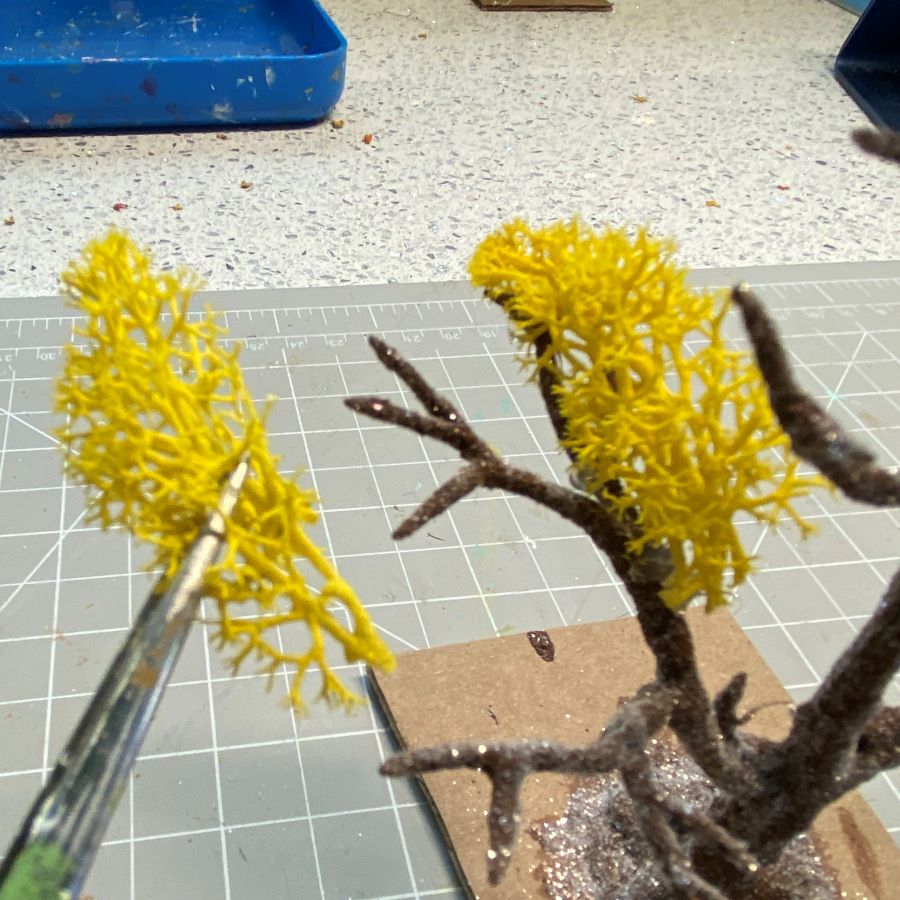

I start at the bottom and work my way up the tree. If a bit of lichen looks too thin, as in the middle of the branches in the left photo below, glue another piece of lichen on top of it. Proceed until the tops of all branches are covered. At the top of the tree, cover one side of any vertical branches.

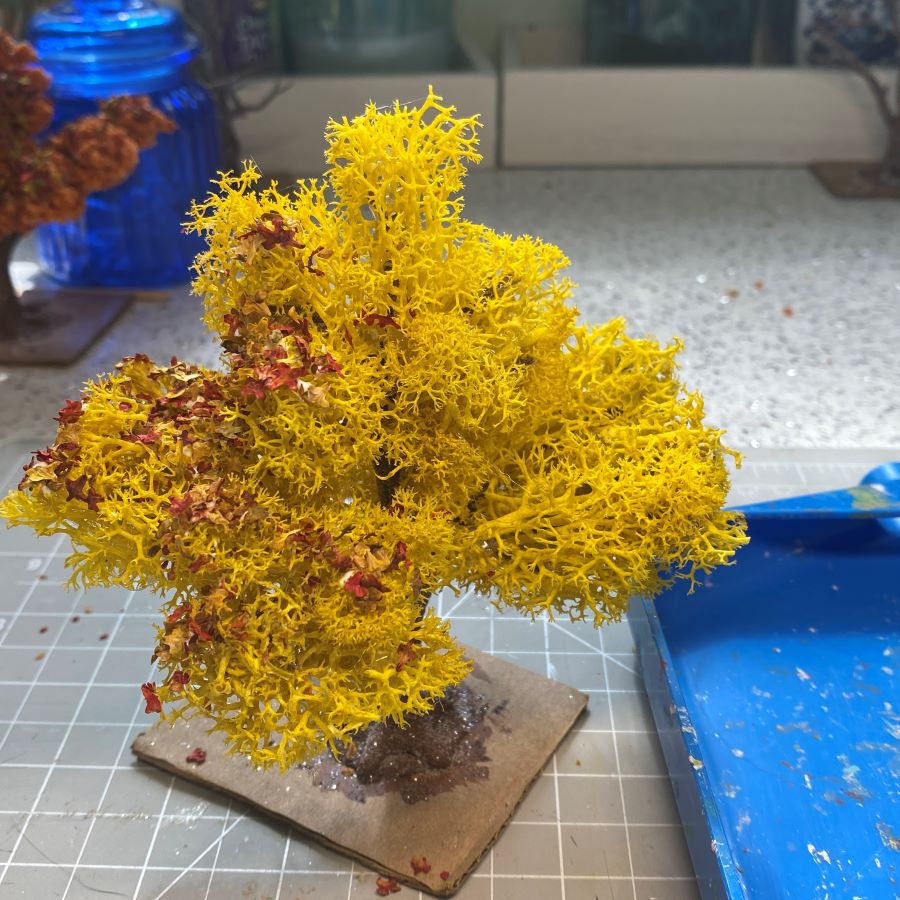
The next step is to cover the back of the top branches of the tree.

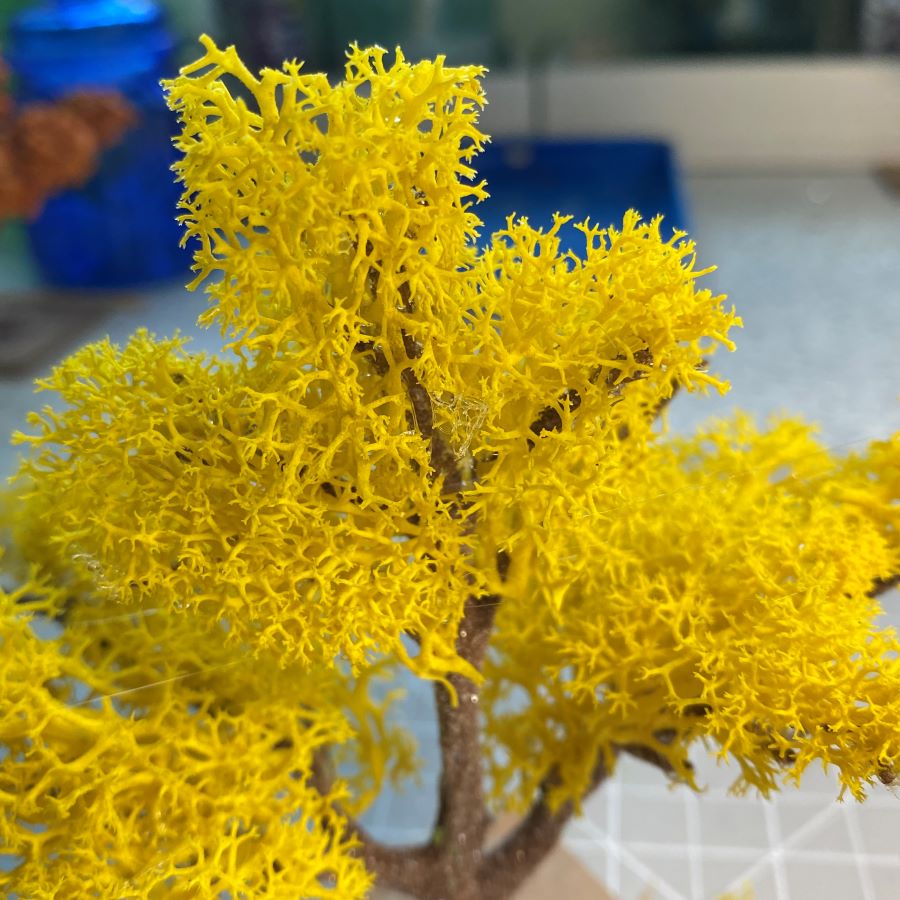
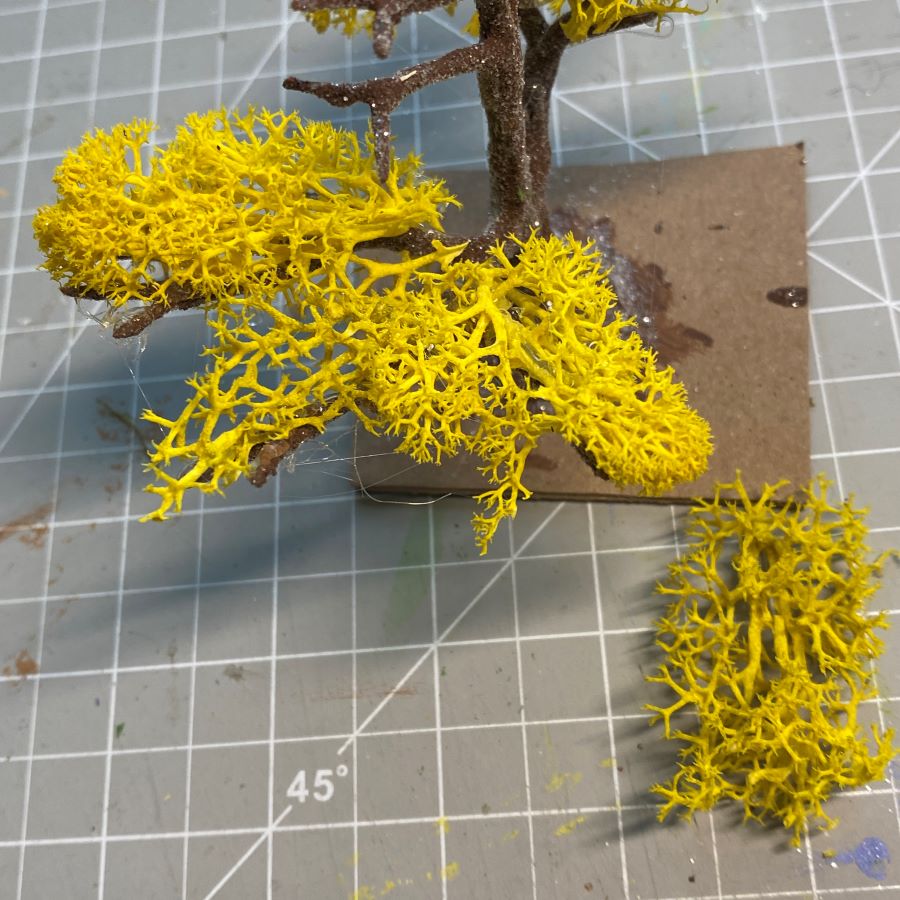
Next, turn the tree over to see the bottoms of the other branches. Cover as needed. Coarser lichen branches can be used as they won’t be as visible as the tops of the branches. Before adding leaf litter, check the tree for hot glue strings, globs of glue that are showing, and spaces in the tree that look like they need more lichen. Cover the ends of branches that are showing. At this point the tree can be considered done. Perfectly fine to use it as is, but I add leaf litter for detail and interest.

Time to add the leaf litter. Daub the branches, a small section at a time, with tacky glue. Don’t cover the whole area with glue. White or clear tacky glue is fine. Pour leaf litter over the glue and press it gently into the glue. Shake the tree over a glitter tray or a sheet of paper to collect the fallen leaves.
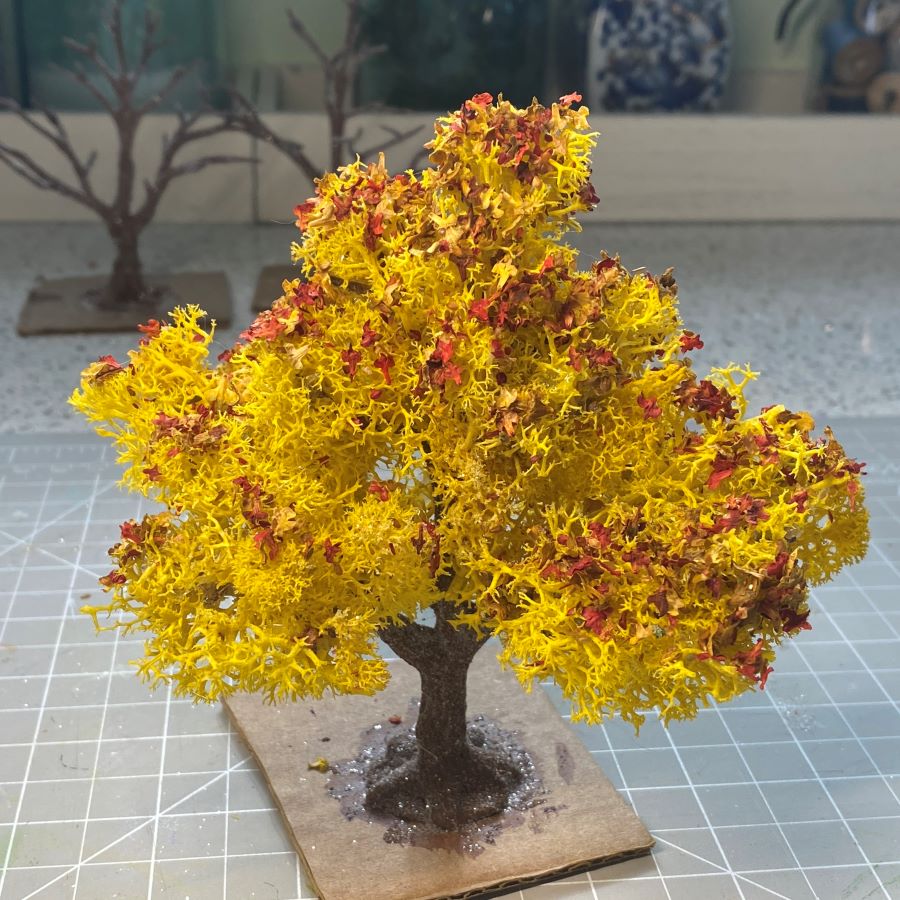
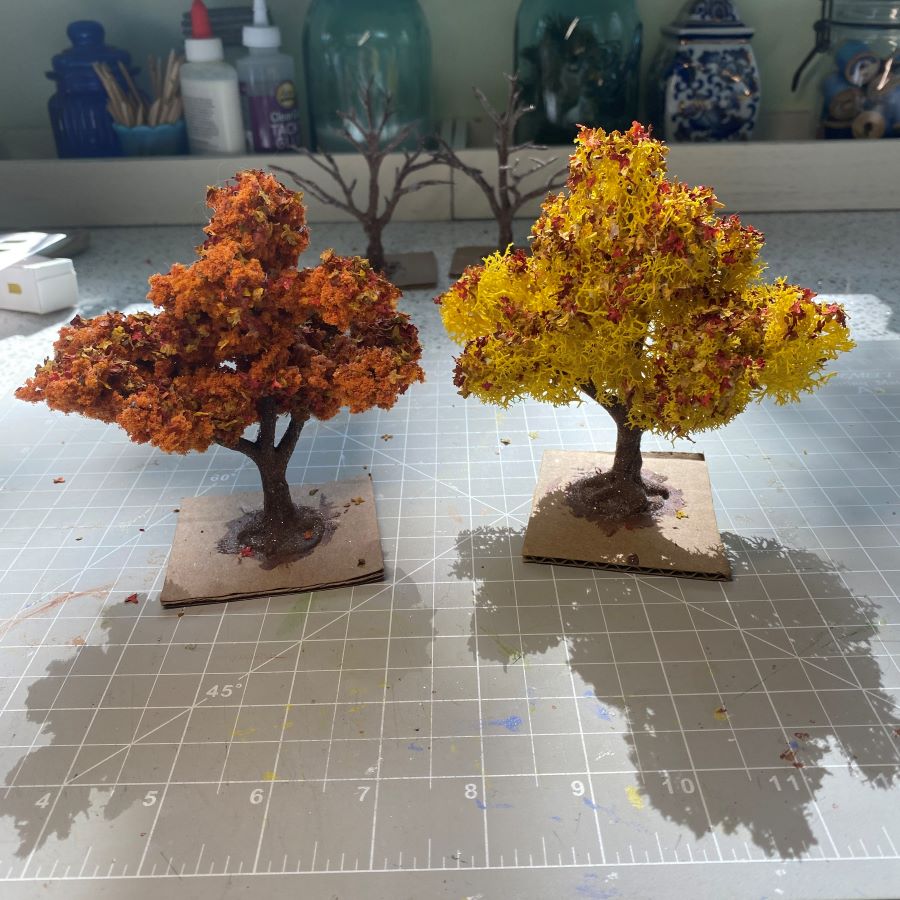
Continue to add leaf litter until the tree is finished. Look the tree over, and add extra leaf litter to any spots that need it. Below, in the picture to the right, the left tree is made with orange sponge foliage, and the right one is made with yellow lichen. The same leaf litter mixture of red, orange and yellow leaves was used on both trees.
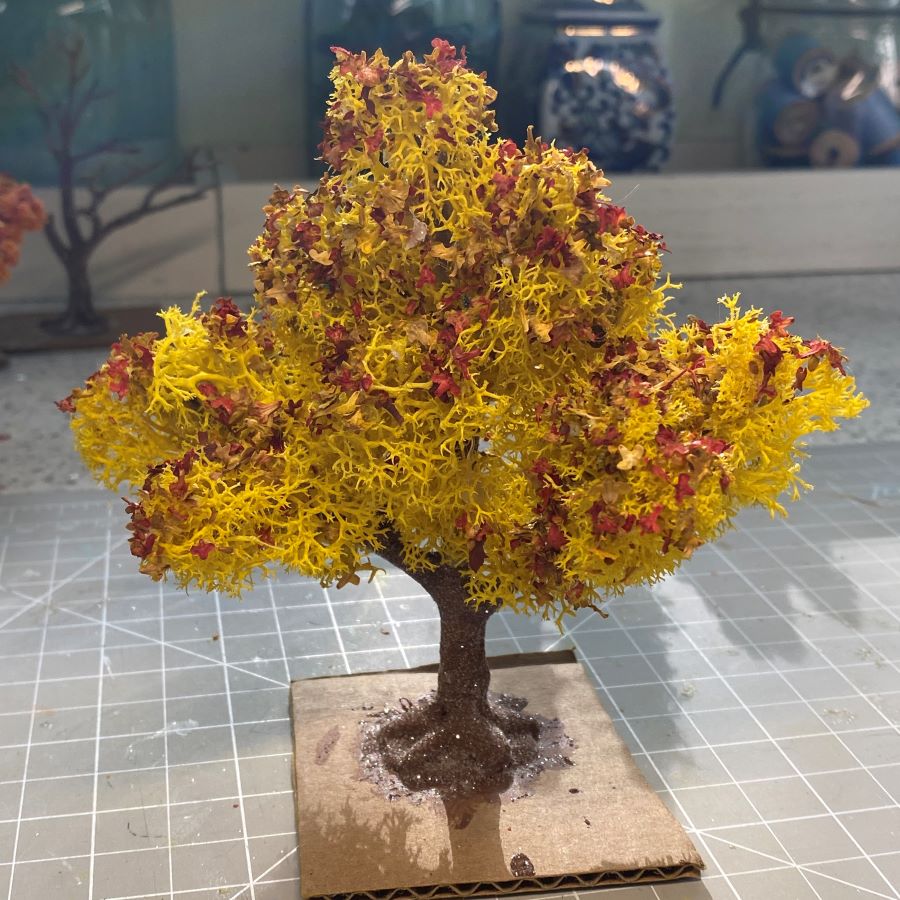
To loosen the tree from the cardboard, slide a palette knife or other flat metal tool under the tree roots and pry the tree off.
If you have any questions about the process of making an autumn tree, please ask!
If you would like to see more of my Putz houses, as well as Christmas ornaments I have made from upcycled holiday cards, please visit my Etsy shop.
If you are interested in crafting Putz houses of your own, check out my Putz tutorials for more information. Putz House Tutorials The blog can be searched for “tutorial” to find any that aren’t linked to the tutorial page. Working on that!
I am always happy to answer questions about the process. Please ask, if you are wondering about the details of putzing!
All proceeds from my Etsy shop benefit Kenya Mercy Ministries. They work with the urban poor of Nairobi, Kenya, particularly the children and their families who live in Kibera, the largest urban slum in Africa. Thank you for your part in helping these children when you purchase items from my shop!
~~Rhonda 🙂