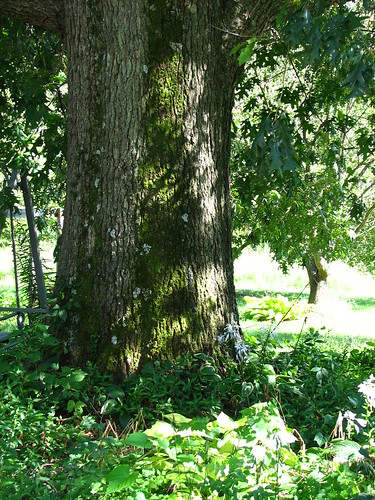
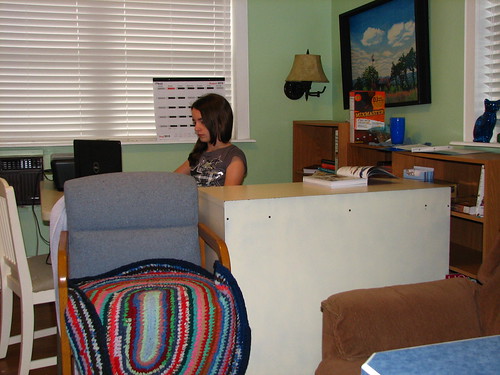
splish splash

Bath time at Grandma’s house.

twin one and twin two

water drops

scrubby clean

The week is passing too quickly. 🙁 ~~Grandma

love my glass straw

I’ve been looking at glass straws online for a month or so. Wanted to buy a few and then came across a blog giveaway which I won! I received five glass straws from strawesome.com via the giveaway on Simple Bites. Four of the straws are clear glass, two different lengths and two styles (widths)…regular and smoothie. The fifth one is decorated with a bit of colored glass. That’s the one I chose…surprised??

love my new glass straw

I really love the straw. I love glass in general, but the glass straw is great because it allows me to give up the use of plastic straws (which I used every day!). I have been reading a lot about the impact of plastic on our environment. When I started paying attention to what comes into and goes out of our home, in terms of plastic, I was really shocked. And I want to do something about it. Especially one-use-and-throw-it-away plastic. Not cool. It takes some effort to figure out how to quit using plastic products, but we’re working on it. I’ll post more about those efforts another time.

Listen to this six year old, named Anna, who has some information you should hear regarding plastic trash.

You can check these web sites for information about glass straws.

Strawesome

GlassDharma

~~Rhonda

we’re having fun!

It’s a busy household with our exchange student and extra family members here. But we’re having a lot of fun!

up and down

down!

Grandpa's story time

pretty flowers

down the slide!

swing time

swingin' high!

Miss Flash

happy face

kisses for auntie

~~Grandma 🙂

guess who’s here!

Twin One and Twin Two!

little duet

A sweet duet.

a sweet duet

Playing with Zak.

playing with Zak

Smile for the camera!

smile for the camera!

Enjoying Great-great-great-grandma Prest’s rocking chair.

great-great-great-grandma's rocking chair

I’ll have more pictures of the rest of the family later. 🙂 ~~Grandma

a few pictures from the garden…

My mower came back from the shop today. I spent a couple of hours mowing the yard. It really needed it. Now it needs a good rain. But the blooms are still blooming. Here are a few pictures from around the garden.

front yard

The crape myrtle looked so pretty against the blue sky.

crape myrtle

front yard

'South Seas'

The daisies are a sea of white.

daisies

Hydrangea ‘Little Lamb’ is growing well. This is its second full summer in our garden. It blooms later than the other hydrangeas in the garden which is a nice feature.

hydrangea 'Little Lamb'

front yard

daisies

So glad to have my mower back. 🙂 ~~Rhonda

tangy buttermilk cheese bread

This recipe from allrecipes.com makes delicious hamburger buns.

burger

Tangy Buttermilk Cheese Bread

1 1/8 cups buttermilk
1 1/2 teaspoons active dry yeast
3 cups bread flour
1 1/2 teaspoons salt
1 1/2 teaspoons white sugar
1 cup room temperature sharp Cheddar cheese, sliced and then diced into small pieces (divided into 3/4 c. and 1/4 c.)

Heat the buttermilk to 110-115*F. This won’t take long in the microwave, maybe 60-90 seconds, depending on your microwave.

Add the yeast, sugar, salt and flour and mix well. Knead by hand or with a mixer and a bread hook for four minutes. Add the 3/4 c. cheese and knead for two more minutes. If the cheese is at room temperature, it will be smoothly kneaded into the dough.

Allow to rise for 45-60 minutes until doubled in size.

Punch down and knead in the remaining 1/4 cup of shredded cheese. Knead just enough to incorporate all the cheese. This will leave some nice chunks of cheese in the dough. Cut the dough into twelve equal pieces.

cheddar cheese rolls dough

Shape into twelve flattened rolls and place on a greased cookie sheet (or line the cookie sheet with parchment paper).

Allow to rise 45 minutes, until doubled in size. Bake at 350*F for 15-20 minutes, until browned.

cheddar cheese rolls

~~Rhonda

menu plan monday ~ july 12, 2010

We’ve had a fun week with our French exchange student. She has been introduced to Oreo cookies (LIKE!), beef jerky (doesn’t like), oven fried potato wedges (like!), cotton candy (like!) and Oreo ice cream (LIKE!). 🙂 She is polite and kind, volunteers to help willingly around the house, and is excited about everything we show her. Today, DD#2 is taking her and DD#3 to the mall. That should be fun, too. I think they’re planning to take her to Steak ‘n Shake for lunch. At home, she and DD#2 love to play Mario Carts on the Wii!

Wii time

This week’s menu is built around several outings and other fun events, including the pending visit of our son and his family. Can’t wait to see them!

Monday
Fridge Food / Sandwiches

Tuesday
Rosemary Ranch Chicken (with bone-in chicken, baked in the oven instead of grilling)
Au Gratin Potatoes
Garden Salad
Steamed Sugar Snap Peas
Glazed Carrots
Corn

Wednesday
Fridge Food

Thursday
Beef and Broccoli Stir-fry
Rice

Friday
Spaghetti / Homemade Sauce
Green Salad
Homemade Rolls

Saturday
Lunch ~ Fridge Food
Supper ~ Subway Sandwiches

Sunday
Lunch ~ Ham / Turkey Sandwiches
Chips
Veggies / Dip
Canteloupe

Supper ~ Lasagna
Homemade Rolls
Green Salad
Corn
Steamed Green Beans
Chocolate Chip Cookie Bars (warm) with Vanilla Ice Cream and fresh strawberries

You’ll find more menu and recipe ideas at Menu Plan Monday.

~~Rhonda

raspberry pie

raspberry pie and ice cream

Raspberry Pie

For one pie: 6 cups raspberries Or peaches or apples or blackberries, etc…the sugar mixture works for all of them. I do add a little freshly grated nutmeg to peach pie.

Mix the following together and set aside. (For one pie.)
3/4 c. sugar
2 T. flour
2 T. instant tapioca
3/4 tsp. cinnamon

Prepare the pie plate(s).

Pie Crust (makes 2 2-crust pies)
Blend together until smooth:
1/2 c. boiling water
1 c. Crisco

Mix the following dry ingredients together, then add it to the shortening mixture, stirring just till well blended. Allow to sit for a few minutes so the flour can be absorbed. Note the tool I use for blending the shortening/water and for mixing in the flour. Works great! It’s also DH’s preferred fudge tool, though he’s using a different, yet similar, one in the link.
3 c. flour
1/2 tsp. salt
1 tsp. baking powder
1 T. sugar

pie dough

Knead with your hands just until it holds together. The longer you knead it, the tougher it becomes. Form into four balls and pat each into a flattened round.

Roll between two pieces of floured waxed paper or parchment paper.

pie dough

Remove the top piece of waxed paper.

pastry

Slide your hand under the bottom piece of waxed paper, with the pie dough still on it, and flip it over into your pie plate. When it is positioned where you want it, remove the second piece of waxed paper.

transfer to pie plate

Trim the edge of the pie crust. Pour enough of the sugar mixture into the pastry lined pie plate to cover the bottom of the pie plate.

sugar mixture

Pour half the fruit into the pie plate. Sprinkle half the remaining sugar mixture over the fruit. Repeat with remaining fruit and remaining sugar mixture. Cover with another piece of rolled pie crust.

Trim and crimp the edges. I always use a fork to mark the cut lines and sprinkle sugar on top the crust because that’s the way my Grandma did it. 🙂

Bake at 425*F for 15 minutes, then at 325*F for an additional thirty minutes.

raspberry pie

raspberry pie

This particular pie was a birthday pie for DD#2. She always requests raspberry pie instead of a birthday cake. This year, after we sang “Happy Birthday” to her, our exchange student sang it to her again, in French and in German and in Spanish! 😀

birthday pie

~~Rhonda

flag cake

As we were celebrating the Fourth on Monday the 5th, with the Independence Day parade and fireworks in the evening, I made a special dessert for the occasion.

flag cake

How cool is that?? I found the idea and the recipe for the frosting on Elissa’s blog 17 and Baking. She attributes the idea to her father.

After browsing several recipes, I used this recipe for white cake and it was delicious. I had to triple it to make three round cakes. I made it all at once and it worked fine.

You can see complete directions for assembling the cake on Elissa’s blog. But basically, you cut the red layer and the white layer in half horizontally. Leave the blue layer intact for now.

Stack, from the bottom, a white layer, a red layer, and the blue layer. For this stack, I chose the red and white layers with the worst looking edges because the outer part of these will not be used in the flag cake. Though you can save them to assemble an oddly colored short cake.

cutting the cake rounds

Cut a hole down the middle of the stack, using a serrated knife.

cutting through the cake

You end up with this.

you need the round blue ring

To assemble the whole thing, it stacks like this: white layer on the bottom, red layer next, then the blue ring, frosting between each layer. Spread a layer of frosting inside the blue ring around the edge of the cut. Then slide in the center, which is the center of the red and white layers that you cut.

That will leave you with a blue circle cut from the center and two rings…a white one and a red one. You can stack and assemble these to make a cake that will be opposite in color composition and will have only one white stripe and one red one…but that way, it doesn’t go to waste. Or you can do what I did. Leave the leftover cake and the leftover frosting on the counter and watch it disappear!

The finished cake makes a great surprise when you cut into it. I didn’t tell the kids what it was going to be. They thought I was making a red, white and blue layer cake. I wish you could have seen their eyes when they saw the flag on their plate! They ran for their cameras! 😀

flag cake

The only problem I had was with the frosting. It seems too runny, so I added more powdered sugar to stiffen it. It worked fine. I did put the cake in the fridge until serving because I was afraid the layers might slip if it were left on the counter in the warm kitchen.

A fun cake to make, and though it seems it might be hard to assemble when you read the directions, it isn’t hard at all. It’s very easy! This will probably become a Fourth of July tradition for our family. 🙂 Thank you, Elissa and Elissa’s Dad!!

~~Rhonda 🙂

menu plan monday ~ july 5, 2010

Monday
Grilled Chicken
Hamburgers / Homemade Buns
Veggie Packets
Grilled Corn on the Cob
Flag Cake
Ice Cream

Tuesday
Ham Sandwiches / Homemade Bread
Veggies / Dip
Chips

Wednesday
DD#2’s Birthday Day Dinner / she hasn’t decided on a menu yet.

Thursday
Pork Chops
Rice
Steamed Green Beans
Glazed Carrots
Green Salad

Friday
Crunchy Lemonade Drumsticks
Oven Fried Potato Wedges
Corn
Asparagus
Green Salad

Saturday
Lunch ~ Fridge Food
Supper ~ Homemade Pizza using this dough recipe

Sunday
Julie’s Fake Baked Ziti
Toasted Garlic Bread made with Tangy Buttermilk Bread
Green Salad
Peas
Corn

You’ll find more menu and recipe ideas at Menu Plan Monday.

~~Rhonda