does anyone else collect pie plates?

My first memory of pie is my Grandma Ruth’s pies and the glass pie plates she used to bring her yummy pies to family reunions. The tops were decorated with cutting lines, punched with a fork, and sprinkled with sugar before baking. I loved those pies. Even as a child I was captivated by that sparkly sugar. Did I ever tell you how much I love glitter???

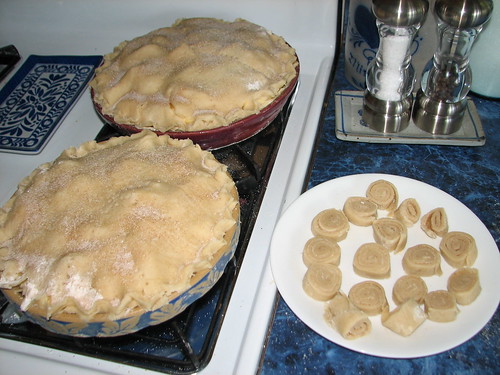
See, just like Grandma used to make. Forked and glittered…I mean sugared…and ready to pop in the oven.

The above is in a disposable plate as it was made for a bake sale. Here are two pies ready to pop in the oven, made in two of my pie plates. I can just about guarantee that the one in the back has peaches in it because that’s the red pie plate I always use for peach pie. 🙂 And those cinnamon roses to the right…oh, yum!

ready to bake

Anyhoo, I’ve been collecting pie plates for years and I think it’s all Grandma’s fault. The first ceramic plate I ever received was a wedding gift in 1977. The second plate I obtained was purchased at Branson, Missouri, when I and the ladies from my church took a field trip there. That was sometime in the early eighties…rough estimate…not sure just when we went down there…After that, I began picking them up at craft fairs, while on vacation, as gifts, etc. I am sure I have 10 or more that aren’t shown in these pictures. There isn’t enough room to display them all. They sit on pegs in the kitchen. To get one down, I have to have someone climb on the counter…not entirely convenient, but they *do* look nice up there.

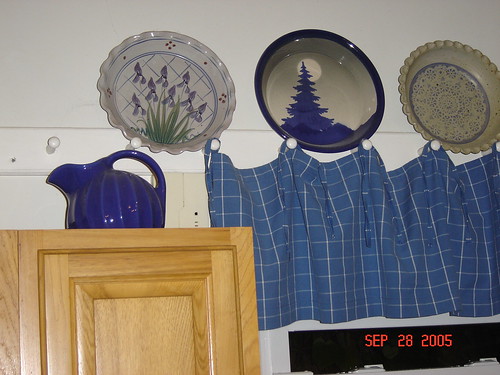
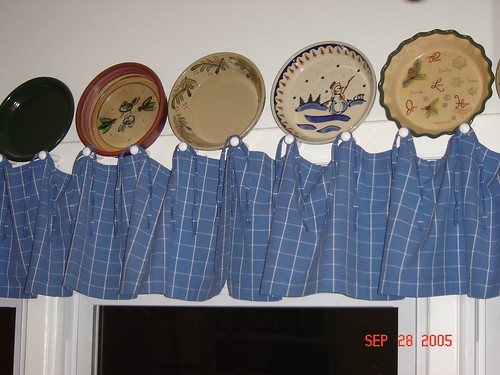
That empty space on the left must be for a pie plate with a pie in it… The plate with the flowers came from a potter at a Rendezvous. I have several plates from the same potter, though I don’t know his/her name. The tree pie plate was a gift from a dear friend. She loves trees. There’s more to that story that I won’t share here, but, girlfriend, you know who you are. Much love. The doily plate is the one I picked up in Branson when my Bible study ladies took a field trip there.

pie plate collection

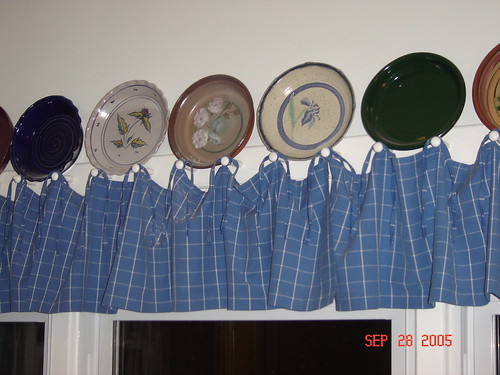
Many pie plates are in browns, greys, muted blues. I’m always on the lookout for something in a different color, like the pink one in this photo. One of my favorites.

pie plate collection

I found the brown one somewhere in Tennessee while on vacation. And isn’t the little kitty plate cute? Yes, I’ve made little pies in it. The dark wine red plate is one of my favorites for peach pie.

pie plate collection

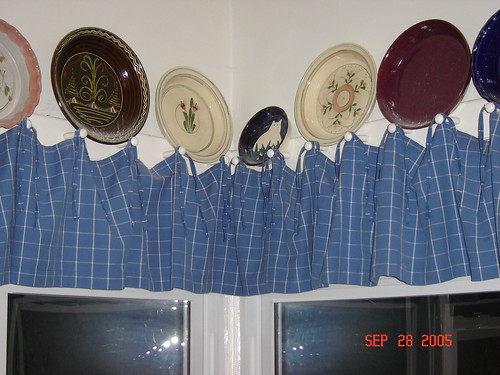
More Rendezvous pie plates in this picture. And the one on the right is a dark hunter green.

pie plate collection

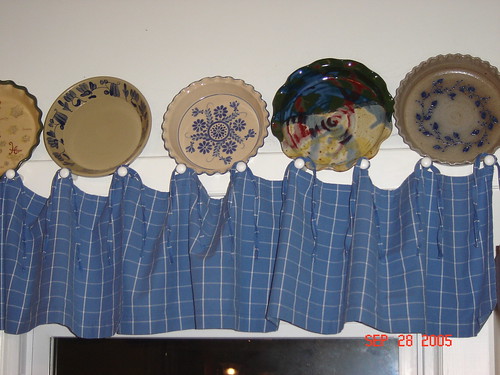
Here are three of my five or six Christmas pie plates. I put them up for the holidays.

pie plate collection

The one with the blue painting inside the rim was a gift. The next one I found at the Cedarhurst Craft Fair. I love the detail of the hand painted design. I usually get a lot of comments on the next one, which I bought in Kentucky somewhere. People seem to like the swirls and the mix of colors.

pie plate collection

In this picture, you get an idea of how the pegs that hold the pie plates and the curtains run over the cabinets as well as over the windows. To the right, they also run over the refrigerator. The ceiling is 12′ high, by the way. Our kitchen was, at one time, an enclosed back porch. One reason I had to paint the ceiling blue. 🙂

ceiling snowflakes

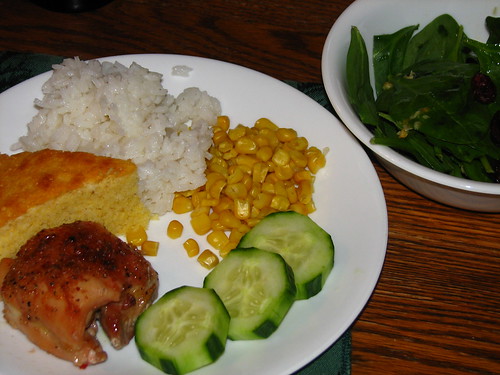
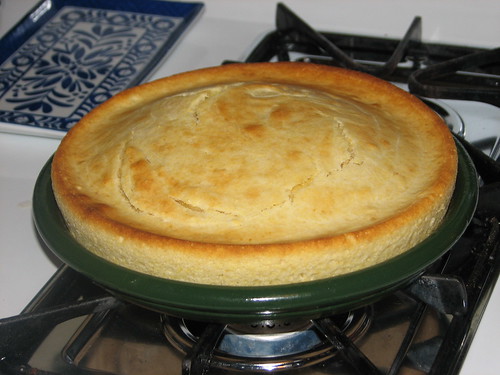
And they aren’t just for pie. We make corn bread in them.
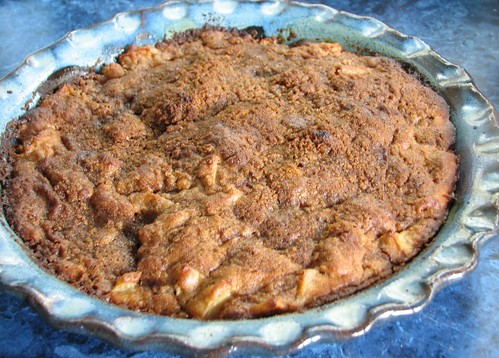
dd's cornbread

And apple cake.

apple cake

Just to mention a couple of things. I use the plates a lot. Seems there’s no sense in having them, if they aren’t used.

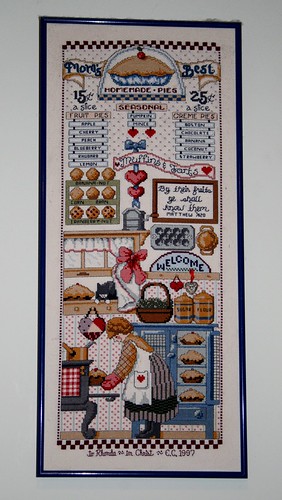
When we moved into our current home, my friend Liz made this counted cross stitch for me. She knows I love to bake pie. 🙂

the pies have it

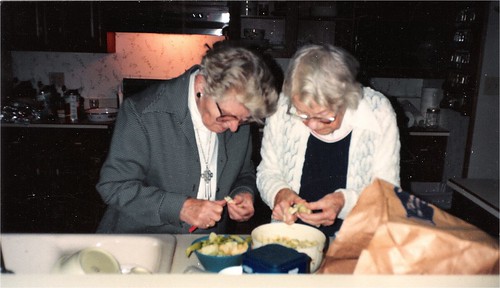
Here’s my Grandma (on the right) and her sister Iva as they peeled apples together. Both have since passed away, but pie plates will always remind me of Grandma.

Iva and Ruth peeling apples

~~Rhonda

tacoritos

Tacoritos…delicious. The entire family gave them a big thumbs up. 🙂

tacoritos

Not hard to make, at all. If your family and/or friends like tacos, burritos, Tex-Mex, etc., they will enjoy this. And I must say, as good as they were, they were even better the next day. Next time I make them, I will consider baking them ahead of time, then reheating in the oven or microwave to serve.

The original recipe, as far as I can tell, was a prize winning recipe at Taste of Home. I’m not a member of the site, so couldn’t access the recipe. I found it on the Noble Pig site, where it had been adapted a bit. I adapted it a little more, so here’s my version.

Tacoritos

3 T. butter
3 T. all-purpose flour
3 cups water
1 T. chili powder [Original recipe called for 3 T. chili powder…I used one tablespoon and added 2 T. cumin for a little less heat.]
2 T. ground cumin
3 cloves garlic, minced
1 T. dry onion flakes (or you can use fresh onion, diced, 1/2 c. – 1 c.)
1 lb. ground beef [I used the leanest available.]
1 lb. bulk pork sausage [I used Jimmy Dean regular.]
1 16 oz. can refried beans
8 flour tortillas (8 inch)
3 c. (12 oz) shredded Monterey Jack cheese [I used sliced pepper-jack and sliced provolone, as that’s what I had on hand.]

In a large saucepan, over medium heat, melt butter. Whisk in flour until smooth. Allow to cook for a minute or two to cook the flour.

Whisk while gradually adding the water. Bring to a boil; cook and stir until thickened. Stir in chili powder, cumin, minced garlic, and dry onion. Bring to a boil. Reduce heat; simmer, uncovered, for 10 minutes.

In a large skillet over medium heat, cook the beef and sausage [and onion, if using fresh] until meat is no longer pink; drain. Stir in refried beans; heat through. You can make the filling with beef only, if you like, but I must say that the addition of sausage to the filling is much better than beef alone.

meat filling

Spread 1/4 cup sauce in a greased 13 x 9 baking dish.

ready the pan

Spread a tablespoon of sauce on a tortilla; place 2/3 cup meat mixture down the center. Top with a 1/4 cup cheese.

didn't have any shredded cheese...

Roll tortilla and place seam side down in prepared dish. Repeat until eight tortillas are done. My pan isn’t quite 9×13, so they are rather crowded.

barely fit eight

Pour remaining sauce over the top; sprinkle with remaining cheese. I used slices, as that’s what I had. Worked just fine.

ready to bake

Bake, uncovered, at 350 degrees for 20 minutes or until bubbly and cheese is melted.

tacoritos

After 20 minutes, I turned the oven off and left the tacoritos in the oven until DH came home from work…maybe 30 minutes. They were perfect.

~~Rhonda

stir fried shrimp

quick and easy supper

Last night’s supper was quick and easy. The rice took the longest to cook at 20 minutes.

Check this link for the recipe for Pan Seared Shrimp I started with, from Gina’s site. She has a lot of recipes worth perusing.

I stir-fried our shrimp and used the following ingredients.

14 oz. bag frozen medium size shrimp, thawed and thoroughly dried
2 tsp. olive oil
salt and freshly ground pepper to taste
sprinkle of red pepper flakes
1/4 tsp. parsley flakes

Gina’s recipe called for more shrimp and a 1/4 tsp. crushed red pepper. That was too much red pepper for my family, so I cut it way back. If you like heat and are used to using lots of red pepper, you’ll probably want to follow Gina’s recipe more closely than I did.

Stir frying is quick and easy. I started the rice, waited about ten minutes, then cooked the pea pods first as they take a bit more time than the shrimp. I used the same wok, without cleaning, for the shrimp after the veggies were done.

Heat the oil in a wok (or large skillet), add the shrimp and stir and toss until they begin to look done. Just takes a few minutes. Add the rest of the ingredients and cook for a minute longer. That’s all it takes. The shrimp had the tiniest bite of heat. DD and I loved them. DH gave them a “passing grade” which means he is happy to see them on the menu again.

The pea pods are easy to make and delicious.

Add a teaspoon of olive oil to the wok. Add the pea pods and stir and toss until they begin to turn bright green with fried bits down the sides. Add salt and pepper to taste. When the pea pods are almost done, add halved cherry tomatoes and cook for one more minute. Serve. Sometimes I add some tamari at the same time I add the tomatoes for a richer flavor. If you don’t have tamari, you can use regular or low-salt soy sauce, though the veggies are delicious with just a touch of salt and pepper.

~~Rhonda

birthday girl

Twelve years and a day.

happy birthday!

Our son and daughter-in-law came to help celebrate. We played Apples to Apples and a few rounds of Scattergories while we waited for supper to be done. DD asked for Cheesy Potato Sausage soup for her birthday meal. I also made bread and some pepperoni and cheese rolls for DS who doesn’t care for soup.

favorite family game

Twelve candles. Not sure how she got to be that old this fast.

got 'em all

Her sister-in-law made this cute Softsquatch for DD.

Softsquatch!

It’s two days later…today we had a snow day. Watched movies, DD cleaned her room and sorted through all her clothes. We had shrimp for supper and cake for dessert. Not much birthday left…

the remains of the day

~~Rhonda

menu plan monday ~ february 8, 2010

DD turned 12 this weekend. How’d that happen?? Time flies… Anyhoo, we celebrated on her birthday with a little cheesecake and celebrated her birthday the next day with family (and the “real” cake).

birthday cheesecake

We’re expecting more snow today and tomorrow, so I’m taking that into account when planning the menu.

Monday
Tacoritos

Tuesday
Baked Salmon
Oven Fried Potato Wedges
Stir Fried Zucchini
corn

Wednesday
Baked Parmesan Chicken
Peas
Steamed Red Potatoes
Romaine Salad with orange, craisins and walnuts

Thursday
Pan Seared Shrimp
Rice
Stir fried sugar snap pea with cherry tomatoes
cornbread

Friday
Grilled Rosemary Chicken
Potato/Carrot Gratin
Peas
Green Salad

Saturday
Fridge Food
Peach Cobbler

Sunday / Valentine’s Day
Marinated Pork Tenderloin
Mashed Potatoes
Creamy Mushroom Bake
Corn
Steamed Green Beans
Green Salad
Baked Fudge
Whipped Cream

You can find more recipes and menu ideas at Menu Plan Monday.

~~Rhonda

birthday cupcakes

DD is celebrating a birthday this weekend. That means cupcakes for the classroom.

cupcakes for dd's birthday

Like me, she prefers white cake over chocolate. I decided to add some sprinkles to the batter to give the cupcakes a bit of fun color. Ummm…maybe a tablespoon? I didn’t measure.

add some sprinkles

Don’t add the sprinkles until the batter is completely mixed. Work quickly to stir them in with as little mixing as possible. The color will begin to melt immediately.

cupcake batter

Cool completely before frosting.

cupcakes for dd's birthday

I have a drawer full of sugary sprinkles and cookie decorations. But these tiny little balls have always been my favorite.

cupcakes for dd's birthday

And inside, little bits of color.

birthday cupcake

She transported them in the cupcake tin. Easiest way to do it. White cake, lots of frosting. The only way to go.

cupcakes for dd's birthday

~~Rhonda 🙂

can’t you tell it’s snowing out here?

"Can't you see it's snowing out here?"

Oreo sits on the carport roof and implores us to let him in. Dream on, kitty. I wonder how long he’ll sit there hoping before he finally heads for the garage?

~~Rhonda

menu plan monday ~ february 1, 2010

out the back door

We still have snow, though the temps are supposed to be a bit warmer this week. I think I’ll start the menu off with soup. Just the thing for cold weather.

Monday
Cheesy Potato/Sausage Soup
Rosemary Crackers

Tuesday
Bacon-Chicken Provolone Sandwiches
Oven Fried Potato Wedges
Grapes

Wednesday
Maple Mustard BBQ Pork Chops
Baby Baked Potatoes
Steamed Green Beans
Strawberry Orange Jell-O Salad

Thursday
Broiled Chicken
Paul’s Brazilian Beans and Rice
Green Salad

Friday
Ground Beef Burritos
Leftover rice and beans

Saturday
fridge food
Pineapple Upside-Down Cake

Sunday
Church Dinner
Potato/Sausage Casserole in the Crock Pot
Pumpkin Cake w/ Cream Cheese Frosting

You’ll find more menu and recipe ideas at Menu Plan Monday.

~~Rhonda

simply great chicken

“Winter is the time for comfort, for good food and warmth, for the touch of a friendly hand and for a talk beside the fire: it is the time for home.” So says Edith Sitwell, British Poet, and I agree. I don’t know what Edith’s thoughts on summer were, but if you know me well, you know there is nowhere I’d rather be than at home, in my own bed, in my own kitchen, in my own garden, any time of year. Of course, a visit to the warm sunny beaches of the south east would not go amiss during the seemingly bleak days of January and February…but home is still my favorite. Three or four days away and I’m yearning to go home, counting down in my head…three more nights and I get to go home…two more nights and I get to go home…but I digress. Here’s a good recipe for a family dinner, chicken and cornbread warm from the oven and smelling, oh, so good, eaten at the kitchen table with the oven still warming the air. Especially if you forget to turn it off…

chicken for supper

I change recipes all the time. Substitute this, omit that, double the other thing… But here is one recipe I didn’t change at all. For one thing, there’s not much to change! For another, it has such rave reviews on the blogs on which I found it, that I wanted to give it an unadorned trial run.

Simply Great Chicken
(Source: Country Chicken cookbook)

3 1/2-4 lb. chicken, cut up and skin removed [I used six boneless, skinless thighs and two large boneless, skinless breasts cut into three pieces each.]
1 (.7 oz.) envelope dry Italian salad dressing mix
1/2 c. packed brown sugar

Preheat oven to 350*.

Place chicken in a single layer in a greased 9×13 baking dish. [I lined mine with non-stick aluminum foil and sprayed it with cooking spray.] In a small bowl, combine dry salad dressing mix and brown sugar; sprinkle over chicken.
Bake, uncovered, @ 350* for 55-60 minutes or until juices run clear. 4 servings.

chicken for supper

It was very good. Everyone liked it and wants to have it again. So there’s another recipe for my binder. Gonna need a new recipe binder any day now. I’ve already made two…one for general recipes and one for desserts. Wonder which way I should go with a new one. Maybe main dishes? And all the sides, beverages, snacks, etc. in the original one? I’ll have to ponder that.

~~Rhonda

crunchy baked pork chops

Supper this evening was late, but good. Crunchy Baked Pork Chops, Creamy Mushroom Bake, spinach with cashews, and corn.

supper...three new recipes

Crunchy Baked Pork Chops Click the link for the original recipe. I made a couple of minor changes.

salt
4 boneless center-cut pork chops, 6 to 8 ounces each, 3/4 to 1 inch thick, trimmed of excess fat
4 slices bread, cubed [I used homemade.]
1 small shallot, minced (about 2 tablespoons) [I omitted this, as DH is allergic to onions.]
3 medium garlic cloves, minced [I used about 1/4 tsp. garlic powder.]
2 T. vegetable oil [I used olive oil.]
Salt and freshly ground black pepper to taste
2 T. freshly grated Parmesan cheese
1/2 tsp. minced fresh thyme leaves
2 T. minced fresh parsley leaves
1/4 cup plus 6 tablespoons unbleached all-purpose flour
3 large egg whites [I used two.]
3 T. Dijon mustard
Lemon wedges

Preheat oven to 350*.

Dissolve salt in a quart of water and submerge the pork chops. [I used a zippered plastic storage bag.] Refrigerate for 30 minutes. Rinse well and pat dry with paper towels.

Using a food processor, pulse the bread till small crumbs are formed.

making bread crumbs

Transfer crumbs to a baking sheet and add shallot, garlic, oil, salt, and pepper. Toss until crumbs are evenly coated with oil. Bake until deep golden brown and dry, about 15 minutes, stirring twice during baking time. Cool and toss crumbs with Parmesan, thyme, and parsley.

If you don’t have a food processor, you can toast bread slices in a low oven until dry, place them in a zippered plastic storage bag and crush till they’ve turned into crumbs. Toss with the other bread crumb ingredients. Nicely browned and crispy.

homemade bread crumbs

Place 1/4 cup flour in pie plate. In second pie plate, whisk egg whites and mustard until combined; add remaining 6 tablespoons flour and whisk until almost smooth, with pea-sized lumps remaining.

recipe

Increase oven temperature to 425*. Spray wire rack with nonstick cooking spray and place in rimmed baking sheet. Season chops with pepper. Dredge 1 pork chop in flour; shake off excess. Using tongs, coat with egg mixture; let excess drip off. Coat all sides of chop with bread crumb mixture, pressing gently so that thick layer of crumbs adheres to chop. Transfer breaded chop to wire rack. Repeat with remaining 3 chops. [I don’t have a pan with a rack, so I just placed the pork chops in a greased baking dish which worked fine.]

Bake until instant-read thermometer inserted into center of chops registers 150 degrees, 17 to 25 minutes. Let rest on rack 5 minutes before serving with lemon wedges.

Crunchy Baked Pork Chops

Delicious. Next time I’m going to try the coating with chicken instead of pork chops. I’m sure it will be just as good.

I’ll post the Creamy Mushroom Bake and the spinach/cashew recipe soon. Both were delicious.

~~Rhonda