We are planning a trip to visit DS#1 and his family soon. Until then, here are a couple of pictures of the grandtwins.
Sleepy girl

Sweet face

I love this picture taken at the playground, with mommy in the background.

~~Rhonda
We are planning a trip to visit DS#1 and his family soon. Until then, here are a couple of pictures of the grandtwins.
Sleepy girl
Sweet face
I love this picture taken at the playground, with mommy in the background.
~~Rhonda
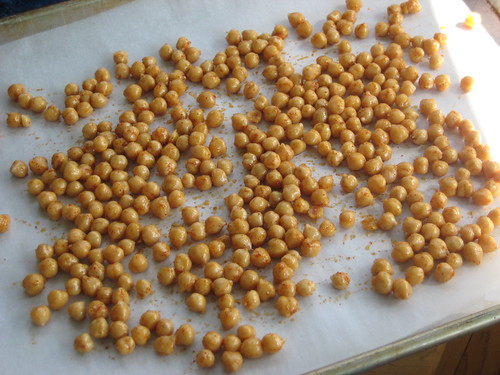
Today I tried making toasted chickpeas (garbanzo beans) for the first time. I’ll say up front that I am the kind of person who likes to eat the old maids when we make popcorn…you know those unpopped and partly popped kernels of corn? I save all the old maids and repop them. Second time around they are crunchy good. Love ’em. So it’s no surprise I liked these chickpeas. They remind me a little of those old maid kernels.
I used:
1 16-oz. can of chickpeas, drained and rinsed
1 T. olive oil
garlic powder
ground red pepper
paprika
freshly ground sea salt
After draining and rinsing the chickpeas, put them in a bowl lined with a paper towel and swirl them around to dry them a bit more.
After discarding the paper towel, drizzle the chickpeas with olive oil, then sprinkle them with the spices, mixing to coat the chickpeas well. The amount of spice depends on personal taste. I used a light hand, as I’ve never had these before. Next time, I may up the spice a bit.

Spread them in a single layer on a cookie sheet lined with parchment paper.
Bake at 350* for an hour, shaking the pan every 15 minutes to stir the chickpeas. The last 15 minutes, check them every 5 minutes. I’ve read they turn quickly from perfect to burned.
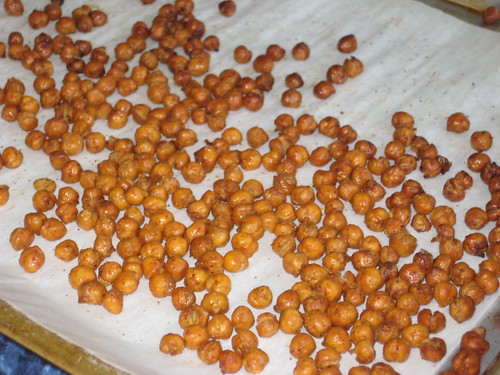
Mine turned out great.
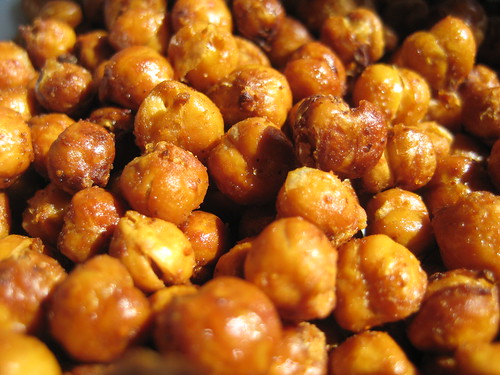
They are delicious, crunchy and spicy. I’ll make them again, but may cook dry chickpeas to use next time. Starting with a bag of dried beans would be cheaper and may be tastier than canned.
~~Rhonda

Last night, Pippin passed away. He was an old cat. An outdoor cat. A stray that adopted us in September of 2006. He became DD#1’s cat. When he came to us he looked terrible. His hair was falling out, he was very thin and weak, he had a bad limp. As time went by, his health improved a great deal. During cold weather, his limp would return, but overall he was doing well. He could always be found on the back porch. Usually on the railing, looking through the back door, hoping someone would come out. The past few weeks he didn’t seem to be himself. He lost weight, was lethargic, his hair was coming off in tufts. I told DD I thought he was dying. She wanted to put him in the basement a few nights ago because he looked worse and it was chilly out. She made a bed for him and went down to visit him. Last night she and DH went down and she said goodbye. She petted him and he purred. DH said Pippin didn’t seem to be in any pain. They buried him this morning, down by the willow tree.
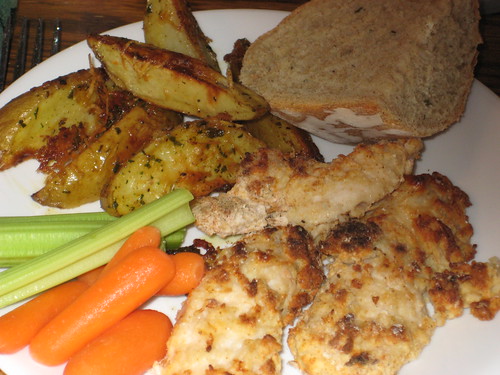
I made the Bisquick Chicken Fingers recipe this week. Everyone liked it well enough, but it wasn’t a rave. Not something I will make again. There are just too many other chicken recipes we like better. And new ones to try. But the Oven Fried Potato Wedges…those will remain on the list of menu options.
Supper consisted of the chicken fingers, potato wedges, rosemary bread, and carrots and celery.
Here is the recipe as given, with the changes I made in bold.
Oven Fried Potato Wedges
Preheat oven to 375*.
Wash the potatoes, cut them into wedges and put them in a mixing bowl. Pour the olive oil over them and mix to coat completely.
Lay the potato wedges on a foil-lined cookie sheet. If it’s regular foil, spray it with veggie spray. I like to use no-stick foil or parchment paper, if I have it on hand. I turned all the potatoes so they were skin-side down. That way, the white sides were able to brown and crisp. Pour any remaining oil over the wedges.
Sprinkle with cheese and spices. The measurement of ingredients doesn’t have to be exact. I just sprinkled them on without measuring. The potatoes could be seasoned with rosemary and parsley, if you prefer.
Bake at 375* for 45 minutes.
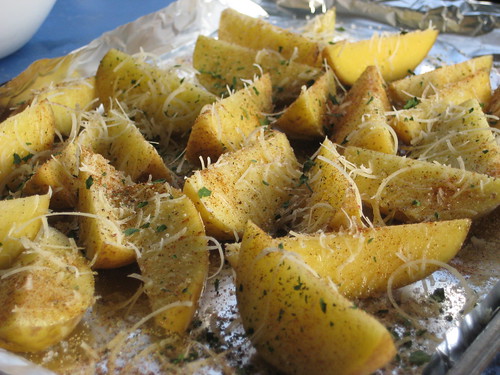
They were delicious. Crispy and yummy.
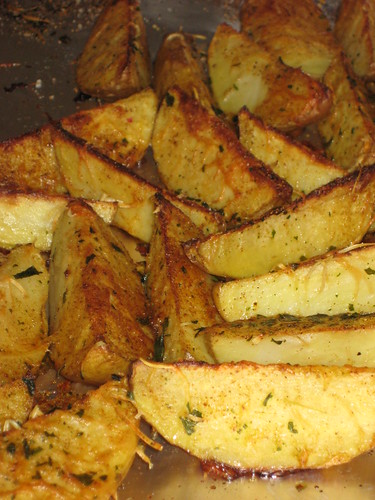
DD even thought they were good cold the next day when she ate some of the leftovers for a snack.
~~Rhonda
After seeing this onion recycling tutorial online, we decided to give it a try. When DD made tomato soup, she saved the root end of the onions and we planted them in a little pot. They have started to grow. I’ll have plenty for a salad, sandwich or garnish when they are larger. DH doesn’t eat onions, so a bag of them often isn’t used completely before they go bad. I’ve added a few more since this picture was taken.
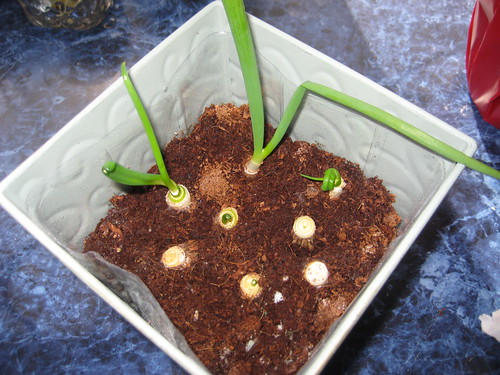
It has been fun to watch them grow, especially this time of year when my eyes are begging for green vegetation. DD checks the pot almost every day to see how much they’ve grown.
~~Rhonda
I tried a delicious new bread called Jo’s Rosemary Bread. It is written for a bread machine. No bread machine here, so I kneaded it in the KitchenAid and baked it in the oven.
The recipe calls for dry rosemary, but I used a teaspoon of finely chopped fresh rosemary, which was plenty for our taste.
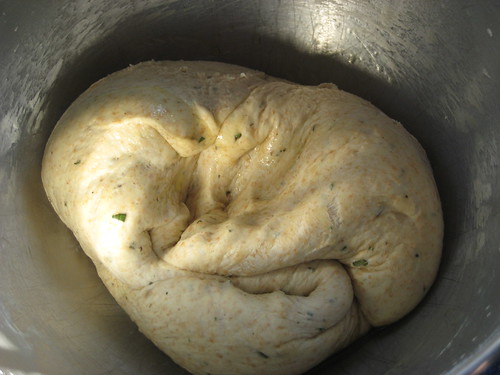
I decided to forgo the pan and formed the loaf, transferring it to rise on a cookie sheet lined with no-stick foil. Out of parchment paper.
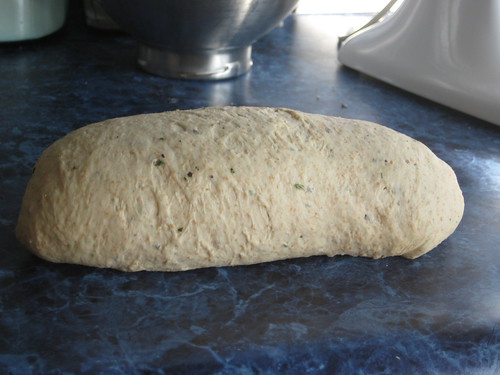
It baked at 375* for about 50 minutes.
DD thought it tasted just like the bread we get at the Macaroni Grill. We even put olive oil and freshly cracked black pepper on saucers for dipping our bread. 🙂
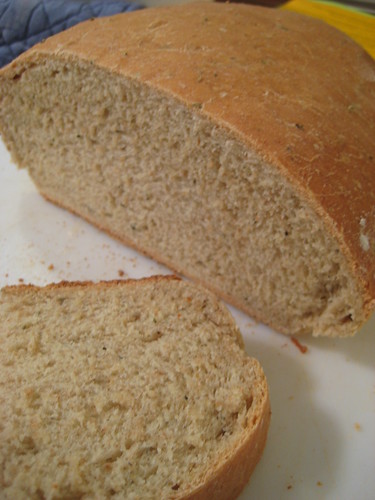
The recipe is definitely a keeper. ~~Rhonda
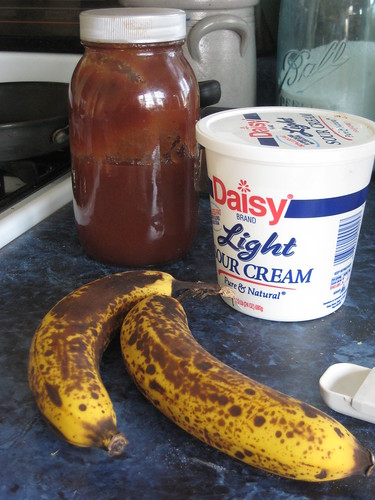
Recently I posted a recipe for chocolate chip banana muffins. I found a banana bread recipe from Martha Stewart while web surfing that was touted as being extra special, so I decided to give it a try because I had these bananas that were on their last legs.
Here’s the recipe with the slight changes I made. Makes about 18 muffins.
Preheat the oven to 350°F.
Line muffin tins with paper liners.
Cream the butter and sugar until light and fluffy.
Add the eggs, beating well.
Sift the dry ingredients together and combine with butter mixture, mixing well.
Mash the bananas, then add them, the sour cream, and vanilla and mix well.
Stir in the nuts and/or mini chocolate chips.
After mashing the bananas, I didn’t have quite the cup required, so I added some apple butter to make up the difference.
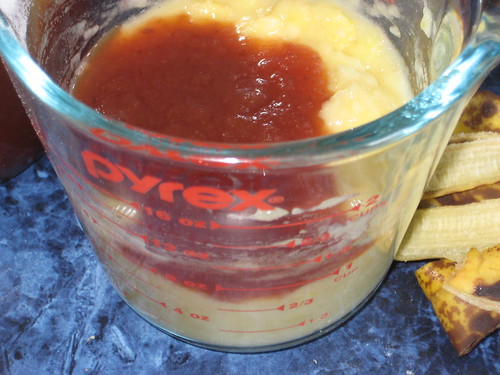
The batter looked like this when done.

Pour batter into muffin tins.
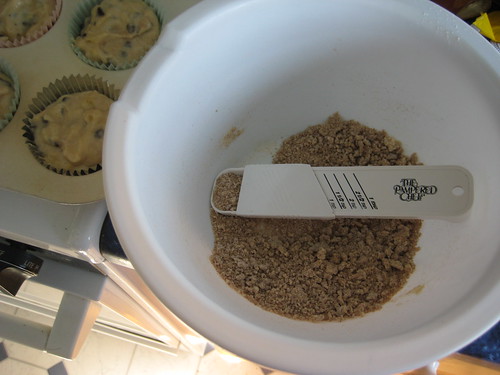
I took the crumb topping from this recipe for Banana Crumb Muffins.
Mix together the brown sugar, the flour and cinnamon. Cut in butter until mixture is crumbly. Sprinkle topping on muffins. I put about one and a half teaspoons on each muffin.
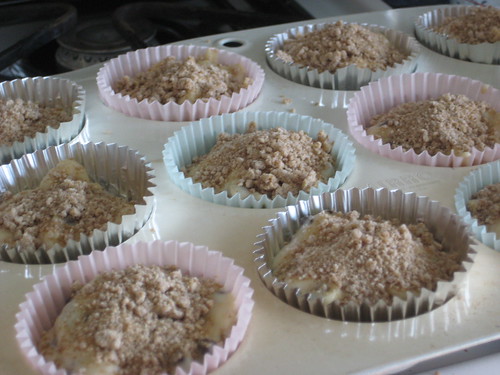
Bake 350* for 18-20 minutes.
Allow to cool for about 15 minutes before removing paper liners.
Delicious! This is now my favorite banana muffin recipe.

After a day or two, the flavor is enhanced by warming them in the microwave for 15 seconds or so.
~~Rhonda 🙂
Timing for supper was off a bit as DD had volleyball practice and DH got home sooner than I thought he would. So we waited to eat until after practice. I had planned to make pizza dough, but decided to use the last of the flatbread for pizzas, instead. These make quick and easy pizzas. DH said he prefers them over commercial pizzas (i.e., Dominoes, Caseys, Pizza Hut…the ones available in our town). And they are way cheaper to make than pizza is to order!
Preheat oven to 425*. Begin by placing the flatbread on a cookie sheet lined with no-stick foil. Or spray regular foil with vegetable spray. Or use a pizza stone. Or set them on parchment paper (I’m out…it’s on the grocery list). Bake the flatbread for four or five minutes. Prebaking the crust helps keep it crisp while baking the finished pizza.
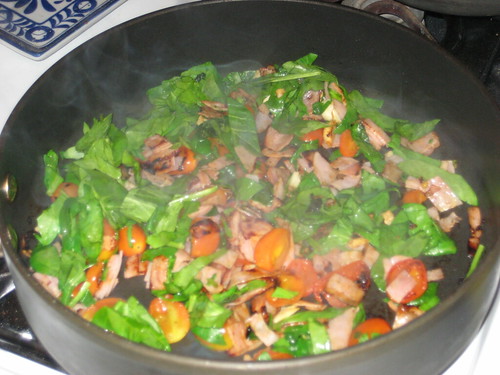
While the flatbread is baking, spray a pan with vegetable spray and saute any veggies or cooked meat you want on your pizza. I used what we had on hand: lean ham, grape tomatoes, and fresh spinach. I’ve used green onions, zucchini, yellow squash, mushrooms, bacon bits, and cooked hamburger before, to mention of few. Go with anything that sounds good to you. Sauteing the veggies/meat before baking the pizza keeps the baking time short.
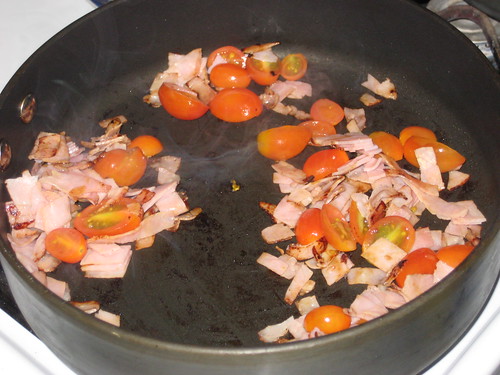
After the meat and tomatoes had seared a bit, I added 2 cloves of minced garlic and sauted for another minute or so. Then I added diced spinach leaves. Use about twice what you think you will need as it wilts by a lot while cooking. Toss the spinach with the other ingredients until well mixed, then remove from the heat. Set aside until needed.
Remove the flatbread from the oven and spread it with spaghetti or pizza sauce. I used leftover spaghetti sauce I had in the freezer. Sprinkle the sauce with some basil and oregano, if you like. I do, so I did.
Sprinkle the pizzas with some freshly grated Parmesan cheese. Spread the sauted toppings over the pizzas. DD likes cheese pizza, so I left one plain.
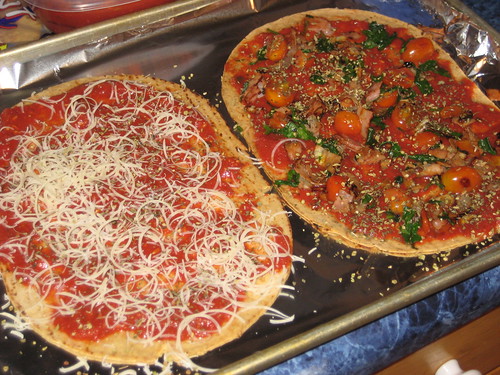
Top with shredded mozzarella or other cheeses of your choosing. Amount depends on your personal preferences.
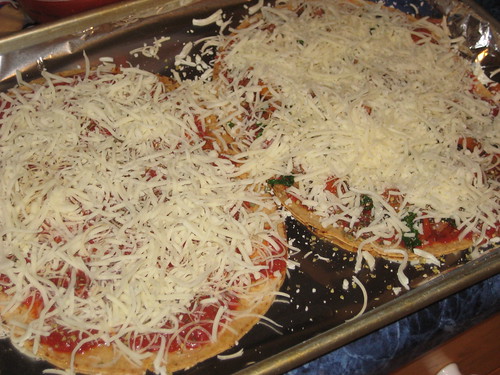
Bake at 425* for about 8 minutes, until cheese just begins to brown. Let cool slightly, cut and serve. I had four flatbreads so I made four pizzas. Worked out fine, though one pizza per person is plenty, unless you’re feeding growing boys.
Very good, quick and easy. And for those of you counting Weight Watcher points, this is an easy meal to customize for a low point lunch or supper. It’s a fun meal for children, too, as they can make their own versions with available ingredients. Flour tortillas can be used in place of flatbread.
One tip, do line the cookie sheet or the shredded cheese will be hard to clean off the pan.
~~Rhonda
