As in other crafting and artistic projects, each crafter has a personal style that marks the Putz (little glitter houses) he/she makes. The details and embellishments added to your own creations, as well as the level of craftsmanship you develop, will mark your work as yours.
Vintage Putz houses, as well as modern interpretations of those houses, come in many styles and degrees of detail. Some are on bases made of a single layer of cardboard. Some are on bases built up to as much as half an inch high. Some new houses are glued on boxes that can be opened or jars are used as bases. Some will have fences (with or without posts). Some will have a plain piece of cardboard as a fence, while others have fences punched or cut with holes and designs. Some fences run just along the front of the base, while others continue along the sides or all the way around the back of the building.
When crafting your own Putz houses, you are free to do as little or as much detail and embellishment as you like. I think fencing is a beautiful detail and enjoy adding it to my creations. Here’s how I make fencing, with a few tips I’ve learned along the way.
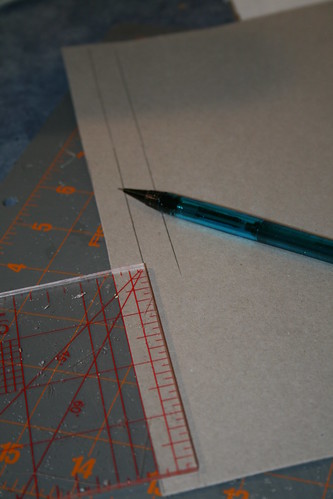
The fence height I use most often is 1/2″, so I mark the cardboard into 1/2″ strips. I do use other sizes, depending on the size of the Putz house and the desired size of the fence. When crafting your own fencing, keep proportion (scale) in mind. Think about how big the fence should be, relative to the size of the building.
A medium weight cardboard (chipboard) is a good place to start. Cereal/cracker box weight, at least. Maybe a little heavier. But too heavy and decorative scissors or punches won’t cut through it. The cardboard I used below came out of a package of bed linens. I haven’t used corrugated cardboard for fencing. The cut edge would have to be treated in some way to fill the holes. Perhaps they could be covered with hot glue and dusted with glitter.
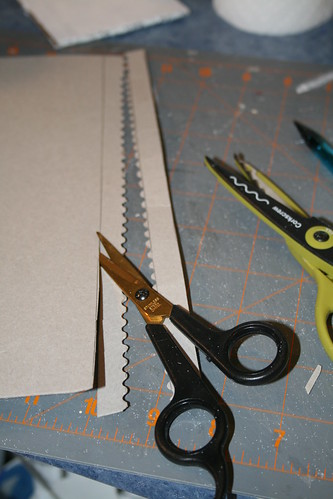
Decorative scissors can be used to make a fence pattern. I have a stash of these for scrapbooking and the wavy one (stamp border pattern) and the zigzag are both good candidates for fencing.
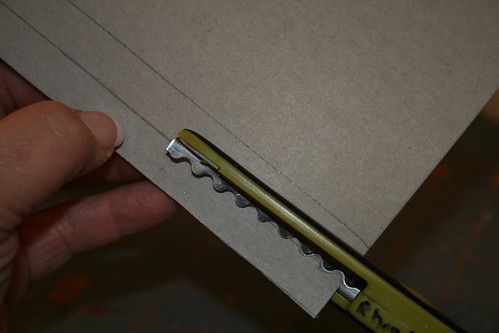
Two strips of decorative fencing can be made with one decorative cut down the middle and one straight cut to separate the fence from the rest of the cardboard piece.
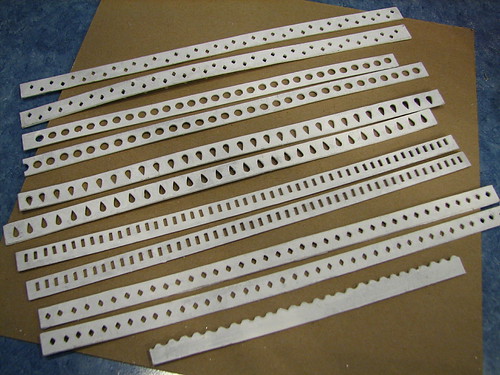
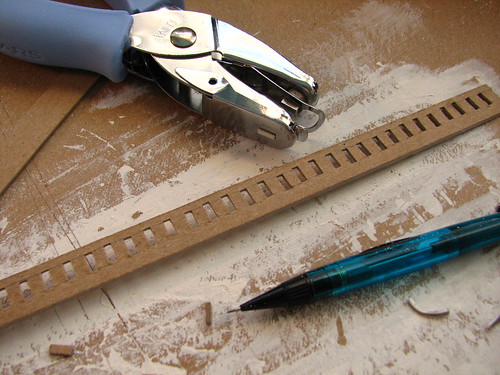
Hand-held punches can also be used to make decorative fencing. These fence strips (from top to bottom) were made with a diamond-shaped hand punch, a circle punch, tear drop punch, rectangular punch, diamond-shaped punch again, and a wavy scissor.
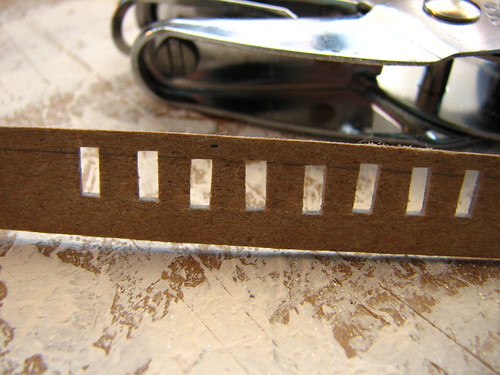
In this example, I used a rectangular-shaped punch to construct a picket fence.
To make this fence, use a 1/2″ strip of cardboard. Mark a guide line 1/8″ from one long edge of the cardboard strip.
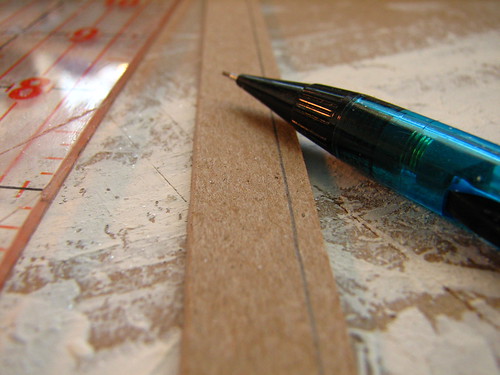
The spacing from the top of the fence (long side of the cardboard that is marked with the guide line) and the spacing between each hole should be as uniform as possible. Hold the punch so the bottom is toward you, allowing you to watch the position of the punch in relation to the line on the cardboard. Choose a position for the side of the punch in relation to the last punched hole and use that as a guide also, as each hole is punched. Keep the hand-held punch as vertical as possible. The first few times I used this particular punch, the finished holes had a distinct lean to the right. It may take a little practice and a little fudging to get it just right.
If you want the punched holes centered on the strip, measure the size of hole your punch makes. Calculate from that, and the width of your cardboard strip, to decide where the guideline should be placed.
When the strip is finished, give it at least a base coat of paint at this point. A toothpick is a good tool for cleaning paint out of the punched holes. Make sure all the edges get a coat of paint, but do clean out excess paint. Paint left in the punched holes makes those little holes even smaller and also blurs the sharpness of the design.
I like to paint and glitter the fencing before attaching it to the base. That’s a personal call. It may be easier for others to completely assemble and glue the fencing (and posts, if used) to the base before painting/glittering. Do what seems most comfortable to you.
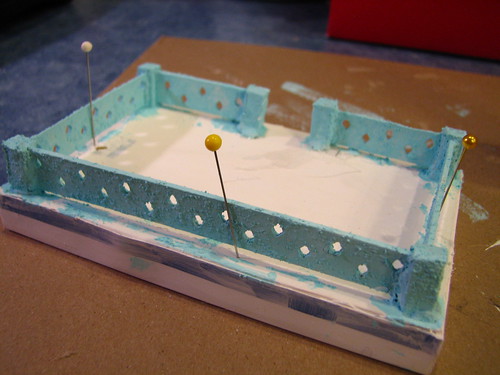
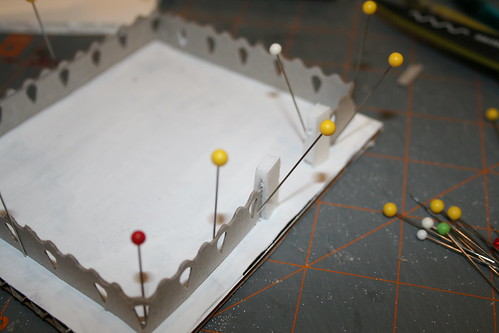
If you paint the fence after it is glued to the base, the cardboard will absorb moisture from the paint, and may warp or bow. If this happens, don’t worry. Just place a few pins to hold the fence in a straight line. With the pins in place, the cardboard will dry straight and the fence will look great. If the pins have been placed into wet paint, twist them as they are removed rather than pulling them straight out. If pulled straight out, they may pull up a chunk of paint that will require a touch up.
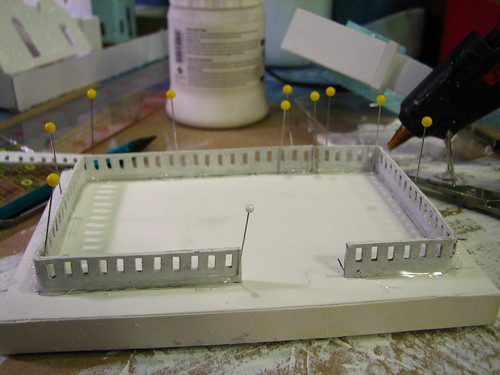
Fencing can be glued to the base without posts. Consider where the entrance should be. This particular base was made for a church with a door set to the right side of the building, so I made the entrance in the fence to the right side of the base.

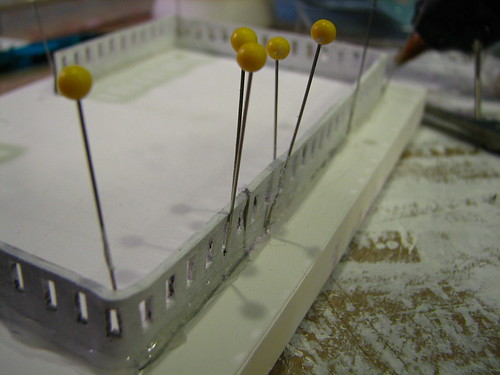
Pinning the fence helps keep it in place while the glue dries. You can use a glue gun or white glue for this step.
This fence was glued with a glue gun. If you look closely where the pins are, you can see that the fence is being extended with a new piece of fencing. The pins hold the two ends together so they will be aligned when the glue sets. Just twist the pins to pull them out later.
This fence was glued with white glue. I glob it on. Those piles of glue are future snow drifts! The posts in this picture are made from foam core. Not my favorite. I found some square wooden dowels at the hardware store that would make good fence posts. I’ll try them sometime soon.
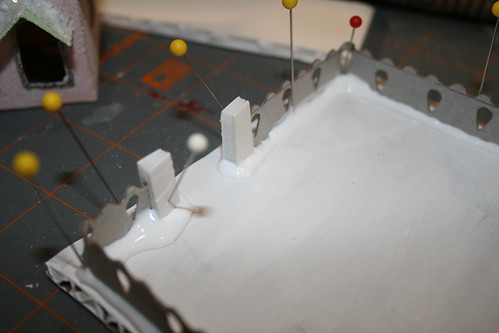
Hot glue sets up quickly. White glue has a longer dry time, so it leaves some wiggle room for moving things around till you like it. As I said, lumps and clumps of dried glue can be disguised as drifts of snow when the fence is painted, so don’t worry about leaving lumpy glue.
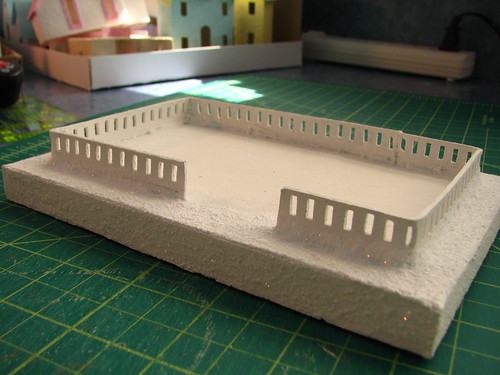
This is a completed base, with fencing and posts, painted and glittered. Ready for the addition of a Putz house or church and any other embellishments you choose to use.
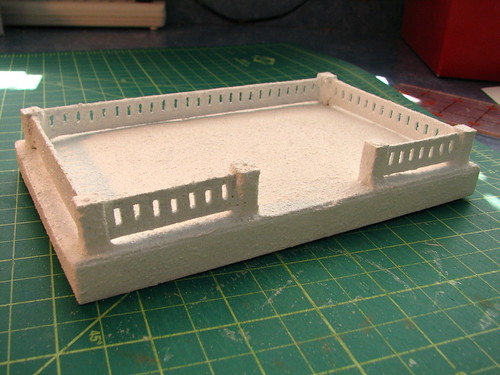
Here’s a fence I made using decorative scissors to cut the top and a punch to add a design. This fence is on a single layer of cardboard and has two posts at the entrance.
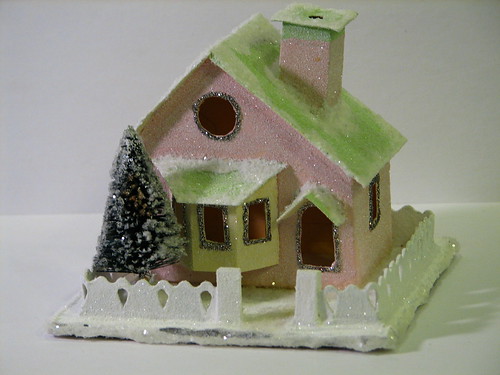
This is the finished house on the base shown above. I used the pattern for the Bay Window House, on the Little Glitter House web site. I modified the bay window just a bit. The web site has patterns for other houses and a lot of helpful information about the hobby of constructing little glitter houses.
I was planning to include making fence posts in this tutorial, but it’s getting too long. Follow the link below for the tutorial for making posts.
If you are making Putz houses, I’d love to see what you’re doing.
Here are links to some of my other tutorials for making Putz houses.
Making Fence Posts for Putz Houses
Making Putz house ornaments from Christmas cards
If you would like to see more of my Putz houses, as well as Christmas ornaments I have made from upcycled holiday cards, please visit my Etsy store.
~~Rhonda
8 Comments
These are wonderful instructions, Rhonda. I’ve been making putzes only for about 4 months, and I have been somewhat intimidated by fancy fences, but you have made it simple. When I master my camera (!), I’ll send photos.
Awesome instructions Rhonda! I absolutely LOVE all of your little Putz houses!! Now, I wanna play with glitter houses!!!! Another thing to my long list of crafts I want to try! LOL!
I just started making Putz houses and these tutorials have been extremely helpful. Your houses are gorgeous! I was wondering what size hole punch you use for the rectangle punched fence? Is it smaller than 1/4 inch punch? Thanks.
Mona, that punch was the regular hole punch, most often used for making holes in paper to put into a binder. But any size can be used to make different designs. I would love to see pictures of your finished houses, if you would like to share. Please ask if you have any questions at all.
Hi Rhonda – LOVE your instructions – so helpful!! I wanted to ask if you use some sort of texturing while painting? The pic above of the blue fence that has been painted looks like is has something in the paint to make it rough? Can you tell me how you do this? It really gives a better look than just paint and glitter I think!
Diana
Diana, I mix the paint half and half with white glue and then add a little clean fine sand to the paint. That adds a great texture that reminds me of vintage Putz houses. We bought a bag of playground sand one time to use in mason jars for candles. I put some of that in a quart jar to keep in the craft room and have been using it ever since. I hope that helps! ~~Rhonda
I have just started in making puts houses I love it made my first one but what I wanted to know is how to make a pick it Fence any help would be great thanks k you
Bonnie, I have not made a picket fence before. But after you asked, I have been pondering how to do that. It would depend, in part, on how tall you would like your fence to be. Most of mine are only 1/2″ tall. That would be a very small picket fence, but I’ve been jotting down some ideas and will try to work something out, once Independence Day is over.
Do you know how tall you would like to make your fence? If you are making larger Putz houses than mine, the fence could be taller, of course.
This has my mind working hard to come up with a solution. 🙂
~~Rhonda
4 Trackbacks
[…] Making Fences for Putz Houses […]
[…] Making Fences for Putz Houses […]
[…] You can read the tutorial here: making fences for putz houses […]
[…] Making fences for Putz houses […]