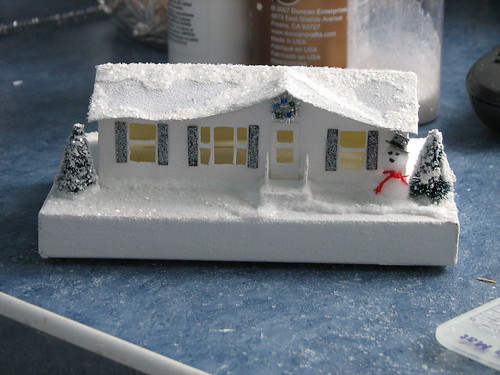
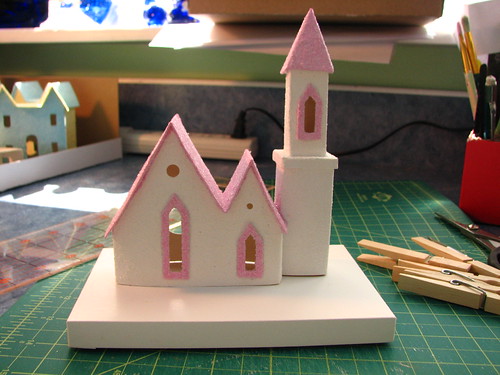
I have had a few questions about making bases for the little glitter houses, so I decided to post a tutorial explaining how I do it. Here is an example of a house I made on a base. This is actually a model of the house my son and DDIL lived in before they moved. At the time, I didn’t know they’d be moving the following year, so am glad I made this house and gave it to my DDIL for Christmas.
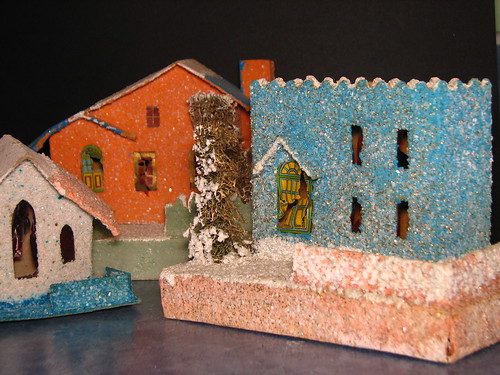
Here are three vintage houses that the above DDIL gave me for Christmas one year. You can see that two of them have bases that are about 1/2″ tall. The white house has a flat piece of cardboard with a very simple fence as its base.
The bases for my little glitter houses are made from thin, not corrugated, cardboard. I use poster board, cardboard from cracker/cereal boxes, cardboard sheets from packaging (like those that sometimes come in new shirts or bed linens), greeting cards, etc., to make boxes for the bases.

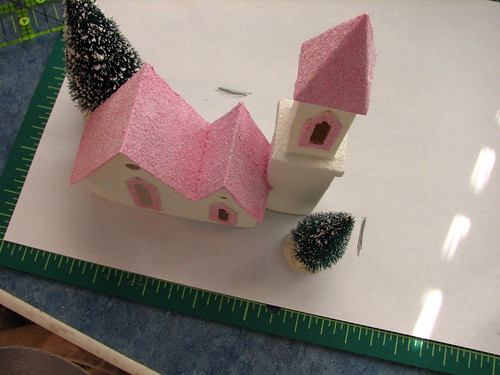
Before you start, decide how large your base should be. I find 4×6 to be a good size for many of the houses I make, but if a Putz house is very small or extra large, the base may need to be adjusted in size to fit. An easy way to do this is to set the building on a piece of paper, arranging the trees and embellishments you want to use. Keep in mind that you may want to put a fence around part or all of the base.
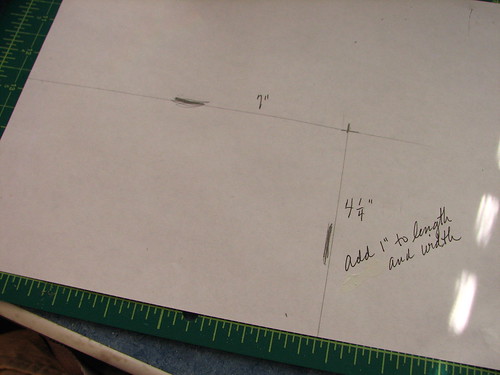
Mark the size for the finished base. Remove the building and the embellishments. Measure the size of the base. Add 1″ to the length and to the width for the 1/2″ sides of the base. On this particular base, the length measured 6 7/8″. I rounded up to 7″.
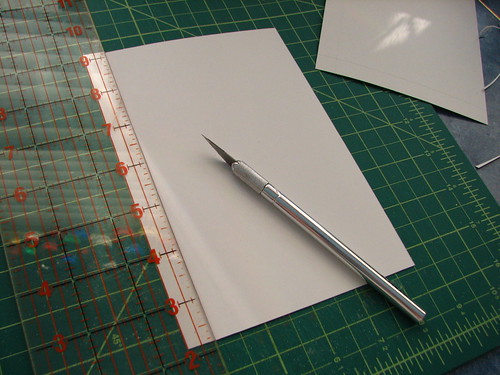
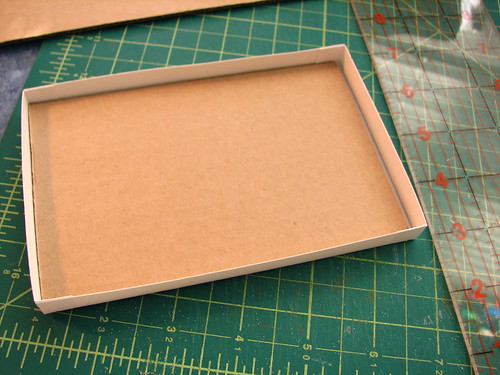
Cut two pieces of cardboard the size of the finished base, plus an additional one inch on the length and the width of each piece. Trim about 1/32 of an inch off one long side and one short side of one of the pieces. This will be the bottom of the box that will make up the base. The thicker the cardboard, the larger this sliver needs to be. Cutting the bottom of the box a bit smaller insures the top of the box will fit over the bottom.

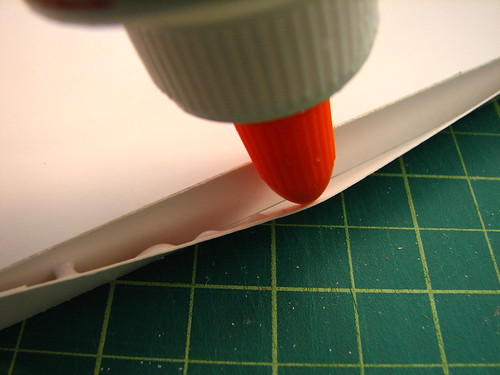
Score a line 1/2″ from the edge of each side of both pieces of cardboard. I use the back of my X-Acto knife to do the scoring, but you can use anything you have on hand that will do the job.
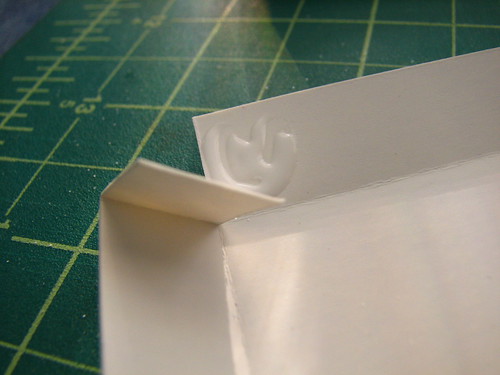
When the scoring is done, cut into the cardboard pieces on the long sides, just to the other scoring line. This creates flaps for the box.
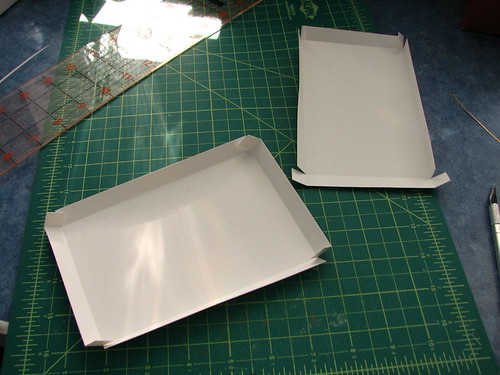
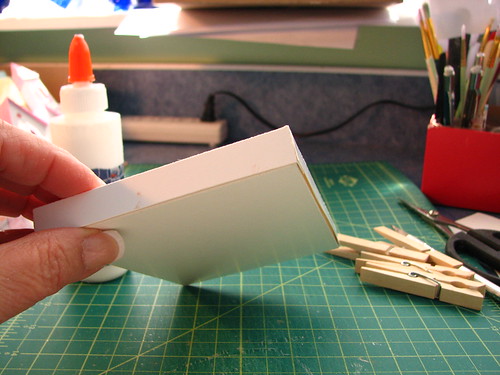
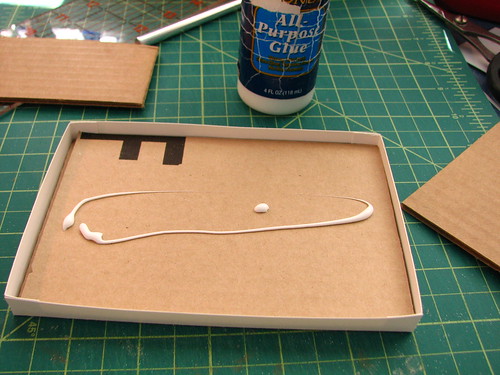
Fold along all the scoring lines. Place a little white glue on the inside of the box, where the flap will rest.
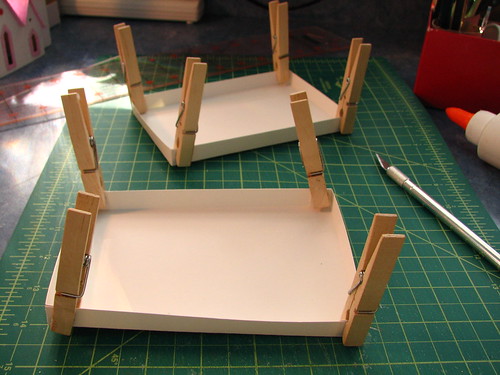
Clothespins make great clamps for holding the flaps down until the glue dries.
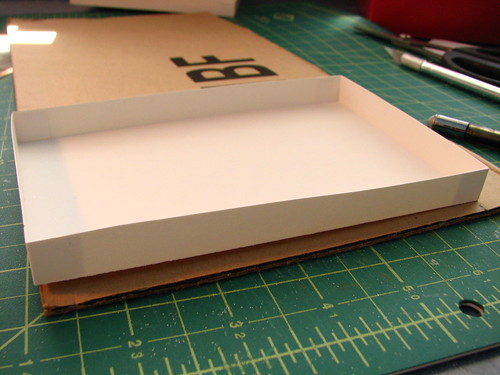
When the glue is dry, remove the clothespins and put the top and bottom together to make a box. They should fit snugly.

I fill the base with corrugated cardboard from shipping boxes to make it strong and to give the house more stability. Use the bottom of the box to determine the size of the cardboard fillers. Measure the cardboard just a bit smaller than the box bottom.
In this example, I cut the length all at one time, then cut the width.
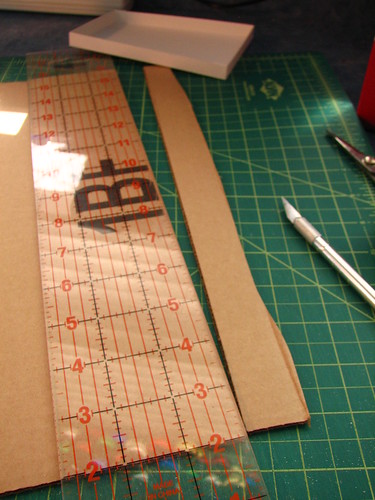
After one piece of fill cardboard is cut, place it in the box to see if adjustments need to be made.
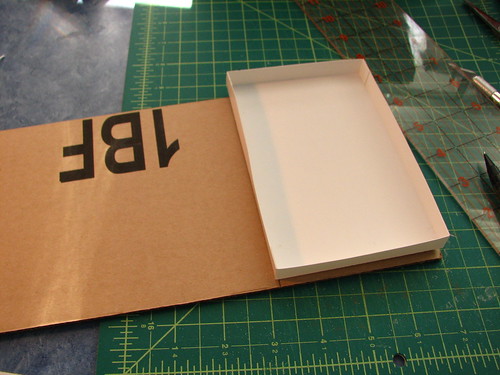
Layer fill cardboard until it comes to the top of the sides. For a box with 1/2″ sides, I find four pieces cut from a box like an amazon.com shipping box to be just the right height to fill the base. A little glue between each layer doesn’t hurt. If the cardboard is a bit short in one direction, alternate the pieces to meet one end, then the other, as they are layered.
Filled with pieces cut from corrugated cardboard, the base is strong and won’t sag under the weight of a house and embellishments.
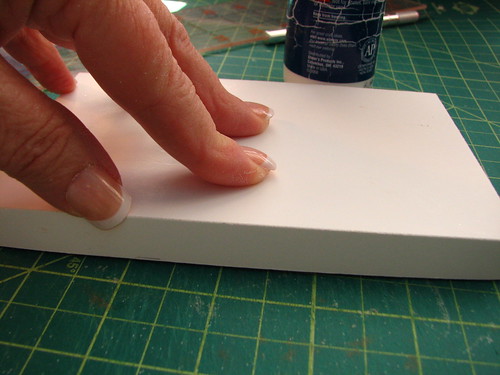
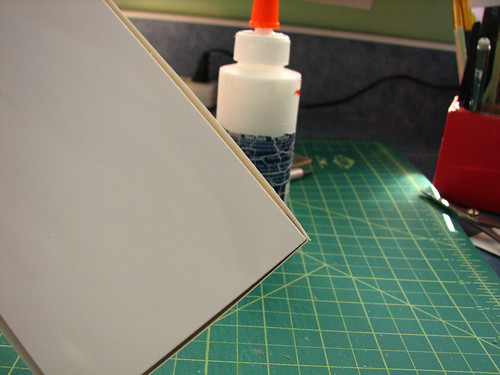
There will be a gap between the sides of the top of the box and the bottom. Draw a line of glue in there and hold the side tight until the glue holds it without gaping. If you like, you can bind the box with large rubber bands to hold everything together until dry.
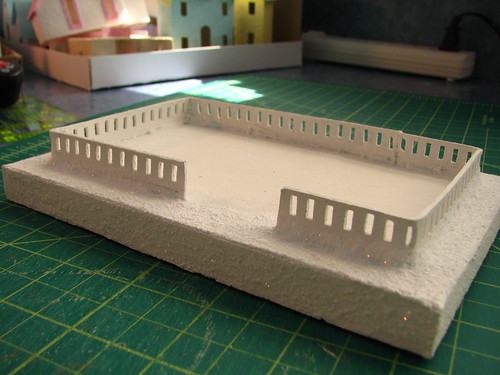
Now it’s ready for painting and glittering. Add a fence, if you like.
To make this fence, I used a hand-held, diamond-shaped punch.
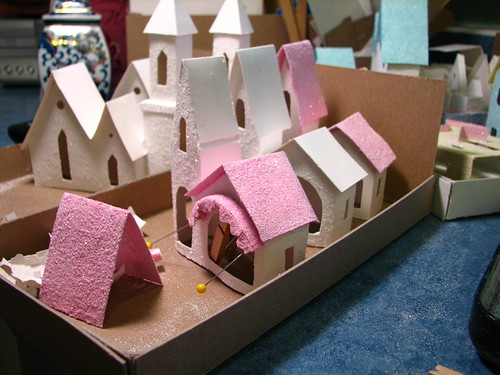
If you have some houses already made, you can try different ones until you find one that seems just right.
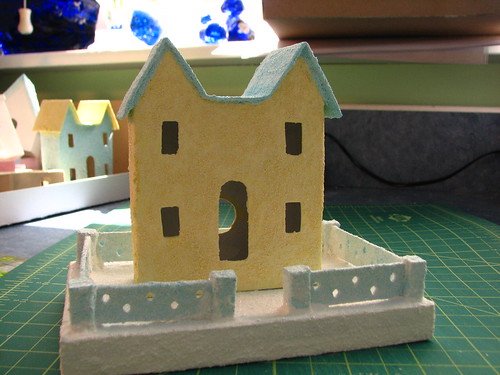
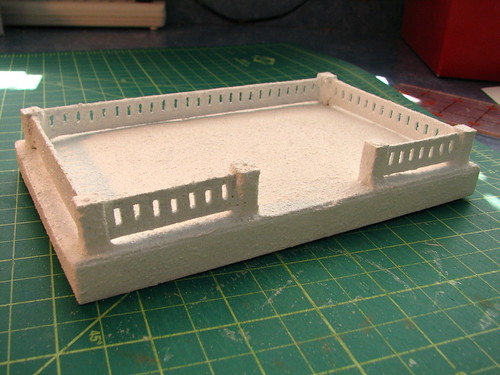
To make this fence with no posts, I used a hand-held, rectangular-shaped punch. I cut the cardboard 1/2″ wide, then drew a pencil line 1/8″ from the edge as a guide for placing the punch. Next time, I’m using thinner cardboard. This was hard to punch.
This is the same style fence, but with posts.
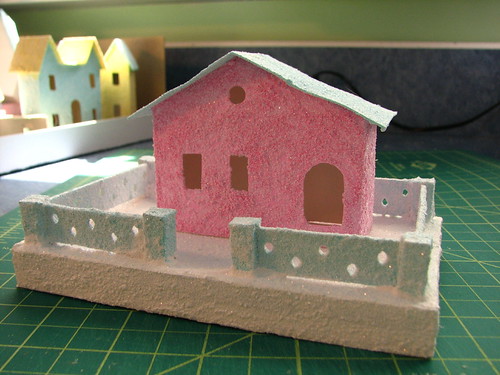
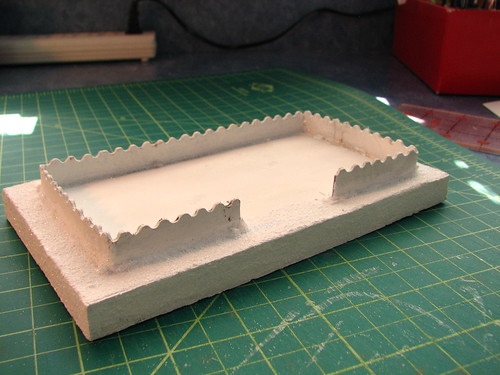
This fence was cut from thin cardboard, using a wavy patterned scissor. I cut the cardboard 1/2″ wide, then trimmed the edge. Worked great.
I have a lot of churches and houses under construction. I’ll be busy making bases for a long time!
Fencing and other details are the stuff of other posts. I’ll try to get to that soon.
If you have any questions about constructing bases for your Putz or little glitter houses, please ask. I’m happy to help if I can.
Here are links to some of my other tutorials for making Putz houses.
Making fence posts for Putz houses
Making Putz house ornaments from Christmas cards
Visit my Etsy store to see more Putz houses and other Christmas ornaments I have made. ChristmasNotebook
~~Rhonda
24 Comments
Your houses are so beautiful I love them. I have started making my our not as fancy as your. I have a stack needing to be cut out. You can see mine here http://hollydaycloset.blogspot.com/2012/01/cereal-box-to-houses.html
Holly
Holly, thanks for commenting! I checked out your houses. Love the happy colors! You did a great job! ~~Rhonda
Rhonda! They are all so adorable!!! I see that you are making LOTS of Putz houses now. Are they all for Christmas decor at your house, or are you doing other things with them as well? I’ve never seen a Putz house in person, what are the “normal” sizes of the houses. From the sounds of it, they are pretty small??
Kathy, yes, I am making a lot of them right now. I’m hoping to sell them on etsy.com. We shall see how that works out. 🙂
Vintage Putz come in all sizes, but the most popular sizes are 3-4 inches tall and 4-5 inches wide. Thereabouts. Of course, new ones are made in all sizes! Depends on what the creator’s personal style is. Currently, I’m making houses that are 1″ to 1 1/2″ deep in the above average heights and widths. Many of the patterns I’ve made are based on pictures of vintage Putz houses.
WOW! They’re pretty tiny!!! The look so much bigger in the pictures! I’m sure you will do well on Etsy! They are too cute!!!
You’re houses are adorable! Wouldn’t it be easier to use foam core for the bases? A lot less material and strong enough to support the weight of the houses and glues. You could glue a paper strip to cover the edge of the foam core, but still would take almost no time to build.
My mom threw away all of our litle houses when she found out they were made with asbestos. I am now inspired to make some replacements. The lights we use now are cooler and even have batteries, so they can go anywhere independently. Thanks for the details!!
(I didn’t know they had such a funny name though, I guess I’m the putz.)
Sally, I hope you will give it a try! I would love to see the finished product! ~~Rhonda
Taka, I would use foam core for the bases instead of cardboard, if it were free. But I hate to buy something when free materials are at hand. But, yes, it certainly would work, if the edges could be covered. ~~Rhonda
where can I buy cardboard to make houses
Faye, I don’t know what stores are available around you, but I buy the white poster board at Wal-Mart. It is not much heavier in weight than the cardboard that makes a cereal box. Any store that sells office or art supplies should have poster board.
Cereal and cracker boxes, etc., are good (and free) sources for the cardboard needed to make bases and houses. The printed side can be painted if you don’t want the product information to show.
I do prefer the white poster board, though. It gives a clean surface and comes in sizes large enough that an entire pattern can be cut from one piece.
I hope that helps! ~~Rhonda
Is there any place you can take a class in making these houses?
Is there a place on the www you can look to for decorating ideas? My frustration is in finding the trees, glitter, etc. for decorating.
Debbie, I do not know where you could take a class for making little glitter houses. I have never heard of one. The houses are very popular, though, so there may be some classes out there.
For decorating ideas, I just google “putz houses” or “little glitter houses” and save the pictures that inspire me. Here is my putz house Pinterest board. Maybe you will find some ideas you like there.
http://www.pinterest.com/reac/putz-little-glitter-houses/
And this board has links to a lot of online tutorials.
http://www.pinterest.com/reac/putz-little-glitter-house-tutorials/
This online site has miniature craft items (like deer and bottle brush trees) that are useful for embellishing putz houses.
http://factorydirectcraft.com/index.php
This one has miniature wreaths, though I make my own with pipecleaners.
http://www.harveyshobbyhut.com/shop/category.aspx?catid=44
I should put this info into a post!
I hope that helps! ~~Rhonda
Hi Rhonda, I’m on a big glitter house kick! I cannot get enough of them! I wanted to tell you how much I enjoy looking at yours, but especially wanted to comment on your tutorials. They are fantastic! I’ve looked at Pinterest pages many times, only to find no directions, even though it will say they are there. I’ve looked at many videos of all kinds of craft stuff, only to be disappointed by the lack of technical details, sometimes one would need. So thank you for all the inspiration, and the fantastic tutorials and spot on directions with pictures! I can view all the info., and know exactly what to do, for a home made glitter house. All the best to you, and I hope you continue to glitter your world, like I am. Thanks again!
I have admired these little houses for years. I’ve finally taken a leap to try my hand at it. So far so good and I’m starting to understand why the price is so high to purchase one. A lot of time and marterials are required.
Let me comment in reference to a comment in this discussion. I thought it was me but I see someone else cannot access instructions on Pinterest when it’s clearly stated that instructions are available on the Pinterest site.
Can someone shed light on how to access?
Cassandra, thank you for posting your comment. I would guess that Pinterest pictures that do not lead to the instructions promised don’t have the correct link associated with the posted picture. Another reason would be that the blog site is no longer available or the link is broken for some other reason.
When I find that to be the case, I do a google search on the item I’m looking for, using the wording (if any) on the Pinterest post that I’m wanting more information about. I can often find the information on the original site. I then save the post from that website to my own Pinterest board, rather than saving the link from Pinterest itself. It is helpful, if a viable link is found, to leave a copy of that link in the comments section of the Pinterest post you hoped would lead you to the correct website. Others looking for the same info will be grateful!
I hope you enjoy your Putz creations! I would love to hear how you’re doing! ~~Rhonda
Rhonda,
Sorry mine is more a question. You have a great tutorial on the bases for putz houses. What would be the difference between mmaking a base or using a small gift box left over from Christmas gifts ( as long as they are the correct size)? Also, what do you use to cover your base? Its very hard to tell by the picture. Is it glitter and glued or is it snow tex? This is the part I can’t figure out. Snow Tex is expensive so if there is a cheaper alternative I would appreciate advice. I’m very into these Putz houses too. I’ve been buying mine but would like to design my own.
Tansy, thank you for your comment and questions! I am always happy to help others with this hobby. My bases are painted and glittered. I use Aleene’s True Snow for the snow around the building, the fence, on the roof, or to embellish trees. Here’s a tutorial about making Putz bases from greeting cards that has more information on how they are covered with paint and glitter.
http://christmasnotebook.com/2018/04/22/tutorial-making-putz-bases-from-greeting-cards/
Anything is a candidate as a base. For me personally, it’s my “thing” to make the bases from greeting cards so there is a picture on the bottom of the Putz. A little surprise when you tilt the Putz and look at the bottom. But anything can be a base. A flat piece of cardboard, foam-core board, gift boxes, jars, etc. Be creative! Boxes usually need some kind of support inside to hold the weight of the Putz house, light though it may be.
I hope you will come to love the Putz hobby and I look forward to seeing your creations! ~~Rhonda 🙂
Rhonda
Rhonda
Thank you so much. That tutorial you suggested answered my questions. I hope to get as good at them as you are. Mine are very different. I’ll have to send you some photos. Where do I send them to? Thank you so much for your help.
I was wondering if it’s okay to use foam board for the base. Thanks for any input
Sue, anything that works for you can be used as a base. Foam core would work. The only concern I would have is the edge. It would look best covered or painted. I don’t know how well it would take paint. Give it a try! Many Putz houses have a flat board as a base. A thick chipboard would work. Craft plywood, 1/8″ thick, is available at craft stores or online, such as on amazon. It would also make a sturdy base.
Hi
How do you make the brown sidewalk? I am trying to get more specific how to do on base
Margaret, I am not sure which brown sidewalk you are referring to, but here are two ways I make sidewalks. If this isn’t the answer you are looking for, just ask!
Sometimes I just paint the sidewalk on the base, after I know where the house will be. I use brown acrylic craft paint mixed with a little clean, playground sand for texture. I paint it on the base and then, while it is still wet, I glitter it with fine clear glitter, though you could certainly use brown glitter if you prefer.
The other way I make a sidewalk is to cut a piece of posterboard to the shape I want the sidewalk to be, paint it as above and glitter it while wet. After it dries, I glue it to the base.
I hope this helps! Thank you for asking! ~~Rhonda