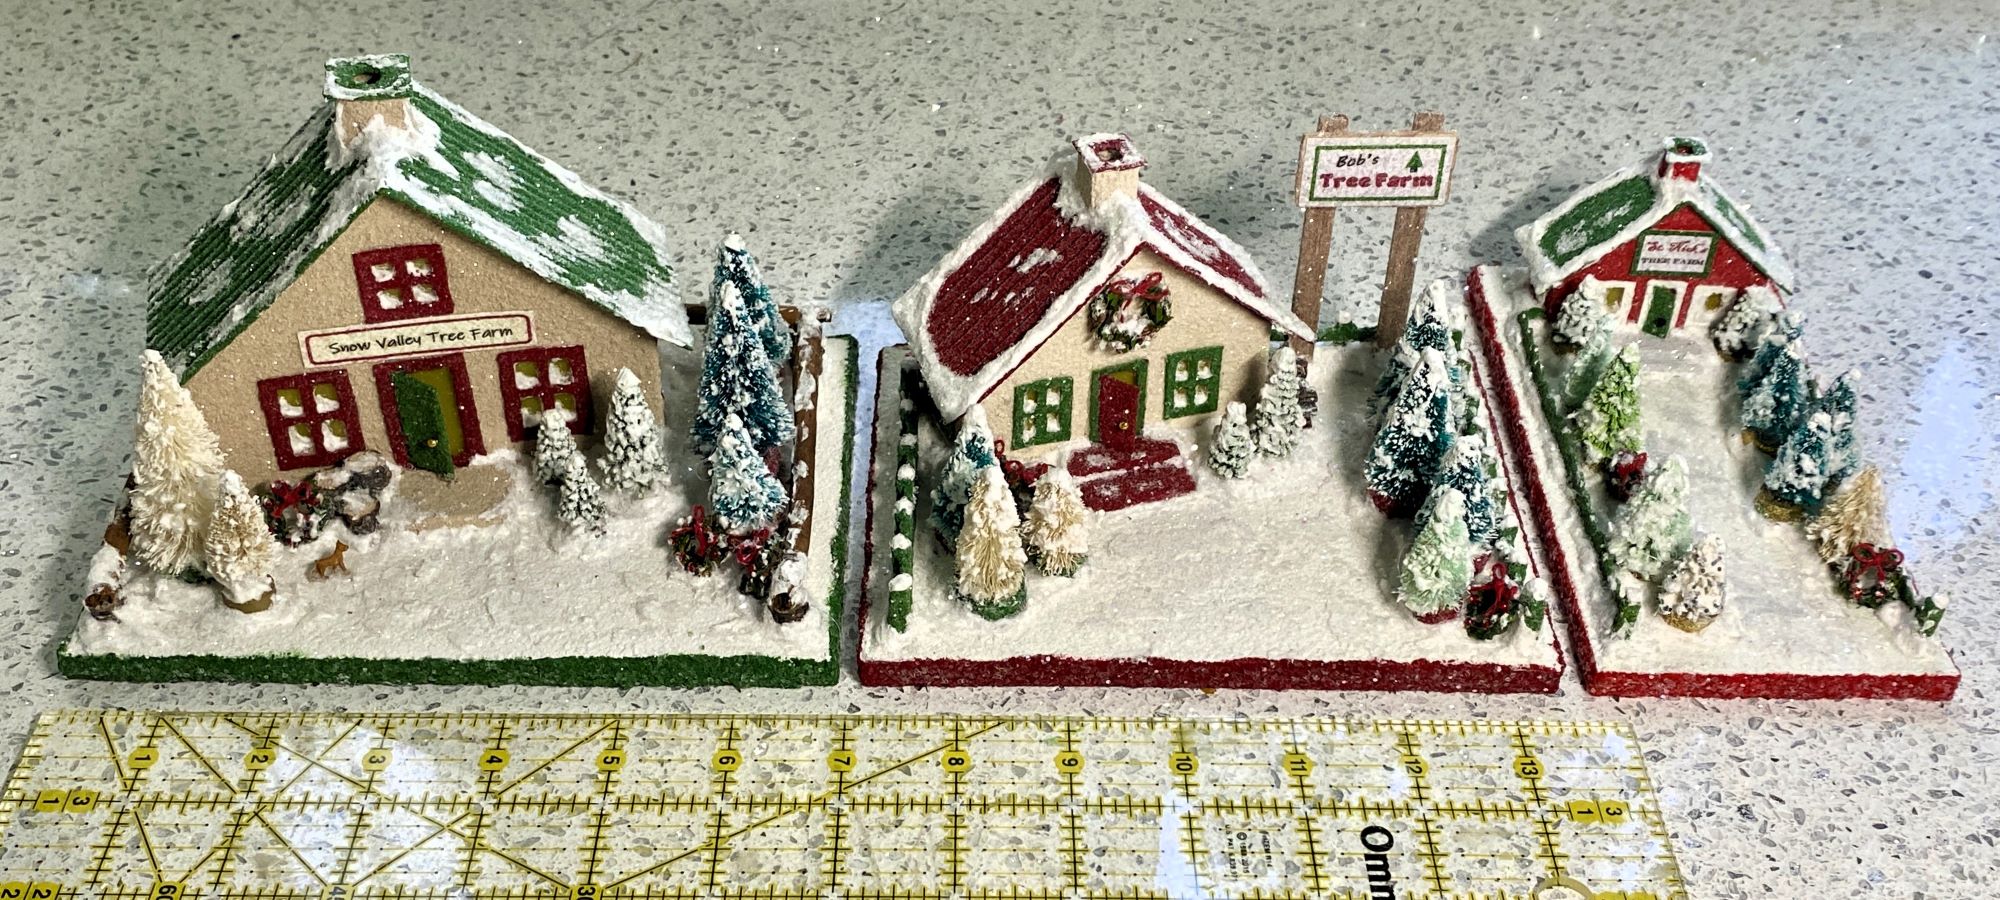
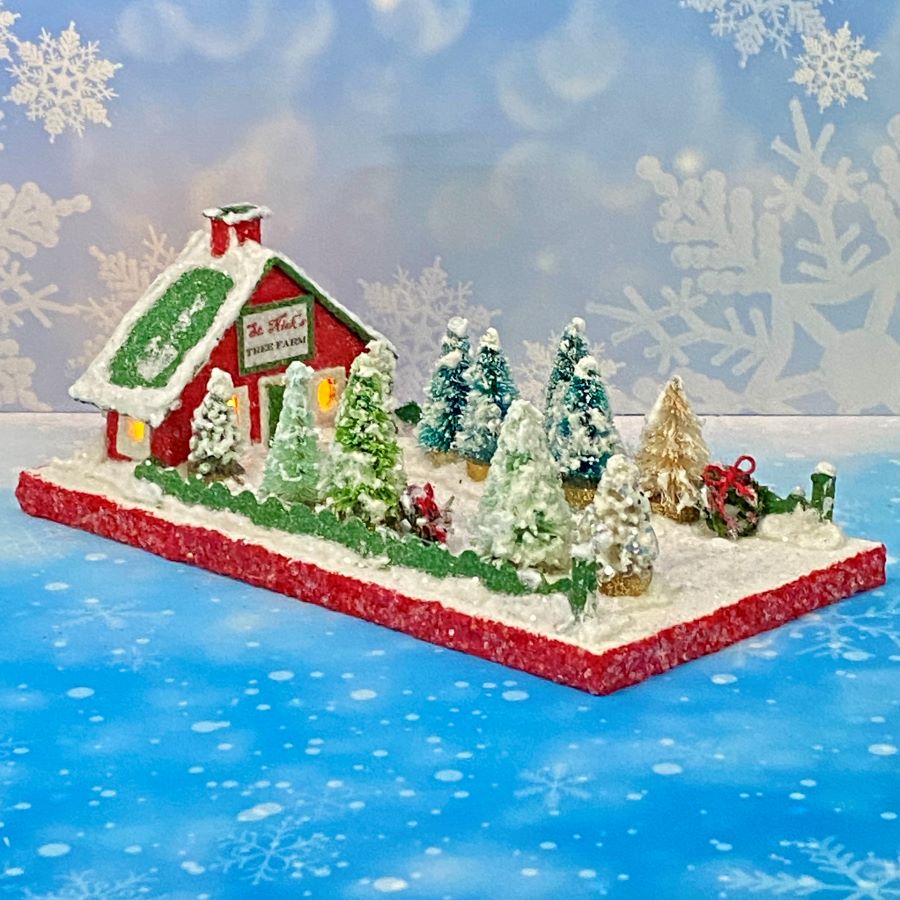
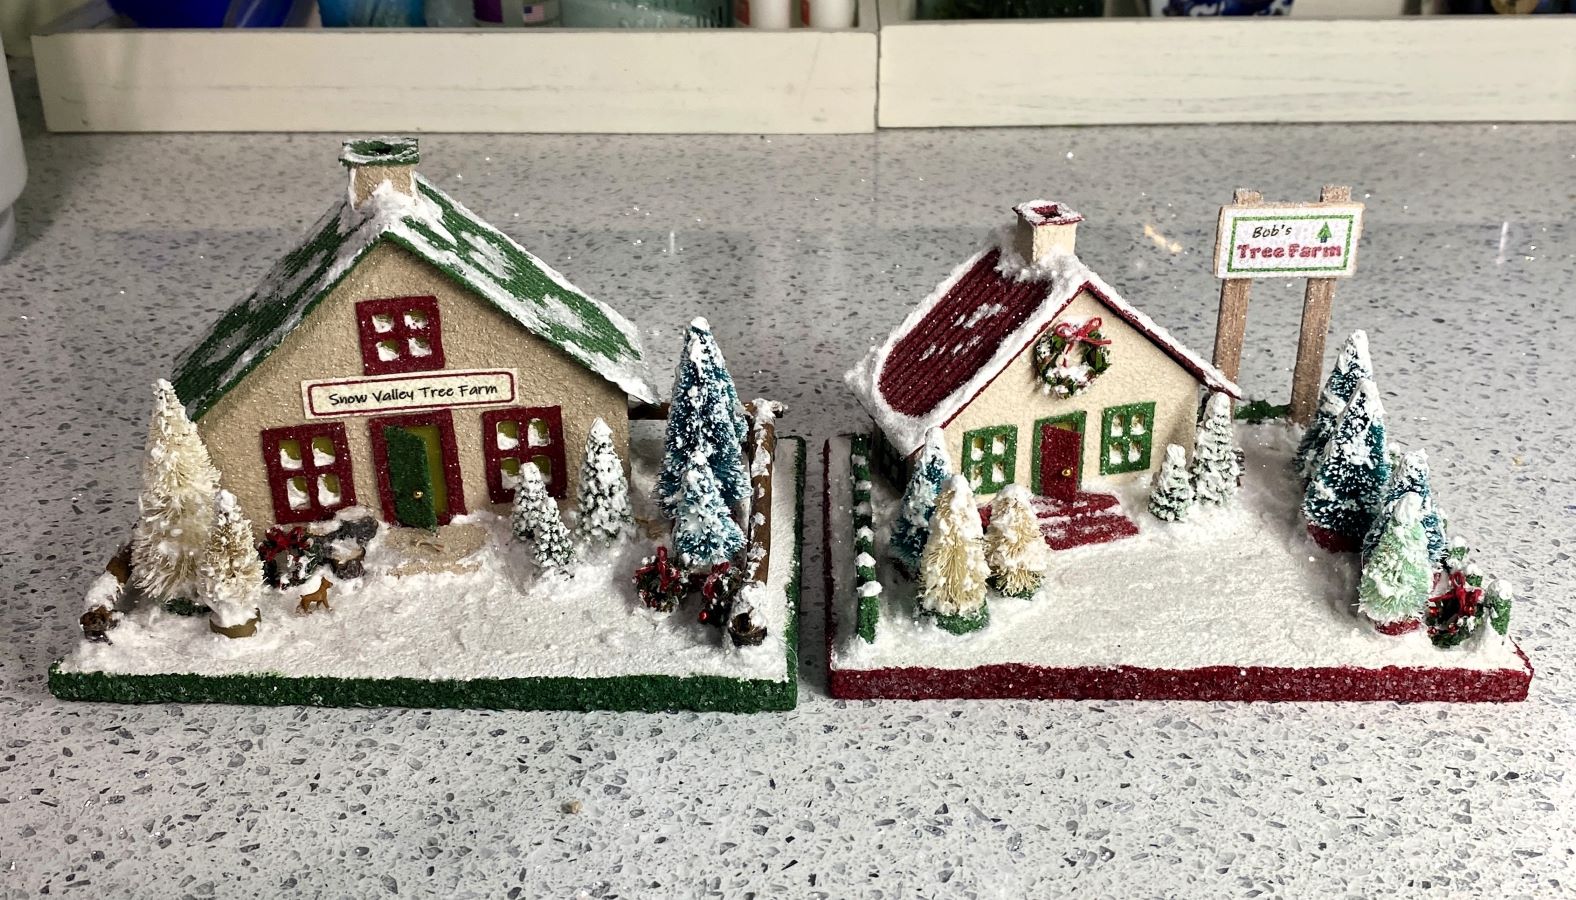
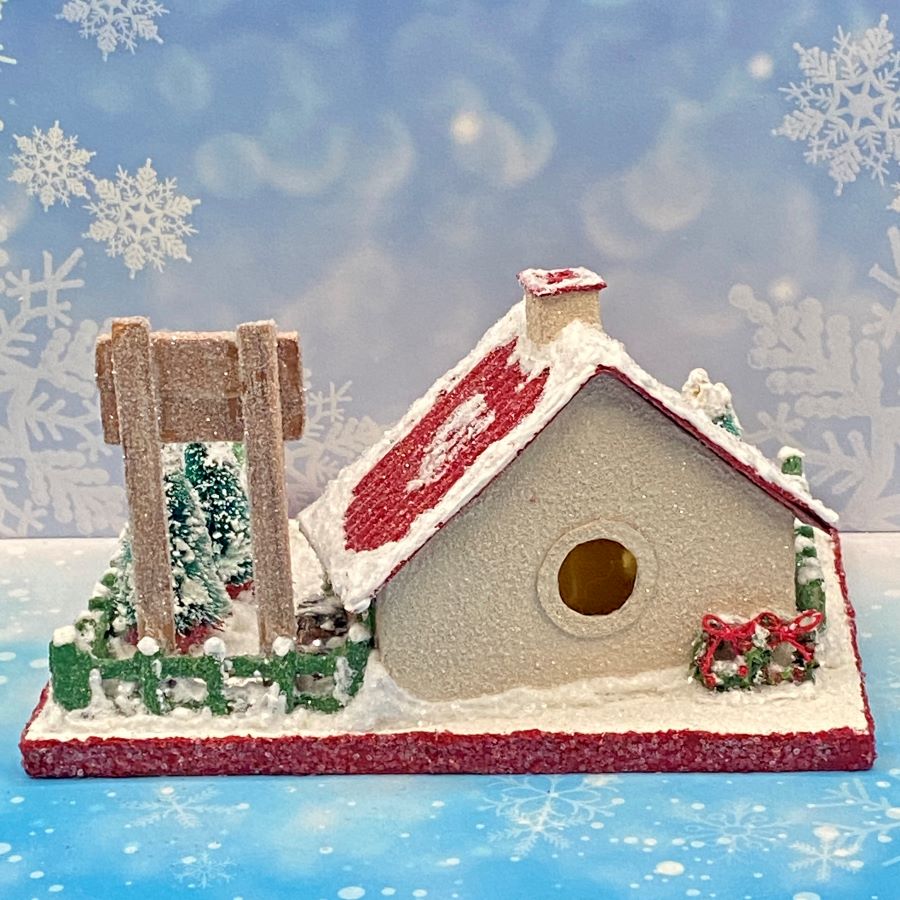
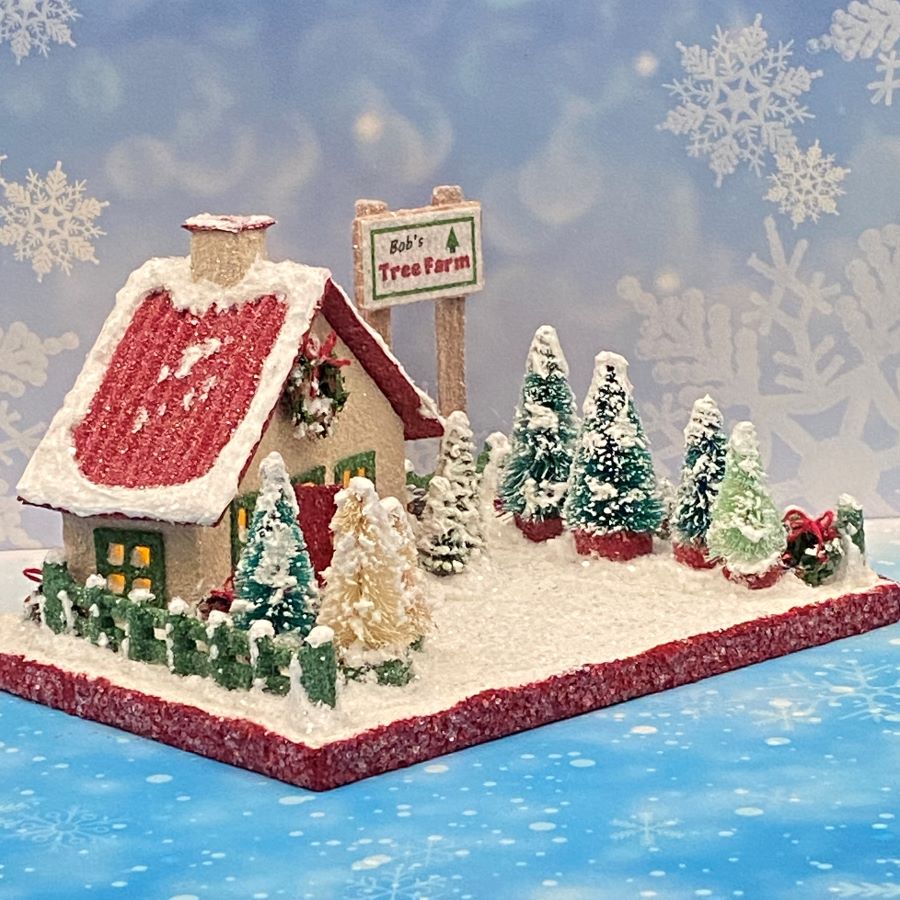
This is the third in a series of tree farms, made in the three sizes I work with. ORIGINAL is 4-6″ tall. MINI is 2-4″ tall and TINY MINI is 1-2″ tall. These three putz were made from the same pattern. The ORIGINAL size building on the left is 4 1/4″ tall. The MINI one in the middle is 3 1/4″ tall. The TINY MINI one on the right is 2″ tall.
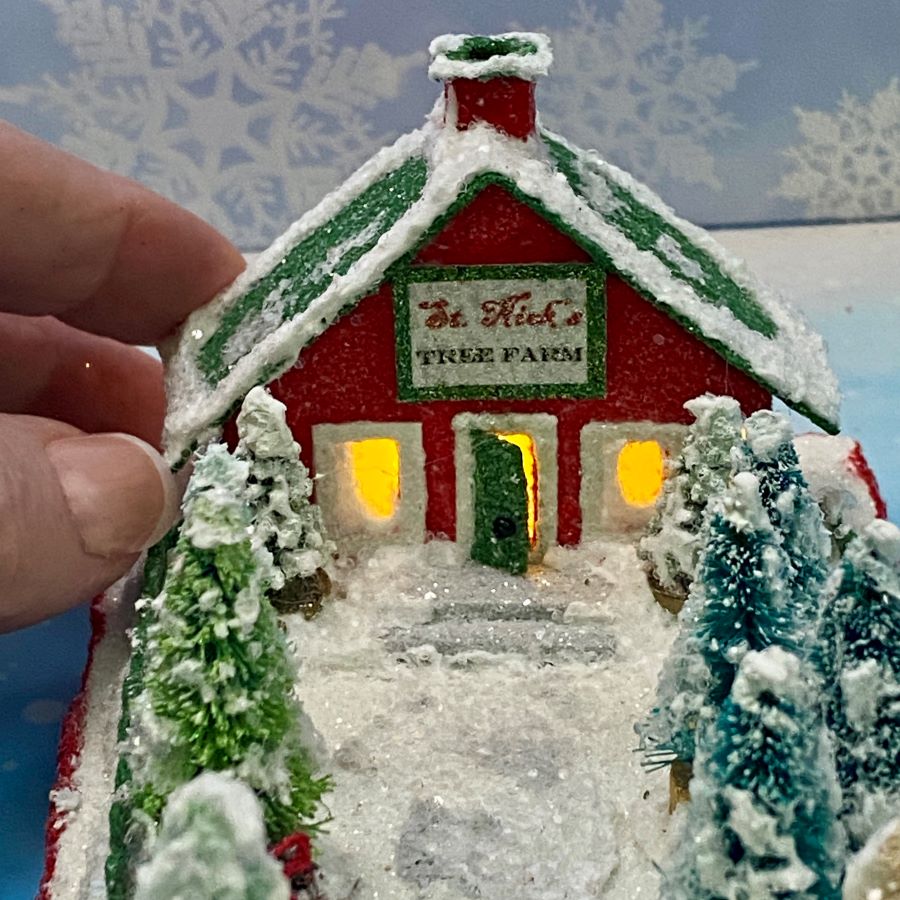
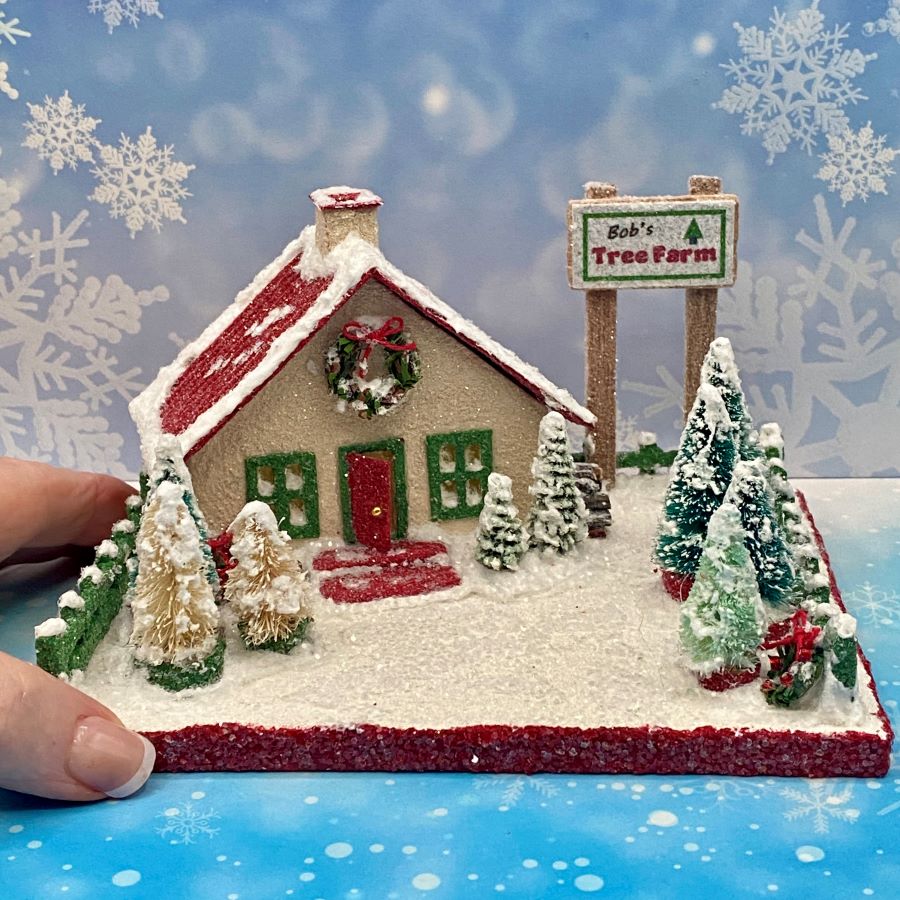
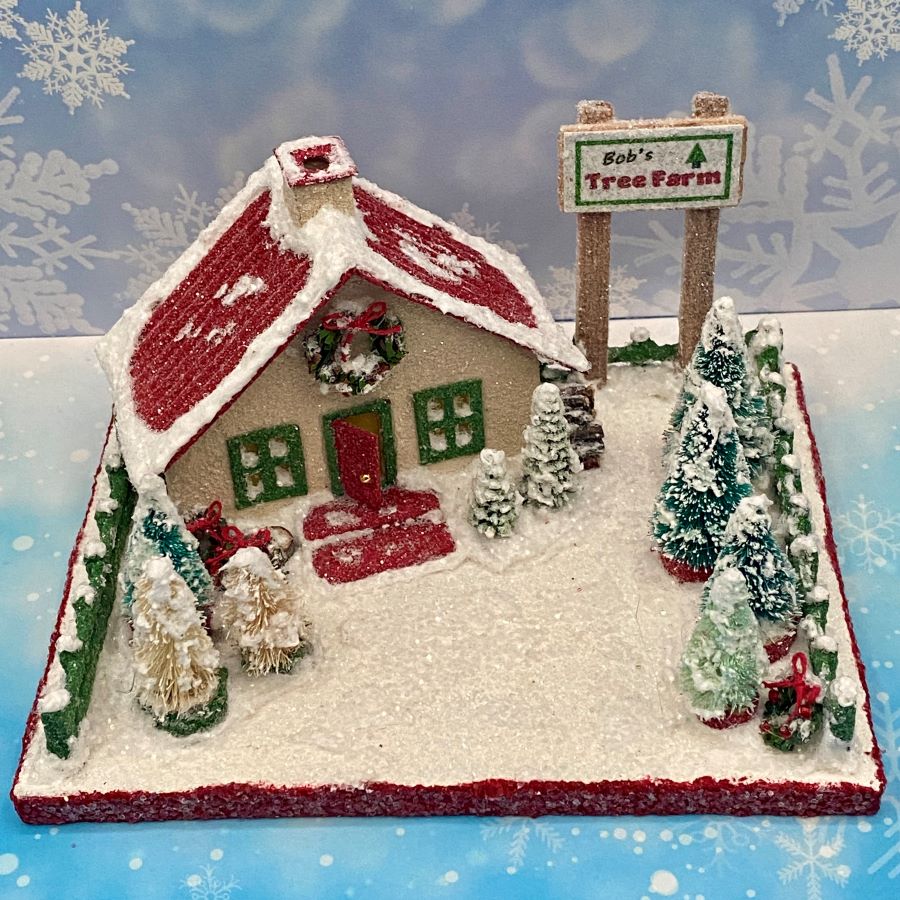
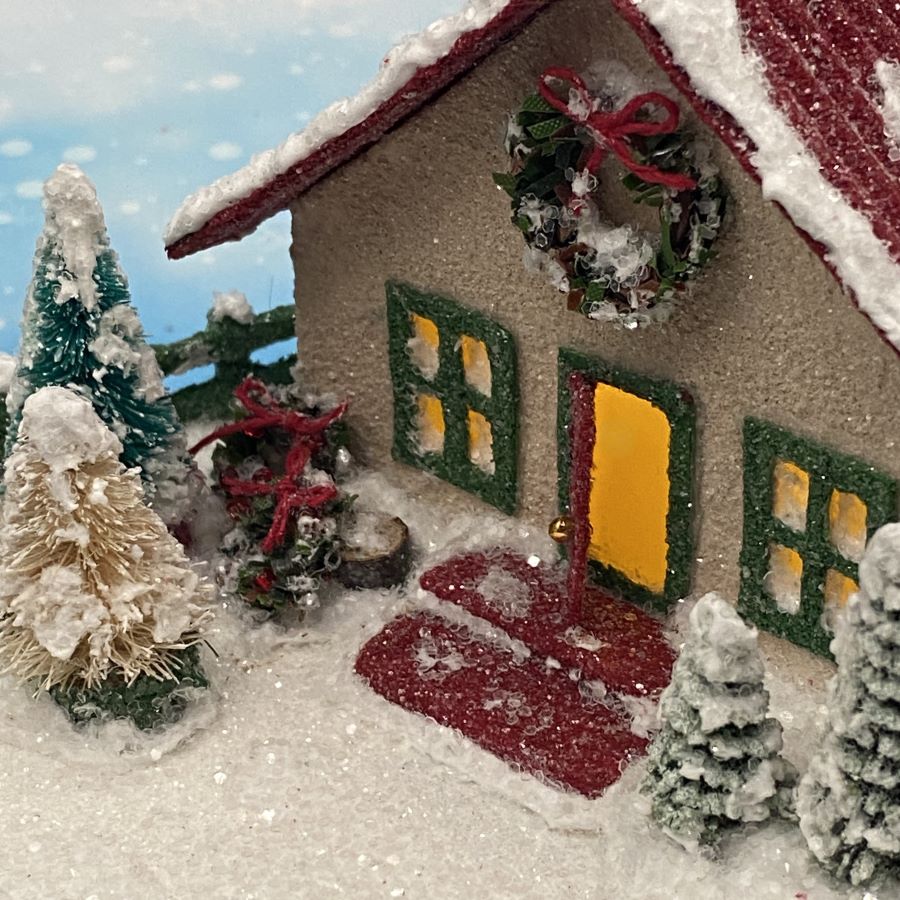
The same pattern was used for all three buildings, with minor changes. On the middle one, I left off the top window and used the space to display a wreath. On the third one, I left the top window off, as well, leaving room for a sign. I cut the windows on the third putz house without pane dividers because the openings were so small.
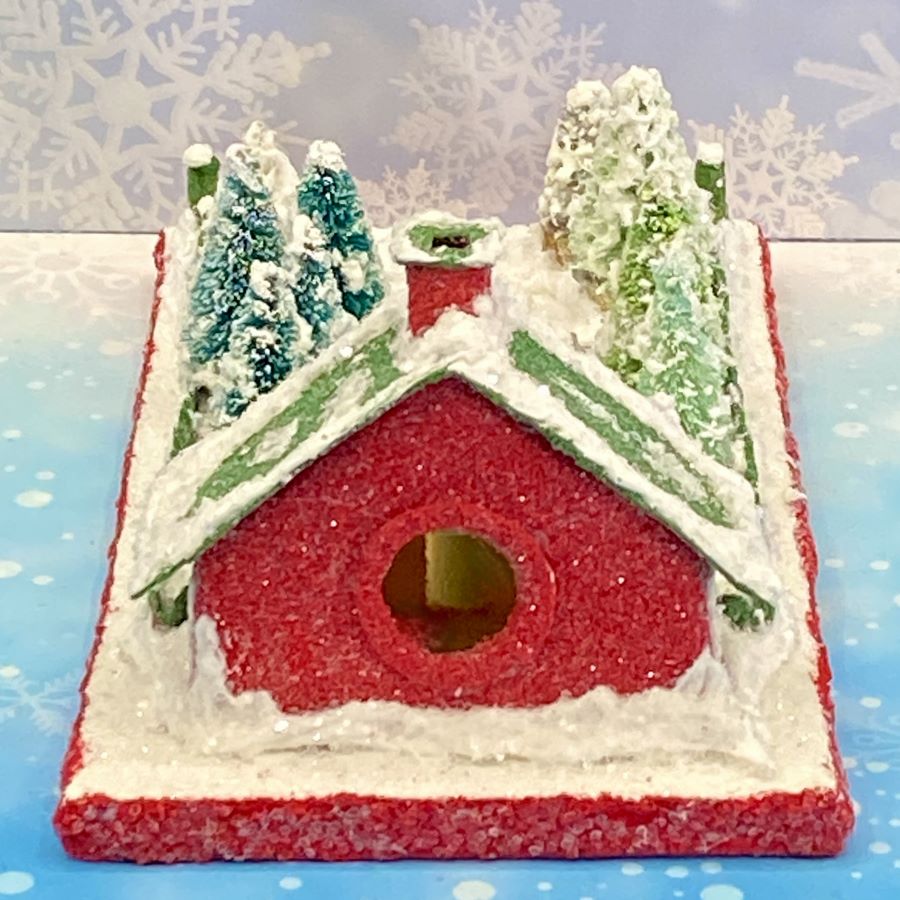
Photos make it hard to grasp the actual size of the TINY MINI putz. The building is 2 3/4″ wide, counting the overhang of the roof. It is 1 1/8″ deep and 2″ tall.
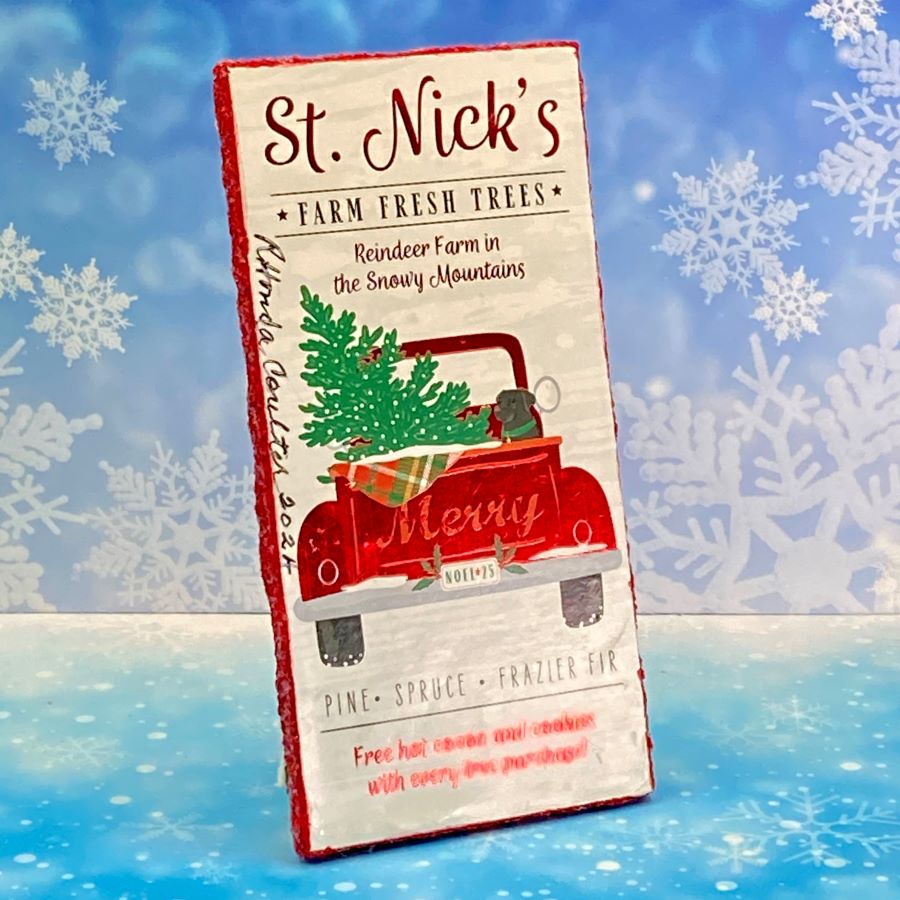
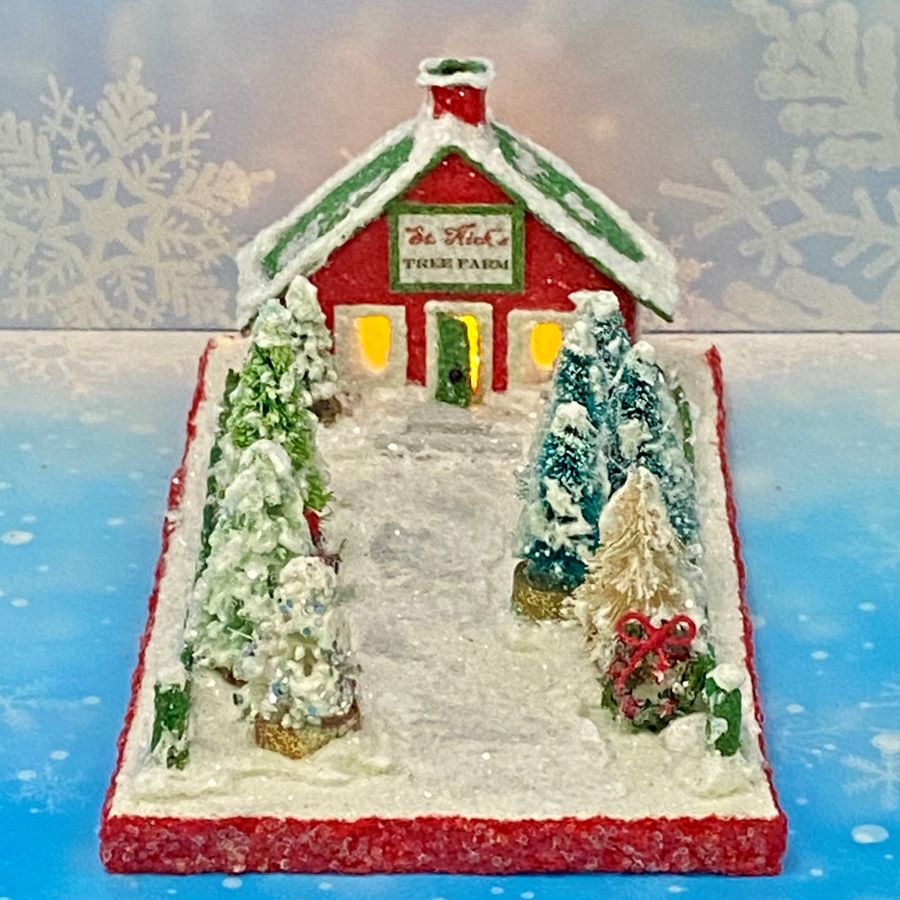
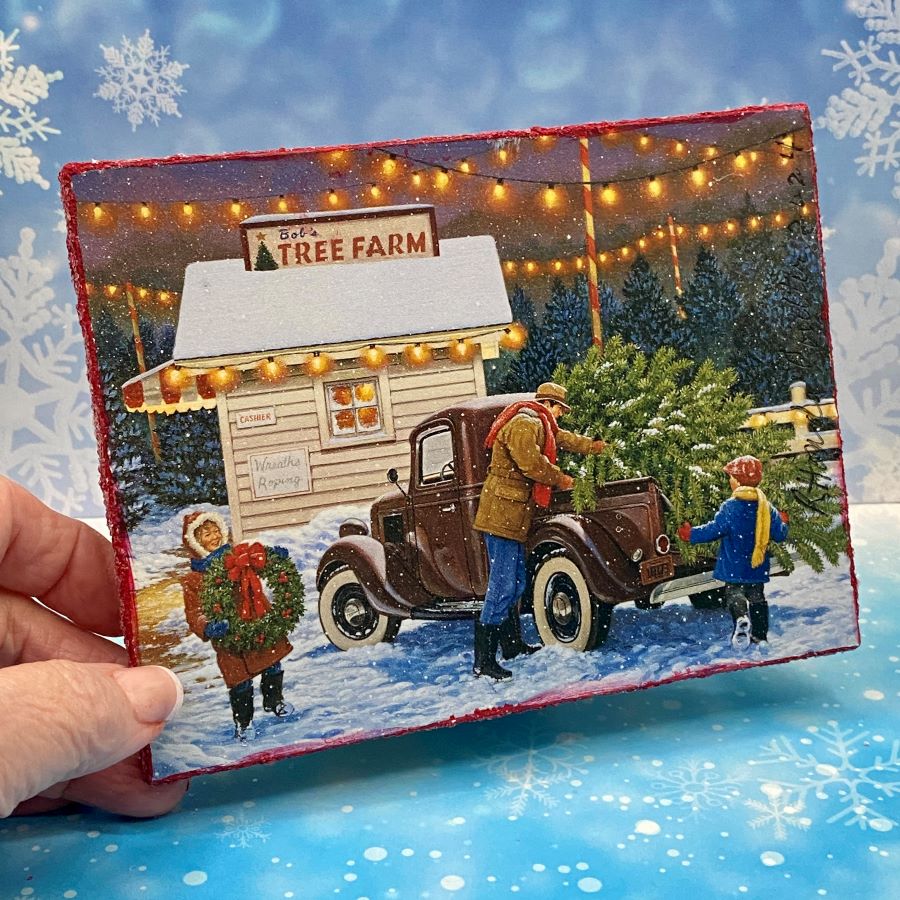
The card I used to make the base features a vintage truck carrying a Christmas tree. The truck and most of the words are picked out in red foil. The house has the traditional hole in the back to provide access for the use of an LED light string to light the building at night.
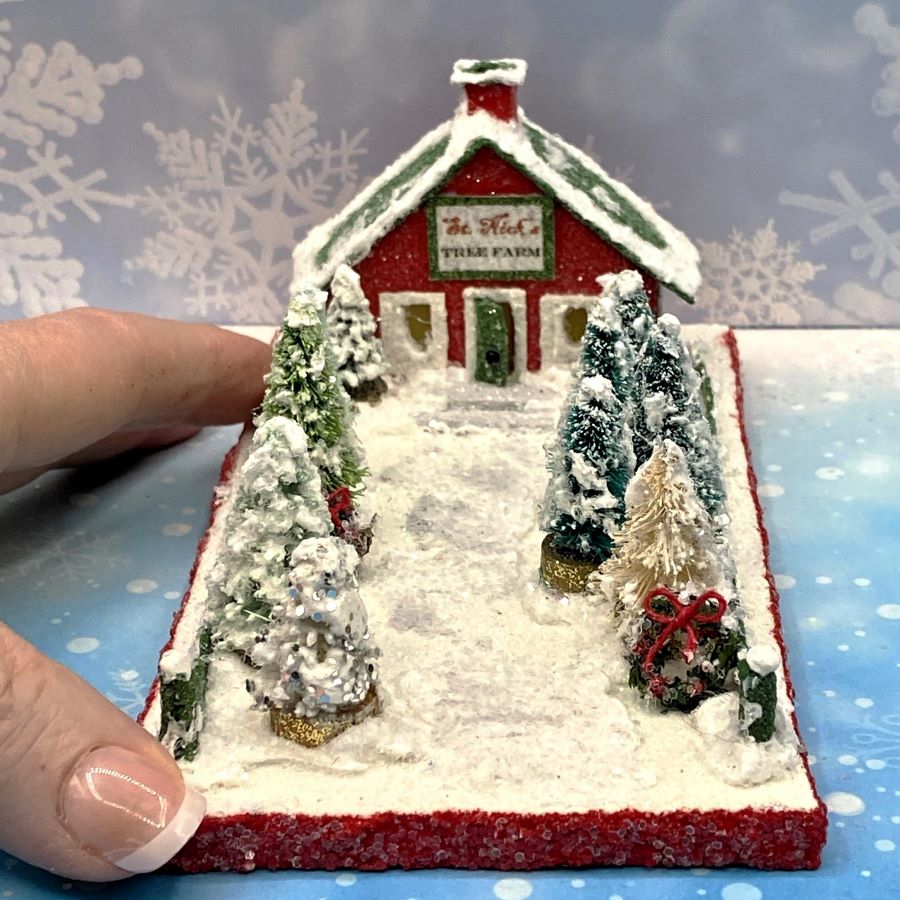
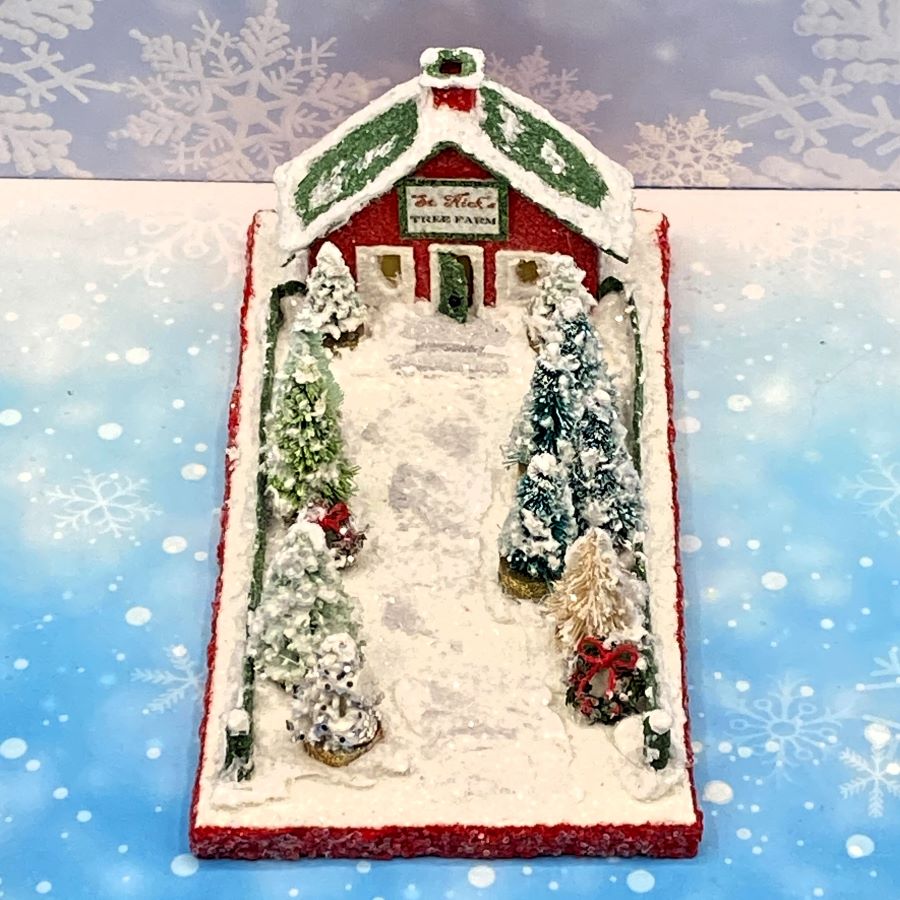
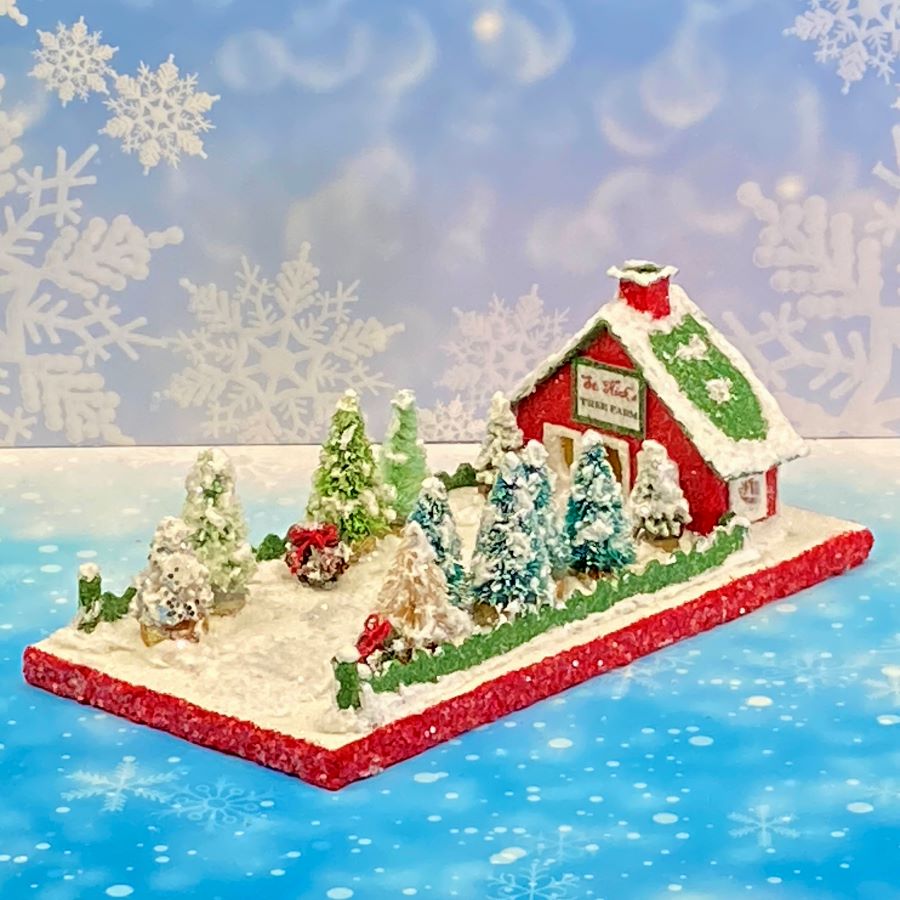
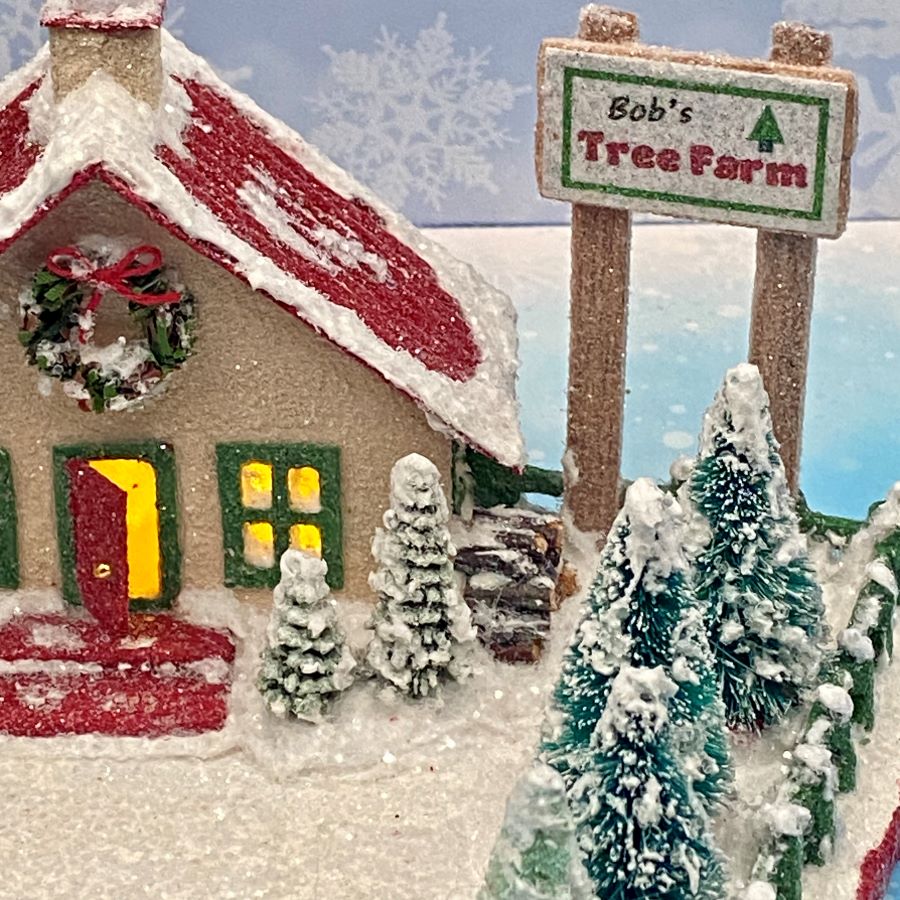
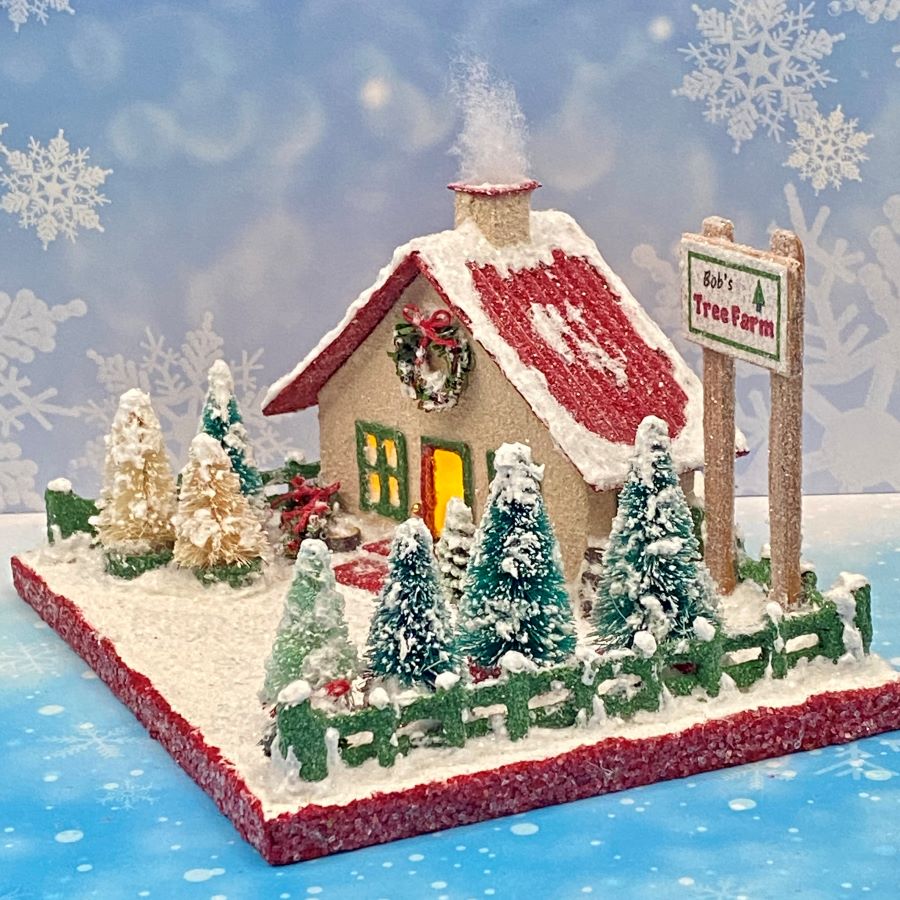
The fence is made from poster board and cut in a wavy design with decorative scissors. There are nine trees and two wreaths displayed in the yard.
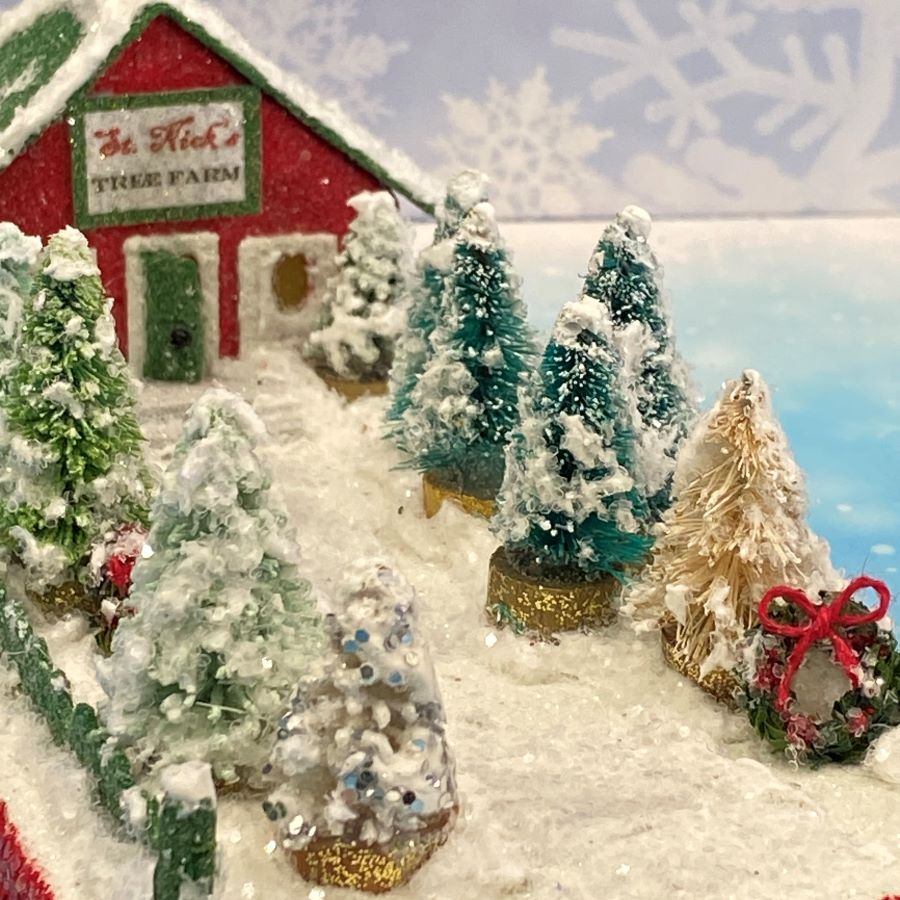
The sign is printed on glitter paper. It doesn’t photograph well, but has a beautiful shimmer when viewed in person. The name of the tree farm is taken from the upcycled card used to make the base.
Meander up the path and choose the perfect tree for your home! Then come in and enjoy hot chocolate and Christmas cookie treats! Merry Christmas!
If you would like to see more of my Putz houses, as well as Christmas ornaments I have made from upcycled holiday cards, please visit my Etsy shop.
All proceeds from my Etsy shop benefit Kenya Mercy Ministries. They work with the urban poor of Nairobi, Kenya, particularly the children and their families who live in Kibera, the largest urban slum in Africa. Thank you for your part in helping these children when you purchase items from my shop!
My putz houses are made in three sizes. The largest size is ORIGINAL which is approximately 5-6″ tall. It is the size I draw all new patterns. MINI is 3-4″ tall. To get this size, I copy an pattern at 75% of its original size. TINY MINI is up to 2″ tall, and is copied at 50% of the original pattern. Sizes are approximate, but they fit most situations. Sometimes there is an additional elements that have to be figured into the equation. For instance, an ORIGINAL size church would be taller, up to 8″ tall because of the steeple.
Below, the putz on the left is an ORIGINAL size. The one on the right, from the same pattern, is a MINI size.
Patterns can often be altered to make new putz that aren’t identical copies from the same pattern. I left off the upper window on the MINI tree farm and replaced it with a large wreath. A small difference, but a new look. The addition of a small roof could be added to one side of the shed to provide cover for the firewood. The chimney could be left off, or changed in style. The windows could be one pane, two, or four, as shown. These putz have corrugated roofs. They could be made with smooth cardboard for another look.
The tree lot has multiple size trees available. You can find the perfect one for your home!
The name for this tree farm was taken from the picture on the card used to make the base. The base also inspired the type of fence I made for the tree lot.
The sign is printed on glitter paper (which doesn’t photograph well). Next to the shed, on the right side, is a stack of firewood, ready to keep the stove burning.
The post and board fence is made from slivered popsicle sticks and craft matchsticks.
If you would like to see more of my Putz houses, as well as Christmas ornaments I have made from upcycled holiday cards, please visit my Etsy shop.
All proceeds from my Etsy shop benefit Kenya Mercy Ministries. They work with the urban poor of Nairobi, Kenya, particularly the children and their families who live in Kibera, the largest urban slum in Africa. Thank you for your part in helping these children when you purchase items from my shop!
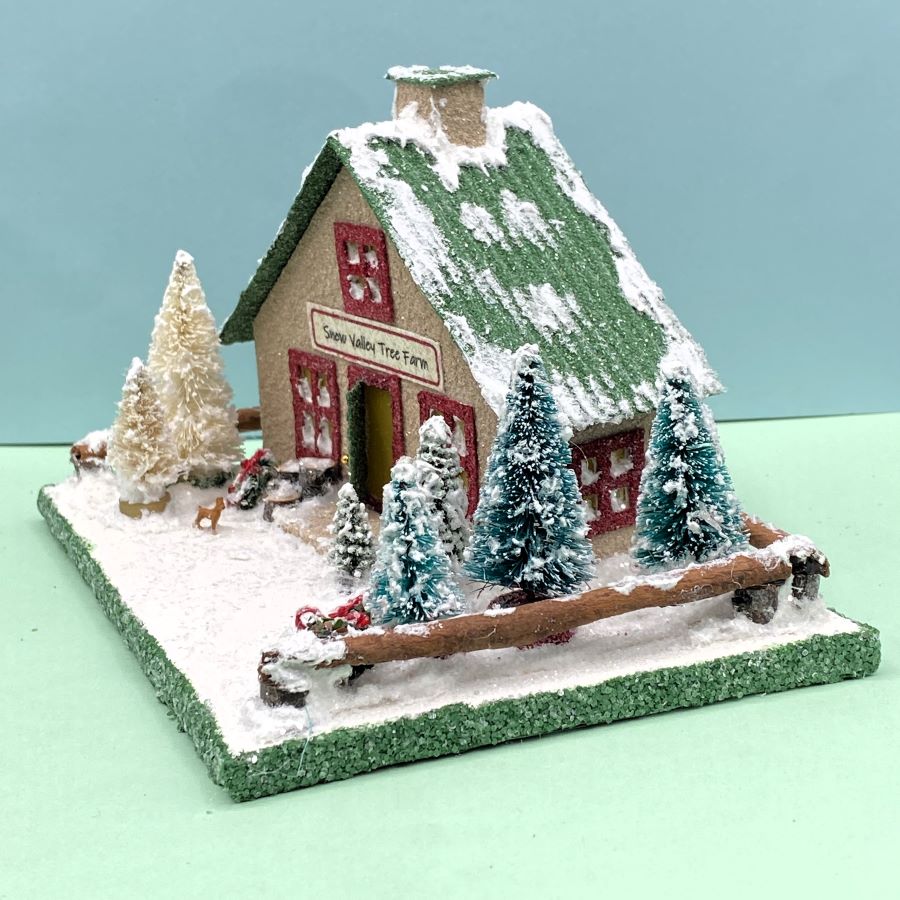
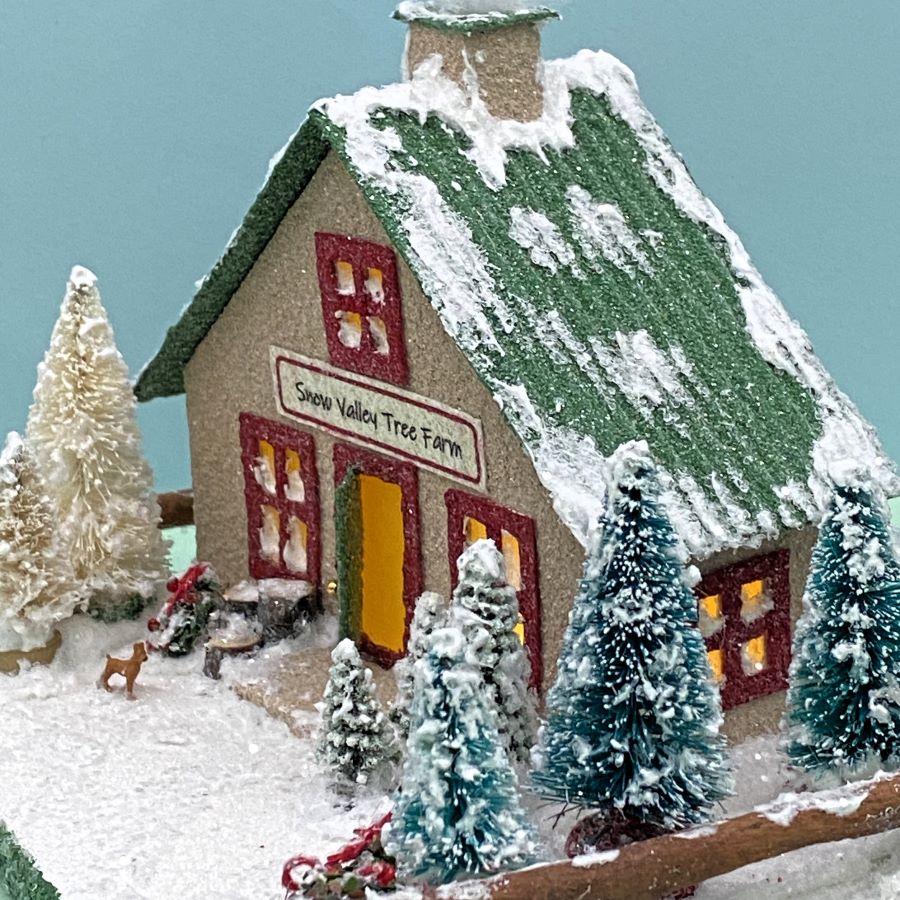
I realized I have only one Christmas Tree Farm Lot in my Etsy shop. I drew a few new patterns last week and this is the first edition of this pattern.
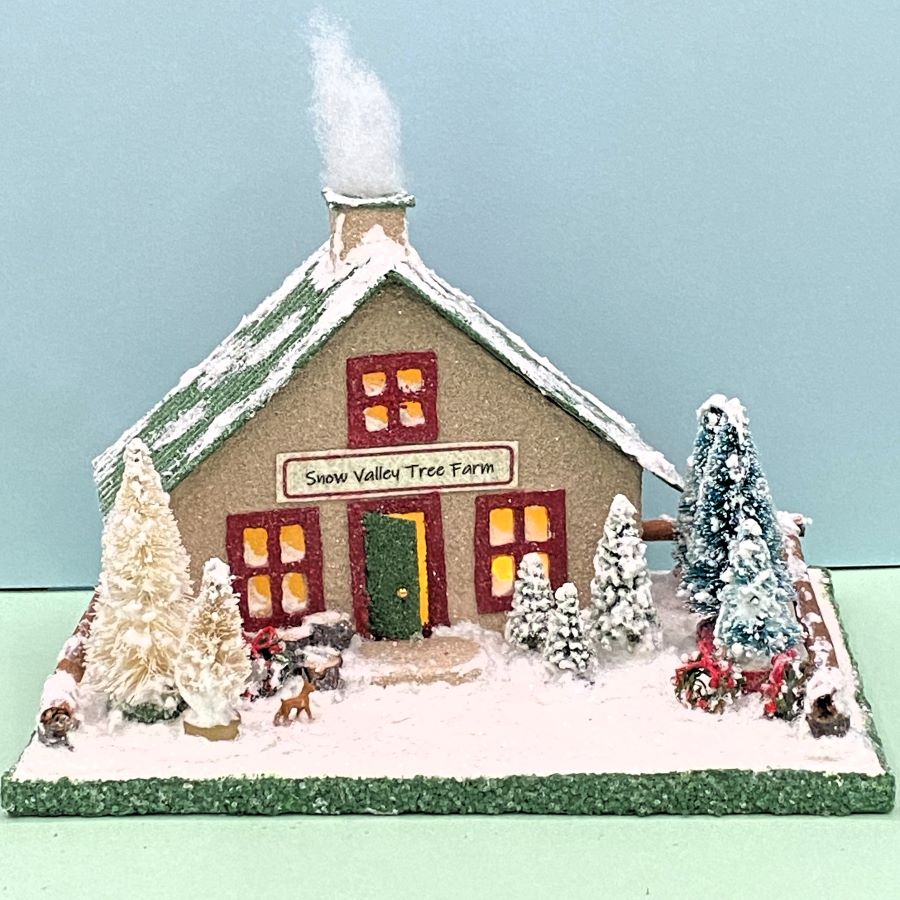
The putz measures 6 7/8″ wide by 5 1/8″ deep. The structure is 4 1/2″ tall as measured from the bottom of the base to the top of the chimney. The fence is made from cinnamon sticks.
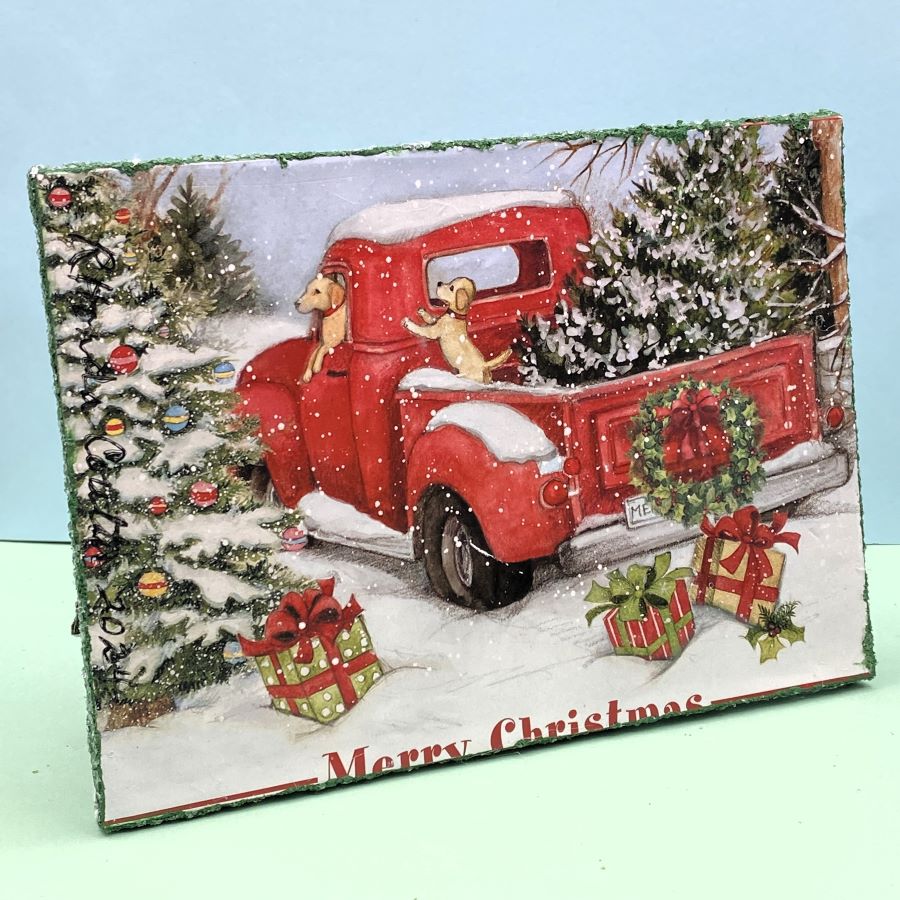
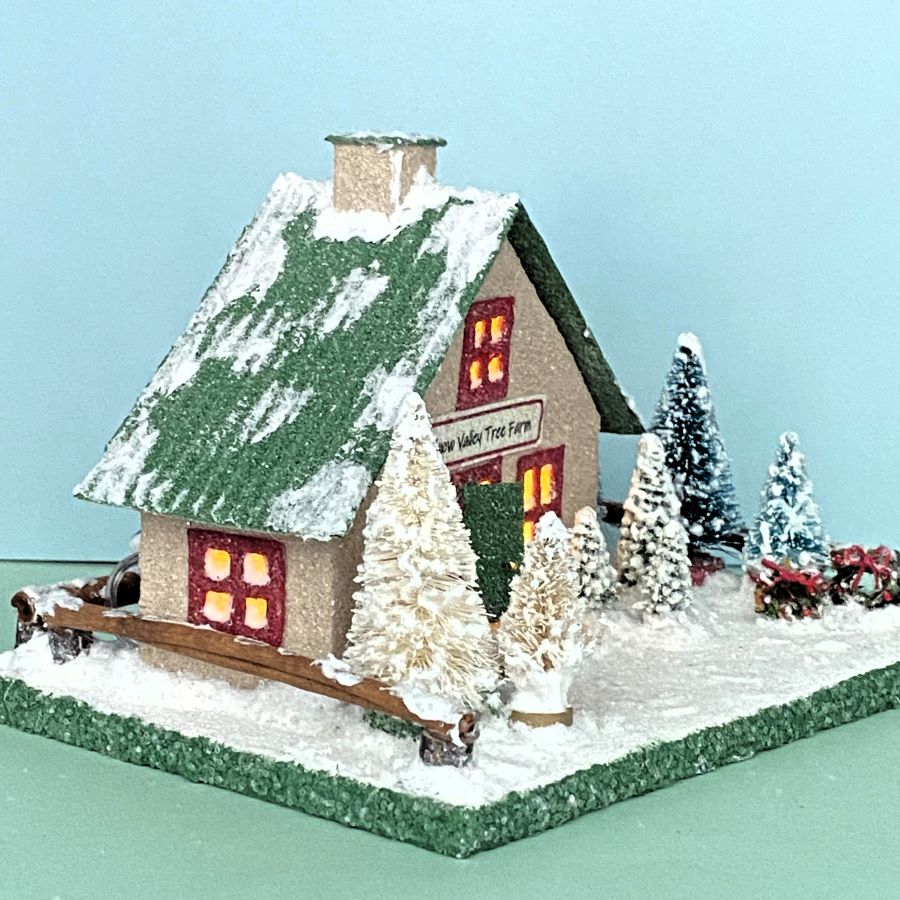
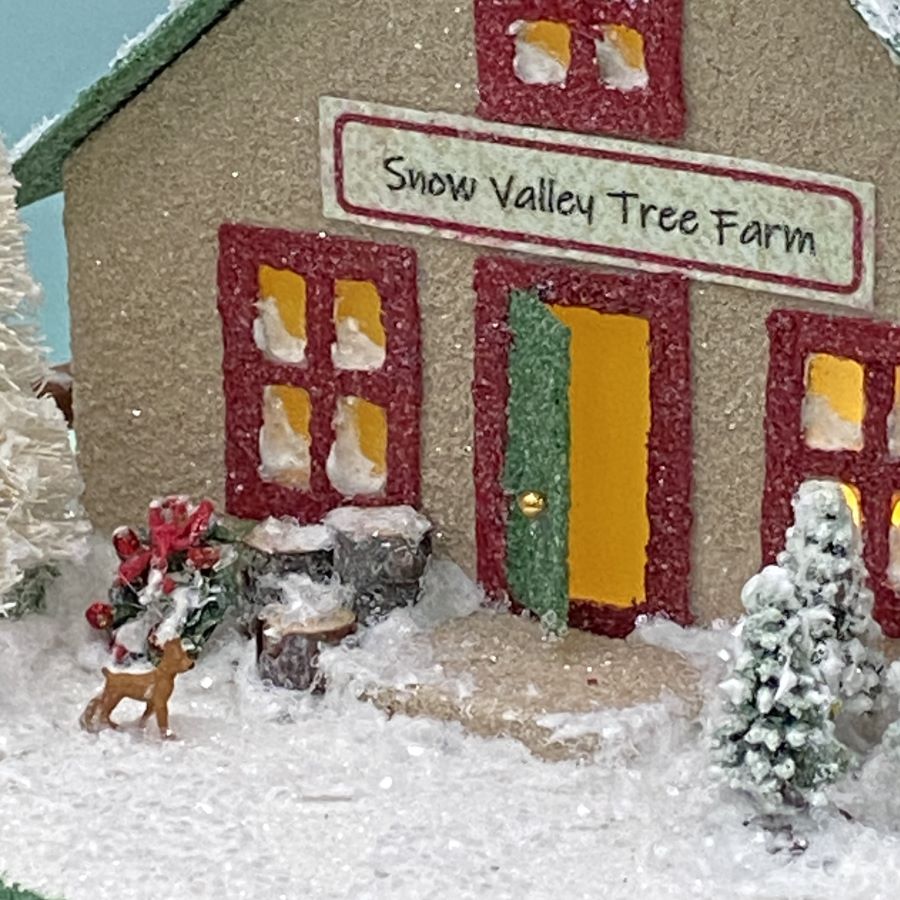
The base is made from an upcycled Christmas card featuring a red truck, puppies, a Christmas tree and gifts. A hole in the back of the building allows the use of a small LED light string for lighting this and other glitter houses in your Christmas village.
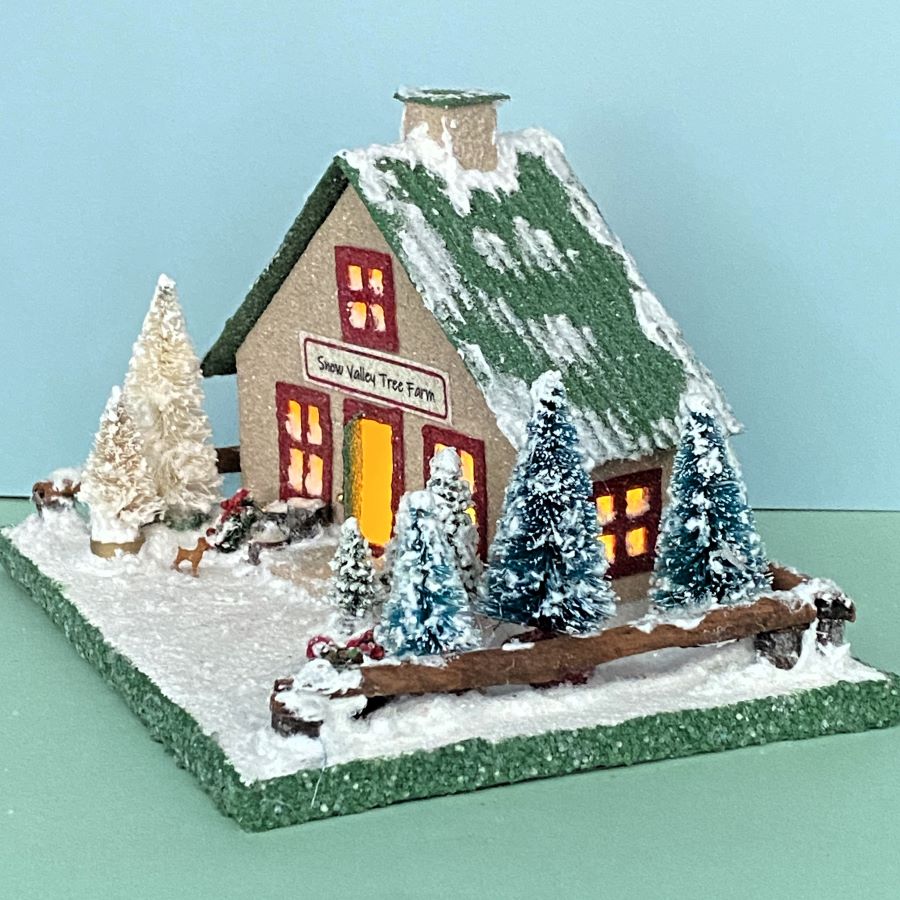
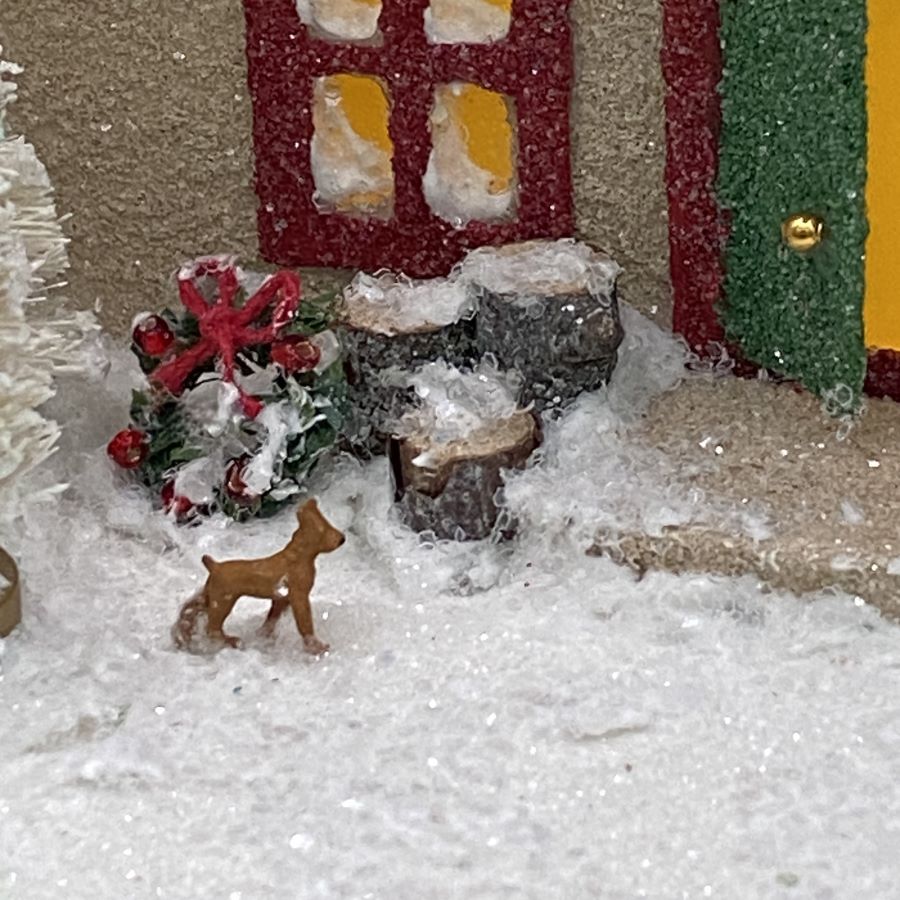
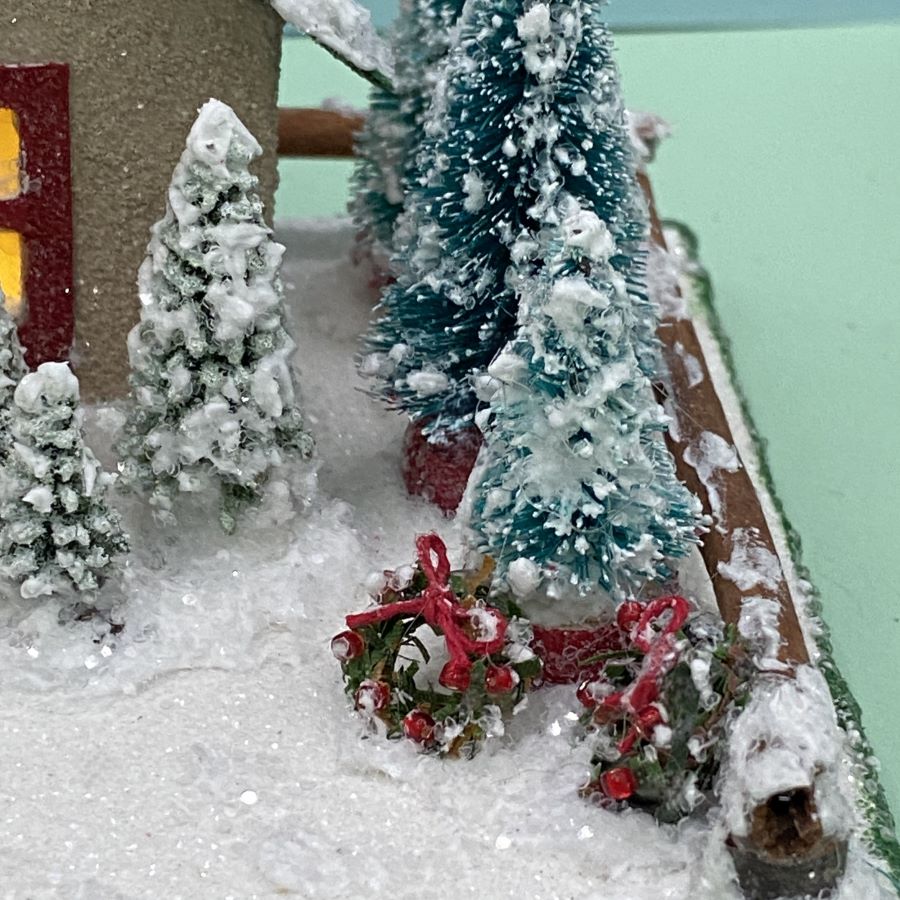
A total of eight trees are displayed in the yard. Three handcrafted wreaths rest against the fence and the trees, ready to hang on your front door.
A tiny dog waits for his family to come back out so they can load up their Christmas tree.
Snow Valley Tree Farm, ready for the Christmas holiday! The roof is made from corrugated cardboard, mimicking a raised-ridge metal roof.
If you would like to see more of my Putz houses, as well as Christmas ornaments I have made from upcycled holiday cards, please visit my Etsy shop.
All proceeds from my Etsy shop benefit Kenya Mercy Ministries. They work with the urban poor of Nairobi, Kenya, particularly the children and their families who live in Kibera, the largest urban slum in Africa. Thank you for your part in helping these children when you purchase items from my shop!
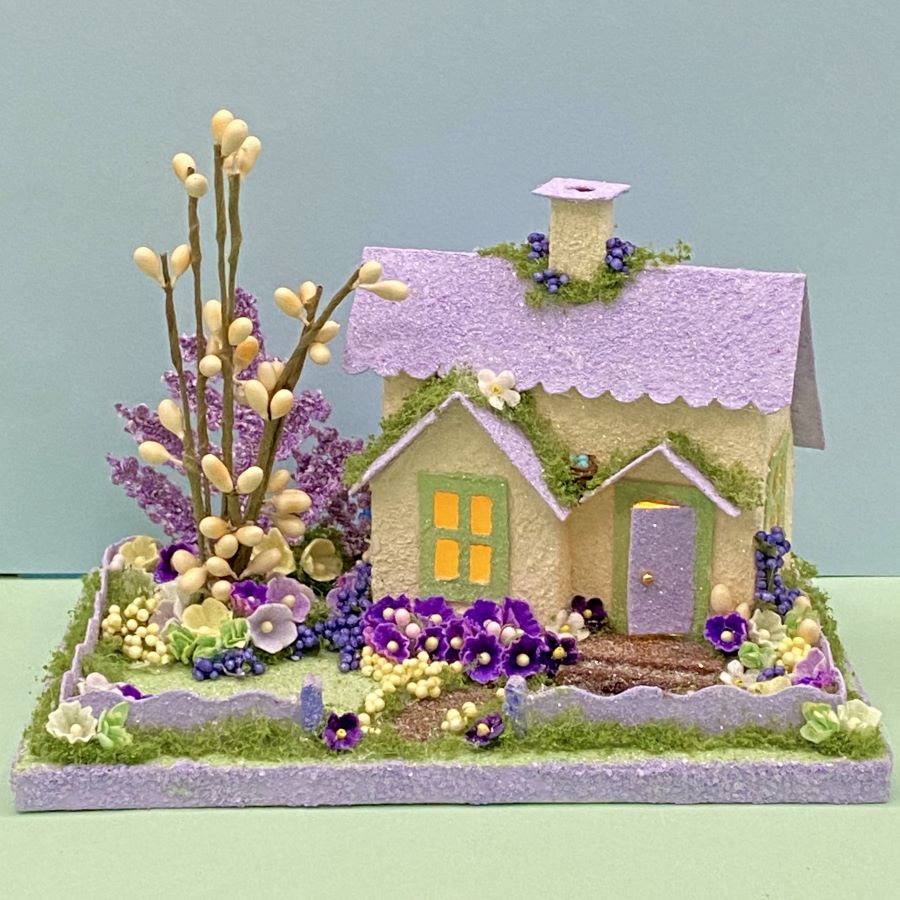
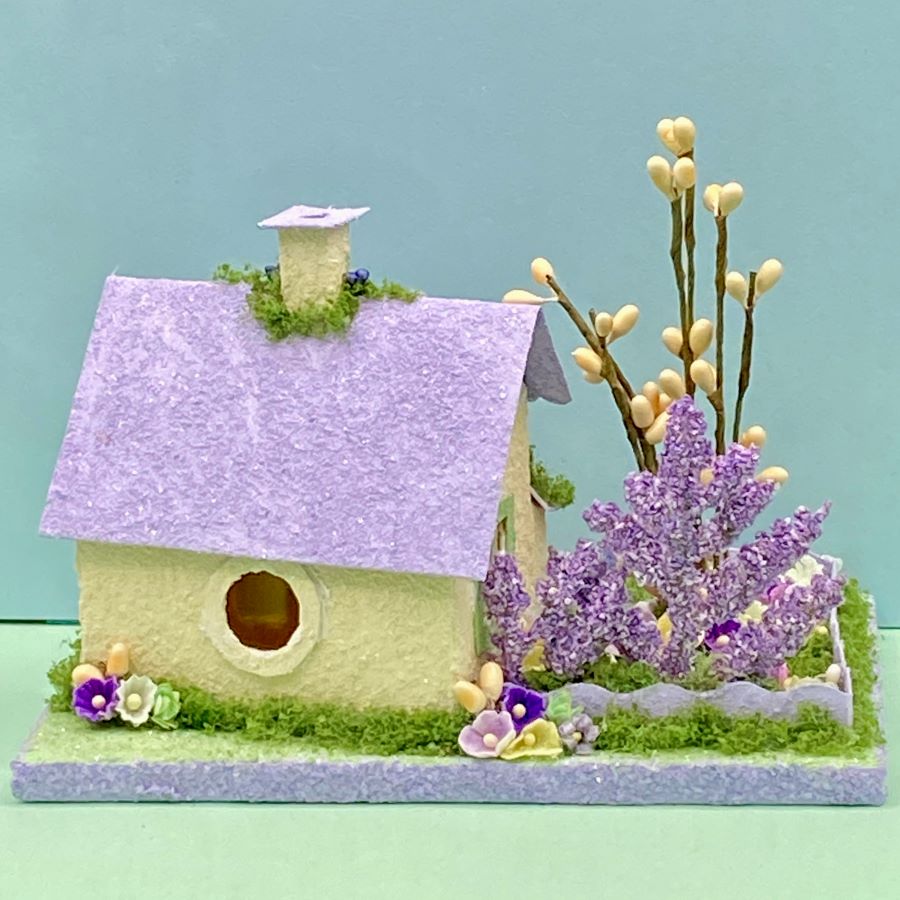
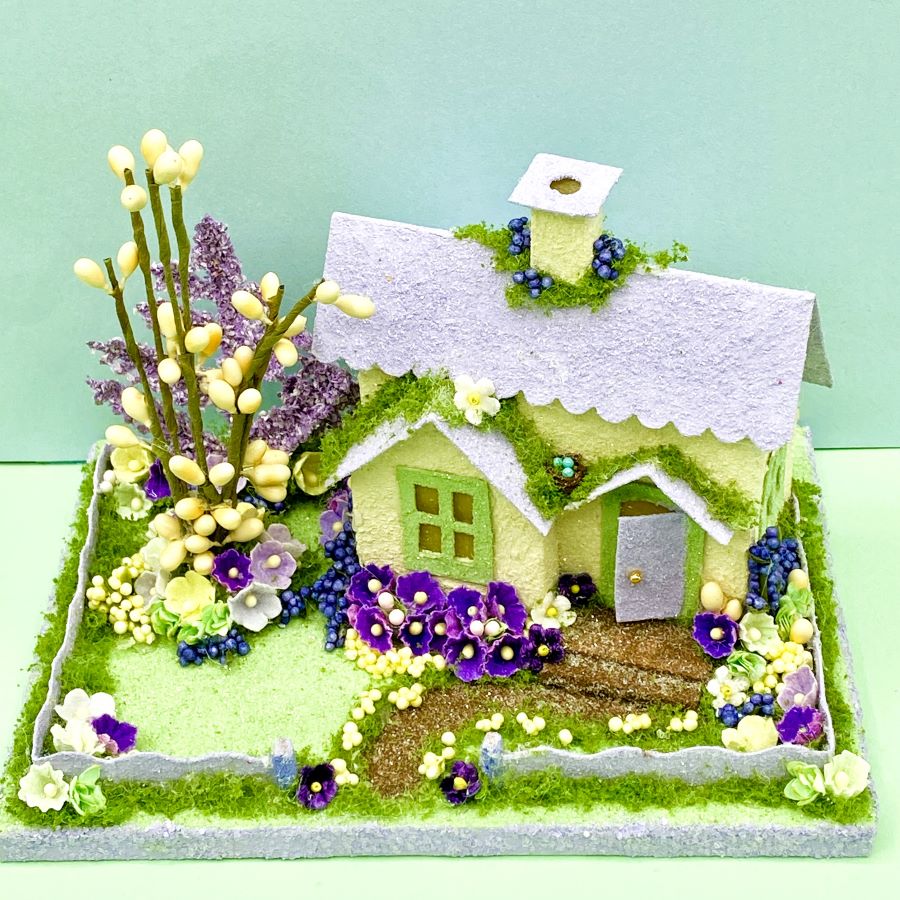
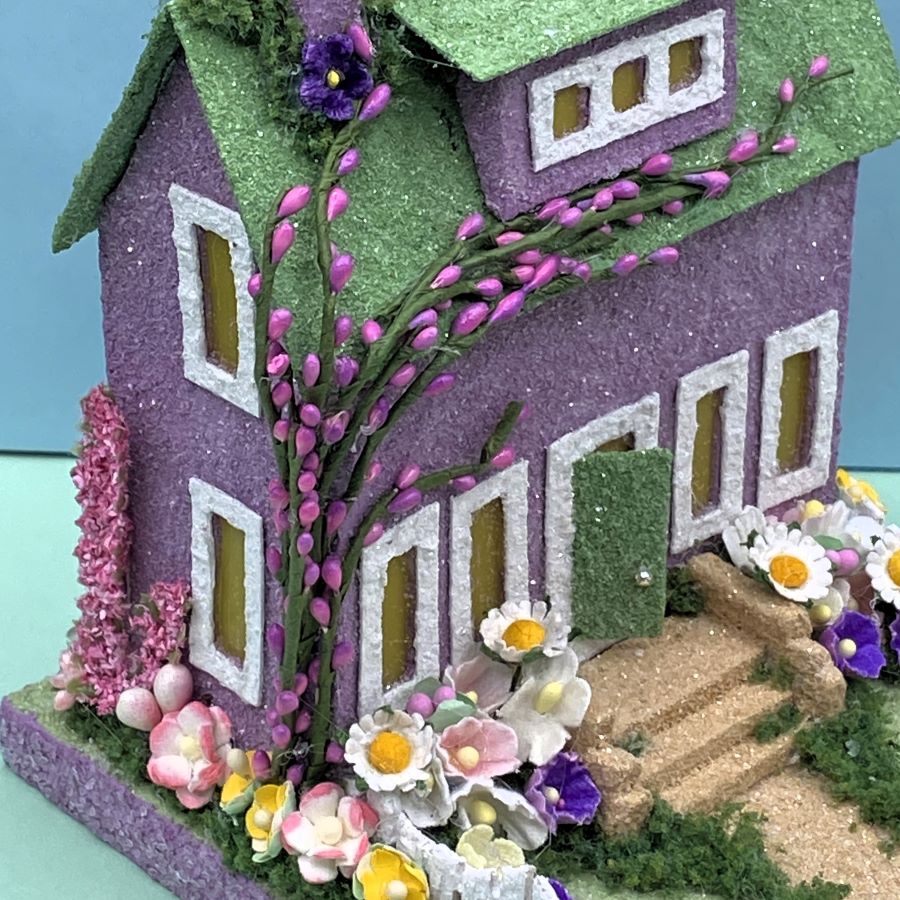
This MINI size spring house is from the same pattern as the winter house I made last week. I scalloped the front of the roof on the spring house and added divided window panes rather than the larger ones used in the winter house.
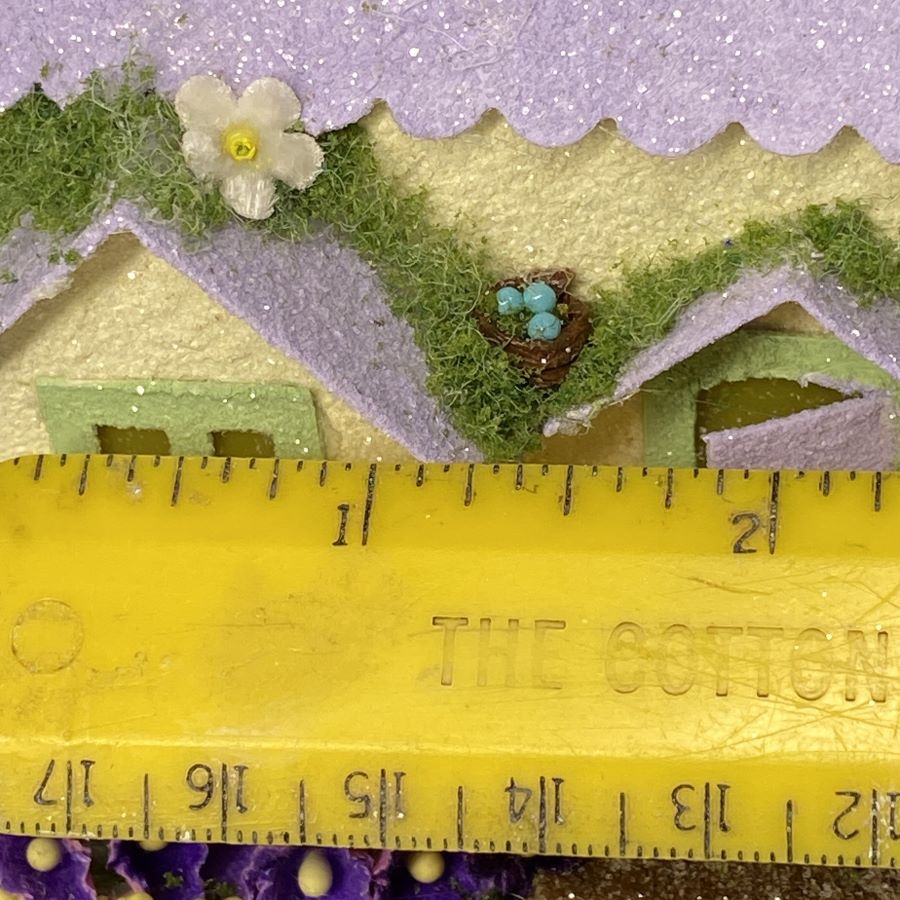
The base of the spring house measures 6 1/2″ wide by 4 1/2″ deep. It is 4 1/2″ high as measured from the bottom of the base to the top of the pip tree.
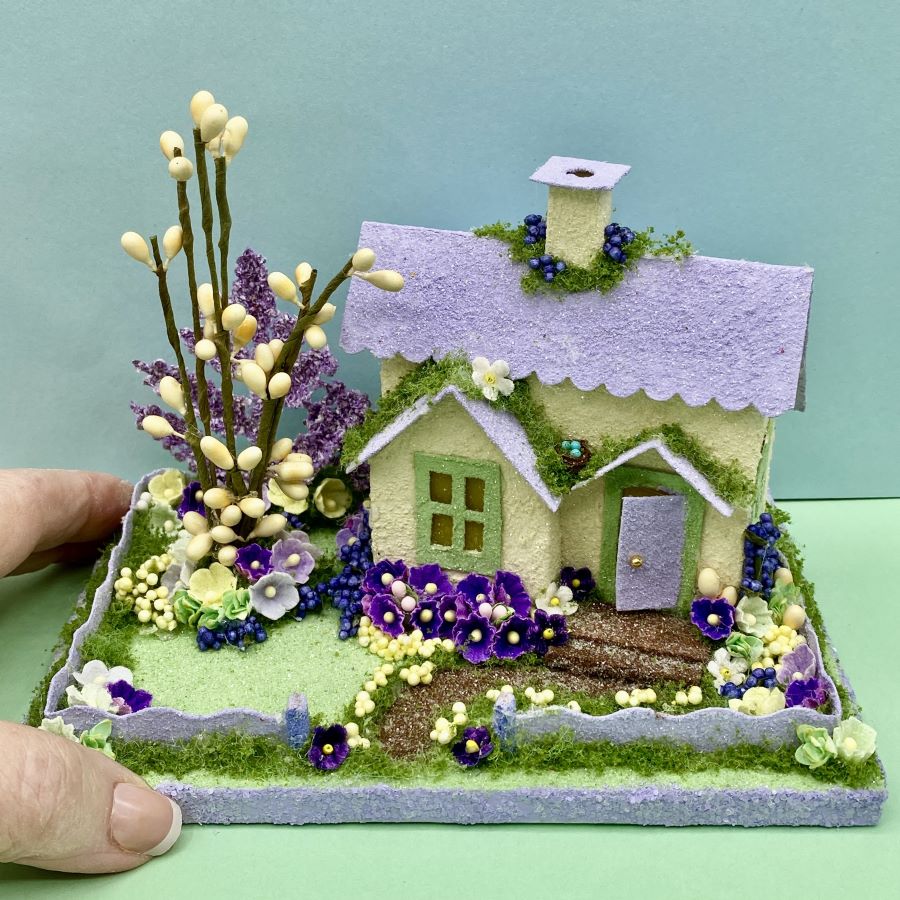
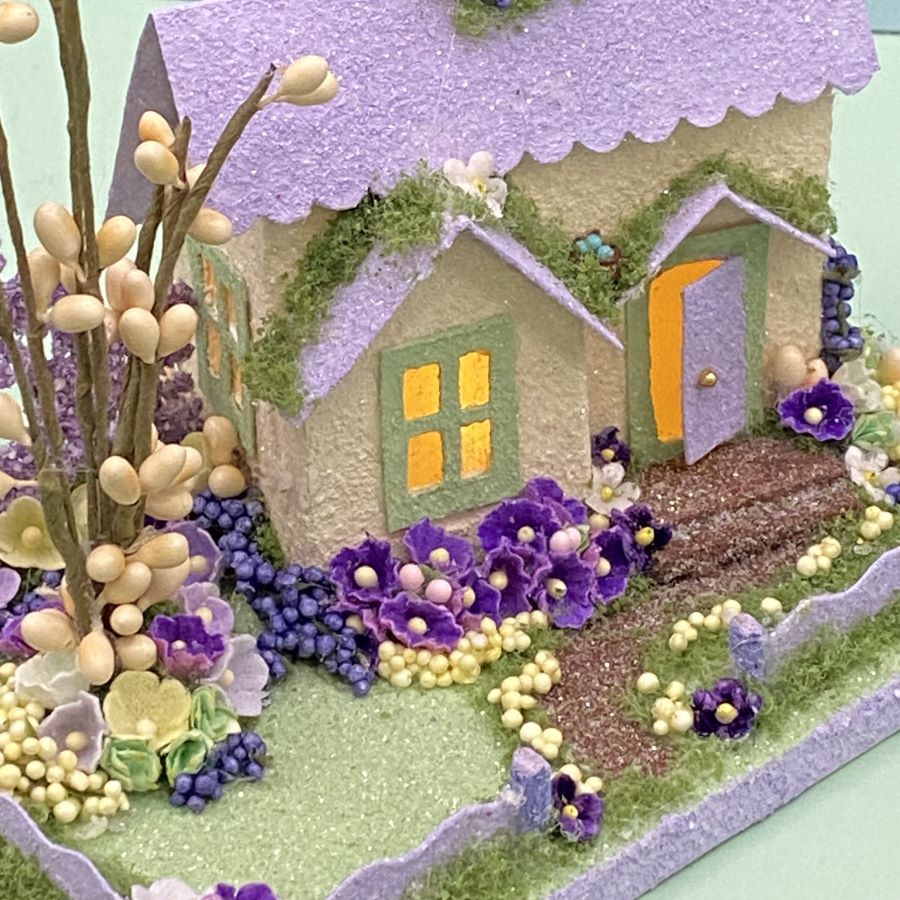
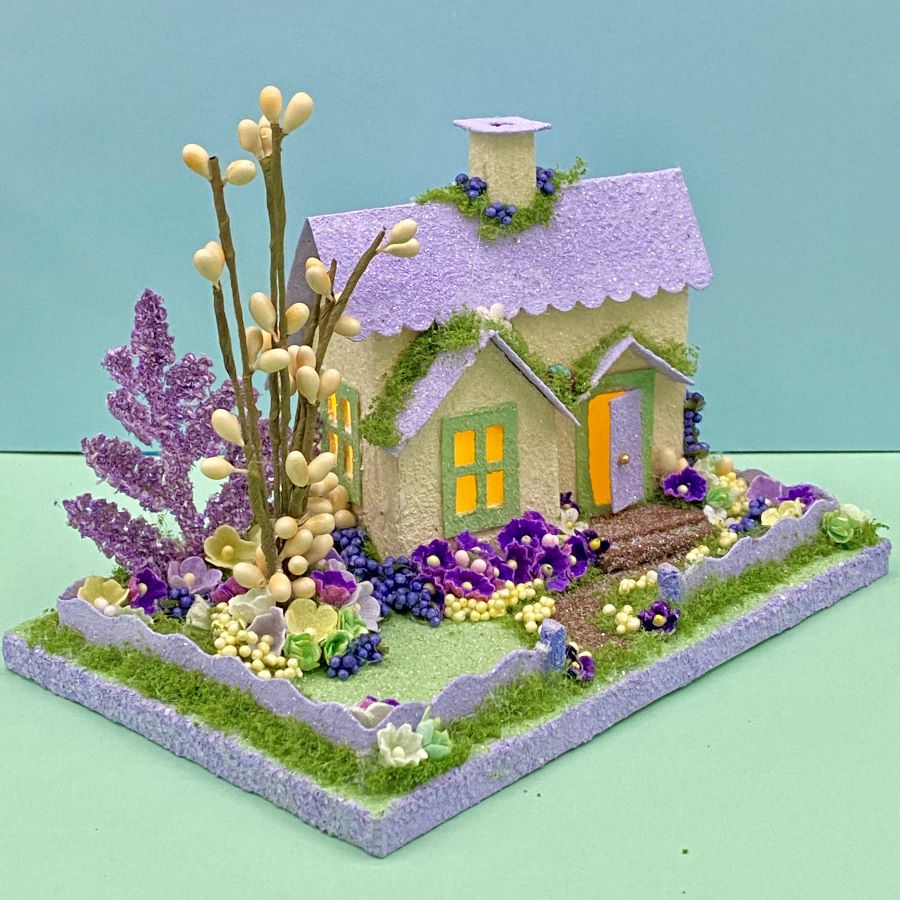
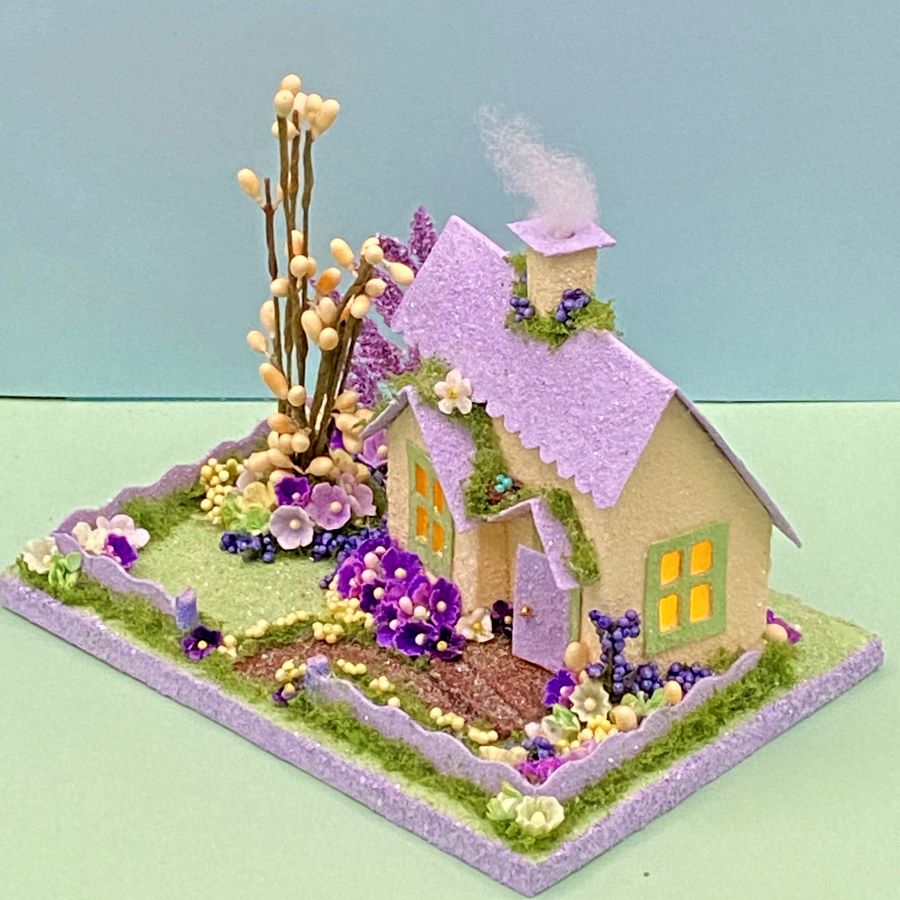
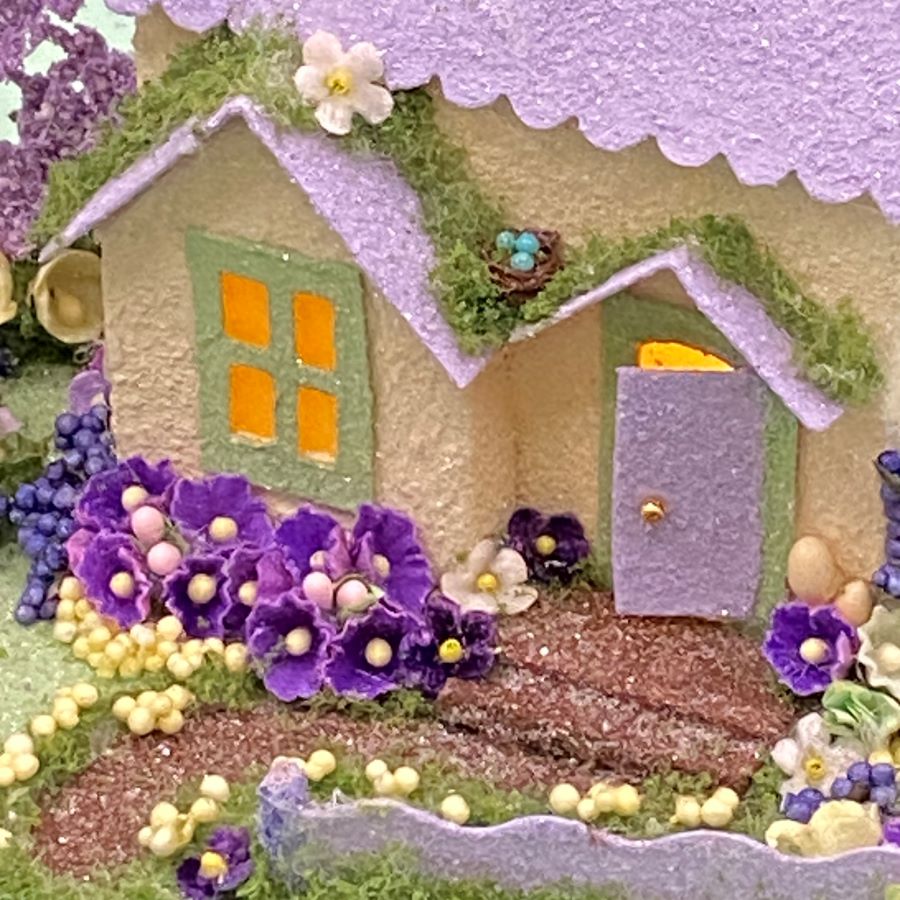
The house sits on the base at an angle. It features paper and velvet flowers, a budding pip tree, and a tiny robin’s nest in the valley between the two roofs on the front of the house. The sidewalk curves from the front door to the opening in the fence.
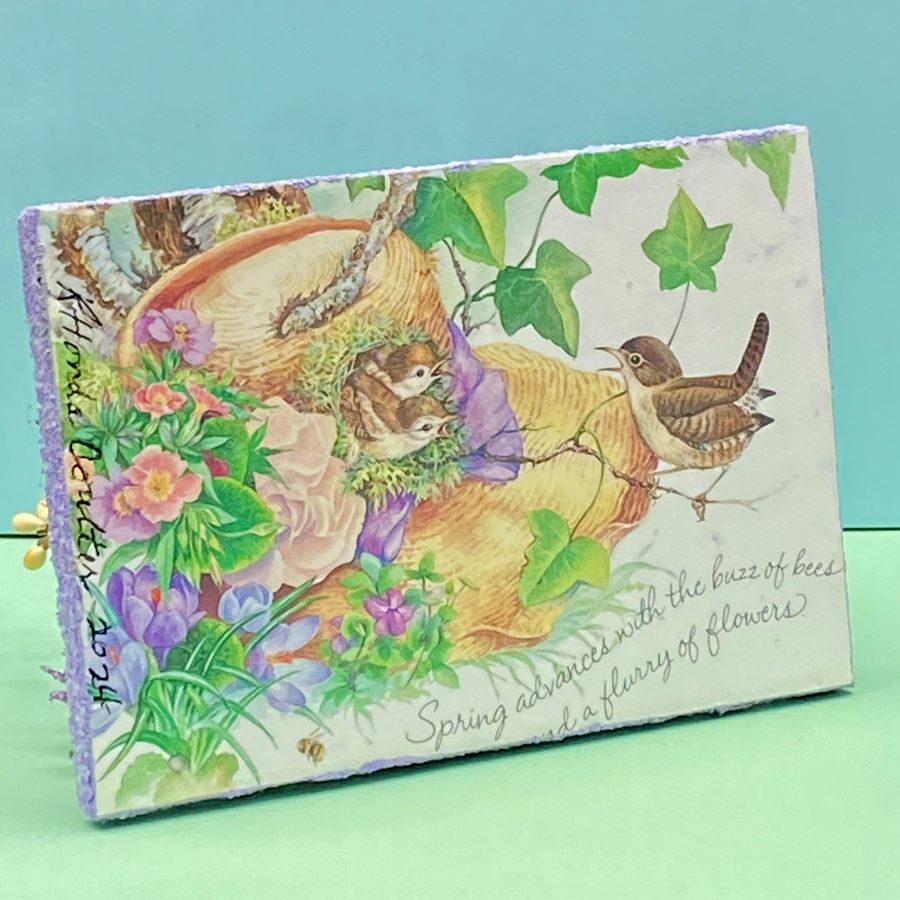
The base is a beautiful spring-themed greeting card featuring a Carolina wren and her brood. A hole in the back of the little glitter house allows the use of a small LED light string to light this and other houses in your putz village.
The yard is enclosed with a poster board fence cut with decorative scissors.
I made the bird nest from paper-wrapped wire. The eggs are faux cookie sprinkles. The nest is 1/4″ wide
Made in shades of purple, green and yellow, this little house greets spring with an abundance of flowers.
If you would like to see more of my Putz houses, as well as Christmas ornaments I have made from upcycled holiday cards, please visit my Etsy shop.
If you are interested in crafting Putz houses of your own, check out my Putz tutorials for more information.
All proceeds from my Etsy shop benefit Kenya Mercy Ministries. They work with the urban poor of Nairobi, Kenya, particularly the children and their families who live in Kibera, the largest urban slum in Africa. Thank you for your part in helping these children when you purchase items from my shop!
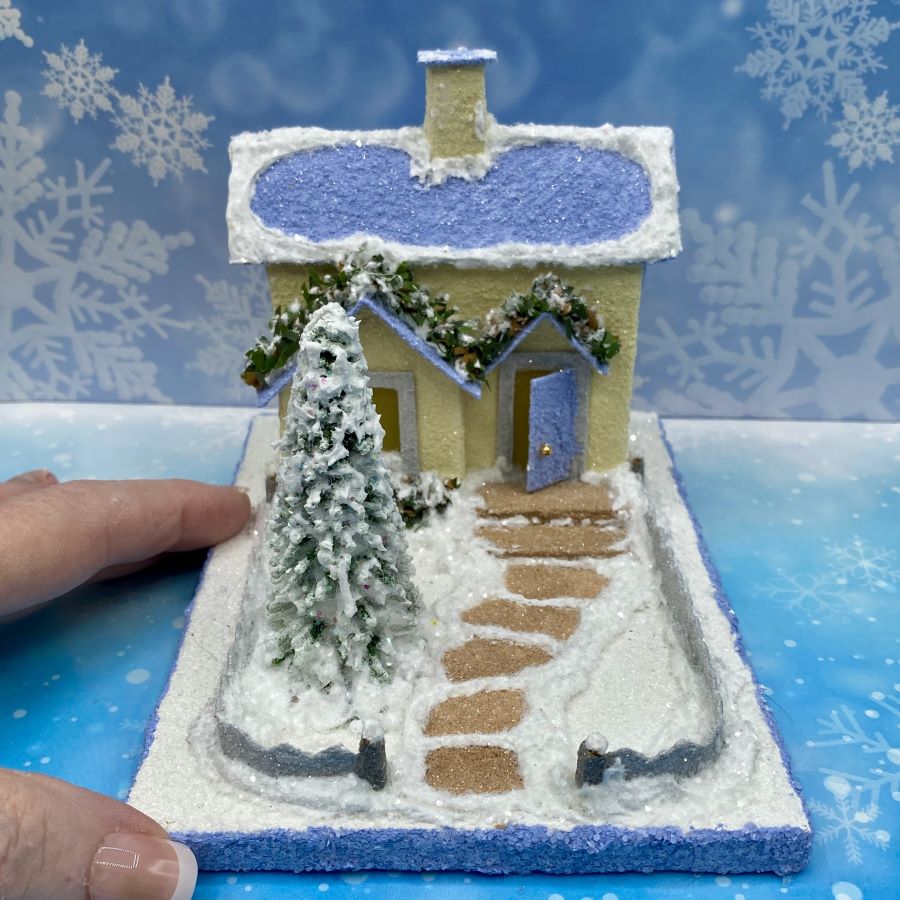
This house came together more slowly than usual. I finished it last night, and listed it in my Etsy shop. The link can be found at the end of the post.
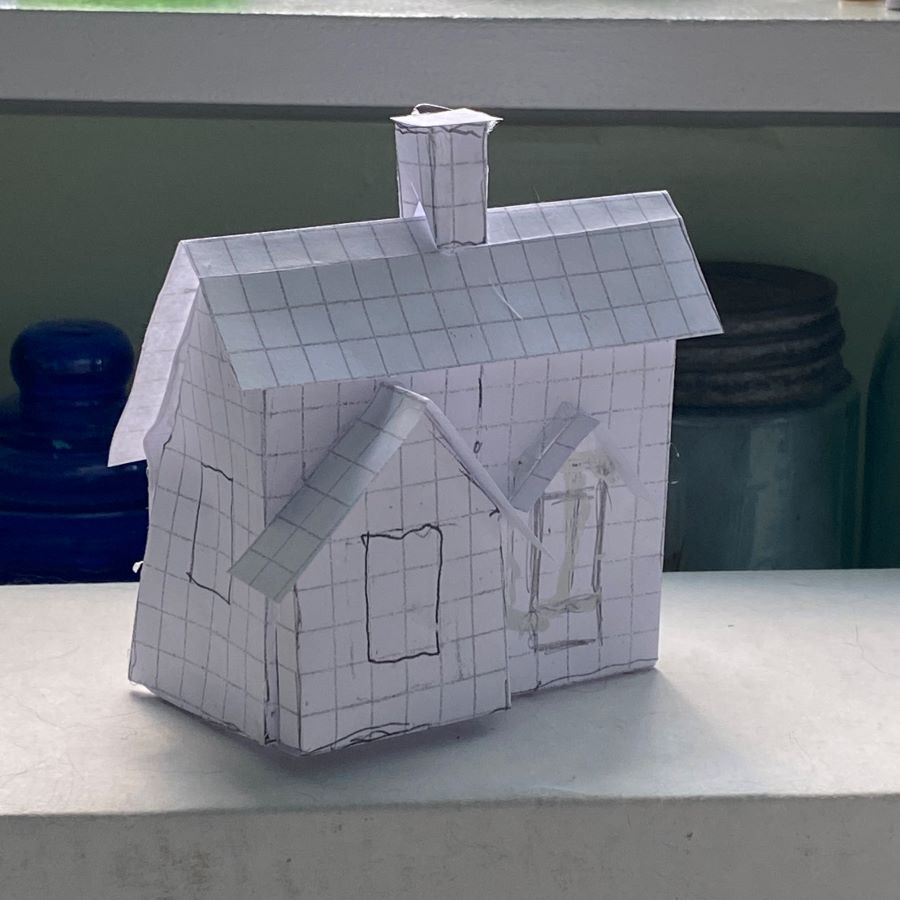
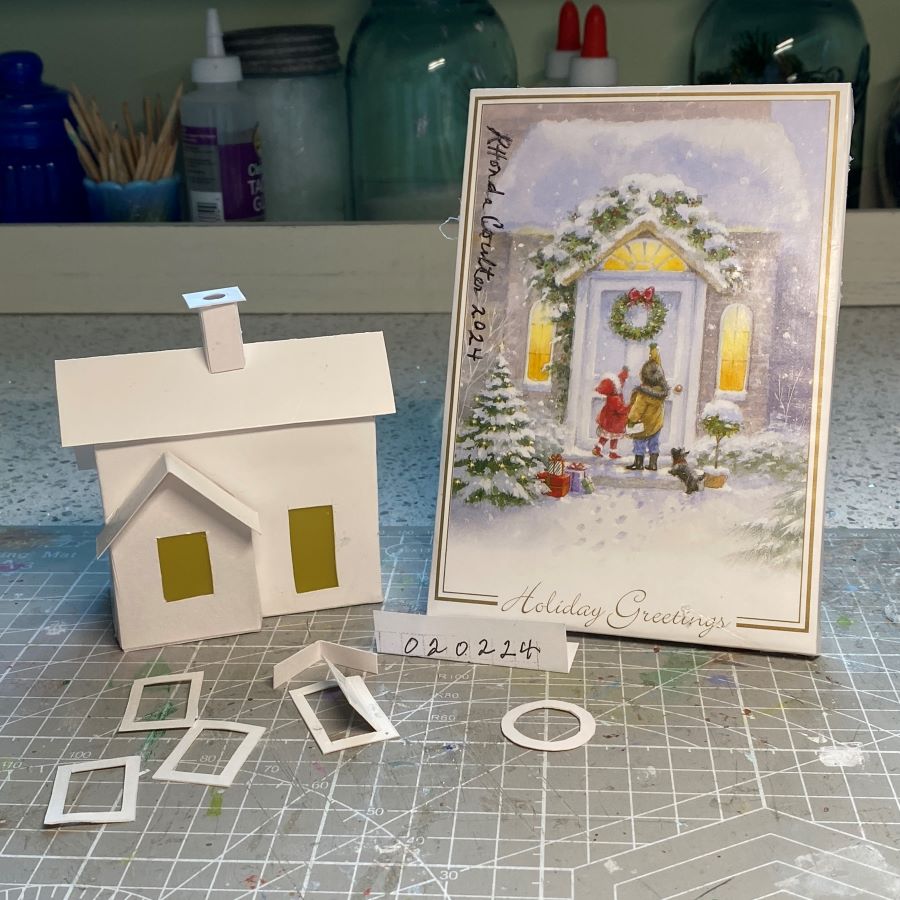
This house is the first edition of this pattern, which I drew in February of this year. When I am designing a new pattern, I always make a paper mockup before finalizing the pattern. This particular one, though a simple pattern, needed three or four adjustments to make it work. Never cut a new pattern from poster board or cardboard without checking it with a mockup first! It will save more than a few headaches.
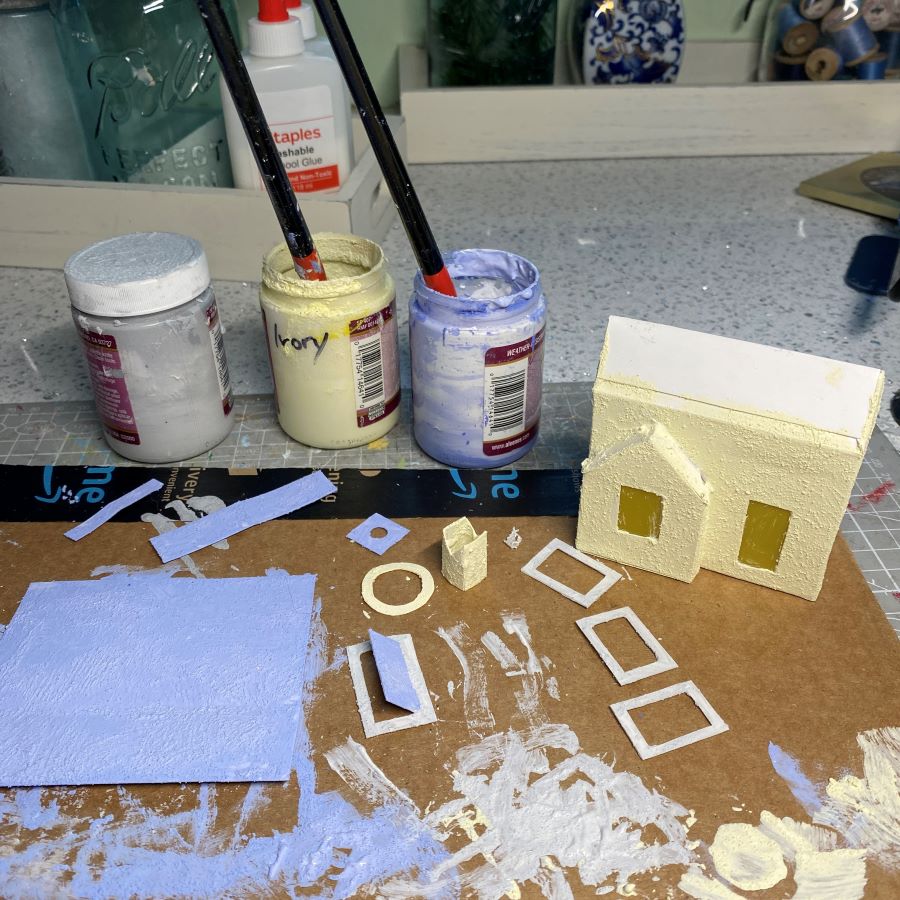
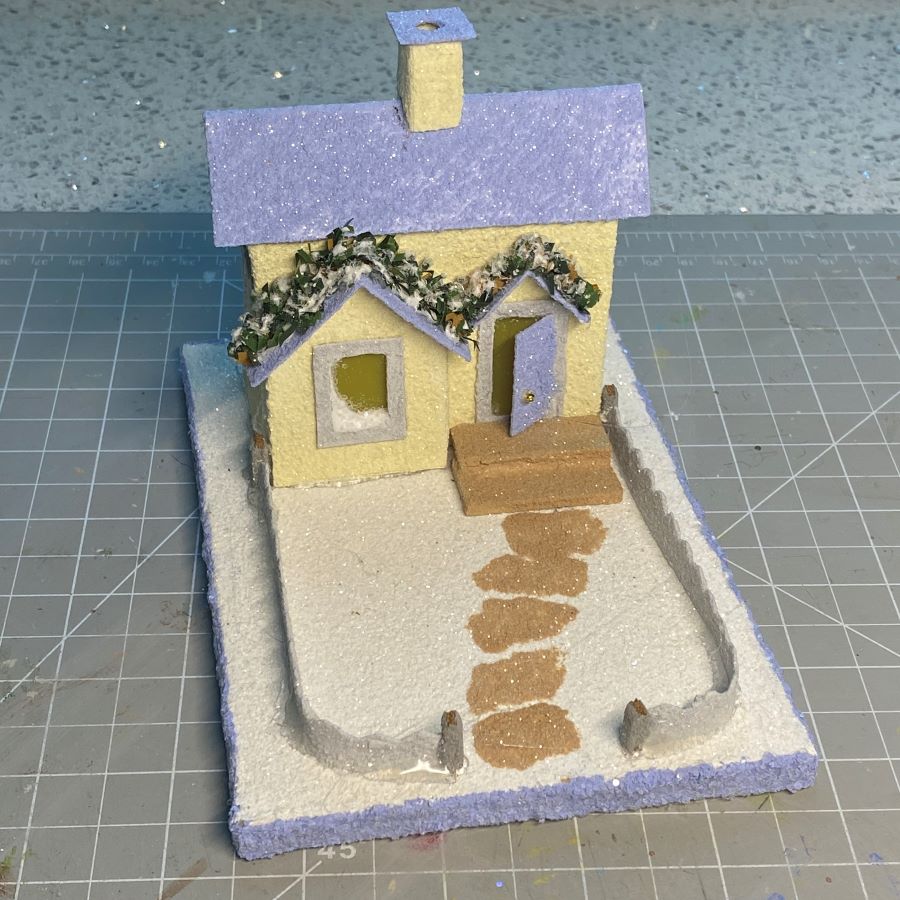
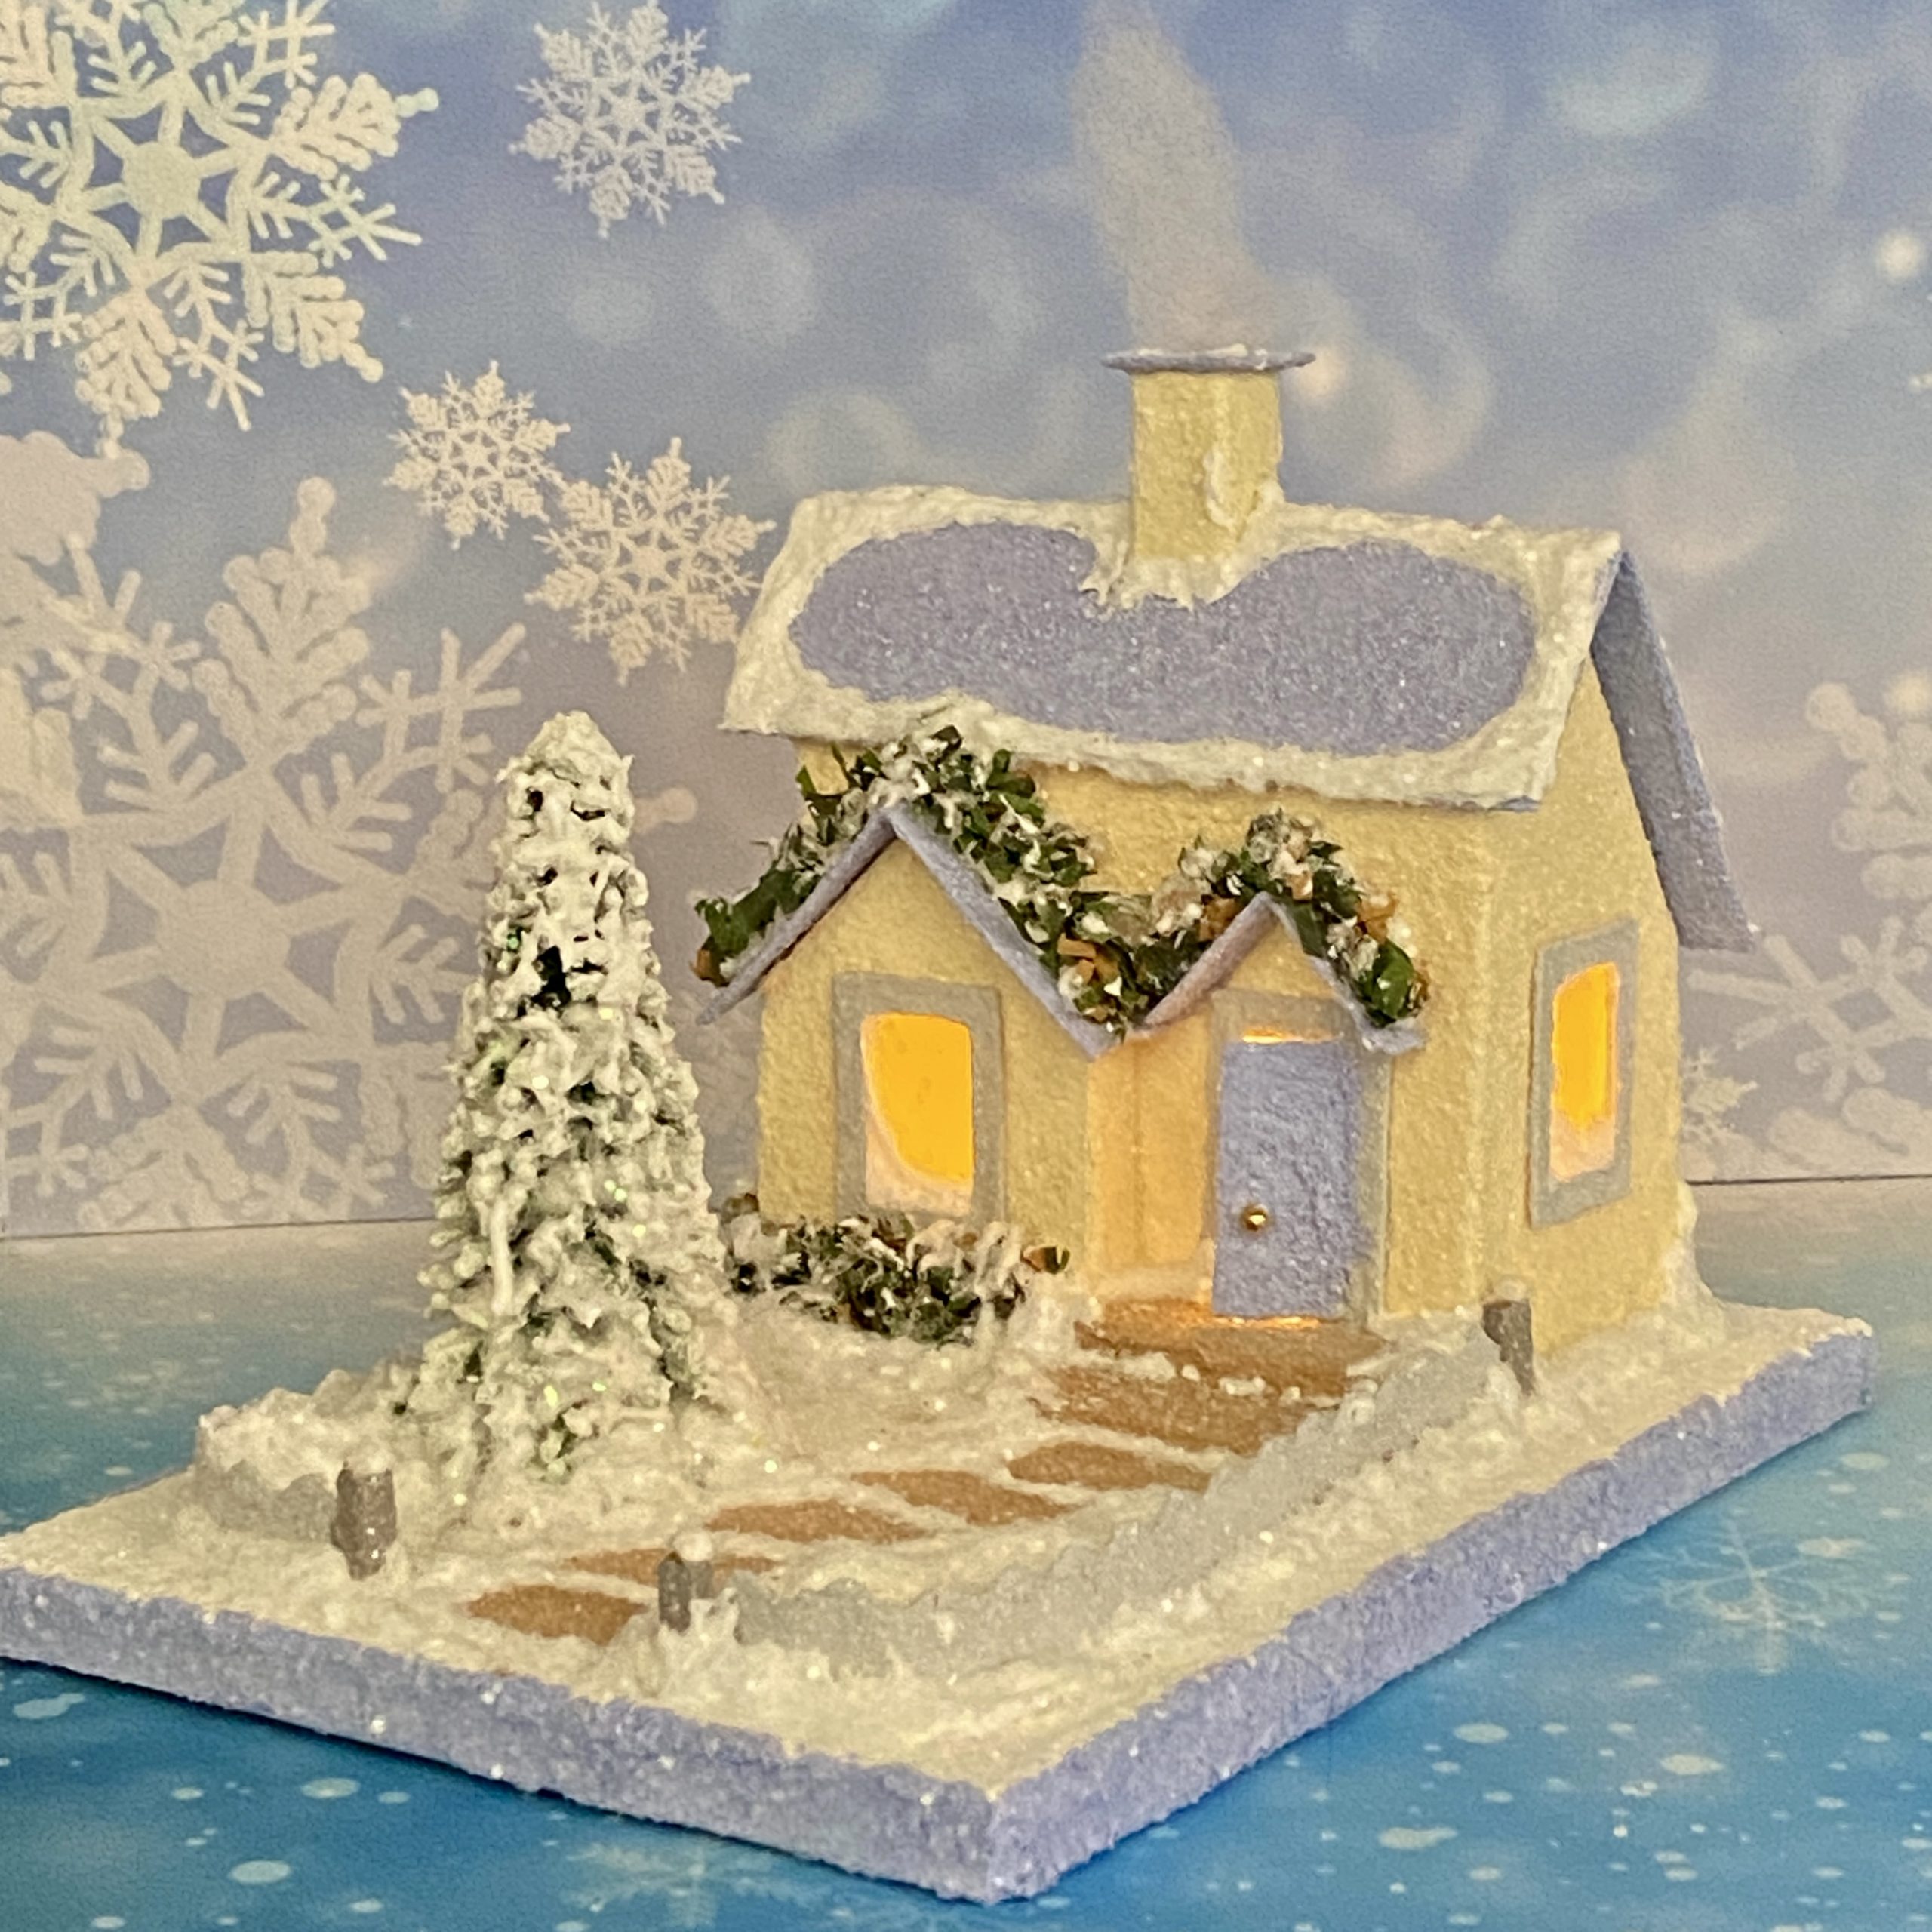
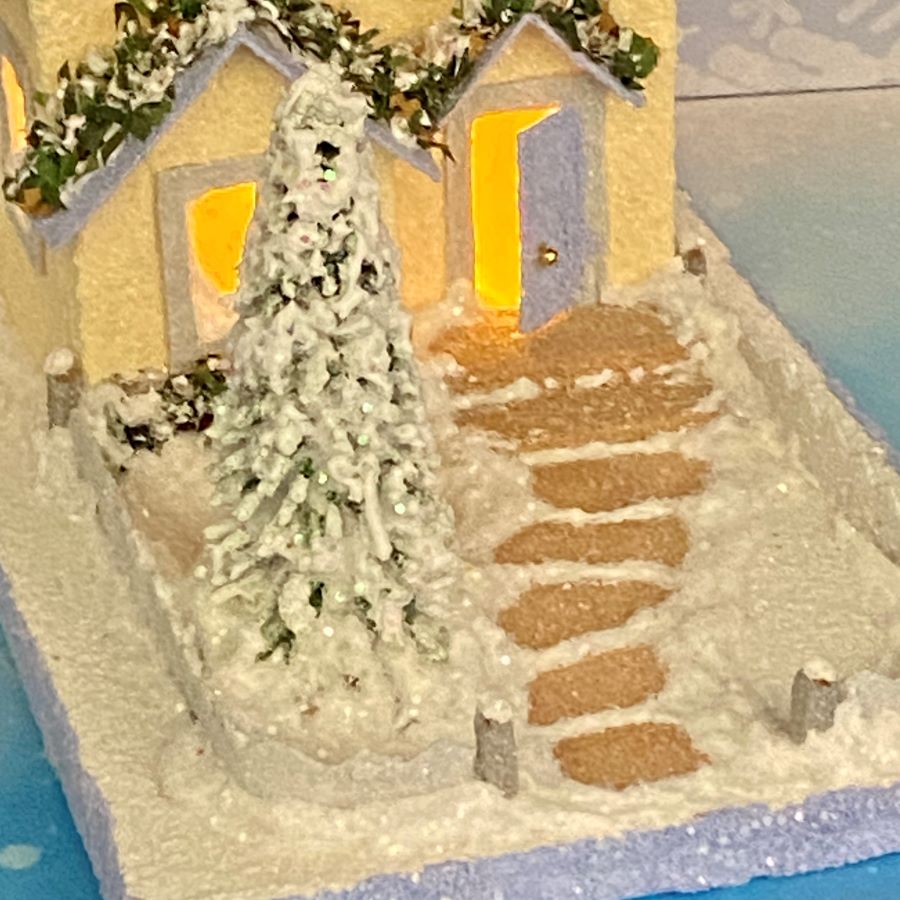
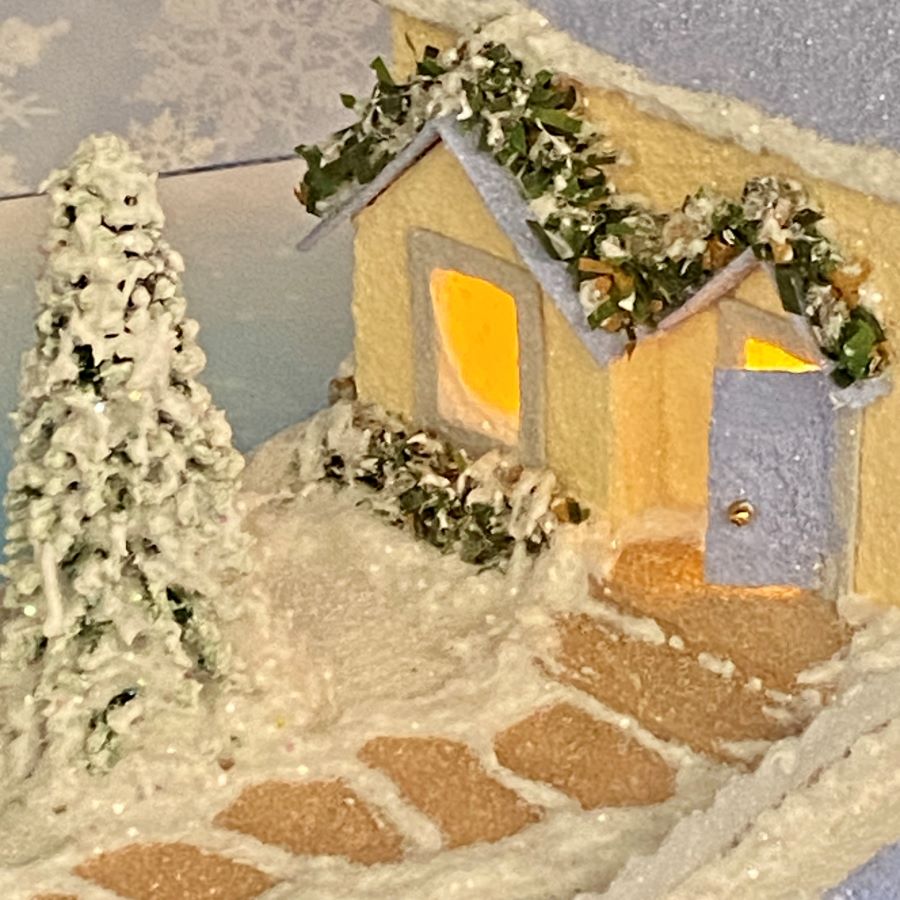
I paint each piece separately. One coat of paint is left to dry, then a second coat applied. While wet, the paint is covered with fine, clear glitter. When dry, I assemble the house with hot glue. The stepping stones for the sidewalk are painted directly onto the base. There are two steps leading up to the door.
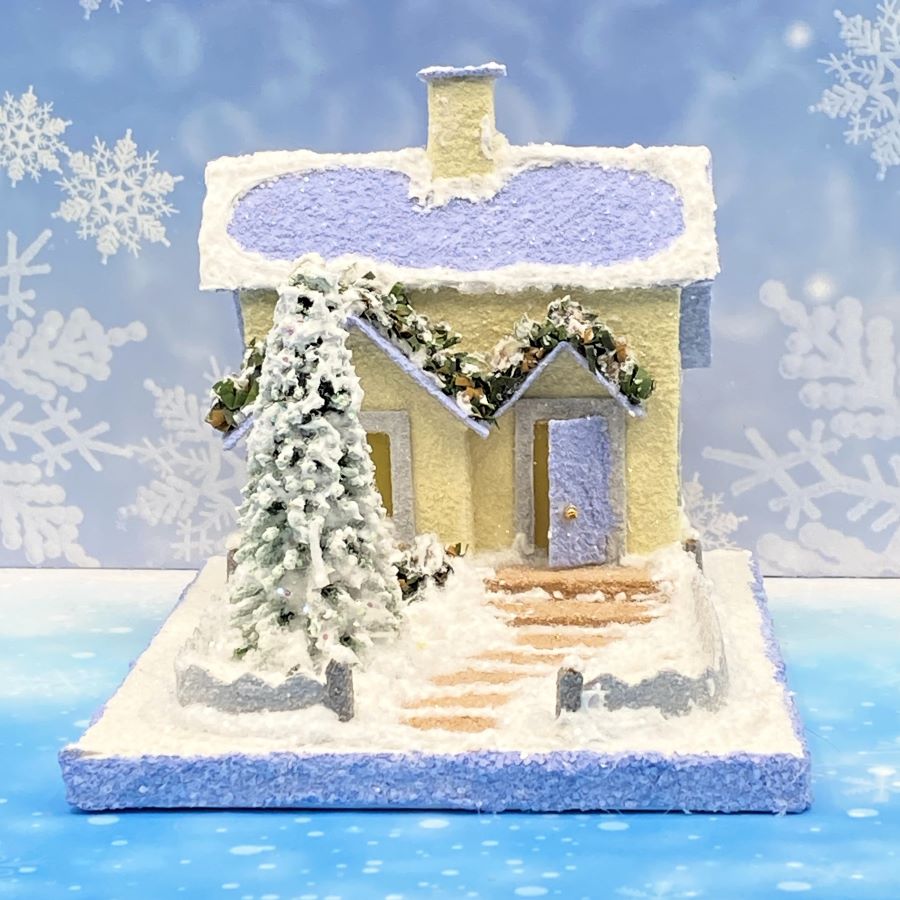
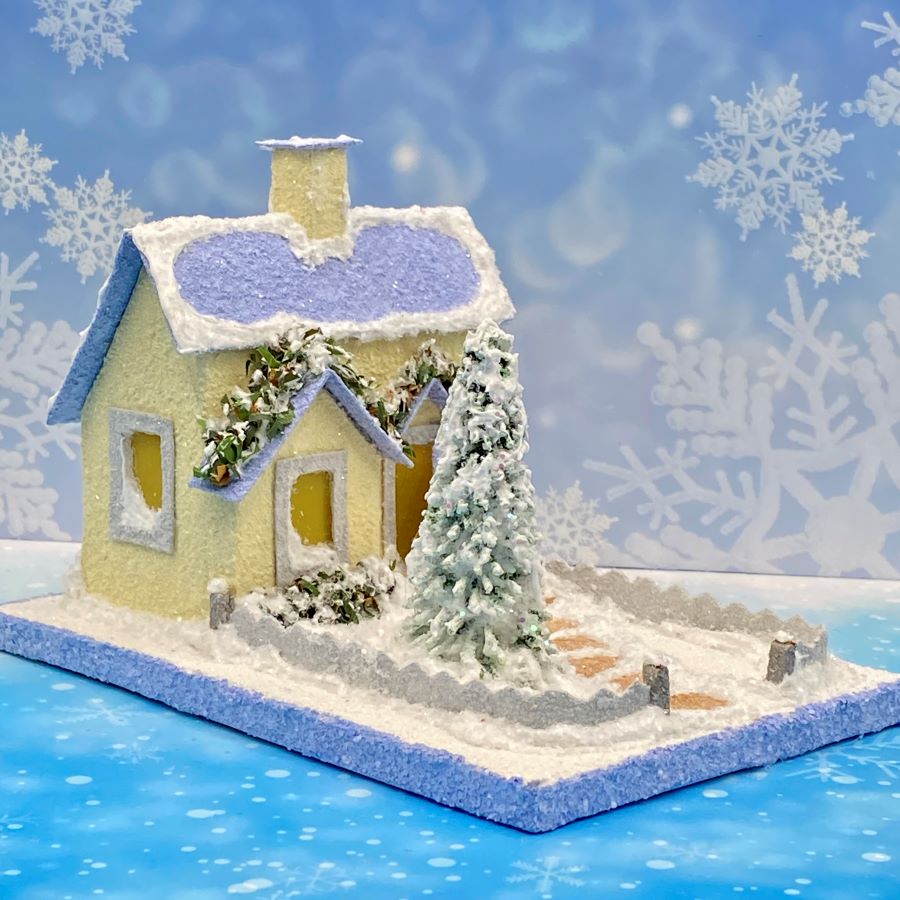
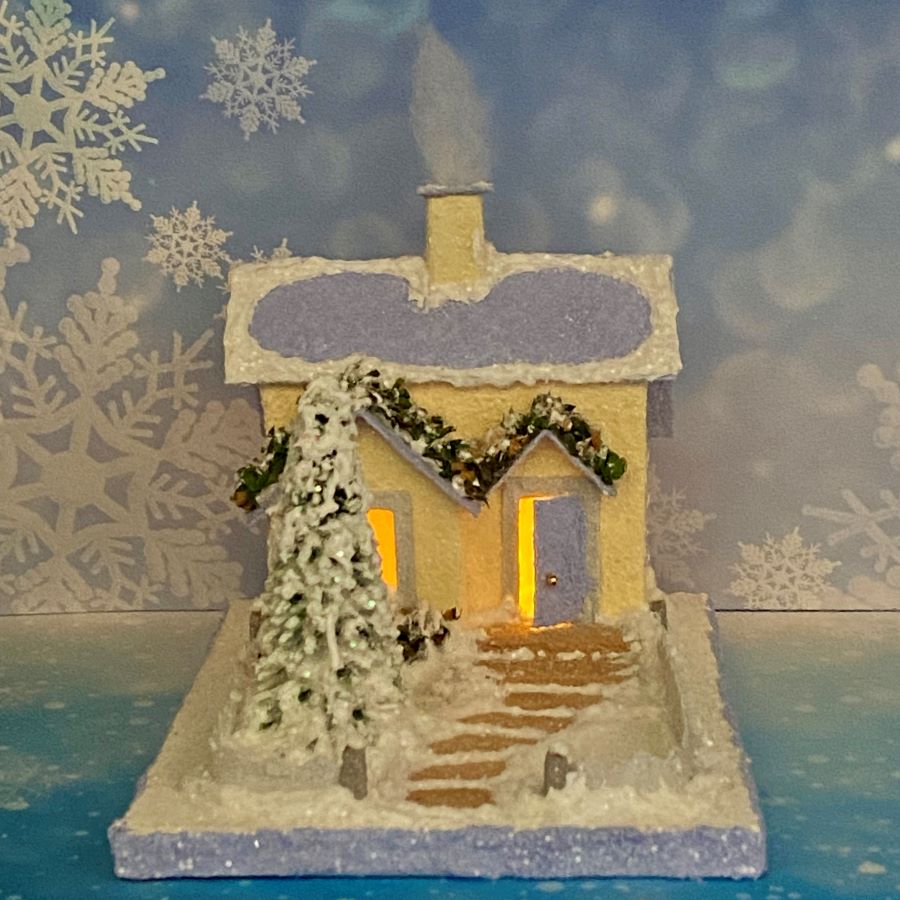
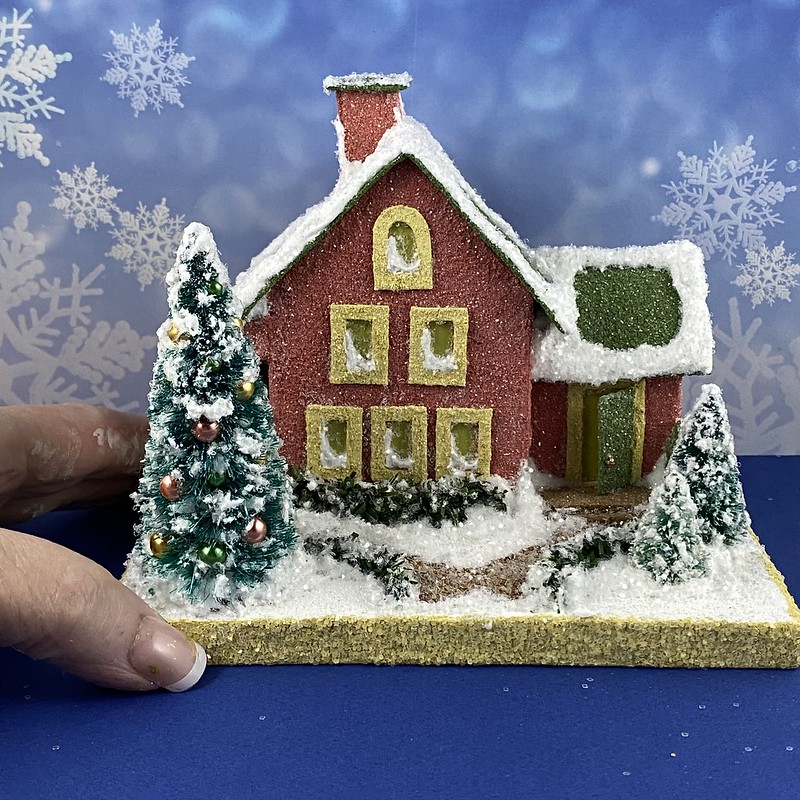
It makes a cozy looking winter house. It isn’t possible to see in the pictures, but the tree is dusted with irridescent glitter.
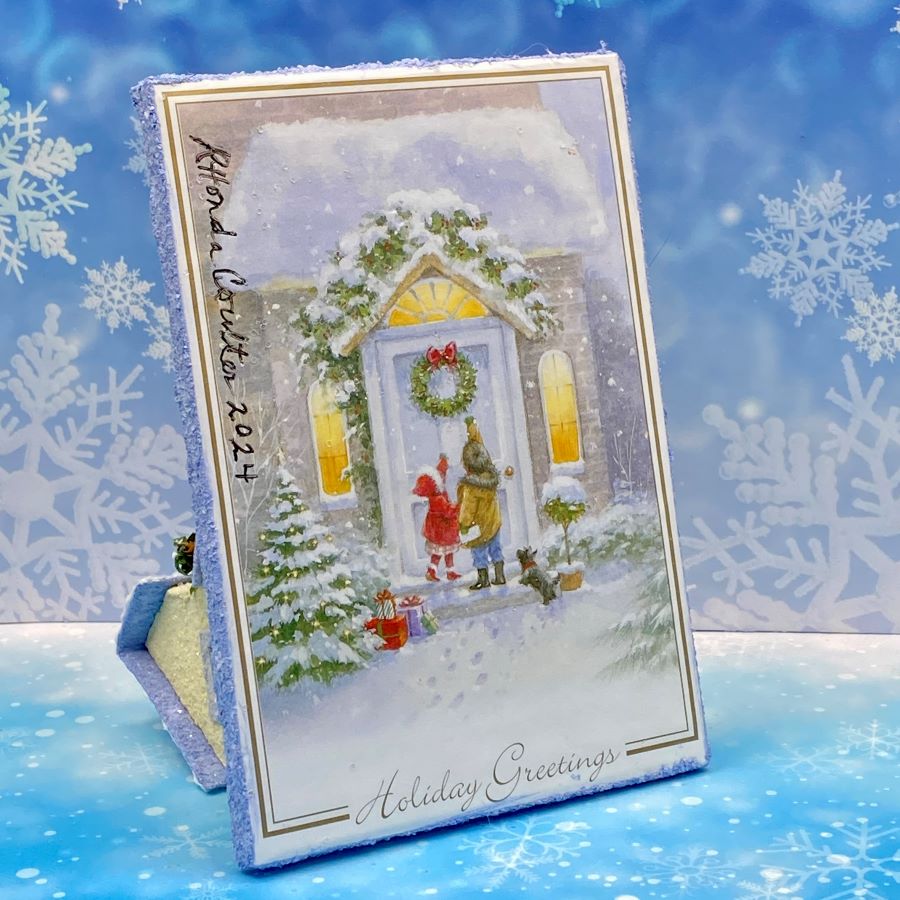
The base is made from a greeting card, featuring two small children with gifts, knocking at the front door. A hole in the back allows the use of a small LED light string for lighting this and other glitter houses in your Christmas village.
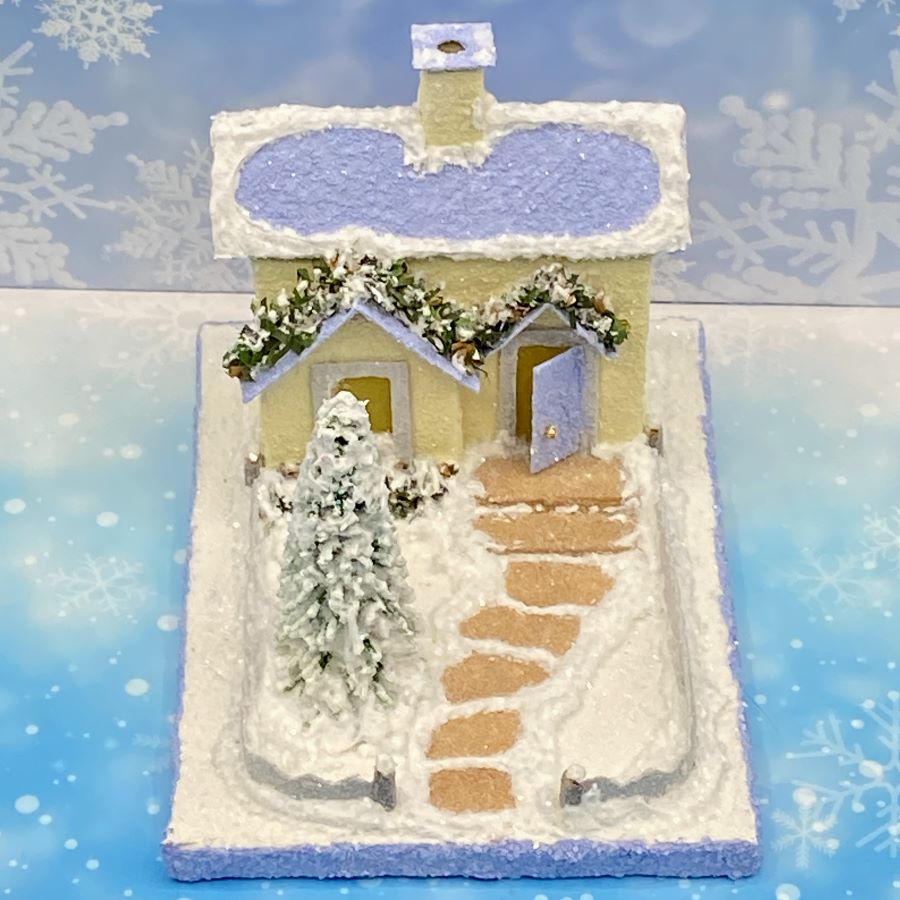
The house features a small bumpout on the front of the house. Evergreen trims the roofs of the bumpout and the front door.
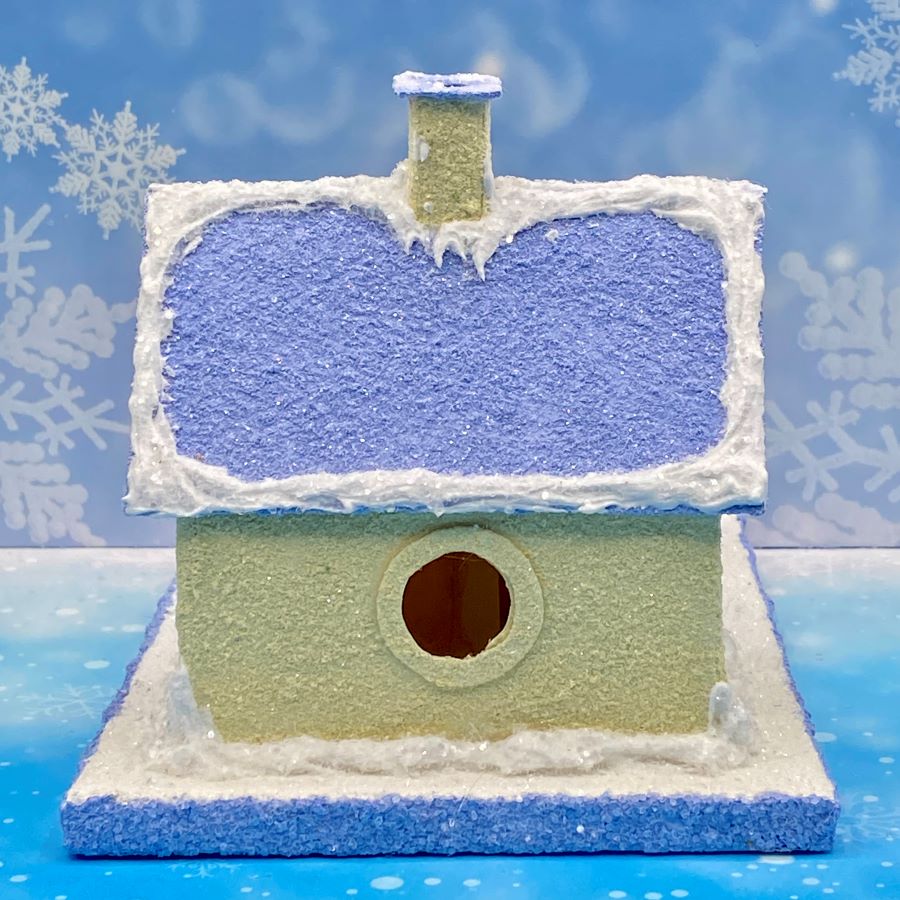
Santa’s view. A puff of smoke is included for those chilly winter nights when the fireplace is needed.
Details include the stepping stones, the door knob on the front door, the poster board fence with fence posts, and the evergreen hedge and trim.
If you would like to see more of my Putz houses, as well as Christmas ornaments I have made from upcycled holiday cards, please visit my Etsy shop.
If you are interested in crafting Putz houses of your own, check out my Putz tutorials for more information.
All proceeds from my Etsy shop benefit Kenya Mercy Ministries. They work with the urban poor of Nairobi, Kenya, particularly the children and their families who live in Kibera, the largest urban slum in Africa. Thank you for your part in helping these children when you purchase items from my shop!
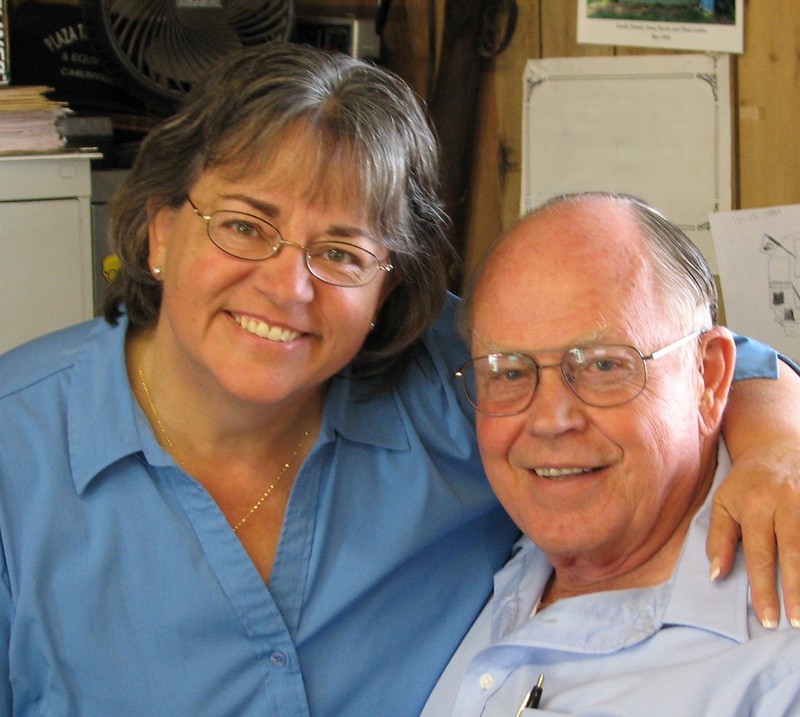
A light went out in my heart and life on July 20. God called my father home to Heaven after 91 productive years on this earth. Dad worked hard all his life. When he turned 75, he gave his business to my two brothers and “retired,” but Dad never quit going to work. He was there full time until several years ago, when his energy levels determined that afternoons were a better fit. He rarely missed a day. He fought cancer for the last four years of his life. He always regretted medical appointments that took him away from his desk. His last day at work was about a month before he died.
Dad and Mom married in 1952, the year after he graduated high school. They raised seven children and Dad worked hard to make our life as good as it could be. During my next to last visit with Dad, when he was easing his grip on life and finding it hard to stay awake, he whispered, “I’m sorry for the ways I failed you. I worked too much.” I cried when he said that. He said, “Don’t cry for me.” I told him, “I’m not. I’m crying for me.” His eyes were closed but he gave a faint chuckle and squeezed my hand. He understood. Dad never failed us. He did the best he could with the resources God granted him. We all should spend more time than we do with those we love the best, but I don’t remember ever thinking Dad was gone too much. He had to work. That was just a necessity of life as we grew up. It was God’s blessing to Dad that he loved his work. Dad asked to be buried in the clothes he wore to the shop. So appropriate.
When Dad’s father died, he realized that Grandpa hadn’t said “I love you” very often. He was a wonderful father and loved his family, but expressing love verbally was hard for him. Dad decided then that he wouldn’t let another opportunity go by when he could say “I love you. I’m very proud of you,” to his own family.
As much as he loved his family and his work, Dad’s faith in God was the most important aspect of his life. I am grateful for his example, living out his love for Christ in such a kind and generous way to all who had the honor of knowing him. I am eternally grateful that Christ’s intervention on our behalf means that death can’t separate us. We will be reunited one glad day.
I can’t imagine a life without my father in it. I was born a week after Dad turned 21. I am blessed, at my age, to have had him as a vibrant part of my life for so long. He loved us all, no matter the circumstances. We were his heart and his life.
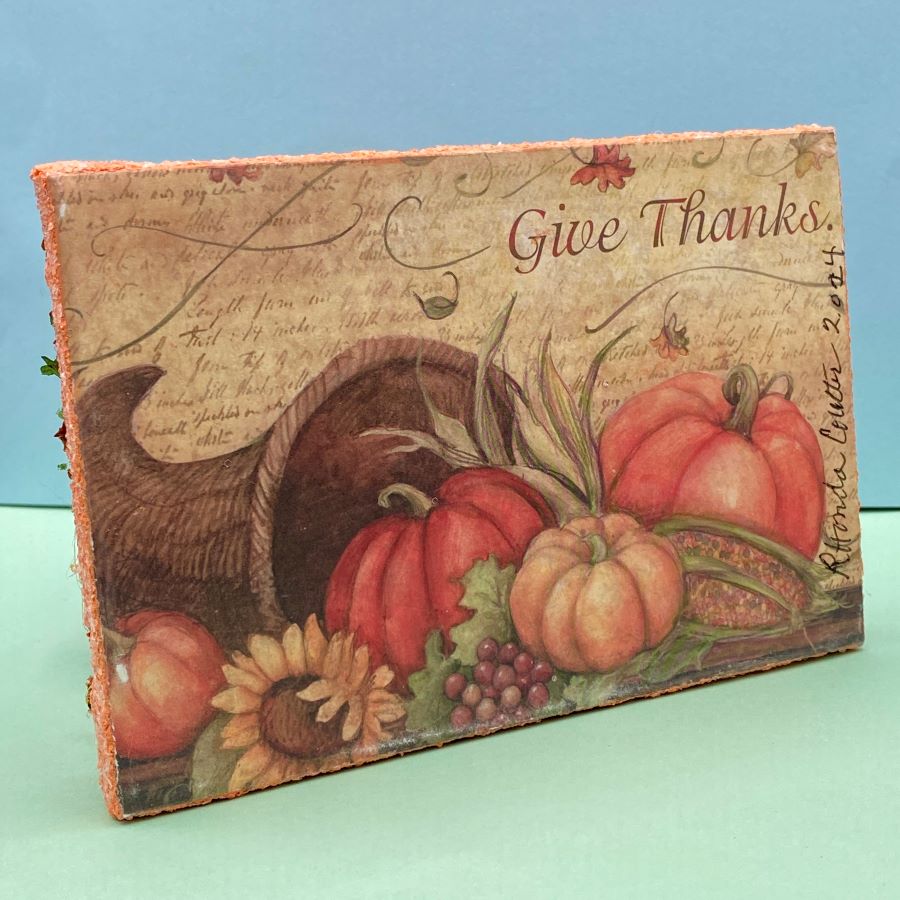
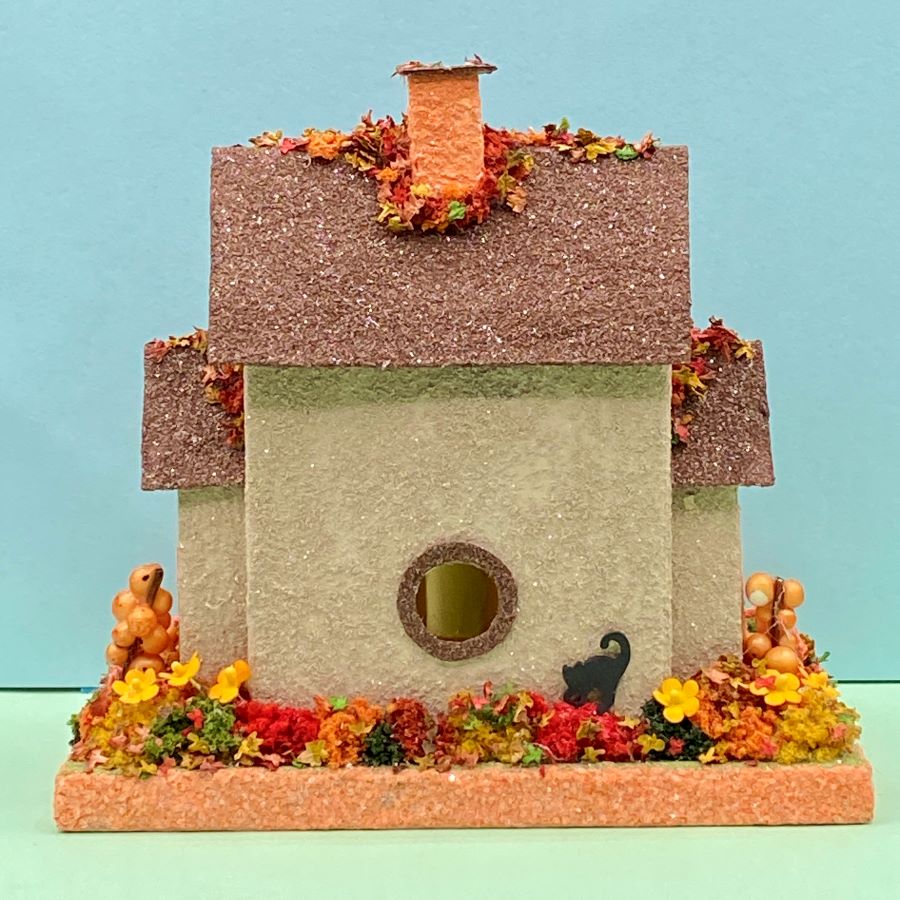
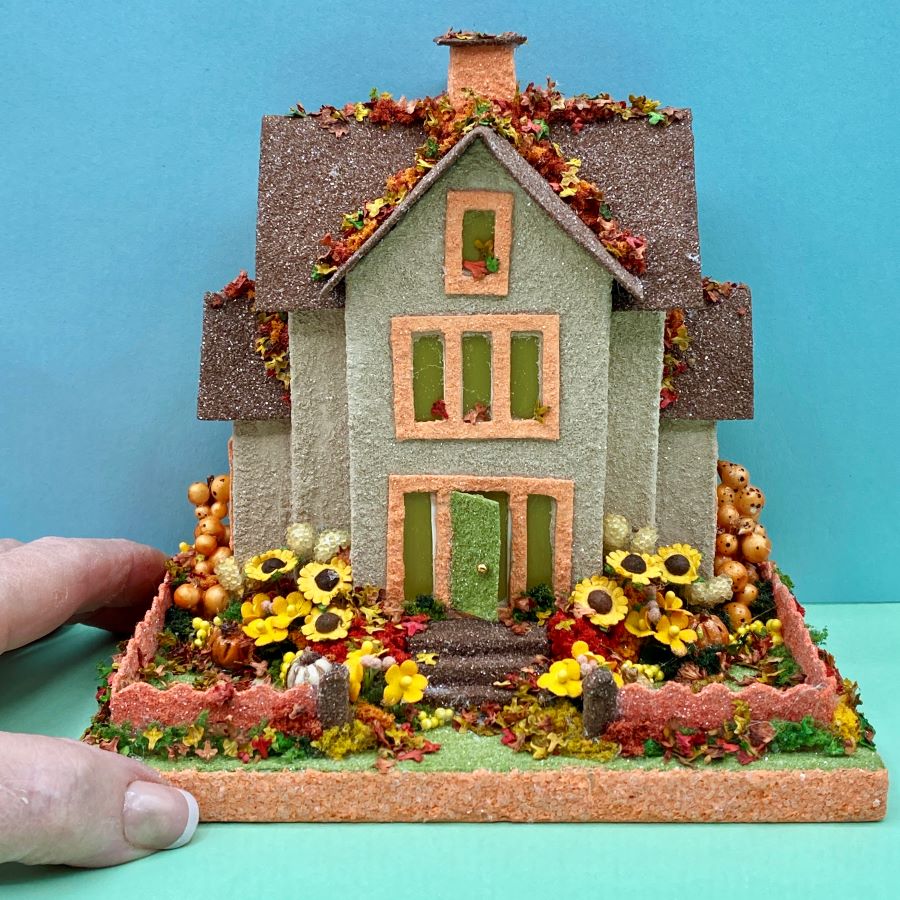
This is the second edition of the pattern 071924. The first one is the blue winter house. The autumn house features fall leaves, sunflowers and four pumpkins. The putz is 6 1/4″ wide by 4 1/2″ and 5 3/4″ tall, as measured from the bottom of the base to the top of the chimney.
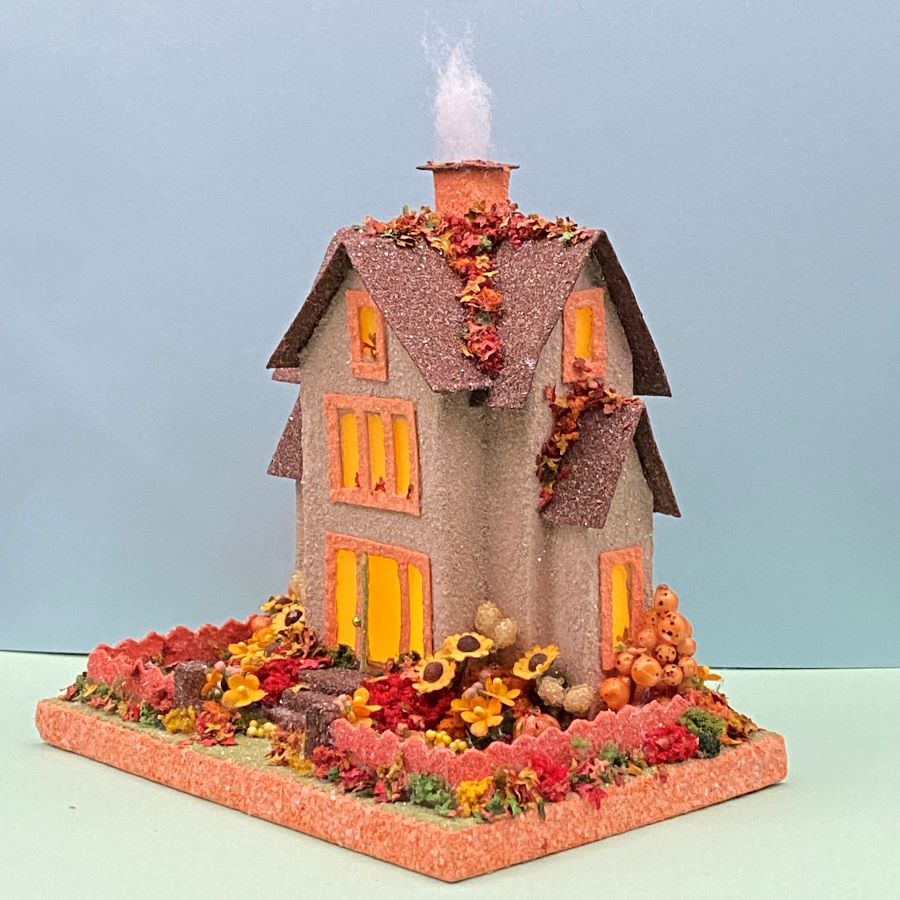
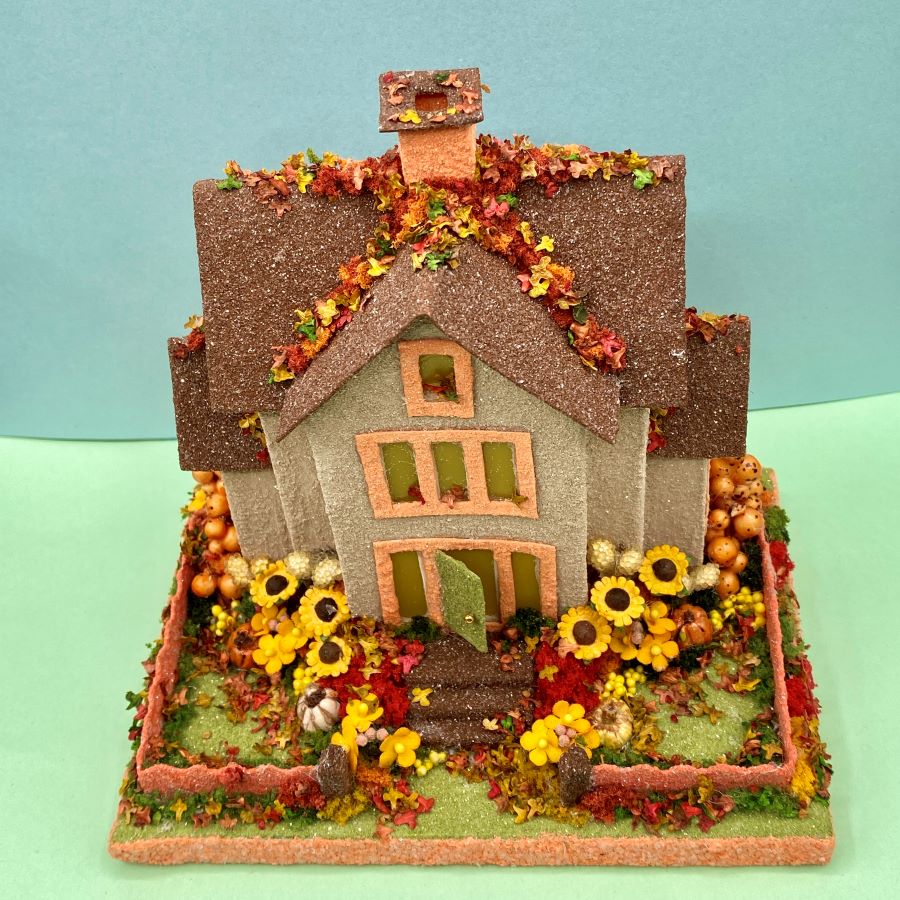
The base is made from an upcycled greeting card picturing pumpkins. A hole in the back allows the use of a small LED light string for lighting this and other glitter houses in your glitter house village.
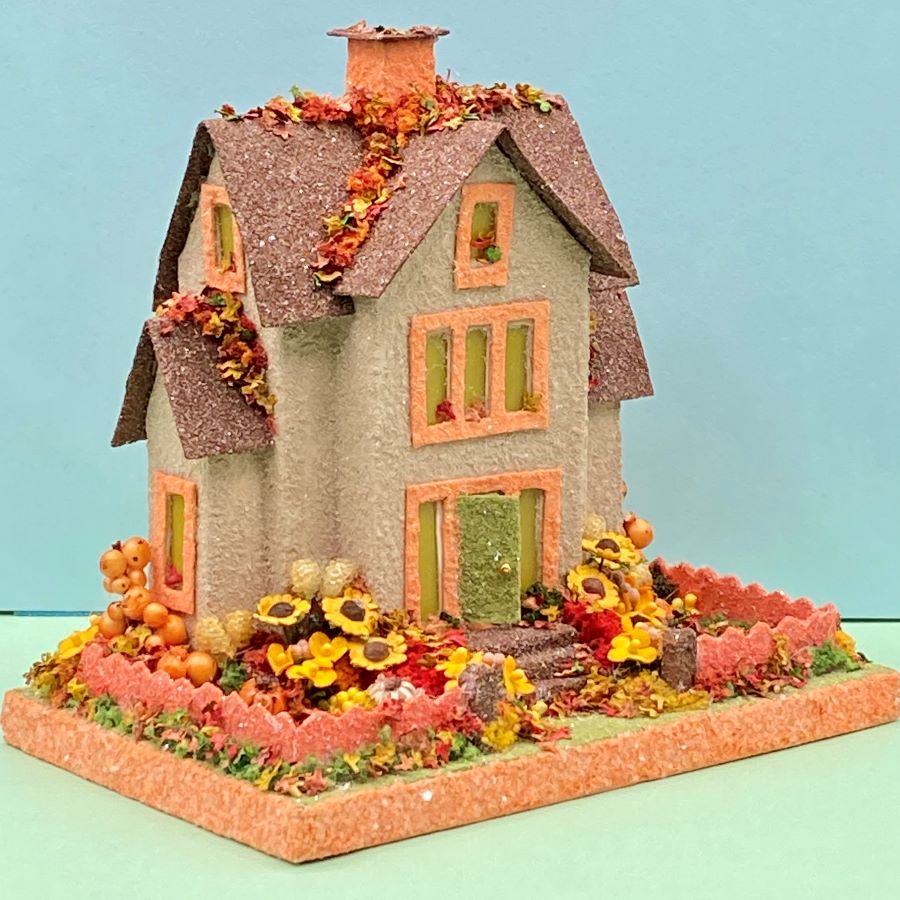
The yard is encircled with a poster board fence. Flowers and autumn shrubs fill the yard. I had planned to put an autumn tree in the front yard, but didn’t have room for it.
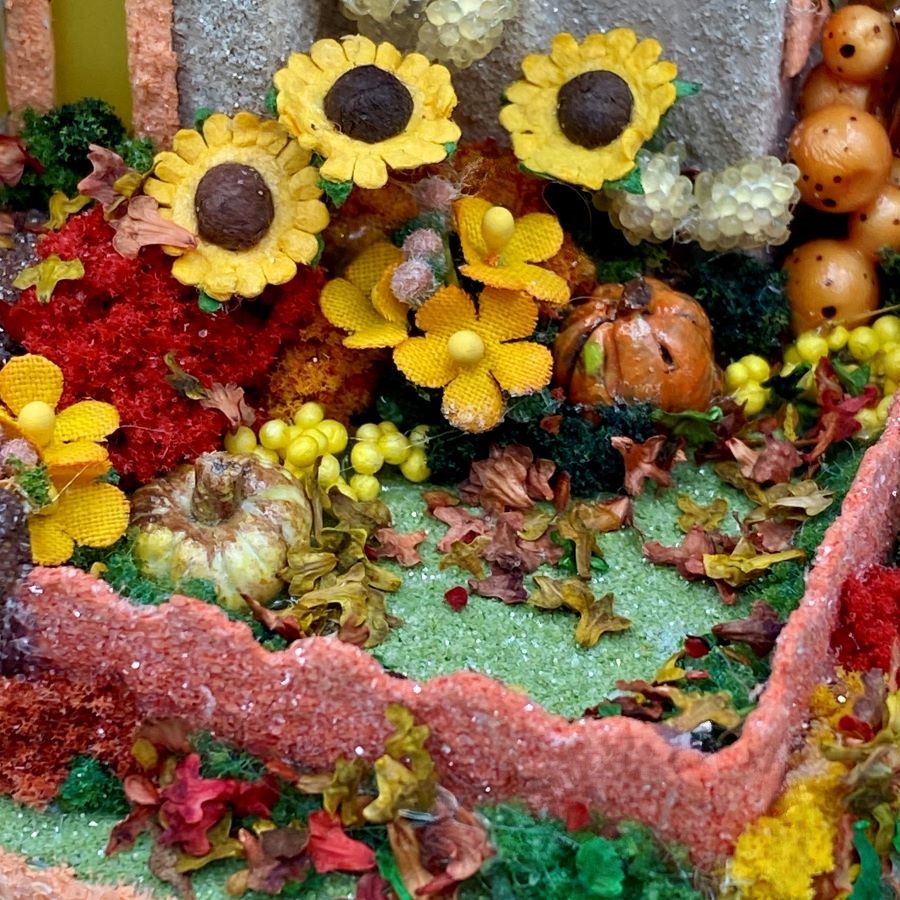
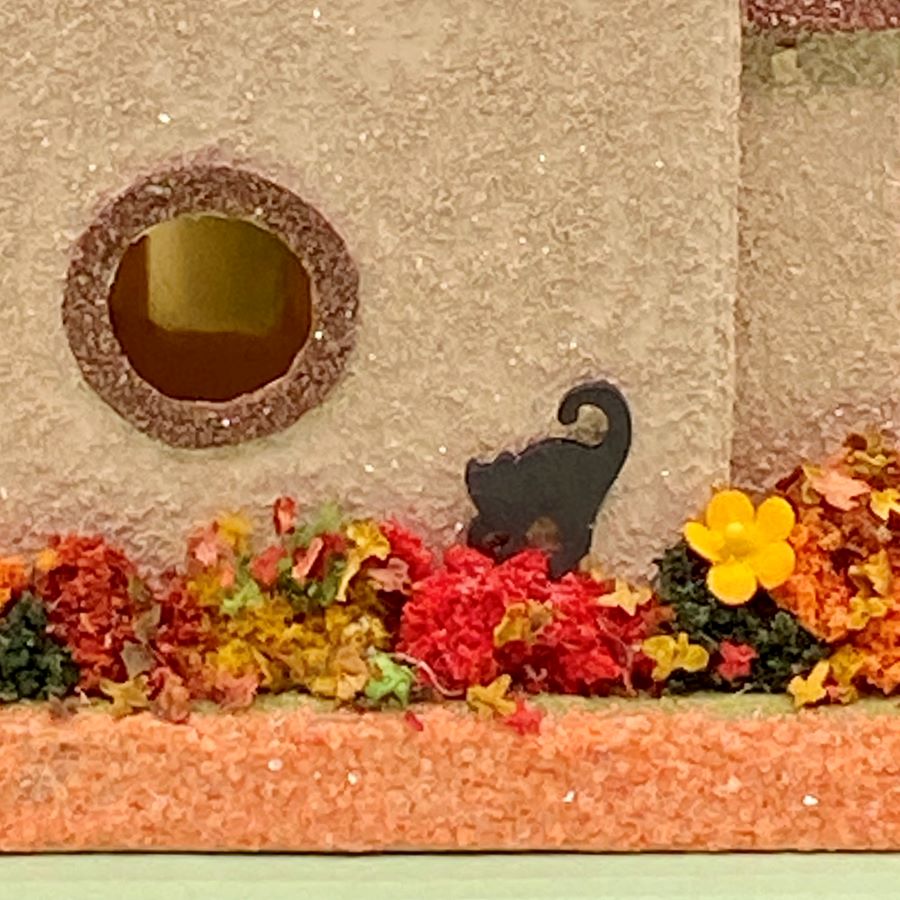
The details include sunflowers and handcrafted pumpkins. On the back of the house is a tiny black cat.
I love the tiny leaf litter. It sets off the autumn theme so well.
If you would like to see more of my Putz houses, as well as Christmas ornaments I have made from upcycled holiday cards, please visit my Etsy shop.
If you are interested in crafting Putz houses of your own, check out my Putz tutorials for more information. Putz House Tutorials The blog can be searched for “tutorial” to find any that aren’t linked to the tutorial page. Working on that!
I am always happy to answer questions about the process. Please ask, if you are wondering about the details of putzing!
All proceeds from my Etsy shop benefit Kenya Mercy Ministries. They work with the urban poor of Nairobi, Kenya, particularly the children and their families who live in Kibera, the largest urban slum in Africa. Thank you for your part in helping these children when you purchase items from my shop!
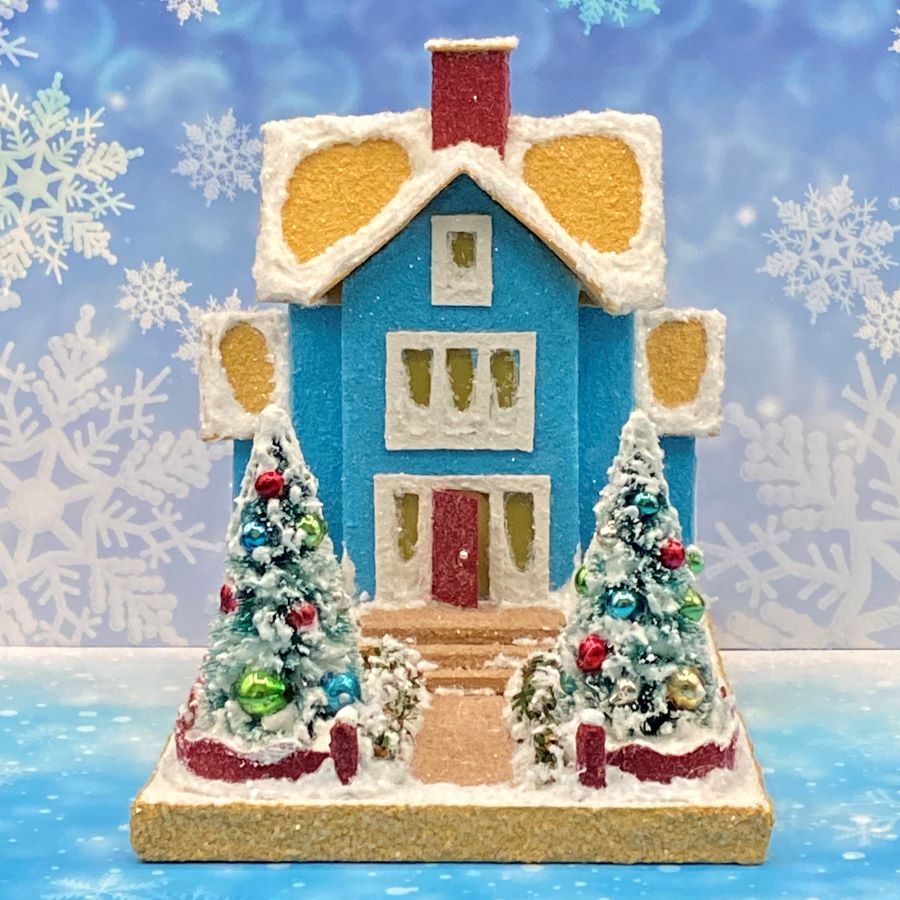
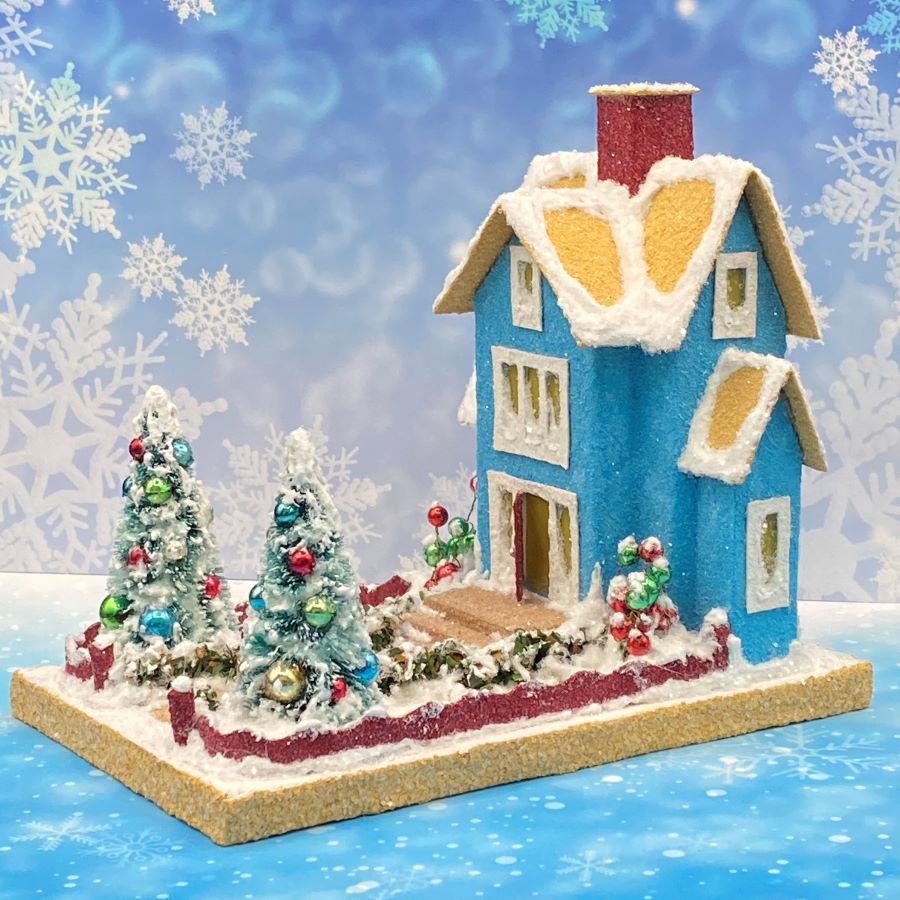
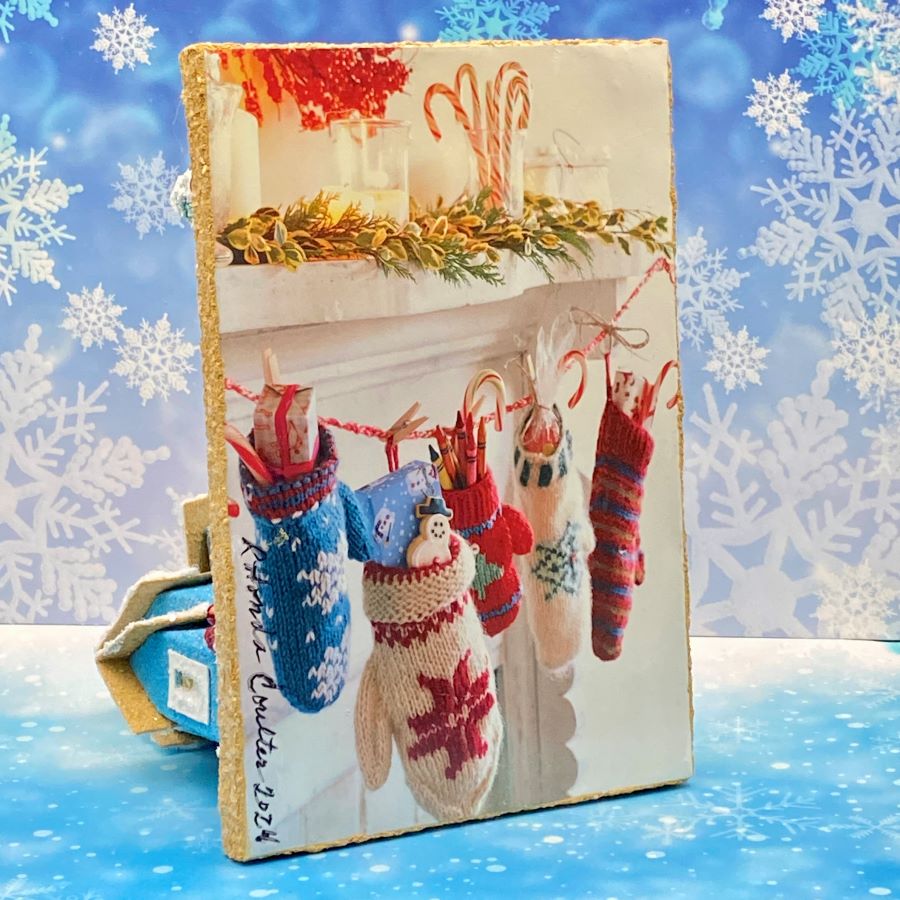
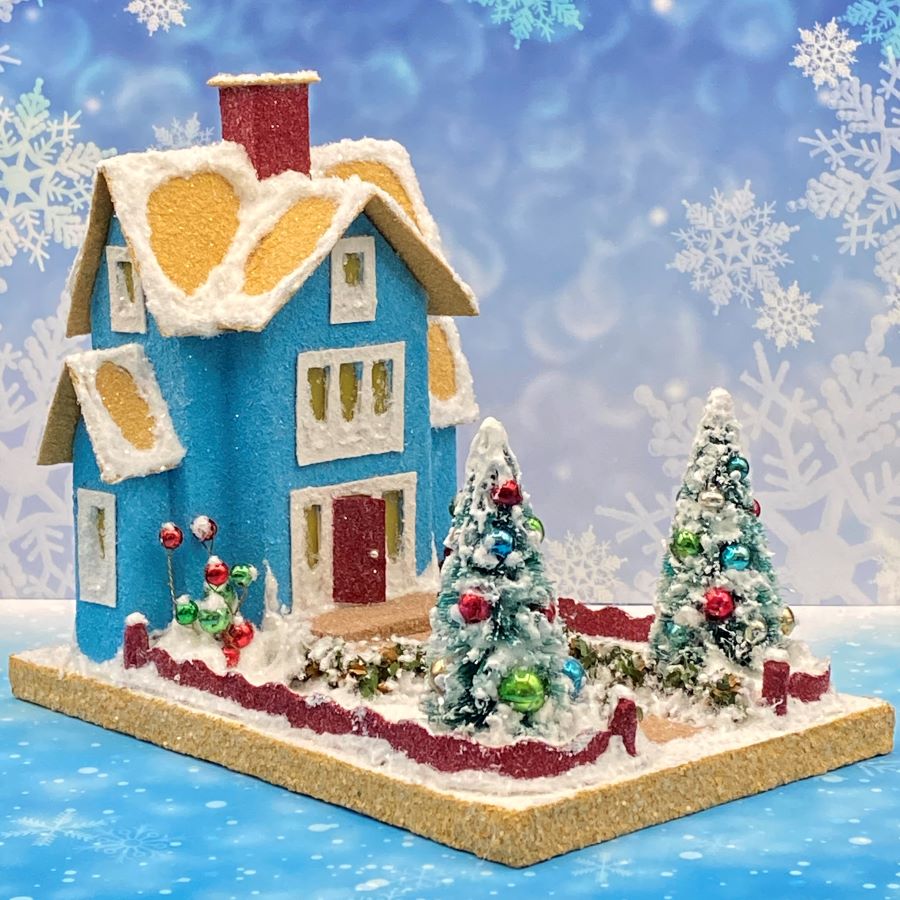
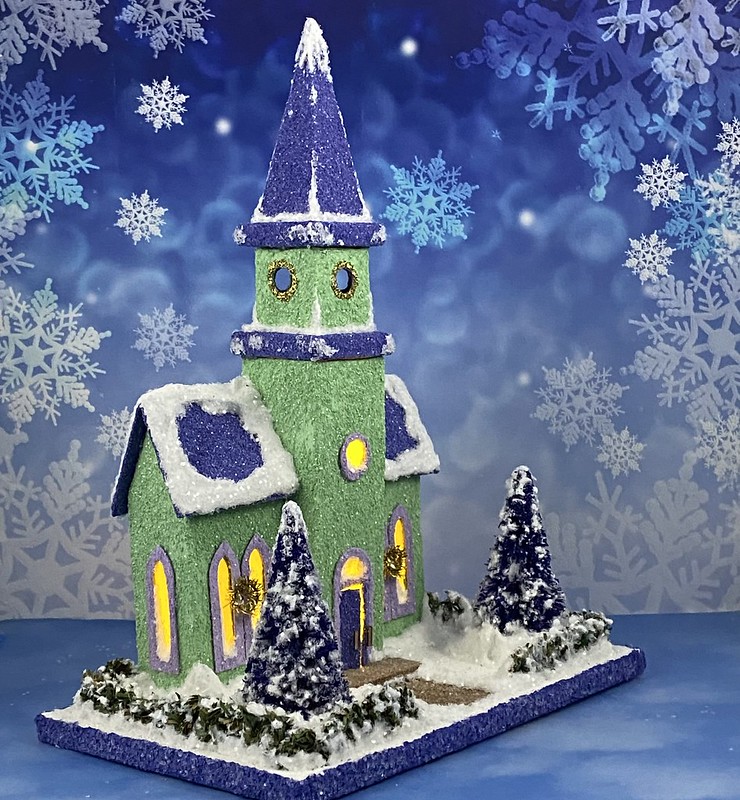
This house is made from a pattern I drew last week. I love the way it turned out. Right down to the gorgeous aqua blue color. When I chose the card to use as the base, I assumed I would use the red and gold colors on the card as they are the most prevelent. But I liked that blue too much not to use it as a prominent color.
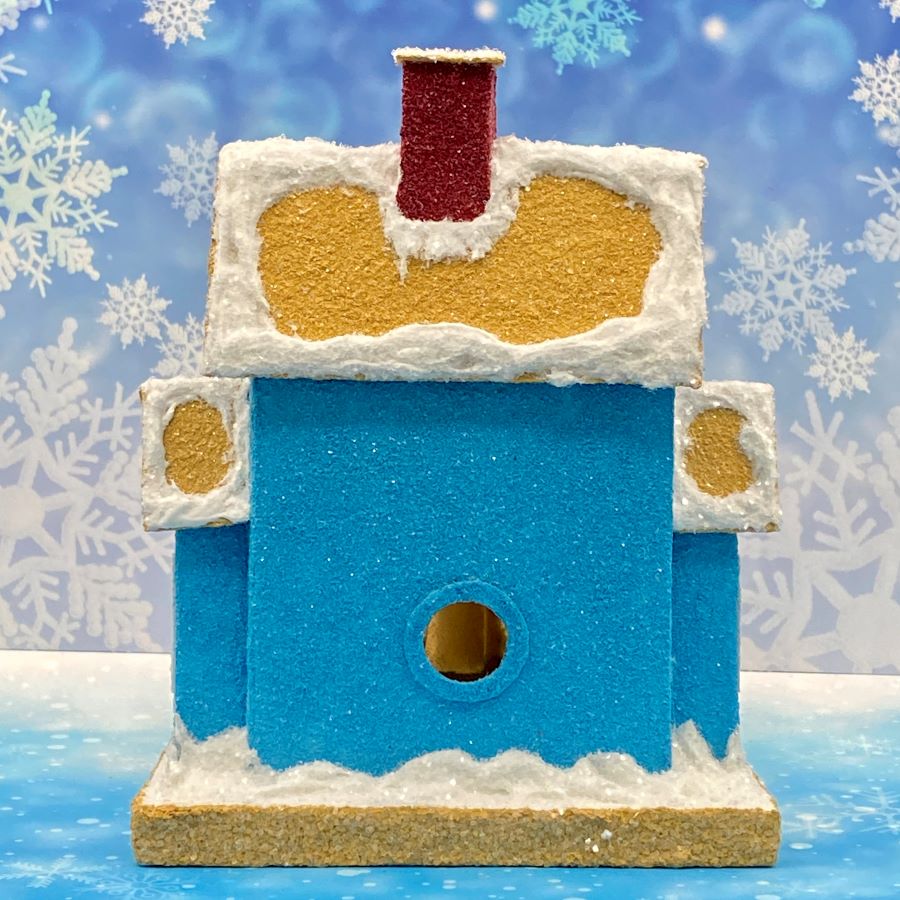
The putz is 4 7/8″ wide by 7 1/4″ deep. It is 6 1/4″ tall, as measured from the bottom of the base to the top of the chimney.
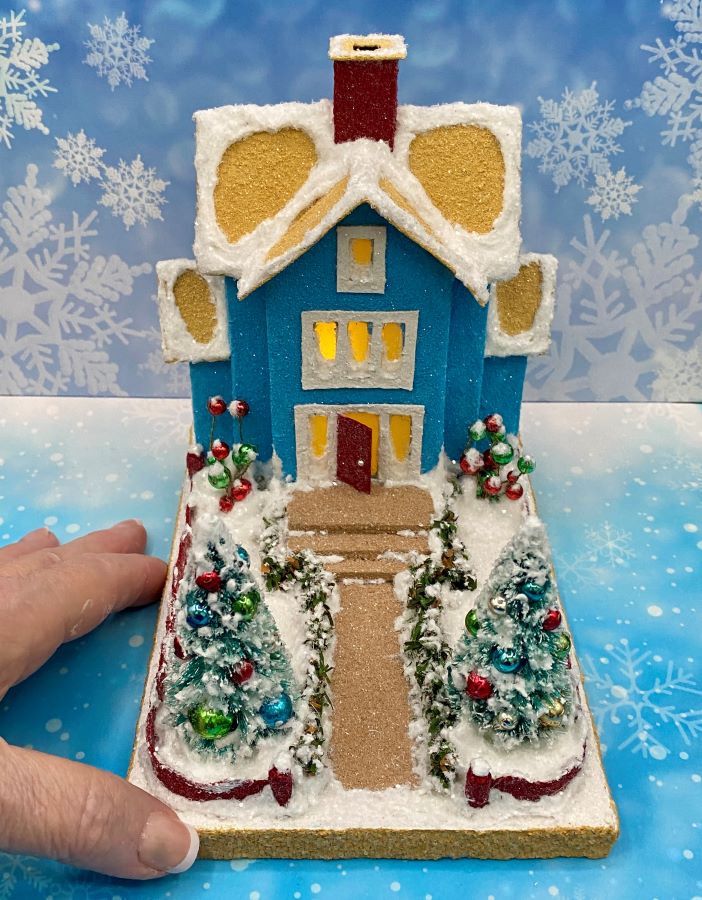
The base is made from an upcycled Christmas card, featuring a fireplace mantel with mittens in place of stockings. A hole in the back allows the use of a small LED light string for lighting this and other glitter houses in your glitter house village.
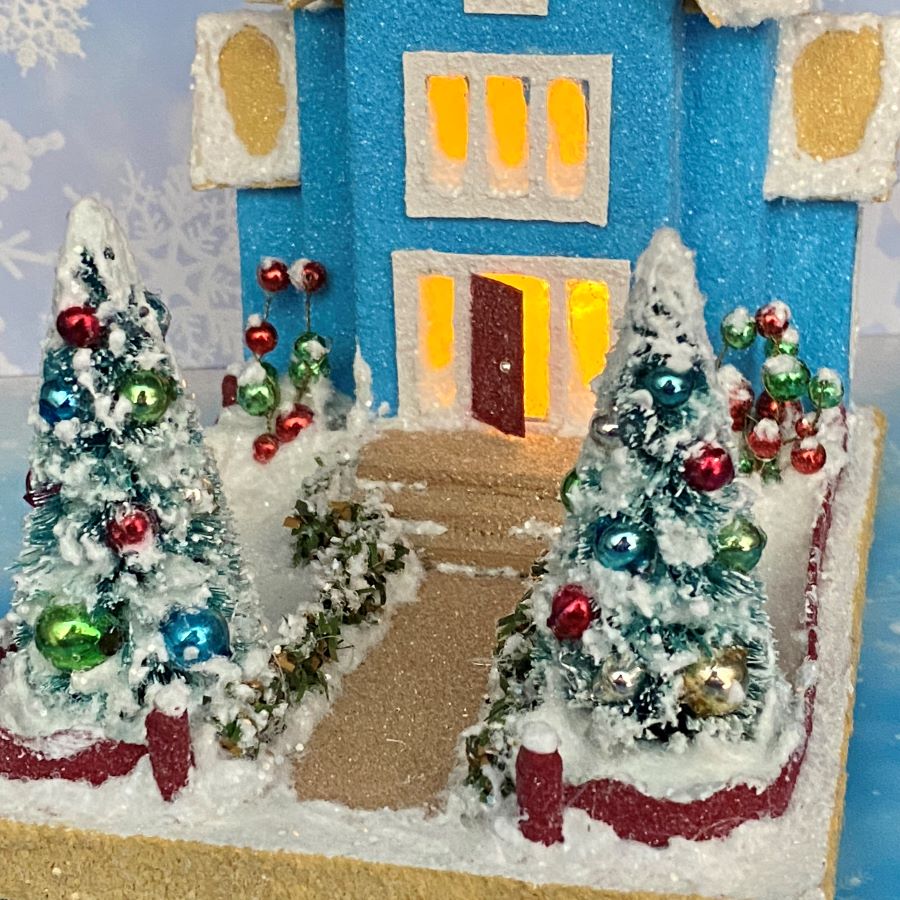
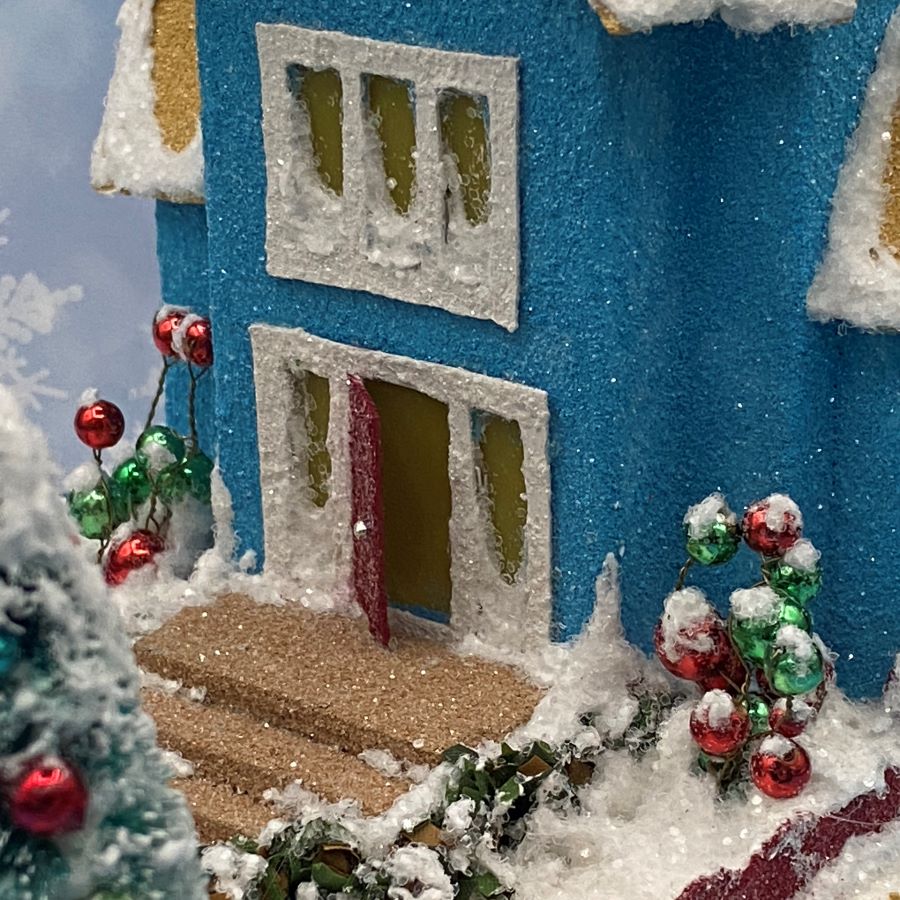
The yard has two bottle brush trees decorated with vintage mercury beads, faux snow and clear glitter. Wired beads decorate both sides of the front steps. While landscaping, I had thought about using several smaller trees, but it just didn’t look right to me. The two taller trees seem to set it off well.
The doors on my putz houses are always open, so guests know they are welcome to drop by any time. Christmas cookies and hot chocolate are waiting for company.
If you would like to see more of my Putz houses, as well as Christmas ornaments I have made from upcycled holiday cards, please visit my Etsy shop.
If you are interested in crafting Putz houses of your own, check out my Putz tutorials for more information. Putz House Tutorials The blog can be searched for “tutorial” to find any that aren’t linked to the tutorial page. Working on that!
I am always happy to answer questions about the process. Please ask, if you are wondering about the details of putzing!
All proceeds from my Etsy shop benefit Kenya Mercy Ministries. They work with the urban poor of Nairobi, Kenya, particularly the children and their families who live in Kibera, the largest urban slum in Africa. Thank you for your part in helping these children when you purchase items from my shop!
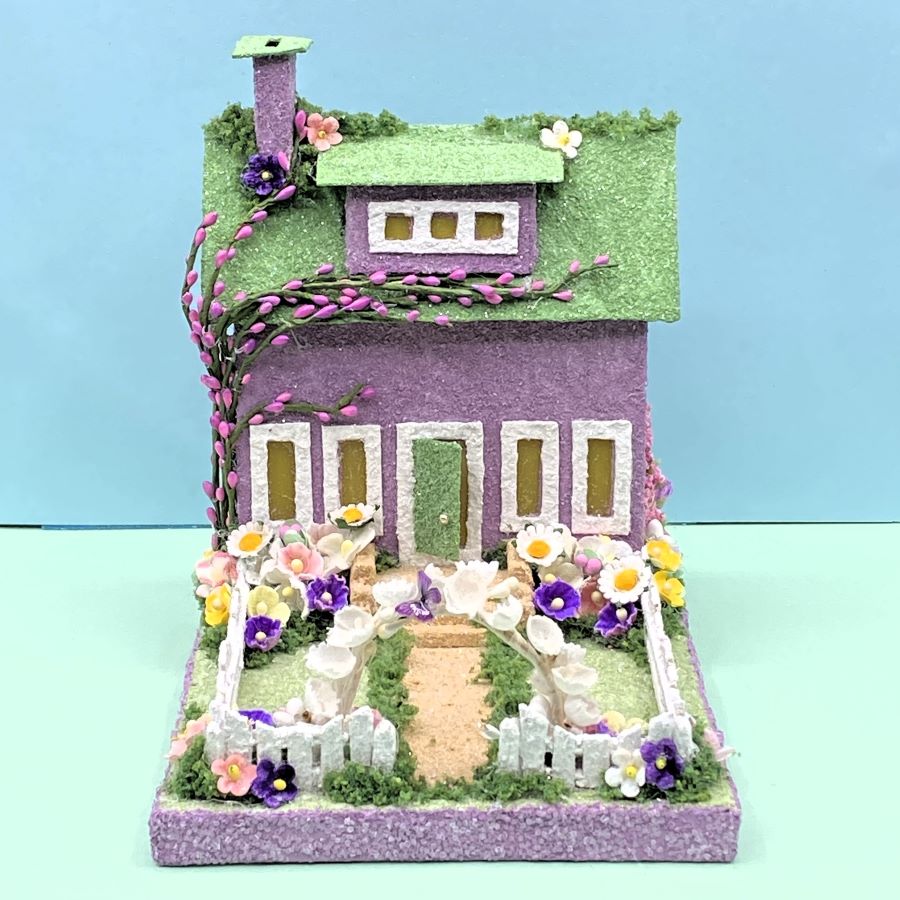
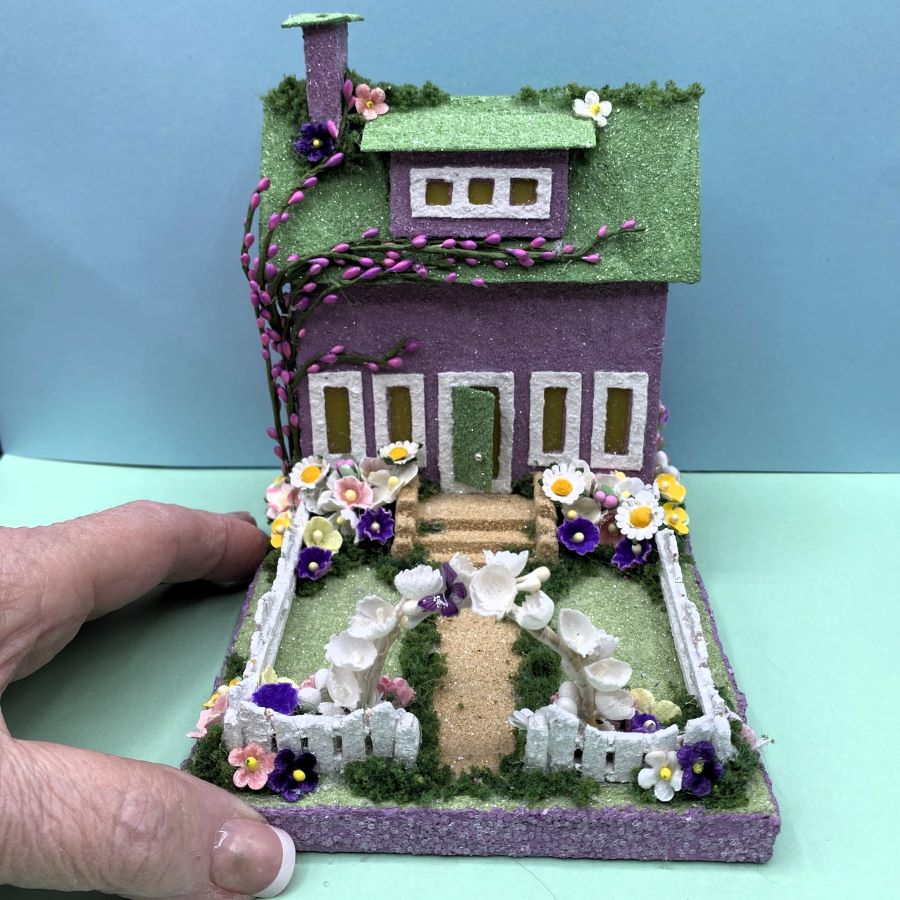
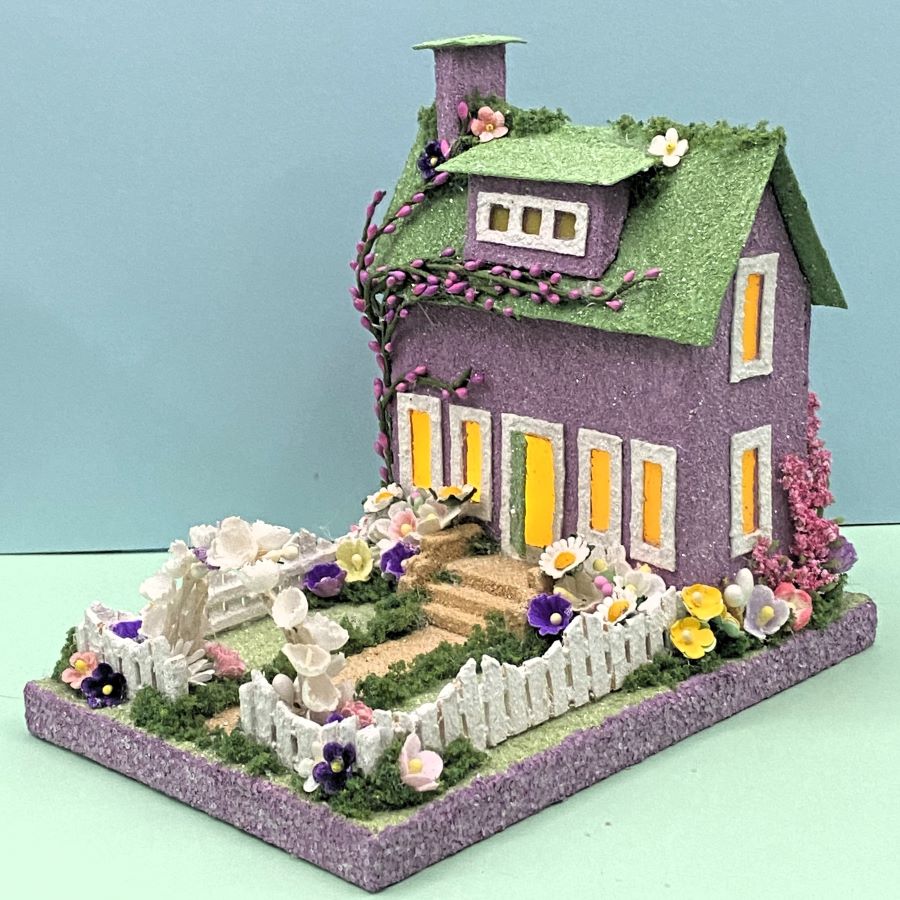
This summer house features a handcrafted wooden picket fence, a floral arbor with a tiny butterfly, and a budding vine growing on the house.
The putz is 4 3/8″ wide by 6″ deep. It is 5 1/2″ tall, as measured from the bottom of the base to the top of the chimney.
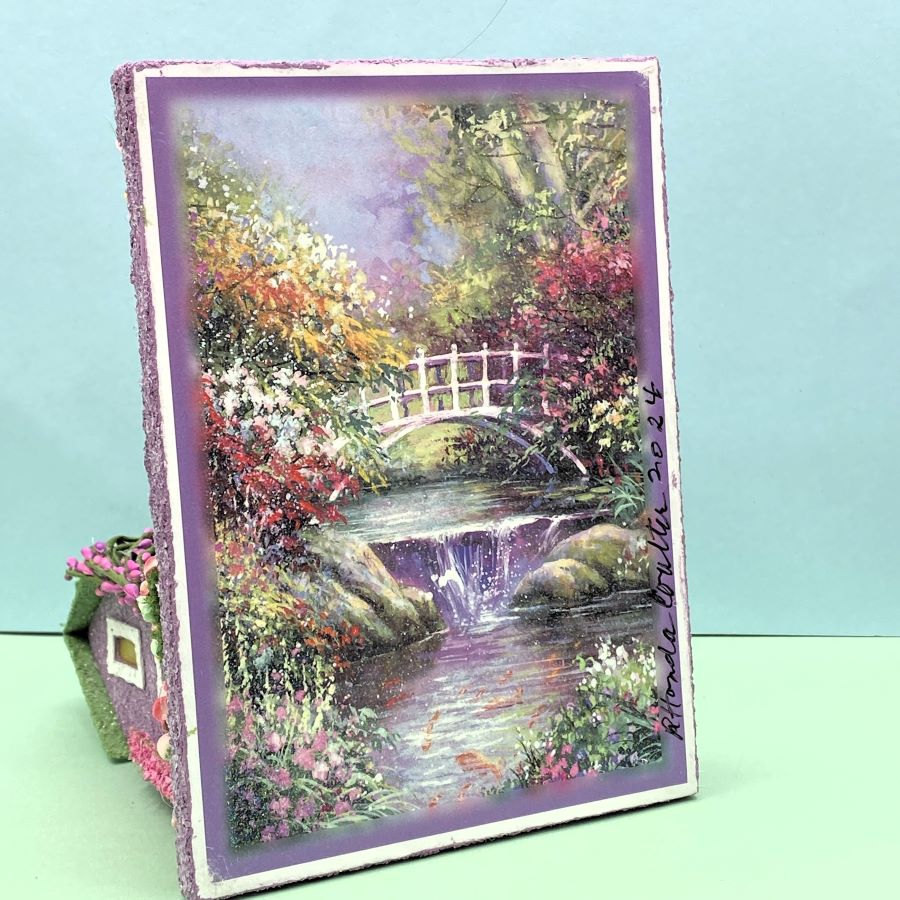
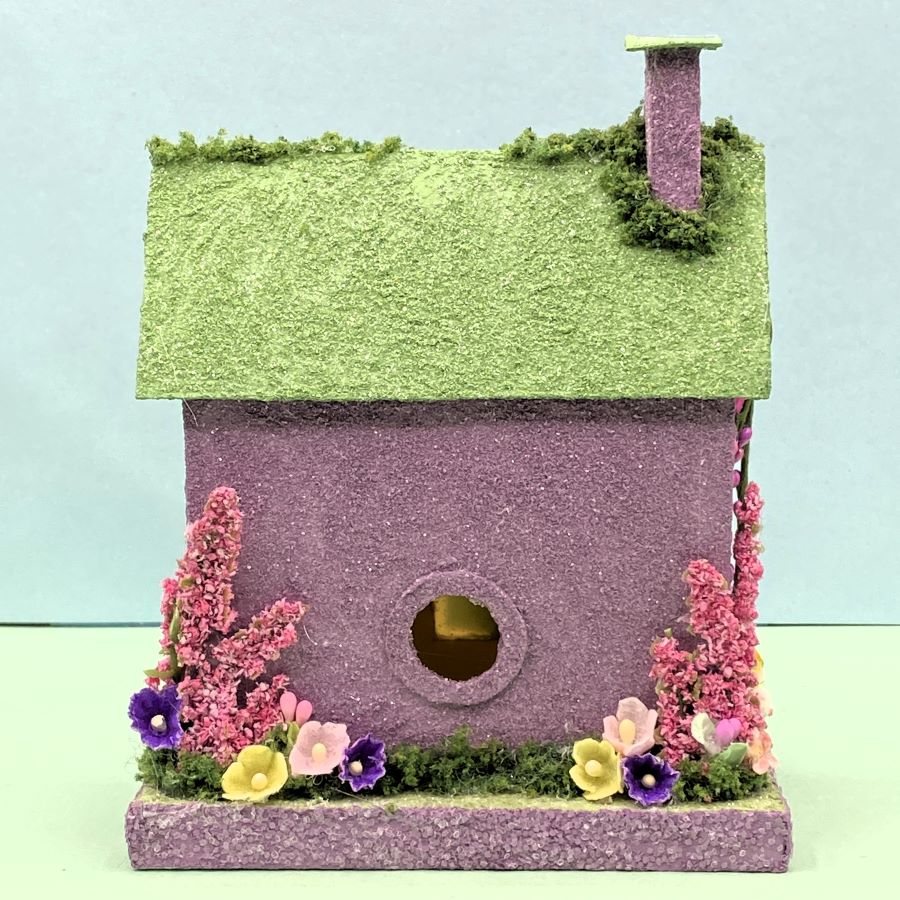
The base is made from an upcycled greeting card. The colors for the putz house are inspired by the colors of the card. This card features a beautiful, lush cottage garden. The house has a hole in the back that allows the use of a small LED light string for lighting the putz.
A budding vine grows over the house. The yard is filled with mulberry paper flowers and velvet forget-me-nots. A handcrafted, wooden, picket fence encloses the garden.
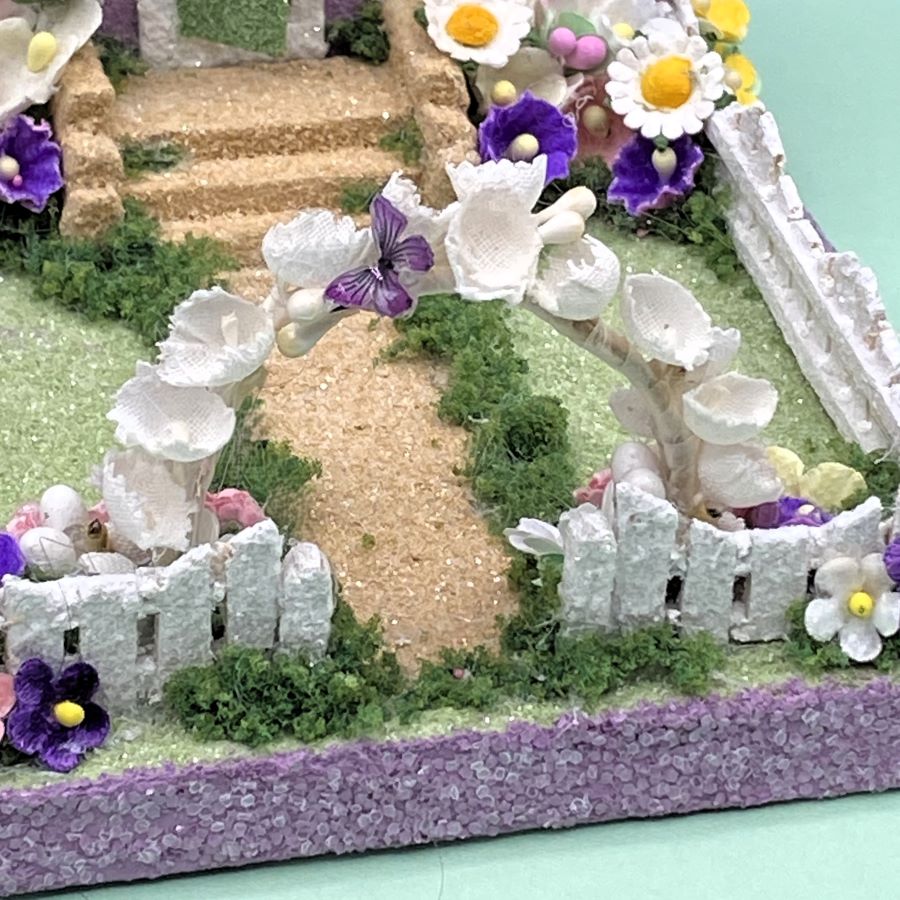
Enter the front yard through a floral arbor. Note the tiny butterfly. A variety of flowers and foliage are used to fill the summer garden with abundant color.
If you would like to see more of my Putz houses, as well as Christmas ornaments I have made from upcycled holiday cards, please visit my Etsy shop.
If you are interested in crafting Putz houses of your own, check out my Putz tutorials for more information. Putz House Tutorials The blog can be searched for “tutorial” to find any that aren’t linked to the tutorial page. Working on that!
I am always happy to answer questions about the process. Please ask, if you are wondering about the details of putzing!
All proceeds from my Etsy shop benefit Kenya Mercy Ministries. They work with the urban poor of Nairobi, Kenya, particularly the children and their families who live in Kibera, the largest urban slum in Africa. Thank you for your part in helping these children when you purchase items from my shop!
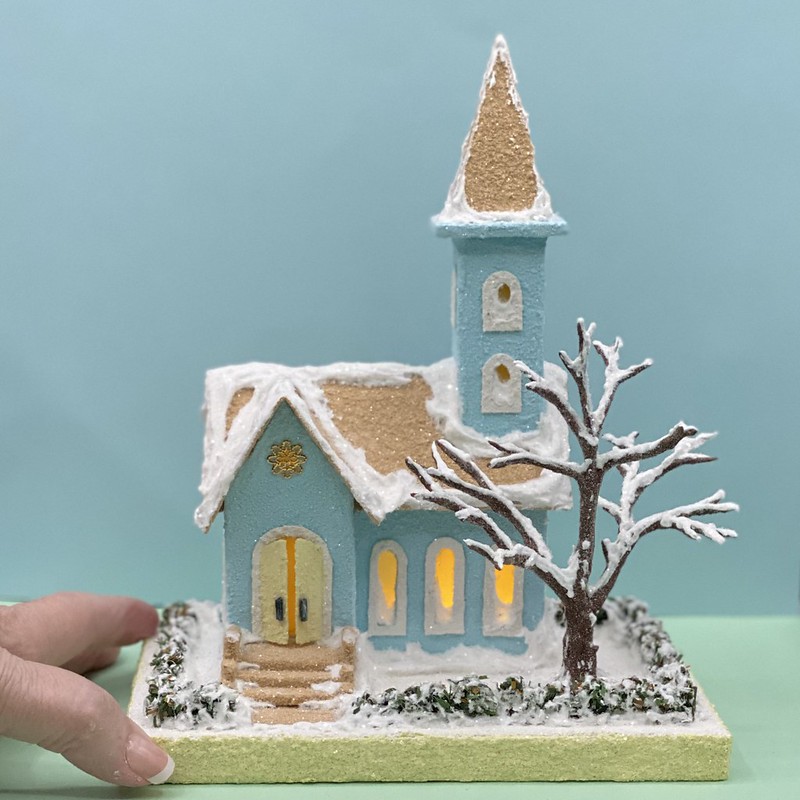
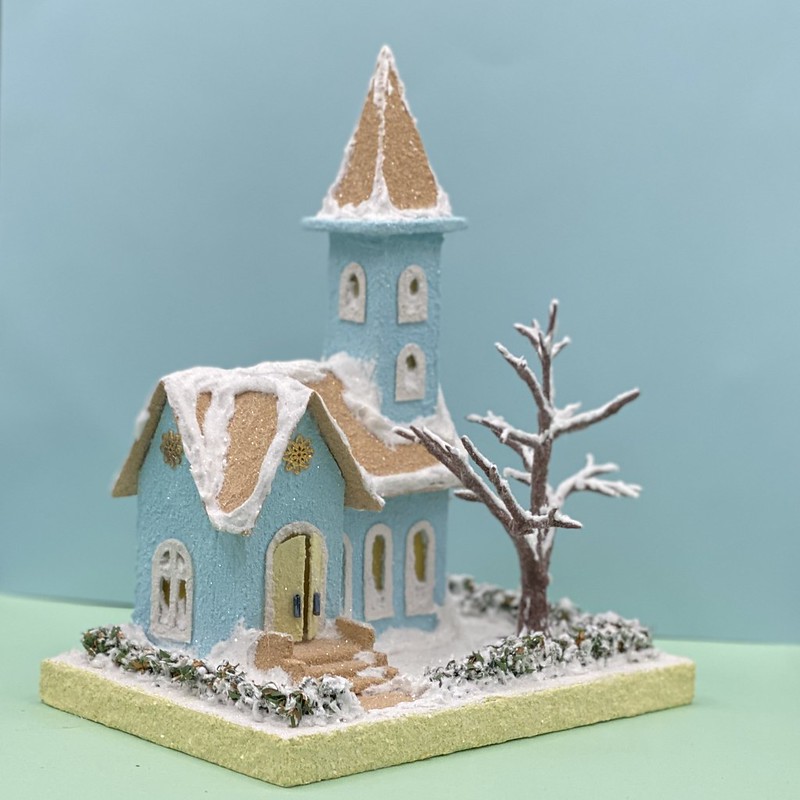
Adding an evergreen hedge to a Putz house adds extra color and a change of pace from a fence cut from poster board. A hedge can be put around the yard, against a building or along a sidewalk.
My personal preference is the evergreen that has some brown in it. Completely green is fine, too. I use this kind of roping for making tiny garlands, roping and wreaths, as well as hedges. Making wreaths and garlands for putz houses
To make a hedge, these supplies are needed.
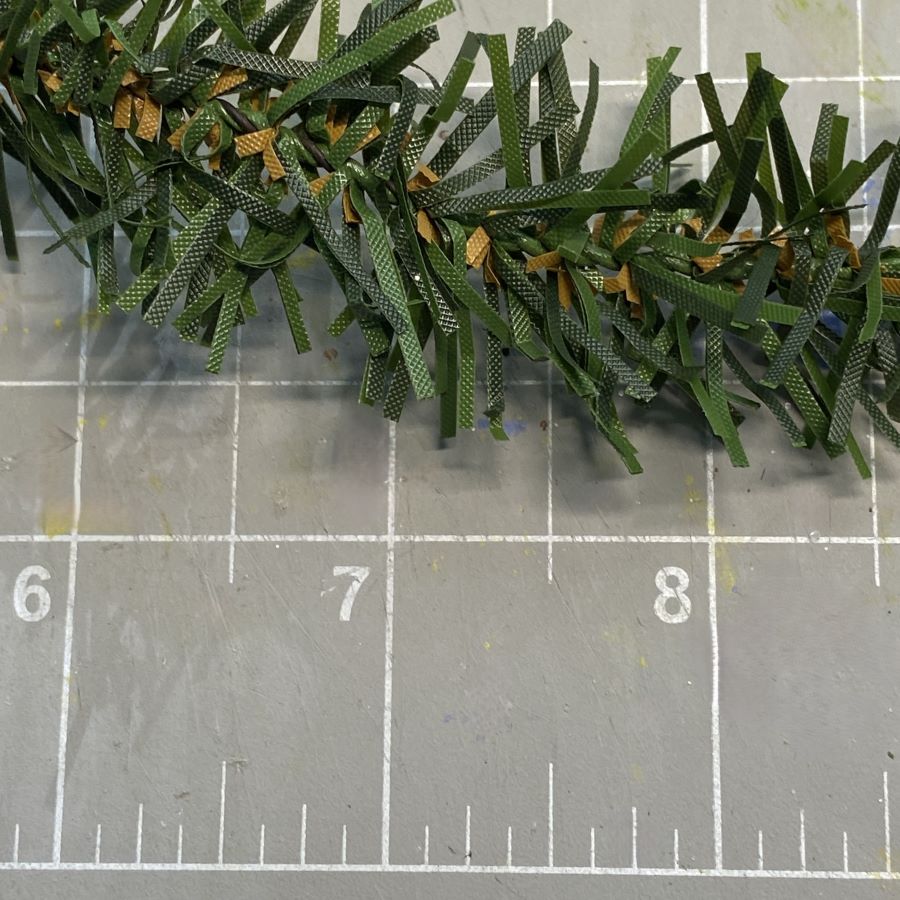
Evergreen pipe cleaners / chenille stems or roping. Anywhere from a 1/2″ to an inch wide. Search “evergreen chenille stems pipe cleaners” on Etsy.com or on the internet in general. Be sure to check the cost of shipping. The ones currently available on Amazon are much more expensive than the ones I found on Etsy (June 2024). Amazon prices may be better during the fall/winter holiday season.
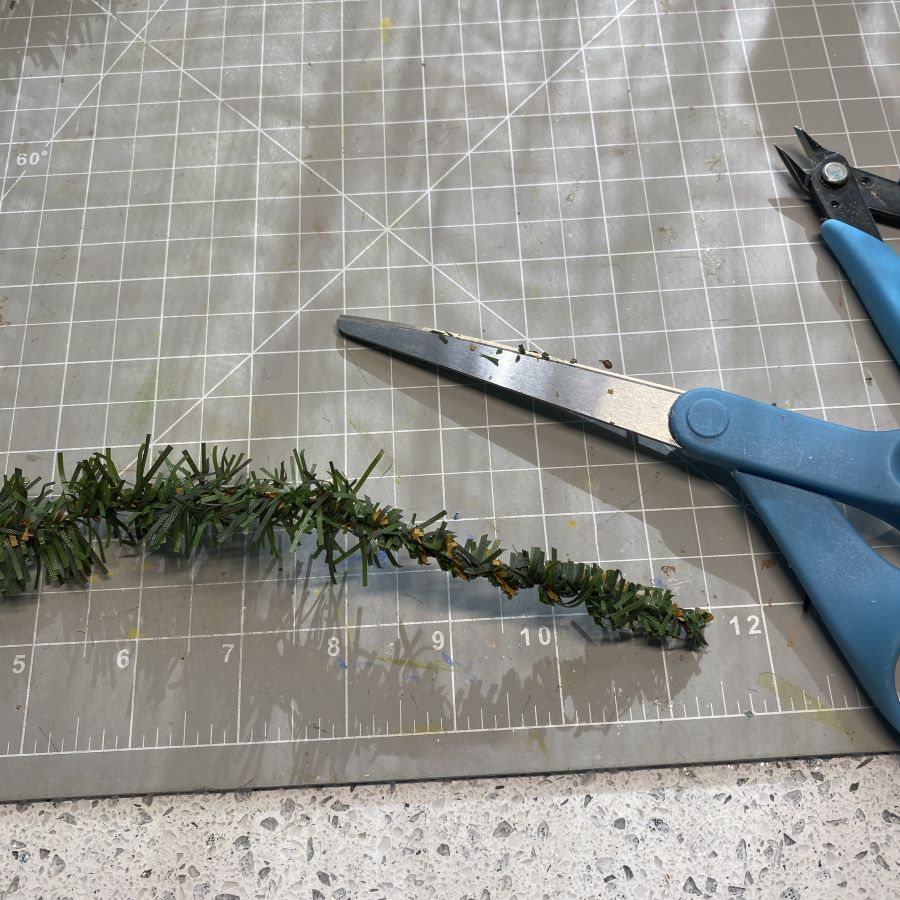
Large scissors for the first trimming of the evergreen stems
Fiskars 6″ scissors or other small scissors for fine-trimming stems. Optional
I don’t receive a commission from items linked on my blog. They are linked for your convenience.
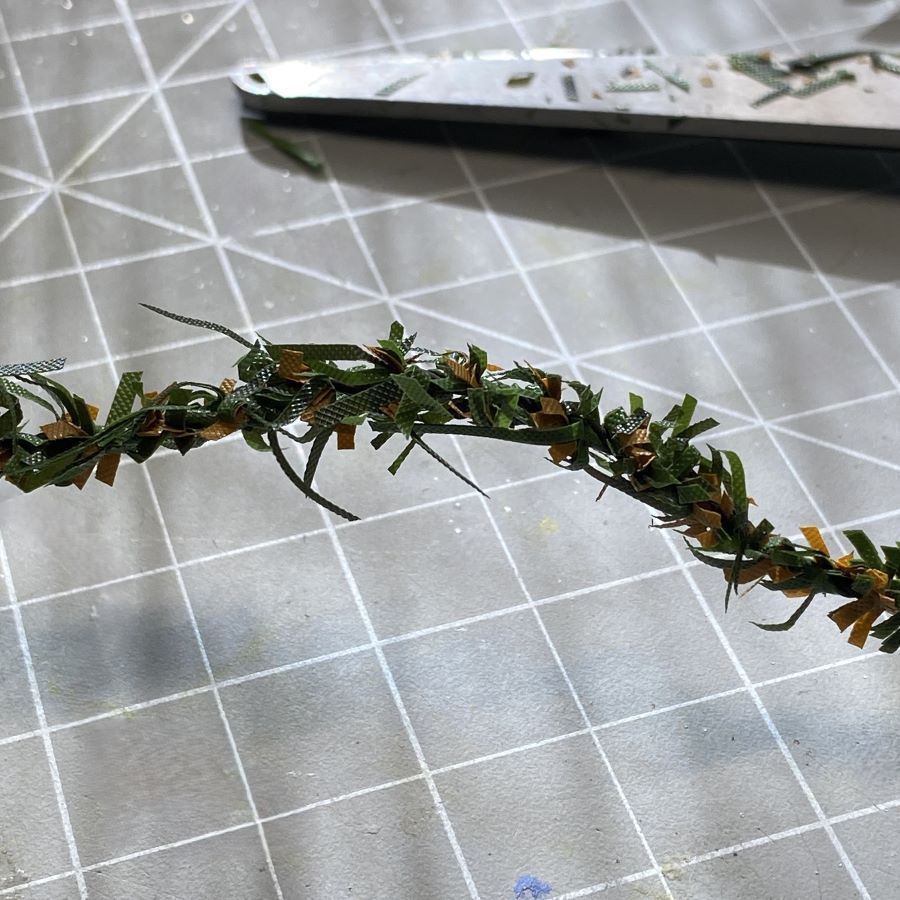
The 1/4″ evergreen chenille stems and garlands are harder to find than the wider stems and garlands. I like using a wider stem, which I cut down nearly to the wire. The leaves are more random when cut by hand than they are on a uniform, manufactured stem. Either way works. This is my way. Your way is whatever you like best. Both are good.
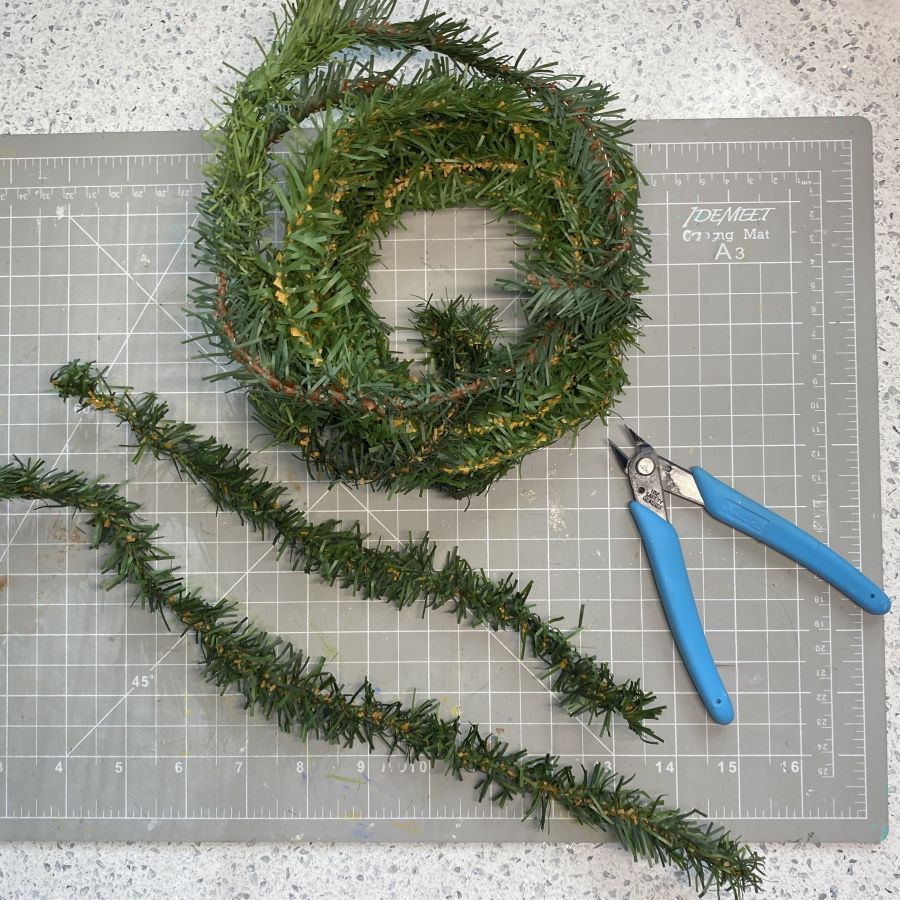
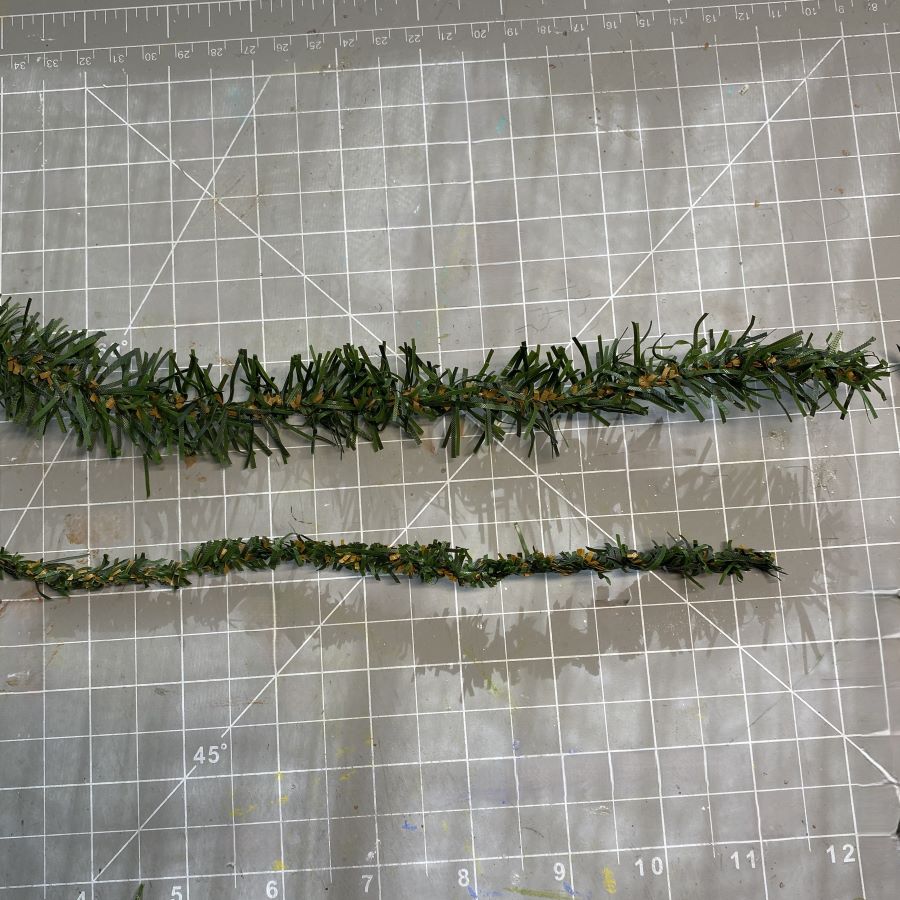
If possible, the stem should be at least twice as long as the space needed to be filled with hedge. As it is shaped, the stem will shorten up a lot. I measured one stem at 16″ before shaping. After shaping, the hedge was 8 1/2″ long. I usually don’t measure ahead of time. I make long pieces of hedge and cut to length as needed. Multiple pieces can be glued to the base so they meet end to end, making a longer hedge, if the first piece is too short. The join won’t be noticable.
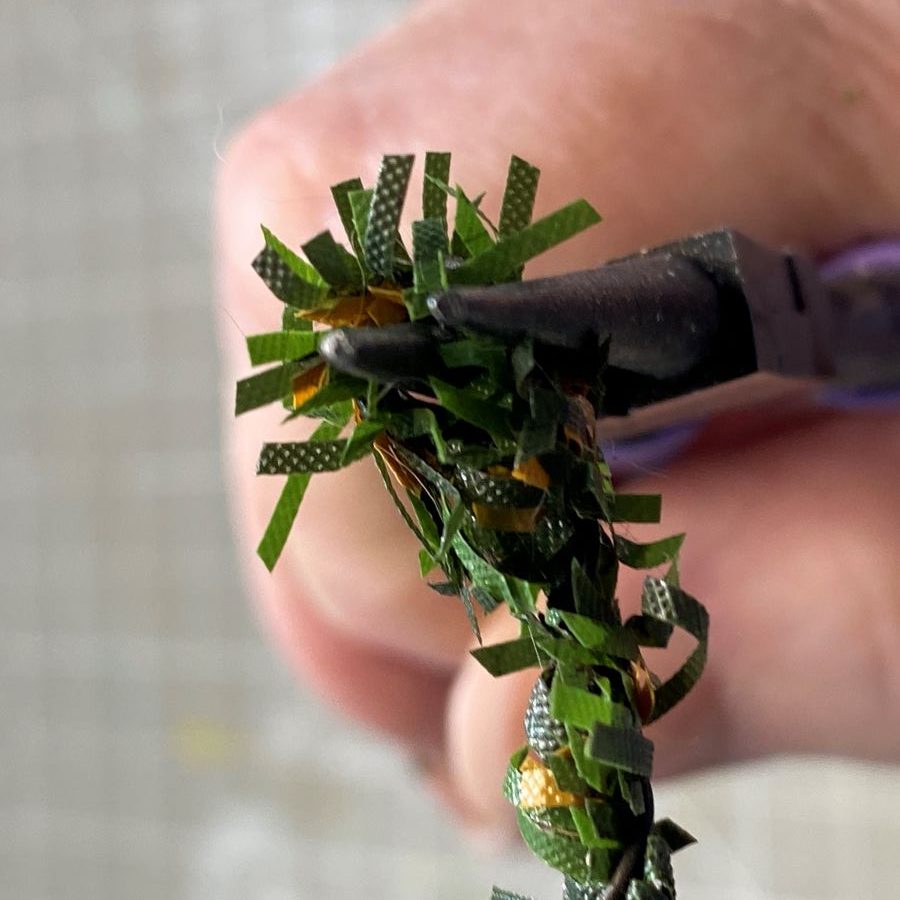
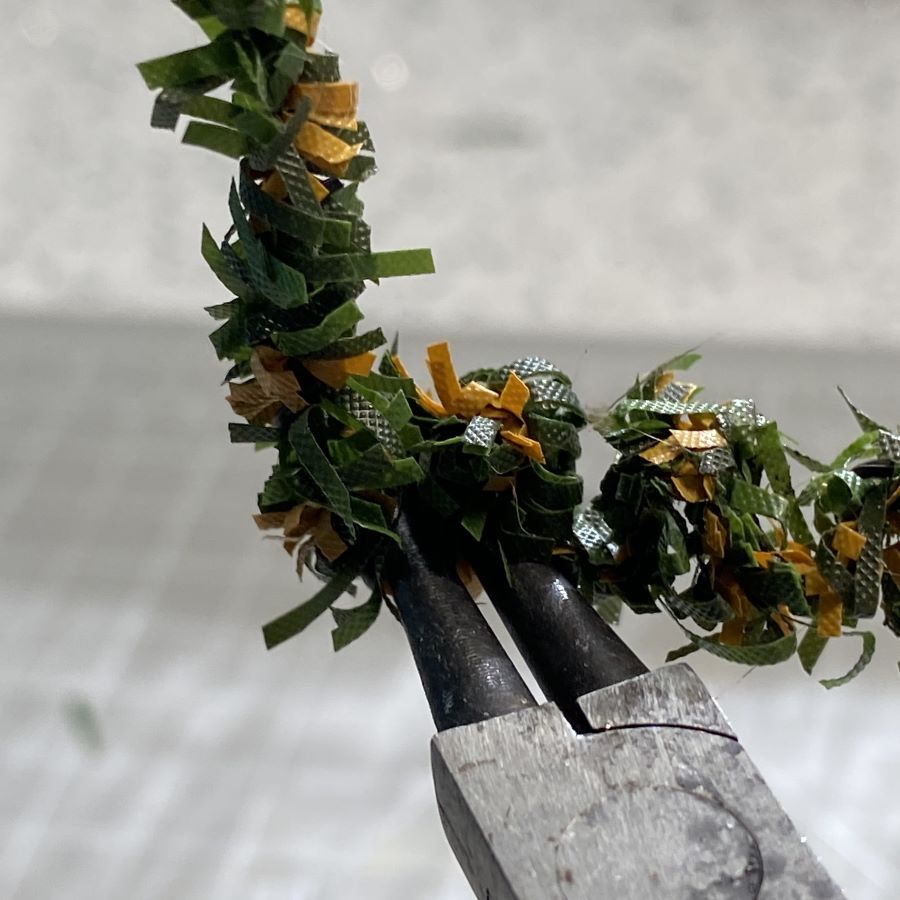
Using the round-nose pliers, the trimmed stem will be bent tightly into this shape. A series of “bumps.”
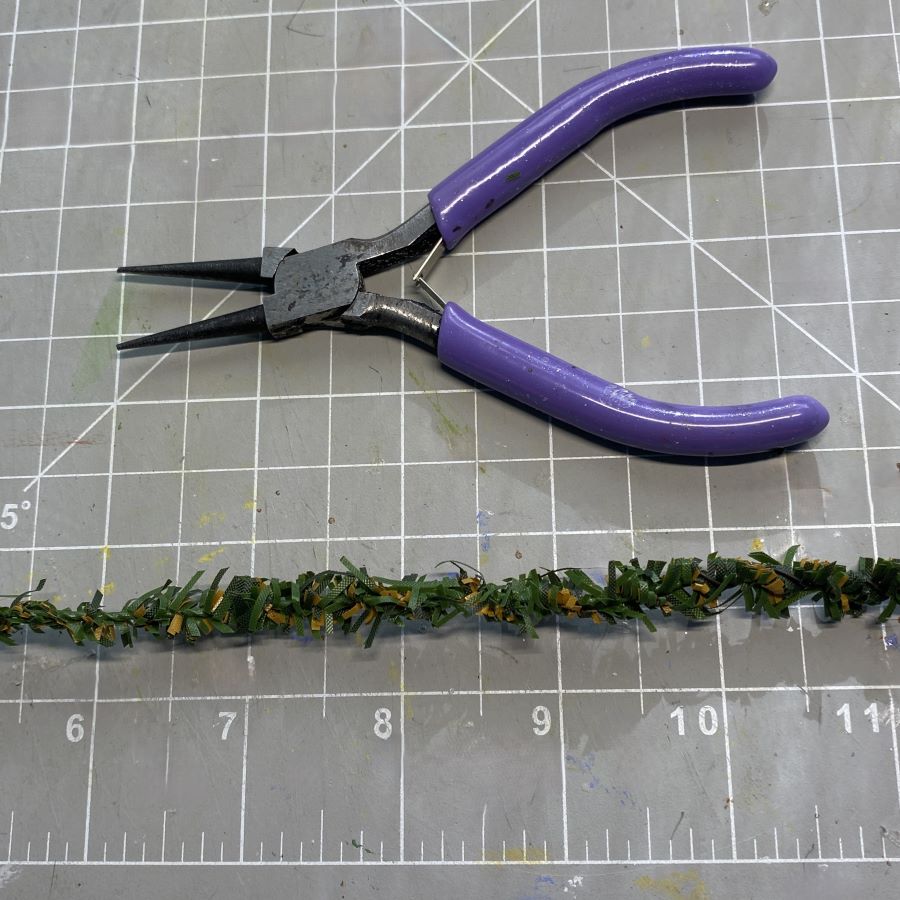
Trim the stem close to the wire. Do this over a wastebasket. It is messy. The bits have some static and will stick to surfaces, scissors, etc.
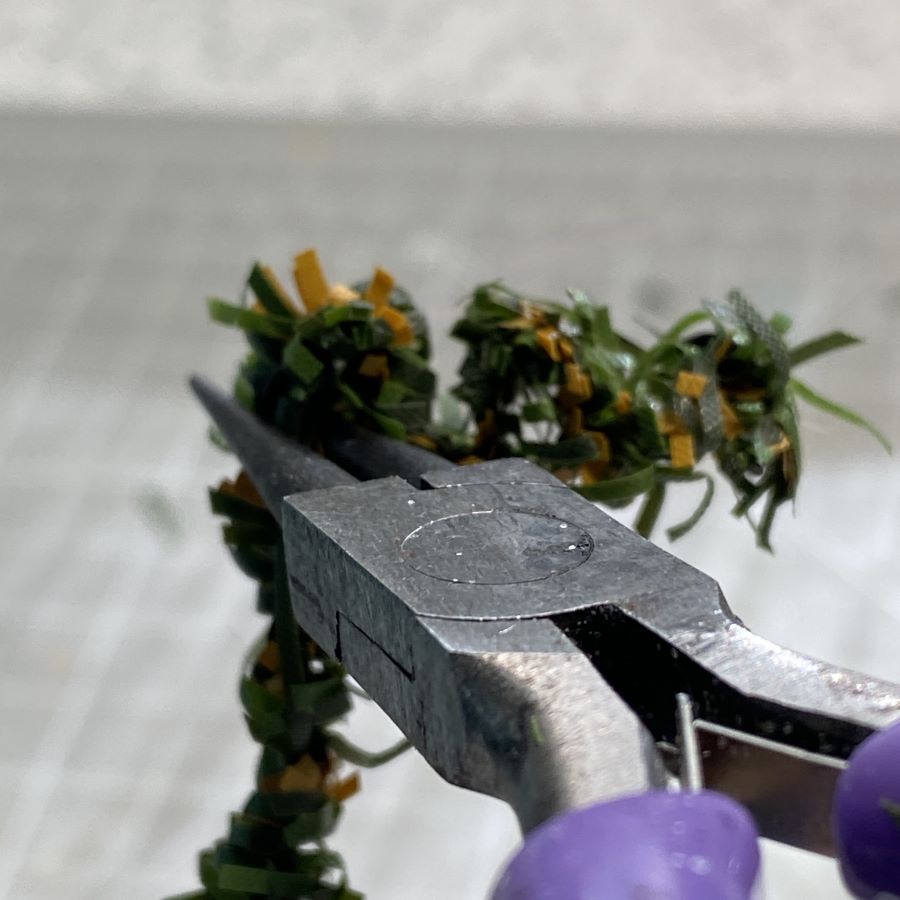
When a stem has been trimmed, there may be individual bits that are too long. I run my hand up and down the stem to show where these longer bits are. I use my small Fiskar scissors to trim those.
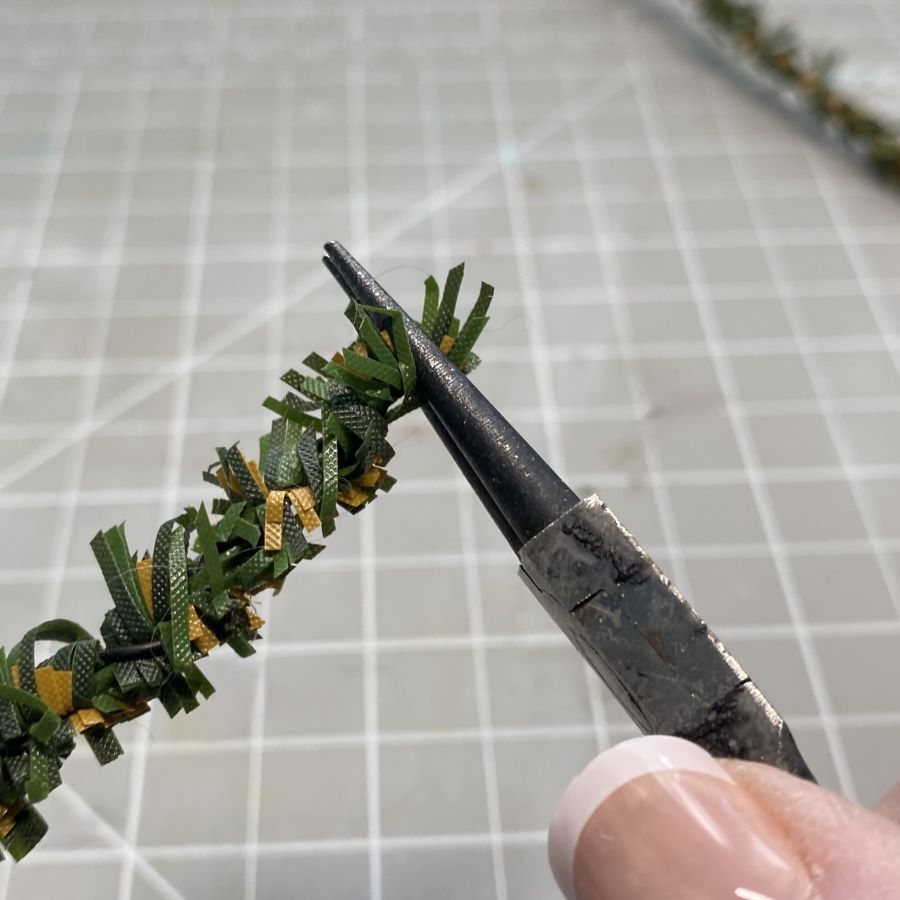
The round-nose pliers make it possible to round the stem into tight curves. Start on one end and turn the stem down into a cane shape.
Use the pliers to grip the short section of the stem. Turn stem into a cane shape. This is the first “bump” of the hedge. The short leg should be just long enough to go around the pliers. The first photo shows the first curve finished. Move the pliers from the short end of the stem directly across to the long part of the stem. In the left, the pliers are holding the short leg of the cane shape. In the second picture, the pliers have been moved to the long leg of the evergreen. Pull the long piece up, over the pliers, so it is headed in the opposite direction from where it started. Refer to the picture of the curved line above.
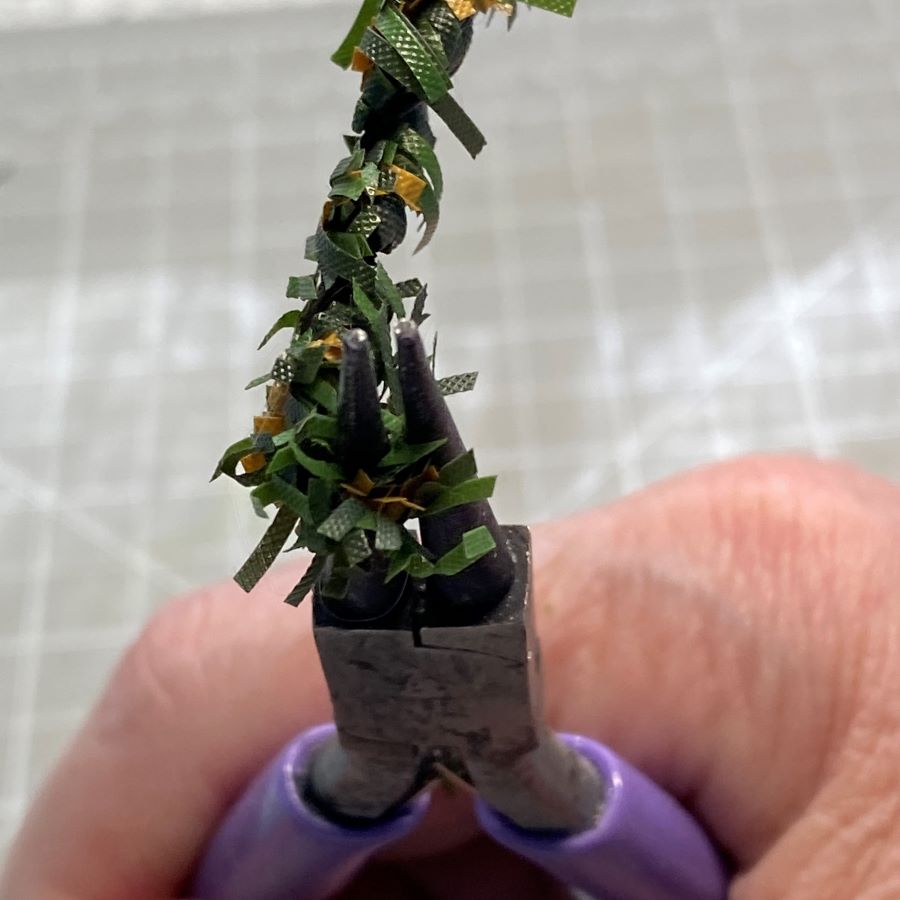
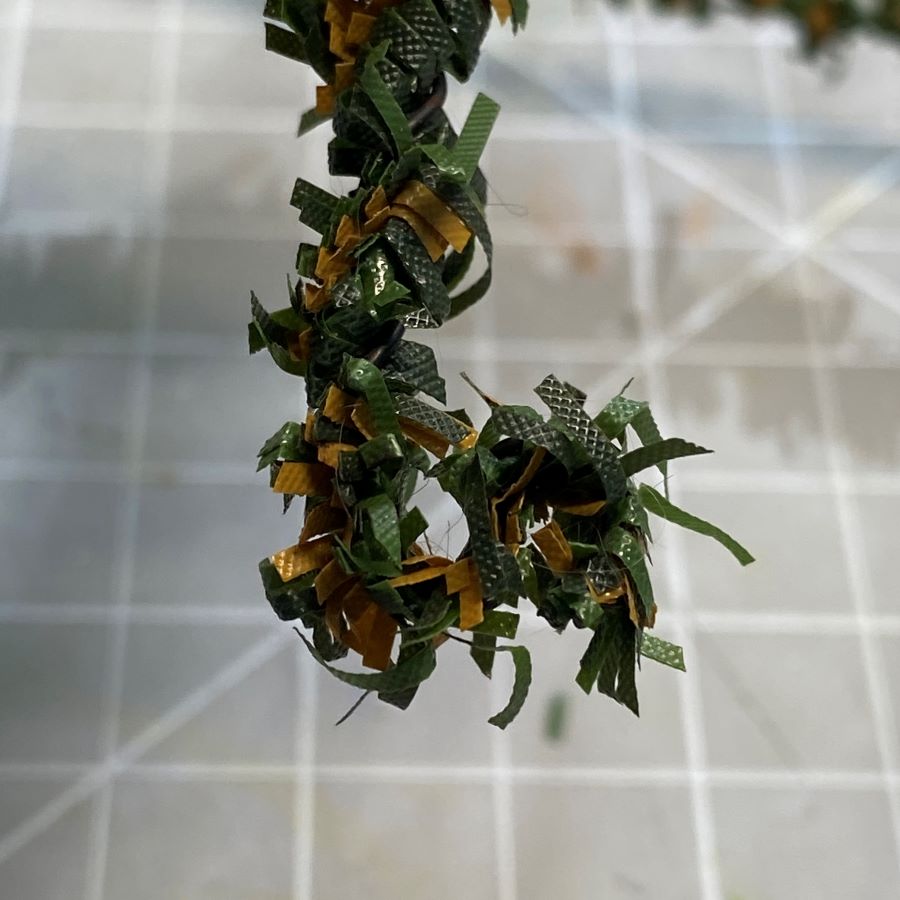
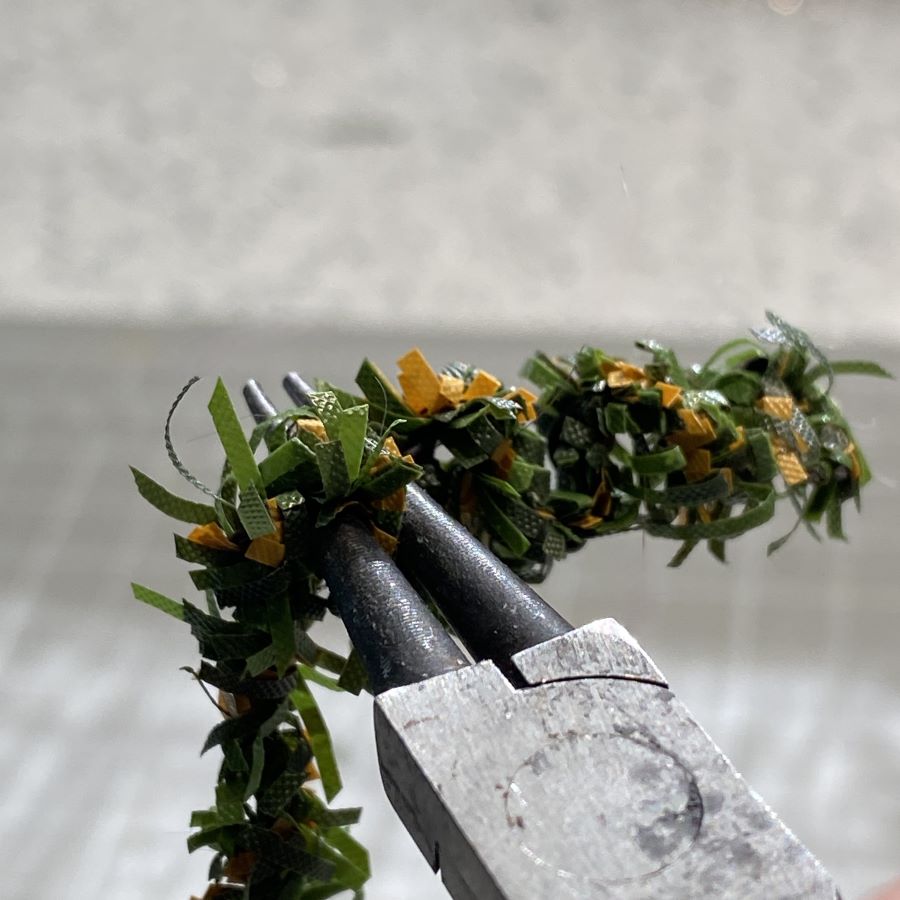
The first picture shows the next loop made. Repeat: After pulling the long end over the pliers, move the pliers over to what is now the longer leg and pull the leg over the pliers. The tighter the curves are made, the better the hedge will look. Try to keep the hedge “bumps” the same size.
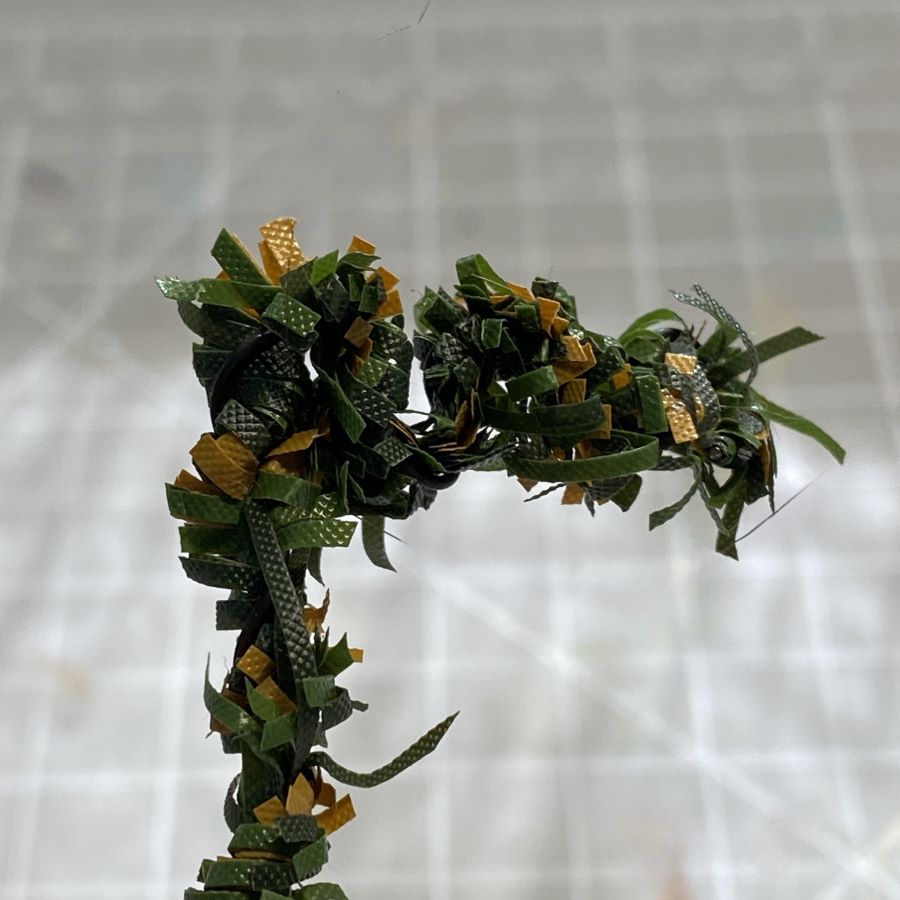
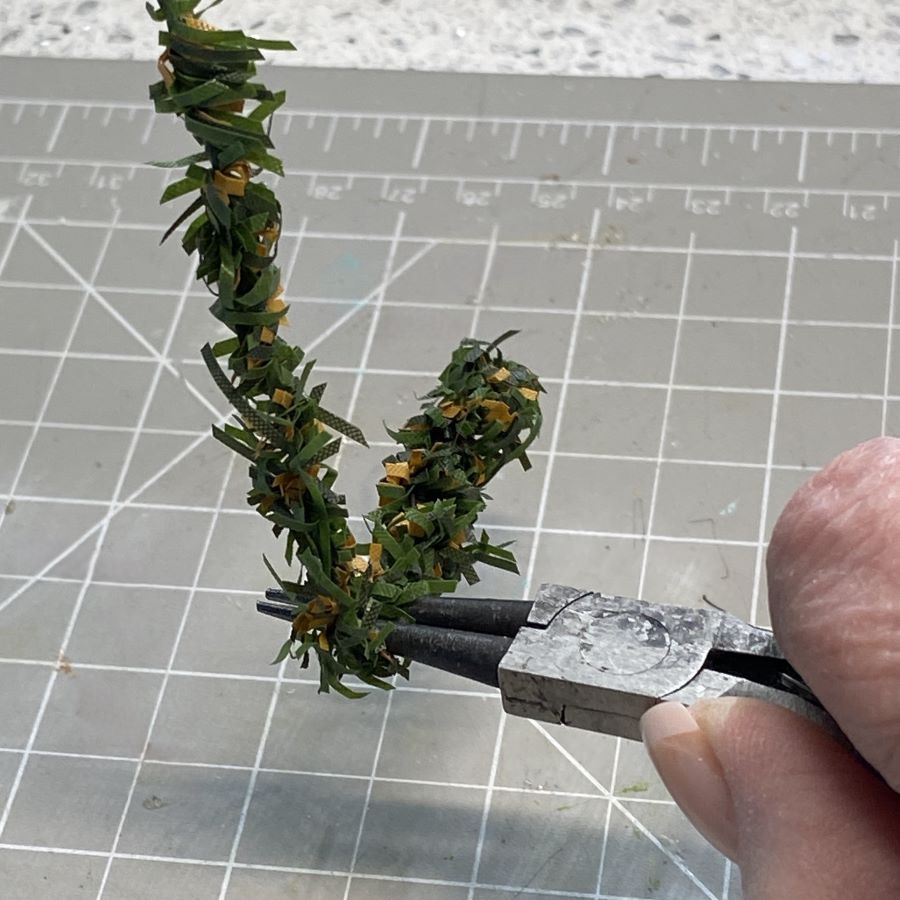
Repeat until the hedge is complete. Insert the pliers. Pull the long end up over the pliers. Move the pliers over to the long leg and pull it down over the pliers. Repeat.
It’s a back and forth action. Keep going until the entire stem is done. When finished, check the beginning and the end of the stem to find the wire. It’s sharp. Be careful. When applied to a base, the sharp end should point down. Don’t leave it up where it could snag a finger. I always cut the ends of my hedge so both wires are pointing down to the bottom of a bump. If the stem is trimmed to fit a space during landscaping, it should be trimmed so the wire is pointing down. That wire will be enclosed in hot glue when the hedge is glued to the based, making the hedge safe to touch.
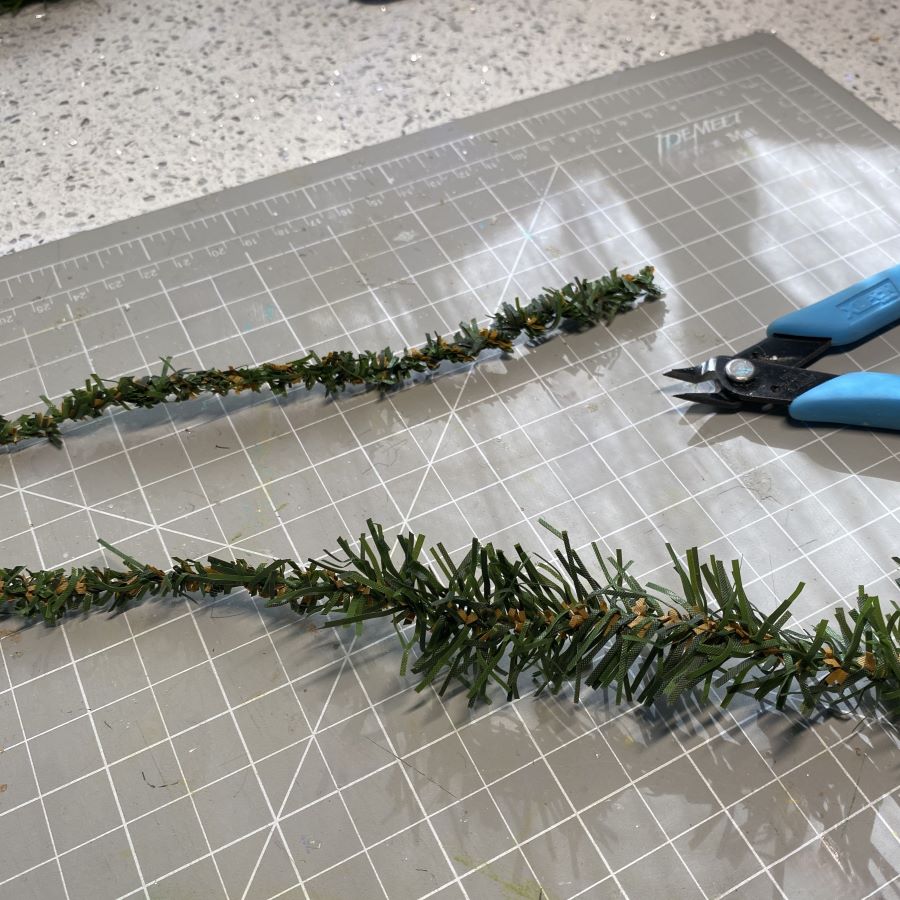
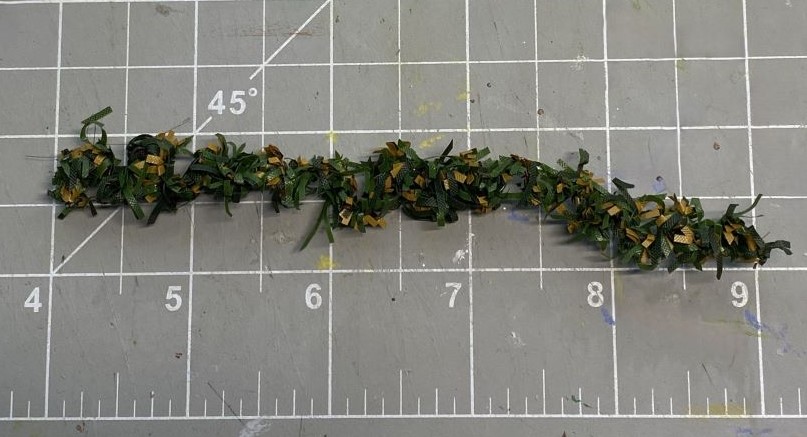
The finished hedge will look like the one pictured below. Trim any longer bits as needed. The individual bumps are not noticable. Even less so when snow has been applied.
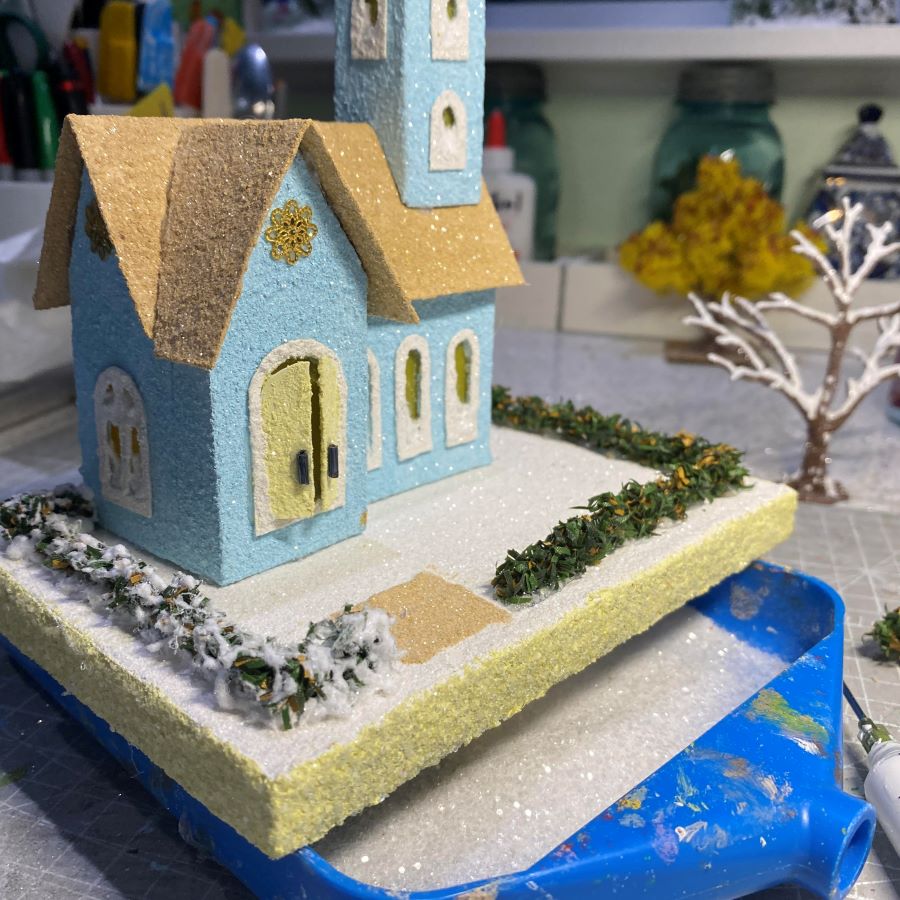
The church, pictured below, has a pieced hedge. I didn’t have a length long enough to do the right side of the church and then all the way to the sidewalk. About two inches of hedge was glued down, at the sidewalk end, to finish the full piece.
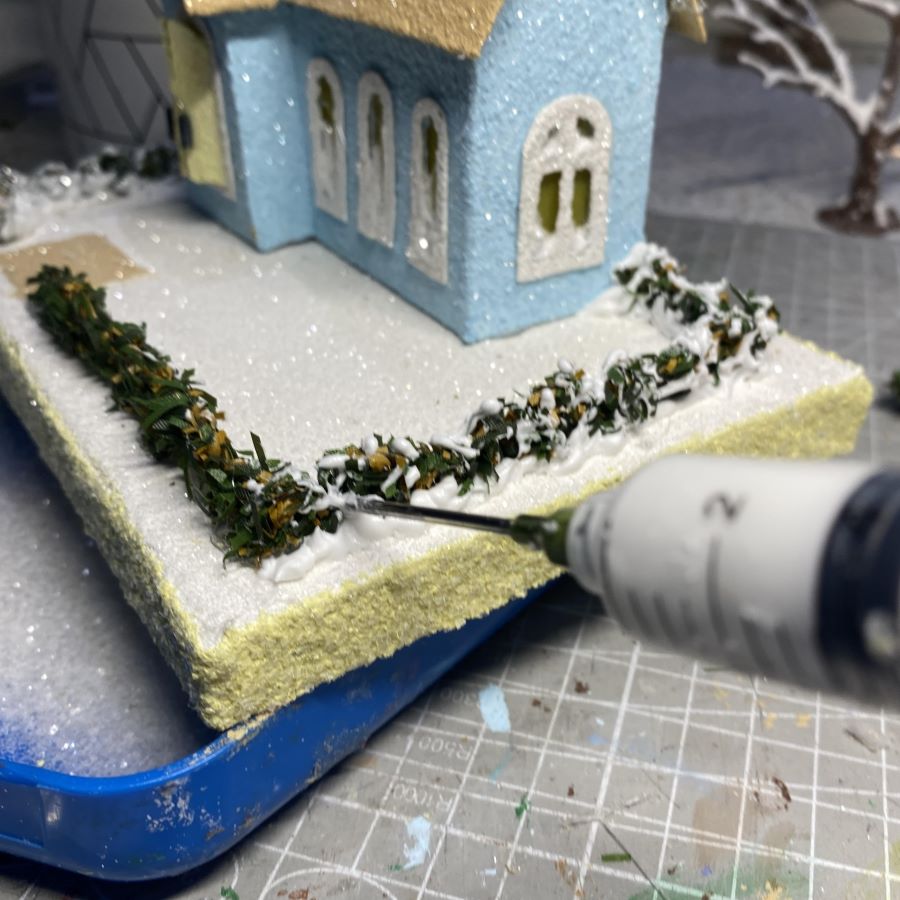
In the first picture below, you may be able to see where I added an extra piece to the hedge. Once the snow is applied, the join doesn’t show. To snow the hedge, I use a syringe filled with Aleene’s True Snow. With slow pressure, I apply it to the hedge, while moving the syringe back and forth. A little goes a long way. I try not to cover the hedge. I also run the syringe along the bottom of the hedge, on both sides to cover any glue that may be showing. That can be seen in the second picture. Immediately, glitter the wet snow with the glitter of your choice. Allow to dry.
Note: Aleene’s True Snow and Aleene’s Glitter Snow look the same when applied. No glitter shows, so I buy the one that is currently cheaper.
The hedge has a little give for filling a space. If it’s a bit too long, it can be gently squeezed together to make it shorter. If it isn’t long enough, and the remaining space is small, the hedge can be gently pulled to stretch it a bit.
I am happy to answer any questions you may have about making hedges. Please ask!
If you would like to see more of my Putz houses, as well as Christmas ornaments I have made from upcycled holiday cards, please visit my Etsy shop.
If you are interested in crafting Putz houses of your own, check out my Putz tutorials for more information. Putz House Tutorials The blog can be searched for “tutorial” to find any that aren’t linked to the tutorial page. Working on that!
I am always happy to answer questions about the process. Please ask, if you are wondering about the details of putzing!
All proceeds from my Etsy shop benefit Kenya Mercy Ministries. They work with the urban poor of Nairobi, Kenya, particularly the children and their families who live in Kibera, the largest urban slum in Africa. Thank you for your part in helping these children when you purchase items from my shop!