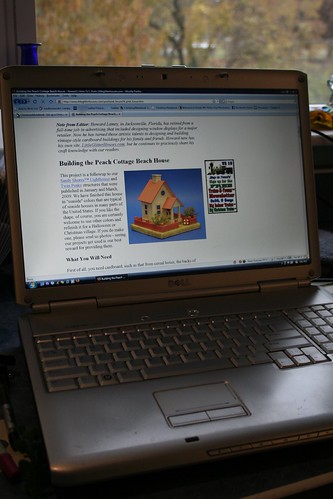
I am back to working on the little Putz houses I have planned for a Christmas display. I’m hoping this post will work as a sort of tutorial for walking you through making your own Putz house, if you are so inclined.
The pattern I am using is from the Little Glitter Houses site. This particular house is called the Peach Cottage Beach House.
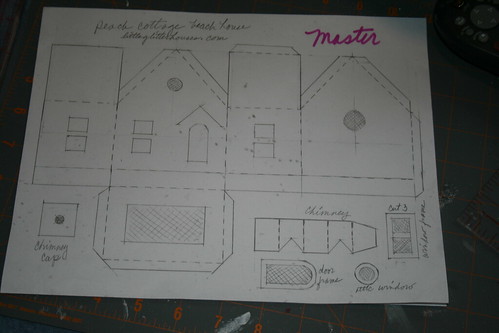
The site includes PDF files of printable patterns for the houses. Personally, I like to draw my own, based on theirs, so I can modify a couple of things. Sometimes a scan or print won’t be quite proportionally correct, or, as in this case, I want to add a built in base to the house. This pattern worked as I had modified it, but I later made one more adjustment to the roof, extending the pattern so the roof pieces met at the top of the house. A separate rectangle is cut later and glued to the assembled house to make a roof with an overhang.
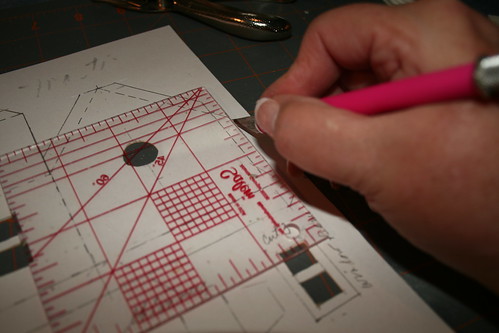
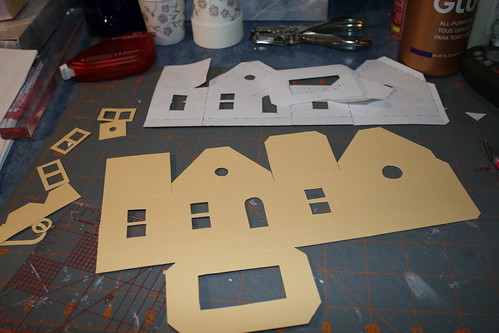
This picture shows a master copy which I use to print the pattern I will cut. The masters are all marked “MASTER” in hot pink, which works as a great flag when I’m getting ready to affix the pattern to the card stock. Before I had marked all the masters in pink, I managed to cut one apart and had to redraw it. Bummer.
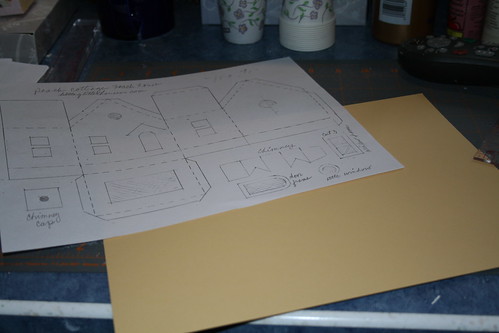
After making a copy of the master pattern, I choose card stock for making the house. It has to have some weight and stiffness, but not so much that it feels like cardboard.
EDIT 2018 / I no longer use cardstock, though it is a fine medium. I now prefer light-weight poster board for the body of the house and heavier-weight poster board for roofs. I get my poster board at Walmart. Nothing special. Use what you can find on hand or buy new.
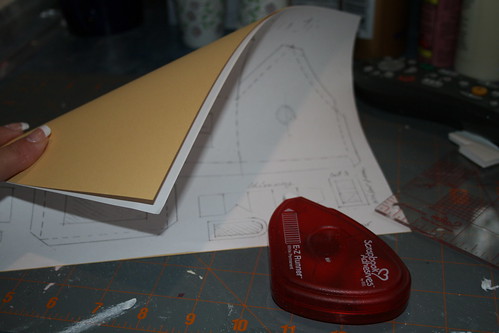
I adhere the pattern copy to the card stock with a few pieces of tape runner. Tiny pieces. In just a FEW places. They must be peeled apart later, so the fewer pieces of adhesive the better. It doesn’t take much to hold the pattern to the card stock. I prefer this way of cutting the pattern to other methods, such as transferring the pattern to the card stock. Seems easier to me and doesn’t leave any marks on the card stock. However, if your printer/copier will print card stock, you could make a copy right onto the card stock.
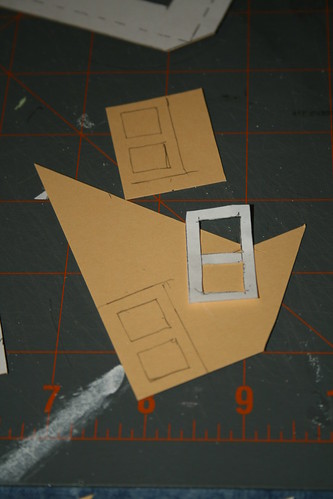
The first thing to do is cut the holes…windows, doors, etc. If cut while the piece is still a whole, the card stock provides a lot of stability and makes the cutting of tiny pieces much easier.

I use an X-acto knife to cut the pattern.
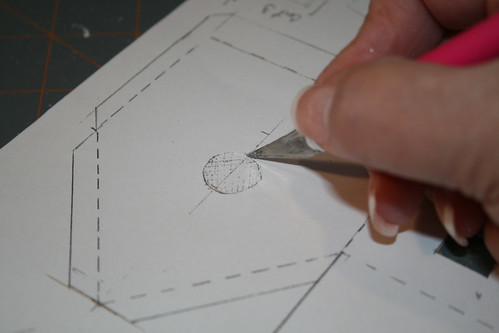
This little Salem Ruler 4″x4″ acrylic square, available at sewexcited.com, is great for cutting the straight edges. The squares are also available in multiple sizes at most quilt shops. I find the four inch square easy to handle and it doesn’t take up much room on the desk top.
While cutting, of course, I have to hold the square securely with my left hand so it stays in place. For the sake of the picture, I was wielding a camera when this shot was taken.
A self-healing cutting mat is worth every penny. This 12×18″ gray one is easy to maneuver as needed.
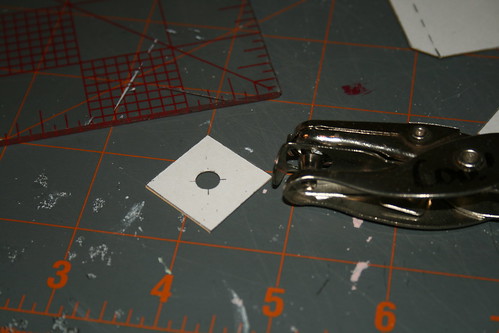
I use a punch for the small holes in the tops of the chimney caps.
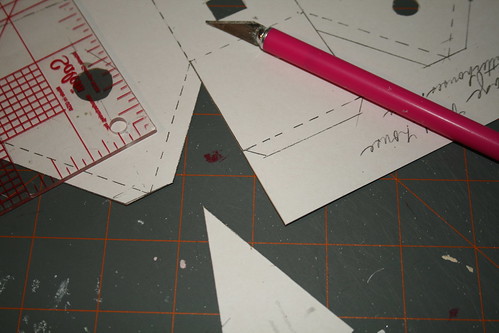
This Putz house requires three window frames. After cutting the first one from the main pattern, I use the same pattern piece to cut the other two. I trace around it onto scraps of card stock, then *carefully* cut them using the X-acto knife and the acrylic square. The square helps keep everything straight. Be careful…slips can result in cuts of things other than card stock…like the tips of fingers, for instance…BTDT. Picture me with my left index finger clamped in my mouth, calling, “Wussew, I cud my fingew!” Thankfully, a bandaid took care of it.
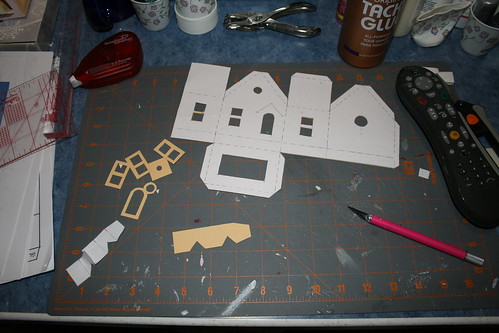
Everything is cut and the pieces are ready to score.
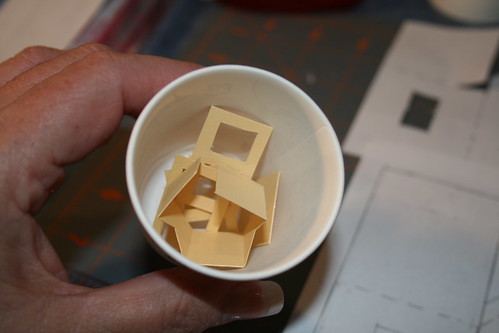
I find little disposable paper cups handy when crafting. I mix paint in them, as well as using them to corral all the little pieces of a pattern until I need them.
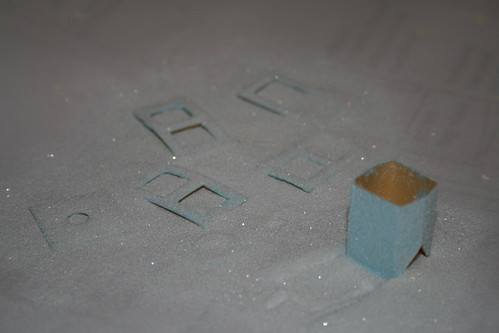
To score the fold lines (dashed lines), I turn the X-acto knife over and use the back of the blade, again, holding the ruler down securely with my left hand. Some of you will have scoring tools for this job. I don’t have one, and this works fine for me.
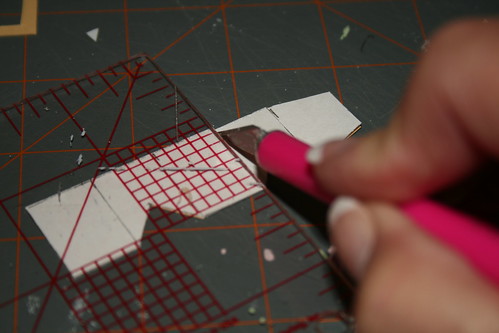
If you look carefully at the chimney piece in the foreground, you can see the score lines. This piece will be folded on each line and the end pieces will be glued together.
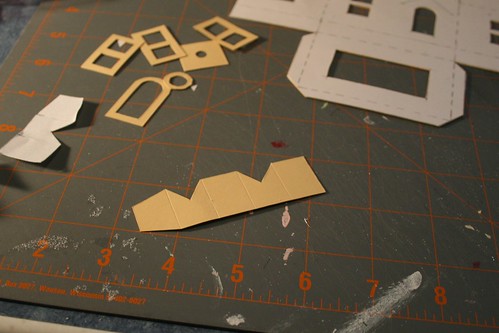
After all the pieces have been cut and scored, I discard the paper pattern. I can make more copies from the master as needed for other projects.
Crease all the fold lines. Now it’s time to glue the house together. I like to start at the base and work my way up. The roof pieces did not extend to the top of the roof on the original pattern. Which didn’t really matter as a rectangle is cut for the roof and glued to the top of the house so the roof has overhanging edges. But I modified the master pattern to make the roof meet at the top next time.
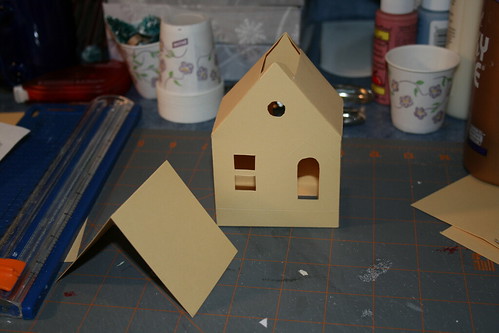
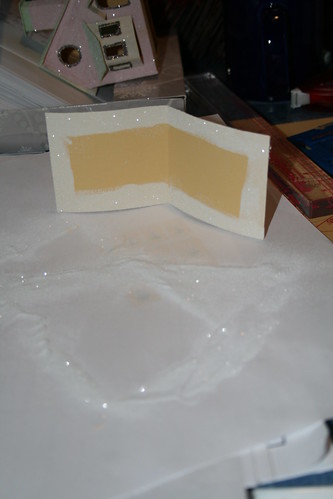
The rectangle for the roof measures 5.5 inches by 2.5 inches. The porch roof is 1 inch x 2.5 inches, which is quite a bit smaller than the one called for on the original pattern on the Little Glitter Houses web site. I found it too large, so cut it down. Both roof pieces should be scored so they fold in half across the width.
Before adhering the roof to the house, paint the edges of the underside. I mix the paint half ‘n half with white glue. It’s a lot easier to paint this now than it is when adhered to the house.
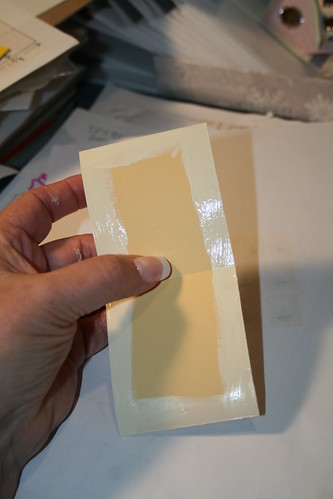
While the paint is wet, add the glitter.
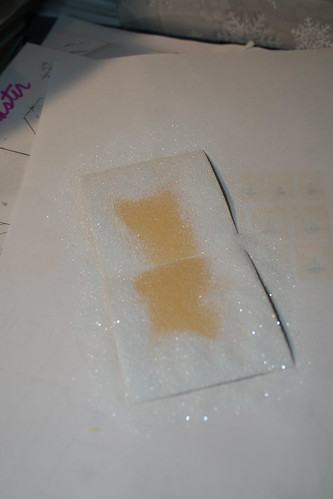
I like to pour the glitter over a piece of paper. It’s easy to pick it up and funnel the leftovers back into the bottle.
By the way, this is the glitter I am using for this project, though you can use any that you find appealing. I do have some vintage style glass glitter, but don’t want to use it as these houses may be handled by children.
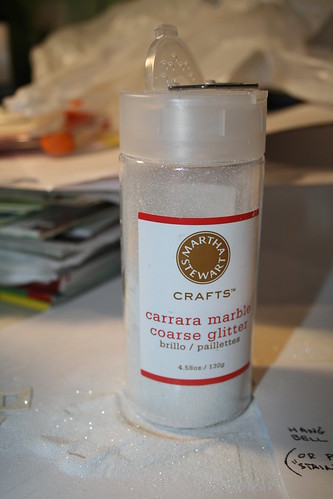
Martha Stewart’s “carrara marble coarse glitter.” It says coarse, but it’s a rather fine glitter. It makes a beautiful sparkle on the Putz houses.
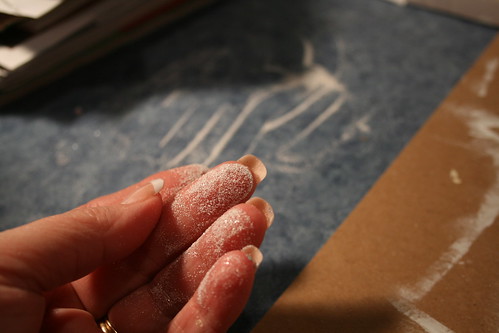
I paint and glitter the house one side at a time. I don’t wait for it to dry between sides. I’m just careful with handling.
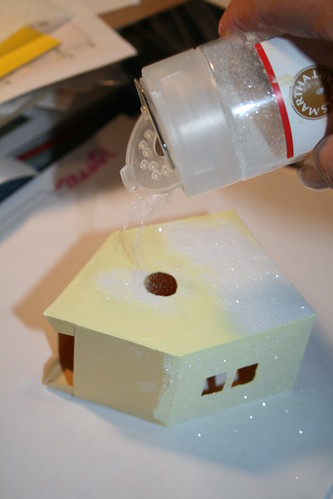
I took this picture without a flash so you could perhaps see the texture that the glitter gives the paint.

I paint the window and door frames and the chimney in contrasting colors to the house. A pair of fine, needle-nosed, craft tweezers work great for moving these little bits of framing around. I found a pair on amazon.com and really like the way they work. Can’t do without them, now. If the link doesn’t work, use this to search amazon: Fine Point Silver Tone Pointy Straight Tweezers 4 1/2″
When gluing the door and window frames to the house, I put a little glue on the back of the frame and also around the window on the house. Let the glue set for a minute, then stick them together. The porch steps are made of foam core.

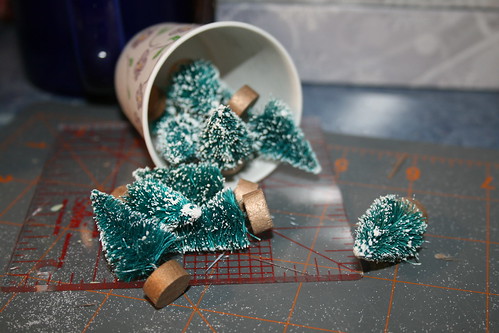
This post is way too long. I’ll write another one in a few days to show how I make the base for the house. I’ll add some embellishments, too…maybe one of the little bottle brush trees my dear friend Mary sent to me. Aren’t they perfect?
Here are links to some of my other tutorials for making Putz houses.
Making fence posts for Putz houses
Making Putz house ornaments from Christmas cards
If you would like to see more of my Putz houses, as well as Christmas ornaments I have made from upcycled holiday cards, please visit my Etsy store.
~~Rhonda 🙂
26 Comments
good morning…a friend sent me the link to your blog…wow!…someone is actually using my patterns!…you’re doing a great job, too!…keep it up!…
my very best regards…
Merry Christmas and a Happy New Year…
Howard Leroy Lamey
~Rhonda,
Thanks for publishing these photos – don’t feel like your article’s too long, it will encourage the next person to try. Do you mind if Howard and I link to this article from our respective web pages?
Have a “grace-filled” Christmas and a very Happy New Year,
Paul Race
http://www.BigIndoorTrains.com
http://www.FamilyChristmasOnline.com
I wish I would have had the pattern for the houses in October…I will be ready now though for 2010..Thank you very much for sharing and all your work making it easy
Nancy
What a great posting!! I have wanted to try to make these for several years after purchasing several at a Christmas store in our area that were very costly. Your instructions and photos are so very well written and NOT too long. I bought my card stock yesterday to give me a project during the long, hot summer and already have my patterns from Paul Race where I discovered you. Thank you, thank you.
I recently found three patterns for putz houses on the Victoria Magazine website. They were quite easy to make and I made two for Halloween and used dimensional stickers for decoration and mounted on a piece of cardboar and put it under a glass cloche. I love them and like to look at them. Can’t wait for the grandchildren’s reaction to seeing my work. I used cardboard from a box had tried the cardboard from cereal box before with the patterns from which you used.
Laura, thanks for letting me know about the Harvest House pattern on the Victoria Magazine website. Here’s the link for those of you who might like to give it a try. ~~Rhonda
http://www.victoriamag.com/content.aspx?id=14113Link no longer works. If anyone has the link for the Victoria Magazine Harvest House putz patterns, please let me know. I was unable to find it. (Dec. 13, 2014)Wow! Thanx for the great tutorial! You instructions are very clear and user friendly.
Such a wonderful tutorial, Rhonda. Thank You! (It looks like so much work to have put the tutorial together). I can’t wait to try paper houses this year.
Thank you so much! I’ve been wanting to make these for such a long time, remembering them fondly from my Grandmother’s house years ago. Your directions and photos make the prospect seem very easy – and fun – to do!
Do you have directions on how to make dormers?
Trish, I apologize for not replying sooner. We haven’t had internet access for four days. Trouble with our provider. But I’m back! Thanks for a great question. I plan to put together a tutorial for dormers tomorrow. It may take me a few days to get it finished and loaded, but keep watching! ~~Rhonda 🙂
I have just been introduced to Putz houses! I’ve never seen them before and I am interested in making one. I have NO talent that does not involve cooking. These house are wonderful!!
wonderful directions cant wait to try this. i am just starting putz houses am looking for patterns thanks kim
Kim, thanks for leaving a comment. I hope you enjoy building Putz houses as much as I do. Here are my Pinterest Putz boards that you might enjoy.
Putz house links to tutorials and some patterns:
http://pinterest.com/reac/putz-little-glitter-house-tutorials/
Pictures of Putz houses that appeal to me:
http://pinterest.com/reac/putz-little-glitter-houses/
I hope you enjoy perusing them. ~~Rhonda 🙂
Your directions and pictures are wonderful! I can’t wait to get started! Thank you, thank you, thank you!
Where can I purchase these prints just started making them
I have wanted to do these for a long tie, but until now, neverhelp others can give us. found a tutorial that I could follow. Thank you for all your efforts. Some of us need all the
I have wanted to do these for a long tie, but until now, never found a tutorial I could follow. Thank you for all your efforts. Some of us need all the help others can provide.
I enjoyed these instructions. I always wondered where I could find some because the houses are hard to find. I remember
these from my childhood.
Sherrie, thank you for leaving a comment. I am so glad you enjoyed the post about making little glitter houses. They do bring back sweet memories, don’t they! ~~Rhonda
Do you use a special weight of cardstock for the putz houses or just ordinary scrapbooking cardstock from a craft store? Can you actually score the fold lines without cutting through the paper? I also worry the paper will curl after painting. I’ve wanted to make these for years but can’t figure out what kind of paper to use or where to get it.
I know it’s been a while and I am not sure if someone has sent the link to you yet but, here it is.
https://www.victoriamag.com//wp-content/uploads/2015/09/HarvestHouses.pdf
Also is there a weight of cardstock you find works best? I have some that I found at the thrift store and I would like to use it, but it appears to have several different weights in it. I have been told that it needs to be no thicker than the cardboard from a cereal box, I also have several of those. Which ones to you suggest?
Hi, Danita! Thanks for the link. Re: cardstock weight…I’m not sure what weight I was using in this post. It’s scrapbooking cardstock. I don’t use that anymore. I use light-weight poster board. You can see a picture of the package in this link.
http://christmasnotebook.com/2012/02/29/tutorial-for-making-putz-house-bases/
Scroll down for the picture. I use it exclusively now. I like the houses to be white inside, without the markings of grocery boxes like crackers or cereal. Those can certainly be used, though. The poster board is about the same as a cereal box. If you use something thicker, it becomes hard to bend where needed.
Cardstock may seem flimsy compared to poster board, but it works well for Putz houses. I have found they become stronger after they are painted.
~~Rhonda 🙂
I am in love with this craft. I can’t wait to make some.
oh my have I had the best day, followed your instructions and have built some houses…one balsa wood, one polystyrene board and 3 cardboard (3 later most successful) I forgot to cut windows and door in the balsa house and poly is so flimsy…still to paint and glitter them and want to make few more but so much fun and your instructions so easy to follow…thanks for the time you put into your tutorials
Felicity, thank you for leaving a comment! I’m so glad you found the tutorial helpful. Enjoy the craft!
8 Trackbacks
[…] Putz houses, also called “glitter houses,” are little houses that make up a Christmas village. Popular from the 1920s on, they can be made from cardboard, card stock, and even old Christmas cards. […]
[…] Click this link to see my tutorial for making a little glitter / putz house. […]
[…] A very simple model, but that’s the best way to start out when you’re crafting your first one. Here’s a link to a tutorial post on making little glitter houses. […]
[…] christmasnotebook.com via Bastelfrau on […]
[…] Christmas Notebook — A step by step guide to building a traditional putz house from a pattern […]
[…] friend Marsha Jane came to see me on Saturday. We built some Putz houses, talked about our high school graduating class (40th reunion last year), looked at grade school and […]
[…] Making Putz Houses […]
[…] Christmas Notebook – Building a Putz House […]