Putz houses, also called “glitter houses,” are little houses that make up a Christmas village. Popular from the 1920s on, they can be made from cardboard, card stock, and even old Christmas cards.
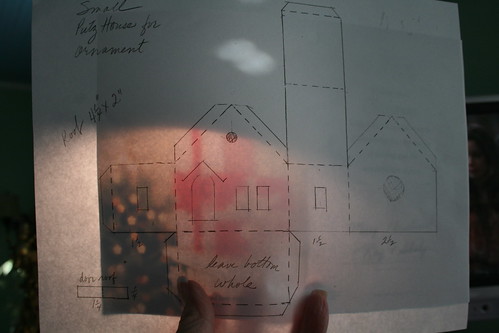
I drew the pattern for this house based on the pattern for the Stone Cottage on the Little Glitter House site, which has patterns for different kinds of buildings. I made it a bit smaller than the given pattern and made a few minor changes to it.
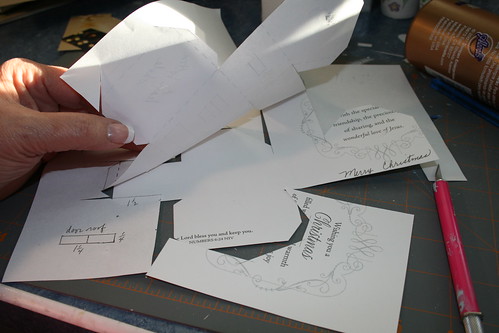
To make a house, using a Christmas card, choose a card that will accommodate the pattern. The card should be large enough, when open, to cover most of the pattern. Some fudging of the pattern can be done. An additional piece of Christmas card can be added to the side of the pattern, if necessary, or the roof section can be cut a bit shorter than the pattern because, after the house is assembled, another piece will be glued over the roof section of the pattern to make a roof with an overhang.
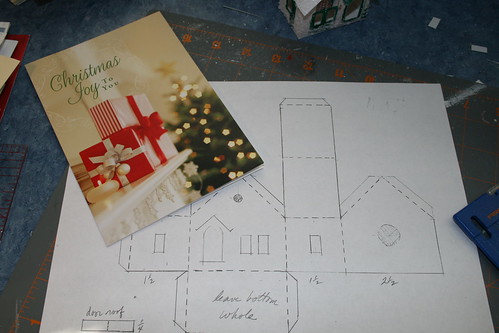
I open the card and place the pattern over it, then hold it up to the desk lamp so I can move the pattern to best fit the picture on the card.
Sometimes I change the pattern by switching the door and the front windows to accommodate the picture on the card.
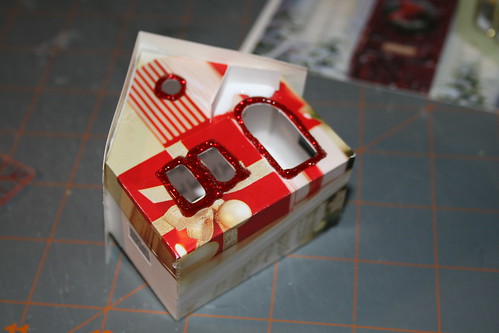
Cut the windows and doors first, then cut the pattern, using an X-acto knife and a straightedge. On this card, I adhered the pattern to the front of the card, but I found as I made more that it works better to adhere the pattern to the inside of the card.
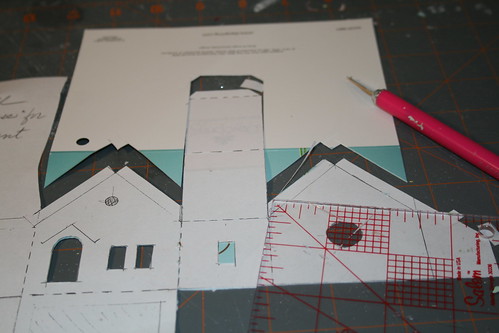
After the pattern is cut, score the fold lines, then remove the pattern from the card. Oops, I forgot to cut the windows and doors before cutting the pattern…

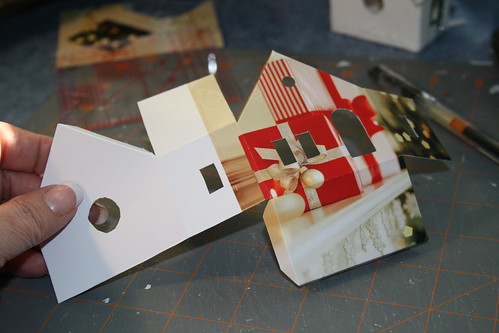
I glue the bottom and sides of the house first, then, when the glue is dry, I glue down the roof section.
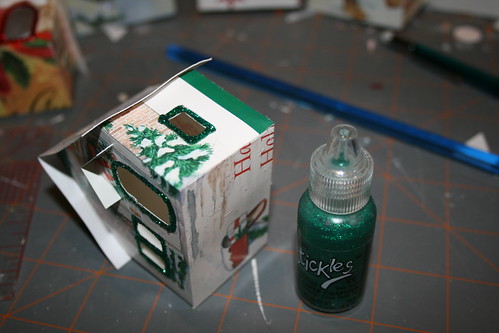
When the house is assembled, I work on the roof. Following the size given on the pattern, cut a rectangle for the roof, crease it down the middle and glue it to the top of the house. This piece is usually from another card, as the cards I have aren’t large enough for the house pattern *and* the roof piece.

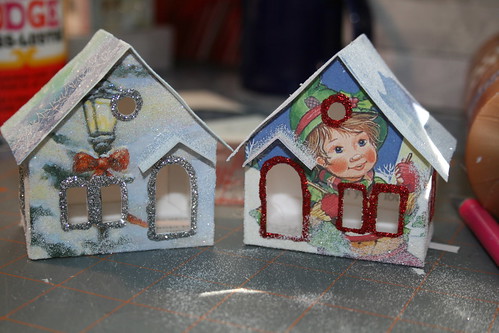
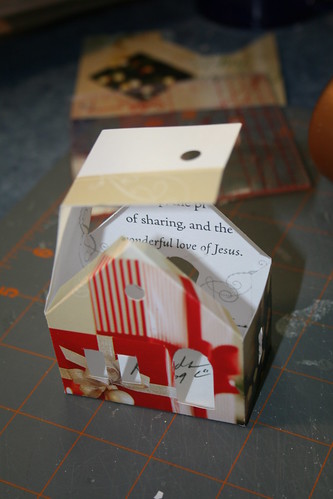
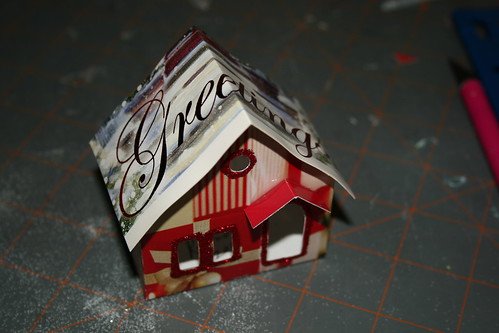
I cut a small piece (1.25″x1/4″) to make a roof over the door and glue it to the front of the house. The windows and door are outlined in glitter glue. The house stays on its back until the glue and the glitter glue (I used Stickles) is dry. Then the side windows are done, one drying before the next one is done.
After all the glitter glue is dry, the house is ready for the next step.
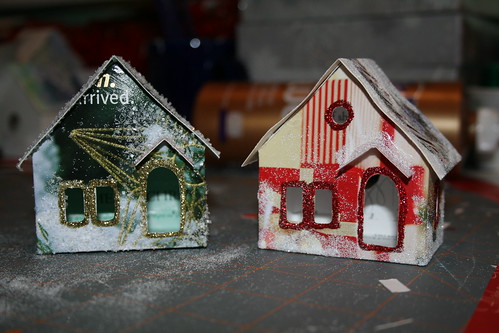
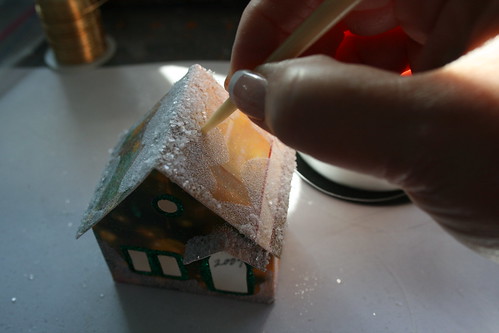
I use Mod Podge to paint a snow design on the house, then glitter it with a white glitter.

When dry, the Mod Podge will be clear and glossy under the glitter. I did totally glitter a few houses, but like the snow patterned glitter better. I also used a very coarse glitter on a couple of houses. Which do you like better?
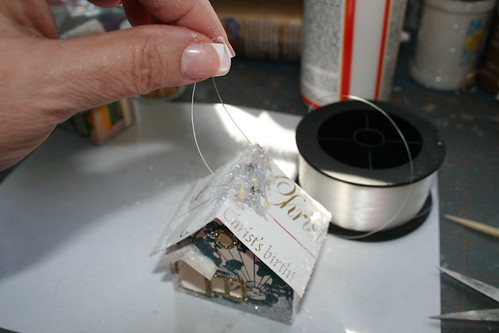
Fishing line made good hanging loops.
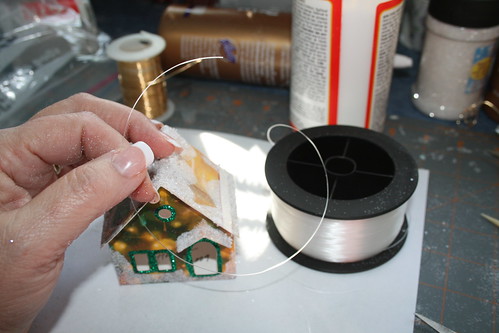
I used my vintage ivory sewing stiletto to make holes in the roof for adding the loop to hang the ornaments. It worked better than anything else I tried.
The line went right through.
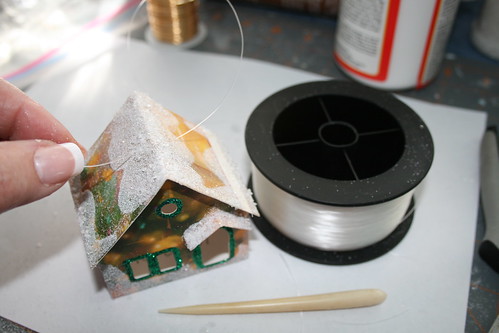
Knot it and it’s ready to hang.
Here’s a link to the ornament pattern. When it opens, click 100%. It may not print to scale, but the proportions should be OK. In that case, the roof, which is supposed to be cut 4.25″ x 2″ may have to be cut down by an 1/8″ or so. Cut it, place it on the house, and see what you think.
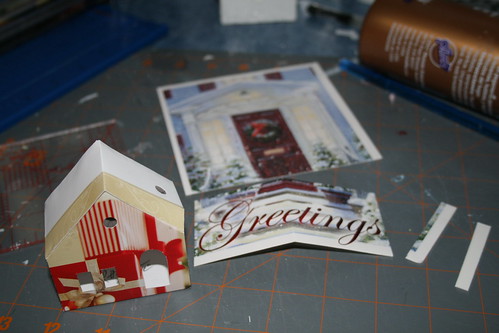
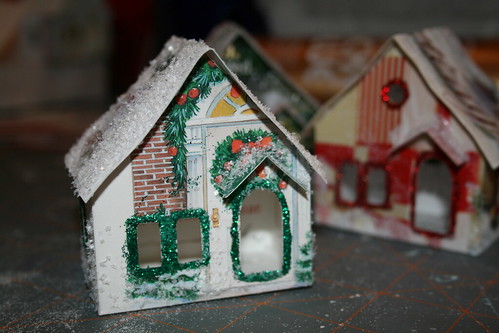
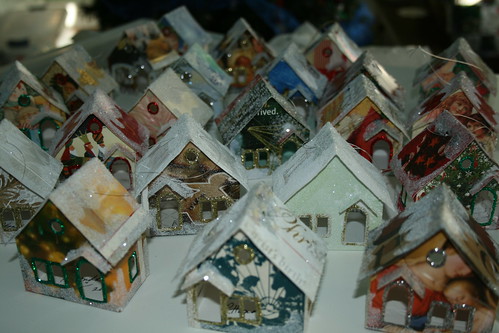
And here are the houses I made. 🙂
If you would like to see some of my more elaborate Putz houses, as well as other Christmas ornaments I have made from upcycled holiday cards, please visit my Etsy shop.
~~Rhonda 🙂
28 Comments
Wow, good tutorial. These look like they take a lot of time and patience to make. How do you find the time?
Viki, I am not sure how long it takes to make one. But they are a lot faster than the Putz houses I made that needed to be painted and embellished. Part of the process is waiting for the glue and glitter to dry, so I usually had three or four in process at the same time. They were a lot of fun to make.
Love these! Thanks for sharing the pattern & tutorial
Hi Rhonda – these are so adorable and such a great idea! Thanks for sharing and keeping me inspired for the past 9 years! I feel like we go way back. Amy in So Cal – although I’m in Sacramento now!!
I just checked out the details of your Putz houses! How cool is that!! I somehow missed that you made them too from recycled Christmas cards! Love it! Perhaps I will make some for the church Christmas tree. I somehow volunteered to be the one to put it up this year! Thanks for sharing!
I can’t even believe you’re already putting up your Christmas decorations!!
But I guess with all the decorating you do, you’d need to start extra early!! Everything looks amazing, I can’t wait to see it all done.
Just found you doing a search on glitter houses! I do love this idea using the cards!! Thank you so much for sharing!
Wow! Thank-you for sharing these putz houses and the pattern! I will definitely be making some!
Many Blessings~Judy
fab.u.lous.
This looks like such a fun craft. Thank you so much for sharing in such great detail the “How Too’s”. I am going to give it a try for our family annual home made ornament exhange. Happy New Year. Barbee
love the site and this is first i’ve heard of putz houses very nice..
OMG, these are so sweet! What a terrific way to use Christmas cards. I’ve been making present tags out of them but this is lots of fun. I saw Martha Stewart glitter on clearance at Michael’s last week and should have snagged it up.
I love this idea! I’ve wanted to start a little village and have also been looking for an idea to recycle my cards. Thanks!! 🙂 Adding this to my winter project list….
These are fantastic. Just purchased materials to make from poster board. This will be a first try for me. I can remember the putz houses my mom use to have under the tree each year. Always loved them – still do.
The glitter house is so beautiful and have just printed off the pattern,,,do you happen to have any more patterns of glitter houses to share,,,like a church house pattern or others,,thank you for your time and kindness,,,I also have lots of christmas cards that I can put to use this way and also I have some of my sister in laws cards that she had saved when she was still here but she passed away in 2000 and I have been trying to figure out how to use her cards in a way that they will be useful but not discarded,,,take care God bless you and your loved ones,,,Cassie
i would love to get the pattern to make these house hope you can help please
Janet, here is the link to the pattern. I hope you give them a try! ~~Rhonda
http://christmasnotebook.com/wp-content/uploads/2009/11/ornament-2.pdf
Thanks for sharing. I am not very skilled at crafts – but am really motivated to try this with my kids. Terrific idea for old cards!
I came across your site through Pinterest while searching for paper craft ideas to do this year. I just ordered supplies and tools to make Christmas ornaments out of my old greeting cards, and your post has inspired me to start making Putz houses! Thanks for the tips!! Looking forward to getting started this weekend.
Love these
Yours is the FIRST tutorial that was easy to follow. You were concise, not wordy, but explained beautifully. Thank you for sharing.
This is really lovely. Thank you.
So Clever I am now looking for old Christmas cards to try making these cute little houses\Thanks Ann South Africa 2015
Love these little houses and they look so quick and easy to do. You have inspired me! I’m going to be making these. Thank you for sharing this pattern to get me started.
As a child of the late 50s, my family had these on our Christmas tree in Wisconsin fitted over lights making a string of brightly lit houses. Their roofs were decorated in pastel colors of pink and blue under white glitter over heavy white cardboard. Our tree lights back then were much larger and hotter. It’s a wonder the paper didn’t catch fire. I have often thought about these houses and how much as a child I enjoyed playing with them after Christmas was over. I am so happy to have found this pattern. Thank you so much! So much nostalgia for me!!!!!!
These little glitter card houses are so cute. I save my Christmas Cards every year for the grandkids to use for projects. You have inspired me to try making some. Thank You for sharing!
The Christmas houses I have made were a bit larger and the roof opened up. The houses were filled with small items as silk scarves and pins and given to nursing home patients.
Lorraine, what a great use for the little houses! Thanks for letting me know! ~~Rhonda
6 Trackbacks
[…] moved from making the above houses to making glitter house ornaments from Christmas cards. They turned out beautifully! And they were faster to make as they have fewer details and […]
[…] these cute Christmas card putz houses using your old Christmas […]
[…] Christmas cards. Bring the trend back by creating a glitter house from templates created by the Christmas Notebook blog. Or simply cut, fold and sticky tape as you please to create your very own “grand […]
[…] on making the traditional “glitter houses,” but you can find the greeting card post here. As you will see, she even uses one of Howard Lamey’s patterns called the stone […]
[…] via Christmas Notebook […]
[…] Christmas Card House Village […]