This is Part 3 of three tutorials about how to construct a Putz house or “little glitter house” as they are sometimes called. This tutorial is meant as a guide to the way I construct a Putz house. Keep in mind that I have my own style and my own techniques, and the following directions will reflect that. Other Putzers have their own styles and techniques, so don’t take this as the only way to make a Putz. Or as the only way a Putz house should look. Everyone brings something to the table. Use what works for you. Change what doesn’t.
Part 1 covered cutting the pattern and installing the window panes.
how to make a putz house / part 1 of 3 / from pattern to ready to assemble
Part 2 covered assembling and painting the Putz
how to make a putz house / part 2 of 3 / assembling and painting
The list of tools and supplies is in Part 1.
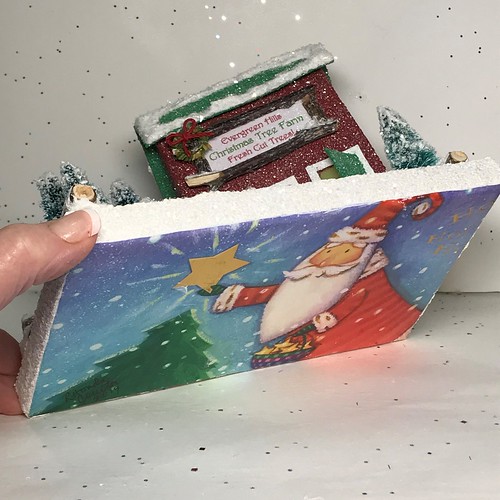
Part 3 begins with choosing a base. I use upcycled Christmas cards to make bases for my Putz. I try to match the card to the theme of the Putz. I thought this card was perfect for a Christmas Tree Lot Putz house. The colors on the card usually dictate the colors of the Putz house.

The greeting card gives a little surprise when the Putz is tilted.
Here’s the link to my tutorial for making bases from greeting cards.
Making Putz bases from greeting cards
The base doesn’t have to be a box, like the ones made from greeting cards. It can be a piece of chipboard (uncorrugated cardboard), thin wood, even a container or jar.
For this tutorial, the fence will be made with sticks. I’ve also made fences using foam core, popsicle sticks, wooden skewers, chipboard, etc. Here is the link to my tutorial about making fences for Putz houses, using chipboard.
To begin, measure the length needed to go across the back of the base.

I use wire cutters to cut the stick to the length I want to use.
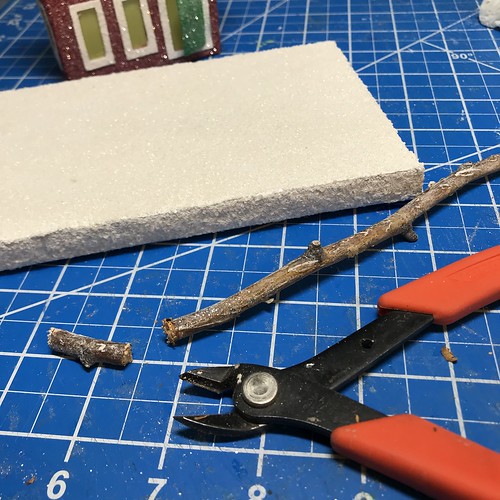
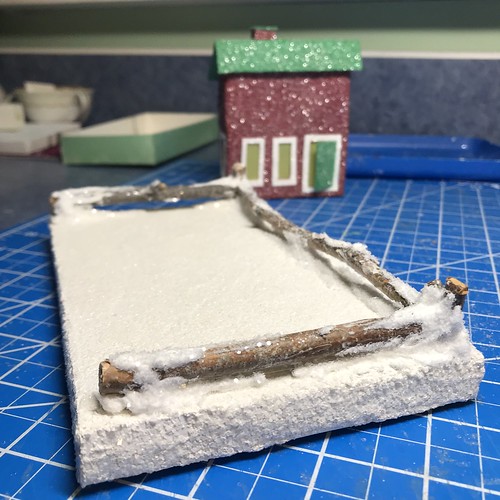
I like to find a stick that has a branching twig on it. That bit of twig can be used as a “post” for the fence. In the picture below, you can see how that works.
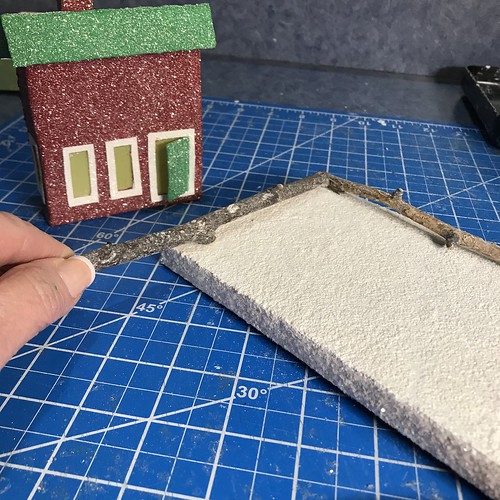
Before gluing the fence to the base, check the bottom of the base to be sure the picture will be oriented in the correct direction when lifted from the front. Glue the stick down well. I use hot glue. The glue will be covered with faux snow, so don’t worry about being too tidy.
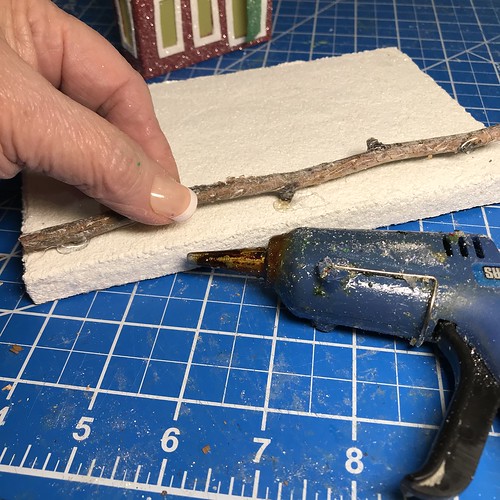
You can see in the following picture, that I cut sticks for use as posts for the back of the fence.

Crooked sticks have character, right?
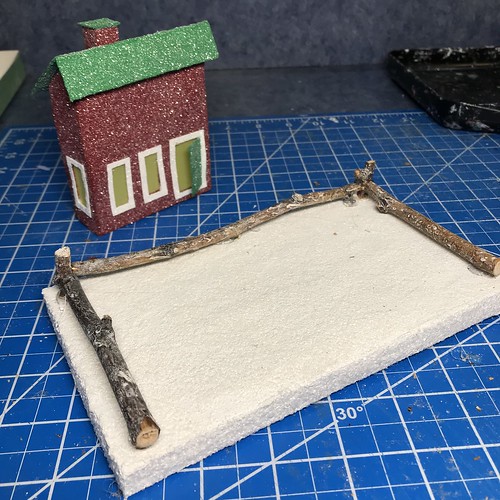
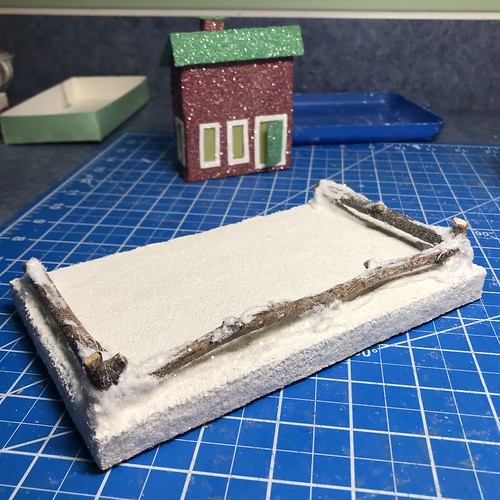
All three sides of the fencing are now secure.

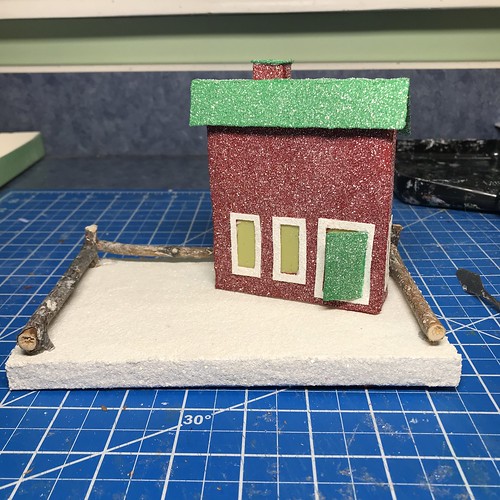
Think about how the building will sit on the base. Because this is a tree lot, I like to leave room on one side for three to five trees.
Before the building is glued down, add faux snow to the fence. It’s much easier to add that without the building in the way.
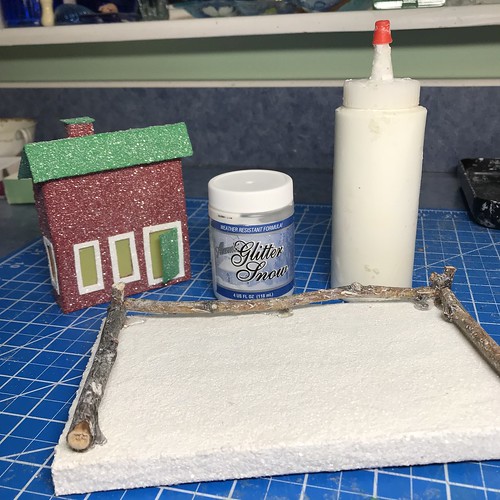
I use Aleene’s Glitter Snow. It makes a fluffy snowfall and is easy to apply, using a squeeze bottle. There is also an Aleene’s True Snow. I buy the Glitter Snow because it is cheaper than the True Snow (go figure!), and it doesn’t actually glitter when dry so I can sprinkle on any kind of glitter I want to use.
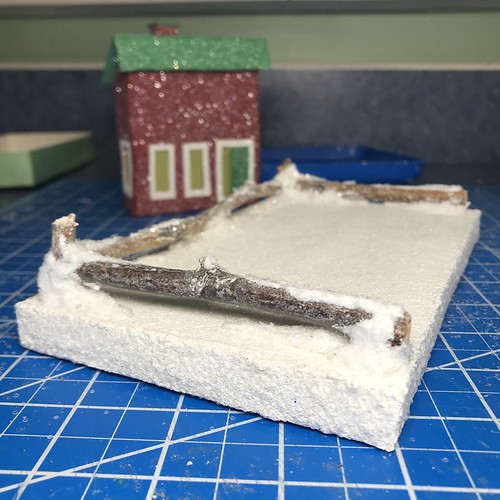
To add snow, I use a plastic squeeze bottle with a small tip. I start on the inside of the fence and cover any hot glue. I like to mound the snow up a bit around the posts. I add snow to the top of the fency by dragging the tip of the bottle across the fence while squeezing out a very small amount.
When the snowfall is complete, and while it is still wet, sprinkle on the glitter.
Use a small bead for the doorknob. I’d use beads without holes (do those have a specific name?) if I had them, but a tiny seed bead works great. Glue it into place by placing a tiny drop of tacky, white glue on the spot the doorknob should be. I use a needle-nose tweezer to pick up the bead and place it on the drop of glue.

Make a final decision about where the building will be placed. Leave it in place, but don’t glue it down yet.

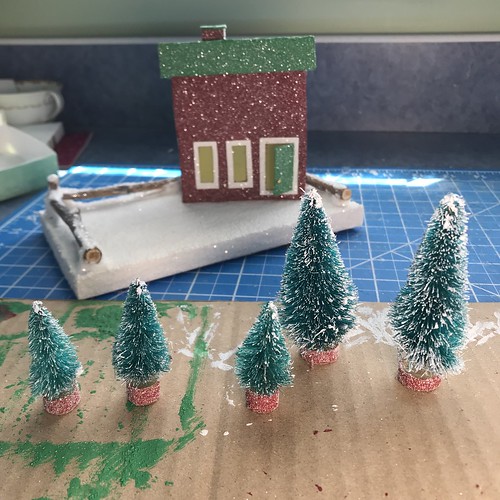
Decide on how many bottle brush trees will be added. Place them on the base, with the building in place, and decide how they will be arranged. If the building hasn’t been glued down, there is some fudge room for tree placement. If desired, a pencil can be used to make small marks for where the items will be glued down. Pencil marks will be covered with snow later.

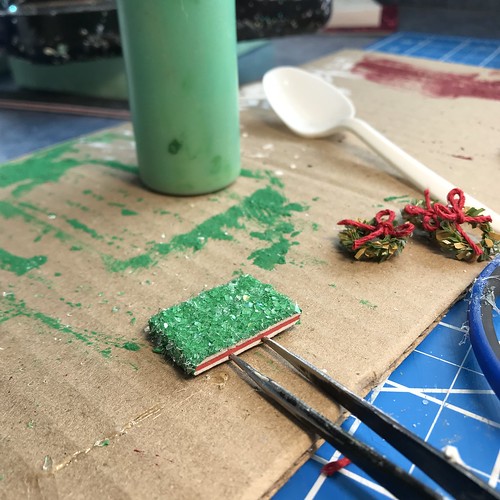
I like to paint the tree bases red for a more festive feel. You could paint them gold or any other color. Your choice! While the paint is wet, dip them into fine glitter. Set aside so they can dry. When the base is dry, add some snow to the trees and glitter them while the snow is still wet.
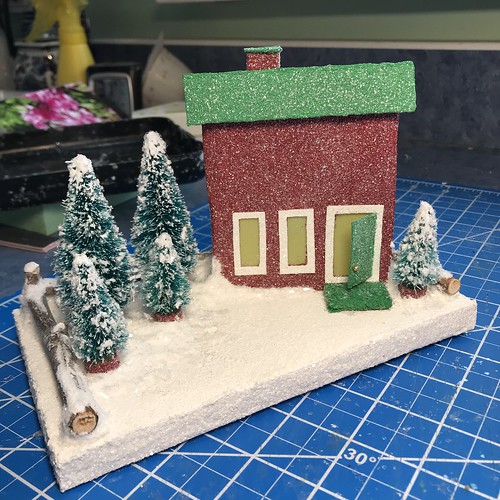
The first step is to glue down the building. Do not apply glue where the front step will be added. When the glue has cooled, snow around it and glitter the snow. Much easier to do at this point, than after adding the trees. Glue down the back row of bottle brush trees.
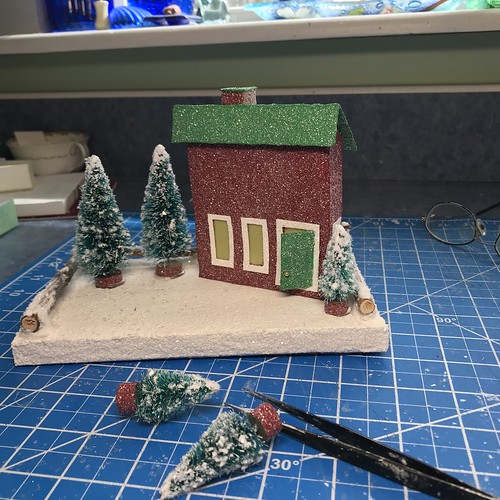
Snow and glitter around the bases of the trees. The snow can be swirled with a palette knife, a toothpick, or a popsicle stick, etc.

Glue down the remaining trees. Snow and glitter around them.

I use cheap nail files for sanding as needed when making Putz houses. When they are worn out, I upcycle them as step material rather than throwing them away.

Cut a piece of the nail file to the desired length. Save those rounded ends. They make cute front step areas for small Putz, as shown below.


Paint the step with two coats of paint, allowing it to dry between the first and second coat. I attach the step to my needle-nosed tweezers for ease of painting.


After the second coat, while the paint is still wet, sprinkle it with glitter. Allow it to dry completely and glue it in front of the door.
When gluing down the step, push it as close as possible to the building so there is no gap.
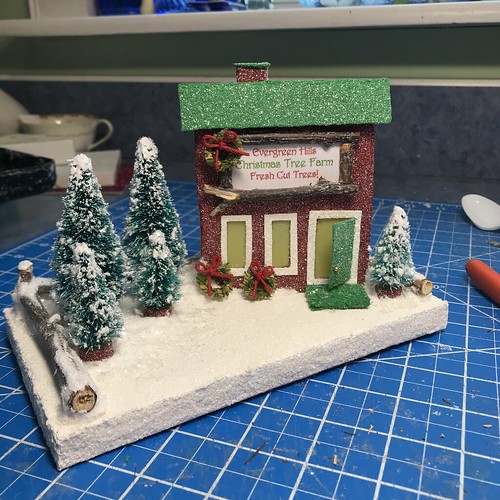
The sign can be printed or hand written. I use Core’dinations Inkjet Printable Glitter Paper to print signs for my Putz. Cut to size. Leave enough room all the way around so the frame can cover the edge. To make a frame, I use a small stick, splitting just the end of the stick with wire cutters, then using a craft knive to slowly cut the stick in half, lengthwise.

If the flat side seems bumpy, it can be gently sanded by rubbing it over a nail file.

Hot glue the stick frame pieces to the sign. Trim the ends, if desired, with the wire cutters.

Each tree lot I make gets a unique name. I made a list of possibilities and printed them all at once on one sheet of glitter paper. When I need one, I can choose from that stock pile.

The tiny wreaths are hand-crafted from evergreen chenille stems. I plan to write a tutorial for that soon. Glue on as many wreaths as desired.
Snow around the step and along a path.
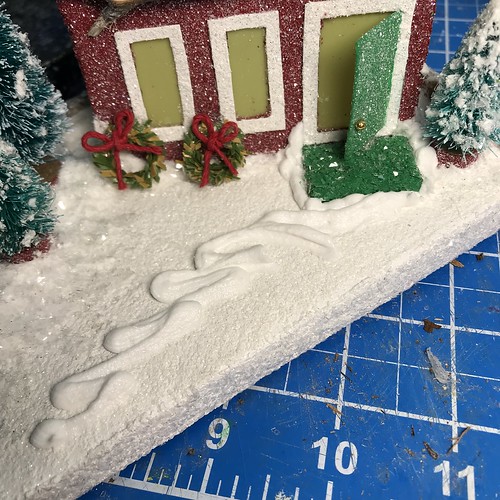
I use a palette knife to smooth the path and to spread the snow around the step.

While the snow is wet, sprinkle it with glitter.

Add some snow to the sign. Just a dab here and there. Glitter it.

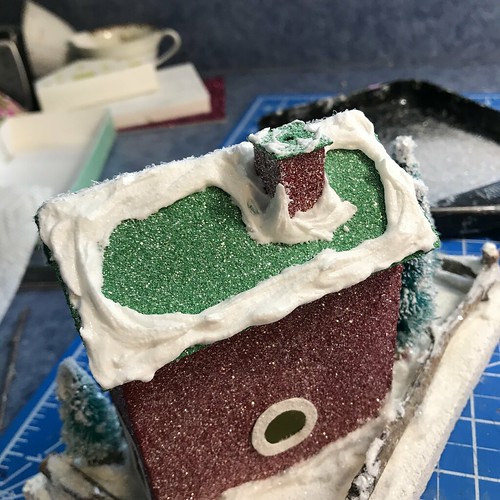
Snow the roof. I start with the ridge line, then outline the rest, rounding the corners a bit.

I don’t try to smooth the snow out. When the glitter is added, it softens the snow. Note that I also added a touch of snow to the wreaths.

Go around the chimney and dab a tiny bit on the chimney cap.
Glitter the snow while it is still wet. I glitter items over a glitter tray to catch the excess and pour it back into the bottle.
The Christmas Tree Lot is done! So cute!
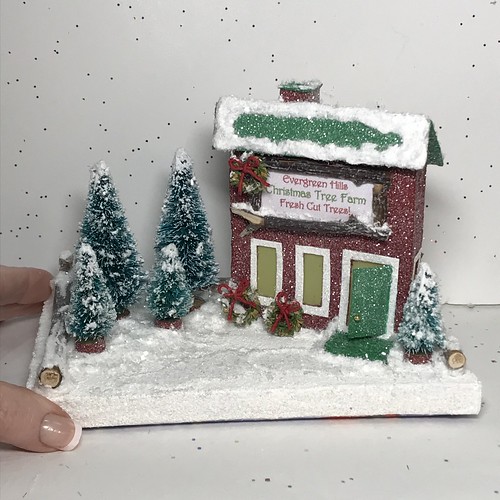
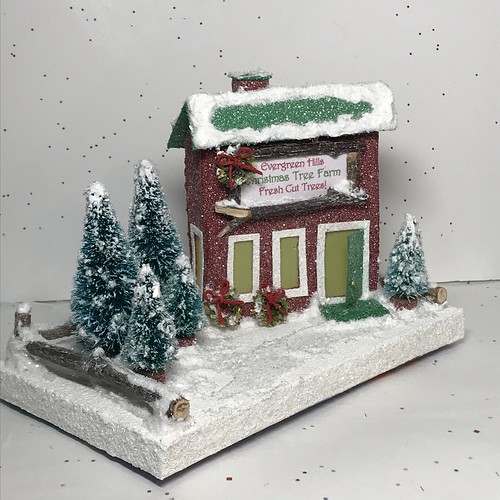
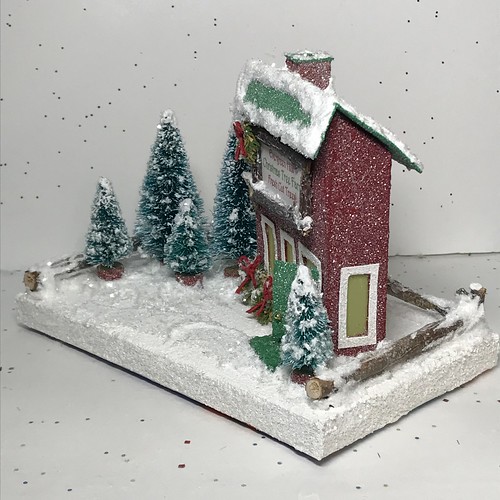


If you have any questions about the construction of the Christmas Tree Lot, please ask! I am happy to help.
You can see my Putz houses and other Christmas ornaments in my Etsy shop.
If you are interested in crafting other Putz houses of your own, check out my Putz tutorials for more information. Putz House Tutorials
I am always happy to answer questions about the process. Please ask, if you are wondering about the details of putzing!
All proceeds from my Etsy shop benefit Kenya Mercy Ministries. They work with the urban poor of Nairobi, Kenya, particularly the children and their families who live in Kibera, the largest slum in Africa. Thank you for your part in helping these children when you purchase items from my shop!
~~Rhonda 🙂
One Comment
Your tutorials on all things having to do with Putz houses are fabulous, Rhonda! Thank you for all the detail you’ve included.
I was wondering what kind of light you use to light up your houses?
Thanks again for these wonderful tutorials!
Linda