This tutorial is meant as a guide to the way I construct a Putz house. Keep in mind that I have my own style and my own techniques, and the following directions will reflect that. Other Putzers have their own styles and techniques, so don’t take this as the only way to make a Putz. Or as the only way a Putz house should look. Everyone brings something to the table. Use what works for you. Change what doesn’t.
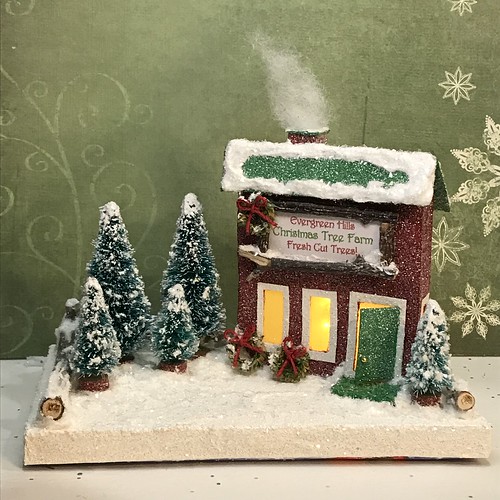
There are three parts to this tutorial. I will post the second and third parts as soon as I have them done. I’m using the pattern for the Christmas Tree Lot pictured here for the purposes of this tutorial.
The following list includes all the tools needed for all three parts of this tutorial. I tried to list them in the order they are used, so some will not be needed until Parts 2 and 3.
- a Putz house pattern / You can draw the pattern for the Putz I use for this tutorial, using this pattern-drawing tutorial. How to draw a Putz Pattern
- chipboard (see notes below)
- adhesive roller
- scissors
- X-acto knife / new #11 blades
- self-healing cutting mat / If you don’t have a cutting mat, a 12″ by 18″ mat is a nice size for working with Putz houses. I use a 24″x18″ mat that I keep on my work space all the time.
- 4″ square acrylic ruler, marked with 1/8″ spaces / I find this particular ruler indispensible. One of my favorite putzing tools.
- Clear acrylic ruler / optional. I like a 12″ ruler for cutting longer lines of the pattern. An 18″ ruler tends to get in the way when positioning the ruler for cutting pattern pieces.
- embossing stylus / Colored ones are nice because they are easier to find on a cluttered desk than wooden ones are.
- bone folder / For making crisp folds.
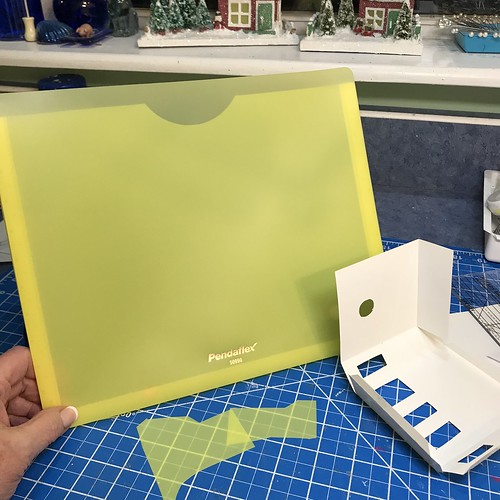
- window pane covering of your choice. I use translucent, poly file jackets for window panes. Yes, I buy the whole pack just for the yellow ones. I always find a good use for the others. Reproduction window and door inserts are available online. Search online for < replacement putz windows >. Reproduction windows and doors are useful for repairing vintage Putz as well as making new ones. For my own Putz, I prefer the poly film as window glazing. I am always on the lookout for a better film, though. Just haven’t found it yet.
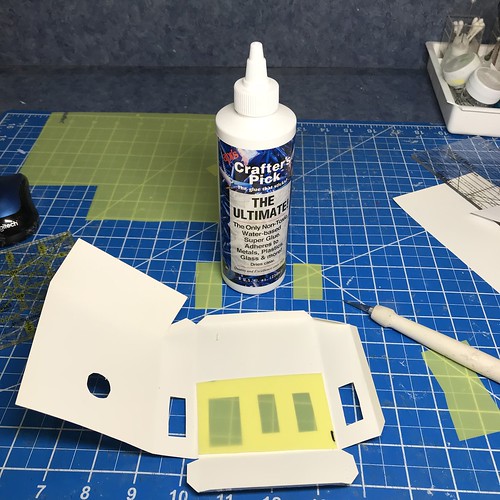
- Crafter’s Pick Ultimate glue / The only glue I have used that keeps the poly window panes from popping off.
- beveled wooden pick
- detail hot glue gun / The link is to the newer model of the glue gun I use. Mine never drips, so no wasted glue. It has a light to show if the tool is on, which I have found helpful many times. The newer model also has auto shut-off if left for more than 30 minutes. I’ve had my older model for years and love it.
- acrylic paint
- white glue to mix with the paint / Optional
- fine, clean sand to mix with the paint for texture / Optional, but gives a vintage look.
- Floetrol or other paint conditioner / Optional. I find it conditions the paint for a nice feel and also helps minimize cracking that may occur when a painted piece is folded. I paint pieces before assembling, but that is optional, too. The entire house can be assembled and then painted.
- paint brush / I like a 1/4″ flat paint brush. Fits the nooks and crannies while covering the larger areas quickly. I also use a fine point paint brush occasionally. I could Putz with just those two kinds if I had to. NOTE: Paint cleaner is good to have. It will extend the life of your brushes.
- fine-nose tweezers / Another tool I use every day.
- glitter / I like to use a fine glitter on the building and the base, then a coarser clear glitter on the snowy areas. Texture and color is a personal choice. Do what makes you happy!
- glitter tray / I like two sizes, one smaller and one larger.
- fine-tip glue application bottle / Optional, but handy for applying glue to small areas, such as the backs of window frames.
- nail file for sanding / When the nail file doesn’t sand well any longer, I save it to make steps to the front door.
NOTE re: chipboard: Any light-weight chipboard can be used. Chipboard is non-corrugated cardboard. Any of the following are fine for making a Putz.
- poster board, light-weight / can be used for the building and for the roof
- poster board, heavy-weight for roof / Optional
- cereal / cracker boxes
- heavy-weight cardstock

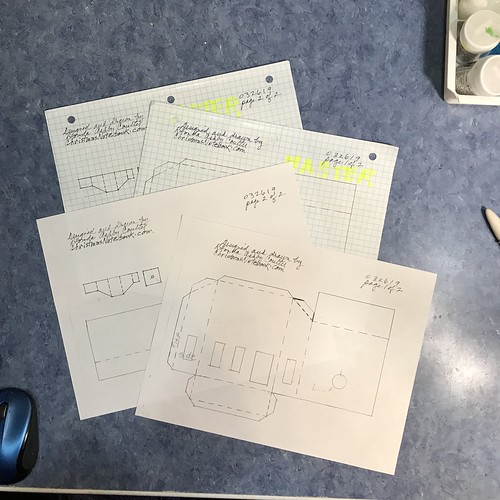
Make a copy of the master pattern. I mark all master patterns with “MASTER,” using a yellow highlighter. If the master is copied in black and white, rather than color, the highlighter won’t show. That makes it easy to keep the master intact. Don’t cut any pattern with a yellow MASTER on it!
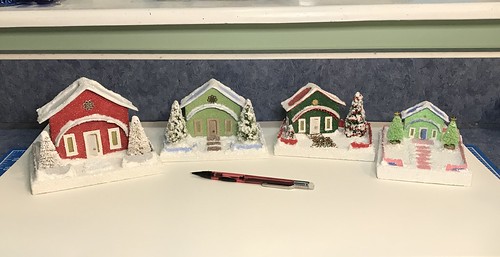
The master pattern can be used over and over. I use my printer to copy a pattern in different sizes to make original, mini, and tiny Putz houses. The red house is copied at 100% of the original size. It stands 4″ tall, as measured from the bottom of the base to the top of the roof. The other houses are copied at 80%, 70% and 50%.
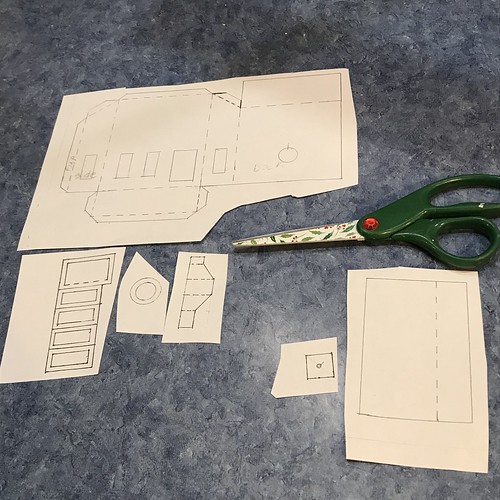
Rough-cut the copied pattern pieces apart. I keep the pattern number till the house is done because I have a form I fill out when each Putz is finished and then posted to Facebook, Instagram, Etsy, etc. The form keeps all the information for each completed Putz together and the pattern number is added to that form.

I separate the pieces into two piles. The first pile will be cut from light-weight poster board. This includes the house pattern piece, the frames, and the chimney.
The second pile will be cut from heavy-weight poster board. This includes the roof and the chimney cap. I use the heavy-weight board for roof items to minimize warping that can occur when the board is wet from painting.
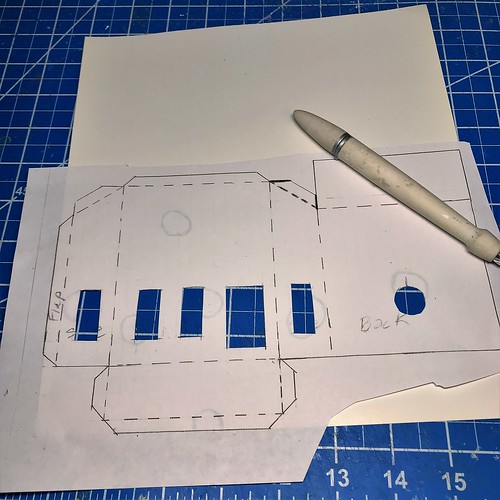
I like to use an adhesive roller to attach the pattern piece to the poster board. Just a few little dots of adhesive on the back will hold the pattern in place while I cut it. In this picture, I circled the adhesive with blue pencil to mark where I like to place them…mostly over places that will be cut out, but also on the outside edge of the pattern.

In this picture, I am holding the pattern up to the light to show how I like to line up the outside line of the pattern with a straight edge of the poster board. In this case, I knew the poster board was a 90% (right) angle, so I was able to line up two sides of the pattern with two sides of the poster board. This saves a bit of cutting.

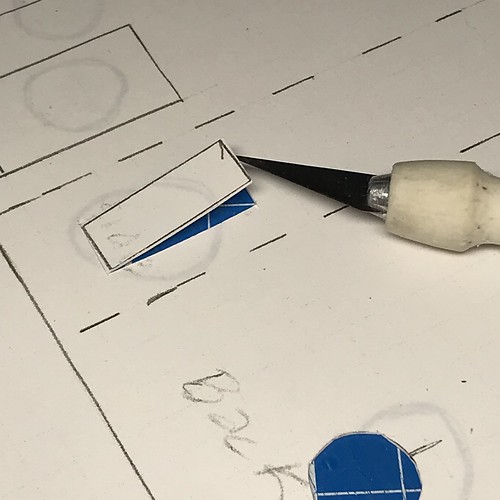
Use an X-acto knife to cut the holes in the pattern. A new, sharp blade makes a big difference over a knife with a used blade.

I cut just barely outside the lines to make the hole a tiny bit bigger than the frame that will cover it. It makes for a cleaner look, once the frame is on. These cuts don’t have to be perfect because they will be covered by the frame, unless frames won’t be added to the finished Putz. Then these holes should be cut as carefully as possible.
An acrylic ruler can be useful for making clean, straight cuts. If you have a die cut set, you can choose door and window sizes from the set and cut the holes using the die.

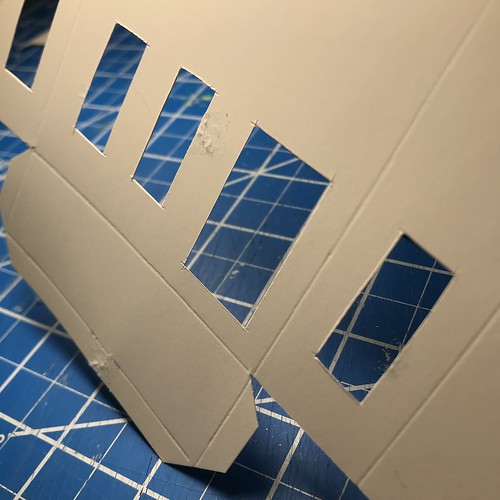
You can see in this picture how much straighter the cuts are when using an acrylic ruler as a guide.

I like to make all the vertical cuts before turning the pattern piece to cut all the horizontal cuts. Just saves time.

I like to use an acrylic ruler to cut the long outside lines of the pattern.


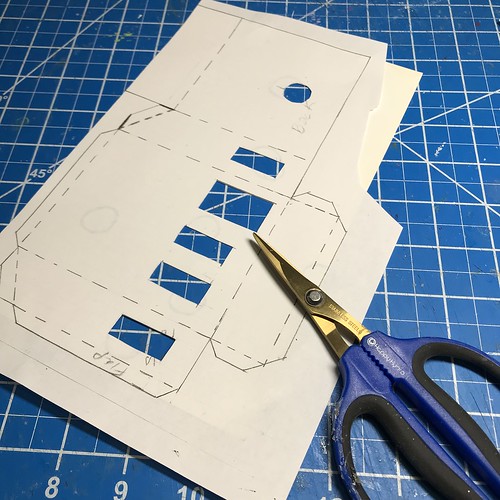
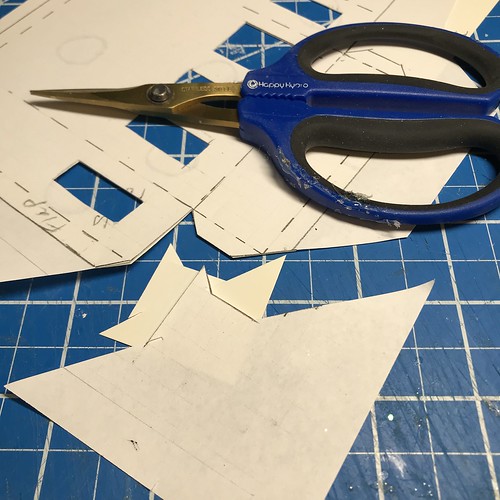
For the smaller, shorter cuts, I like to use bonsai scissors. Also called straight trimming scissors. Solid lines are cut. Dashed lines are not cut, but will be folded after all the pattern pieces are cut and ready to construct.
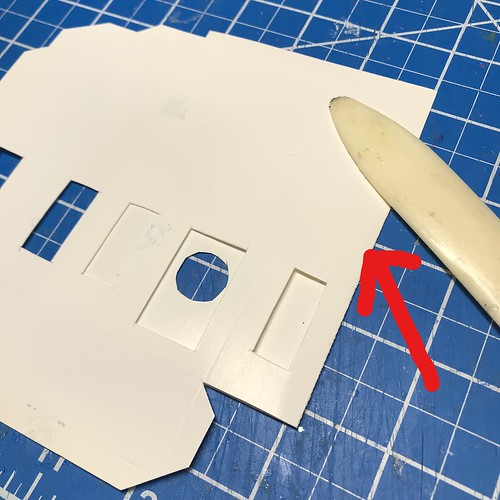
When the pattern has been cut, and before the paper pattern is removed, score all dashed lines to make them easier to fold. I like to use an embossing stylus to score the pattern.

Gently peel the paper off the poster board.

The scored lines are visible in this picture.
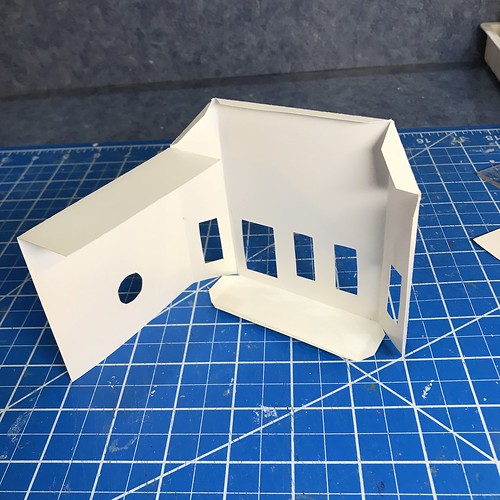
Fold all the scored fold lines. Use a bone folder to make clean, crisp folds.
The next step is to add window panes, if wanted. I use transluscent film from poly file jackets. I am not totally happy with it, but it’s the best I have found so far. I do like the lovely, soft glow this film gives to a Putz when it lights up.

I save the small scraps to cover individual windows when only one hole needs a cover, like on the sides of the Putz.
Cut the film so each piece covers as many openings in each side as possible. I try to add about 1/4″ border if there’s room.


To attach the window panes, I use Crafter’s Pick Ultimate glue. I’ve never had a window pane pop off when using this glue. It’s a thick, tacky glue. There are other brands that probably work as well. White, school glue doesn’t always give the bond needed to adhere the poly film to the chipboard. If you are using reproduction windows, cellophane, vellum, or paper to cover the window holes, school glue would work fine.
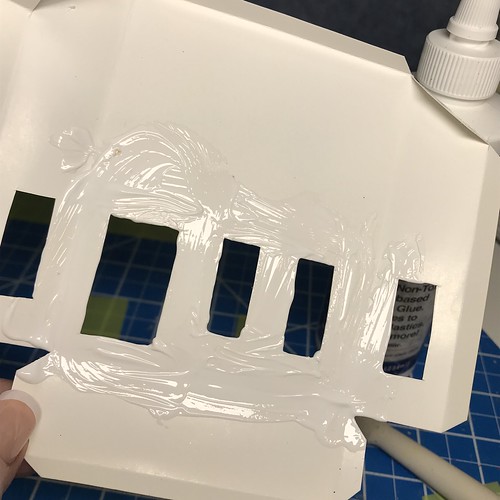
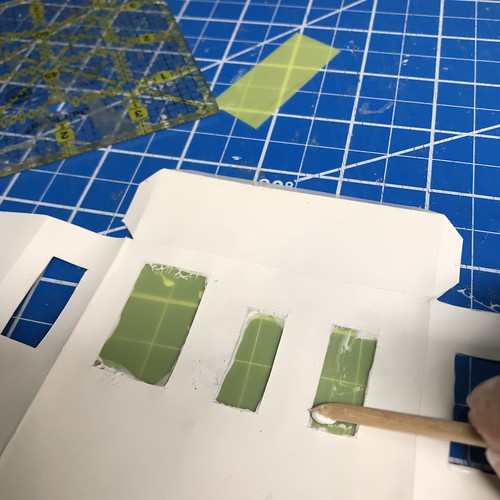
Apply the glue liberally and spread it to cover the area.

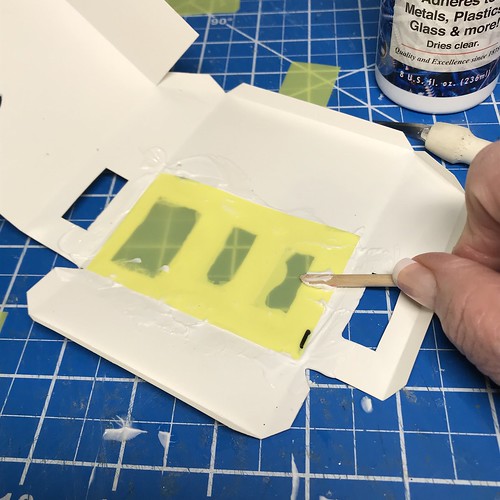
Add the window film and press it to help it seal to the poster board. I have some of these wooden picks that have a beveled edge and they work well for rubbing the film to get a good seal.

When the building is turned over, there will be excess glue around the edges of the film.
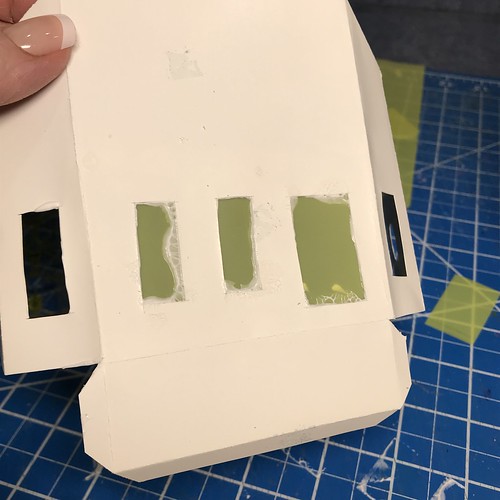
I use the same pick to remove as much of the glue as I can. Do note that this works for poly film and will not be a good method for window panes made of paper, etc. If using those, be as careful as possible when applying the glue. I use a lot because I want the seal to be tight all the way around the edge of the window.
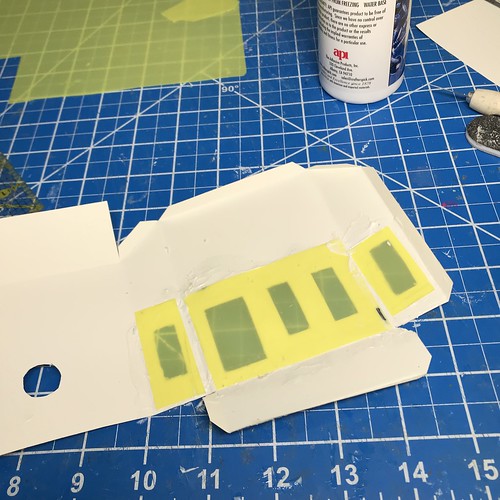
Don’t worry about getting it all. Glue that dries on the window pane is easily rubbed off with a finger. Again, this works for poly film and won’t work for paper windows.

Install all the window panes. The circle hole on the back panel isn’t covered. That allows access for lighting the Putz.
The Putz is now ready to assemble. See Part 2 for the instructions.
Part Two / Assembling and Painting the Putz
Part Three / Adding a Base and Embellishments
You can see my Putz houses and other Christmas ornaments in my Etsy shop.
If you are interested in more information about crafting Putz houses of your own, check out all my Putz tutorials.
I am always happy to answer questions about the process. Please ask, if you have questions about any part of this tutorial, or if you are wondering about other details of putzing.
All proceeds from my Etsy shop benefit Kenya Mercy Ministries. They work with the urban poor of Nairobi, Kenya, particularly the children and their families who live in Kibera, the largest slum in Africa. Thank you for your part in helping these children when you purchase items from my shop!
~~Rhonda
4 Comments
Can you buy the patterns
Thank you for your interest, but I don’t sell patterns at this time. ~~Rhonda
Have you tried using an overhead transparancy for the windows?
No, I haven’t, but it sounds like a good idea. I’ll check it out. Thank you for the suggestion! ~~Rhonda