Yesterday, I posted a tutorial for making Christmas diorama ornaments. I’ve made a few more and thought I’d post again with some tips that may be helpful if you want to make some of these ornaments for yourself. For complete instructions on making these ornaments, see the tutorial. Christmas Diorama Ornaments
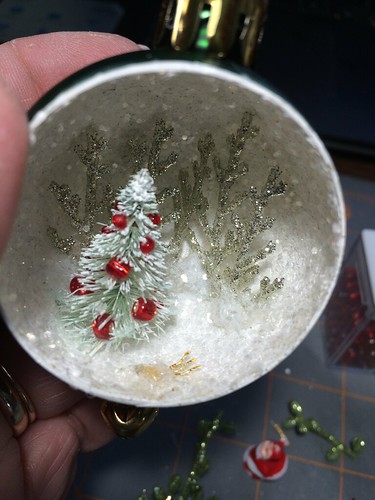
This time I used a smaller ornament ball than I’ve tried before. This one is 1 3/4″ wide.
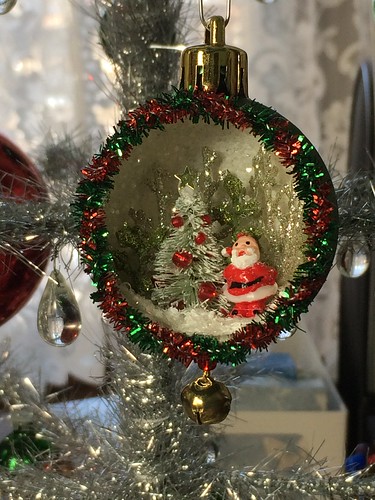
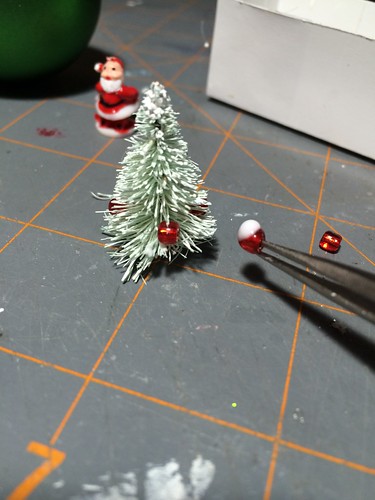
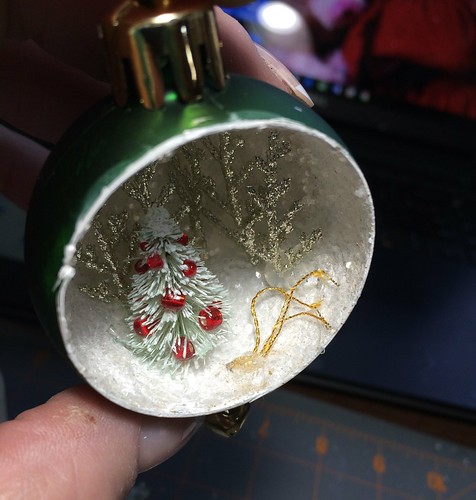
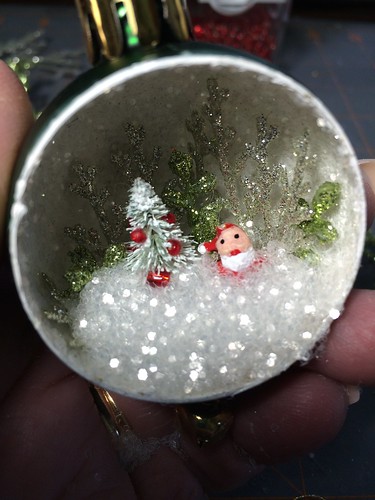
I chose a one-inch bottle brush tree and a tiny Santa figure that came in a stash of craft bits and bobs that I brought home from my mom’s house after she passed away.
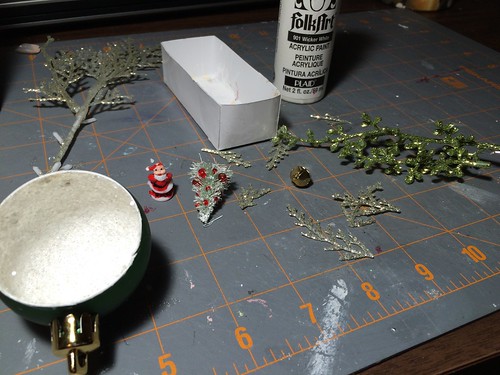
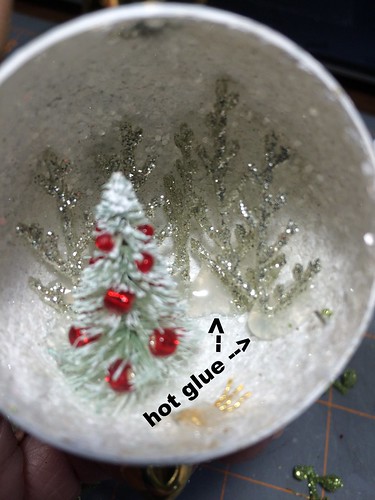
Needle-point tweezers are one of my favorite craft tools. If you don’t have any, I encourage you to get some. I know you will find them so handy, you will wonder how you got along without them! Here, I used them to apply beads as ornaments to the tiny bottle brush tree. I dipped one side of the bead in white glue and added it to the tree. I used two sizes of red beads for this tree.
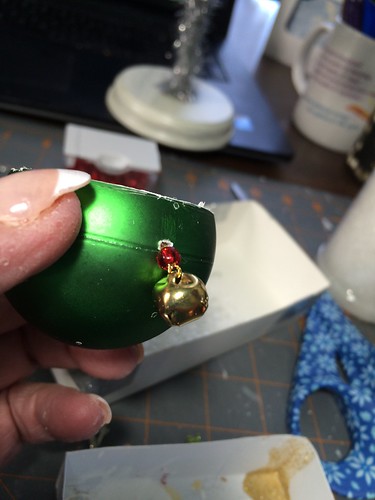
After adding a few embellishments, I decided to hang a dangle from the ornament. To do that, I needed to make a hole through the bottom. I used an awl to “drill” the hole, pressing gently and rotating the awl until it pierced the plastic shell. If you have a Dremel handy, you could use a small drill bit to do this. When finished, brush away the loose crumbs. I thought about filing the edge of the hole, but I didn’t because I thought I might scratch the ornament finish.
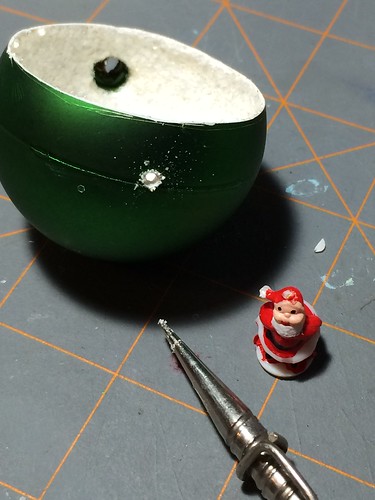
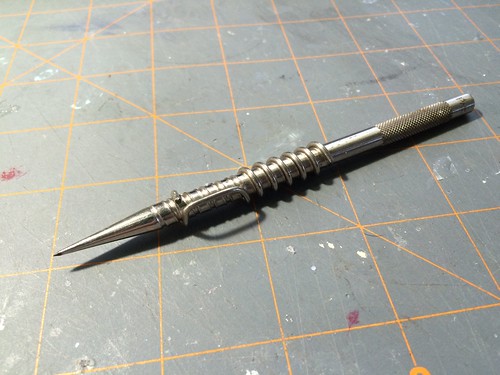
This awl came from my mother’s stash of craft supplies and tools. I often find it useful.
I put a bell and a red bead on gold cord and threaded the cord through the hole.
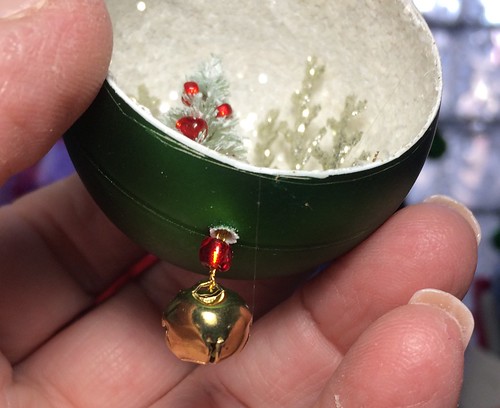
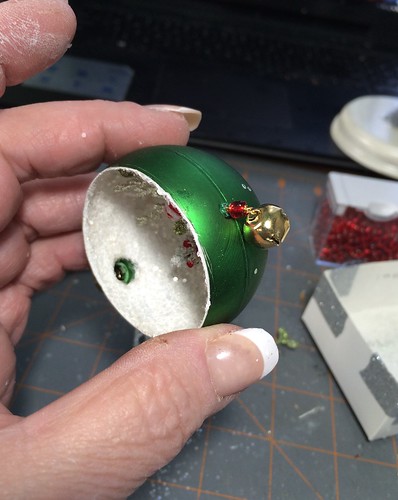
Inside the ornament, I pulled the ends of the cord aside and added a drop of hot glue over the hole to hold the cord in place.
I trimmed the ends of the cord.

At this point, I had already placed some floral bits in the background. I decided to camouflage the base of those bits by covering them with hot glue. Then I painted the glue white and covered it with glitter. It’s a lot easier to do this sort of thing now rather than get to the end of your project and find you can see unfinished spots that you can no longer get to.
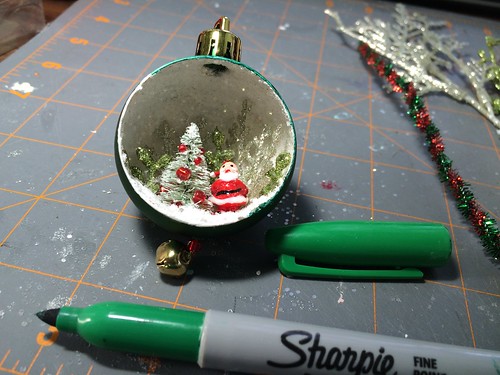
I decided I didn’t like the white showing around the little hole at the bottom of the ornament.
I used a green Sharpie marker to color over the white. An easy fix.
I also used a green Sharpie to cover the white edge of the larger hole. I thought the white might show through the trim. Here, it’s half done. You can see the difference it will make.
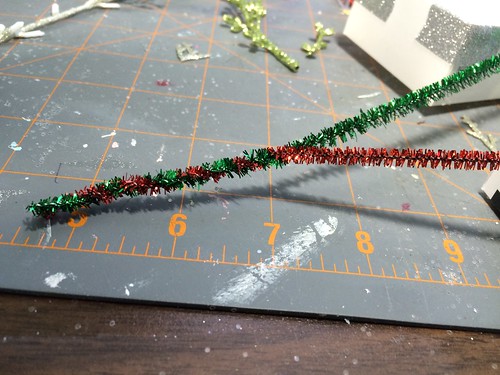
To trim the ornament, I twisted red and green pipe cleaners together.

I used hot glue to attach the trim. To make it easier to follow the circular edge without dislodging the trim, I glued a small portion at a time, clipped it down and waited a few moments to let it dry before gluing the next section.
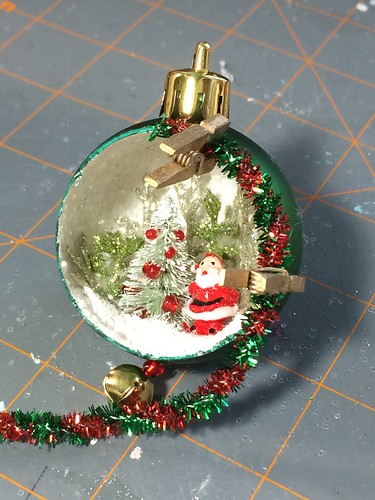
To finish the floor of the ornament, I added a puddle of hot glue, allowed it to dry, painted it white, then glittered it. Looks like Santa just came through the Great Blizzard of 2016!
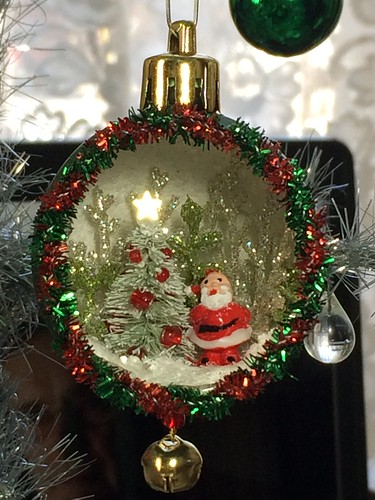
I poured off the extra glitter and the ornament was done.
If you make some diorama ornaments of your own, I would love to see pictures!
Similar diorama ornaments I have made are featured in my Etsy shop. ChristmasNotebook
~~Rhonda
2 Comments
Mom would like you using her bits and tool. The twisted pipe cleaner is a nice touch, as is the jingle bell !
These are adorable and I’ve put them on my project list for next Christmas. They look like projects that my daughter’s use to create with a much loved neighbor…she was the Queen of crafting. Love you are using your Mother’s tools and I’m sure she looks down and is happy. Great idea to twist the pipe cleaners.