The first part of this tutorial can be found here: tutorial / make leafed model trees using armatures, part 1
Part 1 explained how I use wired tree armatures to make the trunk and branches for Putz house trees. I also make trees from the stems of flowers I use for embellishing Putz houses. That’s a future tutorial.
In Part 2, I will show how I add leaves to summer trees. There are many ways to do this. If you google “trees for model railways,” you will find many videos on making model trees. The process in this post is the way I craft summer trees. I encourage you to take a look at other methods, as well as this one, and find the way that suits your own crafting style.
To make an armature tree, you will need these supplies, also listed in Part 1 of this tutorial.
- armatures
- pliers to manipulate branches
- medium to dark brown acrylic paint, or other color/shade you prefer
- small paintbrush / I have an old frazzled one I use for painting trees.
- glitter / clear, extra fine
- glitter tray / optional but useful
- hot glue
- scraps of cardboard
- JTT Landscaping Material – Foliage Fiber Clusters, Light Green, Fine
- needle-nose tweezers / One of my top 10 must-haves for putzing.
- scissors / I prefer these small 6″ Fiskars for delicate jobs.
- leaf litter / Just green leaves are available, but the other colors are great for autumn trees. These tiny leaves are the scales that protect seeds in a birch tree catkin. If you have a silver birch, you can make your own. I don’t know if all birch trees make the same kind of seed pod. Making Miniature Leaves from Birch Seed Pods
- clear tacky glue, or white that dries clear
When I craft a building, embellishment or a tree for putzing, I aim for the “impression” of the item, rather than an exact copy. I have learned it doesn’t have to be exact to be a creative and joyful object. Does it look like a tree without being an exact copy? Yes? We’re good to go! I’m not saying exact copies don’t express someone else’s creative abilities. There are many amazing artists online who make miniature, exact copies of buildings and natural features. You may be one of them. I am astounded when I see what they are creating. I subscribe to some of their feeds and have learned a lot from them. There’s room for everyone’s individual style. My style leans to the impressionistic side. Find your own style by crafting and crafting and crafting. Your personal likes and dislikes will guide you to a form or style that suits you.
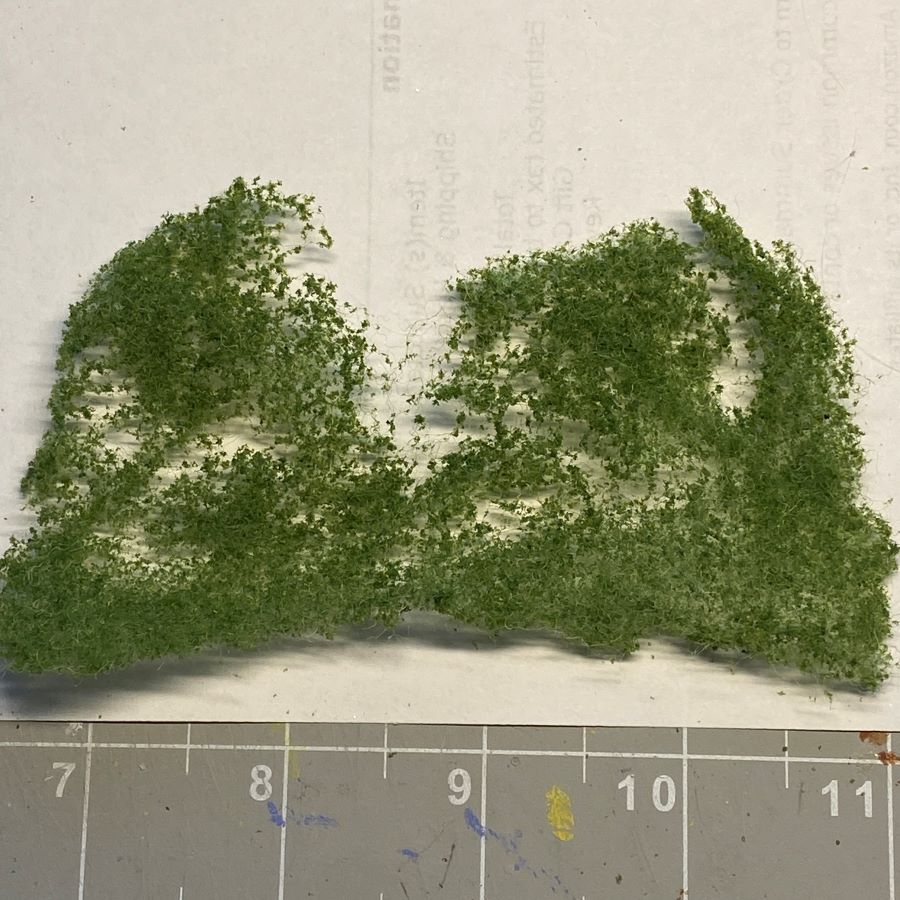
I use this landscaping material for summer trees. I get it on Amazon, but it is available in hobby stores and online. It is used for model railway layouts. I have two kinds of landscaping material. This one is made of tiny bits of green material held together with very fine filament.

The product number for the kind I use, is 95064. The other package in the first picture below contains a different material made from sponge. It can’t be stretched over the branches. In the second picture below, the one on the right is made of clumps of sponge material. The sponge material can be pulled apart by hand. It’s great for making shrubs.

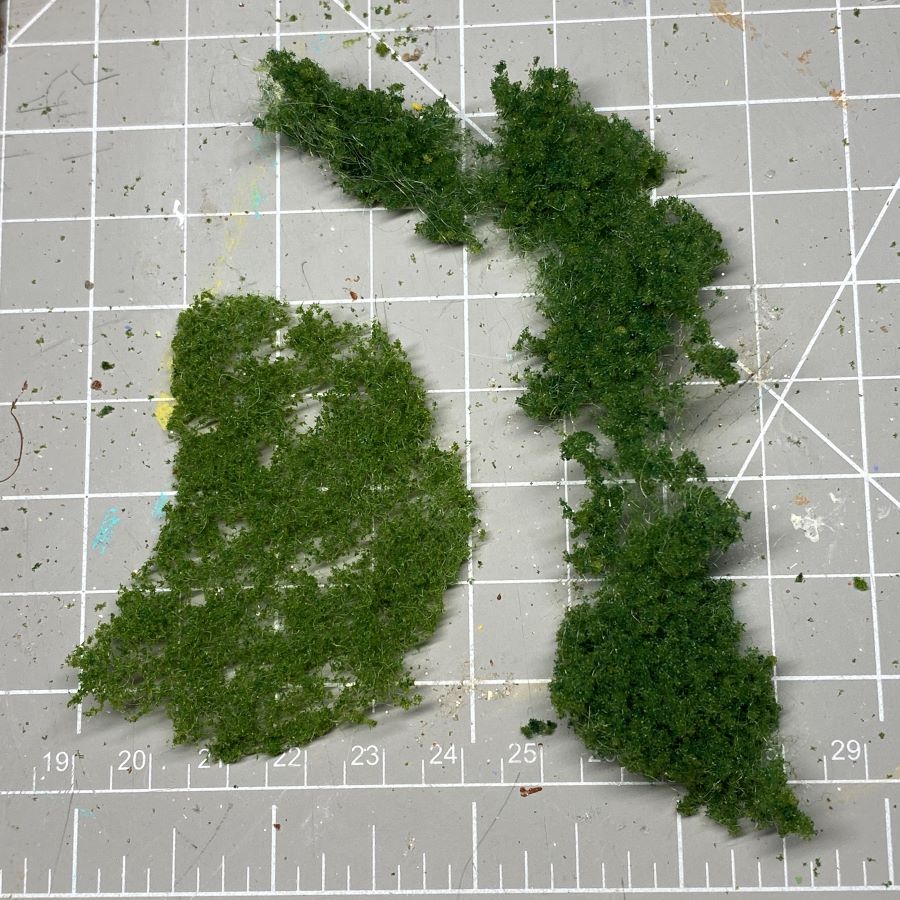
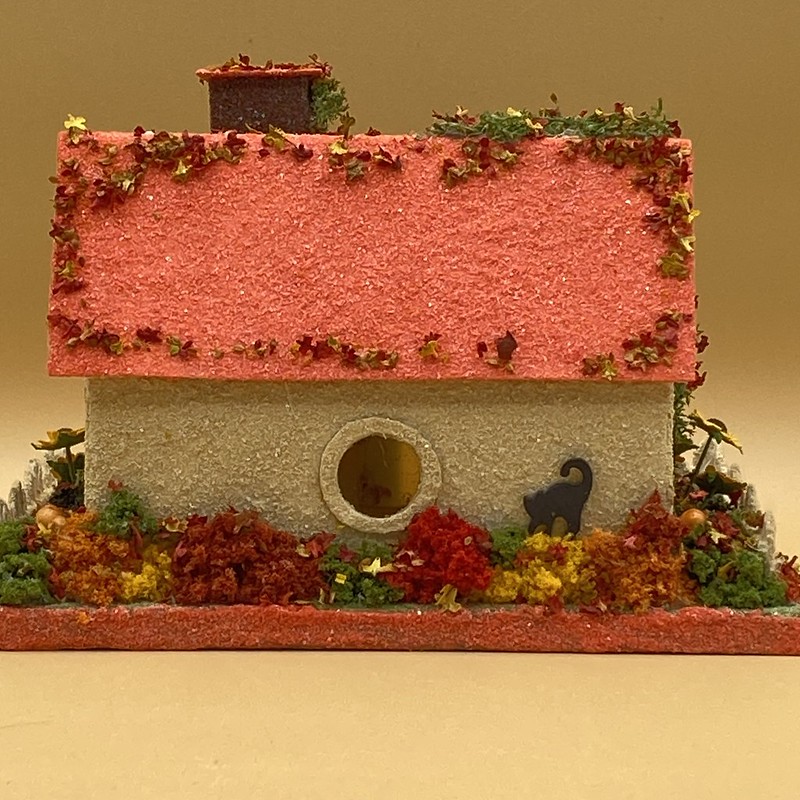
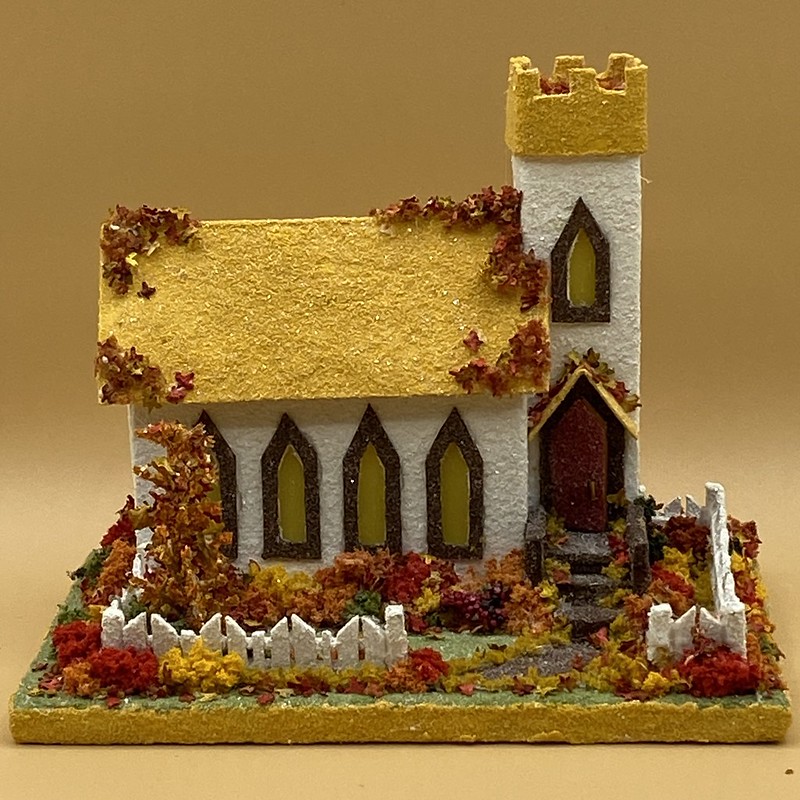
Sponge examples / The first example below shows sponge “shrubs” along the back of an autumn house. In the second picture, they are used along the side of a church. I think they make great shrubs. They are easy to pull apart into different shapes and sizes. I do use the sponge for making autumn trees because I haven’t found the stretchy kind in autumn colors. I’ll write a tutorial for autumn trees soon.
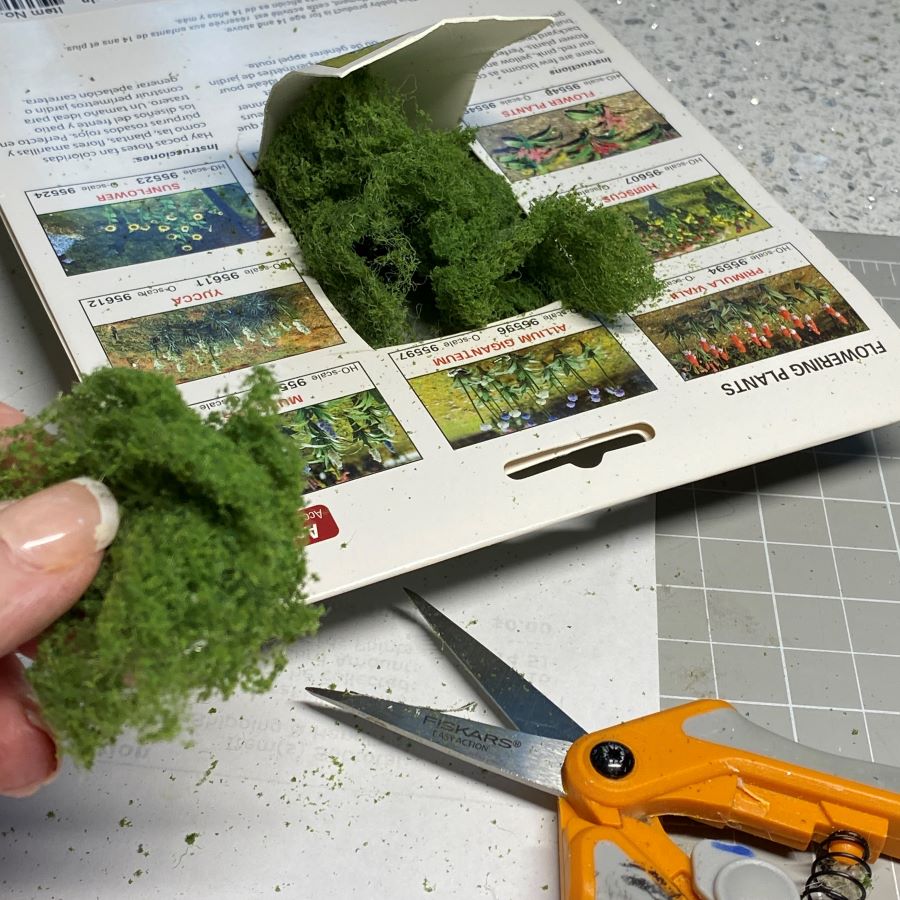
I cut a flap on the back of the box. As I work, I can pull out as much foliage material as I need, cutting it from the rest with scissors. This way, I can store the extra material in its packaging. Do not try to pull pieces of this product apart by hand. That exposes the tiny fibers that hold it together and causes extra trimming as you work. The cut piece from the package may be folded on itself. Open it up so it is one layer.
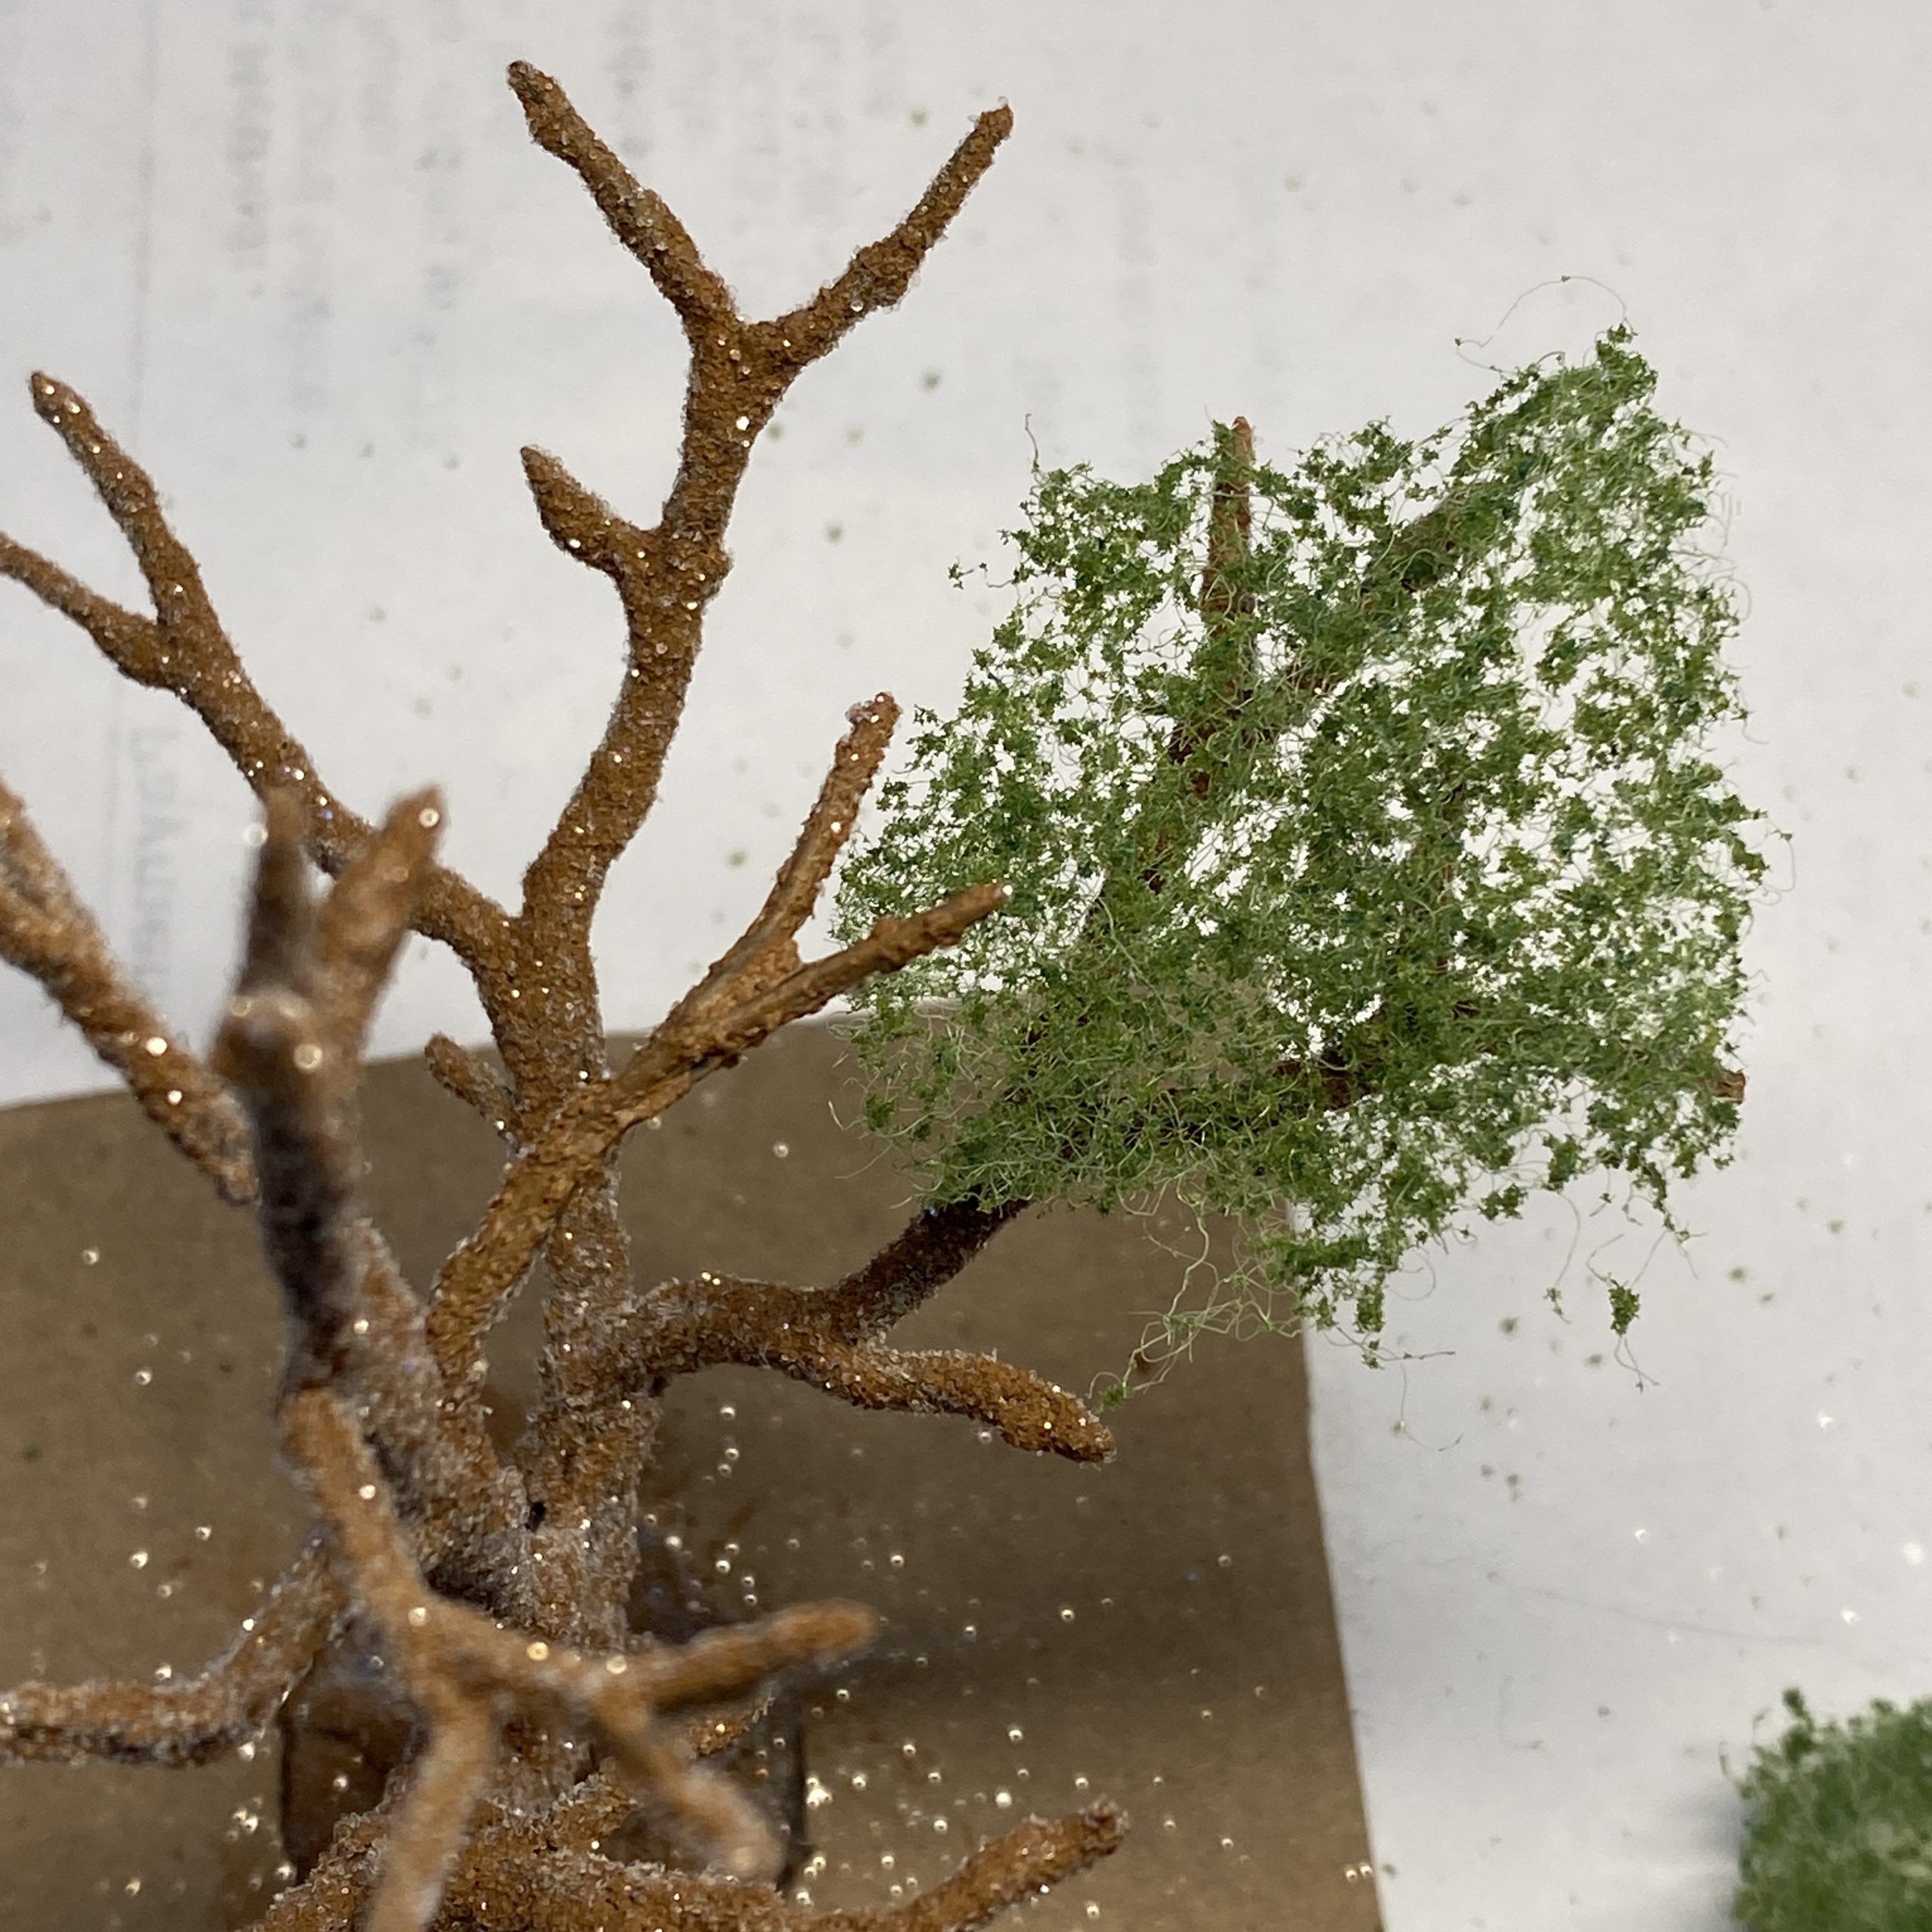
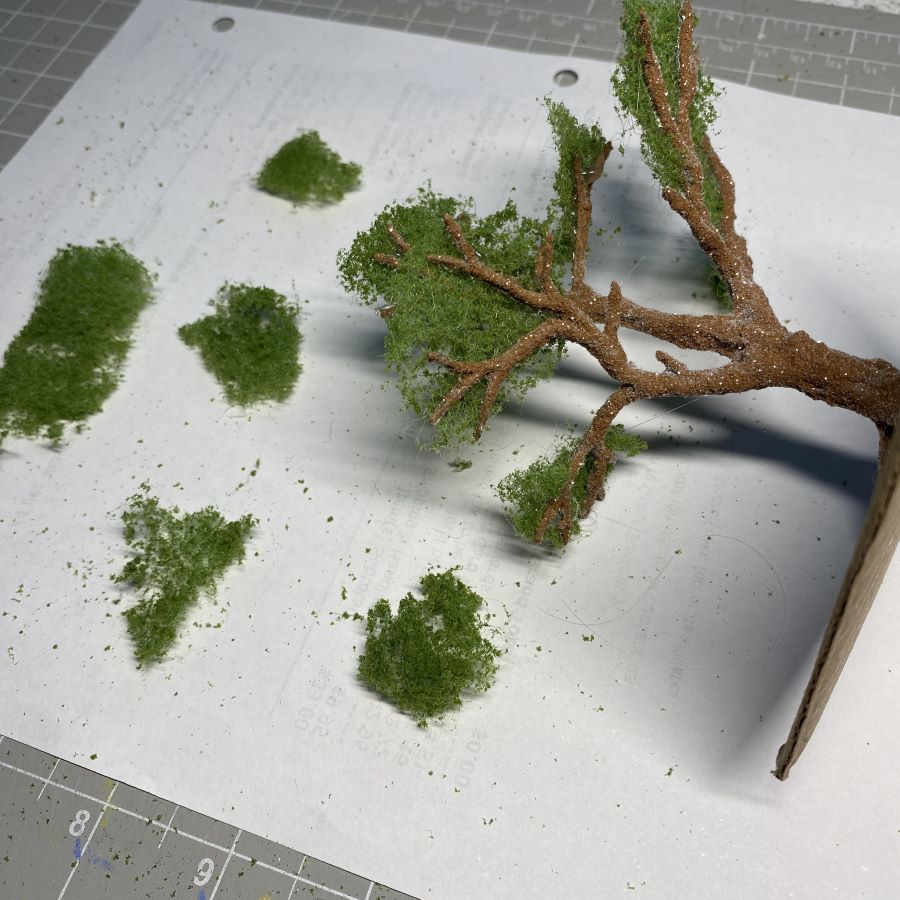
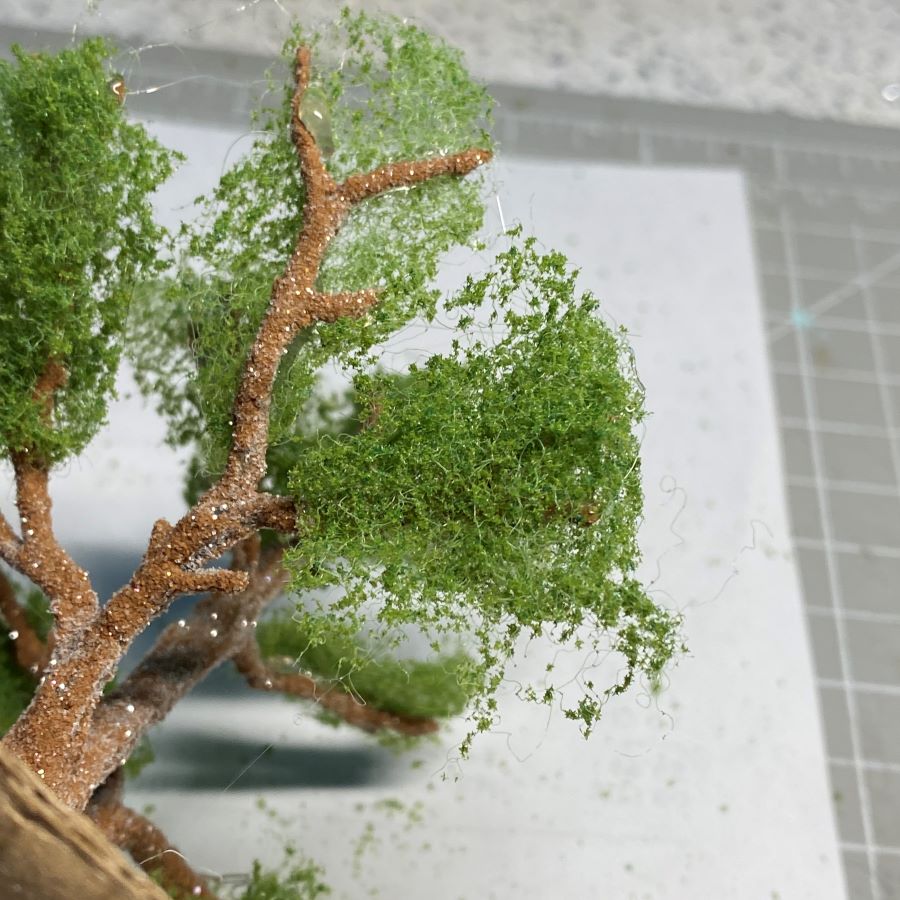
Cut some small shapes. Triangles fit well on the branches. After cutting them, stretch them in different directions to make the material thinner. Check the piece of foliage against the branch to be covered. If it doesn’t fit as it should, it can be bunched up to make it smaller, trimmed with scissors, or stretched a bit to make it larger. It should extend past the tip of the branch. Put hot glue on the part of the branch to be covered. It doesn’t take a lot. I apply foliage by starting at the bottom branches and working my way upto the top of the tree. Cover the tops of the branches before applying foliage to the bottoms of the branches.

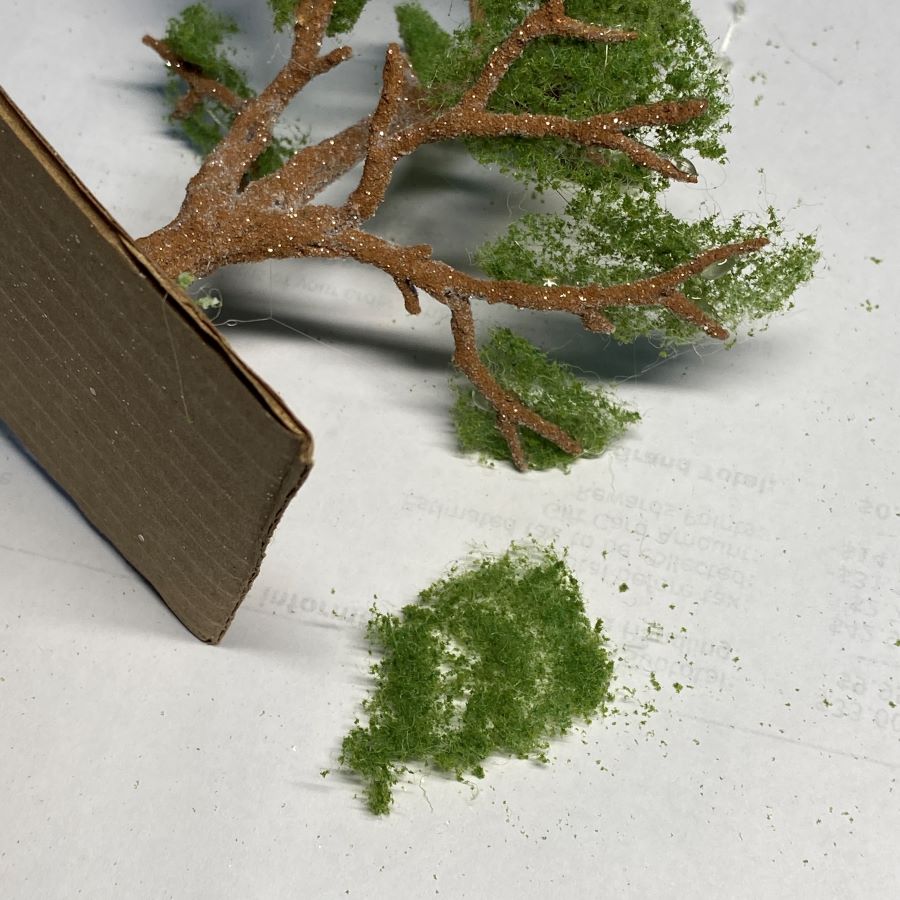
My glue picture for the top of the branches was out of focus, so here’s one from the bottom of the branches. Avoid big globs of glue because they will have to be removed if they show when the tree is finished. That’s extra work you can avoid.
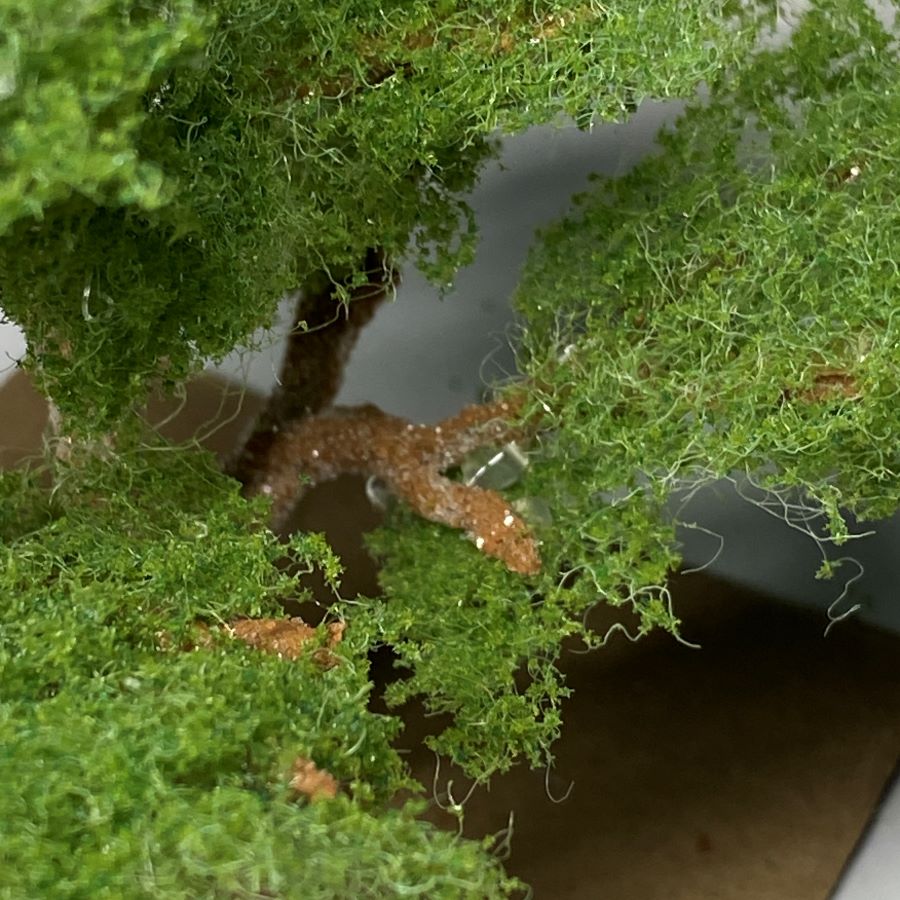
As you can see in these pictures, I am covering only the top half to two-thirds of each branch. We’ll fill in later.
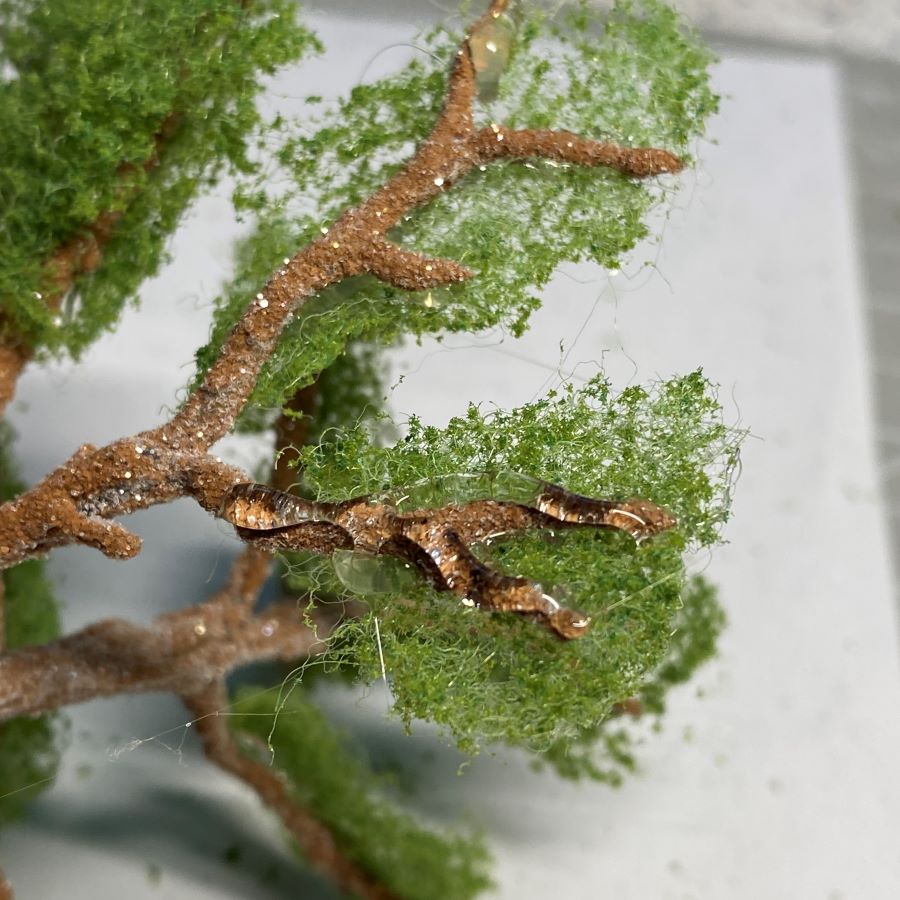
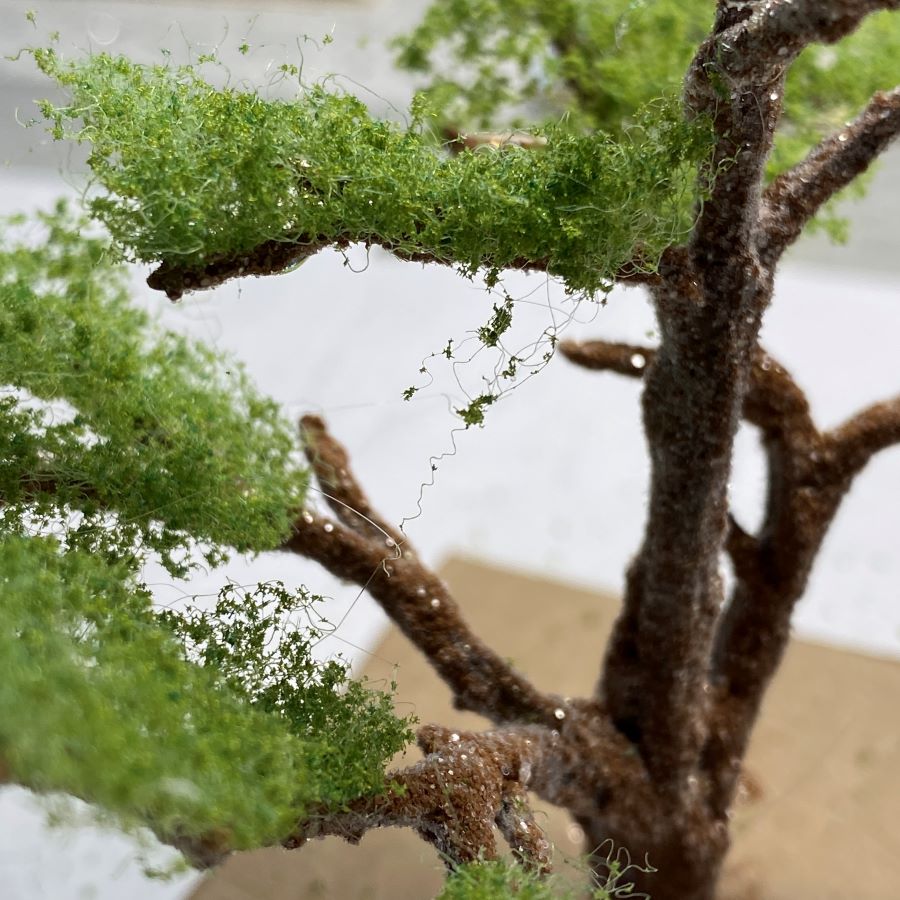
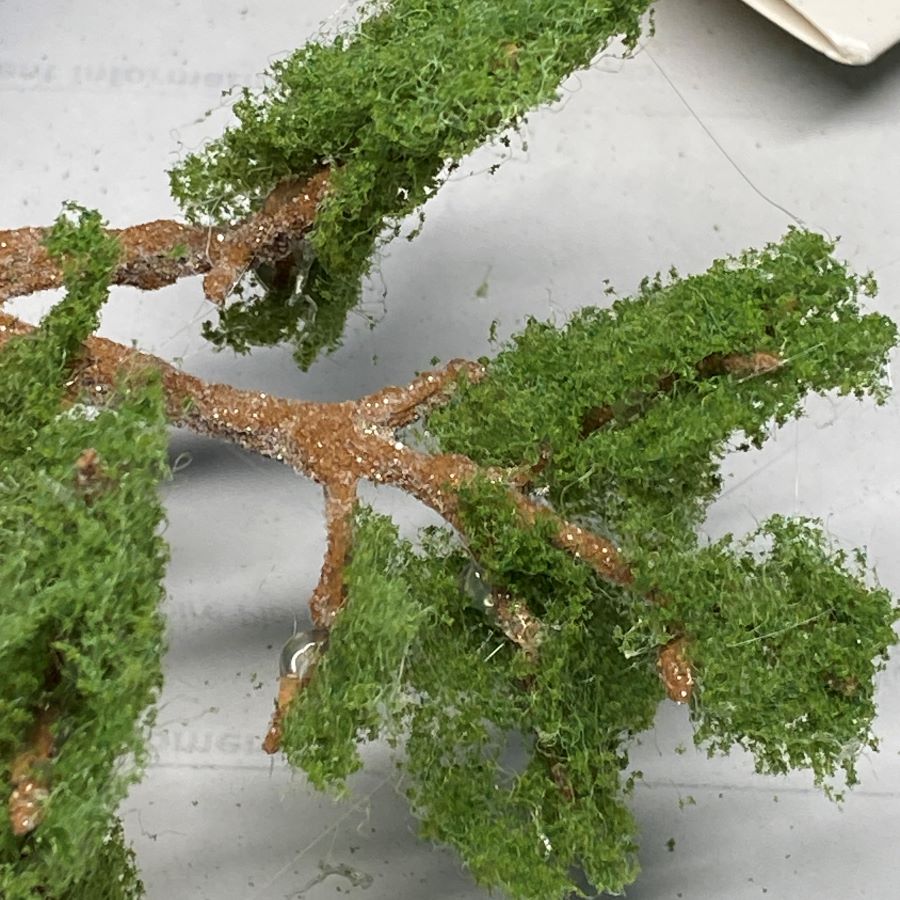
Look closely at the first photo below. You will see the tiny filaments that hold the green material together. Don’t pull at them by hand. It will make the problem worse. Trim them with scissors. In the second photo, note the hot glue hairs and the tiny white wad of hot glue. Don’t pull at these either. Use the hot nozzle of the glue gun to melt glue strings. Remove the white wads of hot glue with scissors.

The bottom of the branch is done the same way the tops were done. Cut a small piece, stretch it to fit the space, and glue it to the bottom of the branch so it fits against the piece on top. It will be like a foliage-branch-foliage sandwich.
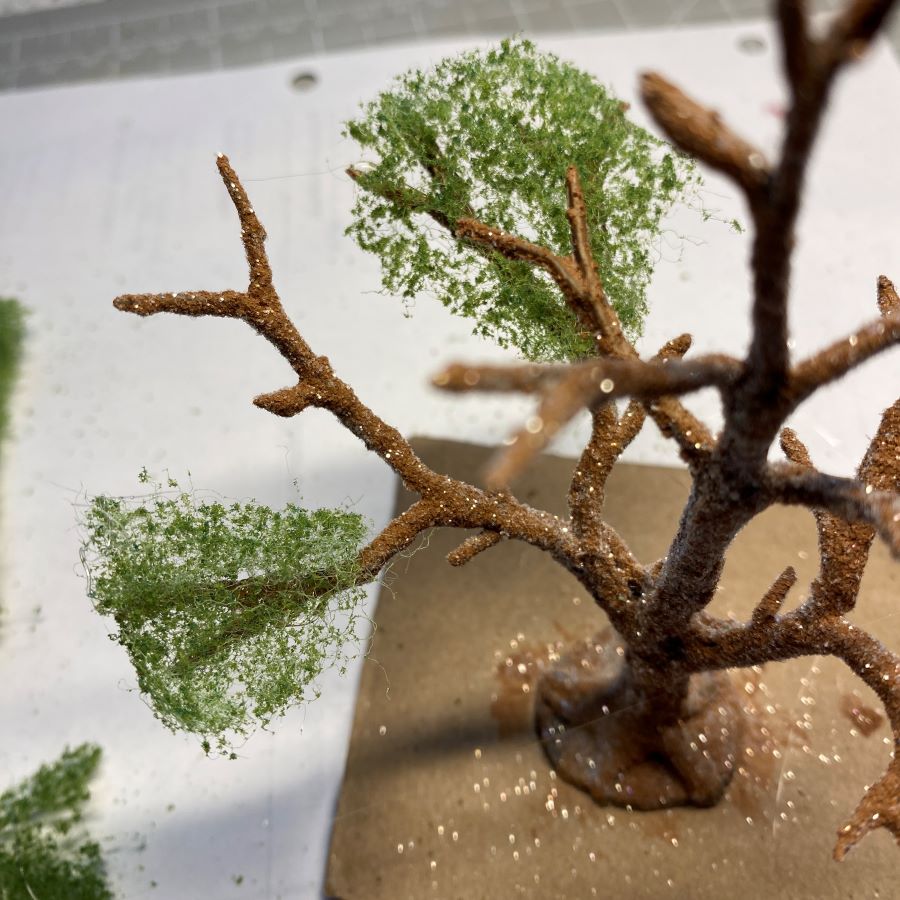
The branch in the left picture has been covered with foliage. In the right picture, all the branches have been sandwiched with foliage.
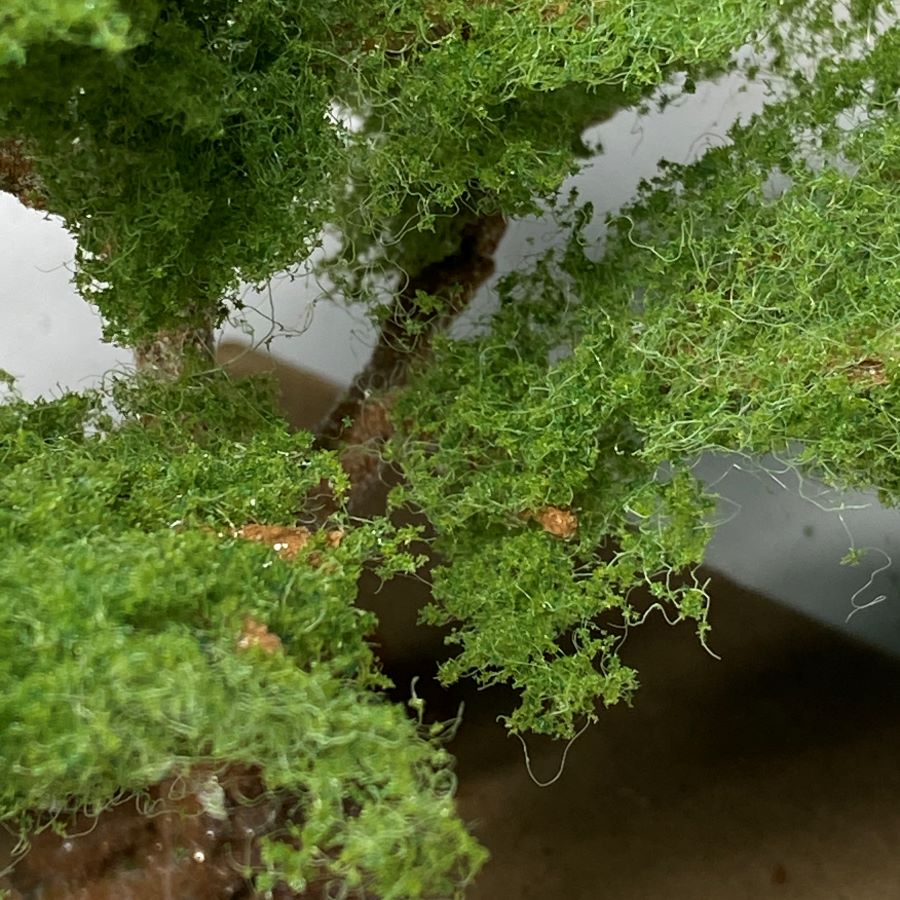
Now it’s time to fill in foliage gaps. I decided the branch in the middle needed a filler (first picture). I put the hot glue on the foliage already on the tree and attached a another clump of foliage on top of the glue (second picture).
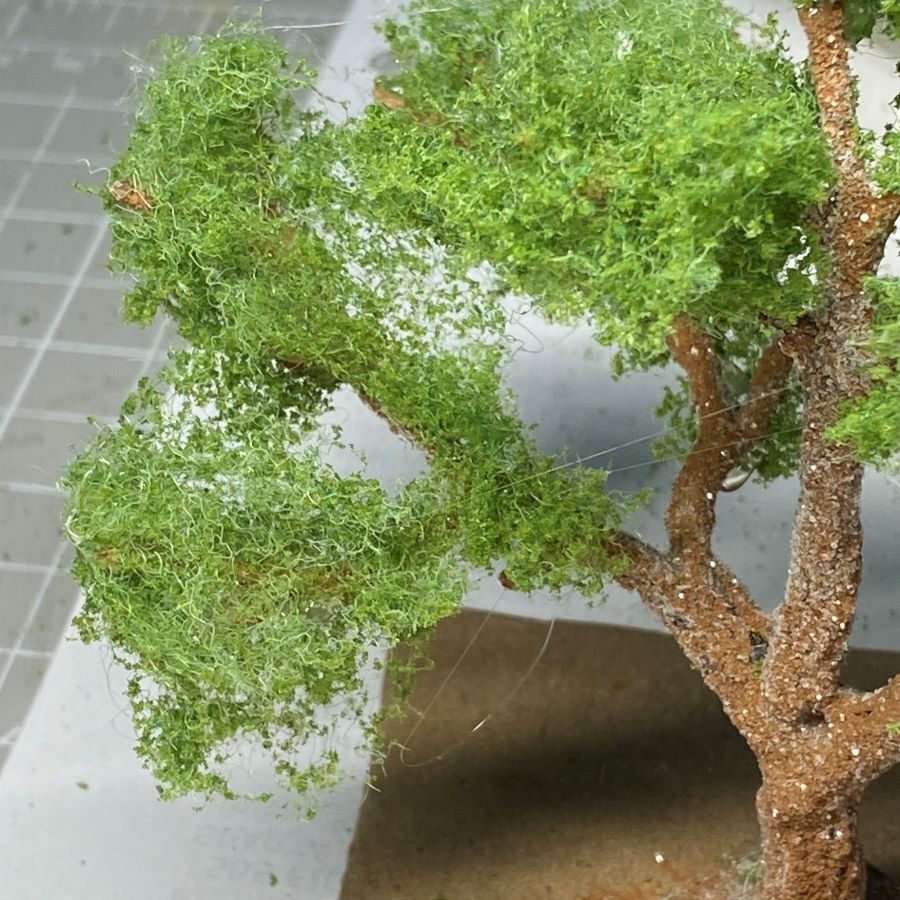
In this shot, I wanted to cover the bare branch. In the right you can see that I added a clump of foliage to the branch. Check your tree for gaps and fill them as needed.
Another thing I check for are the ends of branches. I like to cover those, too, though leaving a few uncovered can make the tree look more natural. Clumps can be added to the main trunk if it looks too bare.
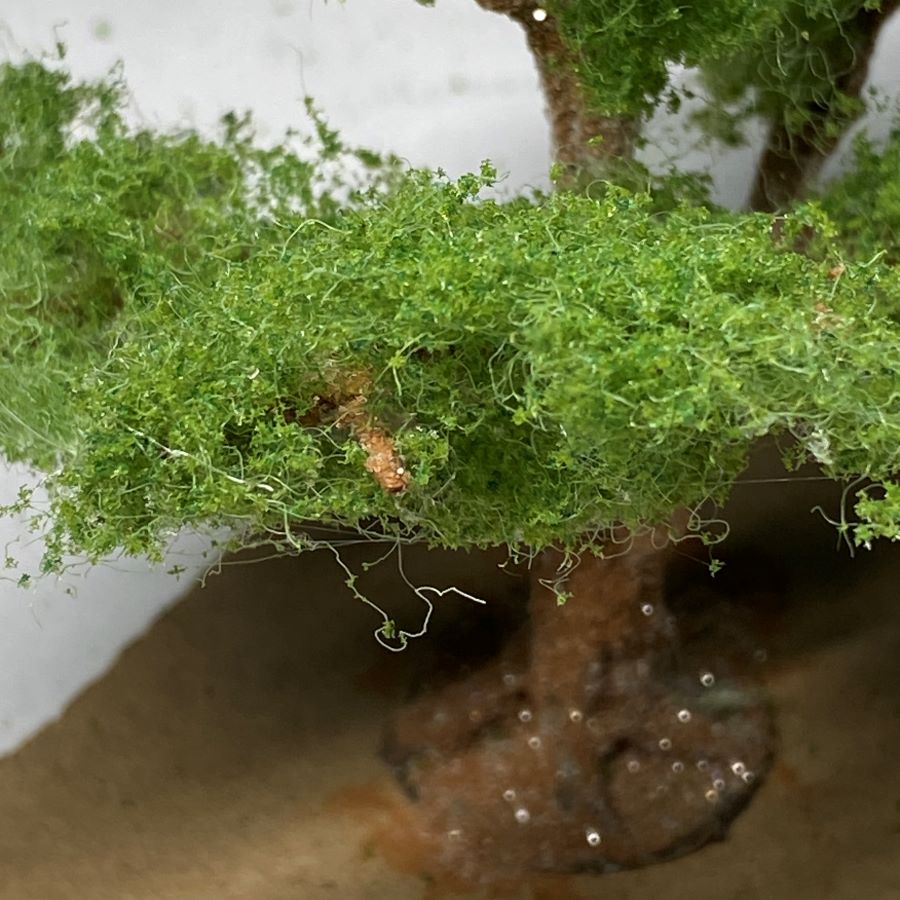
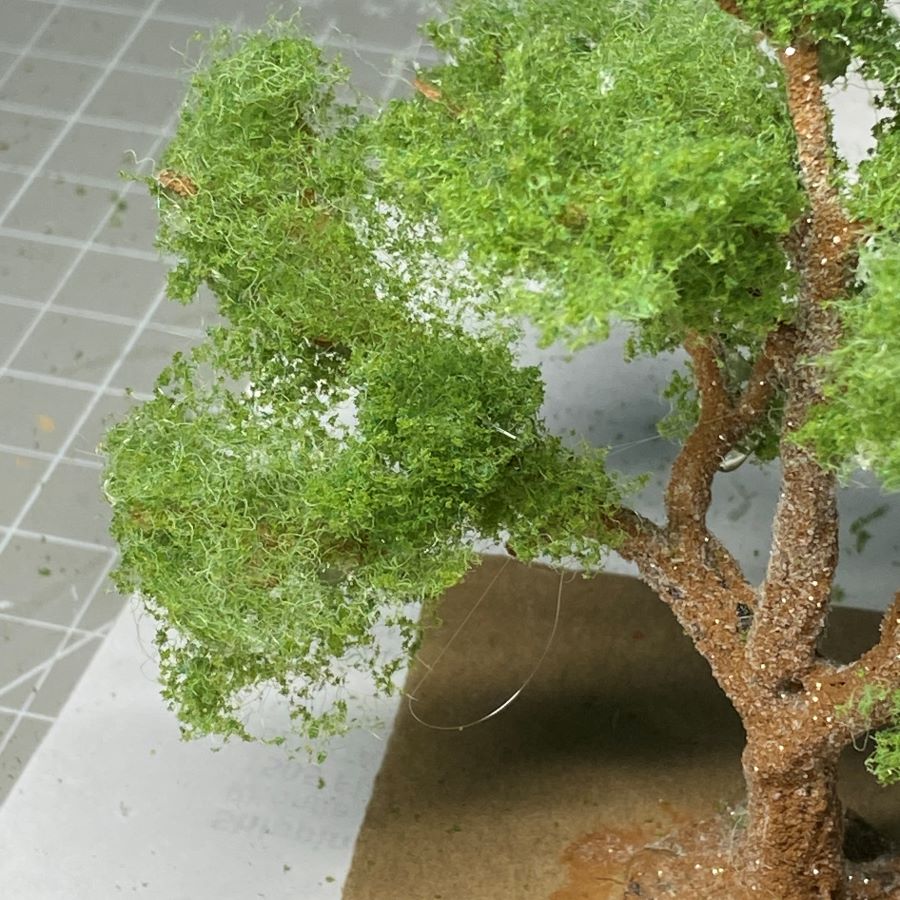
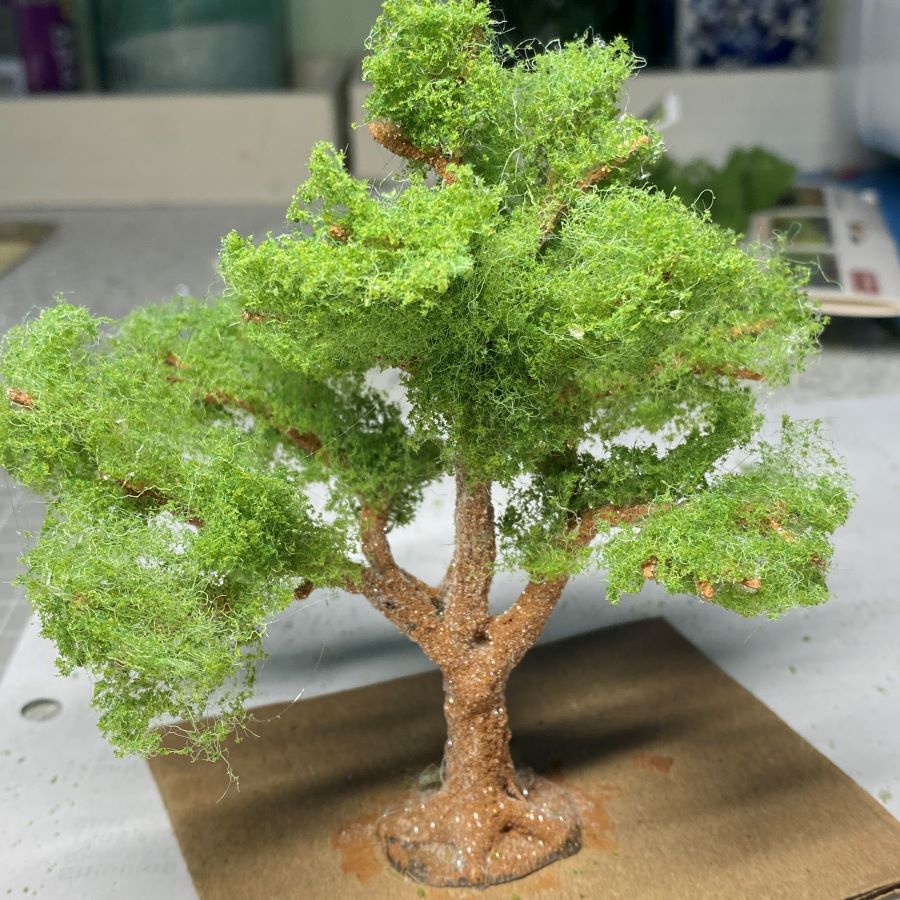
The next step is to fluff the foliage. I use needle-nose pliers to lightly pluck the tops and bottoms of the foliage. The picture on the right shows the fluffed tree.
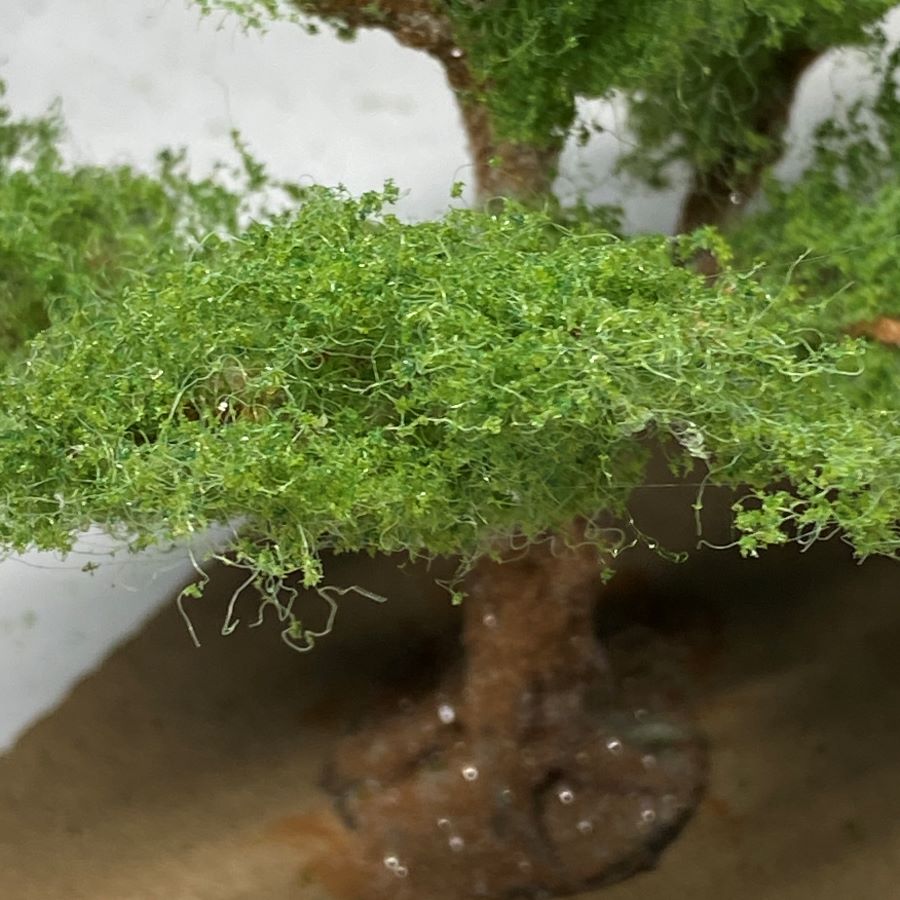
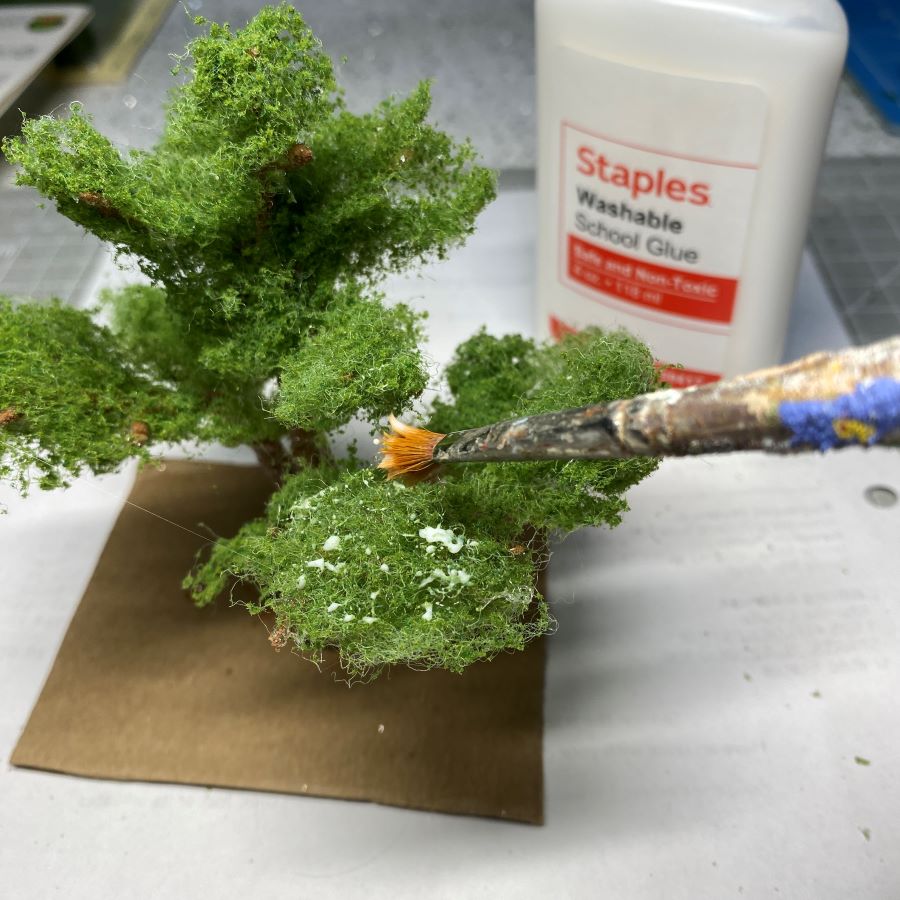
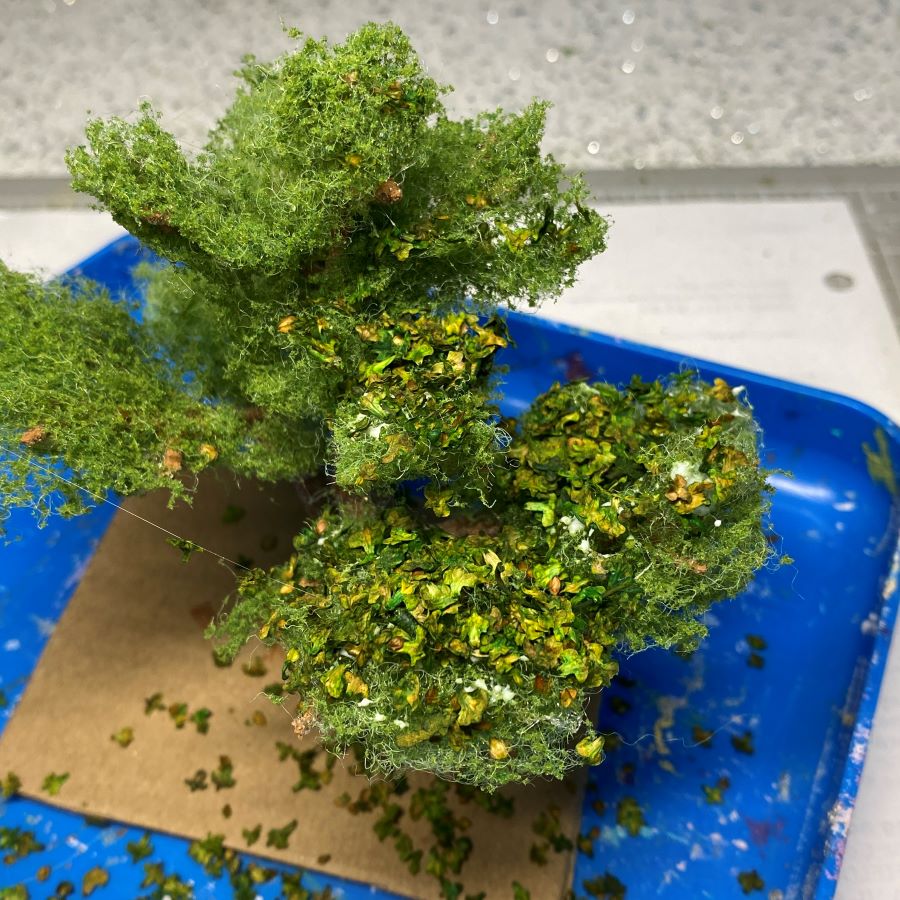
The final step is to add the leaf litter. I use clear tacky glue for this step, but white glue works, too. I used white for the tutorial so you can see the glue. Dab the glue on the tops of the foliage. Sprinkle a good cover of tiny leaves over the glue.
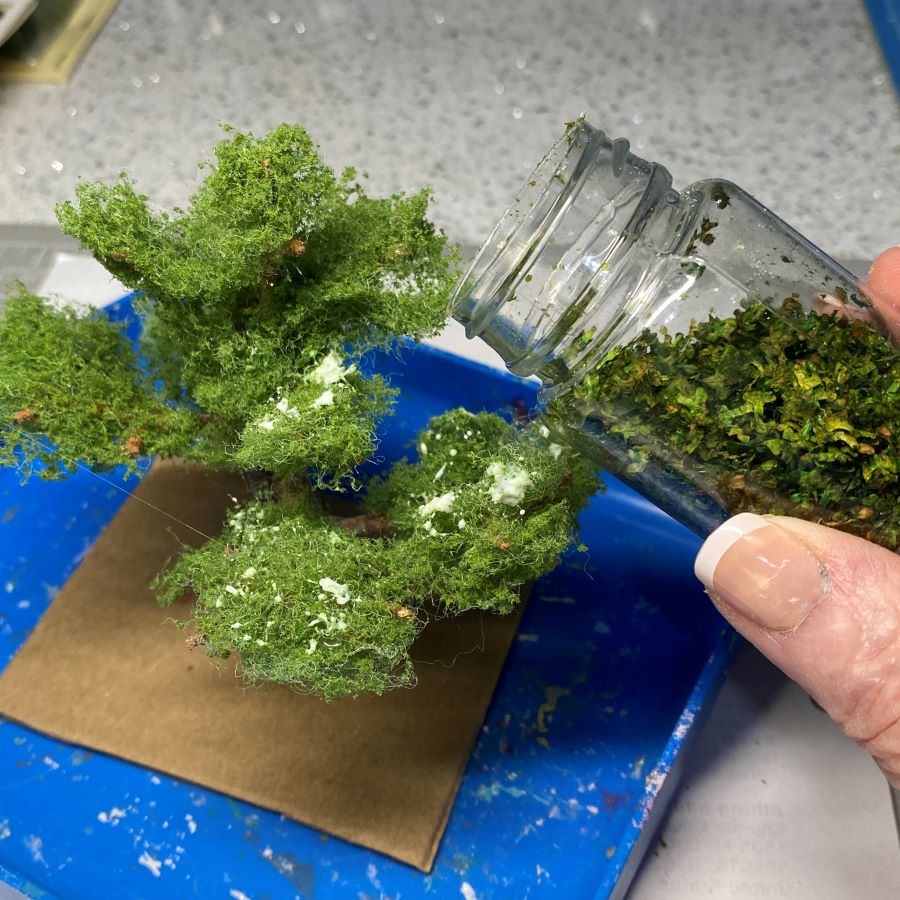
Gently pat the leaves into the glue. Turn the tree upside down over a glitter tray or a sheet of paper. Tap the bottom of the cardboard to shake off the excess. Keep covering bare foliage with dabs of glue and the tiny leaves. I don’t glue leaves to the bottom of the branches, but that is certainly fine if it suits you to do so.

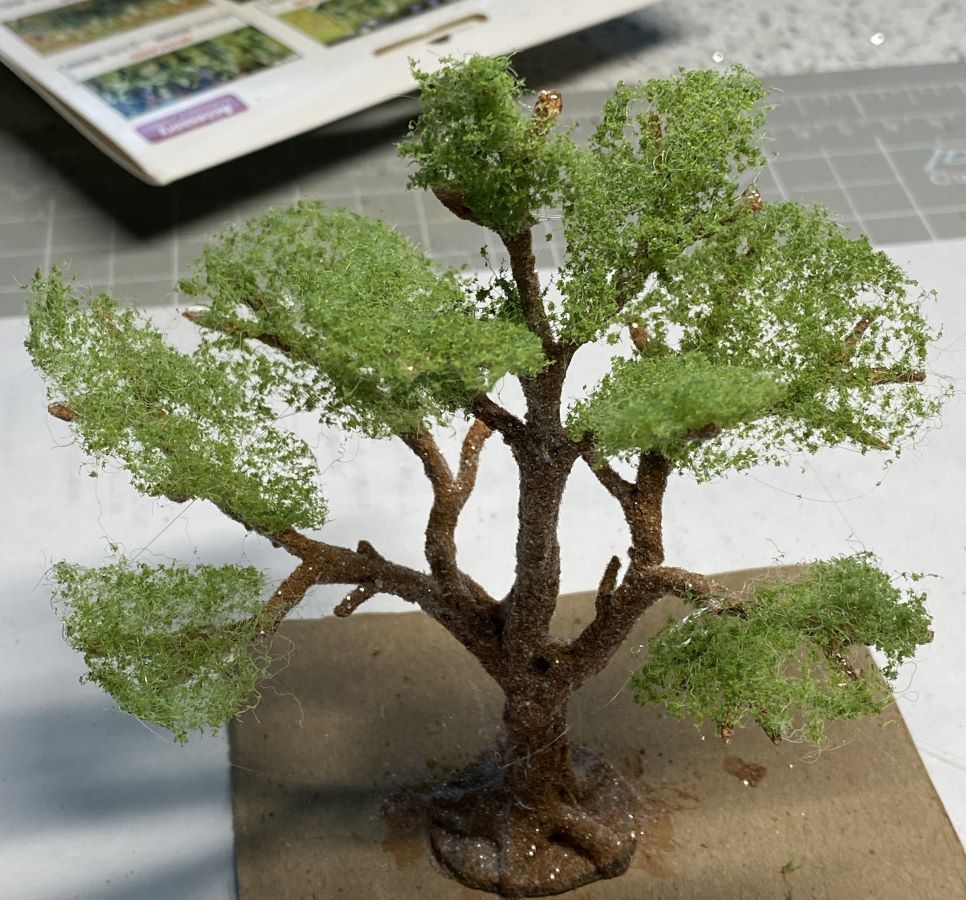
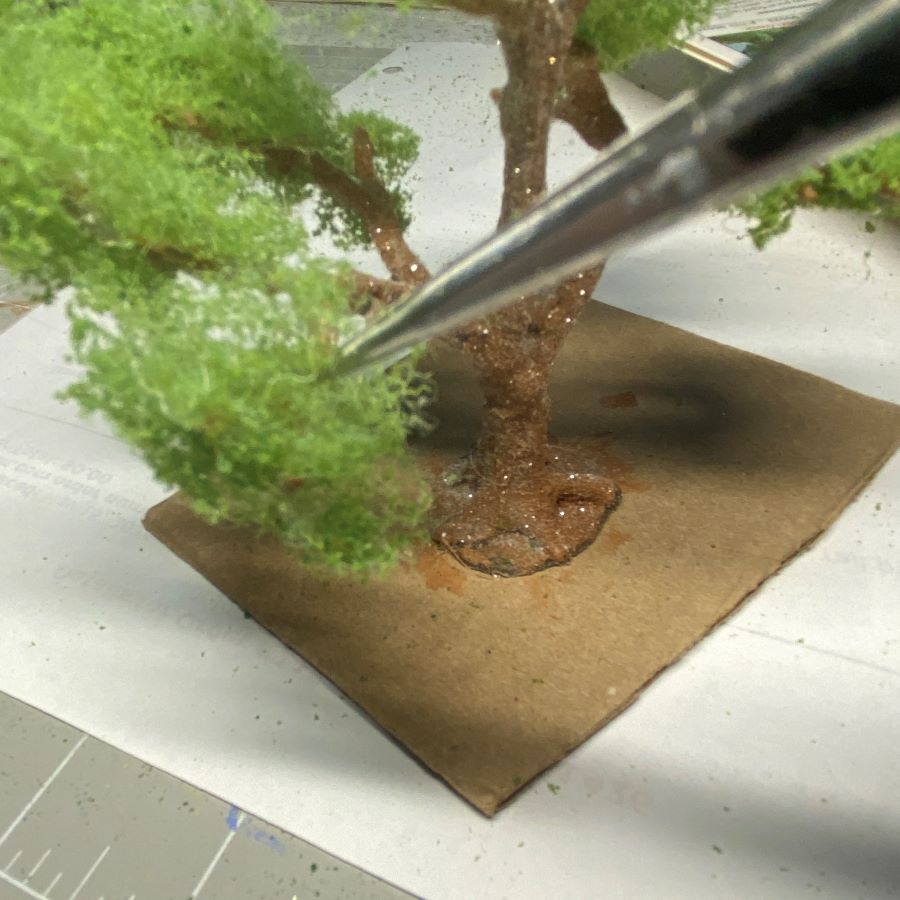
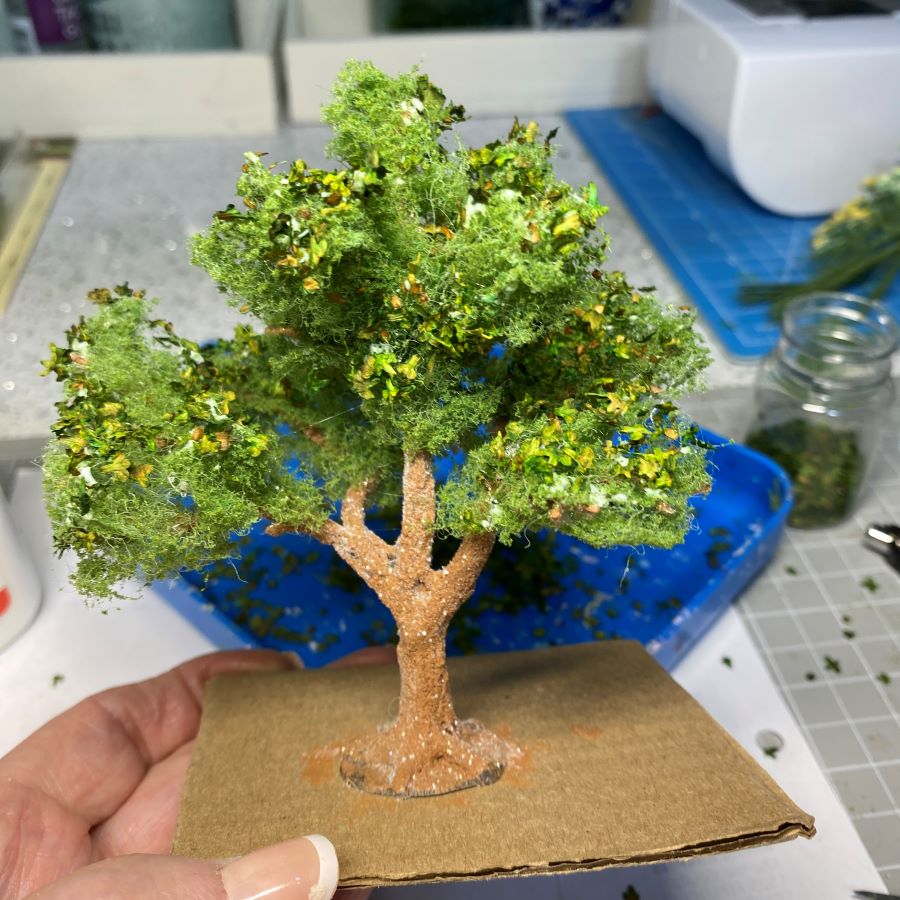
The finished tree. The tree can be pried off the cardboard with something flat, like a putty knife or a palette knife. When I attach a tree to the base of a putz house, I leave the tree base intact and cover the spaces between the roots with faux moss. If the parts between the roots are cut from the base, it is harder to make the tree secure. Leaving the tree base intact gives more area to secure the tree to the putz base.
If you have any questions about the process of making a leafed tree, please ask!
If you would like to see more of my Putz houses, as well as Christmas ornaments I have made from upcycled holiday cards, please visit my Etsy shop.
If you are interested in crafting Putz houses of your own, check out my Putz tutorials for more information. Putz House Tutorials
I am always happy to answer questions about the process. Please ask, if you are wondering about the details of putzing!
All proceeds from my Etsy shop benefit Kenya Mercy Ministries. They work with the urban poor of Nairobi, Kenya, particularly the children and their families who live in Kibera, the largest slum in Africa. Thank you for your part in helping these children when you purchase items from my shop!
~~Rhonda 🙂