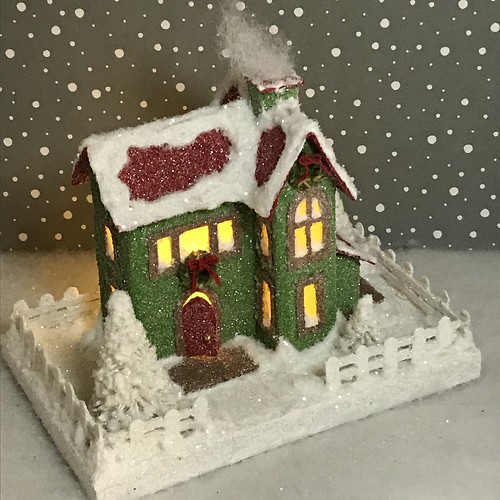
After making this Putz house, I decided to write a tutorial about how to make the picket fence. It’s not hard. Just takes a little time. But after you have made a few, it becomes easier and quicker.
Supplies needed:
- popsicle sticks
- X-acto / craft knife
- scallop scissors
- zigzag scissors
- straight scissors
- posterboard or coffee stir sticks to make pickets
- hot glue gun or white tacky glue
- wire cutters (for trimming wood)
- tweezers
- nail file
- paint
- glitter tray (optional)
- paint brush
- glitter
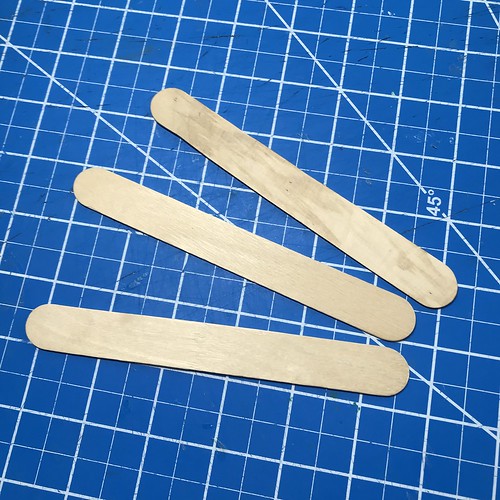
Popsicle sticks are made of birch, so are more durable than craft wood items made from balsa wood. But a fence could certainly be made from balsa craft items. I do have craft matchsticks that would make a great fence, but they don’t seem as durable as the popsicle sticks. Also, when the popsicles are cut into thin strips, sometimes there’s a bit of a wonky wave to it and, in my opinion, that just adds some downhome, homemade flavor to the fence.
To make the long boards for the fence, I use the wide (jumbo) popsicle sticks. They are 6″ long and 3/4″ wide.
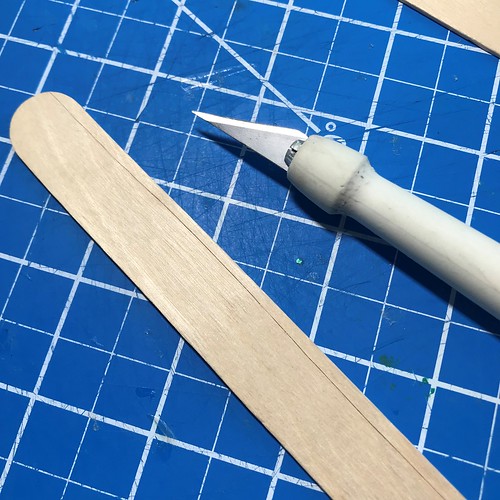
Using an X-acto knife, score a line about 1/8″ from the long edge of the stick.
The first score line is the most important. Make it slowly to keep it as straight and even as possible.
Score the line two more times, pressing a bit more on the third cut. Cut slowly, to stay in the first cut made. It should come apart easily on the third cut. Cut again, if it doesn’t come apart.
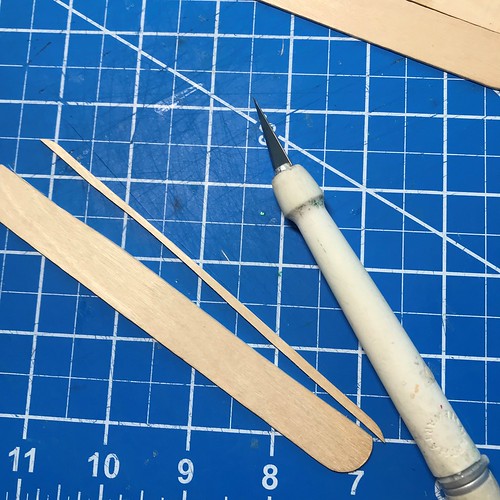
I made seven “boards” from one popsicle stick.
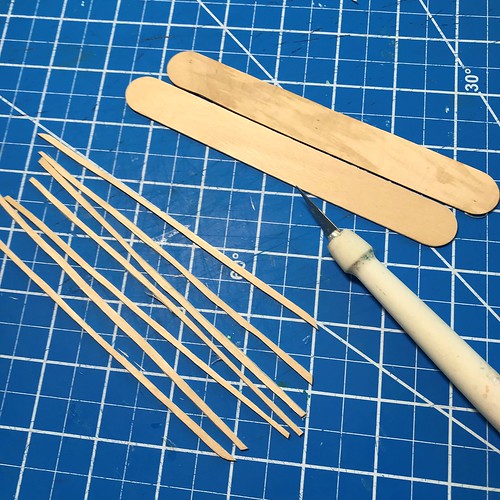
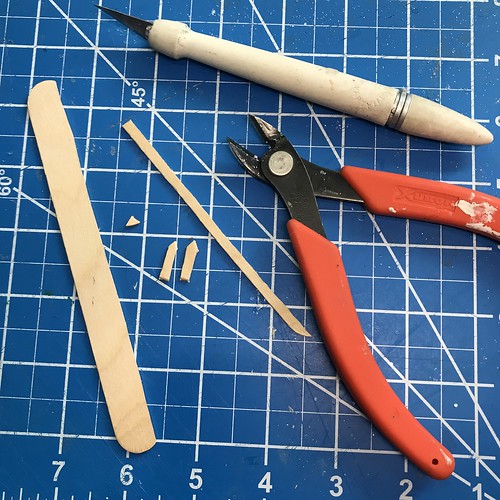
The pickets could be cut from popsicle sticks, as well, though I made mine from posterboard. The advantage of posterboard is that you can make a lot of pickets in a short amount of time. I did try cutting a few pickets from the wood and it did make good pickets. See the picture below. I used a wire cutter to nip a point on one end and that worked well. But it would take a long time to make enough and they would be a bit bulkier than the pickets made from posterboard.
UPDATE / Aug. 6, 2019 To make a fence for this Putz church, I did use popsicle stick pickets, but didn’t clip the tops to make a point. I used my wire cutters to cut the pickets to the height I wanted and I was happy with the finished product. Leaving the tops of the pickets flat saved a lot of time. It’s more of a post and board fence, rather than a picket fence. Setting the pickets closer would change the look of the fence.

BACK TO MY ORIGINAL POST / To make the pickets, I cut a strip of posterboard 5/8″ wide and about 12″ long. I used scallop scissors to cut one edge of the posterboard strip. The remaining strip was about 1/2″ wide, which is a good size for fencing for a Putz house. If I were making fencing for a miniature house, I’d trim that down to about 1/4″ or 3/8″ finished width. Depends on how mini the house was going to be.
Proportion is important, but don’t feel boxed in by that. Sometimes an out-of-proportion fence can be charming on a Putz house. Do what makes you happy!
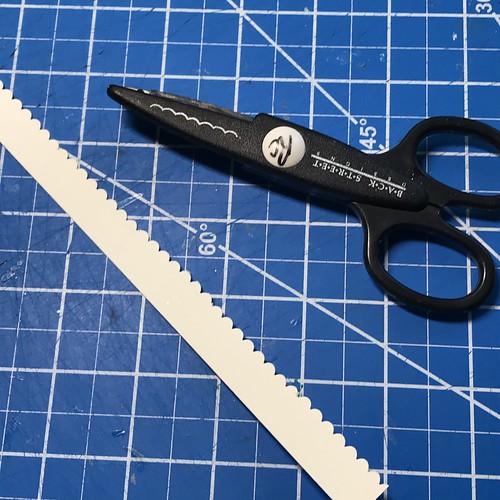
The scallop scissor gives the pickets a nice rounded top.
To make pointed pickets, use a zigzag scissor.
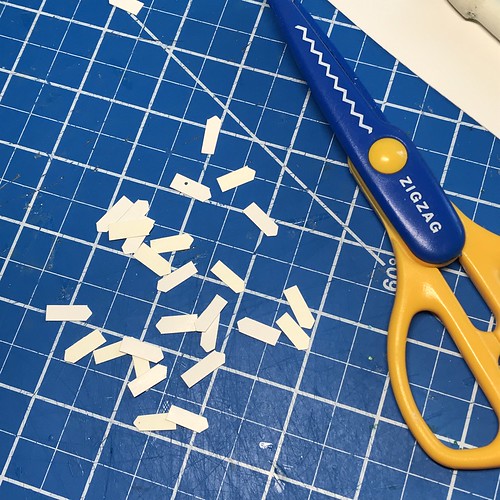
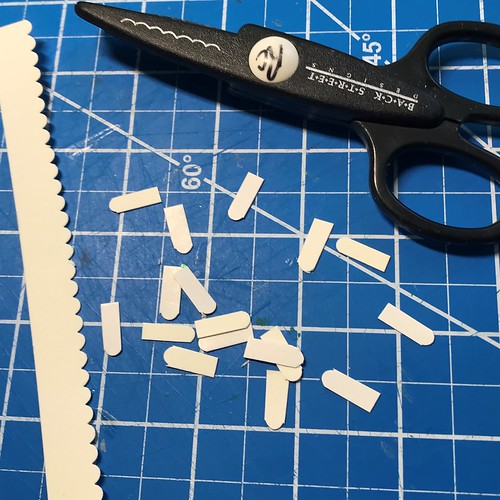
Turn the trimmed strip so it can be cut from the top of the picket down. I eye-balled the cuts, but a pencil line can be drawn if that’s helpful.
NOTE: The right scissors can make all the difference in crafting. My favorite pair for fine work are my bonsai scissors. And, no, I don’t do bonsai. These are just great scissors that cut cleanly, handle beautifully, and feel good in my hand. They make my crafting experience a better one than it would be without them.

UPDATE May 30, 2020 I now prefer to use coffee stir sticks to make the pickets. For rounded pickets, I clip the ends off to the length I want. For pointed pickets, I use the middle of the stir stick, cutting as many pickets as I can in the length I want. I use wire cutters to cut the picket into a point on one end.
Back to the post…
Check the base you plan to use and decide how long the back fence should be. If it is to go all the way across, I like to leave 1/4″ to 3/8″ space at each end so the fence isn’t sitting right on the edge of the base. That also leaves some space for applying enough hot glue to hold the fence in place. I put extra glue on the corners, then cover it with faux snow to make snow drifts, as can be seen in this picture.

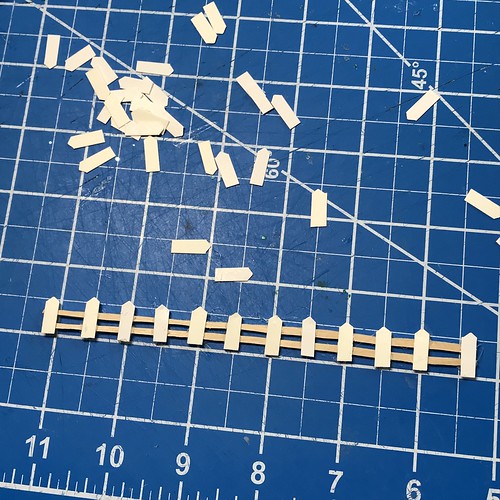
Line up two “boards,” keeping the space between them as even as possible. Hot glue pickets to either end. That will stabalize the board and make it easier to work with as more pickets are glued on. I put the glue on the picket and place it on the boards, rather than putting the glue on the boards and laying the picket on top.

I lined up the fence section with the 1/2″ marks on the cutting mat and glued a picket at each 1/2″ mark. If you look closely at the picture, you can see that the ends don’t line up exactly on the marks, but I don’t think it’s enough spacing to matter.
If the spacing needs to be exact, glue the pickets at each mark, then trim off the excess boards when the fence is long enough. If 1/2″ marks aren’t a good spacing for the fence you want to make, figure out what is and mark that spacing on the boards with a pencil so the pickets can be glued to the right places.

The ends are trimmed. I use my old wire cutters for trimming the boards. Works great.

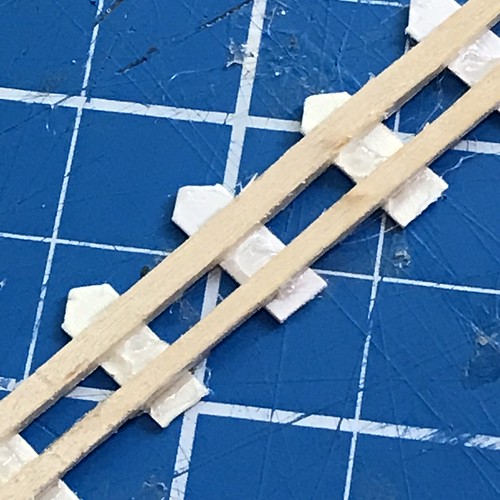
When the pickets are hot glued to the boards, the glue may be blobby on the back.

I move the clean, hot tip of the glue gun back and forth over the blob of glue until it melts and smooths out.

Much better.
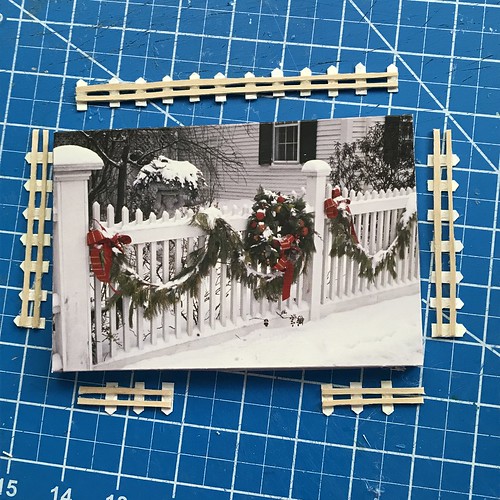
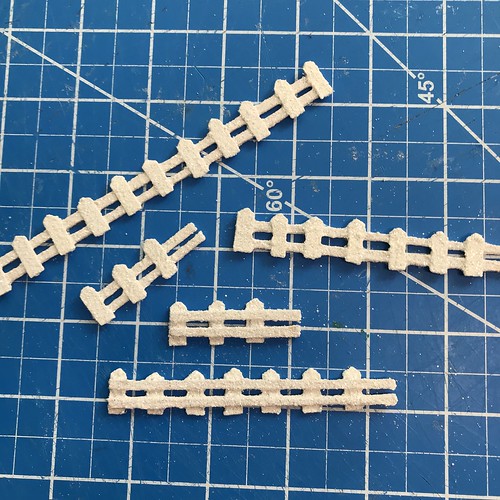
Make each section of fence needed to complete the base. Note that the back fence has pickets at each end. The other pieces don’t. When it is time to glue it all together, the ends without pickets will be against a picket on the adjoining section.
Paint the fencing in the desired color. I use my “Putz mixture” paint for the fence. It adds texture. The paint is one part paint to one part white glue. I add a few drops of Floetrol (paint conditioner) to the paint to make it glide on smoothly. I also add clean, white, playground sand to the mixture to create a vintage-style texture.
Exact measurements for making my paint mixture can be found in this tutorial:
How to make a Putz house, part 2 of 3.
I like to use two coats of paint. Here’s the first coat. Let it dry completely before applying the second coat.

While the second coat of paint is still wet, sprinkle the fence section with fine glitter. I do one section at a time, and I do both sides of each section at the same time. Apply the glitter over a glitter tray so the extra glitter can be easily returned to the container. If you don’t have a glitter tray, use a piece of clean paper to catch the glitter. Let the fence dry completely before gluing it to the base.

Close-up of the fence detail.

When the paint is completely dry, and before I glue it to the base, I use my needle nose tweezers to clean the spaces between the boards, removing hot glue “hairs” and to define the space by rubbing the tips of the tweezers in the spaces between the boards. It sharpens the corners which gives the fence a more refined look. Before:

Use tweezers or a toothpick to scrape the edges to remove bits of paint and debris that may be clogging up the space between the boards and pickets.
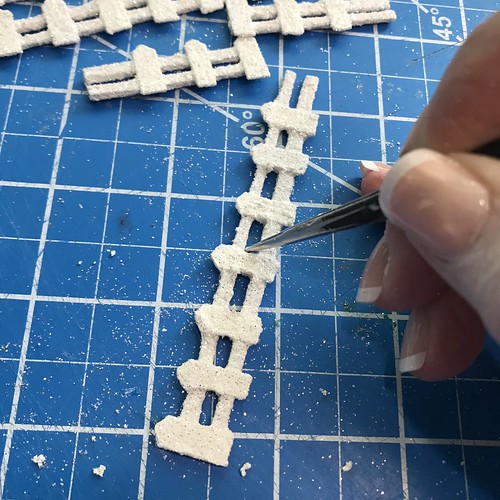
In this close-up, you can see the messy corners.
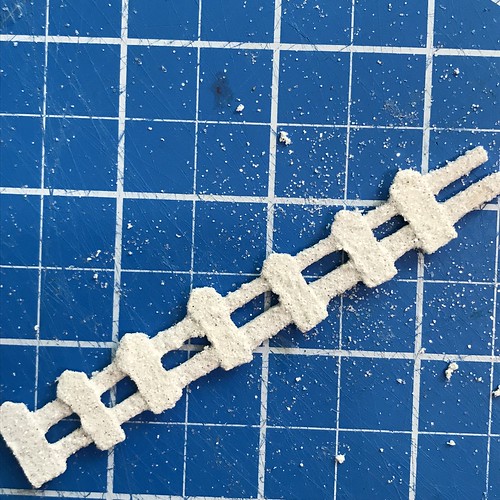
Neat and tidy.

All done.
As you can see in the above picture, the bottoms of the pickets are a bit uneven, so I sand them to make them more even. When sanding the fence, I do an inch or so of the section at a time so the fence doesn’t bend or break. I use a 100/180 grit nail file for sanding. The 180 side does a great job.

Now the bottom of the fence section is smoother and more even. This will make it easier to glue to the base.

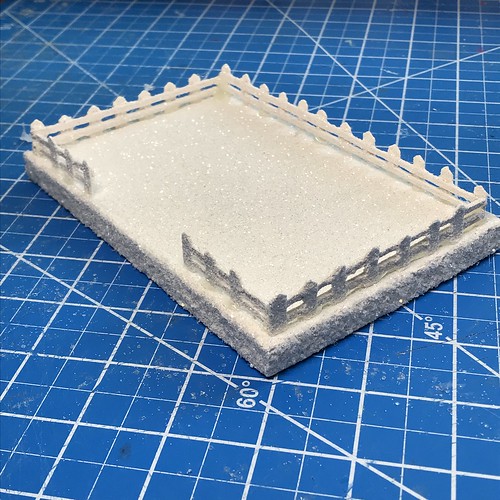
Before gluing the fence to the base, decide if the pickets along the back will face in or out. Your choice. Using a few dabs of glue, hold the fence in place until the glue hardens. Then add more glue to any place that needs reinforcement.

Personally, I like the pickets facing out. When the back is well fixed, attach the sides, with the end with no picket glued to the back section. The front sections are attached last.

Once it is set, I like to add some extra glue to the corners. This can be covered with faux snow to make a snow drift when the fence is snowed. It gives the fence extra strength.

I also add some extra glue to the inside of the corners.

The fence can be made in different styles. The pickets could be made thinner, they could be placed closer together, they could be made taller or shorter. Use your imagination!

Please ask if you have any questions about the process for making picket fences. I hope you give them a try!
You can see more of my Putz houses and Christmas ornaments in my Etsy shop.
If you are interested in crafting Putz houses of your own, check out my Putz tutorials for more information. Putz House Tutorials
I am always happy to answer questions about the process. Please ask, if you are wondering about the details of putzing!
All proceeds from my Etsy shop benefit Kenya Mercy Ministries. They work with the urban poor of Nairobi, Kenya, particularly the children and their families who live in Kibera, the largest slum in Africa. Thank you for your part in helping these children when you purchase items from my shop!
~~Rhonda
One Comment
Rhonda, I absolutely love you! I was looking through your creations today and I felt a such a need to tell you that. I prayed for you and I hope the Lord will continue to bless you.