I saw some cute ornaments on this site – My So Called Crafty Life – and was inspired to make my own version. My thanks to Ashlee for sharing her craft!
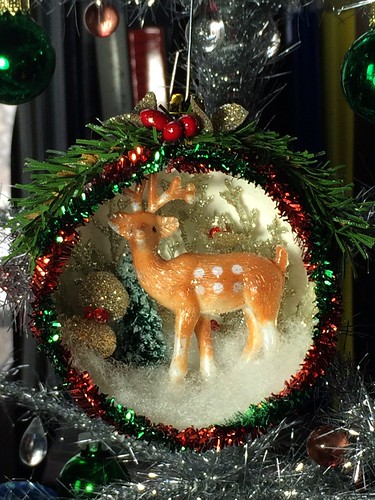
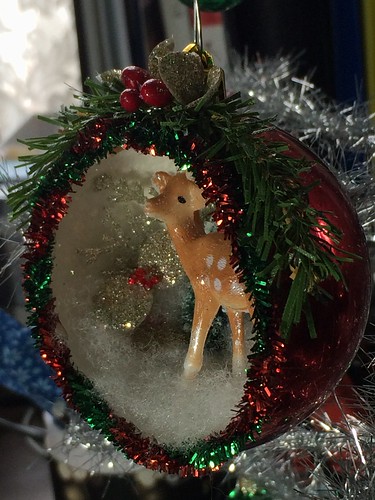
I think my finished diorama turned out pretty cute. I plan to make more of these.
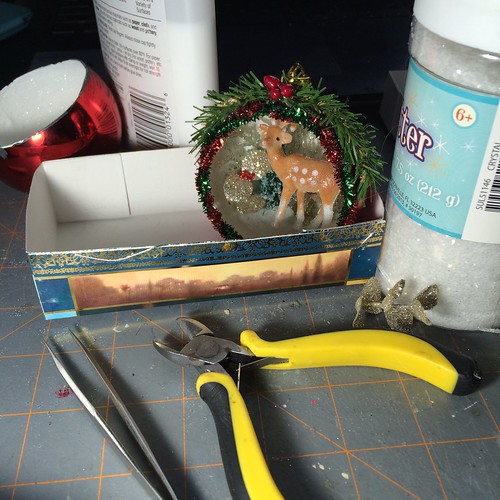
Supply list for the ornament I made.
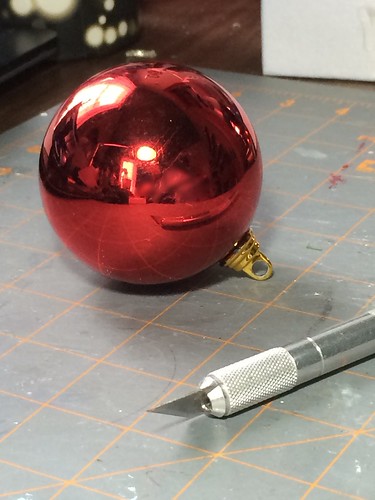
plastic ornament ball
eye protection
craft knife
heavy duty scissors
craft paint
paint brush
glitter
glitter glue
white glue
hot glue gun
Christmas embellishments
artificial floral bits and pieces
red seed beads
pipe cleaner
tweezers
wire cutters
polyester batting
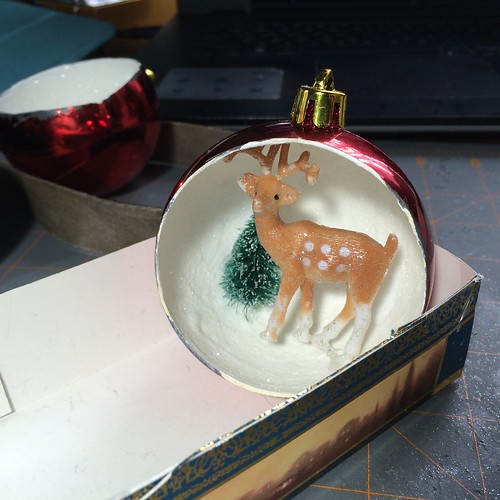
The diorama is made inside a plastic ball ornament.
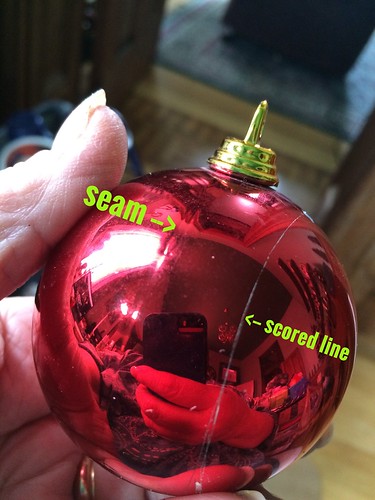
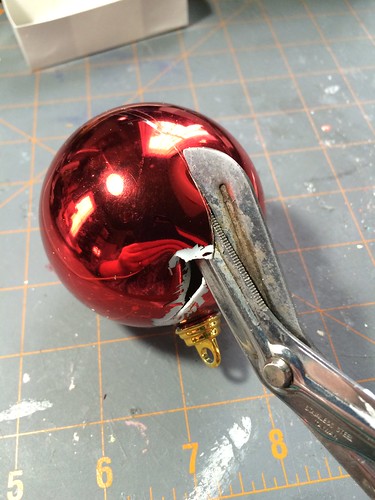
Looking closely, you can see that there is a seam around the middle of the ornament. With a sharp craft knife, mark a circle on one side of the ornament, using the seam as a guide. Scratch a guideline on the face of the ornament about half an inch from the seam.
The crafter I referenced above used a Dremmel tool fitted with a cutting disk to cut a hole in the side of the ornament. I don’t have a cutting blade for my Dremmel, so I ordered one and, in the mean time, used a craft knife for the cutting. Please wear eye protection while cutting the ornament, as it may chip.
Using a sharp craft knife, start at the top of the ornament to cut the hole. If you start at the top, and the paint chips, it is easy to cover the chips with embellishments. Score along the marked line by moving the knife blade along an inch or two of the line, repeating until the knife goes through. Be very careful how you hold the ornament while doing this. Keep your fingers out of the way! Move the knife slowly, pushing down on it until it goes through the ball. Some of the paint will chip off the ball, but this can be painted or covered with embellishments as the ball is decorated.
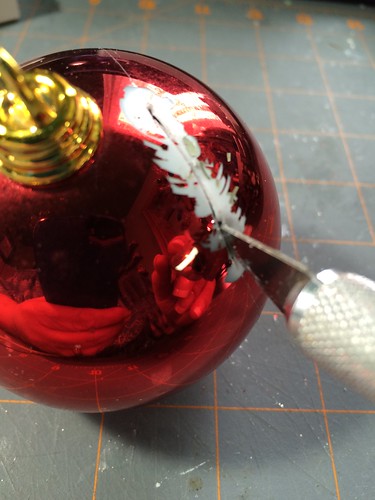
At this point, you can insert a pair of heavy duty scissors and cut along the marked line, going all the way around. Discard the smaller piece of the ornament. Cutting with the scissors will cause the finish to chip a lot less that using the craft knife.
Paint the inside of the ornament with the color of your choice. I decided on white for this ornament.
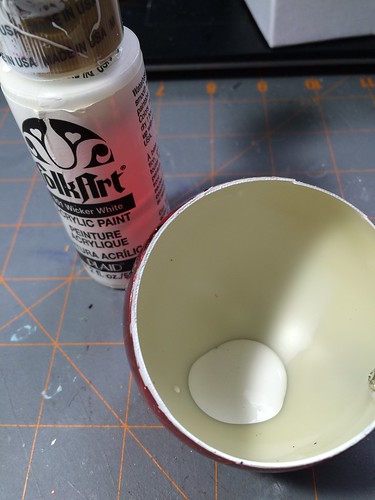

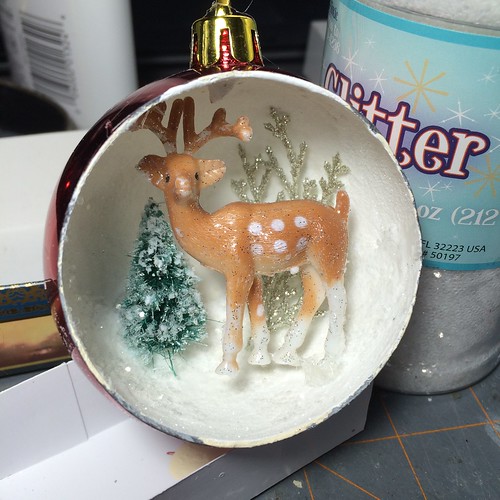
I gave the ball two coats of paint, allowing the first coat to dry before applying the second coat. Being impatient, I used my hair dryer to dry the first coat. While the second coat was still wet, I sprinkled it with glitter, pouring the excess into a small box, then back into the glitter container.
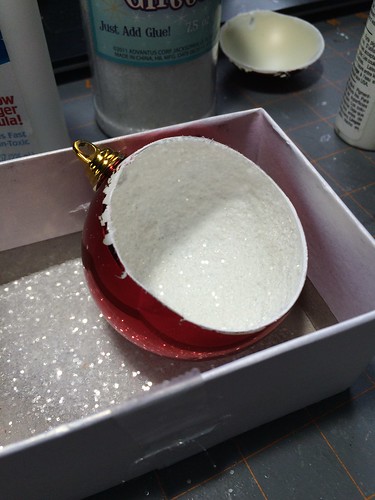
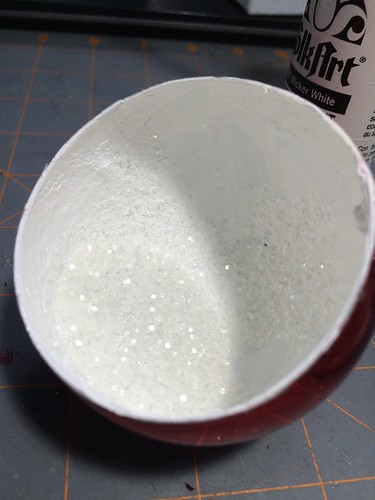
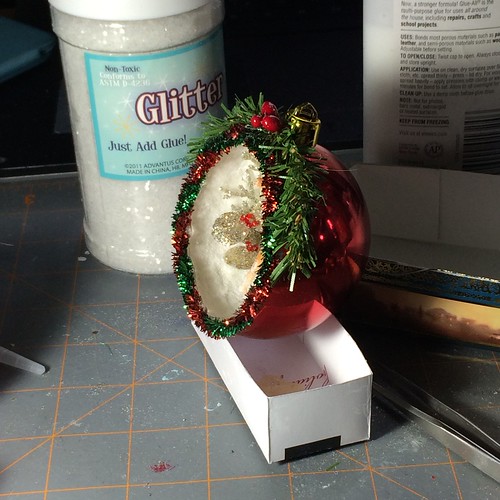
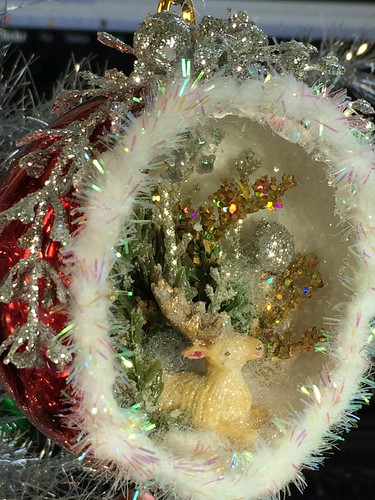
Allow to dry completely. No hair dryer this time or you might make your own little snow storm! If the paint dried in spots before the glitter was applied, brush some white glue over the dry spots and reglitter. While I waited for the paint/glitter to dry, I chose some embellishments for the ornament. I painted silver glitter glue over the deer to give him a little sparkle and allowed that to dry. I chose a bottle brush tree, removed the wooden stand, and clipped the wire trunk up to the bottom of the branches. Those items were then hot glued into place.
Between the curve of the ball and size of the deer, the deer was left floating in space a bit, but I took care of that later. The next step is to add some background branches and filler.
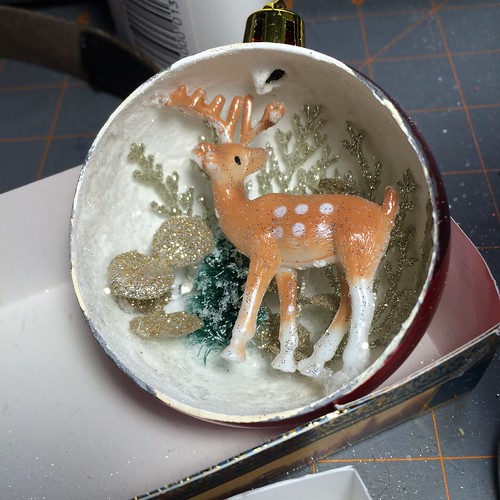
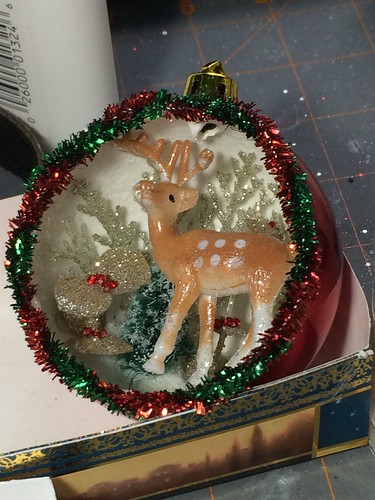
I added tiny red seed beads to some of the branches as berries. A green and red pipe cleaner made perfect trim for the edges of the opening. Begin gluing at the top, adding hot glue to the edge a few inches at a time, allowing to harden between applications.
A couple of pieces of evergreen and three red berries made a nice topper for the ornament. These are hot glued in place.
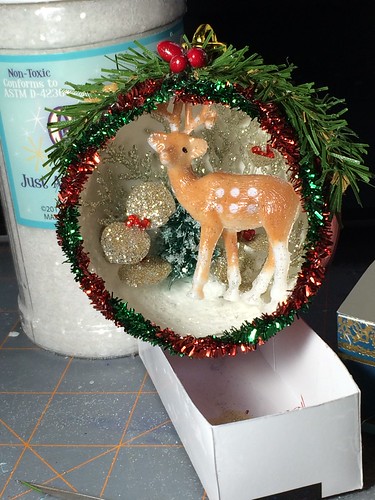
I tucked white polyester batting inside the bottom of the ornament to simulate snow.
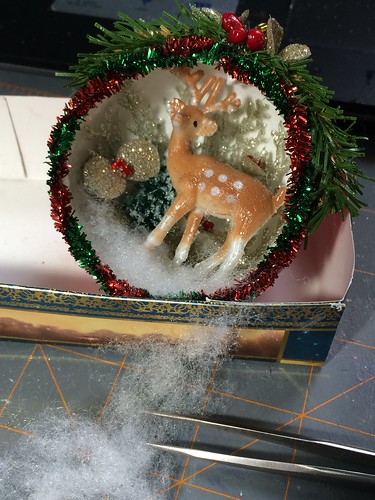
I added a couple of eucalyptus leaves on the top of the ornament because it looked like it needed a little something. Done.
I made a second ornament with a smaller deer. I think I put too much background in it, but I’m OK with it.
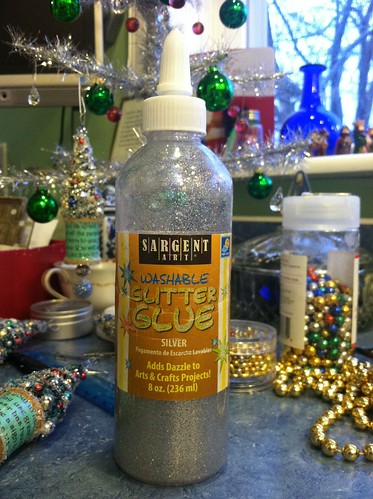
I’ll be making more of these. FYI, this is the glitter glue I like. I have it in silver, gold, red, green, blue and opalescent.
Sargent Art Washable Glitter Glue
Update: More tips in my next post about diorama ornaments. Christmas diorama ornaments #2
My diorama ornaments can be found in my Etsy shop. ChristmasNotebook
~~Rhonda
2 Comments
Clever!
Excellent instructions. Thanks.