The fence shown below was made with a heart-shaped, hand-held punch. This tutorial will make two 1/2″-tall fence sections. If taller fences are wanted, only one side of the poster board strip should be punched, then the strip can be cut to the height desired.

Supplies needed to make the fence:
- 10″-12″ long piece of heavyweight poster board or chip board
- paper cutter
- hand-held heart punch
- pencil
- acrylic ruler
- X-acto knife
NOTE: This tutorial works with the readily available hand-held punch that makes a 1/4″-sized punched heart. I don’t have other sizes of heart punches, so can’t speak to how well they would work with this method.
I like to make fence sections in approximately 10″-12″ pieces. That’s the length my fence section container will hold. Twelve-inch pieces will easily make at least half the fence needed to encircle a Putz house. It is also the maximum length my paper cutter will cut.

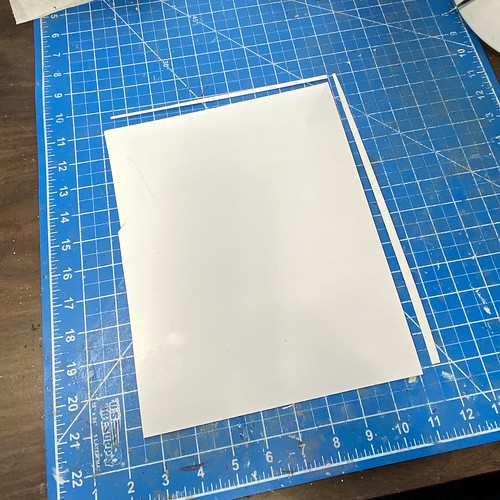
Choose a piece of poster board or chip board. The first step is to square one corner. Use the paper cutter to cut the long edge.
To cut the second side, turn the poster board so the side just cut is placed against the bottom of the paper cutter.
When starting to punch the fence, the long edge of the squared poster board should be to the bottom and the other part of the squared corner should be to your right (if you are right handed and to the left if you are left-handed).
Set the punch as far into the poster board as it will go. Align the right side with the edge of the paper. I leave a slight sliver of the poster board showing on the right. Punch the first heart. Move the punch left, leaving a slight sliver of the poster board showing between the hole and the punch.

Punch the heart, move the punch to the left as before and punch again.

Keep going…
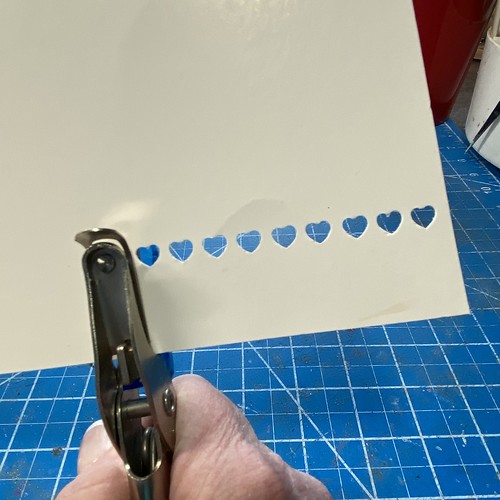
Keep going to the end at the far left. The punched hearts will be straight and even.
NOTE: The amount of space left between the hearts is optional. I like a close spacing because it makes the fence easier to size on a Putz base. The larger the space between features, the harder it will be to fit each section to the base so the design is spaced well along all sides.
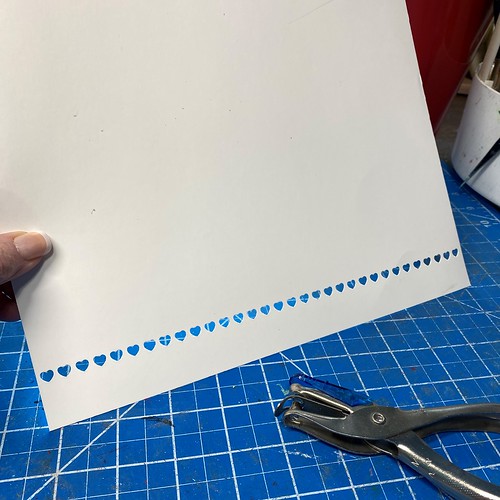
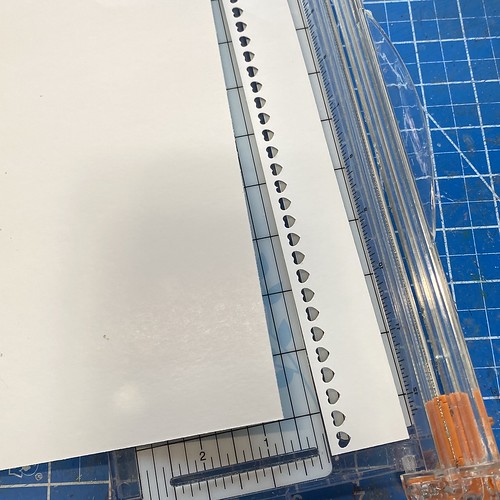
Set the poster board in the paper cutter so the cut line is about 1/8″ above the tops of the hearts. My paper cutter has a metal guide wire which makes it very easy to see where the cut line should be. You can see the punched hearts just to the right of the guide wire which is being pointed out with the wood pick.

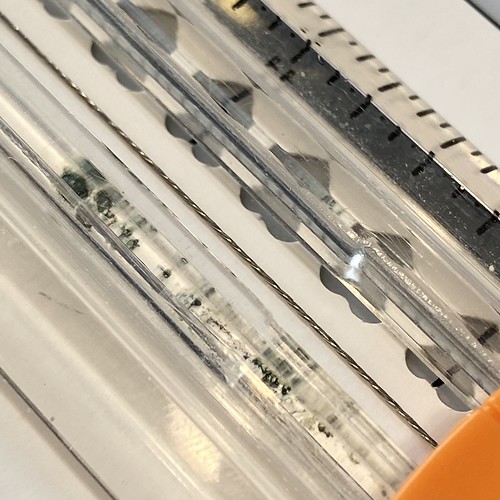
A closer view…
Cut the poster board.
Turn the punched section so the opposite side can be punched in the same way the first side was punched. There is no need to line up the hearts on the second side with those on the first side. The strip will be cut down the middle into two strips.
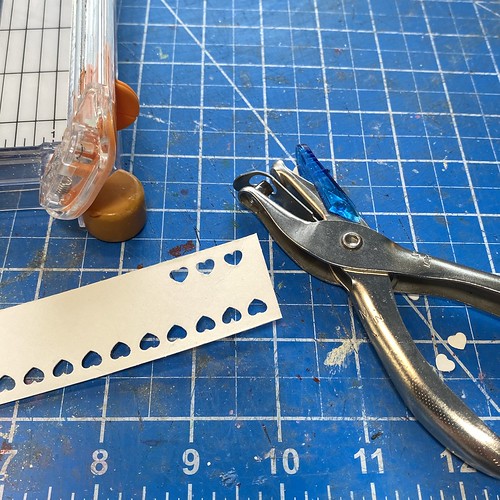
Punch all the way along the second side.
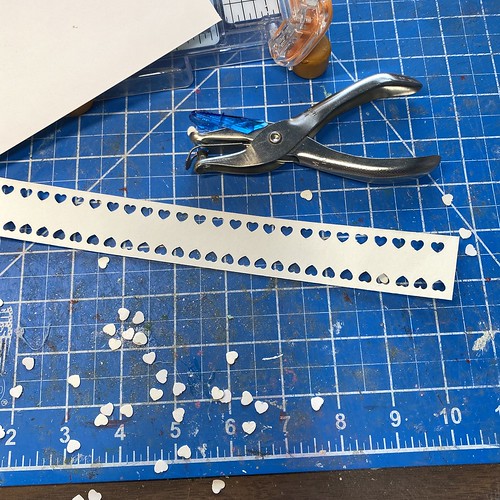
The next step is to cut the two sides apart to make two fence sections. It can be done with the paper cutter. I find that it can be difficult to get the sides exactly if the cutting line is guessed at. The two sections of fencing should be even so that both sections can be used together if needed, without a difference in height. This picture shows how the pieces can be uneven when cut with the paper cutter without marking the center line first. The one on the right is about 1/16″ wider than the one on the left. That doesn’t seem like much until they are needed to be placed end to end on a Putz house base.

If that happens, lay the shorter piece on top the larger one, draw a line to mark the difference and use an acrylic ruler and an X-acto knife to cut the larger one to match the shorter one.

To help prevent that mistake, before cutting, measure the gap between the two lines of hearts and use a pencil to mark the middle. That mark can be used as a guide for cutting with the paper cutter or with the ruler and knife, whichever you find easier to use.
When you have the hang of it, it doesn’t take long to make six or eight sections of fencing. Or just two, if that’s all that’s needed for a particular project. I like to make plenty while I have the necessary equipment out. Then, when needed, I can just grab what I need and keep working on my project without stopping to make fencing.
How cute is that fence? And so even!

I will write a tutorial for this heart-shaped fence soon.


You can see more of my Putz houses and Christmas ornaments in my Etsy shop.
If you are interested in crafting Putz houses of your own, check out my Putz tutorials for more information. Putz House Tutorials
I am always happy to answer questions about the process. Please ask, if you are wondering about the details of putzing!
All proceeds from my Etsy shop benefit Kenya Mercy Ministries. They work with the urban poor of Nairobi, Kenya, particularly the children and their families who live in Kibera, the largest slum in Africa. Thank you for your part in helping these children when you purchase items from my shop!
~~Rhonda