This tutorial, explaining the way I draw a Putz house pattern, is meant for those who haven’t drawn their own patterns and want to try their hand at it. This tutorial can’t cover everything, but it sets out the basics.
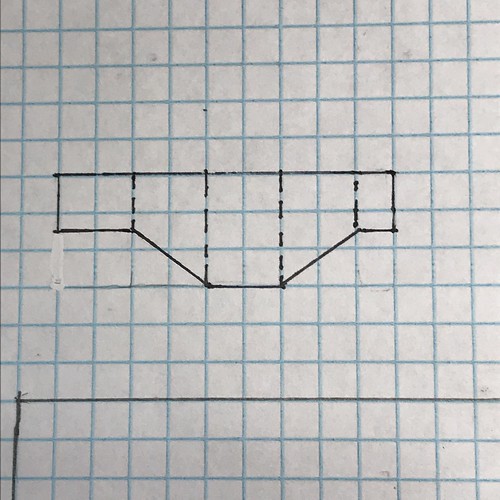
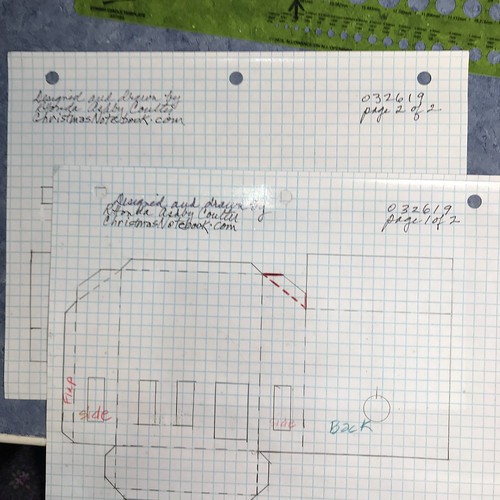
I’m using this simple Christmas tree lot Putz as my example. I drew the original pattern March 26, 2019. Pictured below are two versions of the pattern. The one on the left is the original pattern size and the one on the right was copied at 80% of the original size.

Here are a few hints for drawing Putz patterns:
- Draw solid lines for those lines that will be cut and dashed lines for those lines that will be folded.
- Consider the printer/copier that will be used for copying the master pattern. How close to the edge of the paper does it print? 1/4″? 1/2″? The pattern should be drawn inside that restriction to make copying the pattern as easy as possible.
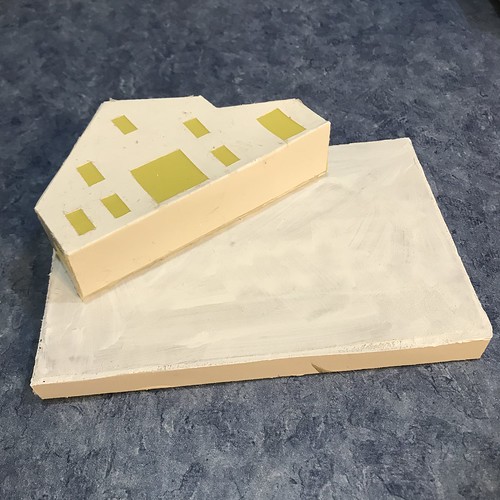
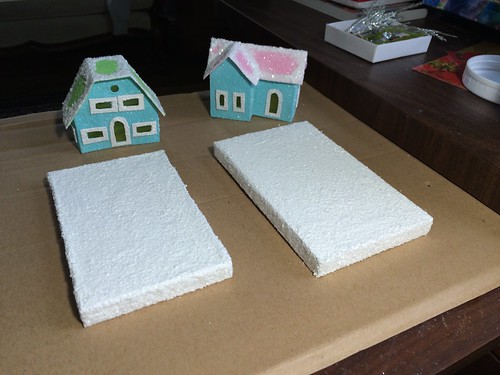
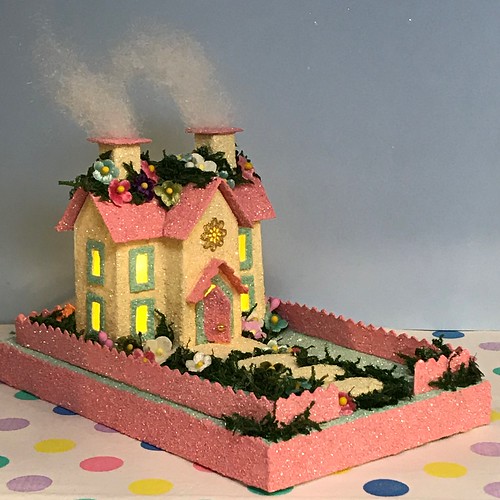
- Leave room for an attached base, if you want to include that. I find it helps keep the Putz house stable when constructing the Putz. The “base” refers to the bottom of the house pattern, not the base the constructed house will sit on. The base for the constructed house can be a flat piece of chipboard or a box like the one below. The Putz shown in this picture is a barn.
Side note…Here’s a link to my tutorial for making Putz bases from greeting cards, if you are interested in making bases. Making bases from Greeting Cards
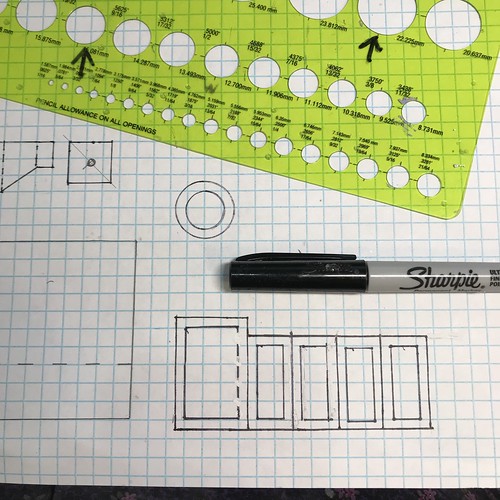
To draw a Putz pattern, you will need these tools.
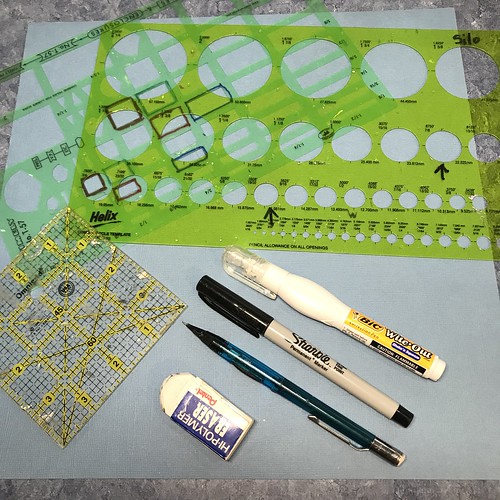
- 1/4″ Graph paper
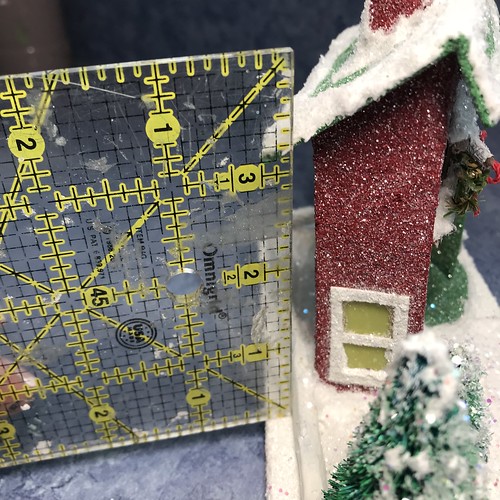
- clear acrylic ruler that has 1/8″ measuring lines
- eraser
- pencil
- pen or thin-line, permanent marker
- White-out pen
- Optional / templates for drawing rectangles, squares and circles
Side Note…RE: cardboard / poster board, etc. A heavier weight cardboard can be hard to fold. Using a bone folder will help. Light-weight poster board may seem flimsy but once it’s painted, it is quite sturdy.
Measure the object you want to make a pattern from. If you are drawing a pattern for something you can’t measure, like a picture, decide how wide and deep you want the Putz to be.
This Putz is 3 1/4″ wide.
… 4″ high in the front…

… and 3 1/4″ high in the back.
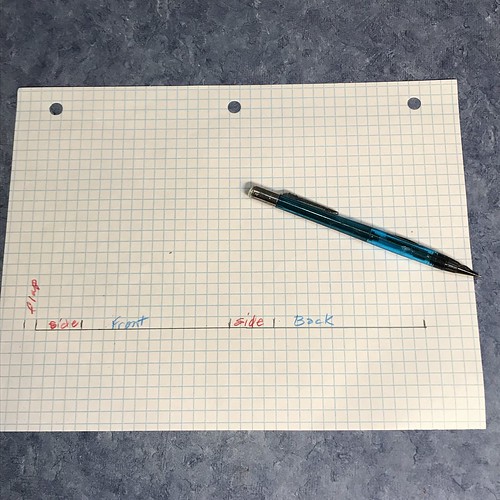
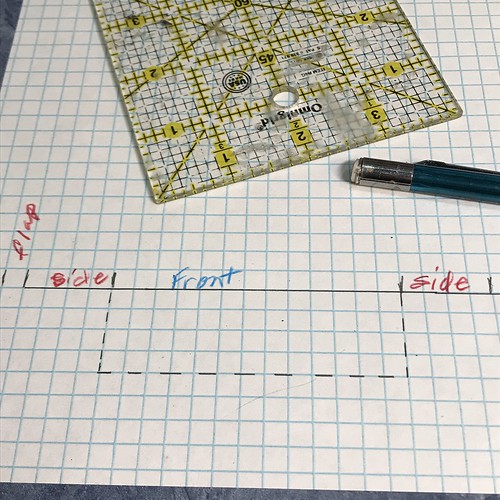
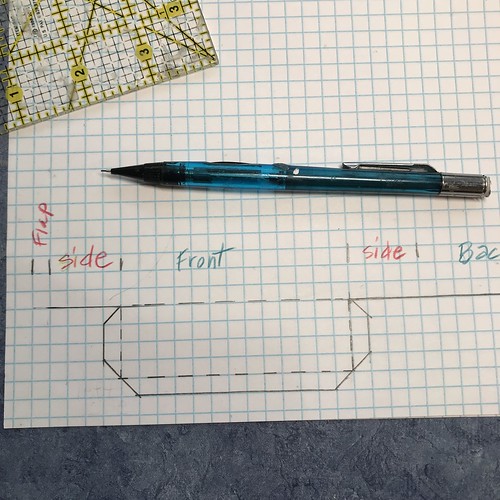
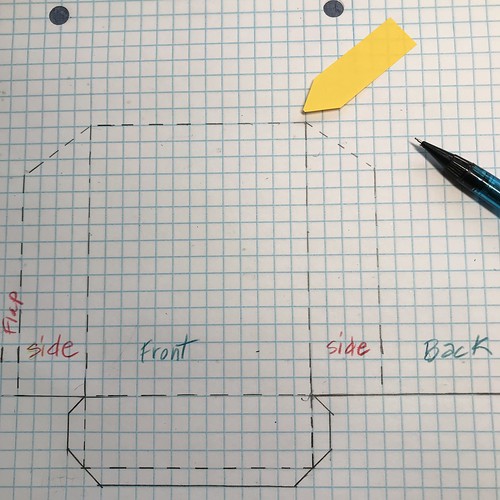
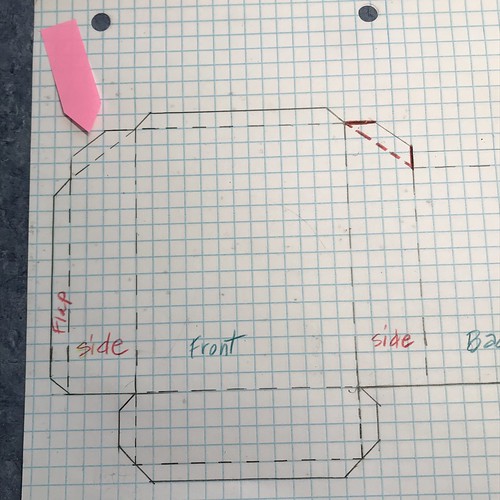
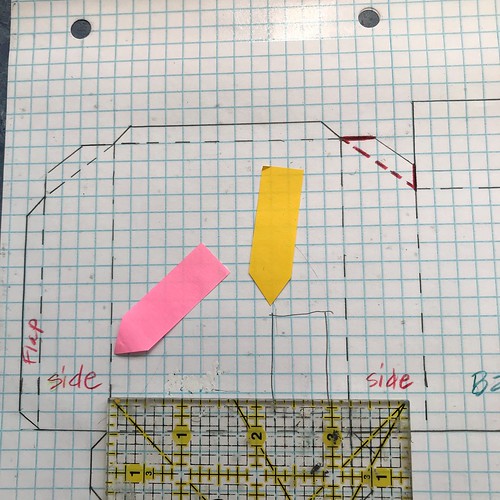
- Using the measurements, mark the graph paper with a guide of where to start drawing. The Putz measures 3 1/4″ wide and 1″ deep. Mark in this order, left to right:
- the beginning point to the far left of the page
- 1/4″ for a flap
- 1″ for left side panel of Putz
- 3 1/4″” for front panel of Putz
- 1″ for right side panel of Putz
- 3 1/4″ for back panel of Putz (no flap on this end)
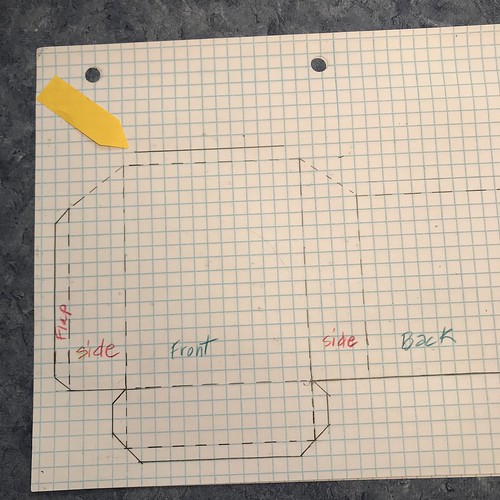
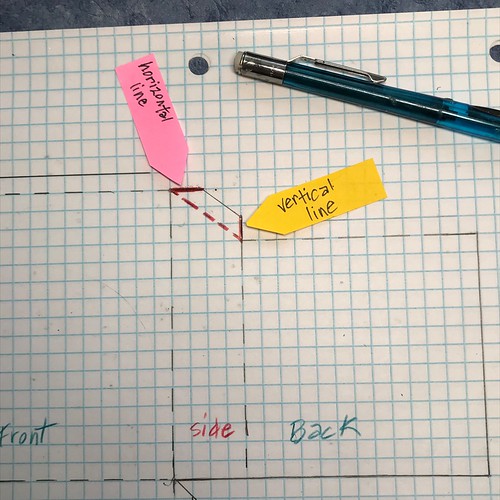
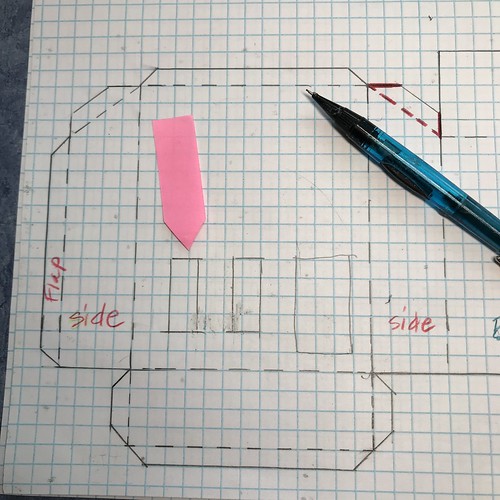
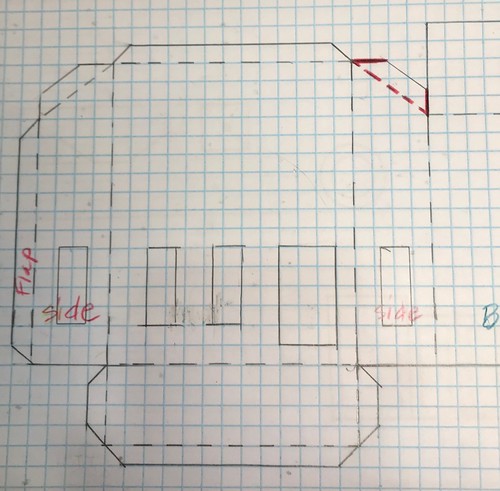
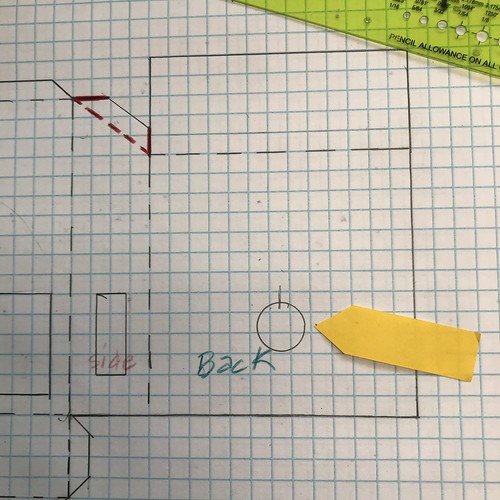
I labeled the pattern with red and blue words to show where the panels of the pattern will be. It makes it easier to show how the marks should be placed. These words can be written on your pattern with pencil if it helps you keep everything straight.

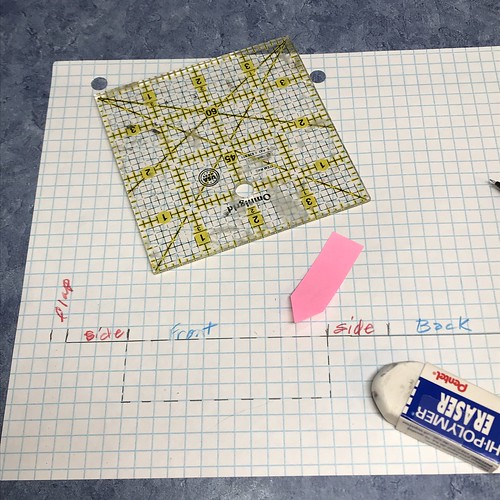
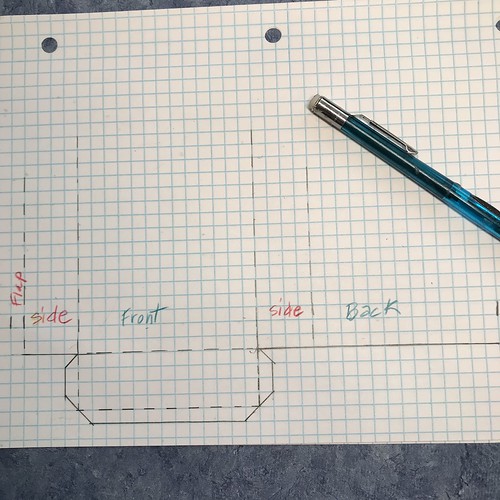
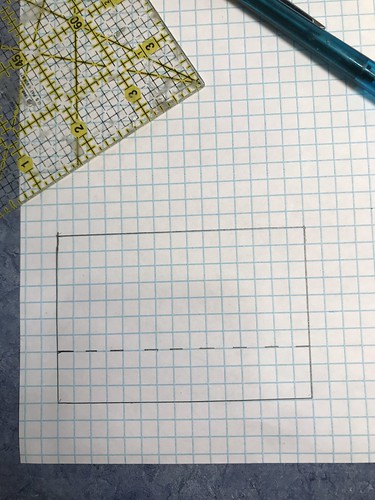
Draw a solid line all the way across, from the second mark to the last mark. This marks the bottom of the panels.
Below this, the base will be drawn, coming down from the front panel of the house. It should be the same depth as the side of the house and as long as the front of the house.
Draw the base with dashed lines, going down 1″ and across 3 1/4″.
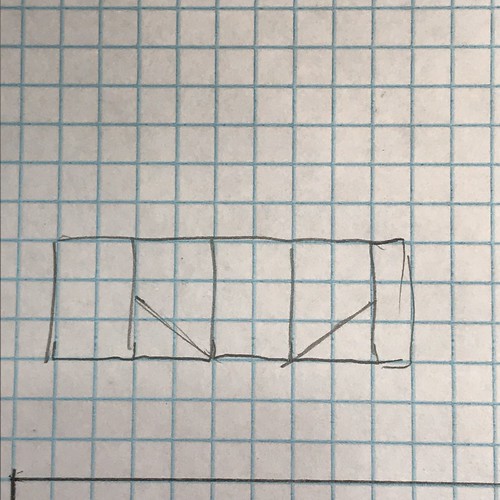
Now the line that was drawn all the way across can be made dashed along the front panel of the Putz by erasing to make dashes. After making a lot of patterns, you learn where these lines are and which should be dashed and which should be solid.
Add flaps to the base.
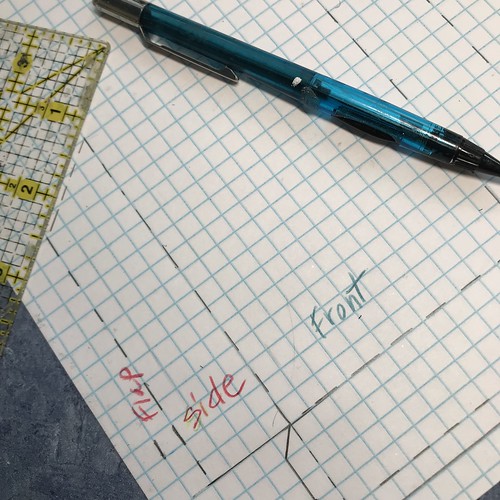
Draw the sides of the front panel with 4″ dashed, vertical lines.
The back of the Putz is 3/4″ lower than the front, so draw the sides of the back panel 3 1/4″ with dashed lines.
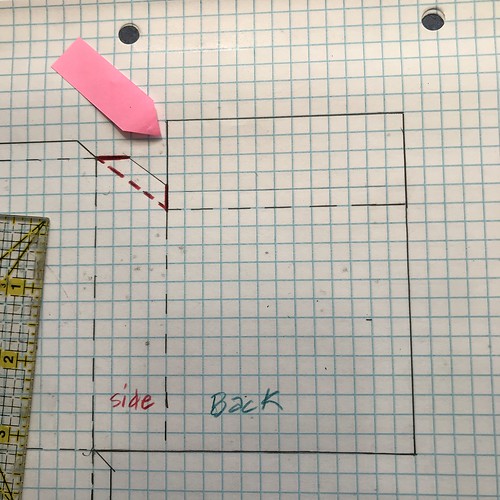
Use the ruler to draw a dashed line that connects the vertical lines.
Connect both sides of the front panel to the side panels.
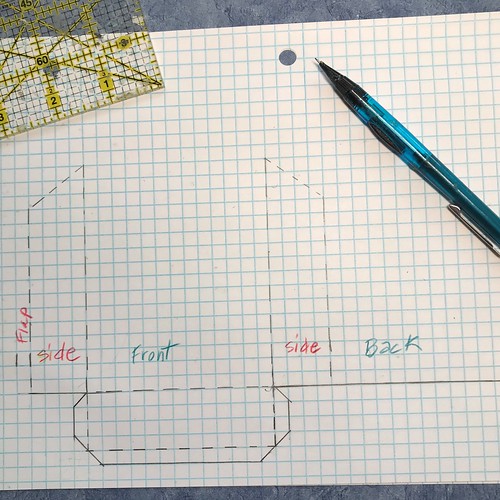
Draw the top of the front panel with a dashed line.
Draw the top of the back panel with a dashed line.
Complete the side flap with solid lines.
Draw a solid line 1/4″ above the the front, starting and ending 1/4″ shorter than the width of the front panel.
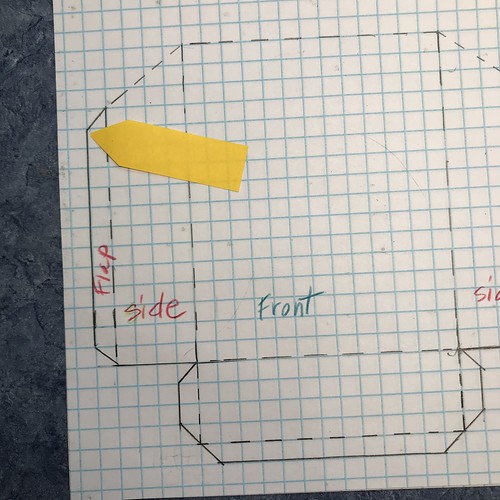
Time to draw the flaps for the side panels of the Putz. I drew this line in red so it will be easier to see through the ruler. Lay the ruler so it is in line with the dashed line, but allows a 1/4″ past the dashed line.

Draw a solid line. This line will meet the horizontal and vertical lines shown in the picture below.
Draw the other side flap. Draw the ends of the side and top flaps.
On the top of the back panel, make one large piece that will fold to the top of the Putz to make a support for the roof. I get the depth of this by measuring the slanted top of the side panel. In this case it is 1 1/4″ long. Draw, with a solid line, the top for the back panel 1 1/4″ tall and as wide as the back which is 3 1/4″.
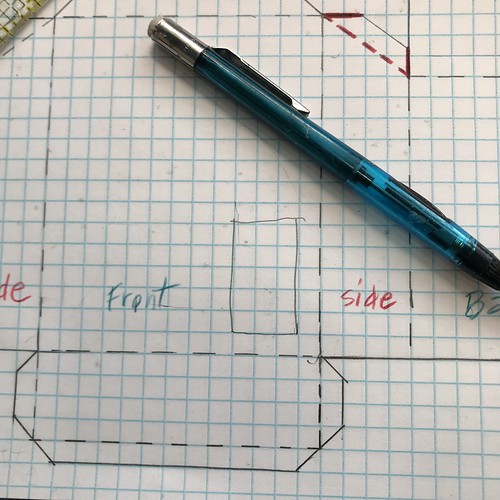
Decide where the door will be and what size it will be. Rough it in for now, in case changes are made.
On to the windows. The Putz I am drawing this pattern from has a large double window. I’m showing how to draw single windows for this pattern because that is simpler for beginners. When I use a double window, I draw the center frame line to match the width of the sides of the window frame.
See the example below. The house on the left didn’t leave enough room between the windows, so the window frames are right next to each other. The house on the right has left enough space to make the windows separate. If the window frame for the house on the left was drawn as a single window with two panes, the frame piece between the panes would be the width of a single frame instead of two.
Here are a few window frames. You can see the window to the right has three panes, with single width framing between each pane.
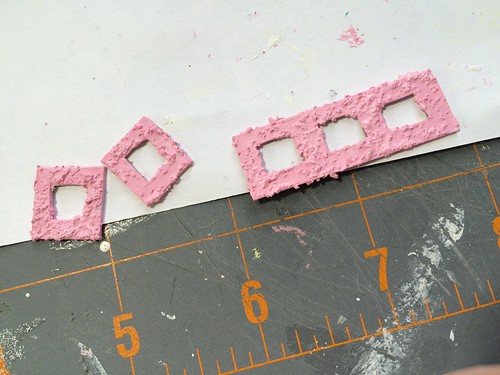
This much attention to detail may not matter to many Putzers, which is fine, but I am a perfectionist by nature and it bothers my senses to see the frames touching. Doesn’t mean it’s wrong for anyone else. Just doesn’t work for me.
The windows will be placed between the left side of the front panel and the front door.
Determine how tall and how wide they will be. Draw them with solid lines. I try to make the spaces between windows as even as possible, but that’s up for interpretation by each Putzer. Make them the way that pleases you.
Draw the door with solid lines. I like to have the door opening 1/4″ above the bottom of the panel so there is room to add a step.
Draw the windows on the side panels. They can be any size. These happen to match the size of the ones on the front.
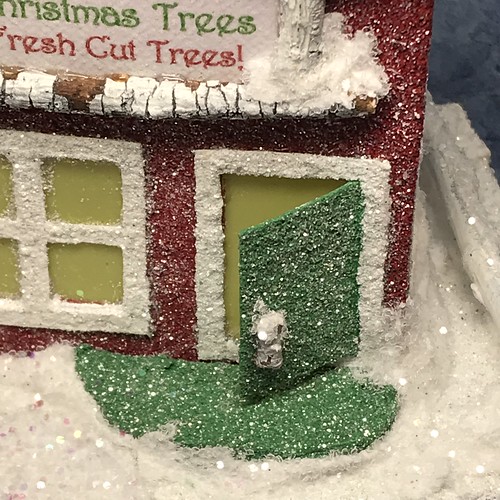
A Putz doesn’t need windows on the sides, but I like to add them because it’s another opening for the light to spill out when the Putz lights are on. Just adds that much more magic, as you can see in this picture of one of my spring Putz.
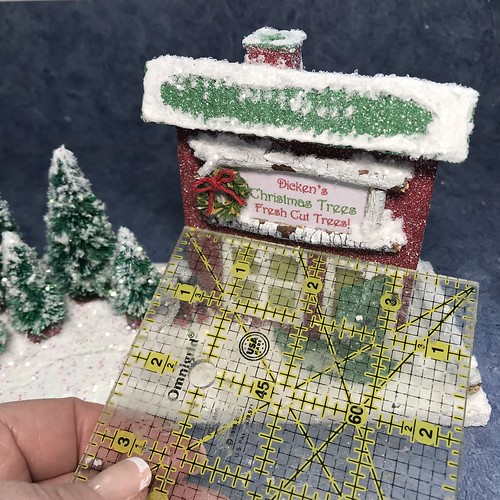
I use a tracing template to draw window and door spaces. I marked the template around the ones I use most often, just to make them easier to find when using the template.
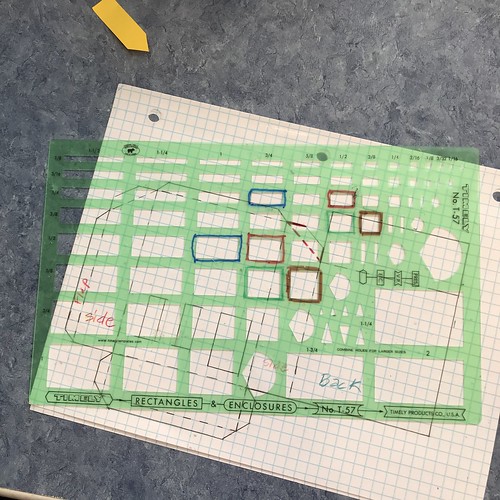
Timely Rectangles and Enclosures Template
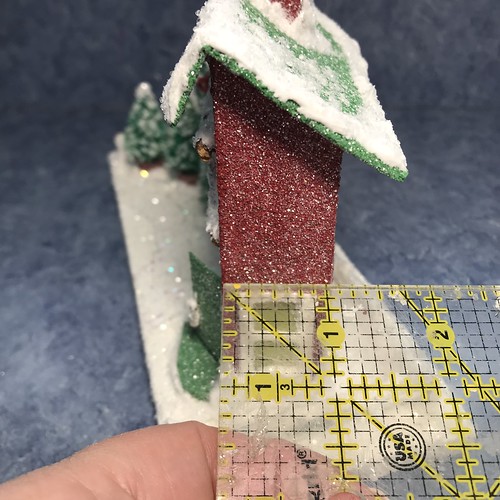
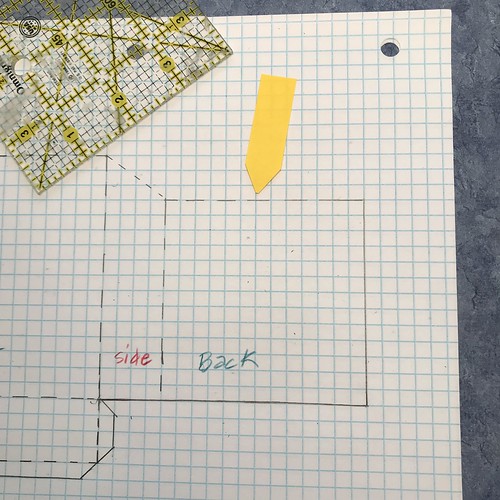
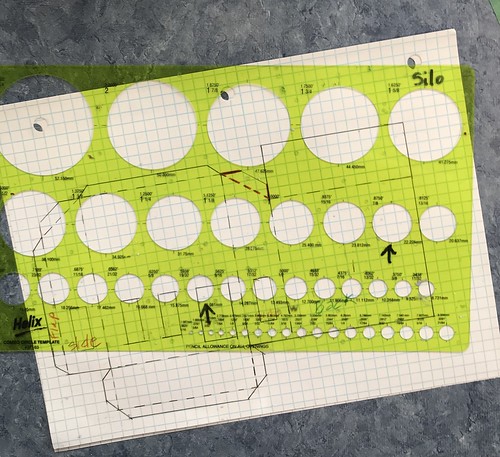
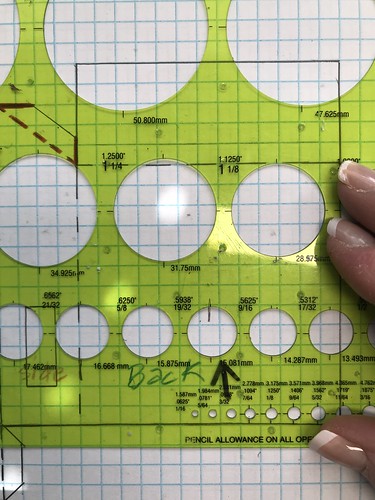
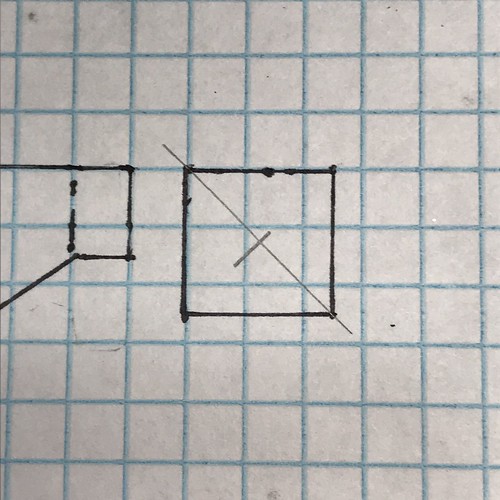
I also use a circle template, most often to draw the opening for the light on the back panel of the Putz. I marked the two circles I use to make the inner and outer rings of the frame for the light hole. Another hole is marked “Silo.” That’s the hole size I use to make a silo roof when I’m adding a silo to a Putz barn. I have some thick, cardboard, spools from serging thread that make great silos. They are all the same size, so I know this hole size will work for cutting a silo roof from poster board.
Time to draw the circle opening on the back panel. Measure across the width to find the center. Draw the circle. If a template isn’t available, use a bottle cap or a coin to trace a circle. I usually set the circle up about 3/4″ from the bottom of the panel because I like to run a fence all the way around the Putz, even across the back. Setting the hole above the top of the fence will save wear and tear on the fence as lights are put in and taken out over time. Many Putzers don’t add a fence along the back. Personal choice. Do what makes you happy with your Putz.
The finished hole.
On a second piece of graph paper, draw the roof, door and window frames, and the chimney.
To draw the roof, mark a line as wide as the front panel of the Putz, plus half an inch for an extra quarter inch on each side for the eave overhang. To draw the vertical lines, measure up 3/4″ for the front overhang. and 1 3/4″ for the back part of the roof. Draw a dashed line across the roof at 3/4″ from the bottom.
Time to draw a chimney. The chimney has four sides. I decided to make it a 1/2″ square. It will sit on a slanted roof, so the bottom of the chimney has to have a slant. Sometimes I add a chimney to a Putz when the pattern doesn’t include a chimney. I decide how wide and tall it will be and sketch four of those squares or rectangles on a piece of graph paper. I add a 1/4″ wide block to one end for a flap.
Sometimes, it takes several sketching attempts before I have it just right, especially when the chimney will sit on an oddly angled roof. After you’ve made lots and lots of them, it gets much easier to “see” how the chimney needs to be drawn for a particular kind of roof.
Go over the pencil lines with a black marker. Remember to draw the fold lines with dashed lines.
To make the chimney cap, draw a square that is as wide as the chimney plus about an 1/8″ larger. That will give it a tiny bit of overhang. Same would go for a rectangular cap if the chimney was a rectangular shape.
Mark an X in the center for punching a hole when the house is constructed. It can be any size. I have a 1/8″ hand punch and 1/4″ hand punch that I use for making chimney holes. I like smaller holes for the mini Putz I make. Again, this is a detail that’s up to the Putzer. Do what works for you. Some even like to leave the chimney open without a cap. That works, too.
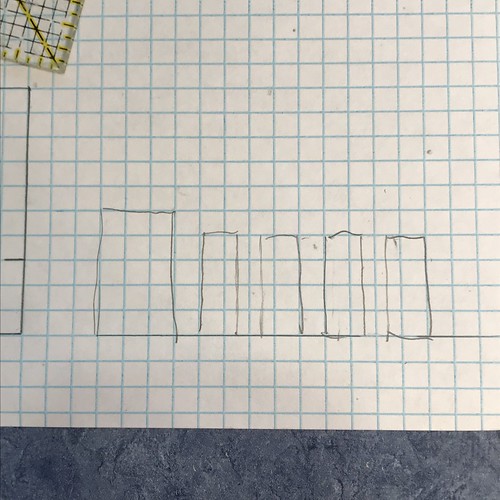
Window and door frames are optional. Another call the individual Putzer makes. To make frames, pencil in the needed rectangles, making them the same size as the door and window openings on the pattern, leaving 1/4″ between each for a 1/8″ frame all the way around. For this pattern, one door and four windows are needed.
Go over the finished sketch with a permanent pen or marker. I use the rectangle template to simplify this part of the pattern.

The next step is to mark where the lines for the frames start and stop. It can be hard to see that with the ruler on top the rectangles if they haven’t been marked.
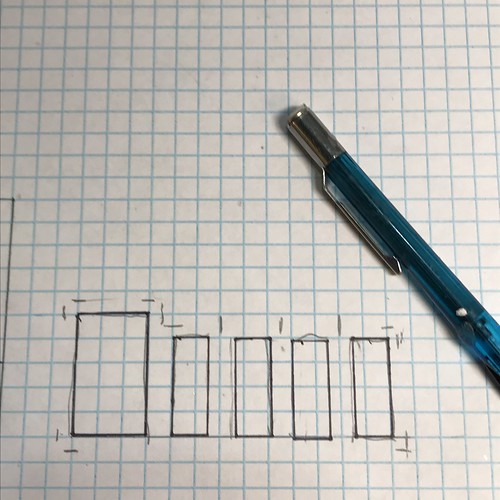
Draw the frames in pencil and then mark them in permanent marker when they look right.
My door frames include the door, so the fold line of the door should be marked with a dashed line.
The last piece to draw is the circle frame for the light hole. I use a circle template. If a template isn’t available, use a compass. If neither is available, use a dime for the center and find a bottle cap or other circular object that has the right size for the larger, outer circle.
Mark the pattern pages with a name and/or pattern number. I mark them with the six digits of the date I drew the pattern. If drawn on March 26, 2019, the pattern number would be 032619. I also mark the pages “page 1 of 2” and “page 2 of 2,” etc. That has saved me several times, when I am not sure if I have all the pages needed.
I also mark all pages of my patterns with “Designed and drawn by Rhonda Ashby Coulter / ChristmasNotebook.com.” Add any information you feel is pertinent to your pattern.
When my drawings are finished, I go over them with permenant pen, but that’s optional. When the ink is dry, I erase all pencil lines.
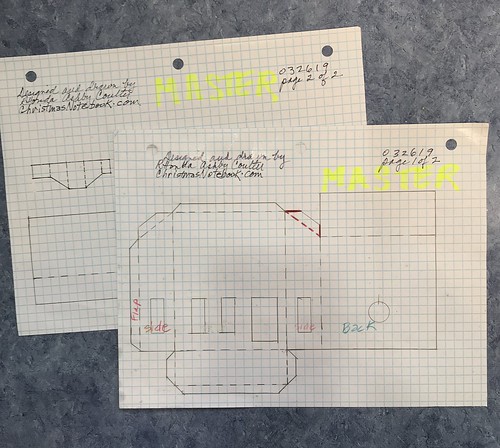
The last thing I do to a master pattern is to mark MASTER on it with a yellow highlighter. When the pattern is copied in black and white, the word doesn’t show up. That keeps the master pattern intact. Don’t cut the paper with the yellow word on it! …ask me how I know…
I hope this tutorial is useful. Again, it just scratches the surface on pattern drawing. I hope to make some tutorials about more complicated features in the future. But it is enough to get a beginner started.
If you have any questions about the pattern, please ask. I have done this so long that it comes as second-nature and I may have missed points that beginners would find helpful. Let me know and I will update the tutorial.
If you are interested in other Putz tutorials, you may check them out here: Putz Tutorials
My Putz houses are available in my Etsy shop. ChristmasNotebook
All proceeds from my shop support Kenya Mercy Ministries. They provide aid to children and their families living in the largest urban slum in Kenya. Thank you for your help when you purchase items from my shop.
Happy Putzing! ~~Rhonda