I thought I’d catch you up with what I’ve been doing. I had taken several days off from working on Putz houses while I was busy with other projects and decided to get back to work this week.
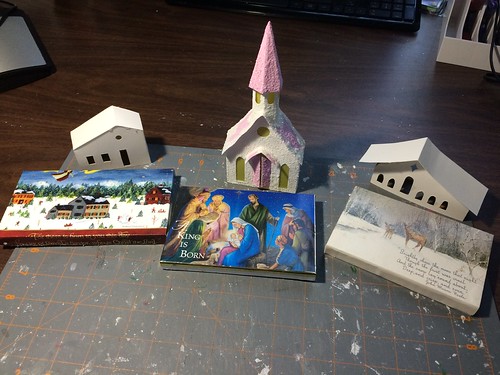
I like to upcycle used Christmas cards in a lot of my Christmas crafting. They make great bases for the little Putz houses. The first thing I did was make seven new bases, using cards I had chosen without their particular color being a deciding factor. I planned to paint the houses to match the cards instead of painting the houses and then finding cards that would work with the finished houses. I am hoping this will push me to use some new colors, perhaps even colors I would not have thought to use.
NOTE: My tutorial for making Putz bases can be found here: tutorial for making putz house bases
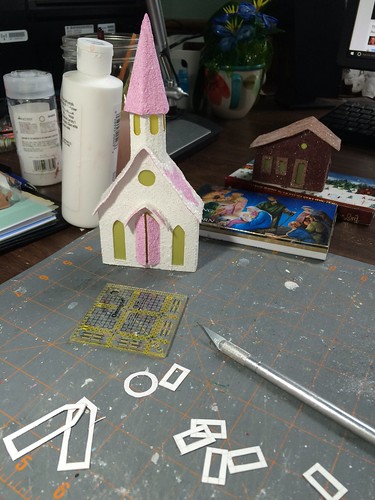
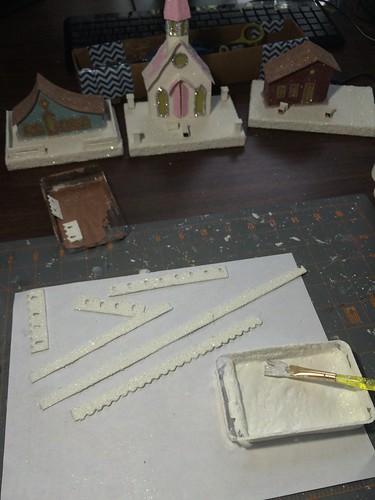
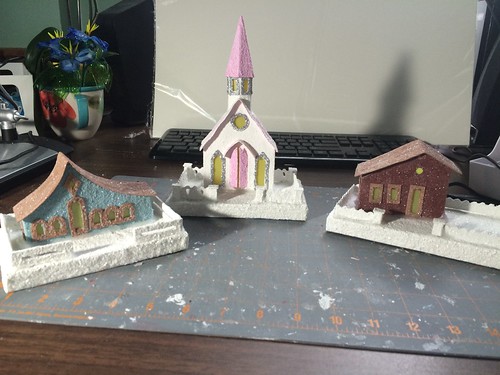
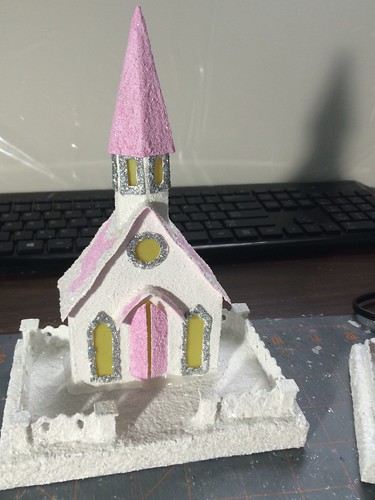
I picked three houses to work on. The pink and white church was already painted. I had to add window panes. The other two houses were still in the infant stage.
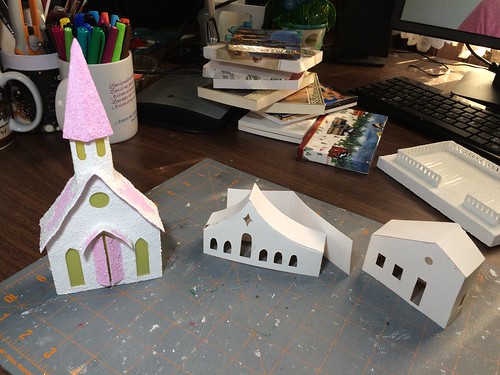
It seems odd that the style of the house design might influence which card to use, but I do find that true most of the time. I was happy to see that one of my new bases was perfect for the pink and white church. Then I chose bases for the two houses that were just in the beginning of the process.
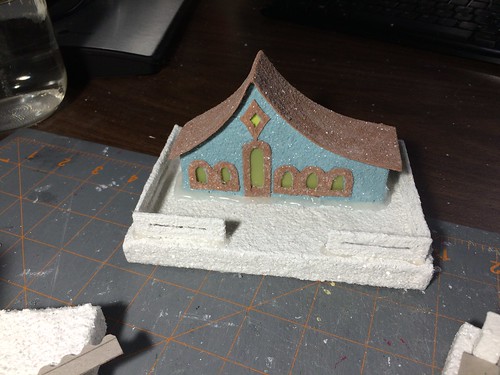
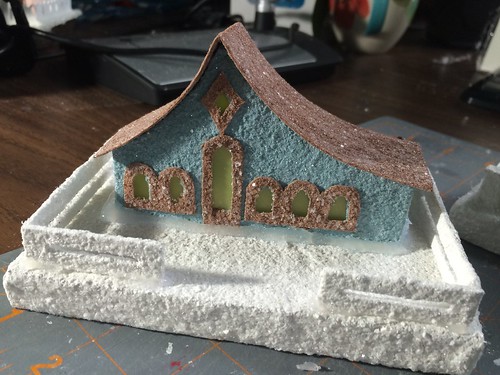
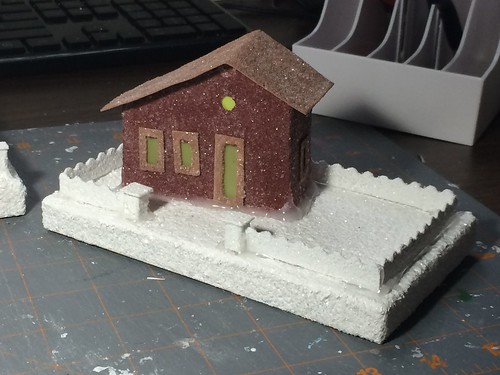
I mixed some paint to get a shade that looked good with the card. The house on the left needed a brown red color and the one on the right needed a muted blue with a tiny touch of green. I used the color ‘Nutmeg’ mixed with a little white to get a light brown color and used that for the roofs of both houses.
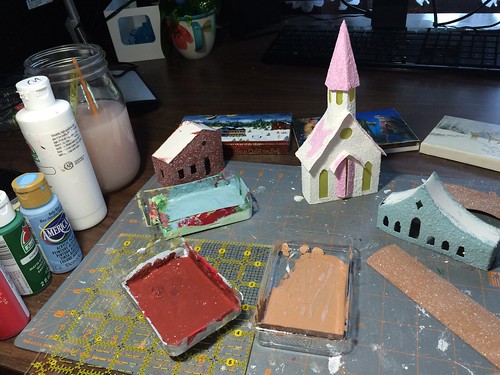
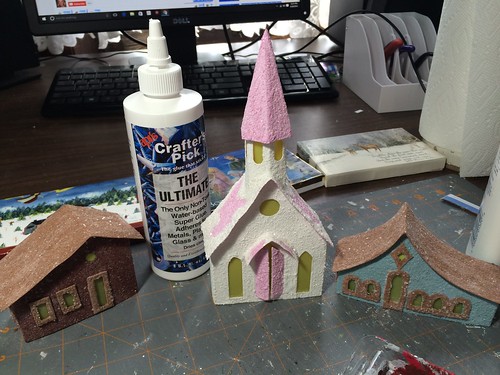
The next step was to install window panes and then make and install the door and window frames. I painted those the same color as the roofs.
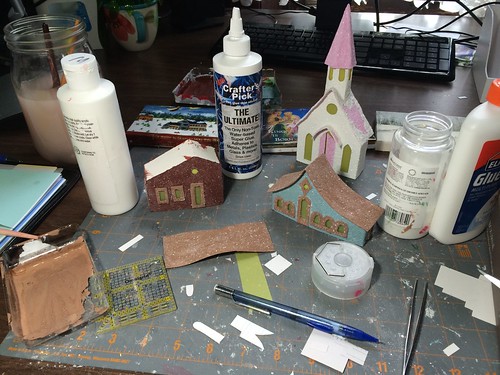
I cut the frames for the church. They were painted white and sprinkled with silver glitter. I like the way they turned out.
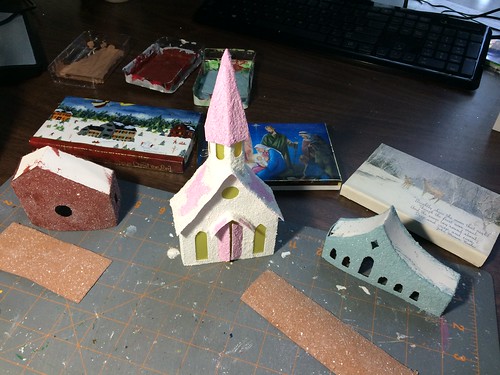
Now we’re getting somewhere. The houses are ready to place on the bases. But I need to paint the bases first. This involves some dry time, so I painted the bases and then resumed work on the houses the next day.
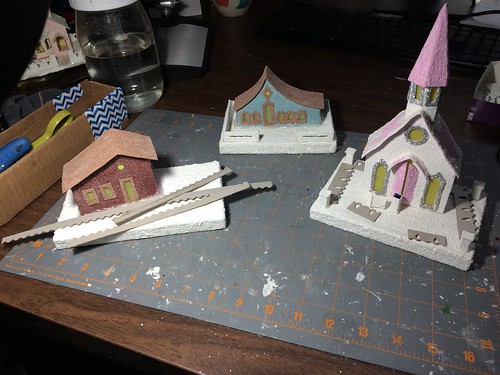
When the bases were dry, I chose fencing for each Putz house.
Some of the fencing had to be painted.
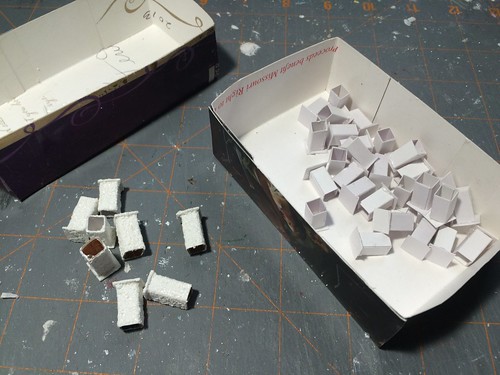
While it dried, I made more fence posts as my supply was getting low. It’s nice to have them made ahead of time so they are ready when I need them.
The finished fences…
I love the way the color combination for this house worked out. The fence is a simple cut-out design with no fence posts.
The fence for the church was fancier, with a wavy top edge and a tear drop punched design. The church got six fence posts.
A shorter wavy fence seemed right for the little dark reddish-brown house. And two fence posts jazzed up the gate.
And that’s where I left them. After I paint and glitter the hot glue, turning it into snow drifts, the next step will be embellishment. I hope you enjoyed this peek into the process. If you have any questions or would like some advice about making your own Putz houses, please leave a comment below. I am happy to help.
You can visit my Etsy shop here: ChristmasNotebook
~~Rhonda