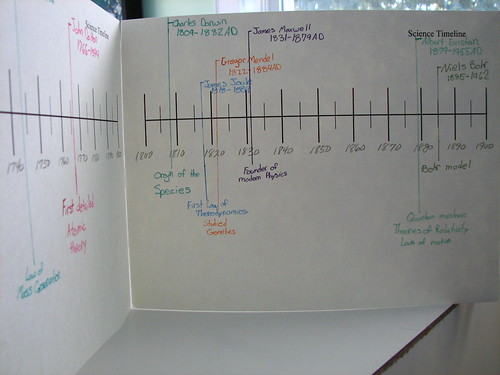
DD made a science timeline to use for recording scientists and historical facts, which I hope will help her visualize where these things fall in the course of history. Visualizing it should also help her see how scientific study advanced as time progressed. As we continue through the science textbook, she can add more and more information to this timeline.
I thought a folding timeline would work well because we don’t have wall space for displaying much in the current classroom. Hoping to find something to give me ideas, I googled < folding timeline> and found the Ginger-snap-shots blog, where Ginger has a tutorial to show how to tape a folding timeline so it folds easily. That helped a great deal! Thanks, Ginger!
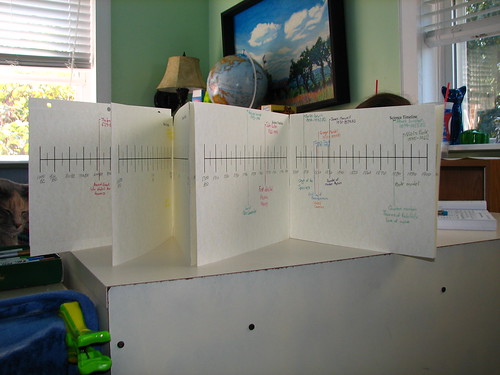
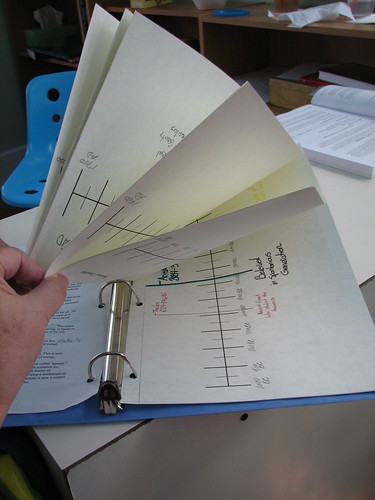
In the comments to Ginger’s blog post, Lisa suggested storing the timeline in a three ring binder, which gave me the inspiration for a neat way to accomplish that. The timeline is printed on lightweight cardstock that goes through my printer without difficulty. To make the timeline easy to store in a three ring binder, I punched holes in another piece of cardstock and adhered that to the back of the first page of the timeline, offsetting it enough to expose the holes. Now it can be stored while we don’t need it and it can be brought out for adding more information to it, as needed. We can also choose to display it on a wall if we ever have that much room!
So my thanks goes out to Ginger and Lisa, both of whom helped with this project, and to DD who did such a neat and tidy job on her timeline. 🙂
If you’re wondering how we printed and spaced the timeline, read on. I used Print Shop to “draw” the lines. Each page is divided into ten main sections, with smaller dividers between each of those. The line is spaced about 1/3 of the way down the horizontal page so DD can write names above the line and their contributions below the line. DD used colored markers to write each one in a different color and drew a line from the name to the info, so it works pretty well. If I were doing it over, I might opt for writing all the info together, but we’ll do it this way for this year. I think there are pros and cons for each way. I do like the way this one shows the scientific progress across the bottom, going from one discovery to the next.
I put 1000 BC to 0 on one page and 0 to 1000 AD on another. From 1000 AD through 1700 AD, I put 200 years on each page. The 1700s and 1800s each have their own page and the 1900s are on two pages. Deciding how many years to put on each page was rather arbitrary, but I didn’t want stacks and stacks of pages with little or no information, so I condensed the early centuries to save paper. We’ll see how it fits as we progress through the year.
~~Rhonda