I found a bread recipe on recipezaar.com that I modified it a little. It makes wonderful soft bread and is so easy my 11 year old daughter can make it by herself. The recipe, as originally given, had a lot of yeast in it so the bread would rise quickly to be ready in a hurry. It does work and makes good bread quickly, but it has a very yeasty flavor and the texture is not as nice as bread that has a longer rising time. I prefer to use less yeast and let the dough rise longer than called for in the original recipe.
You need:
- 4 teaspoons active dry yeast (2 envelopes of active dry yeast = 4 1/2 tsps, which is fine…dump it all in)
- 2 1/4 cups warm water
- 1/2 cup sugar
- 2/3 cup vegetable oil (I use half olive oil, half vegetable oil.)
- 2 eggs
- 2 teaspoons salt
- 8 cups flour (more or less) I use unbleached or bread flour, depending on what’s at hand.
- 1/4 c. wheat germ
- 1/4 c. ground flax seed
I also like to add:
I heat the water in the microwave in a four-cup glass measuring cup for 99 seconds. I use a Thermopen (an instant read thermometer) to check the temperature of the water. I like it to be just above 115*. It will cool down a bit when put into the mixing bowl. BTW, I can’t say enough good things about the Thermapen. It is a great kitchen tool! DH loves it for making homemade fudge, too. He gave it to me for Christmas a few years ago, but he seems to think it’s his…as in “where’s my Thermapen?”
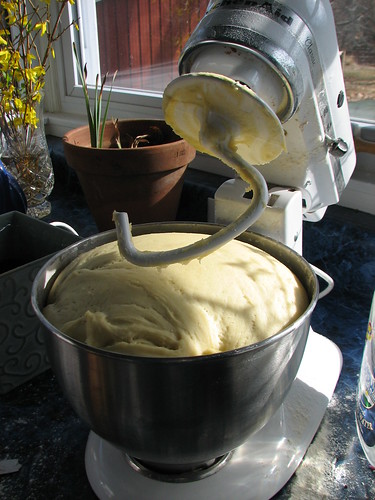
I use a KitchenAid with a dough hook to mix the ingredients, but you can mix by hand or use a hand held mixer for the first part, then mix by hand as you add more flour. I do all the kneading in the mixer, but you can certainly knead it by hand if you prefer. I have never used a bread machine and can’t say how this recipe would work in one. Better to stick with recipes specifically tailored to the machine, I’m sure.
When the water is warm, pour it into a mixing bowl. Add the the rest of the ingredients except the flour, mixing all together well. Add the flour, one cup at a time, until well mixed. The amount of flour varies. I don’t measure it, just dumping in a cup at a time until it looks right. It will be soft and a bit sticky, but not wet. Trial and error, experience…it all works out. Give it a try. If you can’t handle the dough easily, it needs more flour. Read this page for some basic bread information.
I put a clean dishtowel over it and leave the bread in the mixing bowl to rise. Don’t get caught up in all the “rules” of bread making. You don’t need to make it into a ball, put it in an oiled pan, etc., unless you want to. 🙂 Leave it in a warm place to rise until doubled in size. Timing depends on the temperature of the room. If it’s cold, you can set the oven for “warm” and put the dough on top the stove. This takes 40 minutes to an hour or so.
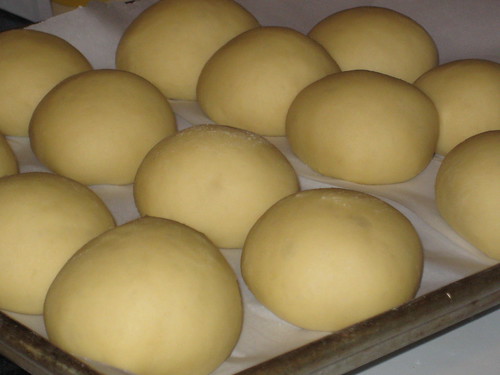
After it has risen, stick your (clean) fist into the dough to punch it down. Turn it out onto a lightly floured surface. We have some thin plastic cutting mats that I like to use. Sprinkle a little flour over the dough if it’s sticky.
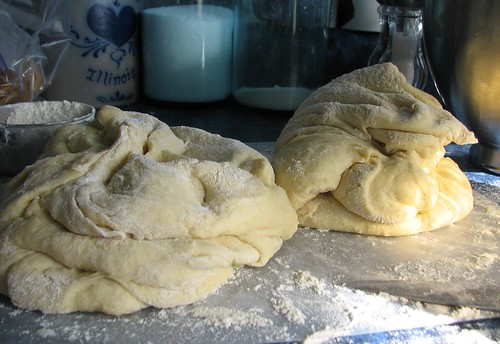
Divide and conquer. Use a sharp knife to cut the dough in half. Cut each half into halves again. And again. Then divide each of those chunks into four pieces. You should be able to make 32 rolls from this recipe.
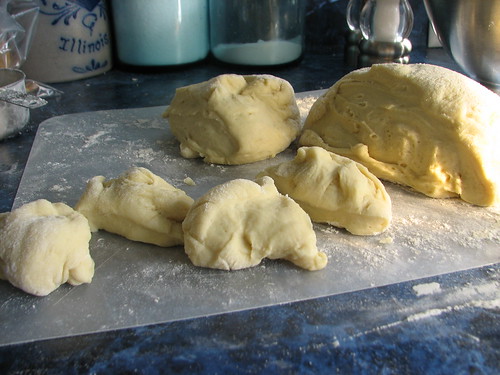
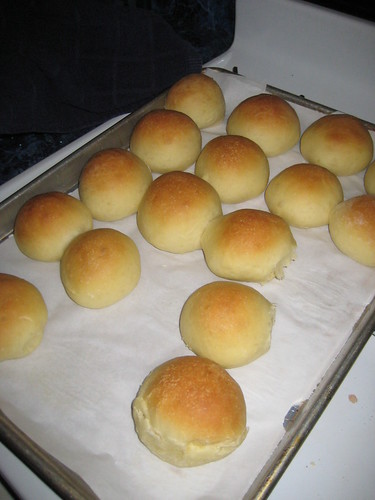
If you want to make some hamburger buns, instead of cutting the last chunks into four pieces, cut them into thirds and roll them into a ball. Then push the ball down into a flat round shape. These make great hamburger buns. The pan on the right has four hamburger buns at the top of the picture.
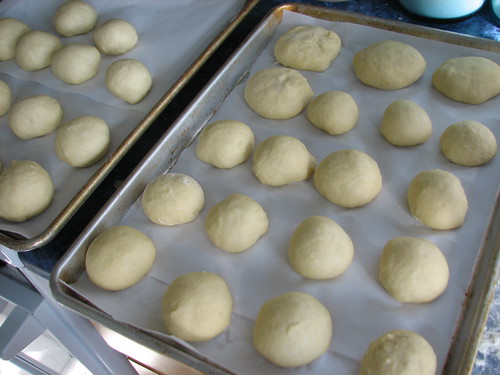
Place the rolls on a cookie sheet, lined with parchment paper. No need to spray or grease the pan. Let them rise in a warm place, covered with a clean cloth, until doubled in size. Again, 40-60 minutes.
Bake in a 375* oven for about 15 minutes. They should be golden brown on top when done.
If you want rolls with a soft top, place the clean cloth over the rolls as soon as they are removed from the oven. Let them cool with the cloth on them. If you want a crunchier top, let them cool without a cloth.
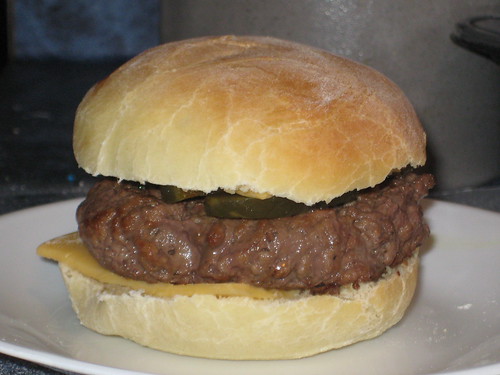
The hamburgers were delicious with the homemade buns. Of course, this is the one DD dropped on the ground on her way to the car as we were leaving for volleyball practice. Had to go back inside, get another one and then head out. Made it to practice on time. And Pippin the cat enjoyed this one immensely.
Let me know if you try the recipe. And don’t be afraid to add some whole wheat flour, a little cornmeal, or wheat germ…whatever floats your boat. Also, the next day, you can pop a couple of these in the microwave for about 20 seconds and they are like fresh from the oven. 🙂
~~Rhonda
2 Comments
Yummm,those look soo yummy!I really wanna start making my own bread and buns because we go through them like crazy around here.I was wondering if you think these would freeze well?
I haven’t frozen it myself, but bread does freeze well. You can freeze the finished loaf, rolls or buns, or freeze the dough so it’s ready to use when you want it.
Here’s a site for freezing baked breads:
http://frugalliving.about.com/od/freezingfoods/qt/How-To-Freeze-Bread.htm
This site gives good advice on freezing dough:
http://www.favoritefreezerfoods.com/freezing-bread-dough.html
We make bread about every 4-5 days. Depends on how many of the kids are home.
We were out of homemade bread, but had some store-bought bread left by someone who came to a party and Anna (age 13 at the time) refused to eat it when she wanted a sandwich. She said “I don’t want a sandwich unless it’s *real* bread.” 🙂
Hope that helps! ~~Rhonda
19 Trackbacks
[…] ham / turkey sandwiches on homemade rolls celery / […]
[…] Tuesday chicken salad homemade rolls […]
[…] Monday hamburgers / homemade buns […]
[…] hamburgers homemade buns celery and carrot […]
[…] hamburgers / homemade buns corn on the cob fruit […]
[…] Roast beef (leftovers from Sunday dinner) homemade rolls veggies / […]
[…] Sunday grilled chicken spinach salad with strawberries corn green beans homemade rolls […]
[…] bread for the sandwiches came out of the oven and was immediately sliced and toasted. Oh, so […]
[…] hamburgers homemade buns […]
[…] hamburgers / homemade buns chips […]
[…] the bread was good, too. I used the usual recipe, but took about one third of the dough after it had one rise, and I added freshly chopped rosemary, […]
[…] made the buns with my regular bread recipe. The original sandwich recipe called for seasoning the chicken with poultry seasoning, which I did […]
[…] Ham Sandwiches / Homemade Bread Veggies / Dip […]
[…] Hamburgers on Homemade Buns Veggies / Ranch Dip Chips Melon […]
[…] Roast Beef Sandwiches using leftover beef from Alton Brown’s amazing chuck roast recipe. Homemade Buns Melon […]
[…] Hamburgers / Homemade Buns Carrot/Celery Sticks with Ranch Dip Red […]
[…] Hamburgers / Homemade Buns Chips / […]
[…] Roast Beef Sandwiches Homemade Buns Coleslaw Celery / Carrot […]
[…] Monday Spicy Shredded Pork Didn’t get to this one on Saturday, so am making it today. Homemade Hamburger Buns […]